
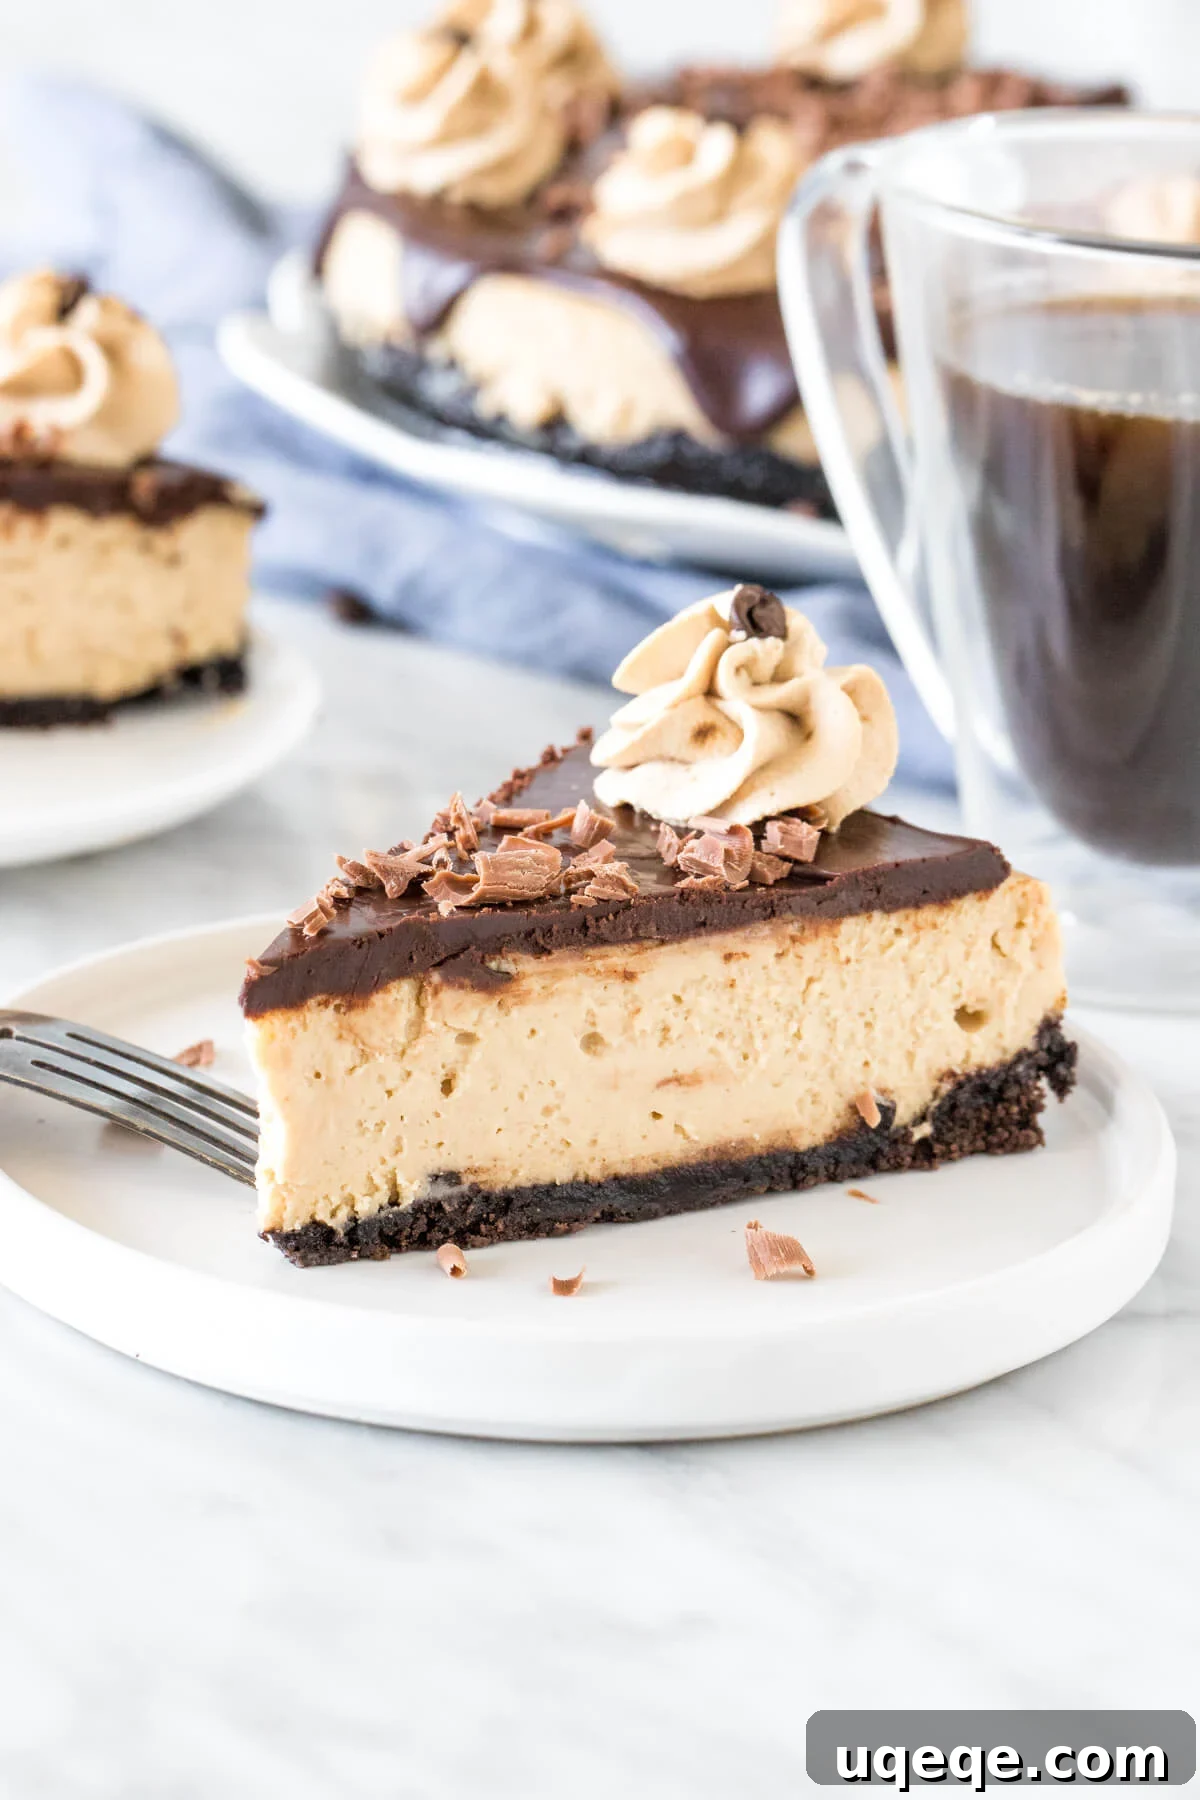
Experience a dessert revelation with this incredibly creamy coffee cheesecake. Featuring a delightful Oreo cookie crust, a richly flavored espresso cheesecake filling, and crowned with a coffee-infused chocolate ganache, it’s a truly decadent treat designed for the ultimate coffee connoisseur. This homemade masterpiece promises a symphony of textures and flavors that will captivate your taste buds and impress at any gathering.
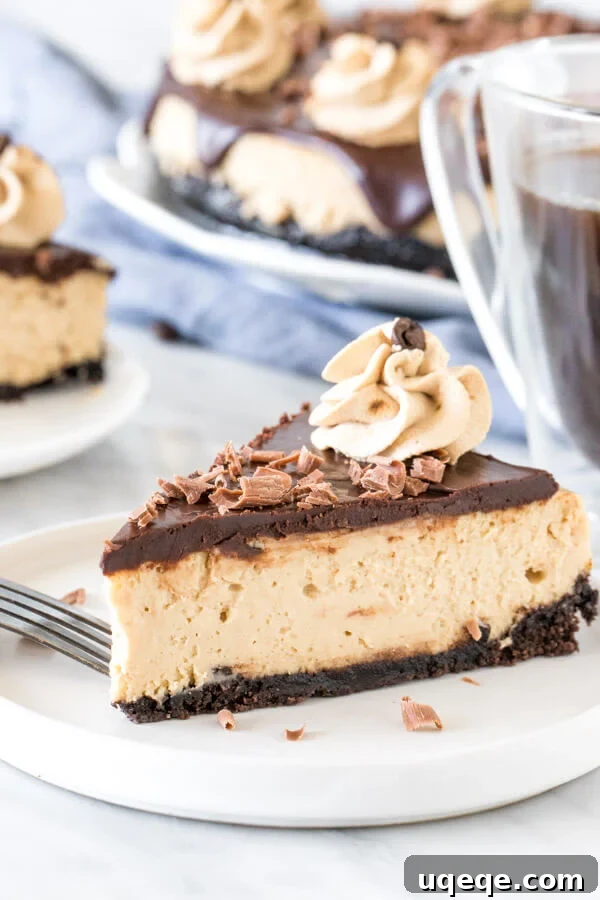
There’s something uniquely satisfying about combining two beloved indulgences: coffee and cheesecake. For many, breakfast just isn’t complete without a cup of joe, and the thought of extending that rich, aromatic experience into a dessert is pure genius. This coffee cheesecake recipe was born from that very idea, creating a harmonious blend where the bright tanginess of cream cheese perfectly complements the deep, nuanced bitterness of coffee. The result is a cheesecake that hits all the right notes – not overly sweet, but wonderfully balanced. The addition of a crunchy Oreo crust and a luxurious chocolate topping elevates it further, because as every dessert enthusiast knows, coffee and chocolate are a match made in heaven.
Crafting Your Decadent Coffee Cheesecake
The Irresistible Oreo Cookie Crust
Every great cheesecake begins with an outstanding crust, and for this coffee cheesecake, an Oreo cookie crust is the undisputed champion. It’s incredibly easy to make and provides the perfect crunchy, chocolatey base that beautifully contrasts the smooth, creamy filling. To create this standard-setting crust, you’ll need a good amount of Oreo cookies – both the wafers and their delicious cream filling. Simply crush them into fine crumbs using a food processor for speed and consistency, or if you prefer a more hands-on approach, place them in a sturdy Ziploc bag and crush them with a rolling pin. Once you have a fine crumb texture, mix them thoroughly with melted butter until evenly moistened. This mixture is then pressed firmly into the bottom of your springform pan, extending slightly up the sides to form a neat, supportive ridge. A quick bake in the oven helps to set the crust, preventing it from becoming soggy when the filling is added.
The Velvety Espresso Cheesecake Filling
The heart of this dessert is its incredibly smooth and flavorful cheesecake filling, which draws inspiration from classic New York cheesecake but with a distinctly delightful coffee twist. The secret to achieving a potent coffee flavor without compromising the cheesecake’s delicate structure lies in using instant coffee powder. Unlike brewed coffee, which would introduce too much liquid and potentially alter the batter’s consistency, instant coffee offers concentrated flavor in a minimal amount of moisture. You’ll start by dissolving the instant coffee granules in just a tiny bit of hot water. Don’t worry if it doesn’t completely dissolve at this stage; the coffee will fully integrate and dissolve as it’s beaten into the cream cheese mixture, with the water merely serving to soften the granules and kickstart the infusion.
Once your coffee base is ready, it’s time to assemble the main filling. In a large mixing bowl, beat together the softened full-fat cream cheese, granulated sugar, and the dissolved coffee mixture. Continue beating until the mixture is beautifully smooth, light, and entirely free of lumps. This initial creaming stage is crucial for a silky cheesecake texture. Next, incorporate the sour cream, which is a vital ingredient for achieving that signature velvety-smooth texture and adding a subtle tang that balances the richness. A touch of vanilla extract is also added for aromatic depth. Finally, and very importantly, the eggs are mixed in one at a time on low speed. This technique ensures they are just combined, preventing overmixing which can introduce too much air and lead to cracks during baking. Each ingredient plays a specific role, culminating in a filling that is both robust in flavor and luxuriously creamy.
Essential Cheesecake Baking Wisdom
- Room Temperature Ingredients are Key: For a lump-free and perfectly smooth batter, always ensure your cream cheese, sour cream, and eggs are at room temperature before you begin. This allows them to incorporate evenly without overmixing. Plan ahead and take them out of the fridge about 30 minutes to an hour before you start.
- Choose Full-Fat, Brick-Style Cream Cheese: Opt for full-fat, brick-style cream cheese. This type provides the best structure, richness, and classic cheesecake flavor. Avoid whipped or low-fat varieties, as they can lead to a runny or less stable cheesecake.
- The Gentle Art of Cooling: After baking, the cooling process is just as important as the baking itself. Allow the cheesecake to cool very slowly, keeping it inside the springform pan and often within the water bath (if applicable) until it reaches room temperature. Rapid cooling can cause the cheesecake to crack.
- Chilling is Non-Negotiable: This step cannot be skipped! Chilling the cheesecake for at least 6 hours, or ideally overnight, is absolutely mandatory. This allows the cheesecake to fully set, develop its firm yet creamy texture, and for all the incredible flavors to meld together perfectly. Patience truly is a virtue here.
- Embrace the Water Bath (Bain-Marie): Don’t let the idea of a water bath intimidate you – it’s a cheesecake’s best friend! Baking a cheesecake in a water bath creates a moist, steamy environment in the oven, which ensures even baking, prevents the top from cracking, and results in that signature silky, custardy texture.
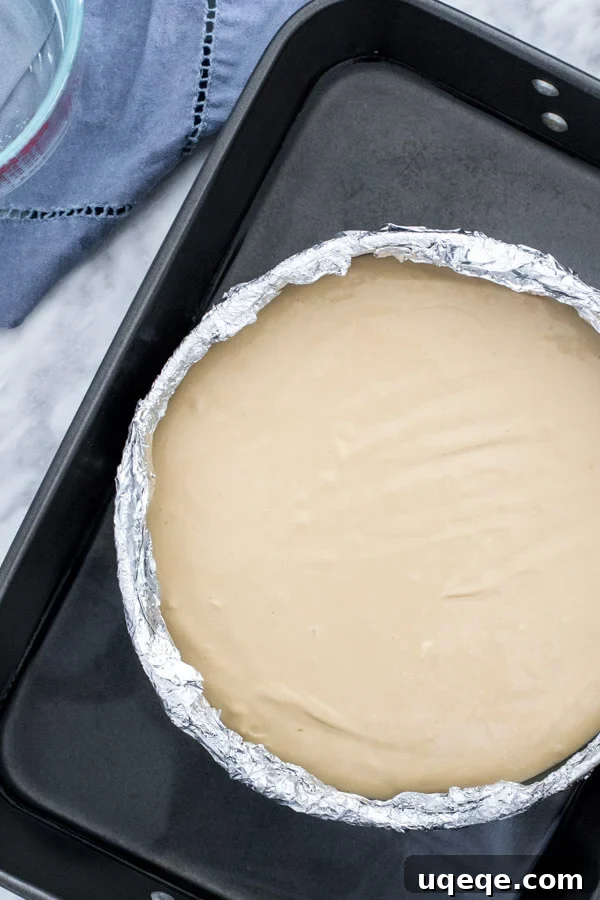
- Pan Preparation: Before adding your crust, carefully wrap the outside of your springform pan with several layers (at least 3-4) of heavy-duty aluminum foil. Ensure there are no gaps or seams where water could potentially seep in.
- Assembly: Place the foil-wrapped springform pan, containing the unbaked cheesecake, into a larger roasting pan.
- Hot Water Addition: Pour about 1/2 inch to 1 inch (1-2 cm) of very hot or boiling water into the roasting pan around the springform pan.
- Baking: Gently transfer the entire roasting pan, with the cheesecake and water bath, into the preheated oven to bake.
The Grand Finale: Coffee-Infused Chocolate Ganache and Garnishes
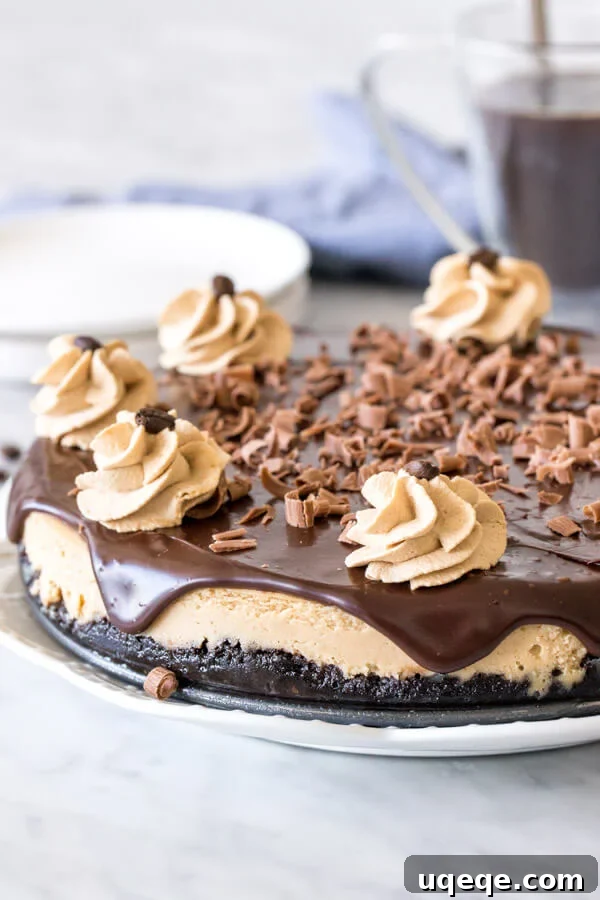
Once your coffee cheesecake has successfully navigated the baking, slow cooling, and essential chilling stages, it’s time for the crowning glory: the topping. While the cheesecake itself is a star, a luscious chocolate ganache takes it to an extraordinary level. For an extra layer of coffee goodness, infuse your ganache with a touch of instant coffee powder – this is optional, but highly recommended to enhance the overall flavor profile. Additionally, you can choose to adorn your cheesecake with coffee-infused whipped cream and elegant chocolate shavings, offering a trio of textures and tastes. Whether you opt for all three, none, or a combination, these garnishes elevate the presentation and further deepen the coffee and chocolate experience.
For optimal results and stress-free serving, it’s highly recommended to make the cheesecake a full day ahead. This allows ample time for proper chilling, which is crucial for the cheesecake to firm up and for the flavors to fully develop. On the day of serving, you can prepare the ganache, let it cool slightly, and then pour it over the chilled cheesecake. It’s best to add any delicate garnishes, such as whipped cream and chocolate shavings, right before serving to ensure they look their freshest and most appealing. This thoughtful timing ensures that your coffee cheesecake is not only delicious but also beautifully presented and ready to be enjoyed.
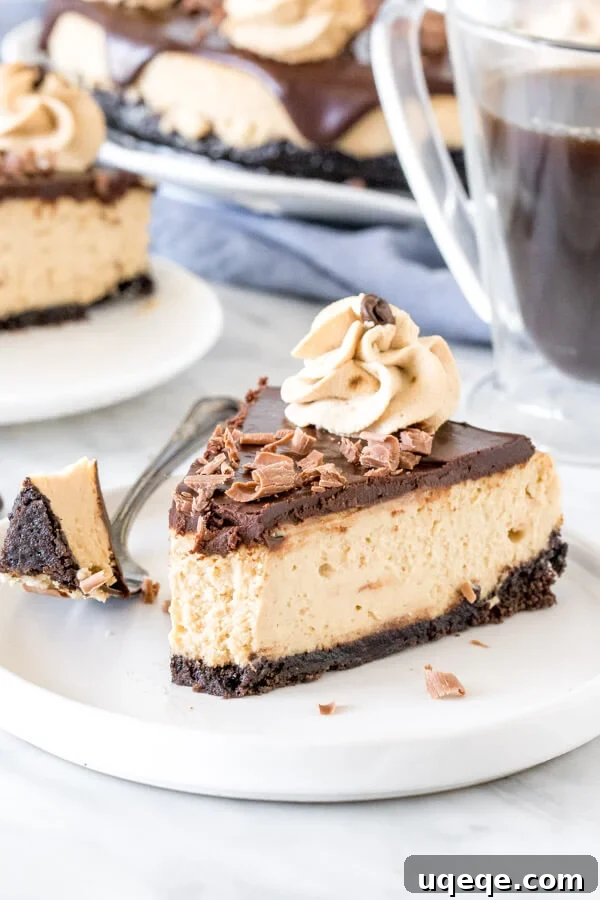
This creamy coffee cheesecake, with its robust coffee essence, silky smooth texture, and decadent chocolate accents, is truly a coffee lover’s dream dessert. It’s perfect for special occasions, holiday gatherings, or simply when you crave a sophisticated and comforting treat. If you find yourself yearning for more delightful coffee-infused desserts, be sure to explore these other fantastic recipes:
- Mocha Brownies with Cafe Latte Frosting
- Irish Cream Brownies
- Mocha Cupcakes with Coffee Frosting
Rating: 4.96 from 22 votes
Coffee Cheesecake
By: Fiona Dowling
This extra creamy coffee cheesecake has an Oreo cookie crust, delicious espresso flavor, and a coffee-infused chocolate ganache on top. It’s a decadent dessert that’s perfect for coffee lovers.
Prep: 45 mins
Cook: 50 mins
Chilling: 6 hrs
Total: 7 hrs 35 mins
Servings: 12 people
Rate Recipe
Print Recipe
Equipment
- 9-inch springform pan
- Large roasting pan (big enough to fit the springform pan inside)
- Aluminum Foil
Ingredients
Oreo Crust
- 25 Oreo cookies (you’ll use the filling and wafers)
- 1/3 cup unsalted butter, melted
Cheesecake Filling
- 2-3 teaspoons instant coffee powder*
- 1 tablespoon hot water
- 24 oz cream cheese*, full-fat, brick style
- 1 1/4 cups white sugar
- 1 teaspoon vanilla extract
- 2/3 cup sour cream*
- 3 large eggs*
- Hot water, for the water bath
Chocolate Ganache
- 6 oz dark chocolate*, 50-70%
- 2/3 cup heavy cream*
- 1 teaspoon instant coffee powder, optional
Coffee Whipped Cream (Optional)
- 1/2 cup heavy cream
- 1 teaspoon instant coffee powder
US Customary – Metric (Note: Unit conversion would typically be a dynamic feature, not pure static HTML.)
Instructions
Oreo Crust
- Preheat the oven to 350°F (175°C).
- Wrap the outside of a 9-inch springform pan with aluminum foil. Wrap it at least 3 times to ensure that all seams are covered, preventing water from entering during the water bath.
- Add the cookies (wafers and filling) to a food processor or high-powered blender and pulse until fine crumbs. Alternatively, place them in a resealable bag and crush with a rolling pin.
- Mix the cookie crumbs thoroughly with the melted butter until well combined.
- Press the mixture firmly into the bottom of the pan, creating a slight lip around the edges for a neat finish.
- Bake in the preheated oven for 10 minutes. Remove from the oven, and turn the oven temperature down to 325°F (160°C).
Cheesecake Filling
- In a small cup, combine 1 tablespoon of hot water and the instant coffee powder. The coffee doesn’t need to dissolve entirely at this stage; the hot water simply helps it soften.
- In a large bowl, beat together the softened cream cheese, white sugar, and the coffee dissolved in water until the mixture is smooth and creamy with no lumps. Stop the mixer and scrape down the sides and bottom of the bowl to ensure everything is well incorporated.
- Beat in the vanilla extract and sour cream until just combined.
- With the mixer on low speed, beat in the eggs one at a time, mixing only until just combined after each addition. Avoid overmixing the eggs.
- Place the springform pan with the baked crust (still wrapped in aluminum foil) in the middle of a large roasting pan.
- Pour the prepared cheesecake batter over the crust, smoothing the top with a spatula.
- Carefully pour very hot water into the roasting pan around the springform pan, creating a water bath. Aim for about 1/2 to 1 inch (1-2 cm) of water in the roasting pan.
- Place the entire roasting pan assembly into the oven and bake for 50-60 minutes. The cheesecake is done when the edges are set, but the very center still has a slight wobble (similar to firm jello or pudding) when gently nudged.
- Remove the roasting pan (with the cheesecake inside) from the oven. Allow the cheesecake to cool completely in the water bath until it reaches room temperature.
- Cover the pan with aluminum foil and transfer it to the refrigerator to chill for at least 6 hours, or ideally overnight, to allow it to fully set and for flavors to deepen.
Chocolate Ganache
- Chop the dark chocolate into very small, uniform pieces and place them in a heat-proof bowl.
- In a small saucepan or microwave-safe bowl, add the heavy cream (and optional instant coffee powder). Heat the cream until it is almost boiling, stirring gently if on the stovetop.
- Pour the hot cream over the chopped chocolate. Let it sit undisturbed for 3 minutes to allow the chocolate to melt.
- Whisk the mixture gently until it becomes completely smooth and glossy.
- Once the cheesecake is thoroughly chilled, gently unclamp and remove the sides of the springform pan.
- Pour the chocolate ganache evenly over the top of the cheesecake, allowing some of it to elegantly drip over the edges. Place the cheesecake back into the fridge until you are ready to serve.
Coffee Whipped Cream (Optional)
- Add the instant coffee powder to the heavy cream. Let it sit for a few minutes to allow the coffee to dissolve.
- In a large, chilled bowl, beat the coffee-infused heavy cream with an electric mixer until stiff peaks form.
- Decorate the coffee cheesecake with the whipped cream and chocolate curls or shavings just before serving for the freshest appearance.
Notes
- For the best flavor and ease of dissolution, use an instant coffee powder with fine granules. You do not need to brew the coffee; simply add the powder as directed in the recipe. For the cheesecake filling, the amount of powder is typically equivalent to what’s recommended for one cup of brewed coffee, but this can vary by brand.
- Ensuring cream cheese, sour cream, and eggs are at room temperature is crucial for a smooth batter. Take them out of the fridge approximately 30-60 minutes before you start mixing.
- If dark chocolate is too intense for your preference, semi-sweet chocolate can be used instead for the ganache.
- For the cream in the ganache and whipped cream, use heavy cream or whipping cream with a milk fat content of around 33-35% for optimal results.
- Always store any leftover cheesecake covered tightly in the refrigerator to maintain its freshness and prevent it from absorbing other food odors.
- Leftovers can be stored in the fridge for up to 3 days. For longer storage, slices of cheesecake can be individually wrapped and frozen for up to one month. Thaw in the refrigerator before serving.
- Nutrition information provided is an estimate based on one serving (assuming the cheesecake is cut into 12 equal pieces) and includes ganache and coffee whipped cream. Actual nutritional values may vary based on specific ingredients and brands used.
Nutrition
- Calories:
- 611kcal
- Carbohydrates:
- 48g
- Protein:
- 8g
- Fat:
- 44g
- Saturated Fat:
- 24g
- Cholesterol:
- 148mg
- Sodium:
- 334mg
- Potassium:
- 284mg
- Fiber:
- 2g
- Sugar:
- 37g
- Vitamin A:
- 1266IU
- Vitamin C:
- 1mg
- Calcium:
- 103mg
- Iron:
- 4mg
Love this recipe? Show your appreciation by rating it and leaving a comment below!