
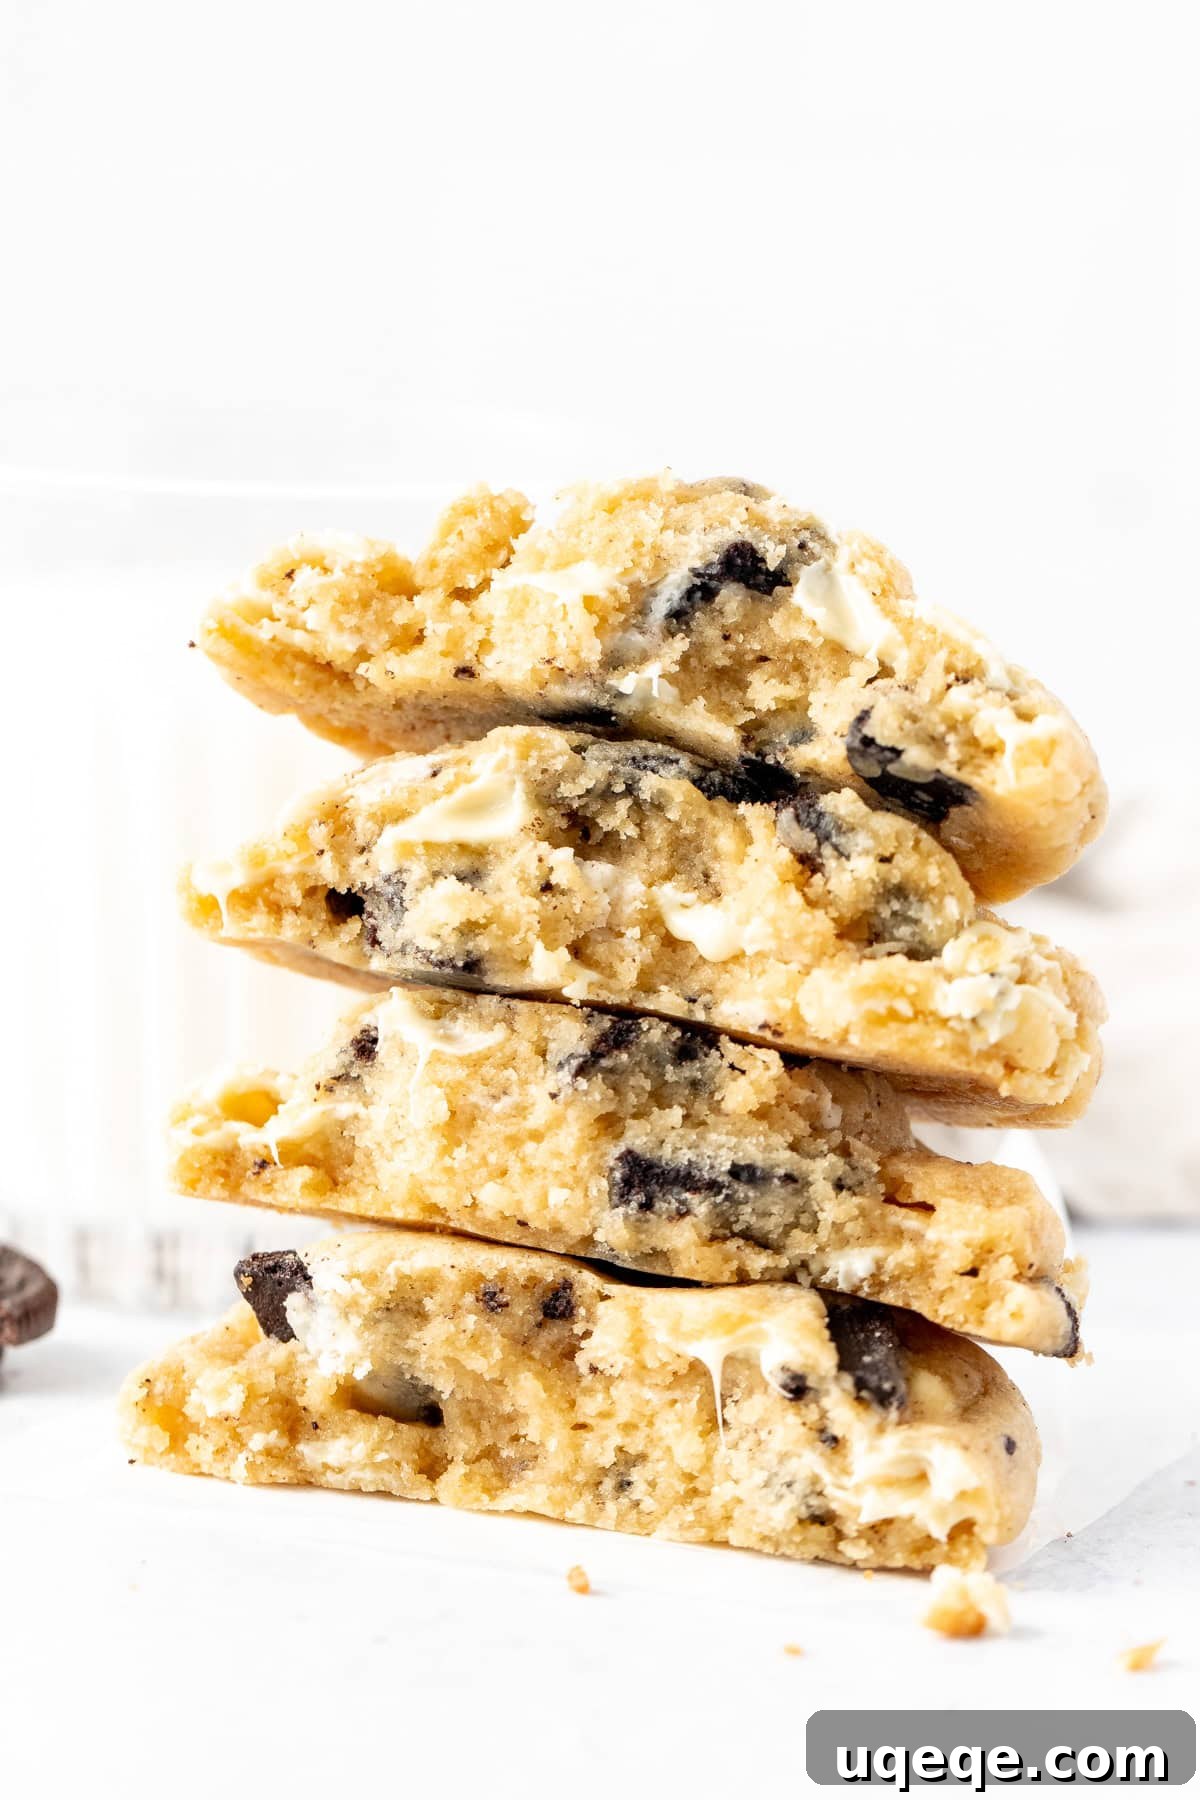
Indulge in the ultimate cookie experience with these bakery-style cookies and cream cookies. Inspired by the legendary Levain Bakery in New York City, these masterpieces are extra thick, wonderfully chunky, and boast a perfectly gooey center, generously loaded with crushed Oreos and creamy white chocolate. Prepare for a cookie revelation!
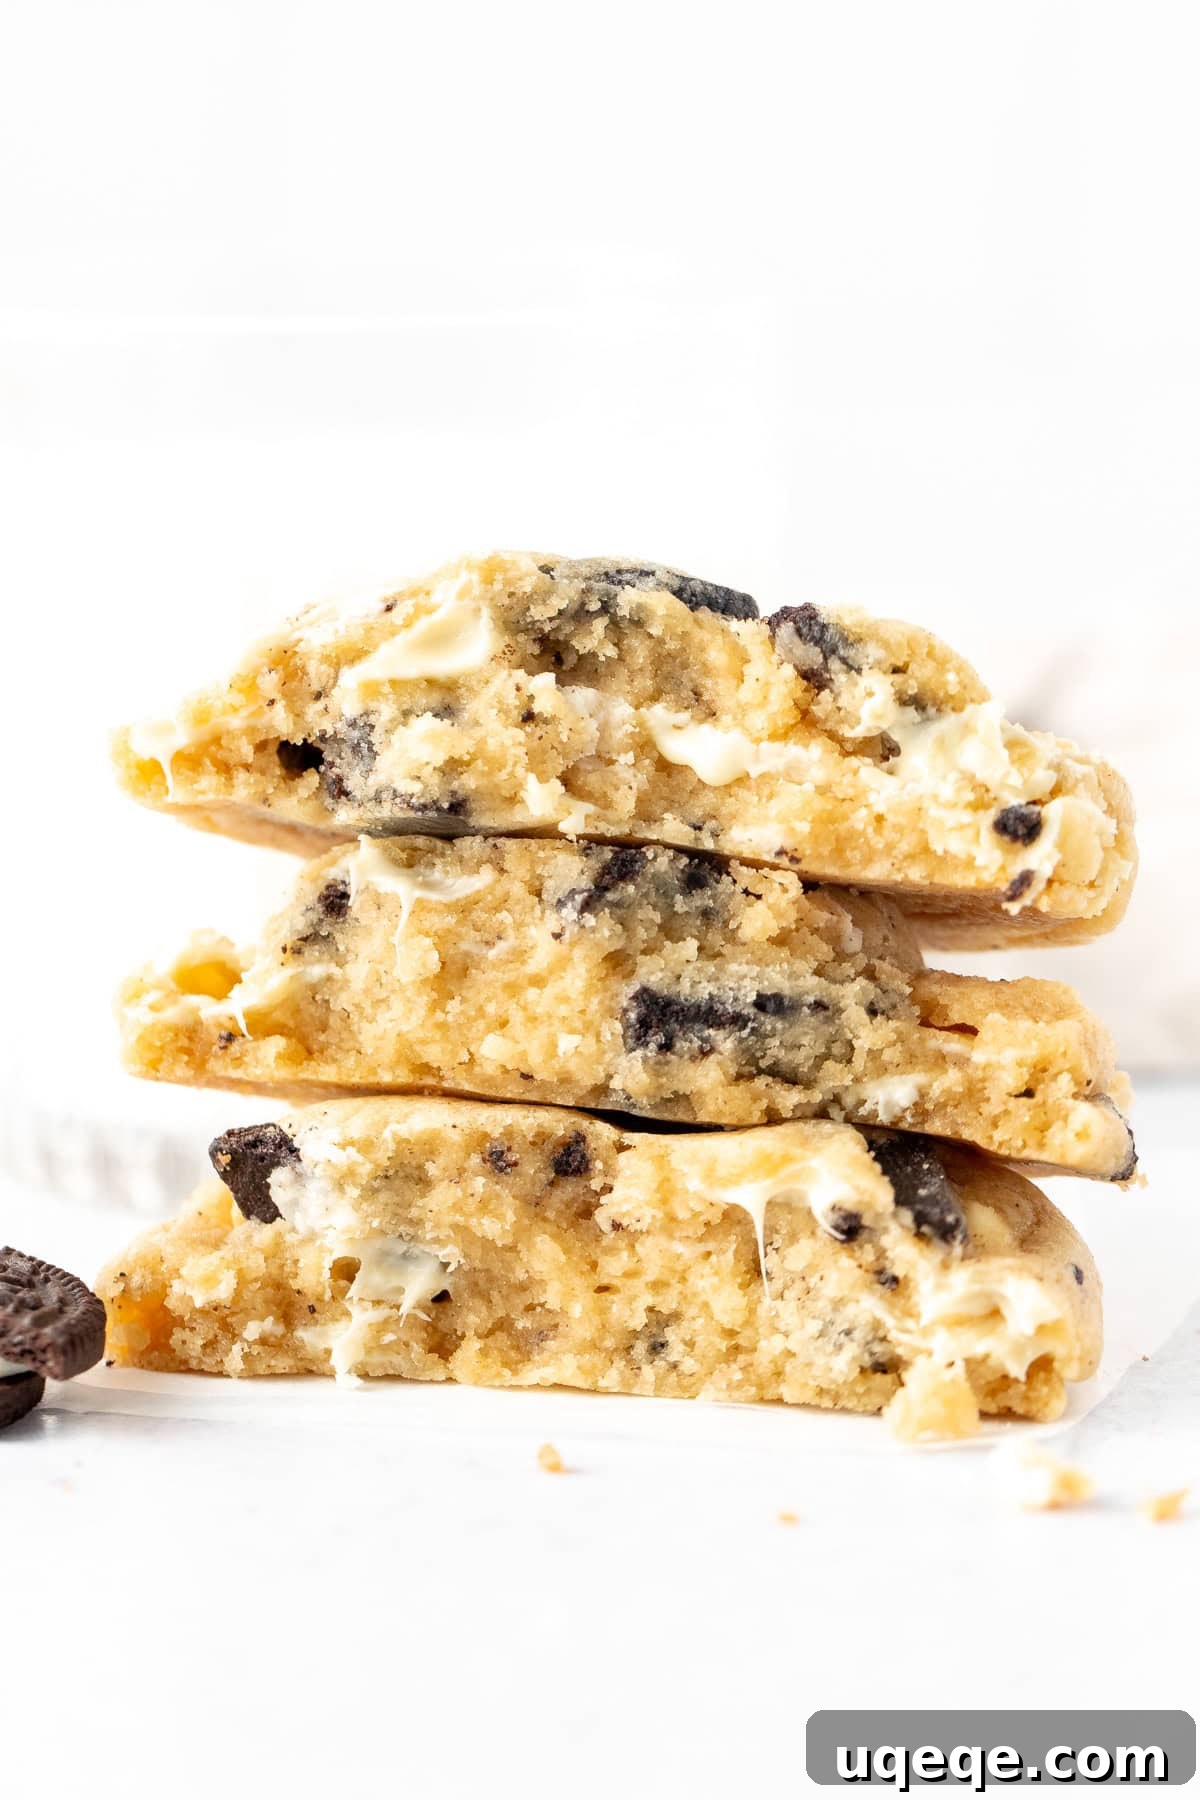
There’s something uniquely satisfying about a truly exceptional cookie – especially one that’s robust, substantial, and utterly overflowing with flavor. We’re talking about those viral, bakery-style behemoths that have taken the internet by storm, characterized by their impressive size, a lusciously gooey interior, and an abundance of delectable mix-ins. It’s a style perfected by iconic establishments like Levain Bakery in NYC, inspiring countless home bakers and professional pâtissiers alike to recreate that irresistible magic. And today, we’re bringing that magic right into your kitchen with our ultimate recipe for cookies and cream cookies.
This recipe isn’t just about baking a cookie; it’s about crafting an experience. Each one of these magnificent creations weighs in at a hefty 3½ ounces (approximately 100 grams), delivering an unparalleled density and thickness. As they bake, the edges achieve a beautiful golden crispness, contrasting beautifully with the intensely moist and slightly molten center. But what truly sets them apart is the sheer volume of mix-ins: an explosion of crunchy Oreo pieces and crumbs, perfectly complemented by pockets of sweet, melty white chocolate throughout every single bite.
While the steps for creating these phenomenal cookies are straightforward, patience is paramount. The secret to their signature thick texture and delightful chewiness lies in allowing ample time for the dough to chill. Skipping this crucial step will result in cookies that spread excessively and risk burning, sacrificing the very qualities that make them so special. Trust us, a little waiting will lead to immense gratification!
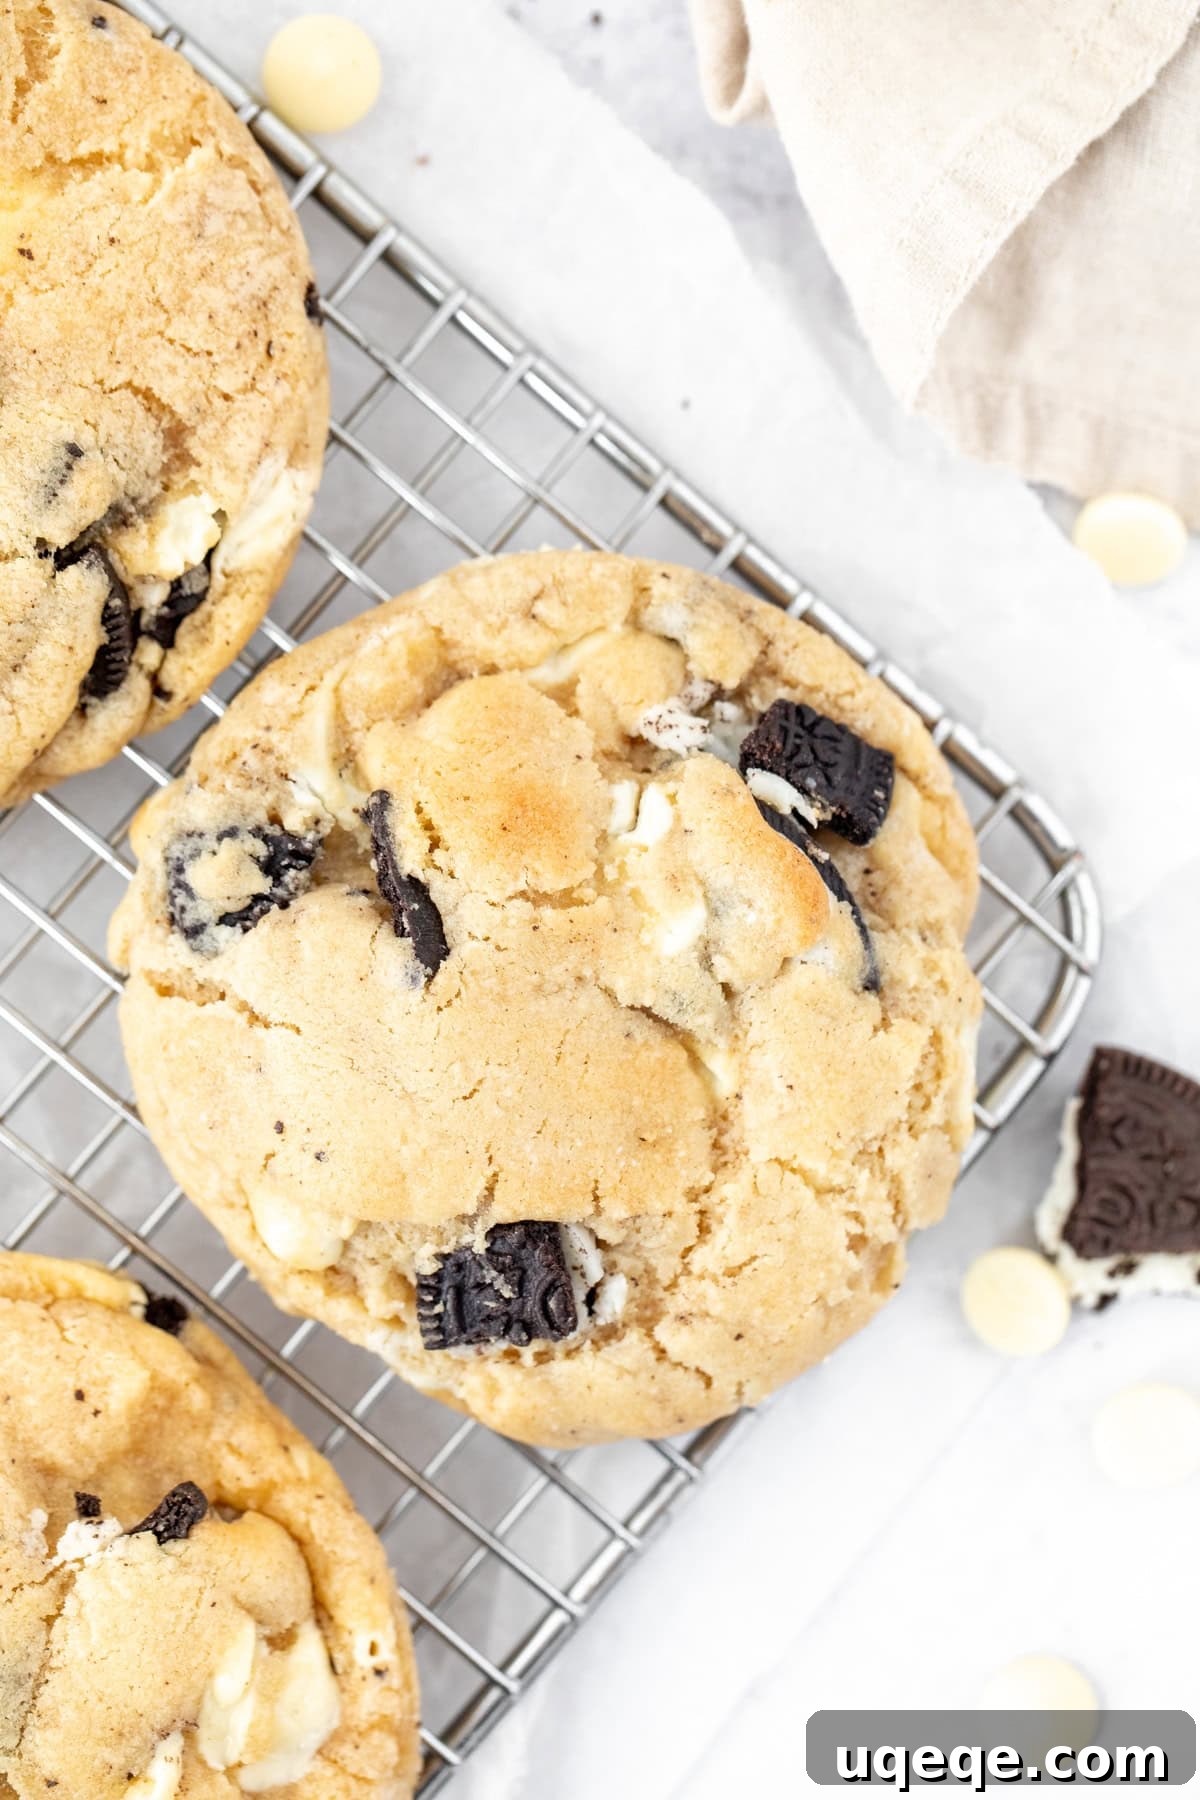
Mastering the Art of Big, Bakery-Style Cookies: Essential Baking Tips
Achieving that coveted bakery-quality cookie requires a few key techniques. These aren’t just suggestions; they are fundamental principles that will elevate your baking from good to extraordinary. Pay close attention to these expert tips to ensure your cookies come out perfectly thick, chewy, and unbelievably delicious every time.
- Cold Butter is Your Best Friend: Unlike many cookie recipes that call for room temperature butter, this recipe specifically utilizes cold, cubed butter. Why? Cold butter melts slower in the oven, creating steam that helps the cookies rise and hold their shape, preventing excessive spreading. This slow melting process also results in a more tender, almost cake-like crumb in the center, while maintaining that desirable thickness. For easier incorporation into your sugars, remember to cut the cold butter into small cubes before mixing.
- Precision with Flour Measurement: The balance of flour is absolutely critical for the perfect cookie texture. Too much flour will lead to dry, dense, and flavorless cookies, while too little will cause them to spread too thin and lose their structural integrity. For the most accurate results, we highly recommend using a kitchen scale to measure your flour by weight (grams or ounces). If a scale isn’t available, use the “spoon and level” method: whisk your flour thoroughly first to aerate it, then gently spoon it into your dry measuring cups until overflowing, and finally, level off the top with a straight edge (like a knife). Never scoop directly from the bag, as this compacts the flour and leads to over-measurement.
- The Magic of Cake Flour: The inclusion of cake flour in this recipe is a game-changer. Cake flour has a lower protein content than all-purpose flour, which translates to a more delicate and tender crumb. This is the secret to achieving that wonderfully soft, slightly gooey center that defines bakery-style cookies. Do not confuse it with self-rising cake flour, which contains leavening agents that would disrupt the recipe’s balance. If you don’t have cake flour on hand, don’t despair! You can easily make a substitute: for every cup of cake flour needed, measure out 1 cup of all-purpose flour, then remove 2 tablespoons of that flour and replace it with 2 tablespoons of cornstarch (also known as cornflour in the UK). Sift this mixture together multiple times to ensure even distribution before using.
- Optimal Oreo Chopping: While you want substantial chunks of Oreo in your cookies, the size of these pieces matters. Each Oreo cookie should be chopped into at least 4 or 5 distinct pieces. If the Oreo chunks are too large, they can create pockets of air or structural weaknesses within the cookie dough, leading to misshapen cookies that spread unevenly during baking. Aim for pieces that are large enough to provide texture and flavor, but small enough to integrate seamlessly into the dough.
- Crafting BIG Cookie Dough Balls: To truly capture the essence of a bakery-style cookie, size matters! We recommend forming generous dough balls, each weighing approximately 3½ ounces (100 grams) or using about ¼ cup of dough per cookie. Weighing each portion ensures uniform size, which is key for even baking and consistent results across your entire batch. Not only does this contribute to the impressive appearance, but it also helps achieve that signature thick, chewy texture.
- Freeze for Perfection: Freezing the cookie dough balls before baking is perhaps the most crucial step for preventing spread and ensuring your cookies stay thick and chewy. The cold dough takes longer to melt in the oven, allowing the edges to set before the center fully spreads. You can freeze the dough balls for a minimum of 1 hour, or prepare them in advance and store them in an airtight freezer bag for up to 2 months. Bake directly from frozen for the best results!
- The Ideal Baking Temperature (375°F / 190°C): A slightly higher baking temperature plays a significant role in achieving that perfect bakery-style texture. Baking at 375°F (190°C) provides an initial burst of heat that quickly sets the edges of the cookies, creating a golden exterior, while simultaneously allowing the center to remain wonderfully gooey and tender. This thermal shock is key to preventing over-spreading and developing a rich, complex flavor profile.
- The “Rounding Out” Technique for a Polished Look: For those who appreciate the aesthetic appeal of a perfectly round cookie, this optional trick is a game-changer. Immediately after removing the freshly baked cookies from the oven (while they are still warm on the baking sheet), take an extra-large biscuit cutter, a large glass, or a mug – anything round and slightly larger than your baked cookies. Place it around the outside of a cookie and gently swirl the cutter in a circular motion. This doesn’t cut the cookie; instead, it gently molds the warm, pliable edges into a beautifully symmetrical round shape. This simple step gives your homemade cookies that professional, picture-perfect bakery appearance.
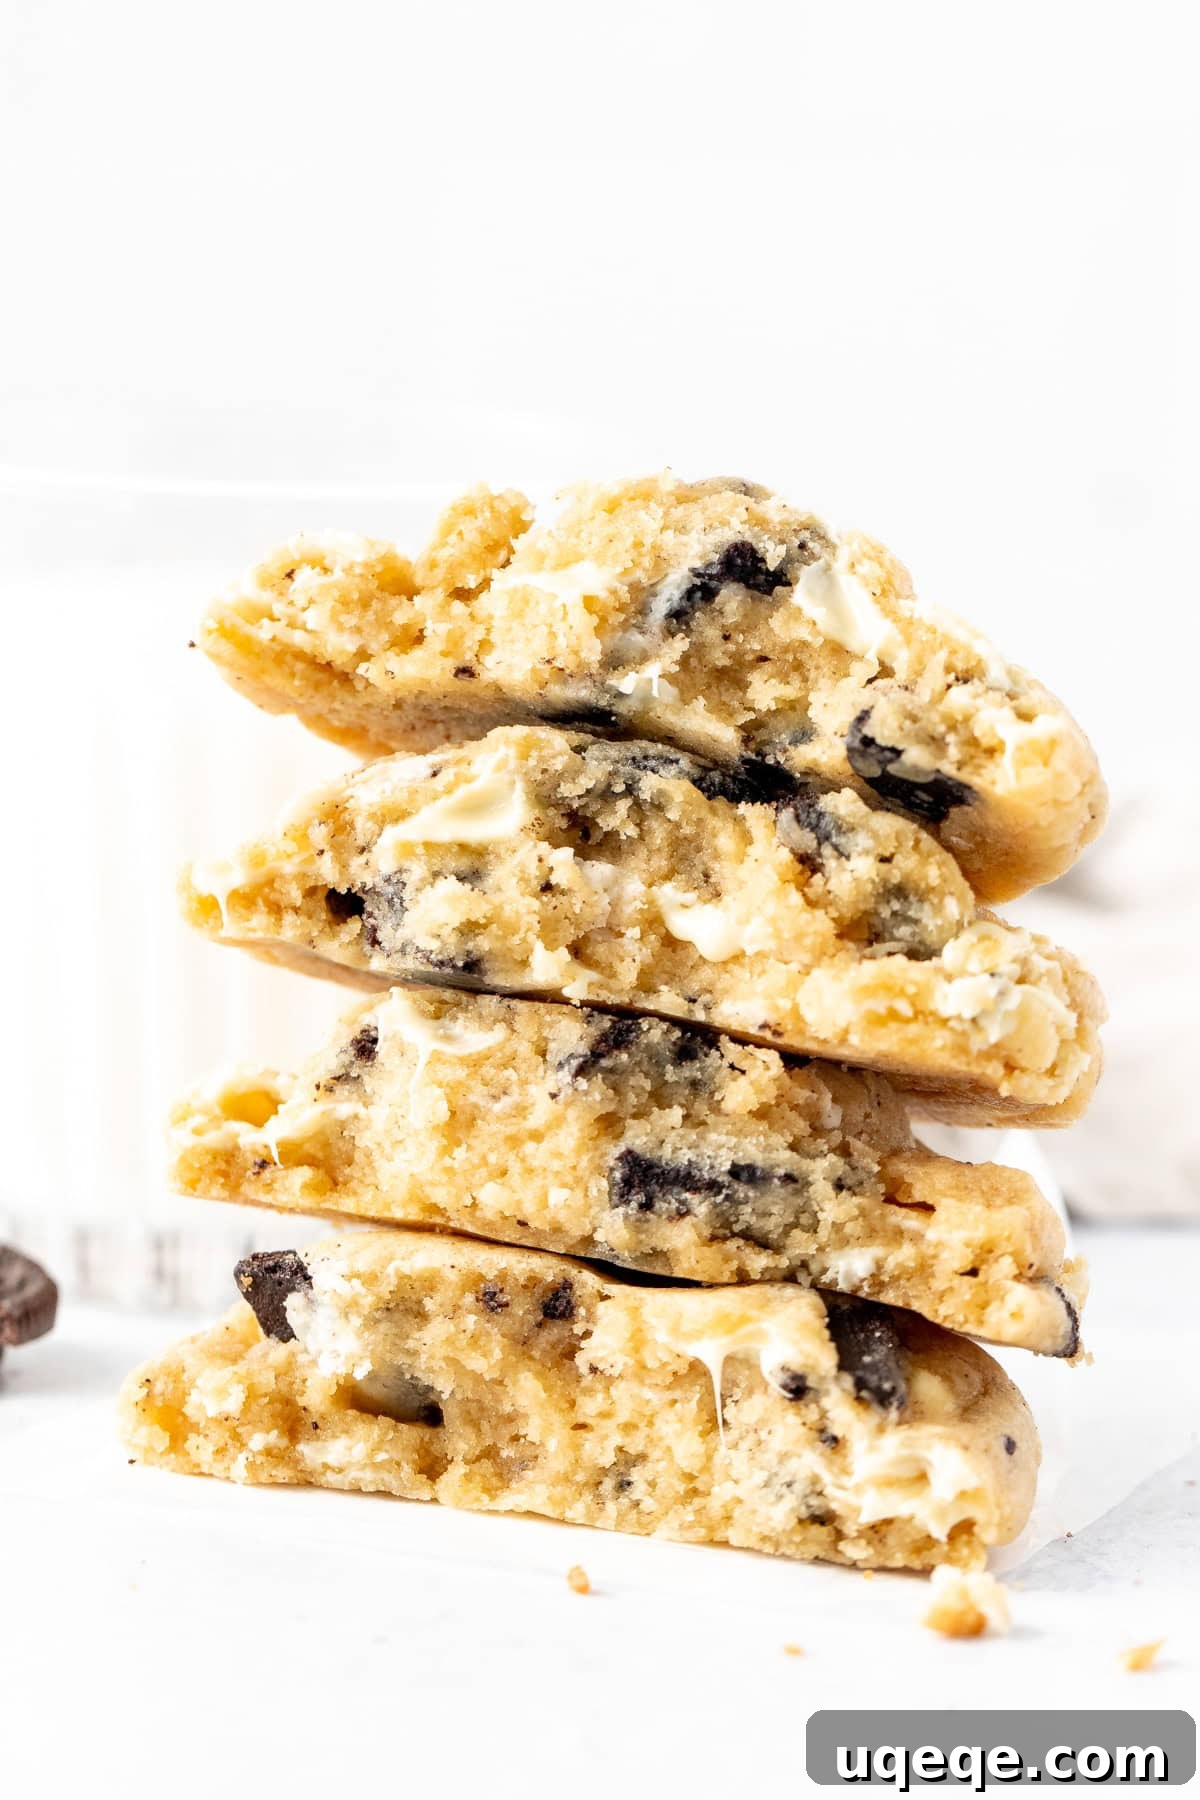
Explore More Bakery-Style Cookie Recipes
If you’ve fallen in love with the sheer indulgence of these cookies and cream cookies, then you’re in for a treat! We have a collection of other equally impressive bakery-style recipes that promise the same thick, chewy, and flavorful experience. Expand your baking repertoire and discover your next favorite treat:
- Bakery-Style White Chocolate Macadamia Cookies
- Extra Thick Chocolate Chip Cookies
- Bakery-Style Red Velvet Cookies
- Raspberry White Chocolate Cookies
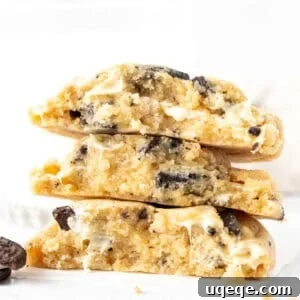
Bakery Style Cookies and Cream Cookies
These big, chunky cookies are inspired by the famous Levain Bakery and deliver an extra thick, slightly gooey middle bursting with Oreos and creamy white chocolate. A true indulgence for any cookie lover!
Rate Recipe
Print Recipe
Equipment
-
Cookie Sheets
-
Large Mixing Bowls
-
Electric Mixer (Stand or Handheld)
-
Sifter or Fine-Mesh Sieve
-
Parchment Paper or Silicone Baking Mats
-
Kitchen Scale (Recommended)
Ingredients
For the Dry Ingredients:
- 2 cups all-purpose flour (250 grams or 8½ ounces)
- 1⅔ cups cake flour (188 grams or 6⅔ ounces), not self-rising, sifted
- 1½ teaspoons baking powder
- ½ teaspoon baking soda
- ½ teaspoon salt
For the Wet Ingredients:
- 1 cup unsalted butter (226 grams or 8 ounces), cold, cut into cubes
- 1 cup brown sugar (210 grams or 7½ ounces), light or dark (light was used here)
- ¾ cup granulated sugar (150 grams or 5¼ ounces)
- 2 large eggs
- 2 teaspoons vanilla extract
For the Mix-ins:
- 16 Oreo cookies, roughly chopped (each should be in about 4-5 pieces)
- 1 cup white chocolate chips (170 grams or 6 ounces)
Instructions
-
Prepare Dry Ingredients: In a large mixing bowl, sift together the all-purpose flour, cake flour, baking powder, baking soda, and salt. Sifting helps to aerate the flours and remove any lumps, ensuring a uniform texture in your cookies. Whisk gently to combine all dry ingredients, then set aside.
-
Cream Butter and Sugars: In a separate large bowl or the bowl of a stand mixer fitted with the paddle attachment, beat together the cold, cubed unsalted butter, brown sugar, and granulated sugar. Mix on medium speed until the ingredients are well combined and no visible lumps of butter remain. This process might take a few minutes, especially with cold butter. The mixture should be light and fluffy.
-
Add Eggs and Vanilla: Scrape down the sides of the bowl. Add the large eggs one at a time, mixing well after each addition until fully incorporated. Then, stir in the vanilla extract until just combined. Avoid overmixing at this stage to prevent developing too much gluten.
-
Incorporate Dry into Wet: With your mixer on the lowest speed, gradually add the dry flour mixture into the wet butter mixture, about ½ at a time. Mix only until just combined. The dough will be quite thick and somewhat stiff. To check consistency, squeeze a small piece of dough between your fingers. If it feels overly sticky, mix in an additional tablespoon of all-purpose flour. Be careful not to overmix, as this can lead to tough cookies.
-
Fold in Mix-ins: Gently fold in the chopped Oreo pieces and white chocolate chips. Ensure the Oreos are chopped into approximately quarters or fifths, as excessively large pieces can cause the cookies to bake unevenly or become misshapen. Distribute the mix-ins evenly throughout the dough.
-
Form Dough Balls: Divide the dough into large balls, each using about ¼ cup of dough. For the most consistent results and to ensure uniform baking, we highly recommend weighing each cookie dough ball to approximately 3½ ounces (100 grams).
-
Chill the Dough: Place the formed dough balls into an airtight freezer bag or container. Freeze for at least 2 hours. This chilling process is crucial for preventing the cookies from spreading too much and helps develop their rich flavor and chewy texture. You can store the frozen dough balls for up to 2 months, ready to bake whenever a craving strikes!
-
Preheat Oven and Prepare Sheets: When you’re ready to bake, preheat your oven to 375℉ (190℃). Line your cookie sheets with parchment paper or silicone baking mats to prevent sticking and promote even baking. Remove the cookie dough balls directly from the freezer; do not thaw them. Place the frozen dough balls on the prepared cookie sheets, ensuring they are at least 2½ inches (6 cm) apart to allow for proper spreading.
-
Bake to Perfection: Bake one sheet at a time in the middle rack of your preheated oven. The cookies will typically bake for about 13-15 minutes, or until the tops appear set and are just beginning to turn a light golden color around the edges. The centers should still look slightly underdone and gooey – this is key for that bakery-style chewiness. If you notice your cookies aren’t spreading as much as you’d like, you can gently press them down slightly with the back of a spoon immediately after placing them in the oven, or even midway through baking.
-
Cool and Shape: Once baked, remove the cookie sheets from the oven. Allow the cookies to cool on the baking tray for at least 10-15 minutes. They are very delicate when hot and need time to set. For that perfectly round, professional bakery look, while the cookies are still warm on the tray, take a large round biscuit cutter, a wide glass, or a mug that is slightly larger than the cookie. Place it around the outside of each cookie and gently swirl it in a circular motion. This subtly coaxes the warm edges into a perfect circle without cutting the cookie. Finally, transfer the slightly cooled cookies to a wire rack to cool completely. Enjoy warm for an extra gooey center, or at room temperature!
Notes and Expert Tips
- Flour Measurement Matters: Always measure your flour accurately. Using a kitchen scale (as recommended above) is the most reliable method. Improperly measured flour can significantly alter the texture of your cookies, making them either excessively dry and thick or too thin and spread out.
- Cake Flour Substitution Guide: If cake flour is unavailable, create a quick substitute by measuring out 1¼ cups (156 grams) of all-purpose flour. Then, remove ¼ cup of this all-purpose flour and replace it with ⅓ cup (40 grams) of cornstarch (known as cornflour in the UK). Sift this mixture together at least three times before adding it to your dry ingredients to ensure it’s thoroughly combined and aerated. Remember, do not use self-rising cake flour.
- Nutrition Information Disclaimer: The nutritional details provided are estimates only. They are calculated based on the assumption that the recipe yields 15 uniform cookies. Actual values may vary depending on exact ingredient brands, quantities, and preparation methods.
- Storage and Freezing Instructions: These cookies are best enjoyed fresh, but they can be stored in an airtight container at room temperature for up to 4 days. For longer storage, fully baked and cooled cookies can be individually wrapped tightly in plastic wrap, then placed in a freezer-safe bag or container for up to 3 months. To thaw, simply move them to the refrigerator overnight, then let them come to room temperature before serving for optimal texture and flavor.
- Enhancing Flavor: For an even deeper flavor, you can slightly brown your butter before chilling and cutting it. This adds a nutty, complex note to the cookies.
- Ingredient Quality: Using high-quality vanilla extract and white chocolate chips can significantly impact the overall taste of your cookies. Opt for real vanilla and good quality chocolate for the best results.
Nutrition
Per Cookie (estimated):
- Calories: 449kcal
- Carbohydrates: 64g
- Protein: 6g
- Fat: 20g
- Saturated Fat: 11g
- Polyunsaturated Fat: 1g
- Monounsaturated Fat: 6g
- Trans Fat: 1g
- Cholesterol: 60mg
- Sodium: 191mg
- Potassium: 170mg
- Fiber: 1g
- Sugar: 37g
- Vitamin A: 418IU
- Vitamin C: 0.1mg
- Calcium: 68mg
- Iron: 3mg
Enjoyed baking this recipe? Please take a moment to rate and share your thoughts in the comments below!