
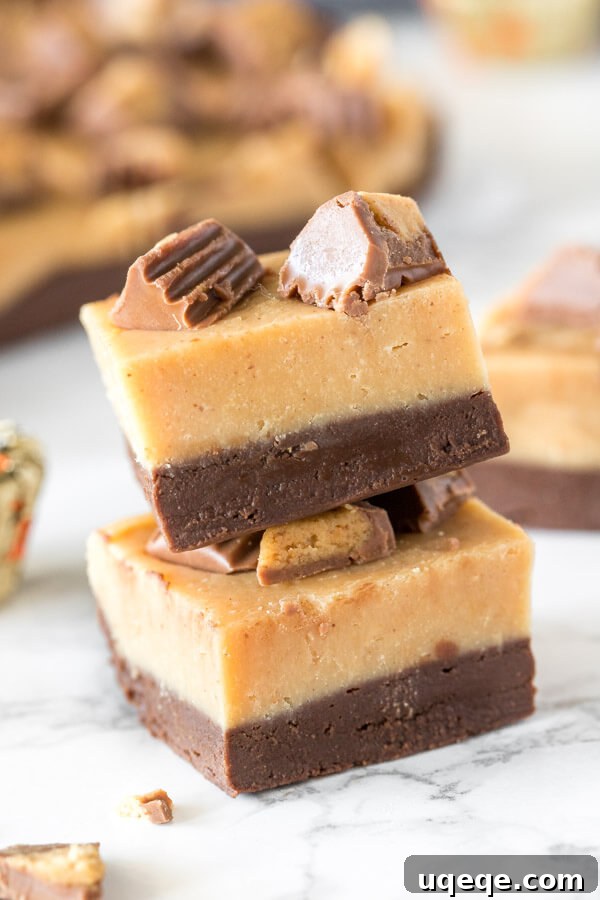
Indulge in the irresistible delight of our Chocolate Peanut Butter Fudge, a truly incredible dessert that comes together in mere minutes, right in your microwave! This layered masterpiece features a rich, creamy chocolate fudge base crowned with a perfectly balanced salty-sweet peanut butter fudge top. Each bite is a harmonious blend of flavors, reminiscent of your favorite peanut butter cups, making it an instant classic for any occasion.
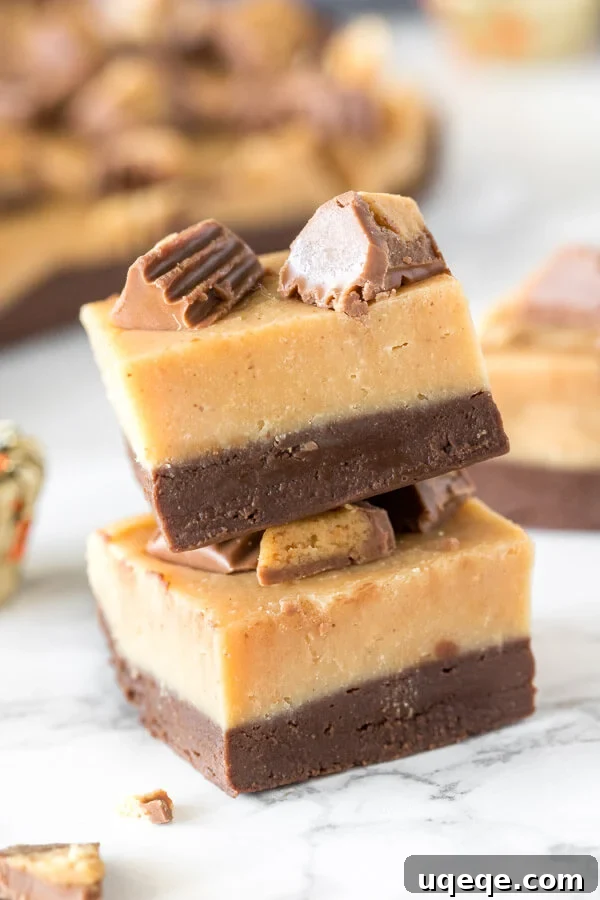
There’s something uniquely satisfying about homemade fudge. It always feels like a special indulgence, yet with this recipe, it’s surprisingly simple to create. Imagine presenting a tray of this stunning chocolate peanut butter fudge, adorned with an optional sprinkle of miniature peanut butter cups, and watching as everyone’s eyes light up. Its impressive appearance is only surpassed by its utterly delicious taste, making it a guaranteed crowd-pleaser.
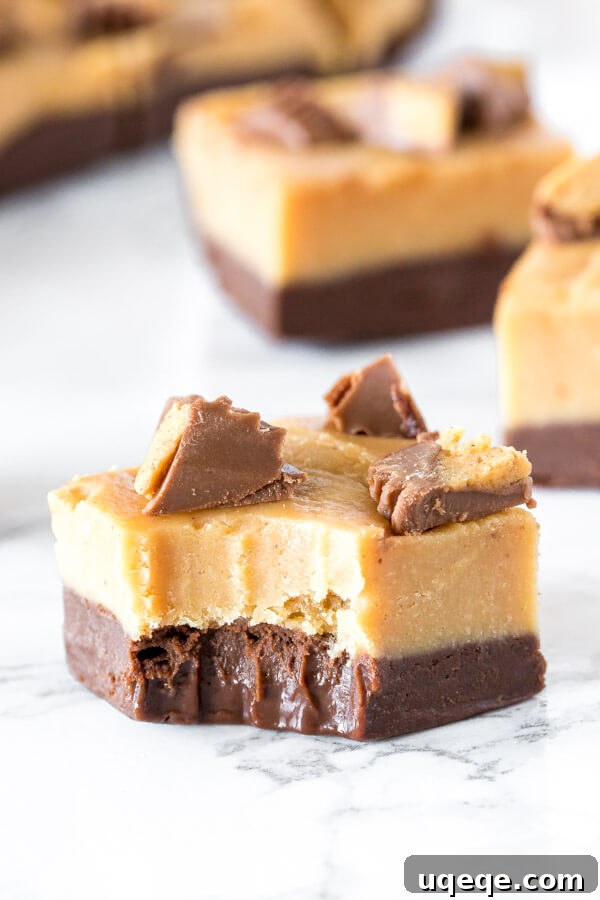
You might also know this delightful confection as “Buckeye Fudge,” thanks to its iconic two-layered combination of chocolate and peanut butter, mirroring the beloved Buckeye candies. Whatever you choose to call it—be it chocolate peanut butter fudge, Reese’s fudge, or buckeye fudge—one thing is certain: it’s incredibly tasty. Many find this two-in-one treat even more delightful than classic chocolate fudge or a standalone peanut butter fudge, offering the best of both worlds in every luxurious square. It’s the perfect blend of creamy, sweet, and salty that satisfies every craving.
The Magic of Microwave Fudge: A Game-Changer for Homemade Sweets
One of the greatest advantages of this chocolate peanut butter fudge recipe is its incredible simplicity and speed, all thanks to your microwave. Forget about fussy candy thermometers, constant stirring over a hot stovetop, or complicated techniques. We harness the power of your microwave to create perfectly smooth, creamy fudge with minimal effort and cleanup. This makes it an ideal recipe for beginner bakers, busy home cooks, or anyone craving a decadent treat without the lengthy preparation traditionally associated with homemade fudge.
Minimal Ingredients, Maximum Flavor: What You’ll Need
This remarkable fudge recipe requires just a handful of staple ingredients, making it accessible and quick to whip up. Each component plays a vital role in achieving that perfect fudge texture and iconic flavor combination:
- One 14 oz can (395 grams) sweetened condensed milk: This is the magical binding agent and sweetener that gives the fudge its signature creamy texture and rich sweetness. It’s crucial not to confuse this with evaporated milk; they are very different products, and using the wrong one will yield drastically different results. Sweetened condensed milk is thick, sweet, and provides the essential base for microwave fudge.
- 1 1/4 cups semi-sweet chocolate chips: These form the foundation of our luscious chocolate layer. Semi-sweet chocolate provides a classic, balanced chocolate flavor that pairs beautifully with the richness of peanut butter without being overly sweet. High-quality chips melt more smoothly and offer superior flavor.
- 1 1/4 cups peanut butter chips: These specialty chips are specifically formulated to melt smoothly, ensuring a silky peanut butter layer, and deliver that unmistakable salty-sweet peanut butter punch that defines this fudge. Using actual peanut butter won’t yield the same texture or setting properties.
- Optional: Miniature Reese’s Peanut Butter Cups (or other toppings): For that extra touch of texture, a burst of familiar flavor, and an undeniably impressive presentation, these are highly recommended. They truly elevate the “peanut butter cup” experience of this fudge.
Step-by-Step Guide to Layered Fudge Perfection
Crafting this two-layered wonder is a straightforward process, designed for ease and success:
- Prepare Your Pan with Care: Begin by lining an 8×8 inch (20×20 cm) baking pan with parchment paper. It’s essential to leave an overhang of parchment paper around the sides; these “handles” will make it incredibly easy to lift the set fudge cleanly out of the pan later. If parchment paper isn’t available, aluminum foil can be used as an alternative, but remember to lightly grease it to prevent sticking.
- Initiate the Chocolate Layer: In a large, heatproof (microwave-safe) bowl, combine exactly half of the sweetened condensed milk with all the semi-sweet chocolate chips. Ensure the bowl is sufficiently large to accommodate stirring without spills.
- Microwave the Chocolate Mixture Thoughtfully: Place the bowl in your microwave and heat on medium power. This specific power setting is crucial – avoid using high or standard power, as this can cause the chocolate to seize or burn, resulting in a grainy, unappetizing texture. Microwave for 1-minute intervals. After each minute, promptly remove the bowl and stir the mixture vigorously until it’s creamy and smooth. Continue this process, microwaving and stirring, until the chocolate chips are just melted and fully incorporated with the condensed milk. Stop as soon as it’s smooth to prevent overheating.
- Form the First Layer Evenly: Without delay, pour the melted chocolate mixture into your prepared pan. Use a clean rubber spatula, ideally one lightly sprayed with non-stick cooking spray, to gently and evenly spread the fudge to all edges of the pan. This step is key for a uniform, attractive base layer.
- Prepare the Peanut Butter Layer: In a separate large, heatproof microwave-safe bowl, combine the remaining half of the sweetened condensed milk with all the peanut butter chips. Keep this bowl clean to ensure no chocolate residue mixes into your peanut butter layer.
- Microwave the Peanut Butter Mixture with Precision: Just like the chocolate layer, microwave this mixture on medium power for 1-minute intervals. After each minute, remove from the microwave and stir thoroughly. Repeat this microwaving and stirring process until the peanut butter chips are fully melted and the mixture is completely smooth and cohesive. Again, stop once it reaches a smooth consistency.
- Add the Second Layer Carefully: Gently pour and then spread the warm peanut butter fudge mixture over the top of the already laid chocolate fudge layer. Work quickly but with a light hand to avoid disturbing or mixing the chocolate layer underneath. The non-stick sprayed spatula will be helpful here again.
- Top it Off (Optional, but Highly Recommended!): If you’ve chosen to include toppings like chopped Reese’s Peanut Butter Cups, Reese’s Pieces, extra chocolate chips, or even chopped peanuts, sprinkle them evenly over the still-warm and slightly soft peanut butter layer. Gently press them down slightly into the fudge to ensure they adhere well as the fudge sets.
- Chill to Perfection: Transfer the entire pan of layered fudge to the refrigerator. Allow it to chill and set for a minimum of 4 hours. For the best possible results, including super clean cuts and optimal firmness, chilling the fudge overnight is even better.
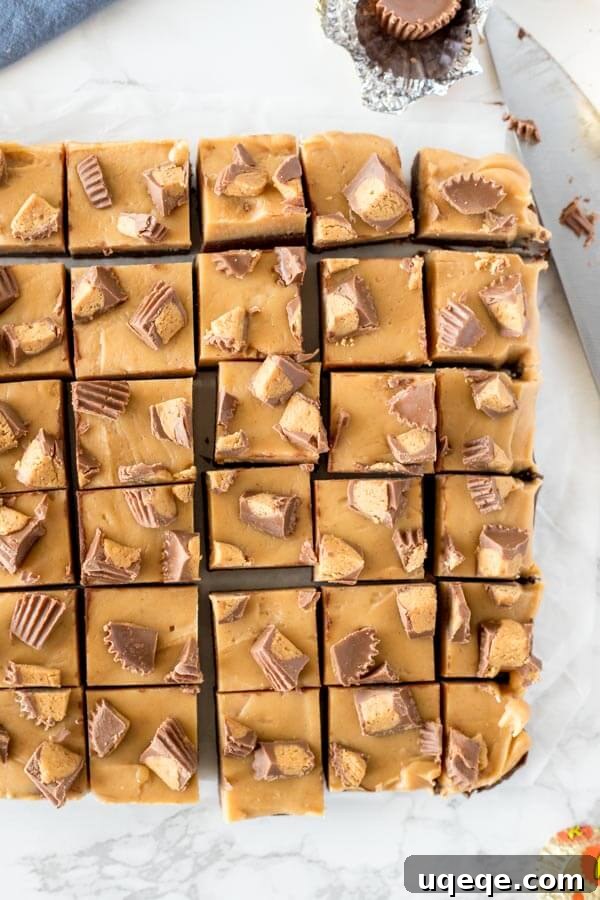
- Slice and Serve with Ease: Once the fudge is completely firm, use the parchment paper overhang to lift it cleanly from the pan and transfer it to a cutting board. For perfectly neat and professional-looking squares, use a sharp knife. For an exceptionally clean cut with no sticking, run your knife under hot water, wipe it completely dry, and then make a cut. Repeat this hot-knife technique for each slice. Cut into your desired square or rectangle sizes and enjoy!
Expert Tips for Fudge Perfection: Achieving Flawless Results
- The Critical “Medium Power” Setting: This cannot be stressed enough. Always use medium power on your microwave. High power can “bake” or scorch the chocolate and peanut butter chips, causing them to seize, burn, or become grainy. This ruins the smooth, creamy texture essential for delicious fudge. Patience with 1-minute intervals and diligent stirring is your secret weapon.
- Stir Thoroughly After Each Interval: After every 1-minute burst in the microwave, remove the bowl and stir the mixture vigorously. This isn’t just about combining; it helps distribute the heat evenly and ensures that the chips melt into a silky, homogeneous consistency. Don’t stop stirring until absolutely no lumps remain.
- Non-Stick Spatula Trick: When it comes to spreading the warm, sticky fudge layers, a rubber spatula lightly sprayed with non-stick cooking spray will be your greatest asset. It prevents the fudge from clinging stubbornly to the spatula, allowing for a much smoother, more even spread across the pan.
- Perfectly Pressed Toppings: If you’re adding any toppings, whether they be chopped peanut butter cups, nuts, or sprinkles, ensure you do so while the top fudge layer is still warm and slightly soft. Gently pressing them down slightly ensures they are securely embedded and won’t fall off once the fudge has fully set and hardened.
- Chilling Time is Non-Negotiable: Do not attempt to rush the chilling process. Adequate time in the refrigerator (at least 4 hours, or ideally overnight) is absolutely crucial for the fudge to firm up properly. This allows for clean, well-defined cuts without stickiness or crumbling.
- Achieving Clean Cuts Every Time: For perfectly neat, bakery-quality squares, always use a sharp knife. For an even cleaner, professional-looking cut, try the warm knife trick: run your knife under hot water for a few seconds, wipe it completely dry, and then make your cut. Repeat this process for each slice to prevent sticking and dragging through the fudge layers.
Creative Variations and Serving Suggestions: Elevate Your Fudge
While this classic chocolate peanut butter fudge is undeniably divine on its own, its versatility allows for exciting creative variations and presentation ideas:
- Reese’s Overload: Go beyond miniature peanut butter cups! Consider chopping up full-size Reese’s cups for larger chunks of candy, or liberally sprinkling with Reese’s Pieces for an extra burst of peanut butter candy flavor and a delightful crunch.
- Nutty Enhancements: For an additional layer of texture and enhanced nutty flavor, finely chopped peanuts, pecans, or walnuts can be a wonderful addition. Sprinkle them generously on top, or for an integrated flavor, fold a small amount into the peanut butter layer just before spreading.
- Salty-Sweet Pretzel Perfection: Introduce a fantastic salty-sweet crunch by crushing some pretzels and sprinkling them generously over the top. The saltiness of the pretzels provides a beautiful contrast to the rich sweetness of the fudge, creating an irresistible flavor profile.
- Elegant Chocolate Drizzle: After the fudge has completely set and cooled, melt a small amount of extra chocolate chips (dark, milk, or white chocolate) and drizzle them decoratively over the top using a spoon or a piping bag with a fine tip. This adds an elegant finish and another layer of chocolatey goodness.
- Festive Seasonal Sprinkles: Tailor your fudge to any holiday or celebration by adding festive sprinkles! Use orange and black for Halloween, classic red and green for Christmas, or pastel colors for Easter and spring events.
Serve this exquisite fudge alongside a steaming cup of coffee, a comforting mug of hot cocoa, or a refreshing glass of milk. It’s also a perfect candidate for feature on a holiday dessert platter, a charming addition to a potluck, or a thoughtful hostess gift. For a truly indulgent experience, warm a piece slightly in the microwave for a few seconds and serve it with a scoop of premium vanilla bean ice cream, allowing the fudge to melt slightly around it.
Storage and Freezing for Extended Enjoyment and Make-Ahead Ease
This chocolate peanut butter fudge is so incredibly delicious, you might wonder if you’ll ever have leftovers! However, if you do, or if you’re planning to make it ahead of time for a special event, proper storage is key to maintaining its fresh taste and perfect texture:
- Refrigeration for Freshness: Store any leftover fudge in an airtight container in the refrigerator. When stored correctly, it will maintain its delicious flavor and firm texture for up to 1 week. Keeping it chilled is essential to prevent it from becoming too soft or sticky, especially in warmer environments.
- Freezing for Long-Term Storage: This fudge freezes beautifully, making it an excellent make-ahead treat for holidays, unexpected guests, or simply to satisfy future cravings.
- Preparation Before Slicing: For optimal freshness and to prevent the dreaded freezer burn, it’s best to wrap the entire block of fudge (before cutting it into individual squares). Wrap it tightly in aluminum foil, using at least two layers, ensuring that no edges or seams are exposed to the air.
- Secure in a Freezer Bag: After wrapping, place the foil-wrapped fudge block into a heavy-duty freezer bag. Press out as much air as possible before sealing the bag tightly. This double layer of protection helps maintain its quality.
- Freezer Duration: Properly stored, the fudge can be frozen for up to 3 months without significant loss of quality.
- Thawing Process: When you’re ready to enjoy your frozen fudge, transfer the wrapped block to the refrigerator and allow it to thaw slowly overnight. Once fully thawed, you can unwrap it, slice, and serve as usual. Avoid thawing at room temperature, as this can affect the texture.
- Freezing Sliced Fudge: While you can freeze pre-sliced fudge in an airtight container, be aware that individual pieces are slightly more susceptible to freezer burn due to increased surface area. If freezing slices, ensure they are tightly packed with pieces of parchment paper placed between layers to prevent them from sticking together.
Troubleshooting Common Fudge Problems and Their Solutions
Even with simple recipes, sometimes things don’t go exactly as planned. Don’t worry, here are some common fudge issues you might encounter and straightforward ways to avoid or fix them:
- My Fudge is Too Soft or Doesn’t Set Properly:
- Primary Cause: This typically occurs if the fudge mixture wasn’t cooked quite enough, or if excess moisture was introduced. For microwave fudge, it often means the ingredients weren’t fully combined or weren’t heated sufficiently long (even on medium power) for the condensed milk to properly thicken and bind.
- Solution: Double-check that you’ve used sweetened condensed milk and not evaporated milk, which is thinner and won’t set. Ensure that after microwaving, both the chocolate and peanut butter mixtures are truly smooth and hot, with all chips fully melted and no lumps. If your fudge is still too soft after the recommended chilling time, you can try gently reheating the entire batch (or the softer layer if distinct) in the microwave for very brief periods (e.g., 15-30 seconds on medium power), stirring well, and then rechilling thoroughly.
- My Fudge is Grainy or Sugary in Texture:
- Primary Cause: A grainy texture is almost always due to overheating or overcooking the sugar in the sweetened condensed milk, which causes sugar crystals to form. Once these crystals form, they can propagate throughout the fudge, leading to a gritty mouthfeel.
- Solution: The “medium power” microwave setting is absolutely critical for preventing this. Heating in short, controlled 1-minute bursts and stirring diligently after each interval helps prevent localized overheating. Make sure you stop microwaving as soon as the mixture is smooth and melted, avoiding any further cooking that could cause sugar crystallization.
- My Fudge Layers are Blending or Not Distinct:
- Primary Cause: This usually happens if the first fudge layer (chocolate) hasn’t had enough time to cool and slightly firm up before the second warm layer (peanut butter) is poured over it, or if the second layer itself is excessively hot.
- Solution: While the first layer doesn’t need to be completely rock-hard, allowing it to cool for at least 5-10 minutes on the counter after spreading can significantly help it firm up enough to support the second layer. Additionally, ensure the second layer of fudge is just melted and smooth, not bubbling hot, before carefully spreading it over the first layer. Working quickly and gently is also beneficial.
Frequently Asked Questions About Homemade Chocolate Peanut Butter Fudge
- Can I use natural peanut butter instead of peanut butter chips?
- No, this recipe specifically calls for peanut butter chips because they are designed to melt smoothly and contain ingredients (like hydrogenated oils and extra sugar) that help the fudge set correctly. Natural peanut butter, especially varieties where the oil separates, has a different fat and sugar content and will likely result in a greasy, soft fudge that won’t set properly or have the desired texture.
- Can I use other types of chocolate chips for the chocolate layer?
- Yes, you absolutely can experiment with different chocolate chips to customize the flavor! Milk chocolate chips will create a sweeter, milder chocolate layer. Dark chocolate chips (60% cacao or higher) will yield a richer, more intense, and slightly less sweet chocolate flavor, offering a wonderful contrast to the peanut butter. Always ensure you use good quality chocolate chips for the best melting properties and overall flavor.
- How many pieces does this recipe make?
- When prepared in an 8×8 inch pan and cut into standard 1.5-inch squares, this recipe typically yields 36 generous pieces of fudge. You can easily cut them into smaller bites for a party or larger squares for a more substantial treat, depending on your preference.
- Is this chocolate peanut butter fudge gluten-free?
- Generally, yes. Most common brands of chocolate chips, peanut butter chips, and sweetened condensed milk are naturally gluten-free. However, if you are serving individuals with severe gluten allergies or celiac disease, it is always recommended to double-check the ingredient labels of your specific brands to confirm they are certified gluten-free.
- Can I double the recipe to make a larger batch?
- You can double the recipe, but it’s often more manageable and yields better results to make two separate batches in two 8×8 inch pans, or use a larger 9×13 inch pan if you have one. When doubling, be mindful of your microwave’s capacity and ensure you still microwave in short 1-minute intervals, stirring thoroughly, as larger quantities of ingredients will take longer to melt evenly.
For those who love to explore the wonderful world of fudge, be sure to try these other fantastic recipes from our collection:
- Maple Walnut Fudge
- Butter Pecan Fudge
- White Chocolate Peppermint Fudge
- Or simply revisit our classic easy Chocolate Fudge recipe for another quick and delicious treat.
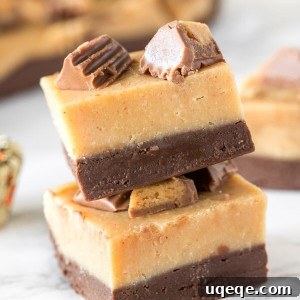
Chocolate Peanut Butter Fudge
Rate Recipe
Print Recipe
Ingredients
- 1 14 oz can sweetened condensed milk
- 1 1/4 cup semi-sweet chocolate chips
- 1 1/4 cup peanut butter chips
- 8 miniature Reese’s Peanut Butter Cups
Instructions
-
Line an 8×8 inch pan with parchment paper leaving an overhang around the sides, or line with aluminum foil and lightly grease.
-
Add 1/2 of the sweetened condensed milk and chocolate chips to a large, heatproof bowl.
-
Microwave on medium power (not high/standard) for 1 minute. Remove from the microwave and stir. Repeat the process until smooth, microwaving until just melted.
-
Pour the mixture into the prepared pan, and smooth the fudge to the edges.
-
Add the rest of the sweetened condensed milk and peanut butter chips to a separate large, heatproof bowl.
-
Microwave on medium power for 1 minute. Remove from the microwave and stir. Repeat the process until smooth, microwaving until just melted.
-
Pour and spread the mixture over top of the chocolate fudge layer.
-
Chop the peanut butter cups and lightly press them into the top of the fudge.
-
Place the fudge in the fridge to set for 4 hours.
-
Once hardened, remove from the fridge and lift the fudge out of the pan using the overhang of the parchment paper or aluminum foil.
-
Using a sharp knife, cut into squares.
Notes
Fudge can be wrapped tightly and frozen for up to 3 months. Thaw in the fridge overnight before serving.
Nutrition
Carbohydrates: 7g,
Protein: 2g,
Fat: 4g,
Saturated Fat: 3g,
Cholesterol: 2mg,
Sodium: 13mg,
Potassium: 35mg,
Fiber: 1g,
Sugar: 5g,
Vitamin A: 3IU,
Calcium: 4mg,
Iron: 1mg
Love this recipe? Share your thoughts below!
Your ratings and comments help others discover delicious treats.