
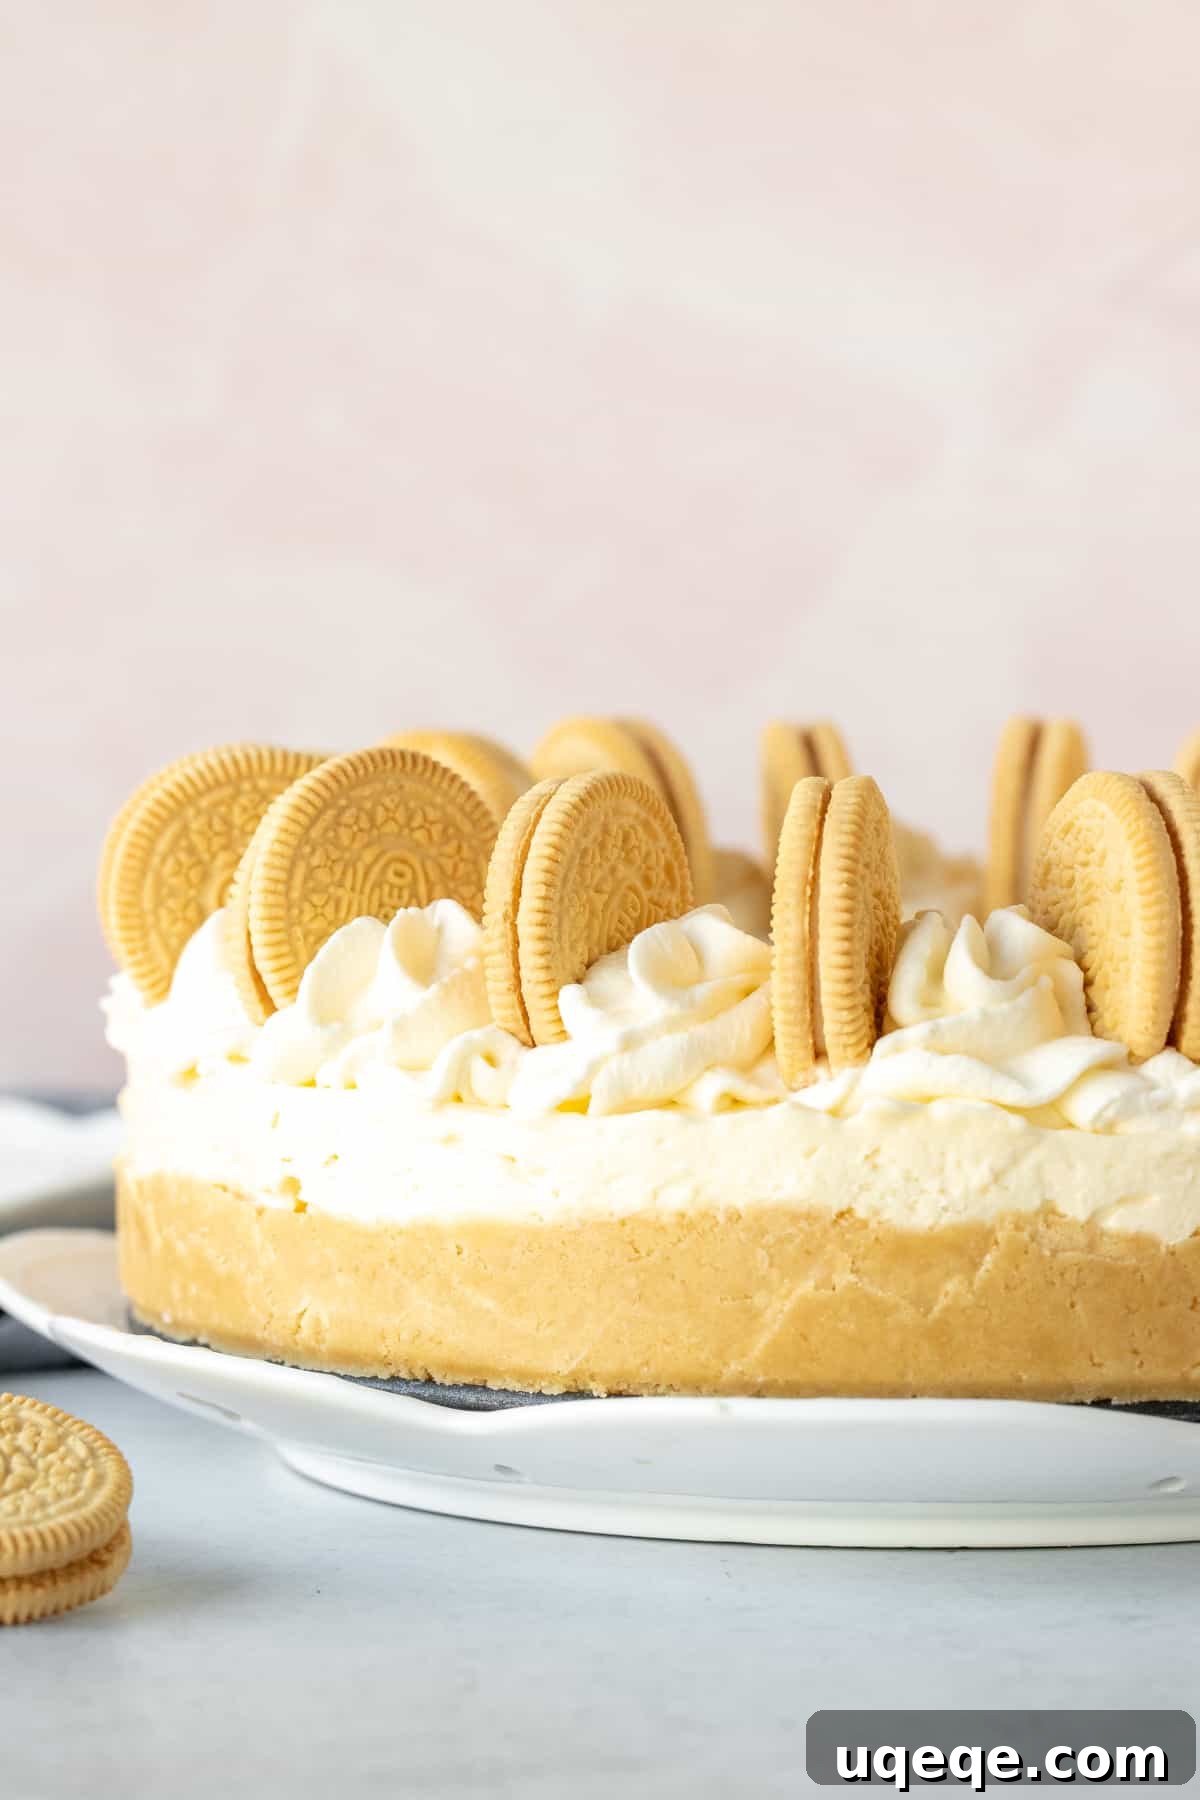
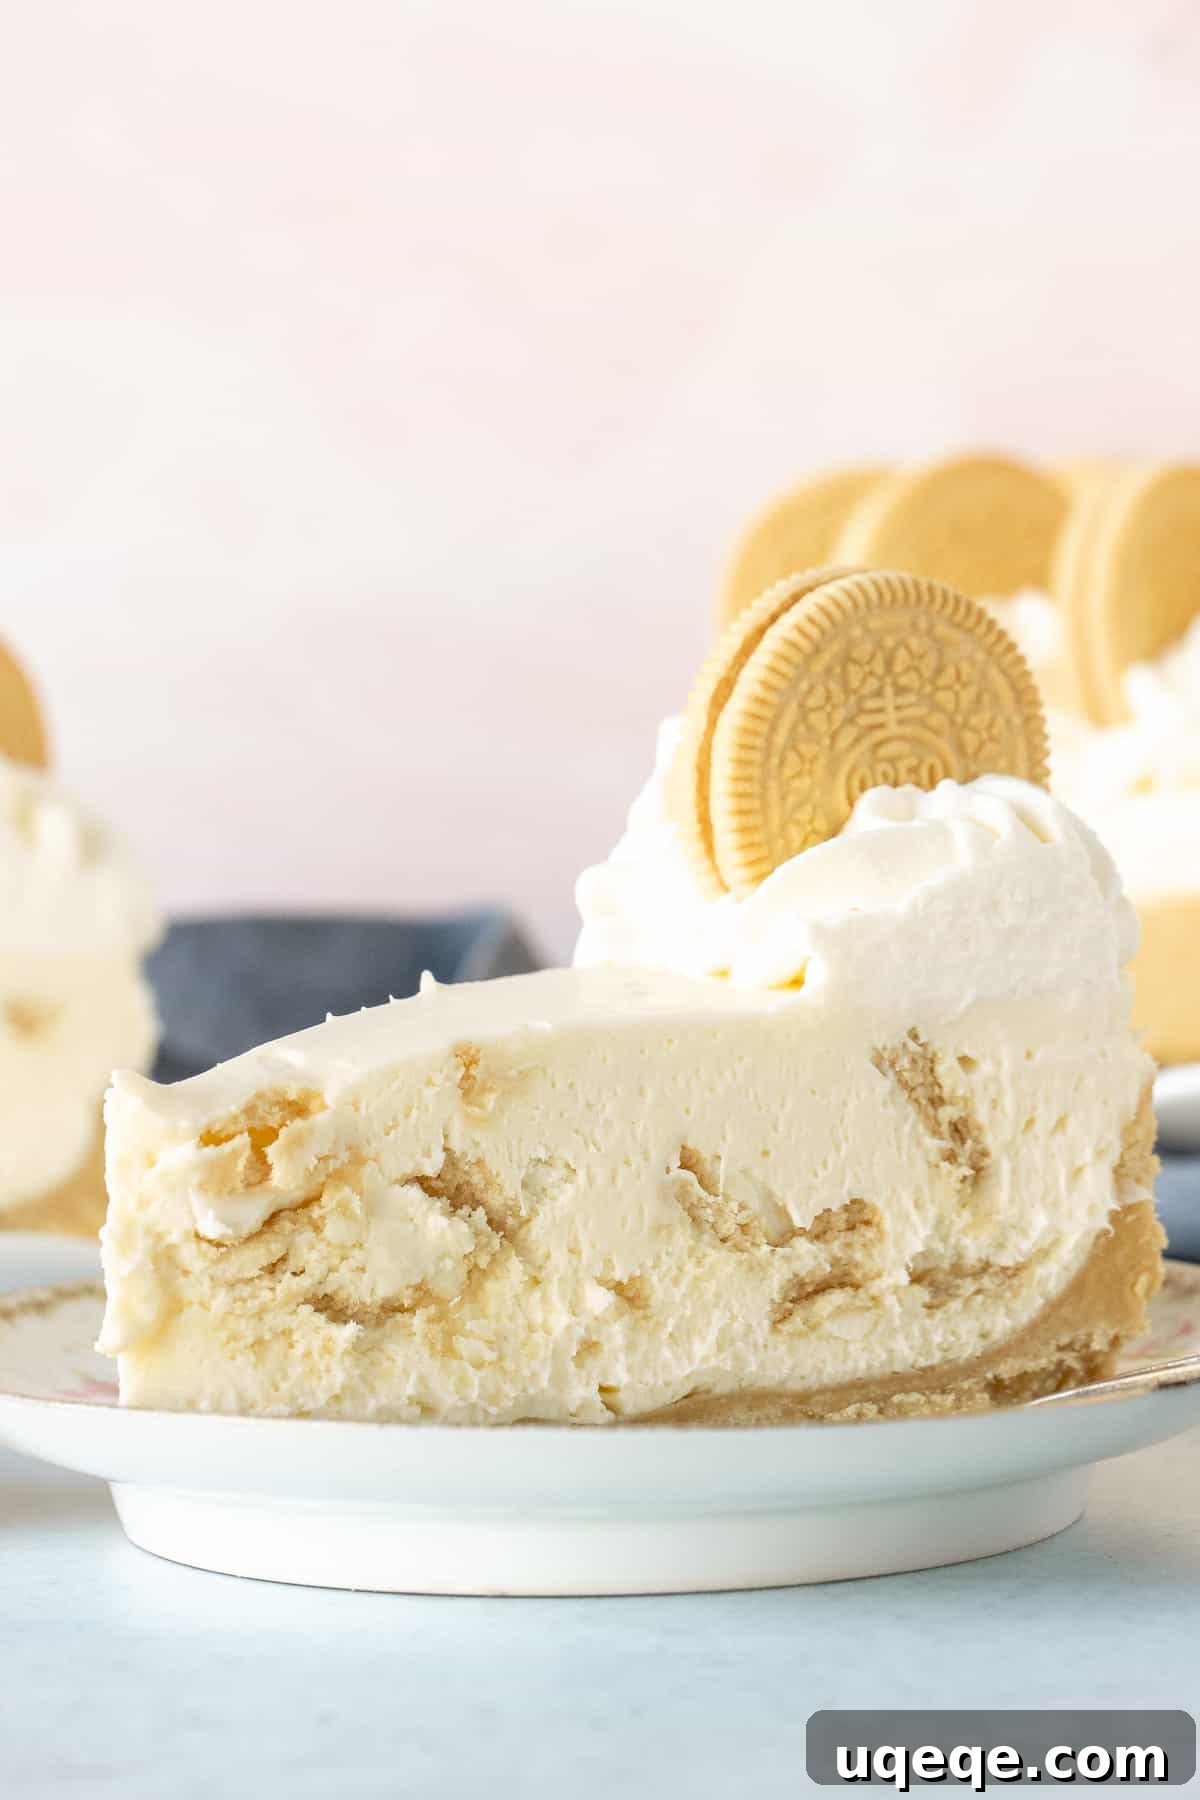
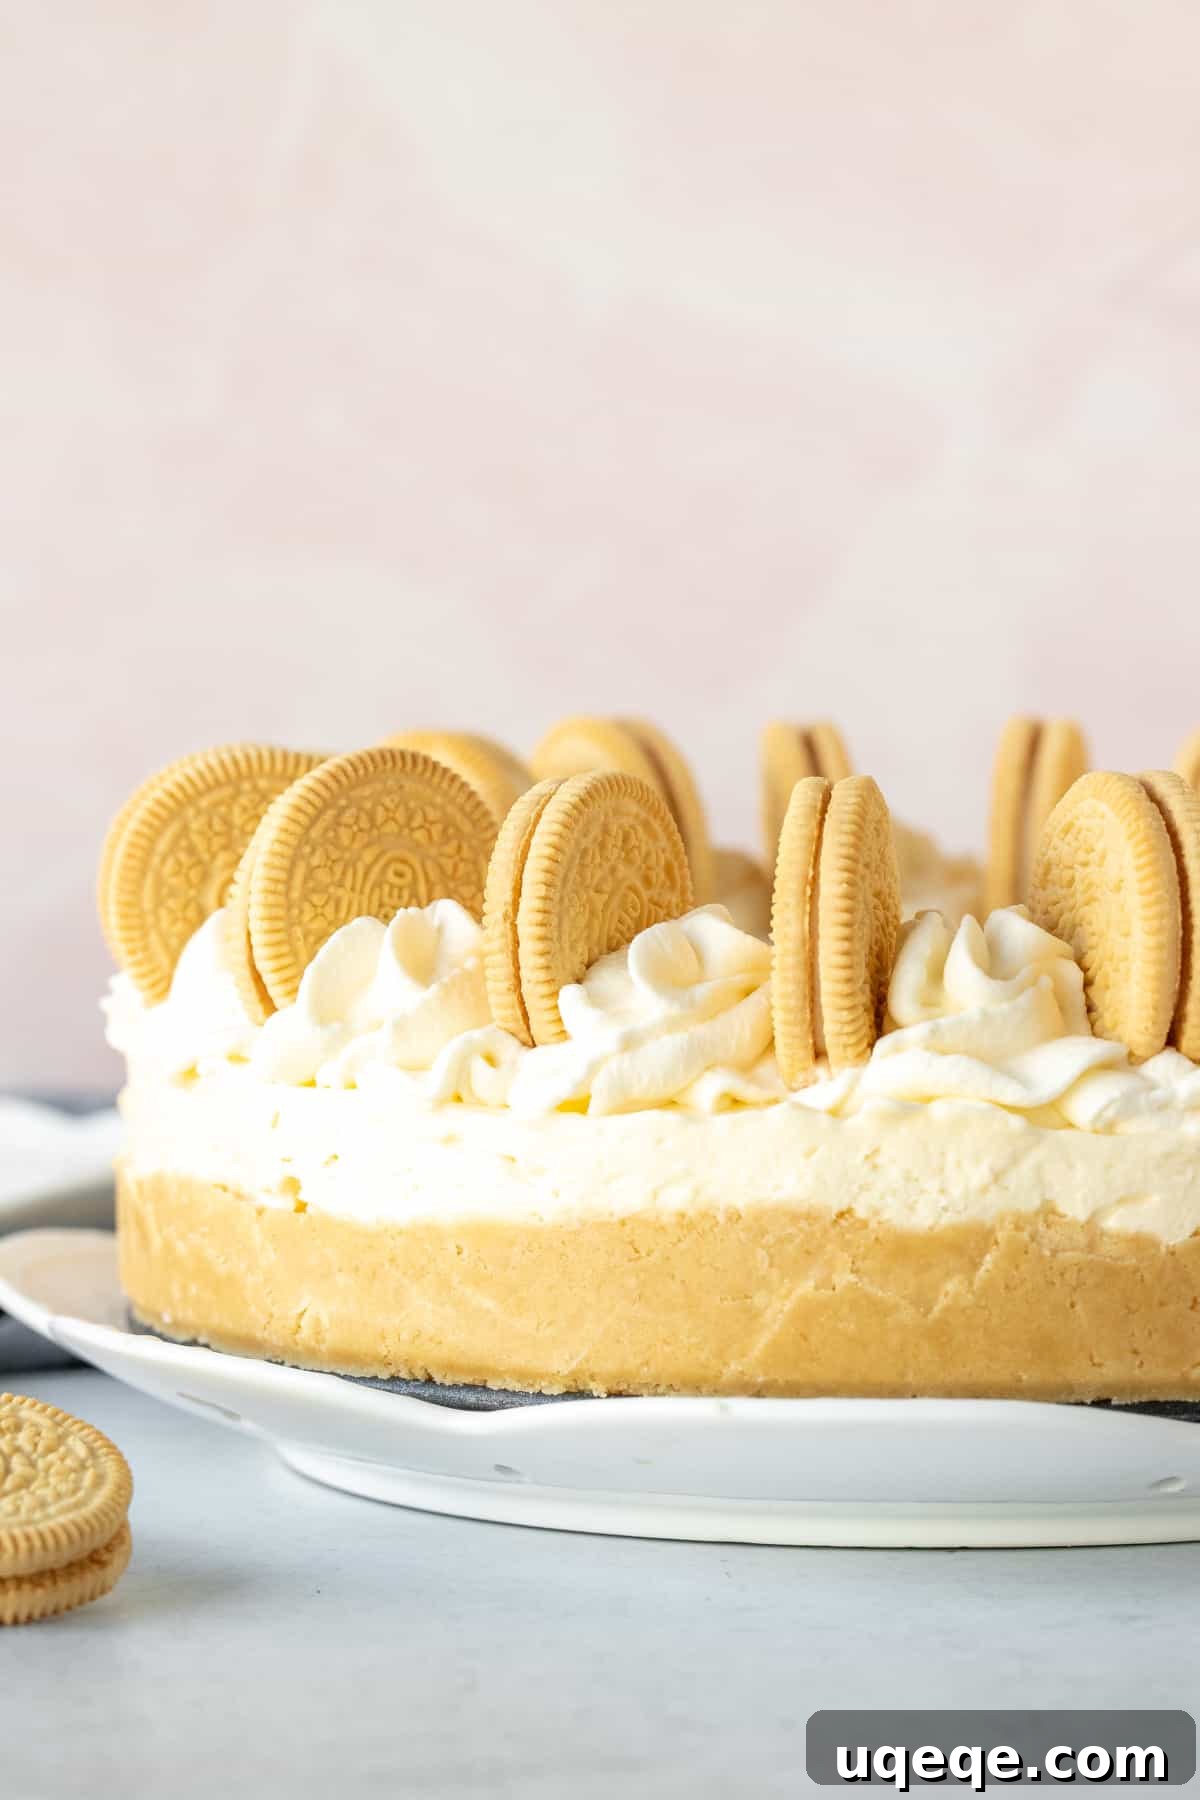
Craving an utterly delightful dessert that’s both incredibly simple to make and bursting with flavor? Look no further than this **Irresistible No-Bake Golden Oreo Cheesecake**. This recipe is a dream come true for vanilla enthusiasts, offering a sublime alternative to the classic chocolate Oreo cheesecake. Imagine a luxuriously creamy, light-as-air filling, generously studded with chunks of golden Oreo cookies, all resting on a thick, buttery crust made from the same beloved vanilla cookies. Topped with delicate swirls of whipped cream and even more Golden Oreos, this cheesecake isn’t just a dessert; it’s an experience. It brings together the joy of a homemade treat with the ease of a no-bake method, ensuring a stress-free path to a show-stopping finish.
While the classic Oreo cheesecake holds a special place in many hearts, this Golden Oreo rendition offers a refreshing twist that stands proudly as a fierce competitor. The magic lies in its simplicity: it’s entirely no-bake, meaning you can whip it up with minimal effort and no oven required. This alleviates the common stress associated with baked cheesecakes, such as cracks or overcooking. Instead, you simply prepare the layers and allow the refrigerator to do all the hard work, transforming simple ingredients into a firm, luscious dessert. The result is a cheesecake with a texture often described as a delightful cross between a traditional cheesecake and a delicate mousse – lighter, airier, yet still wonderfully rich.
Every element of this dessert celebrates the iconic Golden Oreo. The foundation is a robust and wonderfully crunchy crust, providing the perfect textural contrast to the silky filling. Within the filling itself, generous pieces of chopped Golden Oreos are incorporated, ensuring a burst of cookie flavor and texture with every spoonful. Finally, the masterpiece is adorned with a flourish of fresh whipped cream and an artful arrangement of additional Golden Oreos, making it as visually appealing as it is delicious. This cheesecake isn’t just a dessert; it’s a testament to the simple pleasure of vanilla, elevated by the beloved Golden Oreo.
Why Choose This No-Bake Golden Oreo Cheesecake?
In a world of countless dessert options, what makes this particular Golden Oreo cheesecake stand out? It’s a harmonious blend of convenience, flavor, and texture that caters to both casual bakers and seasoned dessert connoisseurs alike.
- Effortless Elegance: The term “no-bake” is music to many ears. This recipe completely bypasses the oven, eliminating concerns about water baths, cracking, or lengthy baking times. It’s an ideal choice for busy schedules or when you want to impress without the traditional baking fuss. Simply assemble, chill, and serve a dessert that looks and tastes incredibly sophisticated.
- Vanilla Lover’s Ultimate Dream: If your palate leans towards the sweet, comforting notes of vanilla rather than deep chocolate, this cheesecake is tailor-made for you. The Golden Oreos infuse every layer with their distinct vanilla cookie flavor, creating a bright, inviting taste profile that is both familiar and exciting.
- Creamy & Light Texture: Unlike some denser, baked cheesecakes, this no-bake version boasts a remarkably light and incredibly creamy consistency. It melts in your mouth, offering a luxurious, almost mousse-like feel that is utterly irresistible. This lighter texture makes it a perfect dessert after a hearty meal.
- Oreo Overload in Every Bite: From the sturdy, buttery crust to the generously studded filling and the final decorative touches, Golden Oreos are the undeniable star. Each spoonful promises a delightful combination of smooth creaminess and satisfying cookie crunch, ensuring the beloved flavor of Golden Oreos is present throughout.
- Perfect for Any Occasion and Season: Whether it’s a summer backyard BBQ, a cozy winter gathering, a birthday celebration, or just a weekend treat, this chilled dessert is always appropriate. Its refreshing coolness makes it particularly appealing during warmer months, while its comforting flavor profile is welcome year-round.
The Magic Behind a Perfect No-Bake Cheesecake
Understanding the science behind a no-bake cheesecake can elevate your results from good to absolutely spectacular. The primary difference from its baked counterpart lies in how the filling sets. Instead of relying on heat to coagulate eggs and firm up the dairy, no-bake cheesecakes depend on the stability of full-fat dairy products and careful chilling. The combination of cold heavy whipping cream, beaten to stiff peaks, and softened, full-fat cream cheese provides the necessary structure. When these are gently folded together, the air incorporated into the whipped cream helps create a light, stable base that firms up beautifully in the refrigerator.
Achieving this perfect texture requires attention to a few key details, primarily ingredient temperatures and gentle handling. Cold whipping cream is non-negotiable for successful whipping, ensuring maximum volume and stability. Conversely, cream cheese needs to be at room temperature to blend smoothly, preventing lumps and ensuring a silky-smooth filling. The folding technique is also crucial; it helps maintain the airy volume of the whipped cream, contributing to that desirable mousse-like consistency. Patience during the chilling phase is perhaps the most critical step – allowing ample time for the cheesecake to fully set is what guarantees those clean, impressive slices. This method is incredibly forgiving, making it a fantastic entry point for anyone new to making cheesecakes.
Essential Ingredients for Success
Crafting this Golden Oreo cheesecake requires a few simple yet crucial ingredients. Using high-quality components and understanding their specific roles will ensure your dessert turns out perfectly every time.
- Golden Oreos: These are the undisputed stars of our cheesecake! You’ll need enough for the crunchy crust, the delightful cookie pieces mixed into the filling, and a few extra for decorating the top. A standard 14.3-ounce package typically contains about 36 cookies. For this recipe, which utilizes both the wafer and the creamy filling, you’ll typically need two packages unless you plan to adjust for decoration.
- Unsalted Butter: Essential for binding the crushed Golden Oreos into a cohesive, rich crust. Using unsalted butter allows you to control the overall saltiness of the dessert. Ensure it is fully melted before mixing with the cookie crumbs for the best texture.
- Full-Fat Cream Cheese: This is the backbone of your creamy filling. It is absolutely vital to use full-fat, brick-style cream cheese (like Philadelphia brand). Avoid low-fat, whipped, or spreadable varieties, as their thinner consistency will prevent the cheesecake from setting properly. Always bring your cream cheese to room temperature before beating to ensure a smooth, lump-free mixture.
- Powdered Sugar (Confectioners’ Sugar): Used in both the whipped cream and the cream cheese filling. Powdered sugar dissolves seamlessly, contributing to the silky-smooth texture of the cheesecake without any graininess.
- Whipping Cream (Heavy Cream): This ingredient adds incredible lightness and volume to the filling, creating that desirable mousse-like texture. Look for cream with a fat percentage between 33-35% (often labeled as heavy cream or heavy whipping cream) sold in a carton. It must be very cold straight from the refrigerator to whip properly into stiff peaks.
- Vanilla Extract: A crucial flavor enhancer, especially in a vanilla-centric dessert. Use a good quality pure vanilla extract to deepen the overall flavor profile of your cheesecake.
Step-by-Step Guide to Your Golden Oreo Masterpiece
Creating this stunning no-bake cheesecake is a straightforward process when you follow these clear steps. Each stage is designed to build upon the last, ensuring a perfect dessert with minimal effort.
Crafting the Crunchy Golden Oreo Crust
- Begin by lightly greasing a 9-inch (23-cm) springform pan. This simple step will make releasing your cheesecake much easier later on.
- Crush the Golden Oreos: Gather your Golden Oreos (both the wafers and their delicious creamy filling). You have two excellent options for crushing them:
- Food Processor: For the quickest and most uniform crumbs, place the Oreos in a food processor and pulse until finely crushed.
- Ziploc Bag & Rolling Pin: If you don’t have a food processor, place the Oreos in a large, sturdy Ziploc bag, seal it, and use a rolling pin to crush them into fine crumbs.
You’ll want the consistency to be fine, but a few small pieces are perfectly acceptable and add to the crust’s character.
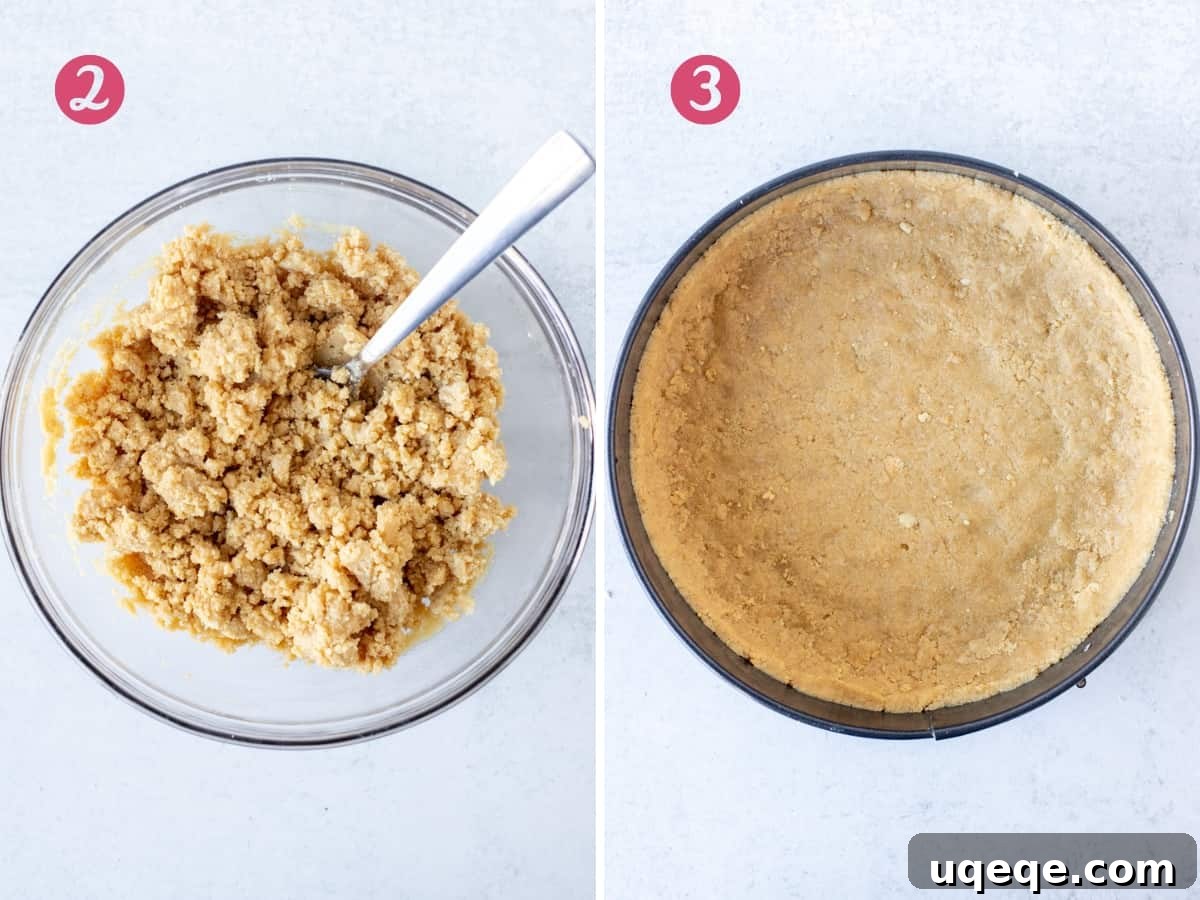
- Combine with Melted Butter: In a medium bowl, mix the crushed Golden Oreo crumbs with the melted unsalted butter. Stir thoroughly until the crumbs are evenly coated. The mixture should resemble damp sand and hold together when you squeeze it lightly in your palm.
- Form the Crust: Pour the buttered crumb mixture into your prepared springform pan. Using the bottom of a glass, your fingers, or a flat-bottomed measuring cup, firmly press the mixture into an even layer across the bottom of the pan and about 1/3 to 1/2 of the way up the sides. A well-compacted crust is key to preventing crumbling when sliced.
- Chill the Crust: Place the springform pan with the crust into the freezer while you prepare the cheesecake filling. This crucial step helps the crust firm up and set, preventing it from getting soggy once the creamy filling is added.
Preparing the Irresistibly Creamy Filling
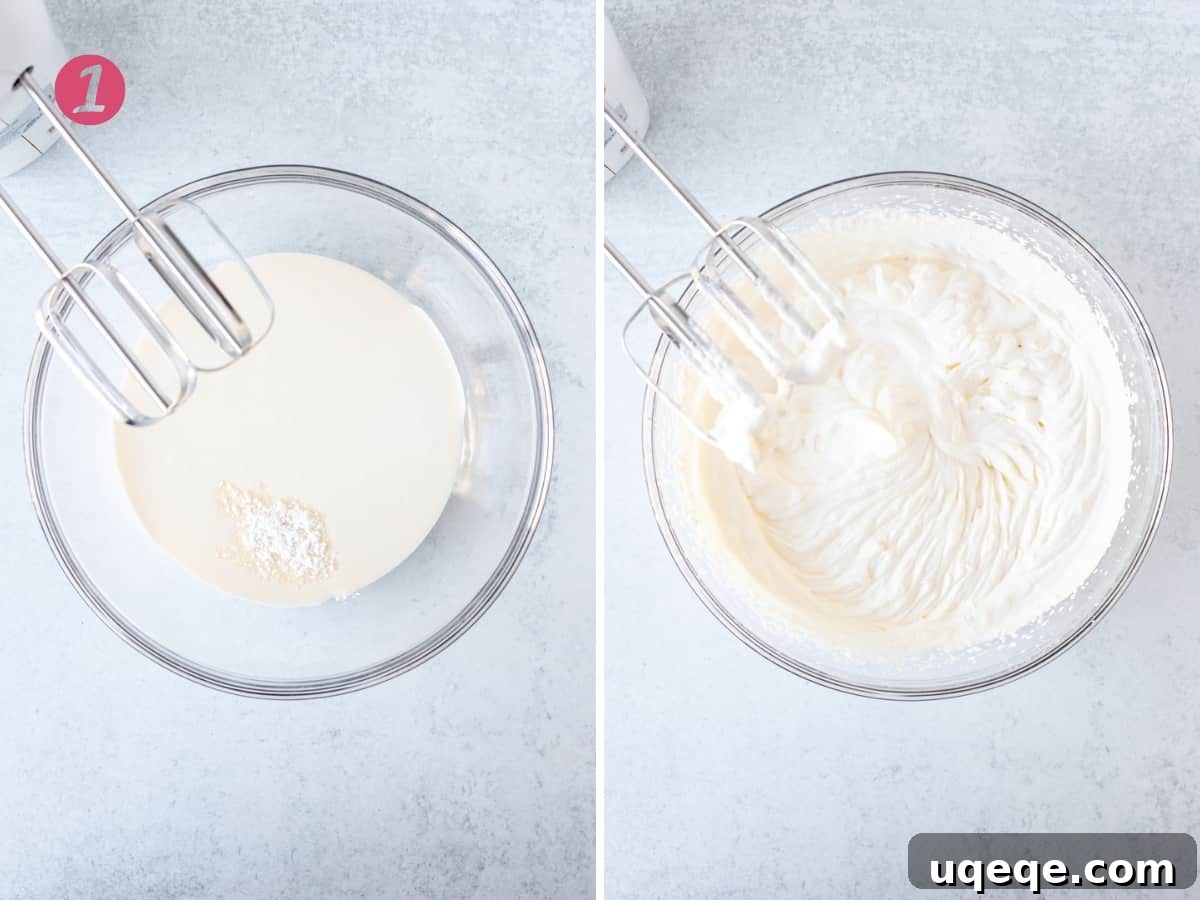
- Whip the Cream: In a large, impeccably clean mixing bowl (or the bowl of a stand mixer fitted with a whisk attachment), combine the very cold whipping cream (heavy cream) and 2 tablespoons of powdered sugar. Beat on high speed until stiff peaks form. Stiff peaks mean that when you lift the whisk, the cream holds its shape firmly. This process is much easier and quicker if your cream is chilled. Once whipped, gently set the whipped cream aside, preferably in the refrigerator to keep it cold and stable.
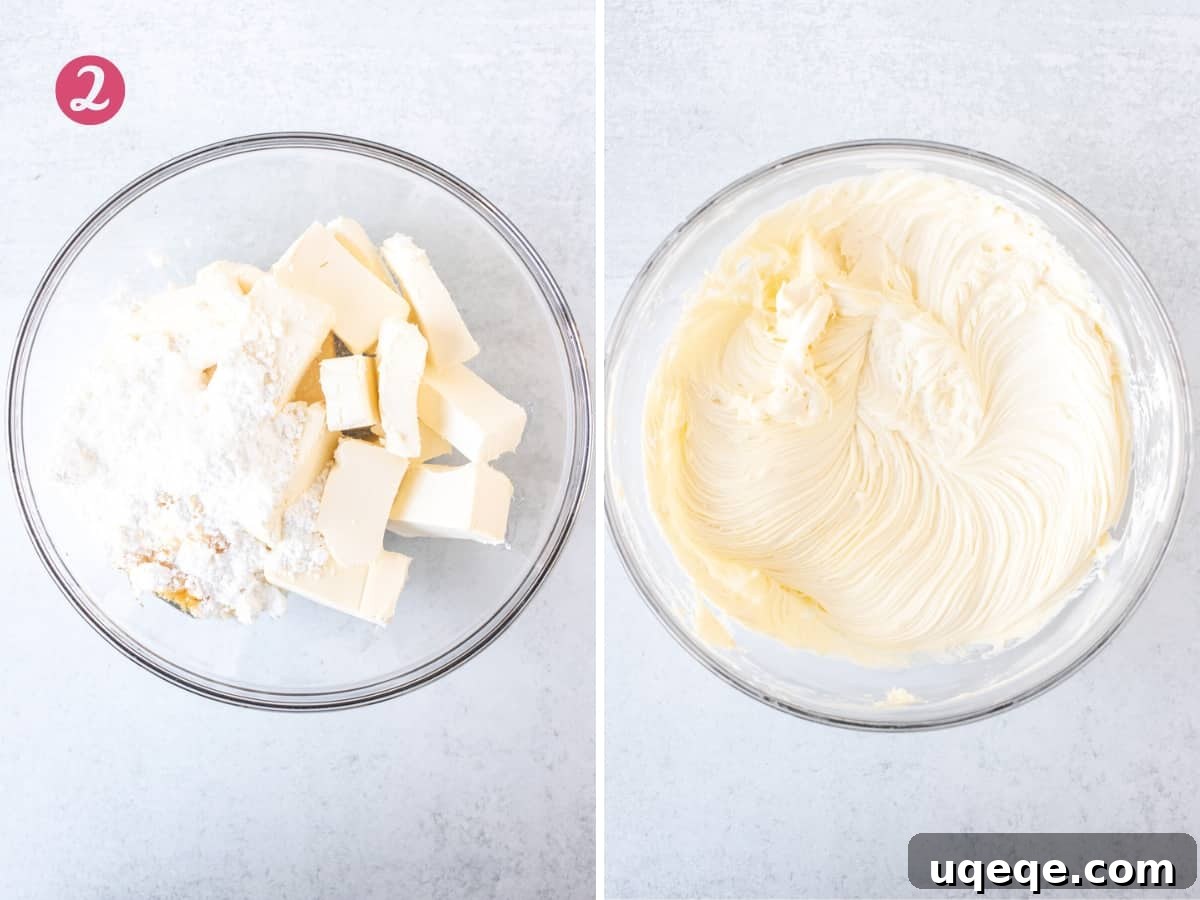
- Prepare the Cream Cheese Mixture: In a separate, very large mixing bowl (or the bowl of a stand mixer fitted with a paddle attachment), add the softened full-fat cream cheese, the remaining 1 1/2 cups of powdered sugar, and the vanilla extract. Beat on medium-high speed for 3-5 minutes, scraping down the sides of the bowl as needed, until the mixture is completely smooth, creamy, and free of any lumps. It should appear light and fluffy.
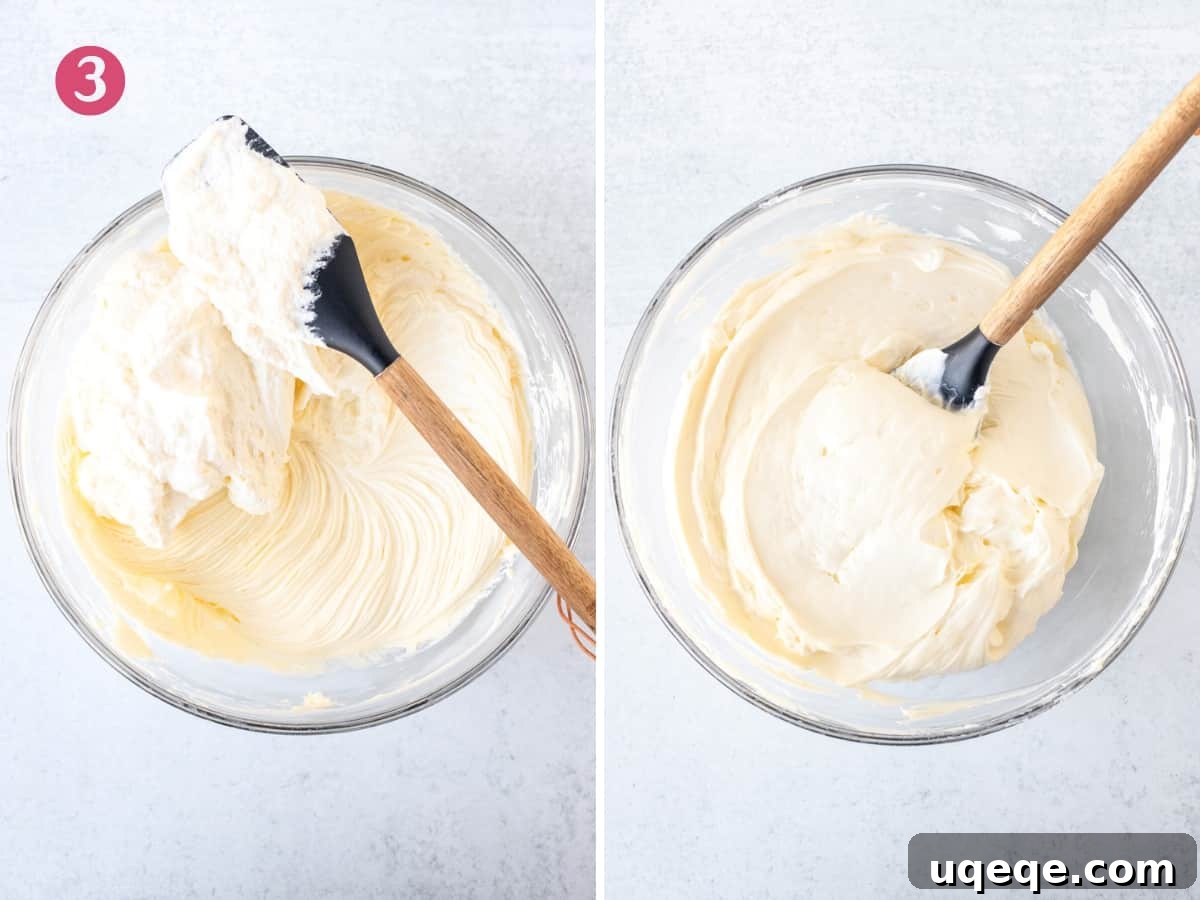
- Gently Fold in Whipped Cream: This step is critical for achieving the light, airy texture of a no-bake cheesecake. Using a rubber spatula or a large wooden spoon, very gently fold the whipped cream into the cream cheese mixture. Use a motion that scoops from the bottom and folds over the top, taking care not to deflate the whipped cream. Continue folding until no streaks of whipped cream are visible, and the mixture is uniform in consistency and color.
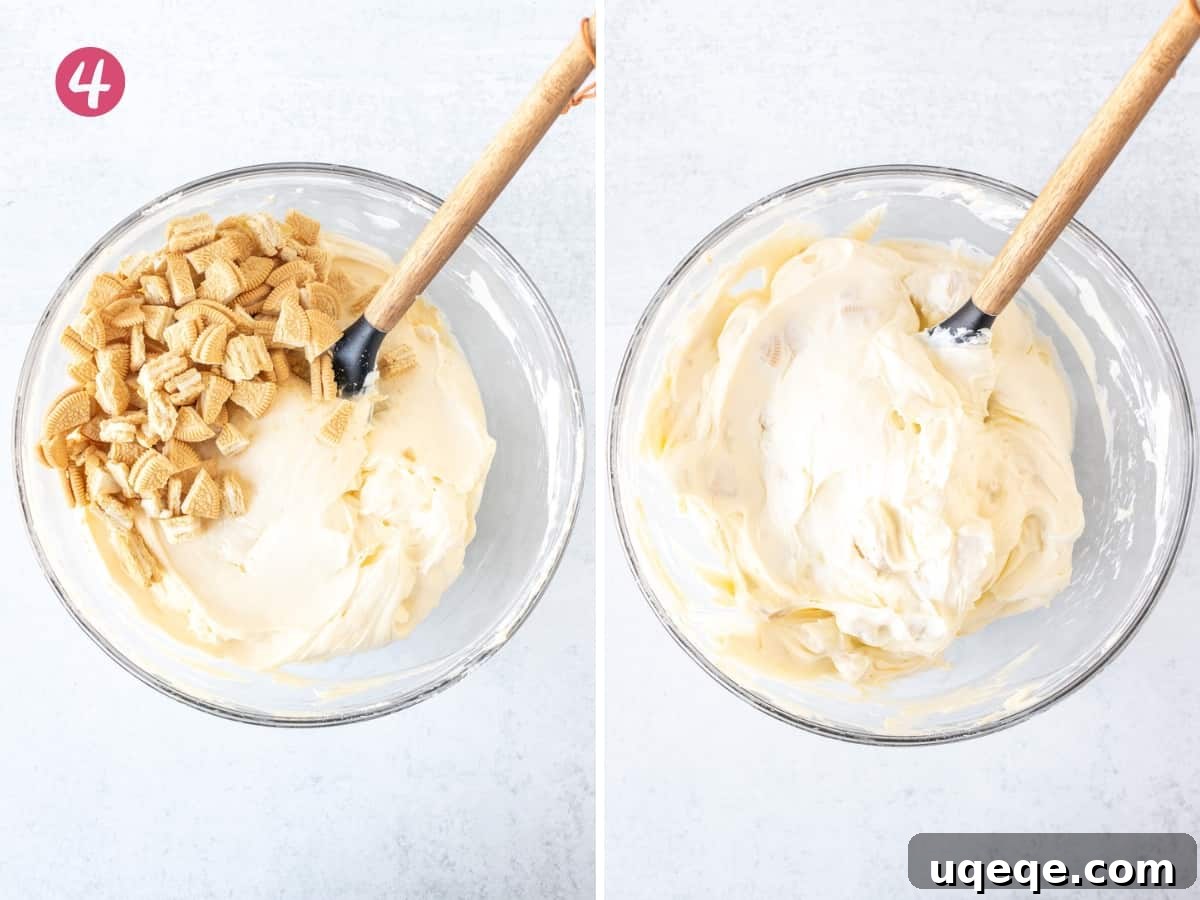
- Incorporate Golden Oreo Pieces: Lastly, take your 12 chopped or crushed Golden Oreos and gently fold them into the cheesecake filling. You can choose to have larger pieces for more texture or finer crumbs for a more integrated cookie flavor – it’s entirely up to your preference. Again, use a light hand to preserve the airy quality of the filling.
Assembling and Chilling Your Cheesecake
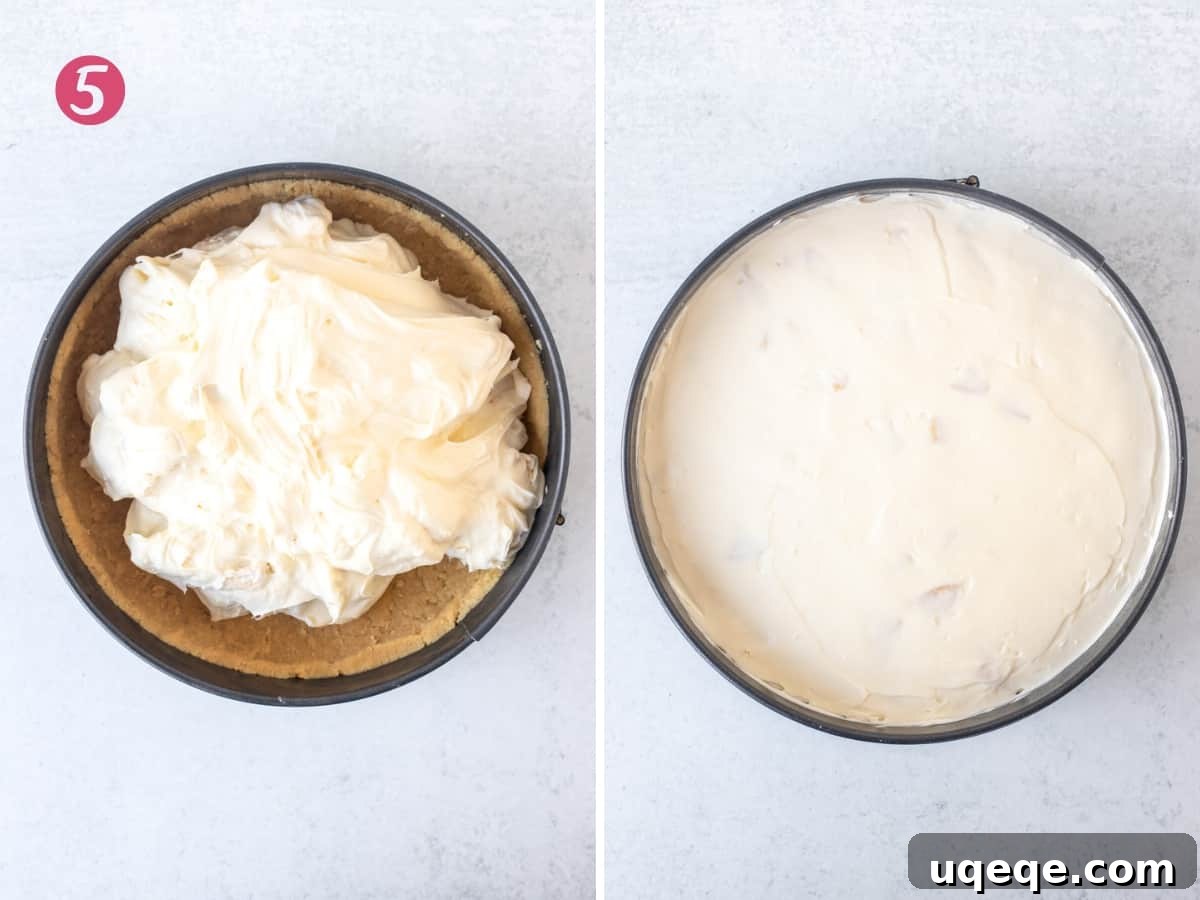
- Fill the Crust: Retrieve your chilled Golden Oreo crust from the freezer. Spoon the prepared cheesecake filling evenly into the crust. Use an offset spatula or the back of a spoon to gently smooth the top surface of the filling, creating a neat and attractive finish.
- The Crucial Chill: This step is absolutely non-negotiable for a perfectly set cheesecake. Place the springform pan, uncovered, into the refrigerator to chill for a minimum of 6 hours, or ideally, overnight. Allowing sufficient chilling time ensures the cheesecake firms up completely, making it easy to slice and serve without collapsing. Resist the urge to cut into it prematurely!
Decorating and Serving Your Dessert
- Release from Pan: Once thoroughly chilled, remove the cheesecake from the refrigerator. Run a thin, sharp knife around the inside edge of the crust. Then, unclamp and gently lift off the outer ring of the springform pan.
- Decorate to Perfection (Optional): Now comes the fun part – making your cheesecake truly shine!
- You can pipe additional whipped cream around the edges or on top. To do this, you might whip an extra 1/2 cup of whipping cream with 1 tablespoon of powdered sugar, similar to step 1 of the filling process. Using a piping bag fitted with a 1M star tip creates beautiful rosettes or swirls.
- Arrange whole or halved Golden Oreos on top of the whipped cream or directly on the cheesecake surface.
- Alternatively, you could finely crush a few more Golden Oreos and sprinkle them over the entire top for a simple yet elegant finish.
- Slice and Enjoy: For clean, professional-looking slices, use a thin, sharp knife. For the neatest cuts, wipe the knife clean with a warm, damp cloth between each slice. Ensure you cut all the way through the crunchy Golden Oreo crust at the bottom. Serve immediately and savor every glorious bite of your homemade Golden Oreo cheesecake!
Expert Tips and Tricks for No-Bake Cheesecake Perfection
While this recipe is incredibly forgiving, a few expert tips can ensure your Golden Oreo cheesecake turns out perfectly every single time, from its creamy texture to its flawless presentation.
- Ingredient Temperatures are Paramount: This is arguably the most important rule for no-bake cheesecakes. Your **whipping cream MUST be ice-cold** straight from the refrigerator. This ensures it whips up quickly and holds its volume. Conversely, your **cream cheese MUST be softened to room temperature**. Take it out of the fridge 30-60 minutes before you start. If you’re short on time, unwrap it, cut it into cubes, and spread them out on a plate to soften faster. Room temperature cream cheese blends smoothly, preventing lumps and ensuring a silky-smooth filling.
- Choose the Right Cream Cheese: Always opt for full-fat, brick-style cream cheese for cheesecake recipes, whether baked or no-bake. Brands like Philadelphia are consistently reliable. Varieties labeled “low-fat,” “whipped,” or “spreadable” have a higher water content and thinner consistency, which will prevent your cheesecake from setting properly, resulting in a runny dessert.
- Understanding Whipping Cream: “Whipping cream” refers to heavy cream that has a fat percentage typically between 33-35%. It’s sold in a carton, not a tub or aerosol can. This high fat content is what allows it to be whipped into the stiff, airy peaks essential for the cheesecake’s light texture and stability.
- The Art of Gentle Folding: When incorporating the whipped cream into the cream cheese mixture, use a rubber spatula and a gentle folding technique. Over-mixing can deflate the whipped cream, leading to a denser, less airy cheesecake. The goal is to combine the mixtures until just incorporated, with no visible streaks, while maintaining as much of the whipped cream’s volume as possible.
- Do NOT Rush the Chill Time: The chilling period is non-negotiable for a no-bake cheesecake. A minimum of 6 hours, or ideally overnight, is required for the filling to fully set and firm up. Attempting to slice it too early will result in a messy, unset dessert. Plan ahead to give your cheesecake ample time to chill.
- Oreo Quantity Guidance: A standard 14.3-ounce package of Golden Oreos contains approximately 36 cookies. For this recipe, you’ll need about 34 for the crust and 12 for the filling, plus more for decoration. This means you will likely need to purchase two standard packages. If you opt for a family-size package (which usually has around 48 cookies), one might suffice if you don’t plan on heavy decoration, using about 35 for the crust and the remainder for the filling and a light topping.
- Clean Slices Every Time: For picture-perfect slices, use a long, thin, sharp knife. For even cleaner cuts, dip your knife in hot water and wipe it dry between each slice. This warms the blade slightly, allowing it to glide through the creamy filling and crust without sticking or dragging.
- Storage Best Practices: Always store any leftover cheesecake in an airtight container or keep the springform pan tightly covered with plastic wrap. It will remain fresh and delicious in the refrigerator for up to 4 days.
Customize Your Golden Oreo Cheesecake
While this Golden Oreo cheesecake is divine as is, feel free to unleash your creativity and personalize it with a few simple additions or variations:
- Add White Chocolate: Melt some white chocolate chips and gently fold them into the cheesecake filling along with the chopped Golden Oreos for an extra layer of sweetness and richness.
- Drizzle with Sauce: Before serving, drizzle slices with a luscious caramel sauce, white chocolate ganache, or a tangy raspberry coulis for a gourmet touch.
- Fruit Topping: For a vibrant contrast, top the chilled cheesecake with fresh berries like strawberries, raspberries, or blueberries before serving. A simple fruit compote would also be exquisite.
- Nutty Crunch: For added texture, consider mixing finely chopped pecans or walnuts into the Golden Oreo crust mixture.
- Individual Servings: Instead of a large cheesecake, press the crust mixture into the bottoms of muffin tins lined with cupcake liners or small ramekins. Fill with the cheesecake mixture and chill for adorable individual no-bake cheesecakes.
More Delightful Oreo-Inspired Desserts
If you’re a devoted fan of the iconic Oreo cookie, whether golden or classic, you’ll surely love exploring these other irresistible treats from our collection. They offer unique ways to enjoy that beloved cookie flavor in various delicious forms:
- Golden Oreo Blondies
- No-Bake Oreo Pie
- Oreo Cheesecake Cookies
- Oreo Chocolate Chip Cookie Bars
Golden Oreo Cheesecake
Fiona Dowling
30 minutes
6 hours
6 hours
30 minutes
12
slices
Rate Recipe
Print Recipe
Equipment
-
9-inch (23 cm) springform pan
Ingredients
Golden Oreo Crust
-
34
Golden Oreos -
5
tablespoons
unsalted butter (70 grams) ,
melted
Cheesecake Filling
-
1 1/4
cup
whipping cream (300 ml) ,
from the carton, 33-35% MF -
2
tablespoons
powdered sugar -
24
ounces
full-fat cream cheese (683 grams) ,
brick style, softened to room temperature -
1 1/2
cup
powdered sugar (165 grams) -
2
teaspoons
vanilla extract -
12
Golden Oreos ,
chopped, or crushed
To Decorate
- whipped cream
- Golden Oreos
Instructions
-
Lightly grease a 9-inch (23-cm) springform pan.
Golden Oreo Crust
-
Crush the cookies (wafer and filling) in a food processor or place in a Ziploc bag and crush with a rolling pin.
-
Mix together the crushed cookies and melted butter until the mixture resembles damp sand.
-
Pour into the prepared pan. Press the mixture firmly into the bottom and about 1/3 to 1/2 way up the sides of the pan.
-
Place in the freezer to chill as you make the filling.
No-Bake Cheesecake Filling
-
In a large bowl, beat the very cold whipping cream and 2 tablespoons powdered sugar until stiff peaks form. Set aside (preferably in the fridge).
-
In a very large bowl, beat the softened cream cheese, 1 1/2 cups powdered sugar, and vanilla extract until the mixture is completely smooth and creamy. This will take about 3-5 minutes, scraping down the bowl as needed.
-
Using a rubber spatula or wooden spoon, very carefully fold the whipped cream into the cream cheese mixture until just combined and no streaks of whipped cream remain. Be gentle to maintain volume.
-
Gently fold in the chopped Golden Oreo cookies, still using the wooden spoon or rubber spatula, until evenly distributed.
-
Spoon the cheesecake mixture into the chilled crust and smooth the top evenly with an offset spatula or the back of a spoon.
-
Place in the fridge to chill for at least 6 hours or, ideally, overnight. This step is essential for the cheesecake to properly set.
To Serve
-
Once chilled, run a thin, sharp knife around the outside of the crust before unlatching and removing the outer ring of the springform pan.
-
Optionally, decorate the edges or top of the cheesecake with additional whipped cream (you can make more by whipping 1/2 cup whipping cream with 1 tablespoon powdered sugar) and more Golden Oreos. I decorated using a 1M piping tip and bag. Alternatively, you could sprinkle the top of the entire cheesecake with finely crushed Golden Oreos.
-
Slice with a thin, sharp knife (avoid using a dull table knife). For clean slices, wipe the knife with a warm, damp cloth between each cut. Be sure to slice all the way through the crust.
Notes
- Whipping Cream: Whipping cream is designed for making whipped cream. It typically comes in a carton and has a fat percentage between 33-35%. Ensure it is very cold before whipping.
- Whipped Topping (Alternative): If you prefer to use a whipped topping like Cool Whip instead of fresh whipping cream, skip step 1 of the cheesecake filling instructions. In step 3, gently fold in 2 cups of thawed whipped topping instead.
- Cream Cheese: Always use full-fat, brick-style cream cheese for the best results. It should be softened to room temperature for a smooth, lump-free filling.
- Storage: Store any leftover cheesecake in an airtight container or keep the springform pan tightly covered with plastic wrap. It will remain delicious in the refrigerator for up to 4 days.
- Nutrition: The provided nutritional details are an estimate only. They are based on 1 slice without any additional toppings, assuming the cheesecake is cut into 12 uniform pieces.
Nutrition
Calories:
601
kcal
,
Carbohydrates:
50
g
,
Protein:
6
g
,
Fat:
42
g
,
Saturated Fat:
22
g
,
Polyunsaturated Fat:
5
g
,
Monounsaturated Fat:
12
g
,
Trans Fat:
0.2
g
,
Cholesterol:
98
mg
,
Sodium:
364
mg
,
Potassium:
143
mg
,
Fiber:
1
g
,
Sugar:
34
g
,
Vitamin A:
1272
IU
,
Vitamin C:
0.1
mg
,
Calcium:
85
mg
,
Iron:
1
mg
Like this recipe? Rate and comment below!