
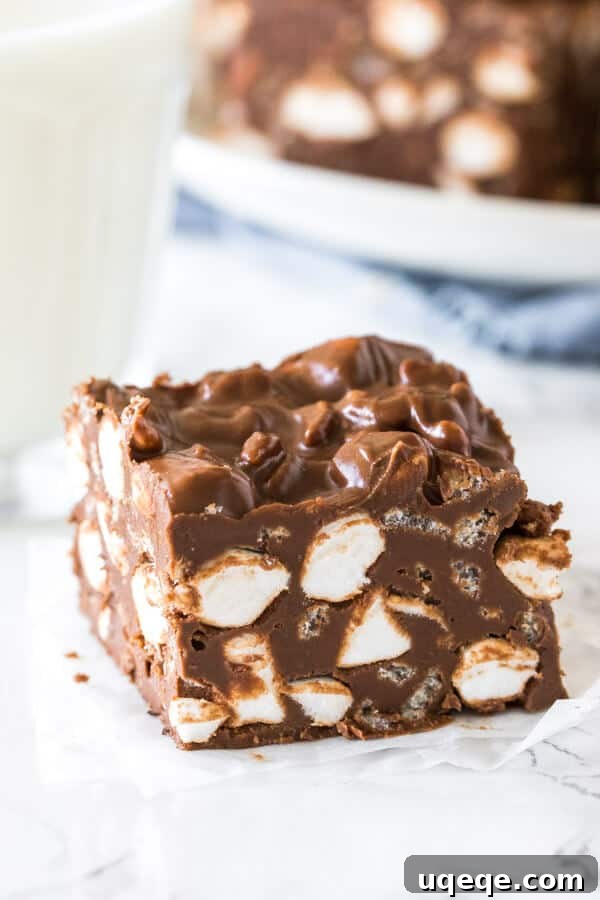
Craving a sweet treat that requires no oven and minimal effort? These No-Bake Rocky Road Bars are your answer! If you’re a fan of the classic combination of peanut butter and chocolate, prepare to fall in love. With just five simple ingredients, these bars come together quickly to create a perfectly balanced dessert that’s crispy from Rice Krispie cereal, chewy from mini marshmallows, and deliciously gooey with melted chocolate and creamy peanut butter. It’s an easy, crowd-pleasing recipe that’s impossible to resist, making it a staple for any occasion, from casual snacks to festive gatherings.
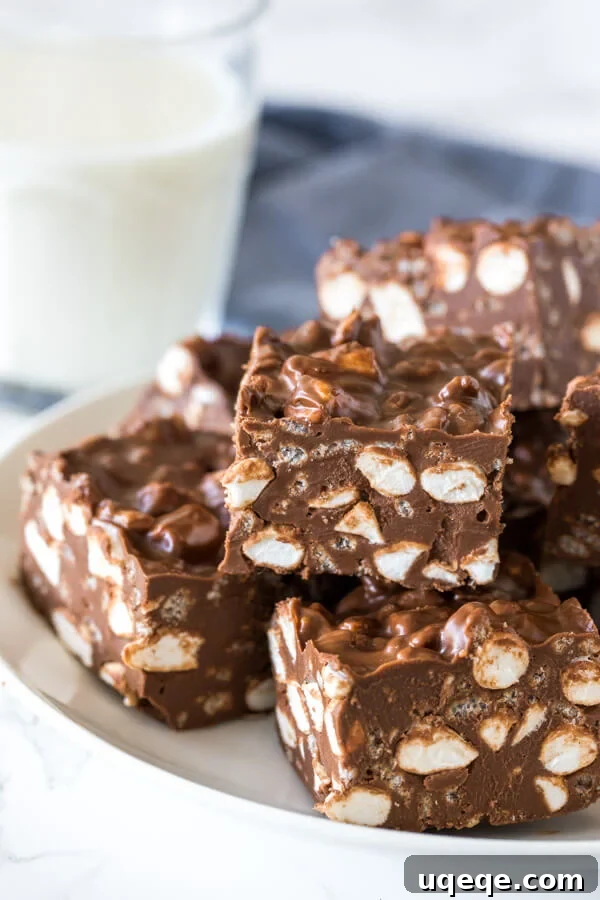
Irresistible No-Bake Rocky Road Bars: Your Easiest Sweet Escape
Forget the fuss of baking and complex ingredient lists. Our no-bake rocky road bars are the epitome of simple indulgence. Imagine a harmonious blend of rich chocolate, savory peanut butter, light and airy Rice Krispies, and soft, sweet mini marshmallows, all chilling out to perfection without ever touching an oven. They offer a delightful texture — a satisfying crunch followed by a smooth, gooey melt-in-your-mouth experience. This recipe is not just easy; it’s a testament to how incredible desserts can be made with minimal fuss and maximum flavor. Whether you’re a seasoned baker or a kitchen novice, these bars are a guaranteed win!
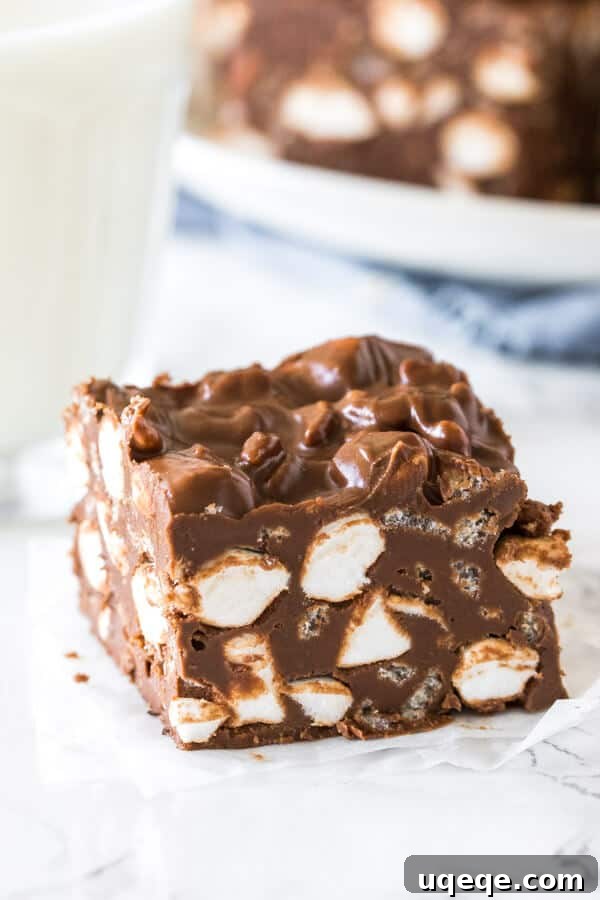
Why You’ll Fall in Love with These No-Bake Rocky Road Bars
These bars aren’t just a recipe; they’re a revelation for anyone seeking a quick, delicious, and utterly satisfying dessert. Here’s why they deserve a permanent spot in your recipe collection:
- Effortless Preparation: Truly no-bake means no oven, no preheating, and no complicated techniques. Simply melt, stir, and chill! This makes them perfect for hot summer days or when you need a dessert in a hurry.
- Minimal Ingredients: With only 5 core ingredients, you likely already have most of what you need in your pantry. This keeps shopping lists short and preparation simple.
- Irresistible Texture: The combination of crispy Rice Krispies, chewy marshmallows, and rich, smooth chocolate-peanut butter provides a textural symphony with every bite. It’s the perfect balance of soft and crunchy.
- Universal Appeal: Peanut butter and chocolate is a beloved pairing, making these bars a hit with kids and adults alike. They’re excellent for parties, potlucks, lunchboxes, or simply a delightful homemade treat.
- Quick Cleanup: Since everything comes together in essentially one bowl (plus a lined pan), cleanup is a breeze. Spend less time washing dishes and more time enjoying your delicious creation!
- Perfect for Any Occasion: From a simple weeknight dessert to a festive holiday offering, these rocky road bars fit right in. They make fantastic edible gifts during the Christmas season or a welcome addition to any dessert platter.
Gathering Your 5 Simple Ingredients
The beauty of this recipe lies in its simplicity. You only need a handful of readily available ingredients to create these scrumptious rocky road bars. Don’t underestimate the power of these five elements when combined!
- Peanut Butter: Creamy peanut butter works best for a smooth, cohesive base, but crunchy peanut butter can add an extra layer of texture. Choose your favorite!
- Unsalted Butter: This helps create the right consistency for the chocolate and peanut butter mixture, ensuring it’s smooth and sets properly.
- Chocolate Chips: You can use milk chocolate, semi-sweet chocolate, or even a blend of different types to customize the richness. High-quality chocolate will always yield the best flavor.
- Rice Krispies Cereal: The star of the crunch! These crispy puffed rice kernels provide that signature light and airy texture characteristic of rocky road treats.
- Mini Marshmallows: These tiny pillows of sweetness bring the “gooey” factor and signature chewiness to the bars. Make sure to use mini ones for even distribution.
Easy Step-by-Step Rocky Road Bars: A Guide to Sweet Success
Preparing these no-bake rocky road bars is so straightforward, it barely counts as cooking! Follow these simple steps, and you’ll have a delightful dessert chilling in your fridge in no time.
- Prepare Your Pan: First, line an 8×8 or 9×9 inch square pan with parchment paper or aluminum foil. Make sure to leave a generous overhang around the edges – this is crucial for easily lifting the set bars out later. Lightly spray the lining with non-stick cooking spray for extra insurance.
- Melt the Base: In a large, microwave-safe bowl, combine your 3/4 cup of peanut butter, 1/4 cup of unsalted butter (cut into pieces to help it melt faster), and 2 cups of chocolate chips.
- Microwave with Care: Heat the mixture in the microwave in 45-second intervals on medium power. It’s important to use medium power, not high, to prevent the chocolate from scorching. Stir well between each interval until the mixture is completely melted and smooth. This typically takes about 2-3 intervals.
- Cool Slightly: Once melted and thoroughly combined, allow the chocolate and peanut butter mixture to cool slightly for about 5 minutes. This small cooling period is essential to prevent the marshmallows from melting completely when you stir them in, maintaining their shape and chewiness.
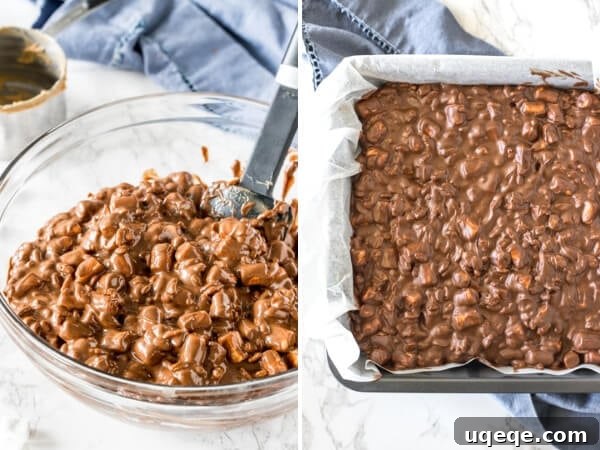
- Fold in Crispies and Marshmallows: Gently stir in the 1 1/2 cups of Rice Krispies cereal and 3 cups of mini marshmallows into the cooled chocolate mixture. Mix until everything is evenly coated. Be careful not to overmix, which can crush the cereal.
- Press into Pan: Pour the entire mixture into your prepared pan. Using a spatula or the back of a spoon, evenly spread and press the mixture firmly into the corners and across the surface of the pan. This ensures uniform bars that hold together well.
- Chill to Set: Transfer the pan to the refrigerator and chill for at least 3 hours, or until the bars are completely set and firm. For best results and easy slicing, a full 3 hours is recommended.
- Slice and Serve: Once set, use the parchment paper or foil overhang to easily lift the entire slab of rocky road out of the pan. Place it on a cutting board and slice into squares or rectangles of your desired size. Serve immediately and enjoy!
Pro Tips for Rocky Road Perfection
Even with a simple recipe, a few tricks can elevate your no-bake rocky road bars from great to absolutely phenomenal:
- The Parchment Paper Trick: Don’t skip lining your pan with parchment paper or foil, leaving an overhang. This is a game-changer for easy removal and clean cuts. Without it, you might struggle to get the bars out cleanly.
- Temperature Control is Key: Allowing the chocolate-peanut butter mixture to cool for a few minutes before adding the marshmallows is vital. If the mixture is too hot, your marshmallows will melt entirely, disappearing into the mix and losing their distinct texture.
- Quality Ingredients Matter: While a simple recipe, using good quality peanut butter and chocolate chips can significantly impact the overall flavor. Invest in brands you love!
- Even Pressing: When pressing the mixture into the pan, aim for an even layer. This ensures that each bar has a consistent texture and appearance, and they will set uniformly.
- Sharp Knife for Clean Cuts: For neat slices, use a sharp, warm knife. You can run your knife under hot water and wipe it dry between cuts to prevent sticking and achieve those perfect edges.
- Don’t Rush the Chill: While it’s tempting to dive in, giving the bars ample time to chill in the refrigerator (at least 3 hours) is crucial for them to fully set and become firm enough to cut and handle without falling apart.
Customize Your Rocky Road Bars: Variations & Add-Ins
One of the joys of no-bake rocky road bars is how easily they can be customized. Feel free to experiment with different ingredients to create your unique twist on this classic treat.
- Nutty Additions: Enhance the crunch and flavor by stirring in 1/2 cup of chopped peanuts, almonds, pecans, or walnuts along with the Rice Krispies.
- Sweet & Salty: For a delightful sweet and salty contrast, add 1/2 cup of crushed pretzels to the mixture.
- Extra Chocolate Boost: Fold in an additional 1/2 cup of mini chocolate chips, or drizzle melted white chocolate or dark chocolate over the top once the bars have set.
- Coconut Craze: Toasted shredded coconut can add a lovely tropical flavor and texture. Add about 1/2 cup to the mix.
- Candy Mix-Ins: Get festive with M&M’s, chopped candy bars (like Snickers or Reese’s Peanut Butter Cups), or even a handful of colorful sprinkles.
- Flavor Extracts: A dash of vanilla extract, almond extract, or even peppermint extract (especially around the holidays!) can add a wonderful aromatic depth to the chocolate-peanut butter base. Add 1/2 to 1 teaspoon with the butter and peanut butter.
- Dried Fruit Fun: Mix in chopped dried cranberries, raisins, or chopped apricots for a chewy, fruity element.
Serving and Storage: Enjoying Your Sweet Creation
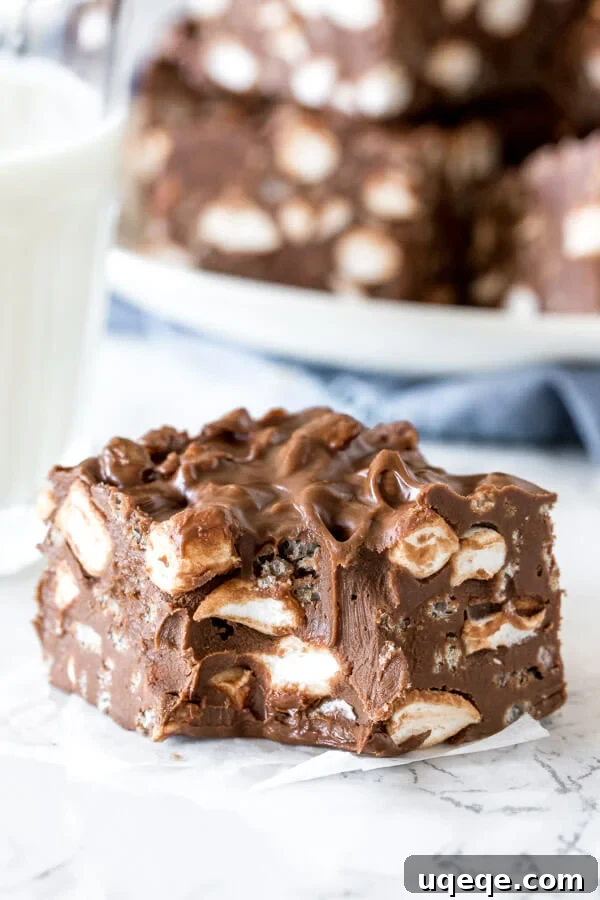
These rocky road bars are incredibly versatile, making them perfect for a variety of occasions. Serve them as a simple after-dinner treat with a glass of milk or a cup of coffee. They’re also a fantastic addition to any dessert platter for parties, potlucks, or holiday gatherings. Because they hold up well, they make wonderful edible gifts for friends and family, packaged in a decorative box or cellophane bag.
Storage Instructions:
- Room Temperature: If your kitchen is cool (below 70°F or 21°C), you can store the bars in an airtight container at room temperature for up to 3 days. However, the texture might be slightly softer.
- Refrigerator: For optimal firmness and to extend their freshness, store the no-bake rocky road bars in an airtight container in the refrigerator for up to 5 days. Chilling them also makes them easier to handle and prevents them from becoming too sticky.
- Freezing: These bars freeze beautifully! Place them in a single layer in an airtight freezer-safe container, separating layers with parchment paper to prevent sticking. They can be frozen for up to 3 months. When ready to enjoy, simply thaw them in the refrigerator overnight or at room temperature for a couple of hours.
Frequently Asked Questions about No-Bake Rocky Road Bars
- Can I use natural peanut butter for this recipe?
- It’s generally recommended to use creamy, shelf-stable peanut butter (like Jif or Skippy) for this recipe. Natural peanut butter, especially the “stir” varieties, can be oilier and may prevent the bars from setting up as firmly, or result in a greasier texture. If you do use it, make sure it’s well-stirred and try adding a little extra chocolate or butter if the mixture seems too loose.
- What kind of chocolate chips are best?
- Semi-sweet chocolate chips are a classic choice and provide a balanced sweetness. Milk chocolate chips will make the bars sweeter and creamier. For a richer, less sweet bar, you can use dark chocolate chips or a combination of different types. Use what you love most!
- I don’t have a microwave. Can I melt the ingredients on the stovetop?
- Absolutely! You can melt the peanut butter, butter, and chocolate chips in a heatproof bowl set over a saucepan of simmering water (a double boiler method), stirring frequently until smooth. Alternatively, you can melt them directly in a heavy-bottomed saucepan over low heat, stirring constantly to prevent scorching. Just be sure to remove it from the heat once melted and let it cool slightly before adding the Rice Krispies and marshmallows.
- How do I prevent the bars from sticking to my knife when cutting?
- For clean cuts, ensure the bars are thoroughly chilled. Use a large, sharp knife. You can also lightly spray the knife with cooking spray or warm it under hot water and wipe it dry between each cut. This helps create smooth, neat slices.
- Can I make these bars gluten-free?
- Yes! Most Rice Krispies cereals are naturally gluten-free, but it’s always best to check the packaging to confirm, especially if serving to someone with a severe gluten allergy. The other ingredients (peanut butter, butter, chocolate chips, marshmallows) are typically gluten-free, but always verify labels if necessary.
Other Irresistible No-Bake Treats You’ll Love
If you enjoyed the simplicity and deliciousness of these no-bake rocky road bars, you’re in for a treat! Explore some of our other favorite no-bake recipes:
- Confetti Squares
- No Bake Chocolate Peanut Butter Bars
- Chocolate Confetti Squares
- Easy Peanut Butter Fudge
And for more rocky road inspired desserts, don’t miss this rocky road fudge or these homemade rocky road candies.
The Full Recipe: No-Bake Rocky Road Bars
No-Bake Rocky Road Bars
Rating: 5 from 10 votes
By: Fiona Dowling
These No-Bake Rocky Road Bars are the perfect easy recipe if you love peanut butter and chocolate. With only 5 ingredients – they’re crispy, crunchy & gooey thanks to using Rice Krispie cereal and mini marshmallows.
- Prep Time: 10 mins
- Chilling Time: 3 hrs
- Total Time: 3 hrs 10 mins
- Servings: 16 bars
Ingredients
- 3/4 cup peanut butter (smooth or crunchy)
- 1/4 cup unsalted butter, cut into pieces
- 2 cups chocolate chips (milk, semi-sweet, or a combination)
- 1 1/2 cups Rice Krispies cereal
- 3 cups mini marshmallows
Instructions
- Line an 8×8 or 9×9 inch square pan with parchment paper or aluminum foil, leaving an overhang around the edges. Lightly spray with non-stick cooking spray.
- In a large microwave-safe bowl, combine the peanut butter, butter, and chocolate chips.
- Microwave for 45-second intervals on medium power, stirring well between each interval, until the mixture is completely melted and smooth.
- Stir until evenly mixed, then allow to cool slightly for 5 minutes. This prevents the marshmallows from melting completely.
- Gently stir in the Rice Krispies cereal and mini marshmallows until everything is well coated.
- Pour the mixture into the prepared pan. Using a spatula, spread and press it evenly into the corners of the pan.
- Chill in the refrigerator for at least 3 hours, or until completely set and firm.
- Using the parchment paper or foil overhang, lift the bars out of the pan. Place on a cutting board and cut into squares. Serve and enjoy!
Notes
Bars can be stored in an airtight container in the refrigerator for up to 5 days. If your kitchen is cool, they can also be stored at room temperature for 3 days. For longer storage, freeze them in an airtight container for up to 3 months, then thaw overnight in the fridge before serving.
Nutrition Facts (per serving)
Calories: 249kcal, Carbohydrates: 28g, Protein: 4g, Fat: 14g, Saturated Fat: 6g, Cholesterol: 11mg, Sodium: 93mg, Potassium: 82mg, Fiber: 1g, Sugar: 21g, Vitamin A: 314IU, Vitamin C: 2mg, Calcium: 32mg, Iron: 1mg
Final Thoughts on These Delightful No-Bake Bars
These No-Bake Rocky Road Bars are more than just a dessert; they’re a celebration of simplicity and irresistible flavor. Whether you’re looking for a quick treat, a crowd-pleasing party snack, or a thoughtful homemade gift, this recipe delivers on all fronts. The perfect balance of crispy, chewy, and gooey textures, combined with the beloved duo of chocolate and peanut butter, makes them a timeless favorite. So, go ahead, gather your five ingredients, and whip up a batch of these delightful bars. You’ll be amazed at how much joy such a simple recipe can bring! Don’t forget to rate the recipe and share your experience in the comments below!