
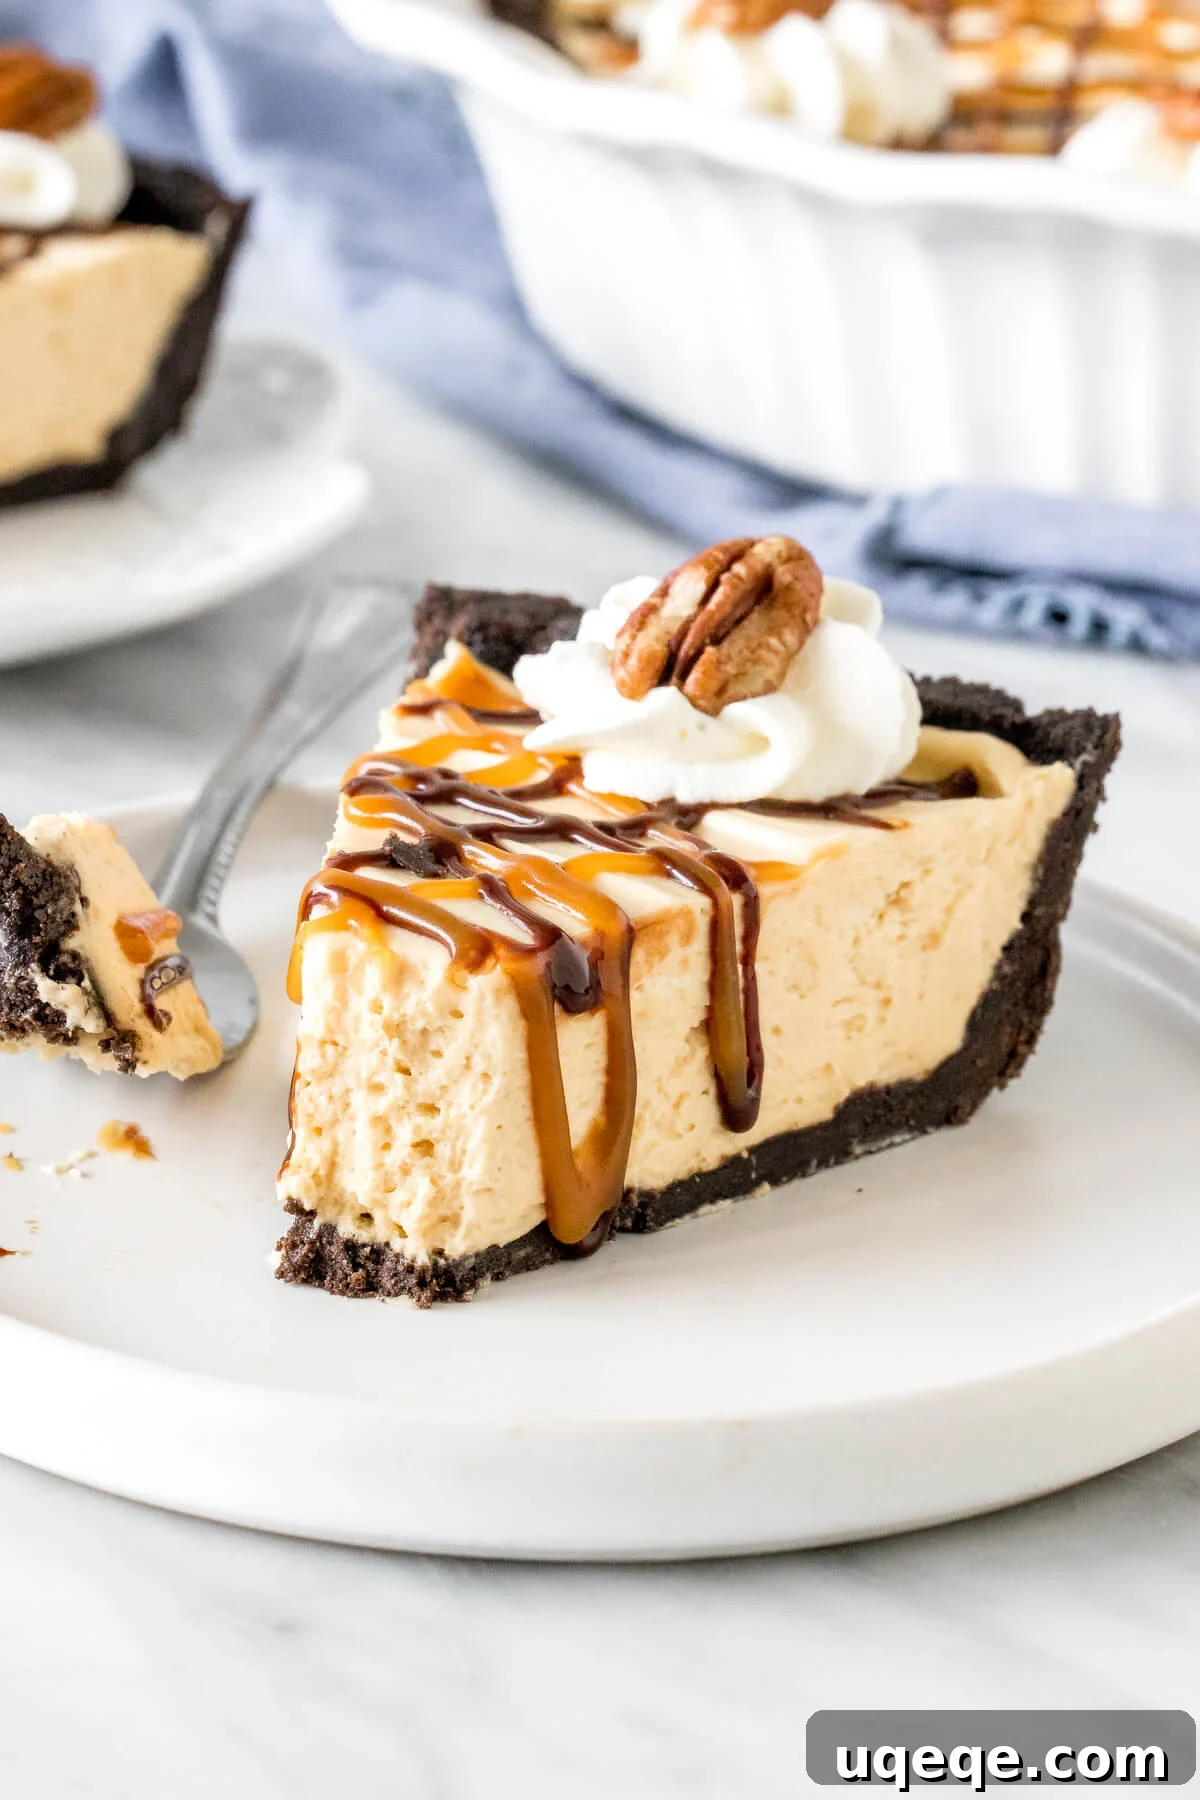
Caramel, pecans, and chocolate unite in this exquisite No-Bake Turtle Pie, offering a delightful twist on a classic candy. Featuring a rich Oreo cookie crust and a velvety caramel cheesecake filling, this dessert is both simple to prepare and utterly decadent.
The Ultimate No-Bake Turtle Pie: A Symphony of Sweet and Crunchy Delight
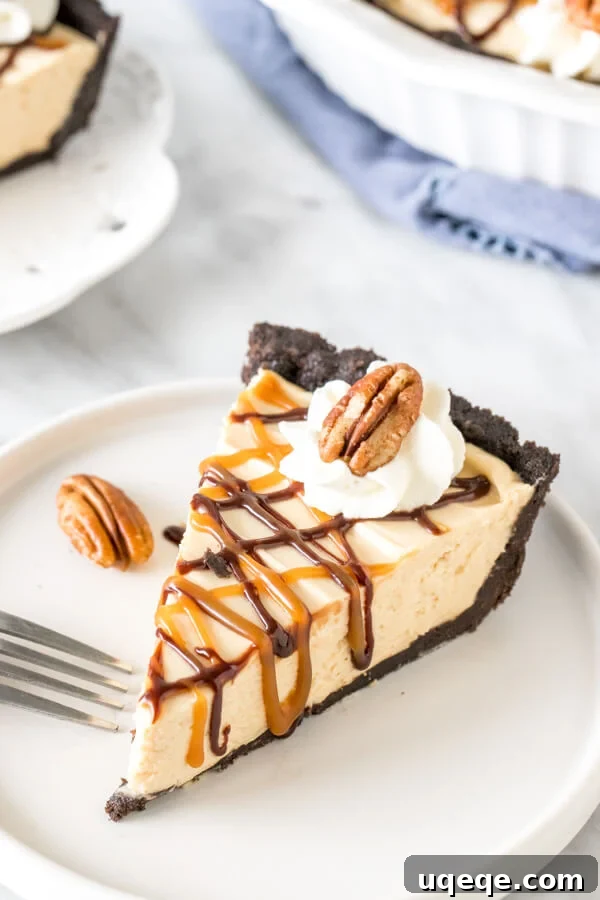
Imagine a dessert that combines the irresistible flavors of rich chocolate, buttery caramel, and crunchy pecans, all brought together in a cool, creamy, and effortlessly prepared pie. This is precisely what our No-Bake Turtle Pie offers – a luxurious take on the classic candy that’s sure to become a new family favorite. Designed for ease and maximum flavor, this pie starts with a robust, perfectly crunchy Oreo cookie crust, which cradles a filling that’s akin to a dreamy, no-bake caramel cheesecake mousse. Each bite is a journey through contrasting textures and complementary tastes, culminating in a dessert that is both sophisticated and wonderfully comforting.
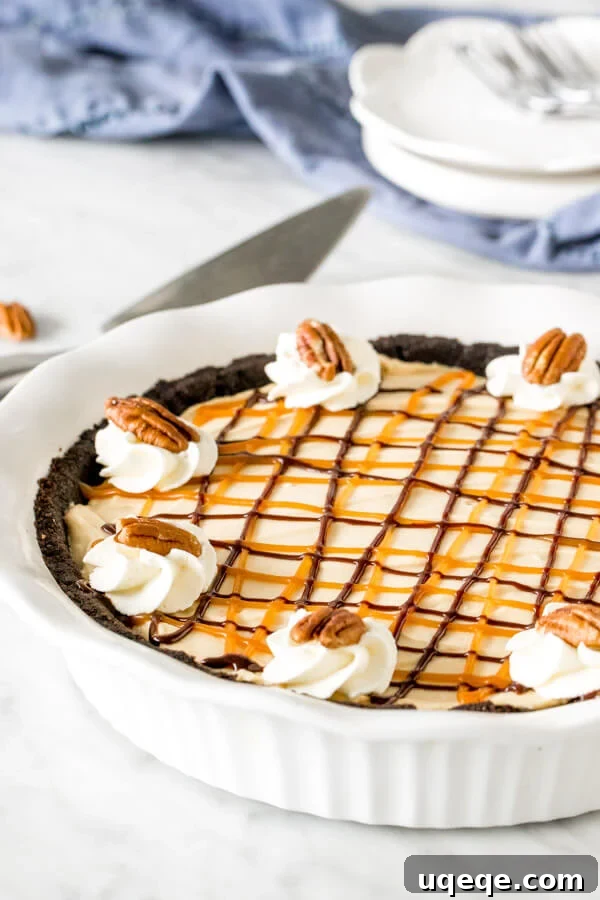
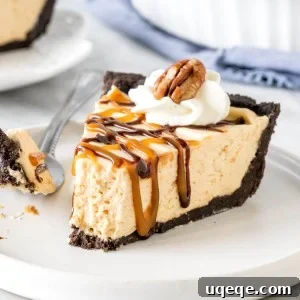
The magic of this pie truly comes alive with its luscious toppings. After setting to perfection, the pie is lavishly adorned with extra drizzles of glossy caramel and rich chocolate sauce, a generous swirl of light whipped cream, and a final flourish of toasted pecan pieces. This combination doesn’t just make the pie visually stunning; it enhances the overall flavor profile, ensuring every mouthful delivers that signature “turtle” experience. Perfect for a summer gathering, a holiday feast, or simply a treat for yourself, this No-Bake Turtle Pie eliminates the need for an oven, making dessert preparation a stress-free joy.
Why This No-Bake Turtle Pie Outshines the Rest
While many may have a soft spot for commercially available turtle pies, our homemade rendition is crafted to surpass them in every aspect. This recipe focuses on achieving a truly superior texture and depth of flavor. Unlike some store-bought options that can be overly sweet or less refined, our No-Bake Turtle Pie boasts an incredibly creamy, velvety-smooth filling that melts delicately on the tongue, coupled with a richness that is perfectly balanced without being cloying. We believe the homemade touch truly makes all the difference, transforming a simple dessert into an extraordinary culinary experience.
One of the most appealing features of this particular turtle pie is its versatility in serving temperature. While some prefer a firmer, almost ice cream-like texture that comes from freezing, we wholeheartedly recommend serving this pie chilled, directly from the refrigerator. This allows the caramel cheesecake filling to achieve its ideal smooth and slightly airy consistency, which we find enhances the overall enjoyment and allows the intricate flavors to shine through beautifully. When served cold, the pie slices cleanly, and its creamy nature is truly at its peak, offering a delightful lightness that contrasts wonderfully with its decadent ingredients.
Building the Foundation: The Perfect Oreo Cookie Crust
Every truly memorable pie requires an exceptional foundation, and for our No-Bake Turtle Pie, the crunchy Oreo cookie crust is undeniably the ideal choice. It offers a fantastic textural counterpoint to the silky-smooth filling, delivering a satisfying crunch with every delightful bite. Creating this crust is remarkably straightforward, requiring minimal effort for maximum impact:
- Crushing the Oreos: Begin by transforming whole Oreo cookies – both their iconic chocolate wafers and the creamy white filling – into fine, even crumbs. The most efficient method is using a food processor or a high-powered blender, which pulverizes them quickly. If these kitchen tools aren’t available, simply place the cookies in a sturdy Ziploc bag, seal it, and use a rolling pin to crush them. This traditional approach can be quite therapeutic and yields excellent results.
- Binding with Butter: Once your Oreos are finely crushed, transfer them to a small mixing bowl. Pour in the melted unsalted butter and mix thoroughly until all the cookie crumbs are moistened and resemble wet sand. The butter acts as the essential binder, ensuring the crust holds together beautifully when chilled.
- Forming the Crust: Press the butter-cookie mixture firmly and evenly into the bottom and up the sides of a 9-inch pie plate. The key to a stable crust is consistent pressure; press it down very well to create a compact, sturdy layer. This diligent pressing ensures the crust won’t crumble or fall apart when you slice into your finished pie. Once formed, place the crust in the refrigerator to chill while you prepare the filling. This initial chilling helps it firm up even further.
The inherent qualities of an Oreo crust make it a superior choice for no-bake desserts. Its ability to set firmly without baking, combined with its universally loved chocolate flavor, provides a robust and delicious base that perfectly complements the rich, creamy filling, making it a reliable and incredibly tasty component of this show-stopping pie.
The Star Attraction: Velvety Caramel Cheesecake Filling
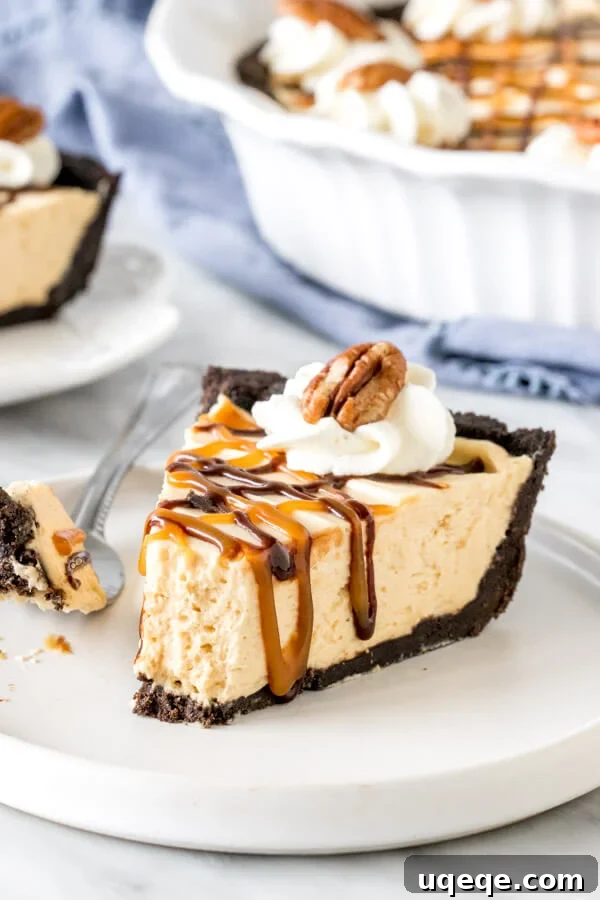
At the very core of this No-Bake Turtle Pie’s appeal is its incredibly smooth, rich, and undeniably creamy filling. Often described as a luxurious no-bake caramel cheesecake, it manages to strike an exquisite balance – being deeply satisfying without ever becoming overly sweet, and possessing a surprisingly light, mousse-like texture despite its decadent flavor profile. This exceptional filling is meticulously crafted from a harmonious blend of carefully softened cream cheese, sumptuously rich heavy whipping cream, a generous measure of thick salted caramel, and a touch of finely sifted powdered sugar, all contributing to its irresistible charm.
Choosing Your Caramel: Homemade vs. Store-Bought – A Crucial Decision
When it comes to the caramel component, you have a flexible choice that significantly impacts the pie’s overall success. We’ve thoughtfully provided our favorite recipe for an extra-thick salted caramel sauce within this guide. Crafting your own caramel allows for a superior depth of flavor and ensures the perfect, robust consistency, which we highly recommend for the best results. However, if time constraints are a factor or you prefer the convenience, a high-quality, store-bought caramel sauce or dulce de leche can certainly be used as a substitute. The single, most paramount factor, regardless of whether you make it from scratch or buy it, is the **thickness of your chosen caramel**. This is absolutely critical.
A very thick caramel is indispensable for the pie’s structural integrity and its ability to set properly. Thin or runny caramel will inevitably lead to a pie filling that struggles to firm up, resulting in a dessert with a compromised, soft texture that may not hold its shape when sliced. Therefore, invest in or create a caramel that is dense and robust enough to provide that essential body and stability to your velvety filling. This careful consideration ensures your No-Bake Turtle Pie achieves its desired luscious consistency and remains a delightful treat from the first slice to the last.
Assembling and Achieving Perfection: The Setting Process
Once you’ve meticulously prepared all your components, the assembly of this magnificent pie is wonderfully straightforward. The process begins with gently folding the stiffly whipped heavy cream into the creamy blend of softened cream cheese, cooled salted caramel, and powdered sugar. This careful folding technique is key to incorporating air and achieving that signature airy, smooth, and homogeneous consistency that makes the filling so irresistible. Once perfectly combined, this delectable caramel cheesecake filling is then spooned generously into your pre-chilled, prepared Oreo cookie crust, where it is gently spread and smoothed across the top, creating an inviting, even surface.
The final, and arguably most critical, step before you can truly enjoy your No-Bake Turtle Pie, is allowing it ample time to chill and set. A minimum refrigeration period of at least 6 hours is absolutely essential. This extended chilling time is crucial for two primary reasons: it allows all the distinct flavors to meld together and deepen harmoniously, and more importantly, it enables the filling to firm up completely, transforming from a creamy mixture into a perfectly set, sliceable pie. Rushing this critical setting phase can result in a pie that is too soft and difficult to serve neatly, diminishing the overall experience.
While the option to freeze the pie exists, offering a firmer, almost ice cream cake-like texture, we strongly advocate for serving it chilled directly from the refrigerator. Our personal preference for the chilled version stems from the superior texture it yields – a smoother, lighter, and more profoundly creamy consistency that truly allows the delicate nuances of the caramel cheesecake filling to shine. Furthermore, a properly chilled pie slices with remarkable ease and precision, providing neat, attractive portions that are a delight to present and savor. This dedicated chilling time is what elevates a simple mixture into a truly solidified, ready-to-enjoy masterpiece.
The Grand Finale: Decadent Drizzles, Swirls, and Crunchy Toppings
With your No-Bake Turtle Pie perfectly set and glistening from the refrigerator, it’s time for the final, show-stopping touches that transform it into a truly unforgettable dessert. The iconic turtle flavor profile demands a generous and artful application of toppings, ensuring every slice is a feast for both the eyes and the palate:
- Luscious Caramel Drizzle: Begin with a final, luxurious flourish of thick caramel sauce. Drizzle it generously in elegant swirls or straight lines across the entire surface of the pie. This not only adds another layer of buttery sweetness but also provides a beautiful, glossy sheen that signals the indulgence to come.
- Rich Chocolate Accent: Next, introduce the chocolate element. You can achieve this with a ready-made chocolate sauce, creating appealing patterns, or for an even richer taste, gently melt some quality chocolate chips or a chopped chocolate bar. Drizzle or artfully swirl the melted chocolate over the caramel. The striking visual contrast of dark chocolate against the golden caramel is incredibly enticing and deeply satisfying, enhancing the classic “turtle” aesthetic.
- Cloud-Like Whipped Cream Peaks: For a light and airy counterpoint to the rich filling, pipe a generous border of freshly whipped cream around the edges of the pie, or create elegant dollops across its surface. This not only adds a beautiful textural element but also a refreshing creaminess that balances the sweetness.
- Perfect Pecan Perfection: To complete the signature turtle experience, scatter a generous amount of chopped pecans over the entire top of the pie. For an aesthetically pleasing presentation, you might arrange them more precisely around the edges, or simply sprinkle them liberally for maximum crunch and flavor. These toasted nuts are far more than just a garnish; they are an integral component, providing an essential earthy flavor and satisfying crunch that completes the classic turtle trifecta.
Each slice of this exquisitely crafted dessert – featuring a creamy caramel filling, a robust chocolate cookie crust, and the crowning glory of extra caramel, chocolate, and pecans – promises a symphony of textures and flavors. It’s a dessert that truly cannot go wrong, guaranteed to delight anyone who tastes it.
Key Tips for No-Bake Turtle Pie Success
To ensure your No-Bake Turtle Pie turns out perfectly every time, keep these essential tips in mind:
- Caramel Consistency is Paramount: Re-emphasizing this crucial point – whether you choose homemade or store-bought, the caramel must be very thick. This is the cornerstone for the filling setting correctly and achieving that coveted sturdy, sliceable texture.
- Room Temperature Cream Cheese: Always ensure your brick-style cream cheese is softened completely to room temperature. This will allow it to beat smoothly, preventing any lumps in your finished filling and ensuring a silky consistency.
- Cool the Caramel Fully: If you opt to make your caramel sauce from scratch, it is absolutely imperative that it cools completely to room temperature before you incorporate it into the cream cheese mixture. Adding warm or hot caramel will negatively impact the texture of the cream cheese and whipped cream, potentially causing the filling to become runny or fail to set.
- Mindful Whipping of Cream: Whip the heavy cream until stiff peaks just begin to form. Be vigilant not to over-whip it, as this can lead to a grainy or curdled texture, which will detract from the pie’s smooth mouthfeel.
- Patience with Chilling: The recommended 6-hour chilling period is non-negotiable for this no-bake pie. It’s the vital step that allows the pie to properly set and firm up, ensuring it holds its shape beautifully when sliced. Attempting to serve it prematurely will likely result in a soft, messy pie.
- The Right Knife for Slicing: For clean, professional-looking slices, use a very sharp, thin knife (a paring knife works wonderfully, but avoid thick table knives). For an even smoother cut, run the knife under hot water and wipe it clean between each slice. This technique helps glide through the crust and filling with ease.
Storage and Make-Ahead Convenience
This No-Bake Turtle Pie is a fantastic make-ahead dessert, perfect for entertaining or when you simply want to prepare a treat in advance. You can easily assemble the entire pie, sans the final whipped cream and drizzles, up to 1 day ahead of time. Store it covered tightly with plastic wrap in the refrigerator to keep it fresh. For the most impressive presentation and optimal taste, add the fresh whipped cream, additional caramel sauce, and chocolate sauce drizzles right before you plan to serve. Any leftover slices can be stored, covered, in the refrigerator for up to 3 days, maintaining their delicious creamy texture and flavor.
Explore More Irresistible No-Bake Desserts
If the ease and deliciousness of this No-Bake Turtle Pie have captured your heart, you’ll be thrilled to discover more delightful recipes that require no oven. Expand your repertoire of effortless yet impressive desserts with these other fantastic no-bake options:
- No-Bake Peanut Butter Pie
- No-Bake Chocolate Mousse Pie
- No-Bake Key Lime Pie
These recipes offer a variety of flavors and textures, all sharing the same convenient no-bake method, making them perfect for any occasion when you need a quick, delicious dessert without heating up your kitchen.
No-Bake Turtle Pie
Rating: 5 from 2 votes
By: Fiona Dowling
Caramel, pecans and chocolate come together in this delicious turtle pie. It’s no-bake with a delicious Oreo cookie crust and creamy caramel filling.
Prep Time: 30 mins
Chilling Time: 6 hrs
Total Time: 6 hrs 30 mins
Servings: 8 slices
Rate Recipe
Print Recipe
Equipment
- 9-inch pie plate
Ingredients
Caramel Sauce (Or Store-Bought)*
- 1 cup granulated sugar
- 6 tablespoons unsalted butter, cut into small cubes
- 1/2 cup heavy cream, 33-35% MF
- 1/4 teaspoon salt
Oreo Crust
- 25 Oreo cookies, wafers and filling
- 4 tablespoons unsalted butter, melted
Caramel Filling
- 3/4 cup heavy cream, or whipping cream
- 10 oz cream cheese*, softened to room temperature
- 1/2 cup salted caramel*, cooled fully
- 1/2 cup powdered sugar
To Serve
- Caramel sauce
- Chocolate sauce, or melted chocolate
- Whipped cream
- Pecans
Units provided are US Customary.
Instructions
Caramel Sauce* (or use store-bought)
- Add the sugar to a medium saucepan over medium heat.
- Whisk/stir the sugar constantly. It will first form clumps, then eventually the clumps will melt and you’ll end up with a smooth, amber-colored sauce.
- Once all the sugar has completely melted and the sauce is smooth, carefully add in the chopped butter all at once and whisk until all the butter is melted. Be careful – the mixture will bubble up.
- Remove the pan from the heat and immediately whisk in the cream until smooth.
- Whisk in the salt.
- Remove from the heat and cool fully before using in the pie.
Oreo Crust
- Add the Oreos (wafers and filling) to a food processor or high-powered blender and pulse until they’re fine crumbs. Or place in a Ziploc bag and crush with a rolling pin.
- In a small bowl, mix the crushed cookies with the melted butter.
- Press the mixture into the bottom and up the sides of a 9-inch pie plate, pressing it down to form a crust. Place in the fridge as you make the filling.
Caramel Filling
- In a large bowl, whip the heavy cream until stiff peaks form.
- In a separate large bowl, beat the cream cheese until soft.
- Mix in the caramel sauce (measure out 1/2 cup of the sauce you made) and powdered sugar until smooth and creamy. Note that the caramel must be 100% cooled before mixing it in.
- Gently fold the whipped cream into the cream cheese mixture using a rubber spatula until the mixture is smooth and even.
- Spoon the caramel filling into the crust and smooth the top over.
- Cover the pie and place in the fridge to set for at least 6 hours. Optionally, freeze the pie for a frozen treat. I personally prefer the pie chilled in the fridge instead of frozen because I find it slices better and has a creamier texture.
Serving
- If you froze the pie, remove the pie from the freezer 1 hour before serving.
- Drizzle the pie with additional caramel sauce and chocolate sauce (or melted chocolate).
- Decorate the pie with whipped cream and add a few chopped pecans around the edges and/or sprinkle the top of the pie with chopped pecans.
- Slice the pie using a sharp knife (such as a paring knife – not a table knife), being sure to slice all the way through the cookie crust.
Notes
- Feel free to use store-bought salted caramel instead of making your own. Make sure to choose a high-quality, very thick caramel (or dulce de leche) if using store-bought caramel.
- This caramel sauce recipe will make about 1 cup total, so you’ll have enough for the 1/2 cup called for in the filling and extra to drizzle on top of each piece. Do not use all of the caramel you made in the pie filling – otherwise, the pie will be way too sweet and not set properly.
- Use full-fat, brick-style cream cheese.
- Pie can be easily made 1 day in advance. Add the whipped cream on top, caramel sauce and chocolate sauce right before serving. Store leftovers covered in the fridge for up to 3 days.
- Nutrition info is based on 1 slice, assuming the pie is cut into 8 large, equal pieces. Nutrition information does not include the caramel sauce, chocolate sauce or whipped cream on top. It is meant as an estimate only.
Nutrition
Calories: 489kcal, Carbohydrates: 45g, Protein: 5g, Fat: 33g, Saturated Fat: 18g, Cholesterol: 85mg, Sodium: 345mg, Potassium: 158mg, Fiber: 1g, Sugar: 24g, Vitamin A: 992IU, Vitamin C: 1mg, Calcium: 67mg, Iron: 3mg
Loved this recipe? Share Your Experience!
We’d love to hear your thoughts! If you enjoyed making and tasting this No-Bake Turtle Pie, please consider leaving a rating and comment below. Your feedback helps us and other home bakers discover delicious new treats!