
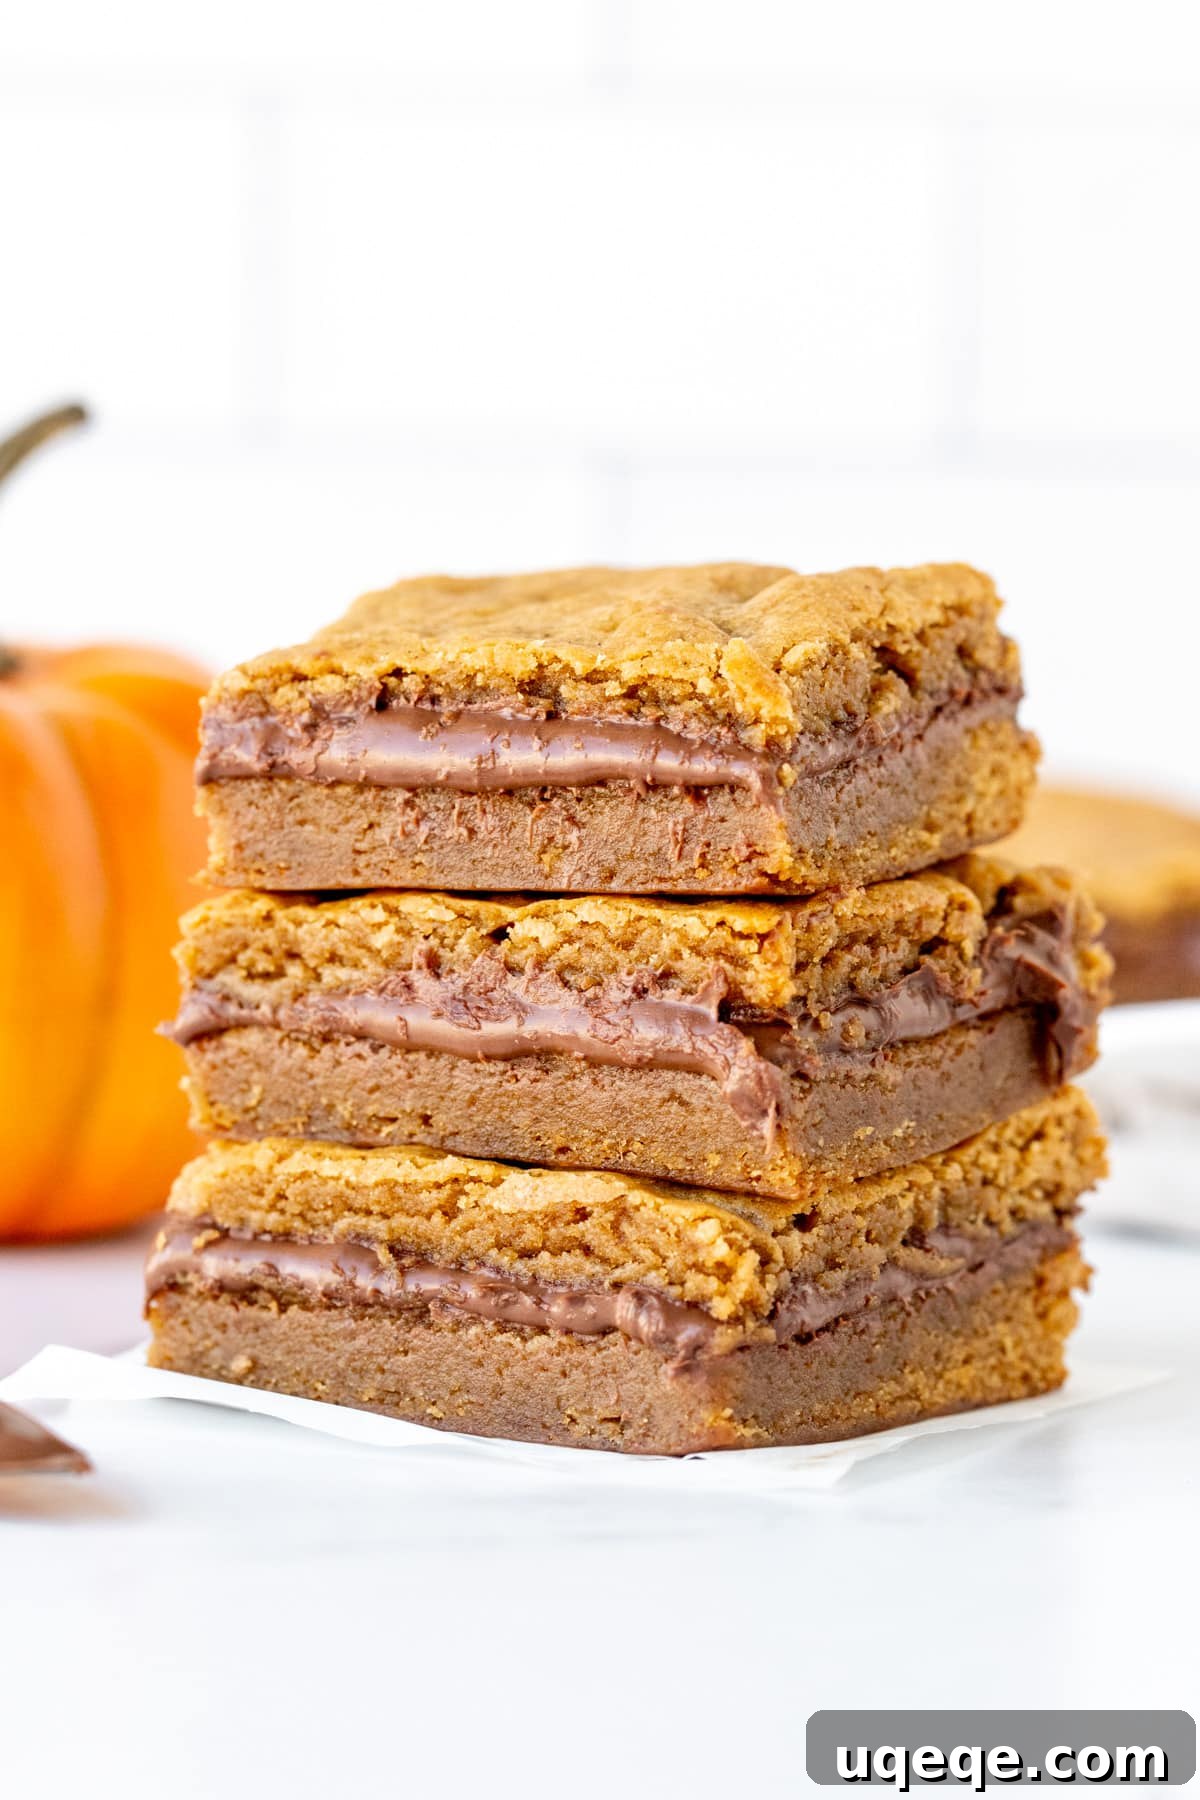
Pumpkin spice and gooey Nutella unite in a symphony of flavors to create these utterly delicious Nutella Stuffed Pumpkin Blondies. With every blissful bite, you’ll discover a soft, chewy pumpkin cookie bar embracing a rich, chocolate hazelnut spread, making them the quintessential treat for the fall season.
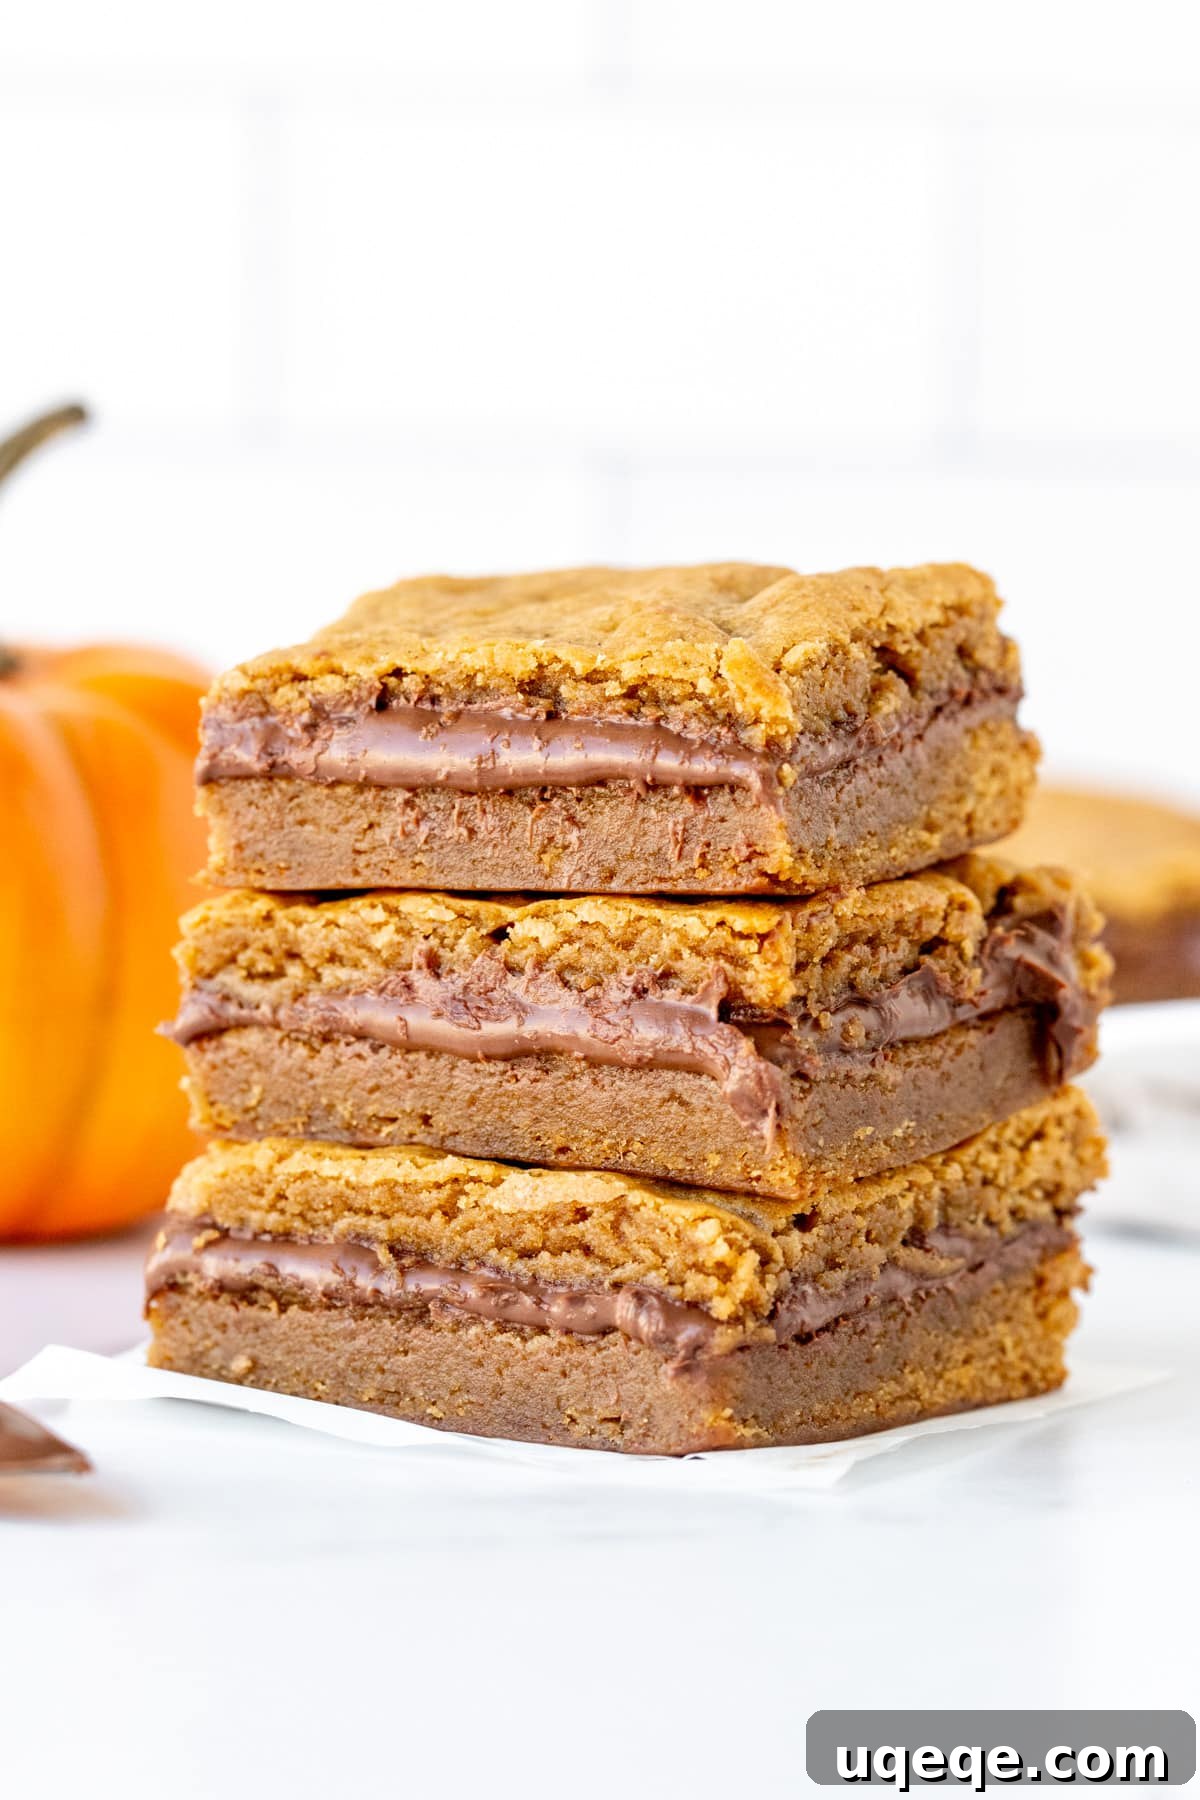
As autumn leaves begin to paint the landscape in hues of gold and crimson, there’s a comforting whisper in the air—a longing for warm, spiced treats that perfectly capture the essence of the season. And what could be more comforting than a classic pumpkin dessert? Now, imagine elevating that comfort with the irresistible allure of creamy, chocolatey Nutella. While some might ponder if pumpkin spice and Nutella are “too many flavors,” we’re here to wholeheartedly guarantee they are not. In fact, this combination is nothing short of culinary brilliance, where the comforting warmth of autumnal spices finds its perfect dance partner in the luxurious creaminess of chocolate hazelnut spread. It’s a match made in dessert heaven, promising an experience that is both familiar and excitingly decadent.
Having recently perfected our beloved Nutella stuffed blondies (a recipe so good it was made twice in one week!), it became clear that a seasonal, pumpkin-infused rendition was an absolute must for fall. And so, these extraordinary Nutella Pumpkin Cookie Bars were born. They deliver a moist, incredibly chewy pumpkin blondie base, generously filled with a thick, luscious layer of gooey Nutella. Each bar strikes a delightful balance between a soft cookie and a rich blondie, boasting the quintessential pumpkin spice flavor profile derived from a blend of warm spices and brown sugar. The star, of course, is that molten core of Nutella, waiting to surprise you with every bite.
Why These Nutella Stuffed Pumpkin Blondies Are a Fall Must-Make
Beyond their undeniable deliciousness, these blondies offer a unique baking experience and an unforgettable flavor combination. Here’s why they deserve a spot on your autumn baking list:
- Irresistible Flavor Fusion: The classic fall taste of pumpkin spice perfectly complements the rich, nutty, and chocolatey notes of Nutella. It’s a sophisticated pairing that satisfies both your spice and chocolate cravings.
- Perfect Chewy Texture: Unlike many pumpkin desserts that lean towards a cakey consistency, these blondies are meticulously crafted to be wonderfully chewy and dense. Every bite offers that satisfying resistance you expect from a premium blondie.
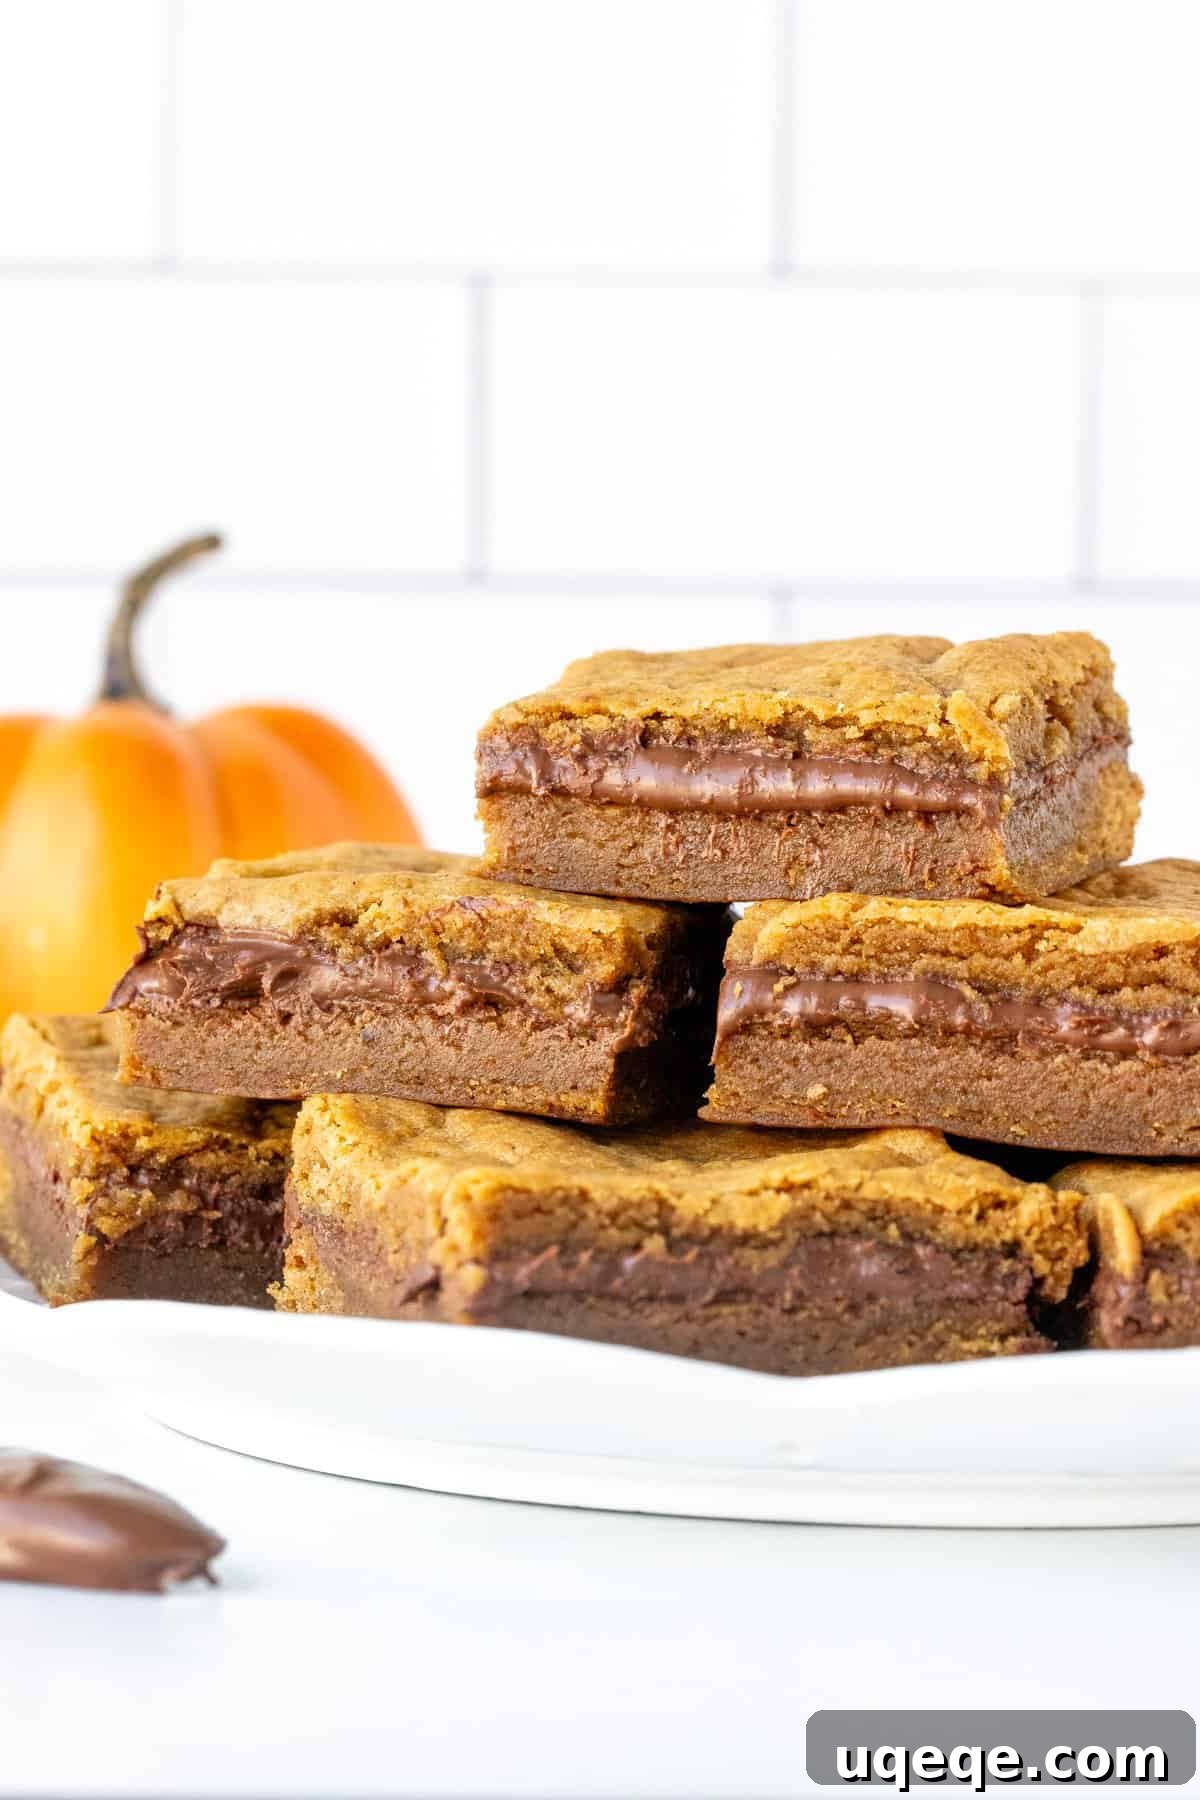
- Gooey Nutella Core: The surprise center of melted Nutella takes these bars from great to extraordinary. It’s a delightful contrast to the spiced pumpkin, adding a layer of indulgence that’s hard to resist.
- Visually Stunning: With their golden pumpkin base and a visible layer of dark Nutella, these blondies are as beautiful to look at as they are to eat. They make a fantastic addition to any fall gathering or dessert table.
- Relatively Simple Yet Impressive: While the “stuffed” aspect might sound complex, our detailed instructions break it down into manageable steps, making this an achievable and rewarding project for bakers of all levels.
Unlocking the Secret to Chewy Pumpkin Blondies
One of the biggest challenges when baking with pumpkin is its high moisture content, which often leads to a cake-like texture rather than the desired chewy blondie. Our recipe addresses this head-on with a few clever techniques to ensure your Nutella Stuffed Pumpkin Blondies are perfectly dense and tender, never dry or overly airy. This meticulous approach is key to transforming them from a standard pumpkin treat into a truly exceptional blondie experience.
Essential Ingredients for Fall Perfection
Each ingredient plays a crucial role in the success of these blondies:
- Nutella: The star of the show! Ensure it’s fresh and at room temperature (or slightly warmed) for easy spreading.
- Pumpkin Puree: Absolutely vital to use pure pumpkin puree, not pumpkin pie filling. The latter contains added spices and sugars that will alter the flavor and texture significantly.
- All-Purpose Flour: Provides the structure for our chewy blondies.
- Warm Spices: Cinnamon, ground ginger, ground nutmeg, and ground cloves create that classic, inviting pumpkin spice aroma and flavor. You can opt for 2 teaspoons of pre-mixed pumpkin pie spice as an alternative.
- Baking Soda: Our leavening agent, working with the brown sugar to create a tender crumb.
- Salt: Enhances all the other flavors, balancing the sweetness.
- Unsalted Butter: Melted butter is crucial for the fudgy, chewy texture of blondies, contrasting with the creaming method used for cakey treats.
- Light Brown Sugar: Contributes moisture and a deep, caramel-like flavor, enhancing the chewiness.
- Granulated Sugar: Adds sweetness and helps with the spread of the blondies.
- Vanilla Extract: A classic flavor enhancer that harmonizes with both pumpkin and Nutella.
Step-by-Step Guide to Making Nutella Stuffed Pumpkin Blondies
This recipe, while incredibly rewarding, benefits from attention to detail during a few key stages. We’ll walk you through each step to ensure your blondies turn out perfectly irresistible.
1. Preparing the Luscious Nutella Layer
The secret to a beautifully contained, gooey Nutella center lies in freezing it before assembly. This prevents it from spreading too much during the initial baking, ensuring a distinct, decadent layer.
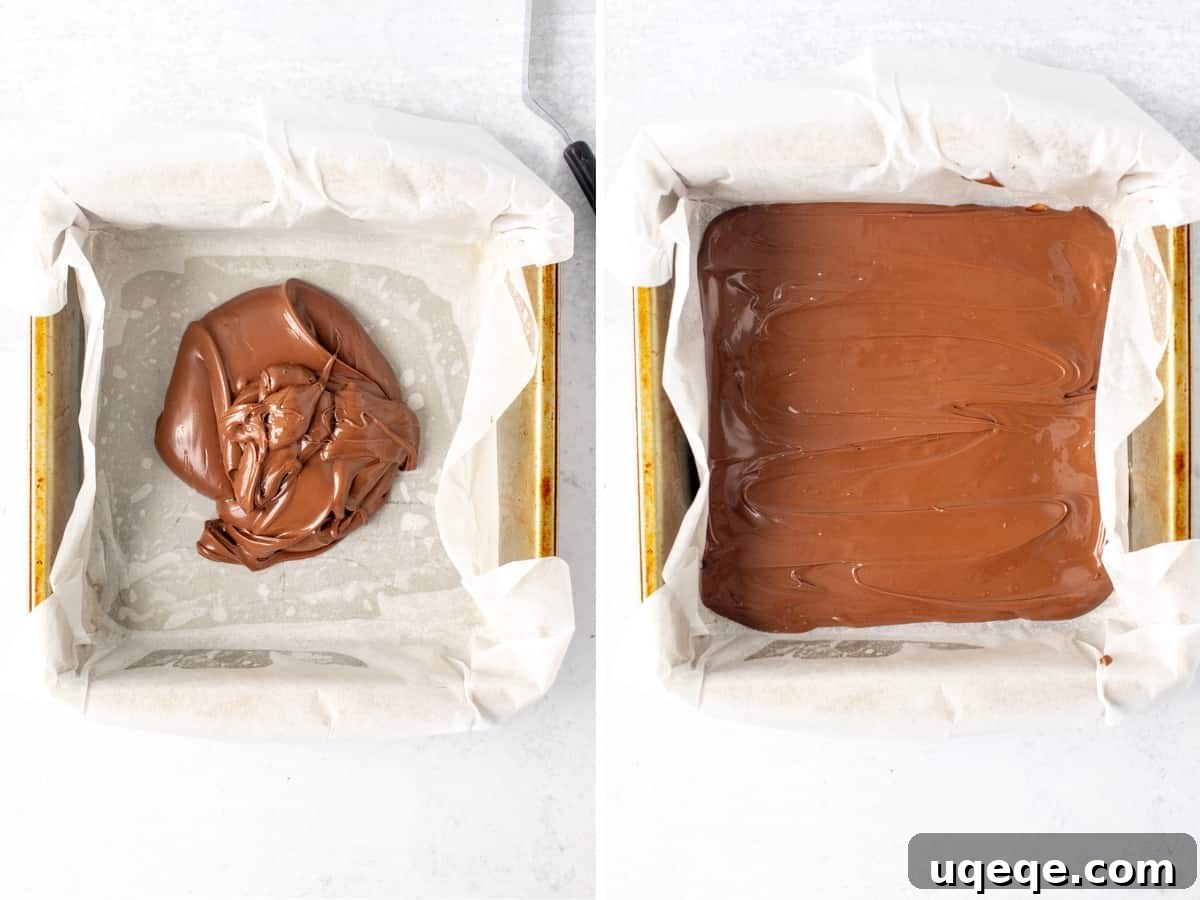
- Prepare Your Pan: Begin by lining an 8×8 inch (20×20 cm) baking pan with parchment paper. Make sure to leave a generous overhang on all sides – this will act as handles for easy removal of the baked blondies later.
- Measure and Spread Nutella: Carefully measure out 3/4 cup of Nutella. For easier spreading, we highly recommend gently warming the Nutella. Remove the lid and any foil seal from the jar, then microwave on medium power for approximately 30-45 seconds. This will loosen it up beautifully.
- Freeze the Nutella: Pour the slightly warmed Nutella into the lined pan and spread it into an even, consistent layer using a spatula. Immediately place the pan in the freezer. This step is crucial for the Nutella to firm up, allowing for easy handling during assembly.
2. Crafting the Perfect Chewy Pumpkin Blondie Dough
As mentioned, pumpkin adds significant moisture, which needs to be managed to achieve a chewy, not cakey, blondie. Our unique approach ensures a dense, flavorful dough that holds up beautifully to the Nutella filling. Notably, this recipe doesn’t call for eggs – another strategic move to maintain that desired chewiness.
- Preheat Oven & Prepare Second Pan: Preheat your oven to 350°F (180°C). If you have a second 8×8 inch (20×20 cm) pan, prepare it by lining it with parchment paper, again leaving an overhang. Lightly greasing the pan first can help the parchment stay in place. If you only have one pan, simply remove the frozen Nutella (still on its parchment) from your first pan, place it back in the freezer on a flat surface, and then re-line your original pan for the pumpkin dough.
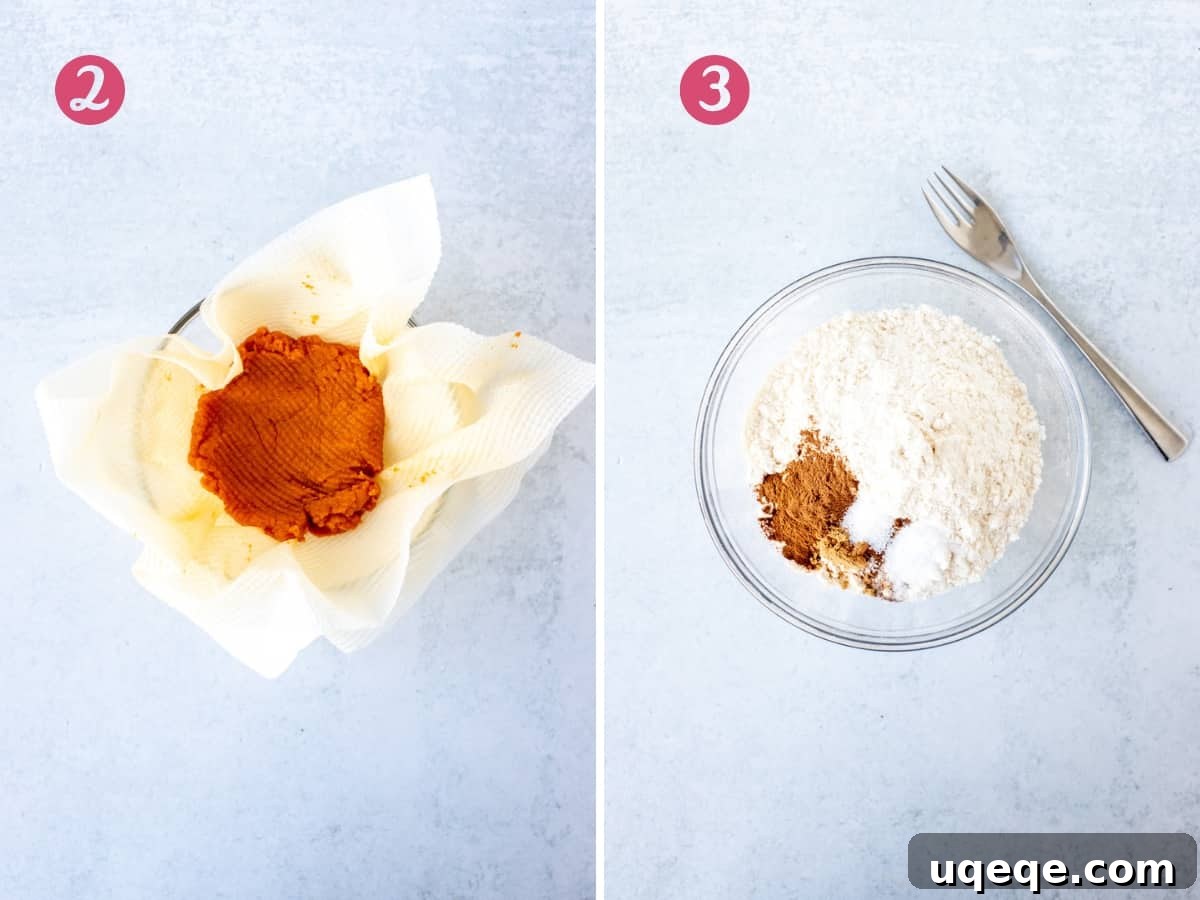
- Blot the Pumpkin Puree: Measure out 1/2 cup (120 ml) of pure pumpkin puree (avoiding pumpkin pie filling). Transfer it to a few layers of paper towel or a clean cheesecloth and gently squeeze out as much excess moisture as possible. You don’t need it bone dry, but removing this liquid is paramount for a chewy, cookie-like bar. Set aside.
- Combine Dry Ingredients: In a medium bowl, whisk together the all-purpose flour, cinnamon, ground ginger, ground nutmeg, ground cloves, baking soda, and salt. Whisking ensures all the spices and leavening are evenly distributed throughout the batter. Set this bowl aside.
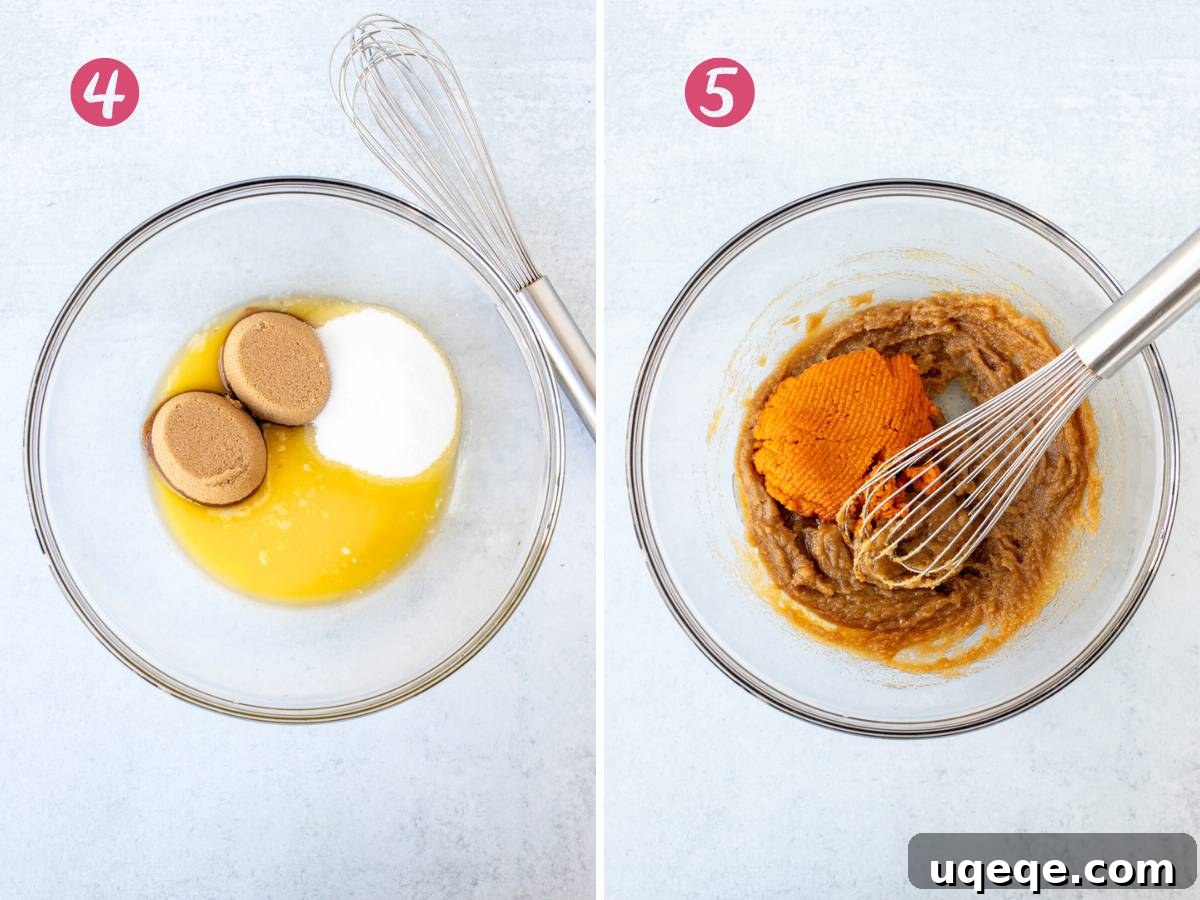
- Mix Wet Ingredients (Butter & Sugars): In a separate, larger bowl, whisk together the melted unsalted butter, light brown sugar, and granulated sugar. Continue whisking until the sugars are fully dissolved into the butter, creating a cohesive, glossy mixture. This step is important for developing the foundational texture.
- Incorporate Pumpkin & Vanilla: Add the blotted pumpkin puree and vanilla extract to the butter and sugar mixture. Whisk well until everything is thoroughly combined and uniform in color and texture.
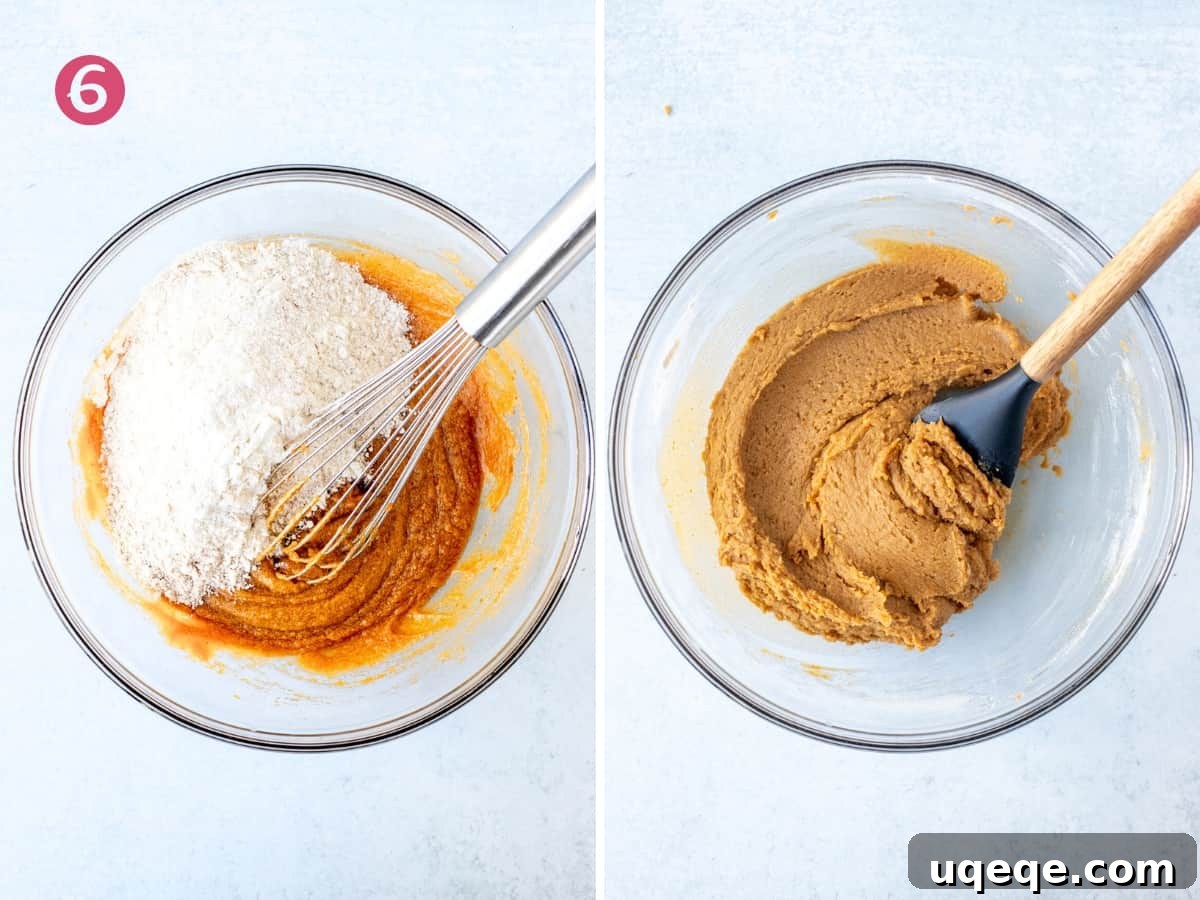
- Gently Fold in Dry Ingredients: Gradually add the dry ingredients mixture to the wet ingredients. Using a rubber spatula, gently fold until just combined. Be careful not to overmix; stop as soon as you no longer see streaks or pockets of dry flour. The dough will be thick and sticky, which is perfectly normal for blondies. If your dry ingredients appear lumpy, sift them into the wet mixture to prevent uneven texture.
3. Assembly and Baking the Stuffed Blondies
This is where the magic happens, transforming simple ingredients into a stunning, layered dessert. The two-stage baking process is critical for preventing a doughy center and ensuring perfect doneness.
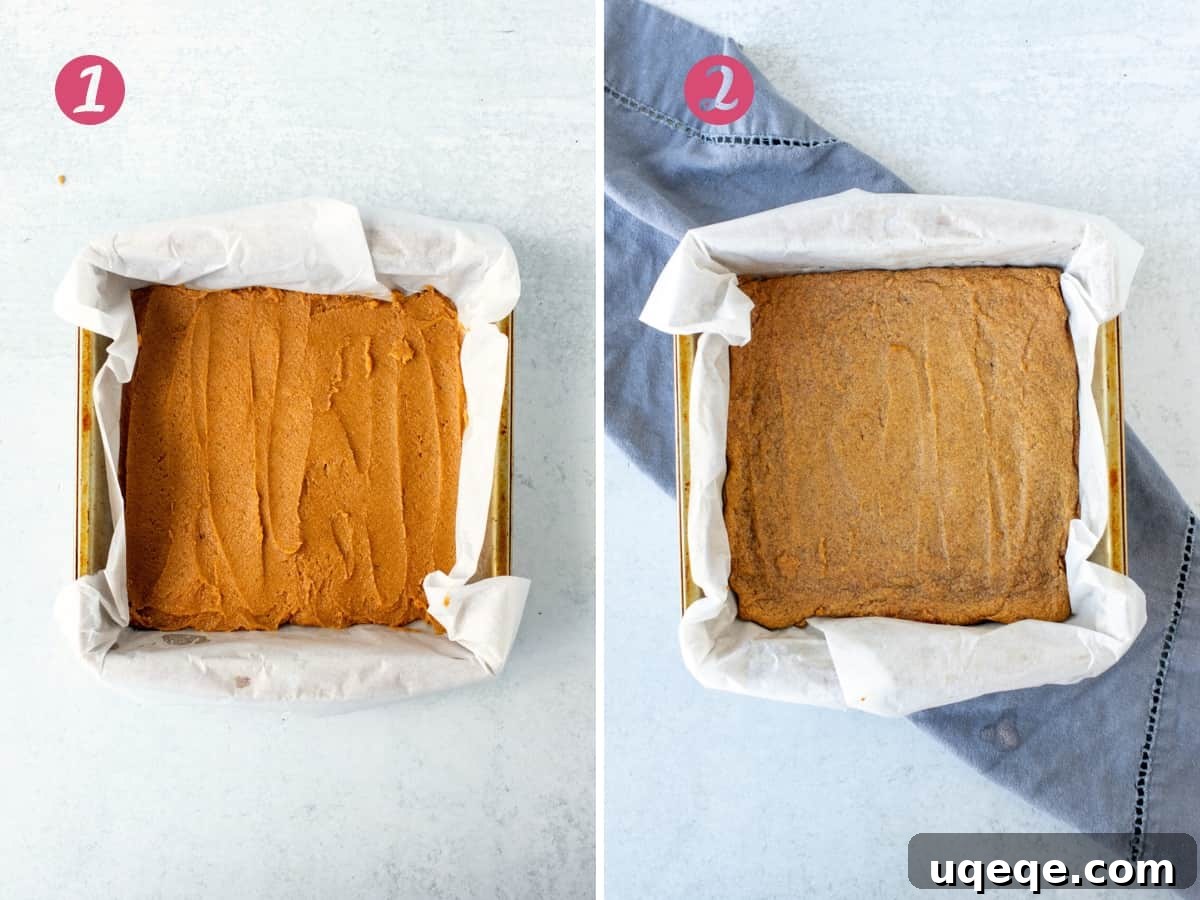
- Bake the Bottom Layer: Take your prepared pan (with the parchment lining). Scoop about 2/3 to 3/4 of the pumpkin blondie batter into the pan. Using a rubber spatula or lightly greased fingertips, spread it evenly across the bottom. Place this into your preheated oven and bake for approximately 18-20 minutes, or until the top appears set and no longer wet. Baking the bottom layer first significantly helps prevent a raw or undercooked center, especially with the added moisture of pumpkin.
- Cool the Base: Remove the pan from the oven, but keep the oven turned on. Let the baked pumpkin base cool in the pan for 5 to 10 minutes. This cooling period is important for stability before adding the Nutella.
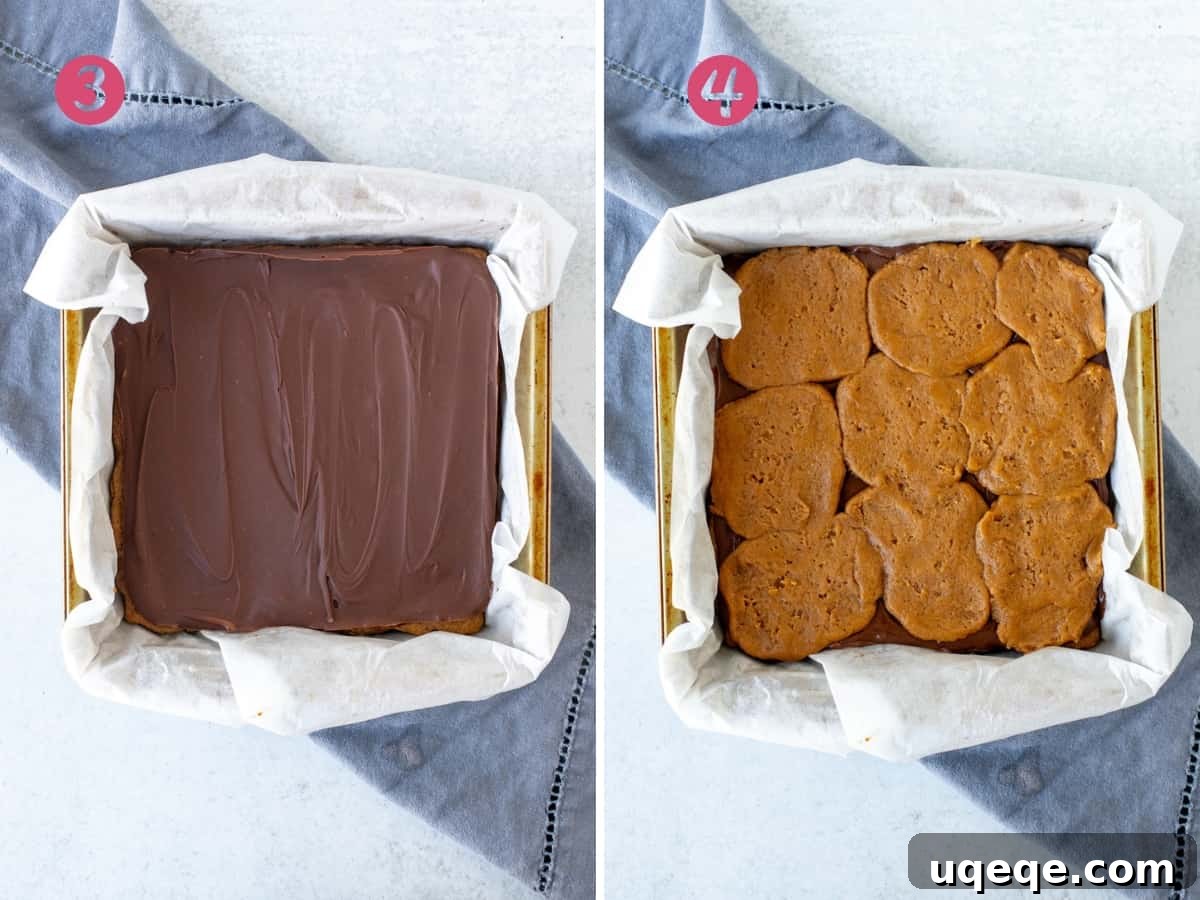
- Add the Frozen Nutella Layer: Retrieve the frozen Nutella layer from the freezer. Carefully peel off the parchment paper from the Nutella block. Gently place the solid Nutella block directly on top of the slightly cooled pumpkin blondie base.
- Top with Remaining Dough: Lightly grease your hands with a little butter or cooking spray; the remaining dough is quite sticky. Scoop or pinch off portions of the remaining pumpkin cookie dough, roughly 1 to 2 tablespoons each. Flatten each portion into a disc shape between your palms. Arrange these pumpkin dough discs on top of the Nutella layer, working to cover as much of the Nutella as possible. Don’t worry if there are small gaps; the dough will spread slightly during baking.
- Final Bake: Return the pan to the oven. Bake for an additional 15-20 minutes, or until the top layer of pumpkin dough looks set and golden brown, and a toothpick inserted into the pumpkin layers (avoiding the Nutella) comes out with moist crumbs, not wet batter. Baking times can vary depending on your oven and your preference for gooiness. For a gooier Nutella center, lean towards the shorter baking time.
- Crucial Cooling: Once baked, remove the pan from the oven and place it on a wire rack. It is absolutely vital to let the bars cool completely in the pan before attempting to slice them. If you cut them while warm, the Nutella will be very runny and ooze out, making for a messy presentation and difficult serving. Allow them to cool until the pan is no longer warm to the touch, and ideally, for several hours or even chill them briefly in the fridge.
- Slice and Serve: Once fully cooled, use the parchment paper overhangs to carefully lift the entire slab of blondies out of the pan and onto a cutting board. Peel back the parchment paper. Using a sharp, non-serrated knife, slice the blondies into 12 (or more, if desired) uniform bars. Clean your knife between cuts for the cleanest edges.
Baking Tips and Tricks for Perfect Pumpkin Nutella Blondies
Achieving bakery-quality Nutella Stuffed Pumpkin Blondies is within your reach with these expert tips:
- Patience with Cooling: We cannot stress this enough – let your blondies cool completely! Warm blondies mean melted, oozing Nutella, which is delicious but messy. For neat slices, ensure they are at room temperature or even slightly chilled.
- Blot That Pumpkin: Excess moisture is the enemy of chewy blondies. Take the time to blot your pumpkin puree thoroughly with paper towels. The drier the puree, the chewier and less cakey your bars will be.
- Pure Pumpkin Only: Always use 100% pure pumpkin puree, not canned pumpkin pie filling. Pie filling contains added sweeteners, spices, and sometimes dairy, which will drastically change the outcome of your blondies.
- Canned vs. Homemade Puree: While homemade pumpkin puree sounds lovely, it can vary significantly in moisture content. For consistent results, especially when baking, commercial canned pumpkin puree (without additives) is often the more reliable choice.
- Pan Size Matters: This recipe is designed for an 8×8 inch (20×20 cm) pan for thick, substantial blondies. You can use a 9×9 inch (23×23 cm) pan, but the bars will be thinner, and baking times for each layer will reduce by a few minutes. Do not double the recipe for a 9×13 inch (23×33 cm) pan, as the increased thickness makes even baking very difficult.
- Don’t Overmix: Overmixing flour develops gluten, leading to tough, rather than chewy, blondies. Mix until just combined.
- Grease Your Hands: When placing the top layer of dough, lightly greasing your hands prevents the sticky dough from adhering, making the process much smoother.
- Oven Temperature: Ensure your oven is accurately preheated. An oven thermometer can be a great investment for consistent baking.
- Visual Cues for Doneness: Look for the top layer to be set and lightly golden. The edges might be slightly firmer, while the center will still feel tender but not raw.
- Customizing Spices: If you prefer, replace the individual spices (cinnamon, ginger, nutmeg, cloves) with 2 teaspoons of a good quality pumpkin pie spice blend for convenience.
- No Eggs = Chewy Texture: The absence of eggs in this recipe is intentional. Eggs add moisture and act as a leavening agent, which would contribute to a cakier texture. By omitting them, we reinforce the desired chewy blondie consistency.
Serving and Storage Suggestions
These Nutella Stuffed Pumpkin Blondies are a treat best savored, whether warm or at room temperature. For an extra special dessert, serve them slightly warm with a scoop of vanilla bean ice cream, a dollop of whipped cream, or a drizzle of extra Nutella. They’re also perfect alongside a hot cup of coffee or spiced cider for a cozy autumn afternoon snack.
To store your blondies, place them in an airtight container at room temperature. They will remain fresh and delightfully chewy for up to 4 days. If you wish to extend their freshness, they can be refrigerated for up to a week, or individually wrapped and frozen for up to 2 months. Thaw frozen blondies at room temperature or gently warm them in the microwave for a few seconds before serving.
Frequently Asked Questions About Pumpkin Nutella Blondies
- Can I use homemade pumpkin puree?
- While you can, store-bought canned pumpkin puree is generally recommended for consistent moisture levels, which is crucial for the chewy texture of these blondies. If using homemade, be extra diligent about blotting out excess water.
- Why are there no eggs in this recipe?
- The absence of eggs is intentional! Pumpkin already provides a lot of moisture. Eggs would contribute to a cakey texture, which we want to avoid in favor of a dense, chewy blondie. This is a key secret to their perfect consistency.
- Can I use a different size pan?
- An 8×8 inch (20×20 cm) pan yields thick bars. A 9×9 inch (23×23 cm) pan can be used, but your blondies will be thinner, and you’ll need to slightly reduce the baking times for each layer. We do not recommend doubling the recipe for a 9×13 inch pan, as the increased thickness makes even baking very difficult.
- How do I know when the blondies are fully baked?
- The top pumpkin layer should look set and have a golden-brown hue. A toothpick inserted into the pumpkin dough (avoiding the Nutella layer) should come out with moist crumbs, not wet batter. Remember, they will continue to set as they cool.
- My Nutella oozed out. What went wrong?
- This usually happens if the Nutella layer wasn’t fully frozen before assembly, or if the blondies were sliced before being completely cooled. Ensuring the Nutella is rock-solid when placed on the base, and allowing ample cooling time, will prevent most oozing.
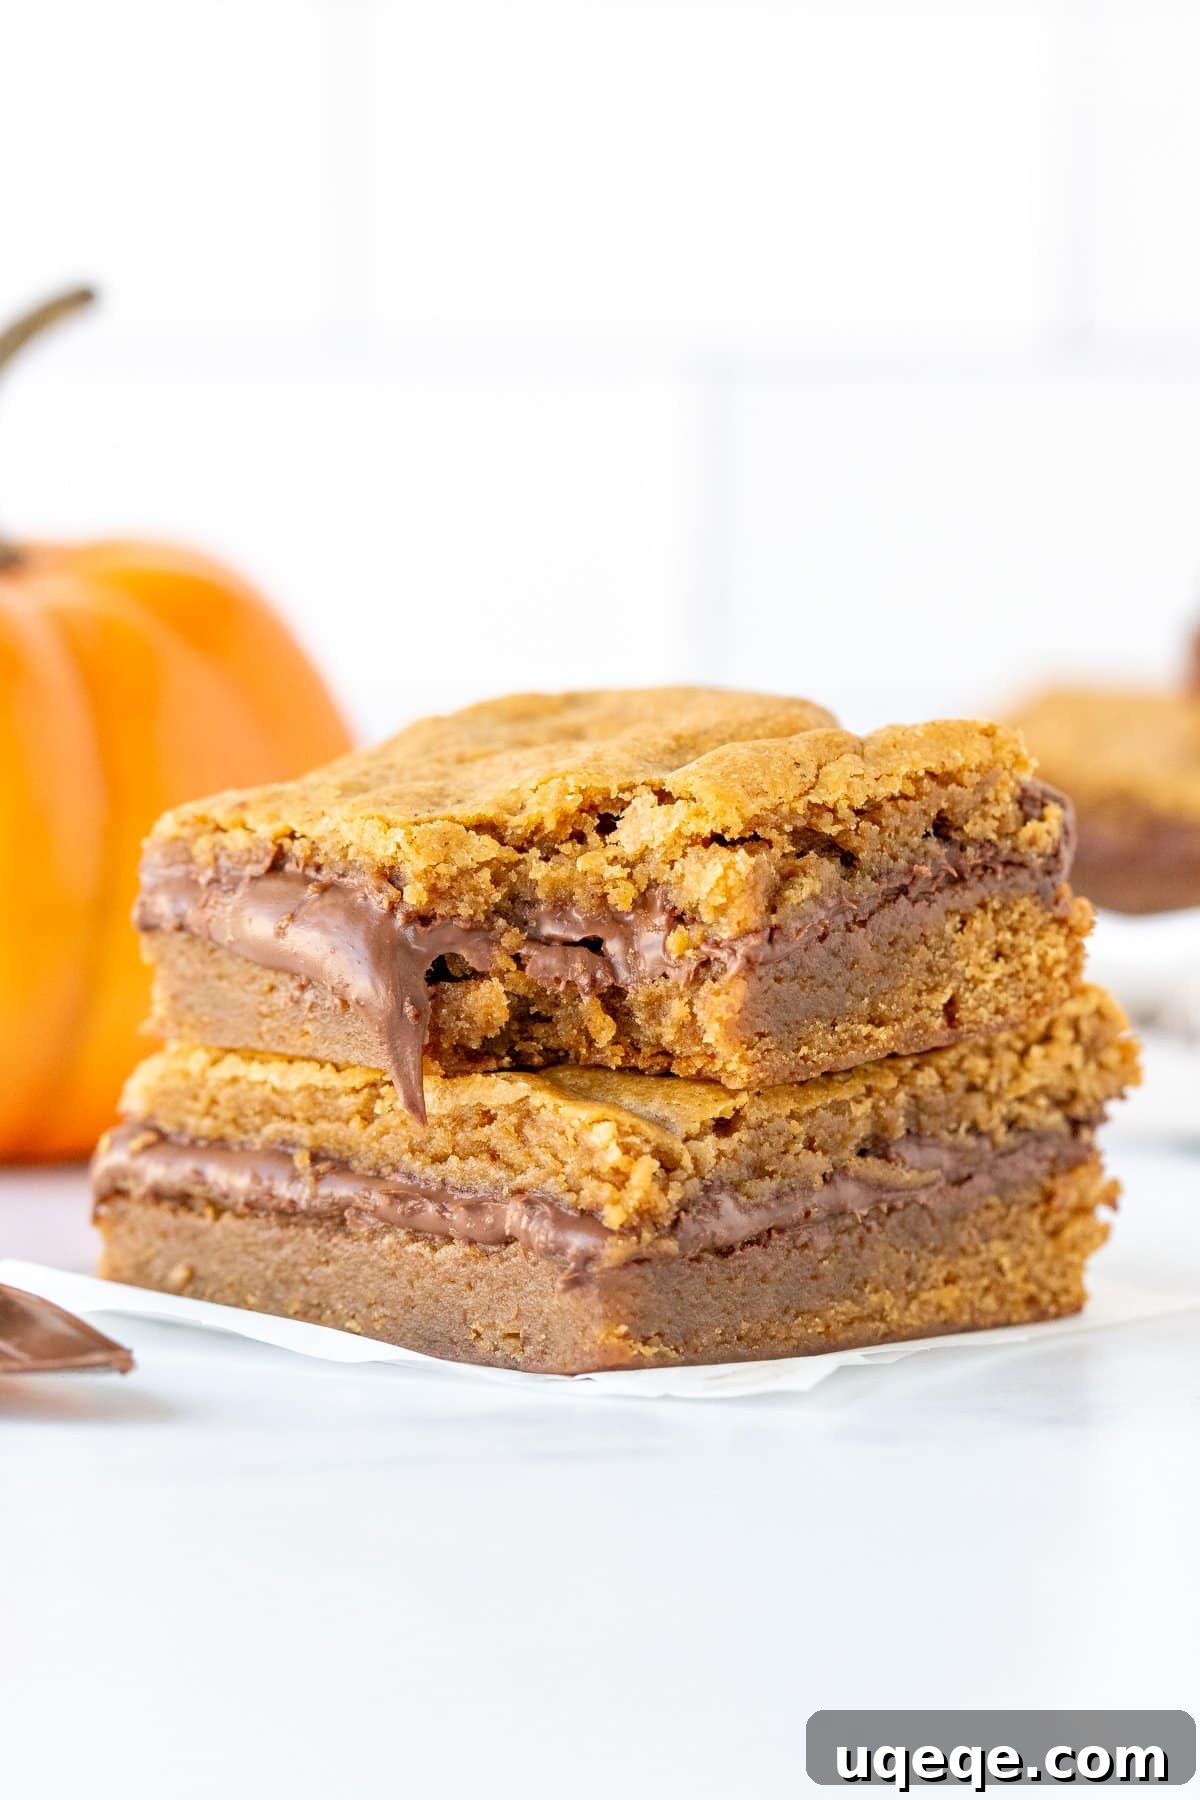
The harmonious marriage of warm pumpkin spice and rich chocolate hazelnut makes these bars utterly irresistible. The dense, chewy blondie texture combined with an incredibly gooey Nutella center truly elevates these to a next-level fall indulgence. Prepare to fall in love with your new favorite autumn dessert!
Craving More Pumpkin & Chocolate Delights?
If you’ve fallen head over heels for the pumpkin and chocolate combination, be sure to explore these other fantastic recipes:
- Pumpkin Chocolate Chip Cake
- Oreo Pumpkin Cheesecake – a surprisingly delightful combination you have to try!
- Pumpkin Chocolate Chip Cupcakes
- Oatmeal Pumpkin Chocolate Chip Cookies
- Pumpkin Brownies – featuring a decadent fudgy brownie base crowned with a layer of spiced pumpkin pie.
Nutella Stuffed Pumpkin Blondies
By: Fiona Dowling
Prep Time: 30 mins
Cook Time: 40 mins
Total Time: 1 hr 10 mins
Yields: 12 blondies
Rate Recipe |
Print Recipe
Equipment
- 8×8 inch (20×20 cm) baking pan
- Parchment paper
- Medium and large mixing bowls
- Whisk and rubber spatula
Ingredients
For the Nutella Layer:
- 3/4 cup Nutella
For the Pumpkin Blondie Dough:
- 1/2 cup pumpkin puree (120 ml), NOT pumpkin pie filling
- 1 2/3 cup all-purpose flour (209 grams)
- 1 teaspoon cinnamon
- 1/2 teaspoon ground ginger
- 1/4 teaspoon ground nutmeg
- 1/8 teaspoon ground cloves
- 1/2 teaspoon baking soda
- 1/4 teaspoon salt
- 1/2 cup unsalted butter (112 grams), melted
- 2/3 cup light brown sugar (140 grams), packed
- 1/2 cup granulated sugar (100 grams)
- 1 teaspoon vanilla extract
Instructions
Nutella Layer
- Line an 8×8 inch (20×20 cm) pan with parchment paper, ensuring an overhang on all sides.
- Warm Nutella (remove lid, microwave 30-45 seconds) then add to the lined pan and spread into an even layer. Freeze until firm.
Pumpkin Blondie Dough
- Preheat oven to 350°F (180°C).
- Squeeze excess liquid from pumpkin puree using paper towels. Set aside.
- In a medium bowl, whisk together flour, cinnamon, ginger, cloves, nutmeg, baking soda, and salt. Set aside.
- In a separate large bowl, whisk melted butter, brown sugar, and granulated sugar until well combined and no butter separates.
- Whisk the blotted pumpkin puree and vanilla extract into the butter mixture until evenly mixed.
- Gently mix the dry ingredients into the wet ingredients using a rubber spatula. Mix until no lumps or streaks of flour remain; do not overmix. The batter will be thick and sticky.
Assembling & Baking
- Line a second 8×8 inch (20×20 cm) pan with parchment paper. (If you only have one pan, remove frozen Nutella, place back in freezer, and re-line original pan).
- Add 2/3 to 3/4 of the pumpkin dough to the prepared pan and spread evenly. Bake for 18-20 minutes, or until the top is set.
- Remove from oven (keep oven on). Let the base cool for 5-10 minutes in the pan.
- Remove frozen Nutella from the freezer. Peel off its parchment paper and carefully place the Nutella block on top of the baked pumpkin base layer.
- Lightly grease your hands. Take sections of the remaining pumpkin dough, flatten into discs, and arrange them over the Nutella layer, covering it as much as possible.
- Return the pan to the oven and bake for an additional 15-20 minutes, or until the top pumpkin sections are set and golden. Baking time depends on oven and desired gooiness.
- Cool the bars completely in the pan before slicing. This is crucial to prevent Nutella from oozing.
- Once cooled, lift the bars out of the pan using the parchment overhang. Peel back parchment and slice into bars with a sharp knife.
Notes
- Pan Sizes: An 8×8 inch pan creates thicker bars. A 9×9 inch pan can be used for thinner bars (reduce bake time by a few minutes). Doubling the recipe for a 9×13 inch pan is not recommended due to thickness.
- Pumpkin: Always use pure pumpkin puree, not pumpkin pie filling. They are not interchangeable.
- Spices: Replace individual spices with 2 teaspoons of pumpkin pie spice for convenience.
- Eggs: This recipe intentionally omits eggs to ensure a chewy texture, as pumpkin adds sufficient moisture.
- Storage: Store in an airtight container at room temperature for up to 4 days.
Nutrition (Estimated per blondie, assuming 12 servings)
Calories: 315kcal, Carbohydrates: 46g, Protein: 3g, Fat: 13g, Saturated Fat: 10g, Polyunsaturated Fat: 0.4g, Monounsaturated Fat: 2g, Trans Fat: 0.3g, Cholesterol: 20mg, Sodium: 107mg, Potassium: 136mg, Fiber: 2g, Sugar: 31g, Vitamin A: 1826IU, Vitamin C: 0.4mg, Calcium: 40mg, Iron: 2mg