
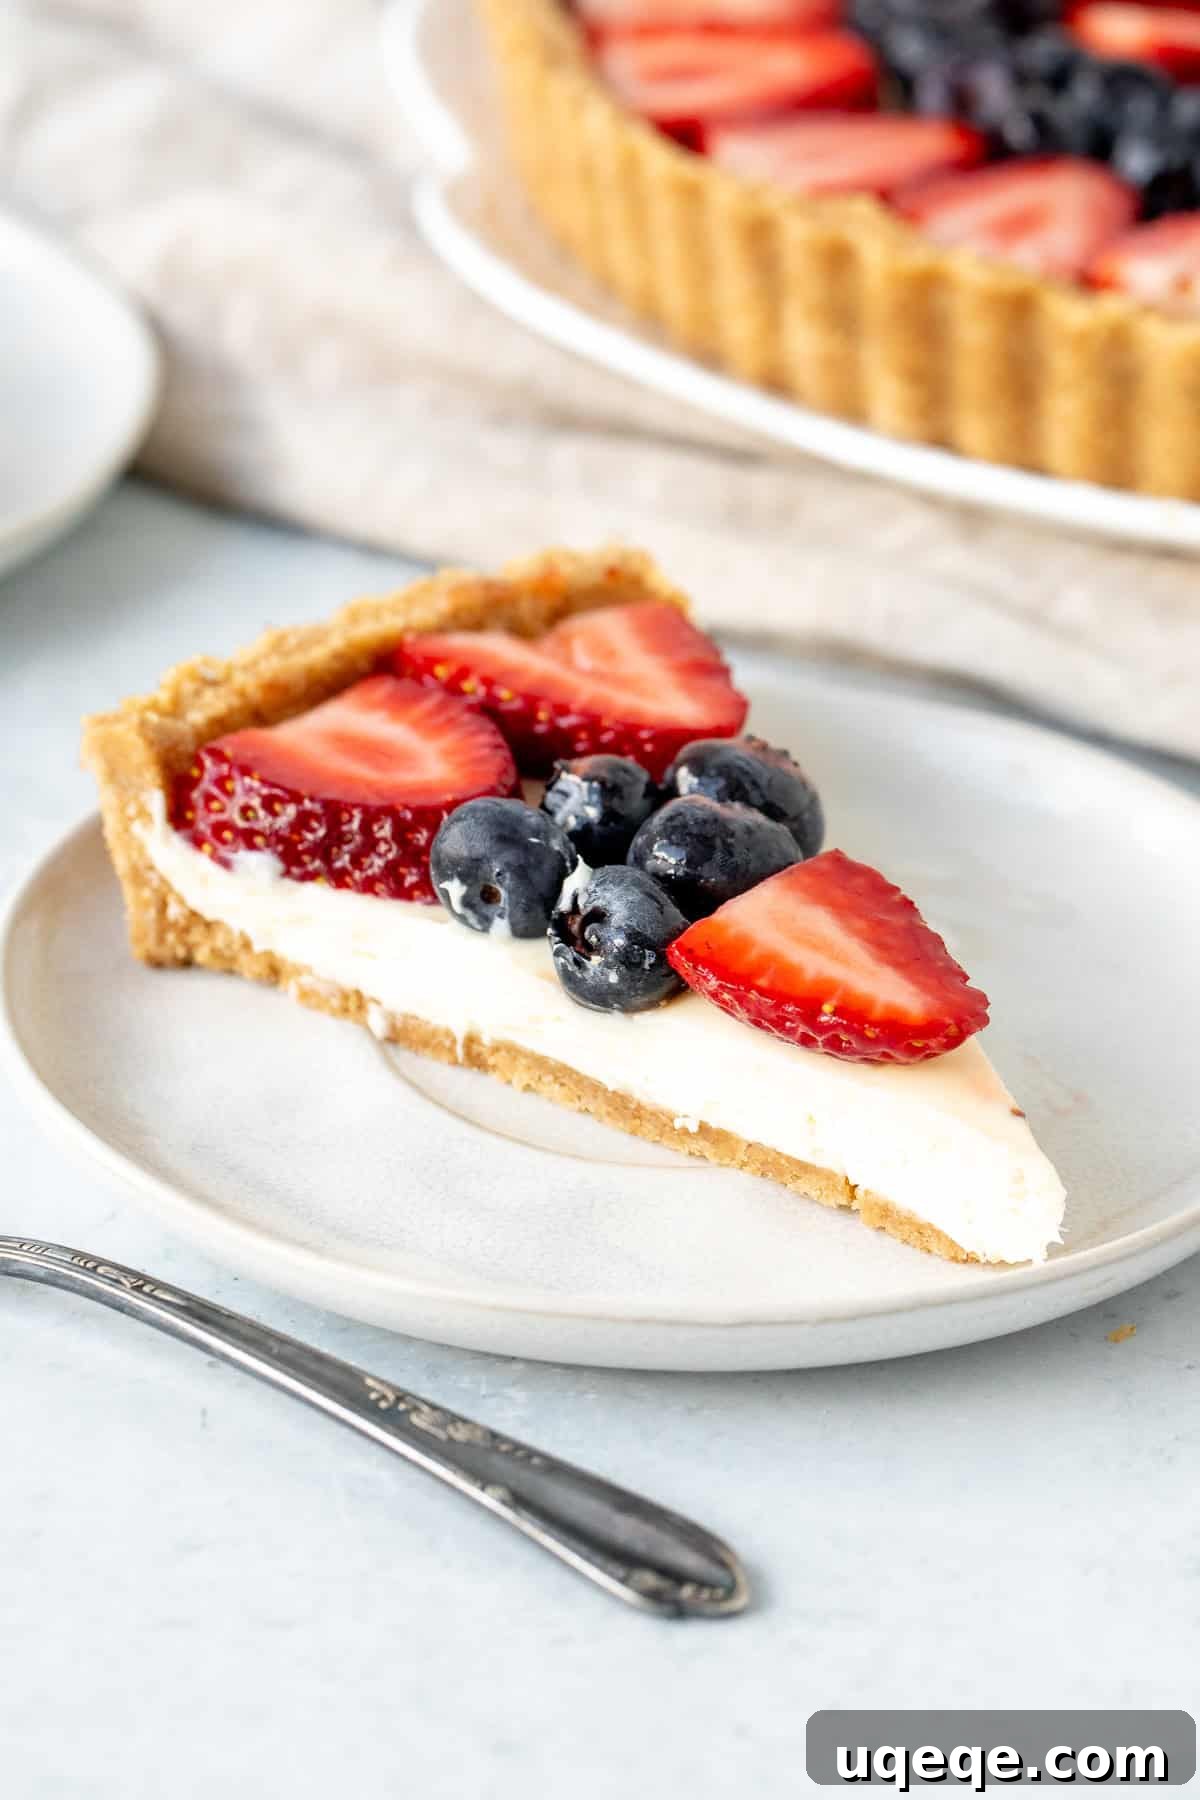
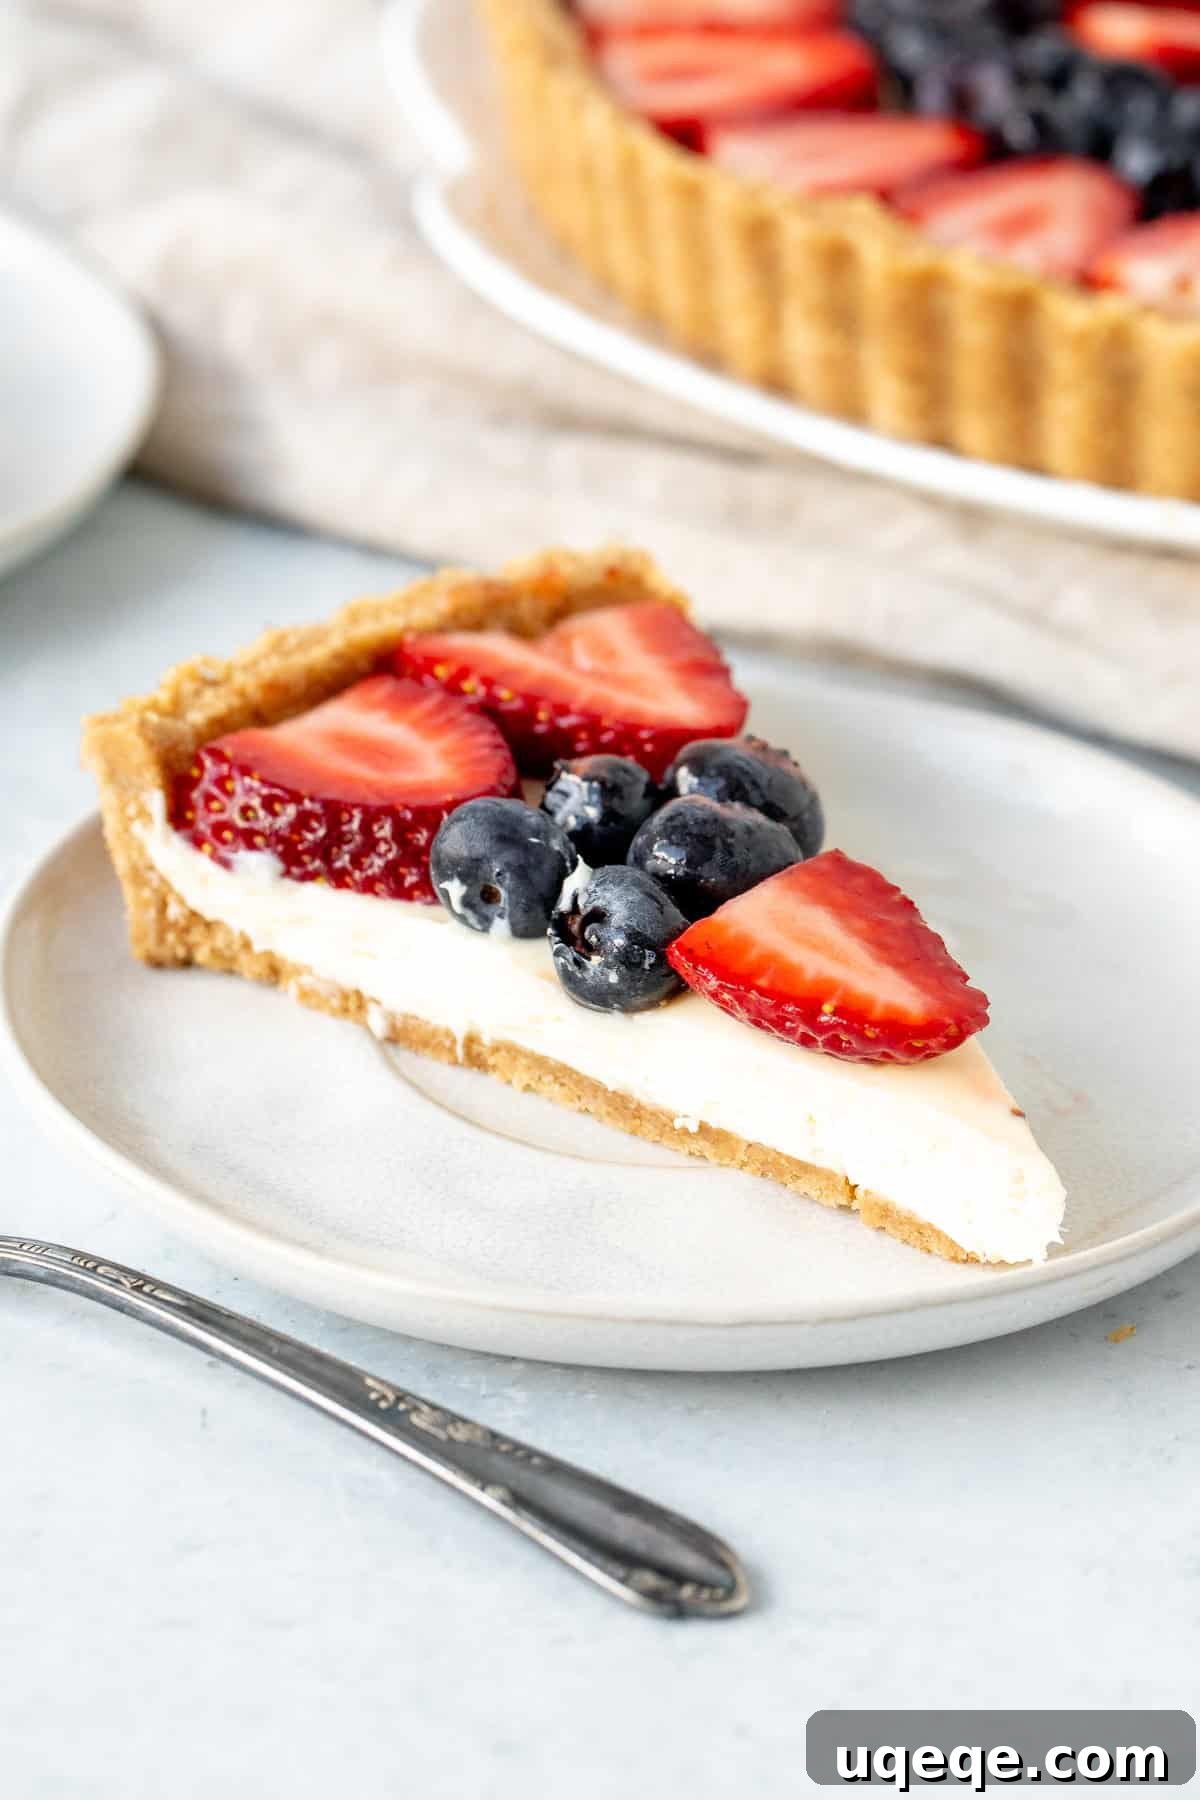
This remarkably easy no-bake fruit tart is truly the quintessential summer dessert, designed to bring joy and vibrancy to any occasion. Boasting a perfectly crunchy, buttery graham cracker crust, a rich yet irresistibly light and tangy cream cheese filling, and a colorful, fresh array of seasonal fruit piled high on top, it’s a dessert that effortlessly combines simplicity, elegance, and pure, delicious flavor. Prepare to impress your family and friends with a stunning creation that requires absolutely no oven time!
Why This Easy No-Bake Fruit Tart Will Be Your New Go-To Summer Treat
If you’re on the hunt for a dessert that demands minimal effort but promises maximum impact and flavor, your search ends with this delightful no-bake fruit tart. Forget the complexities of traditional baking; this recipe offers a refreshing alternative that’s perfect for warm weather and busy schedules alike. While classic French fruit tarts are revered for their delicate shortcrust pastry base and luscious pastry cream (crème pâtissière) filling, often topped with an intricate fruit arrangement and a sweet glaze, they can be quite time-consuming and require precise baking techniques. Our no-bake rendition, however, delivers all the charm and deliciousness with none of the fuss.
Here’s why this simplified approach is a game-changer:
- Effortless Preparation: Say goodbye to hot ovens and complicated pastry techniques. The graham cracker crust comes together in minutes with just a few ingredients and no baking required. This keeps your kitchen cool, making it an ideal choice for scorching summer days.
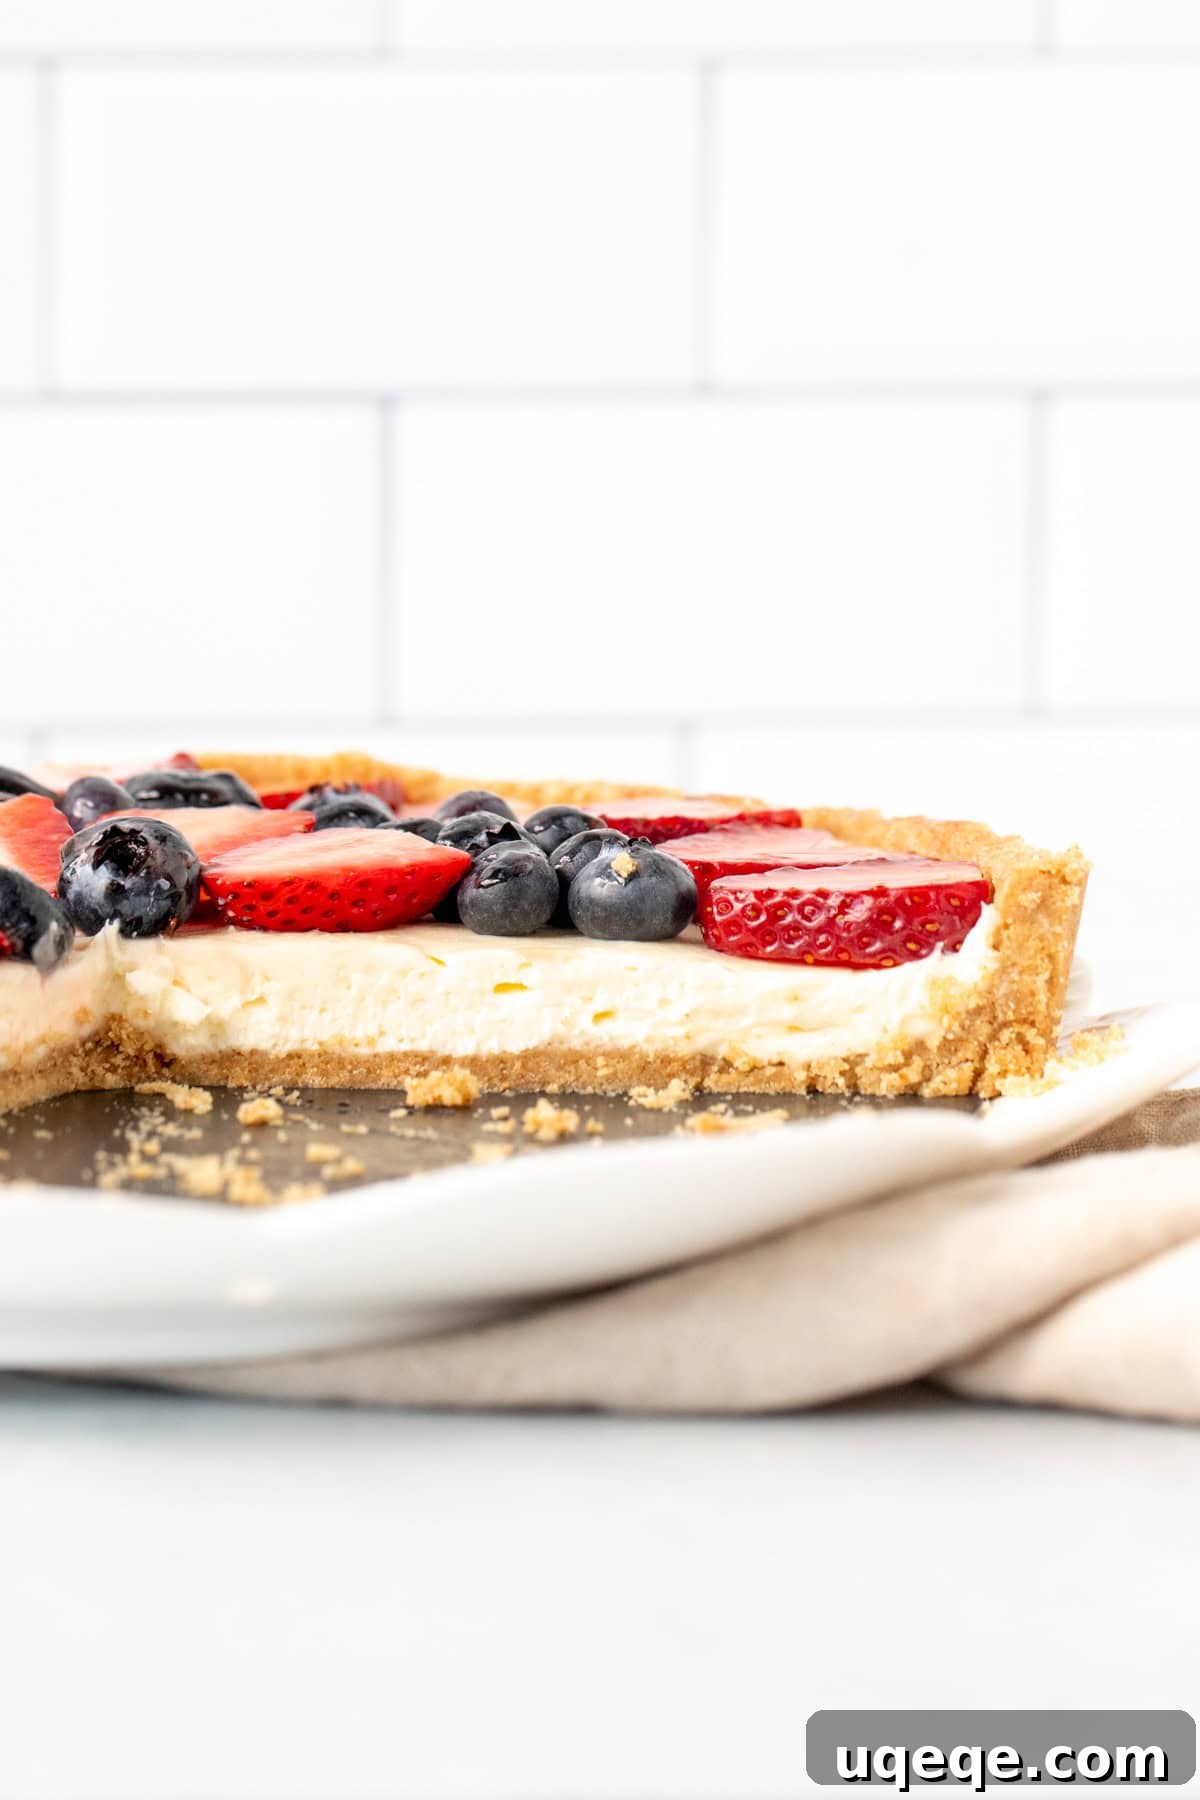
- Sensational Flavor and Texture: We’ve replaced the traditional shortcrust with a homemade graham cracker crust that provides a satisfying, buttery crunch and a subtle sweetness that perfectly complements the filling. The core of this tart is a velvety, no-bake cheesecake filling – a rich yet incredibly light cream cheese mixture that’s perfectly balanced between sweet and tangy, ensuring it’s never overly cloying.
- Stunning Visual Appeal: This tart is a feast for the eyes as much as it is for the palate. Adorned with a vibrant medley of fresh, seasonal fruits, it naturally creates a stunning presentation that looks sophisticated and inviting. An optional fruit jam glaze adds an extra layer of professional shine, making your dessert look like it came straight from a patisserie.
- Incredible Versatility: The beauty of this recipe lies in its adaptability. You can customize the fruit topping based on your personal preferences or whatever fresh produce is bountifully in season. From mixed berries to sliced kiwi, peaches, or mandarins, the possibilities are endless, allowing you to create a unique tart every time.
- Crowd-Pleaser Guaranteed: Whether you’re hosting a backyard barbecue, a celebratory brunch, or simply want a refreshing dessert for your family, this no-bake fruit tart is a guaranteed hit. Its universal appeal, combined with its impressive appearance and delightful taste, ensures it will be devoured with delight.
This recipe truly offers the best of both worlds: the elegance of a classic fruit tart fused with the simplicity and convenience of a no-bake dessert. It’s perfect for both beginners venturing into dessert making and seasoned cooks looking for a stress-free yet spectacular sweet treat.
Gathering Your Ingredients for the Ultimate No-Bake Fruit Tart
Creating this spectacular dessert begins with a few simple, high-quality ingredients. Each component plays a vital role in achieving the perfect balance of flavor and texture. Let’s take a closer look at what you’ll need to make this refreshing no-bake fruit tart:
For the Irresistible Graham Cracker Crust:
- Graham Crumbs: These form the sweet, crunchy foundation of our tart. You can buy pre-crushed graham cracker crumbs for convenience, or crush whole graham crackers yourself using a food processor or by placing them in a Ziploc bag and crushing with a rolling pin. If graham crackers are not readily available in your region, digestive biscuit crumbs make an excellent, similar-tasting substitute. Should you opt for digestives, consider slightly reducing the granulated sugar in the crust to 2 tablespoons, as digestive biscuits are typically sweeter than graham crackers. You could also experiment with vanilla wafer crumbs or shortbread cookie crumbs for a different flavor twist.
- Granulated Sugar: A small amount of sugar is added to the crumbs to enhance their natural sweetness and contribute to the firm, cohesive structure of the crust.
- Unsalted Butter (Melted): This is the crucial binding agent for our no-bake crust. When melted and mixed with the crumbs, it helps them adhere together, creating a sturdy base that holds its shape beautifully. Using unsalted butter allows you to control the overall saltiness of the dessert. Ensure it’s fully melted but not boiling hot when you mix it in.
For the Velvety Cream Cheese Filling:
- Whipping Cream (Heavy Cream, 33-35% Milk Fat): This ingredient is whipped to stiff peaks and gently folded into the cream cheese mixture, providing the light, airy, and fluffy texture that makes this filling so irresistible. It’s imperative that your whipping cream is very cold, directly from the refrigerator, for optimal whipping results. Warm cream will struggle to hold its volume.
- Full-Fat Cream Cheese (Brick Style): For the best results and a filling that sets properly with a rich, creamy consistency, always use full-fat cream cheese that comes in a brick or block. Avoid the softer, spreadable cream cheese sold in tubs, as it contains more water and less fat, which can result in a runnier filling. Ensure your cream cheese is softened to room temperature before beating it, as this prevents lumps and ensures a smooth, uniform mixture.
- Powdered Sugar (Confectioners’ Sugar): Also known as icing sugar, powdered sugar is ideal for this filling because its fine texture dissolves effortlessly, contributing to the silky smooth consistency and providing the perfect level of sweetness without any grittiness.
- Freshly Squeezed Lemon Juice: This is a secret weapon that elevates the entire filling! A teaspoon of fresh lemon juice cuts through the richness of the cream cheese, adding a bright, zesty tang that prevents the tart from tasting too heavy or one-dimensional. It truly brightens and balances the flavors.
For the Fresh and Vibrant Topping:
- Fresh Fruit: This is where your tart truly comes alive and where you can express your creativity! The best choices are seasonal, ripe, and colorful. Popular options include sliced strawberries, plump blueberries, juicy raspberries, tart blackberries, vibrant kiwi slices, sweet mandarin orange segments, or even thinly sliced mango. Aim for a variety of colors and textures for the most appealing presentation. Approximately 2 cups (about 300 grams) of mixed berries or your chosen fruits will be sufficient for a 9-inch tart.
- Strawberry or Apricot Jam (Optional Glaze): For that professional, glossy finish and an extra touch of flavor, a simple glaze made from warmed fruit jam is highly recommended. Strawberry or apricot jam are classic choices as their flavors are generally versatile and complement a wide range of fresh fruits. This glaze not only adds a beautiful shine but also helps to lightly preserve the fruit’s freshness.
With these carefully selected ingredients, you’re well on your way to assembling a spectacular no-bake fruit tart that will be the highlight of any dessert table!
Step-by-Step Guide: Assembling Your No-Bake Fruit Tart
Creating this delightful no-bake fruit tart is a straightforward process, broken down into three main parts: preparing the crust, crafting the filling, and arranging the fresh fruit topping. Follow these detailed steps to ensure a perfect result every time.
Part 1: Crafting the Crunchy Graham Cracker Crust
The foundation of our tart is a simple yet incredibly flavorful graham cracker crust. It’s quick to make and requires no baking, keeping your kitchen cool.
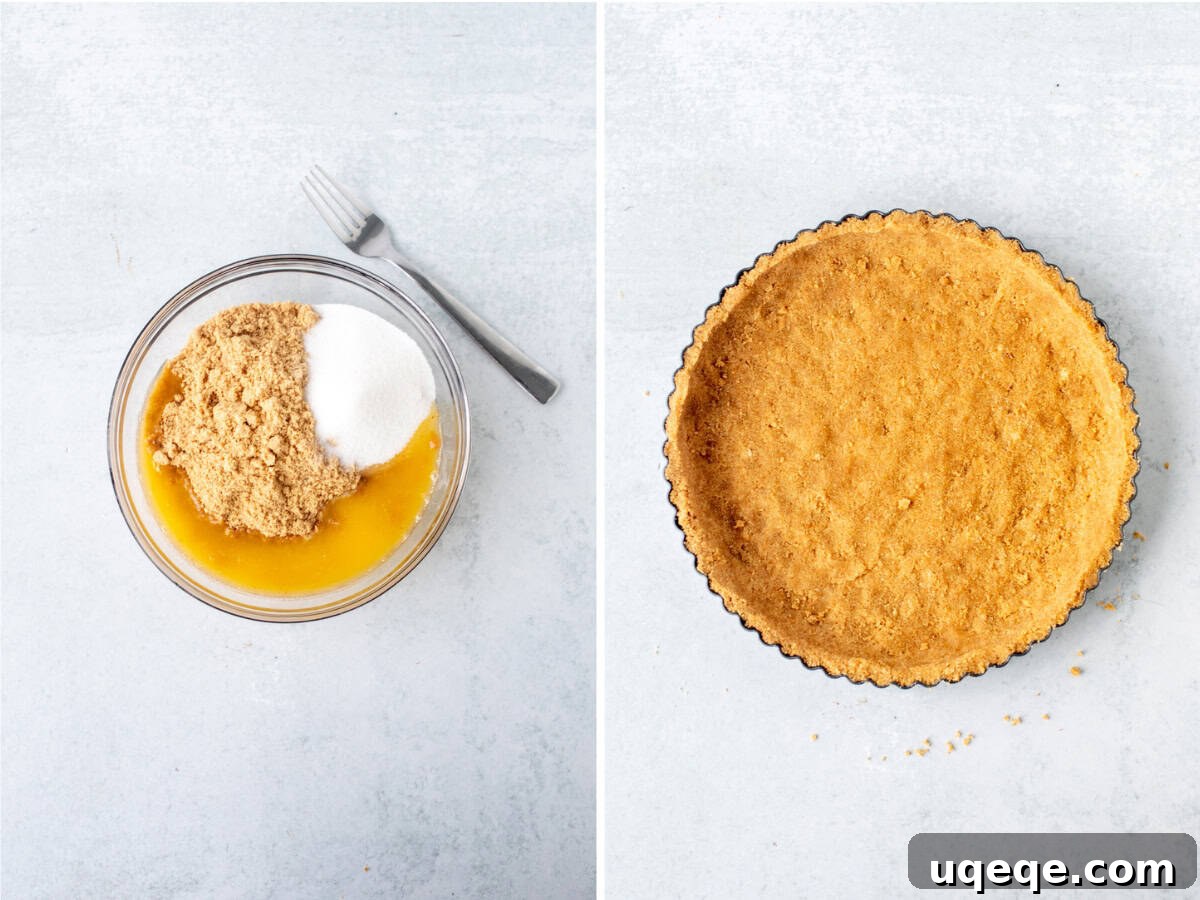
- Prepare the Crust Mixture: In a medium-sized bowl, combine your 1 1/2 cups of graham cracker crumbs with 1/4 cup of granulated sugar and 6 tablespoons of melted unsalted butter. Use a fork or a sturdy spoon to mix these ingredients thoroughly. Continue mixing until all the crumbs are evenly moistened and have the texture of wet sand. A good indicator that you’ve achieved the right consistency is when you can squeeze a small handful of the mixture in your palm, and it holds together without crumbling apart. If it feels too dry, add a tiny bit more melted butter; if too wet, incorporate a spoonful more crumbs.
- Form the Tart Shell: Carefully transfer the prepared crumb mixture into a 9-inch (23 cm) loose-bottom tart pan. Begin by pressing the mixture firmly and evenly into the bottom of the pan. Once the bottom layer is compacted, work your way up the sides of the pan, pressing the mixture firmly and uniformly to create a sturdy crust. A helpful tip is to use the flat bottom of a drinking glass or a measuring cup to compact the bottom layer, and your fingers or a flat spatula to press the crumbs up the sides. Ensure the crust is of even thickness throughout. A well-pressed crust is crucial for structural integrity and preventing crumbling when serving.
- Chill the Crust: Once the crust is perfectly formed and compacted in the tart pan, place it in the refrigerator. Allow it to chill for at least 15 to 20 minutes while you proceed with preparing the filling. This chilling period is essential as it allows the melted butter to solidify, setting the crust and making it firm enough to hold the creamy filling without becoming soggy.
Part 2: Preparing the Silky Cream Cheese Filling
The heart of our tart is a luscious, light, and tangy cream cheese filling that’s incredibly simple to make.
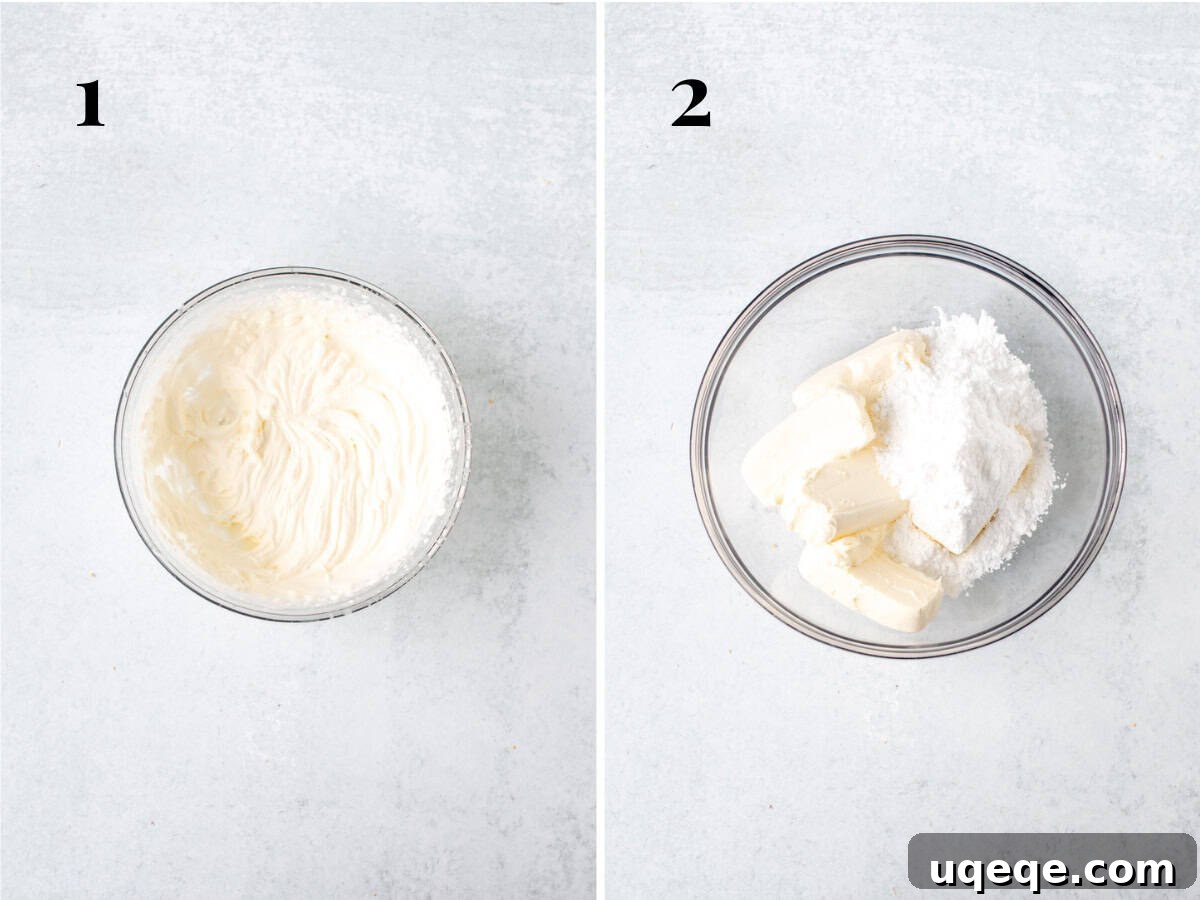
- Whip the Cream: In a very clean and, ideally, chilled mixing bowl, pour your 1/2 cup of very cold whipping cream (heavy cream). Using an electric mixer (either a handheld mixer or a stand mixer with a whisk attachment), beat the cream on medium-high speed. Continue beating until stiff peaks form. Stiff peaks mean that when you lift the beaters from the cream, the peaks stand up straight without collapsing or drooping. Be careful not to overbeat the cream, as it can quickly turn into butter. Once whipped, gently set this bowl of whipped cream aside in the refrigerator to keep it cold and stable.
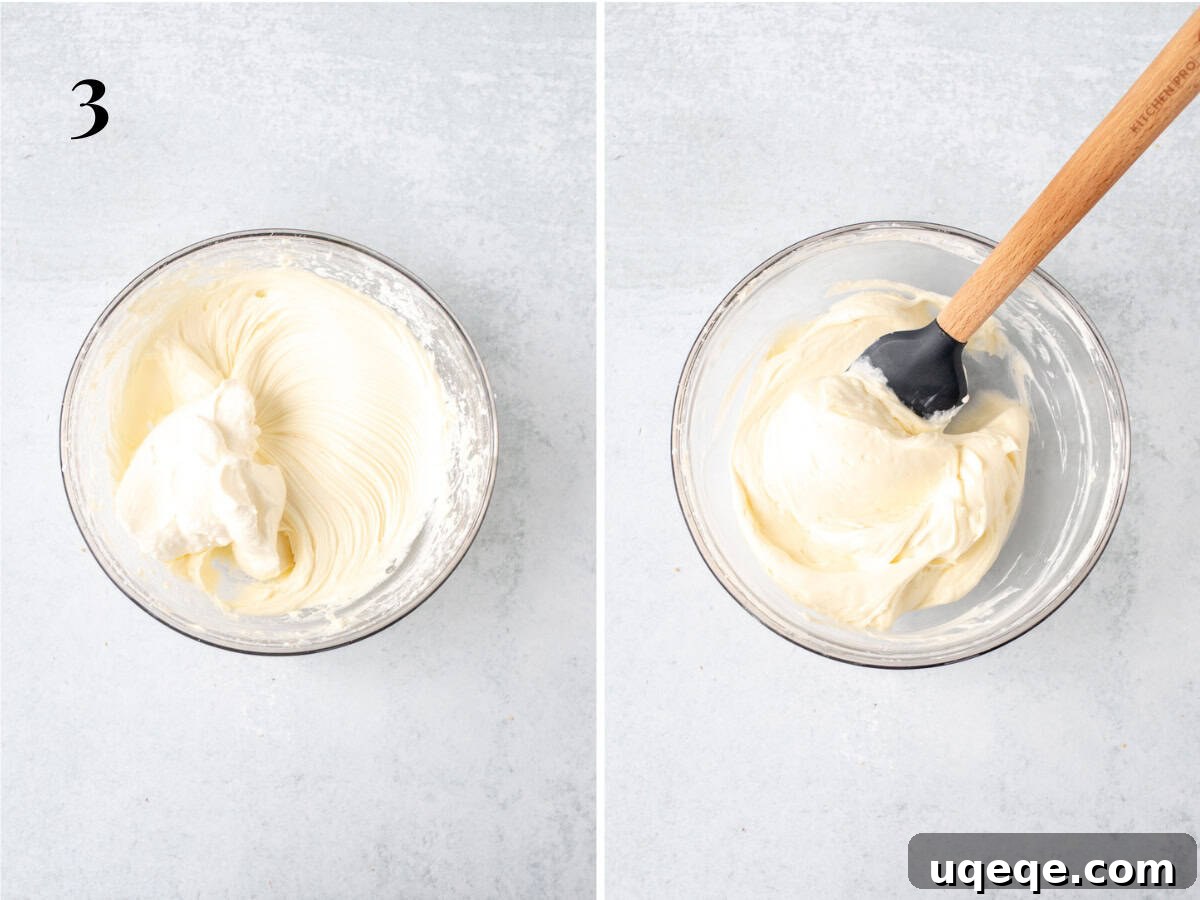
- Cream the Cheese Mixture: In a separate, larger mixing bowl, combine the 8 ounces of softened full-fat cream cheese, 3/4 cup of powdered sugar, and 1 teaspoon of freshly squeezed lemon juice. Using your electric mixer (with a paddle attachment if using a stand mixer), beat these ingredients together on medium speed until the mixture is completely smooth, wonderfully creamy, and entirely free of any lumps. It’s very important to pause periodically and scrape down the sides and bottom of the bowl with a rubber spatula. This ensures that all ingredients are thoroughly incorporated and that your filling has a uniform texture.
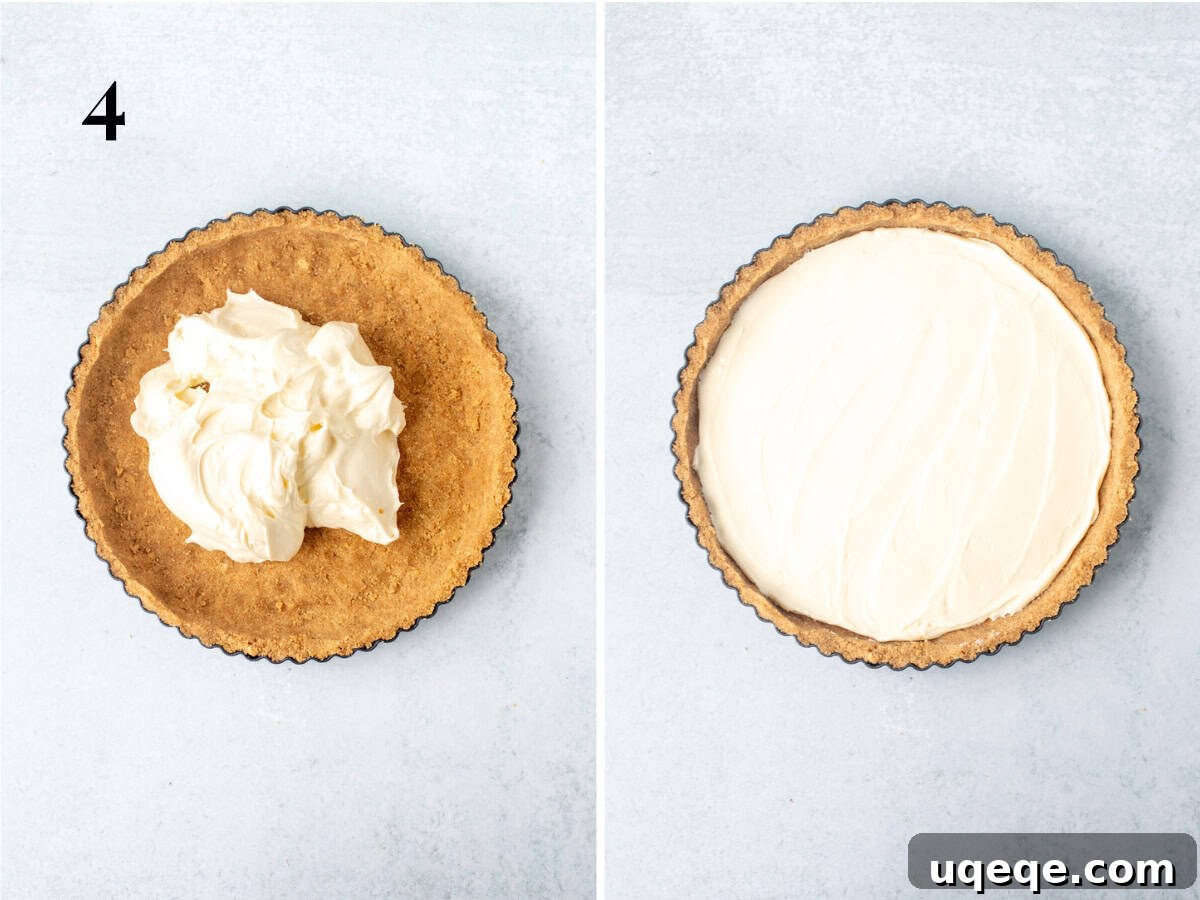
- Gently Fold in Whipped Cream: This step is critical for achieving the light and airy texture of the filling. Retrieve your whipped cream from the refrigerator. Using a rubber spatula or a large wooden spoon, gently fold the whipped cream into the cream cheese mixture. Use an upward scooping motion, turning the bowl as you go, to carefully incorporate the whipped cream without deflating it. Continue folding until the mixture is an even consistency, smooth, and no streaks of plain whipped cream are visible. Avoid overmixing, as this can cause the filling to lose its airy volume.
- Fill the Tart Shell and Chill: Take your chilled graham cracker crust from the refrigerator. Spoon the completed cream cheese filling into the prepared tart shell. Use your spatula or the back of a spoon to gently spread and smooth the filling into an even layer, ensuring it reaches all edges of the crust. Once filled, return the tart to the refrigerator for at least 30 minutes, or ideally several hours (or even overnight), to allow the filling to firm up and set completely. This crucial chilling time ensures that your tart will slice cleanly and hold its beautiful shape.
Part 3: The Vibrant Fruit Topping and Optional Glaze
The final touch is the most visually appealing part – adorning your tart with fresh fruit. This step is often best performed closer to serving time to ensure the fruit remains as fresh and vibrant as possible.
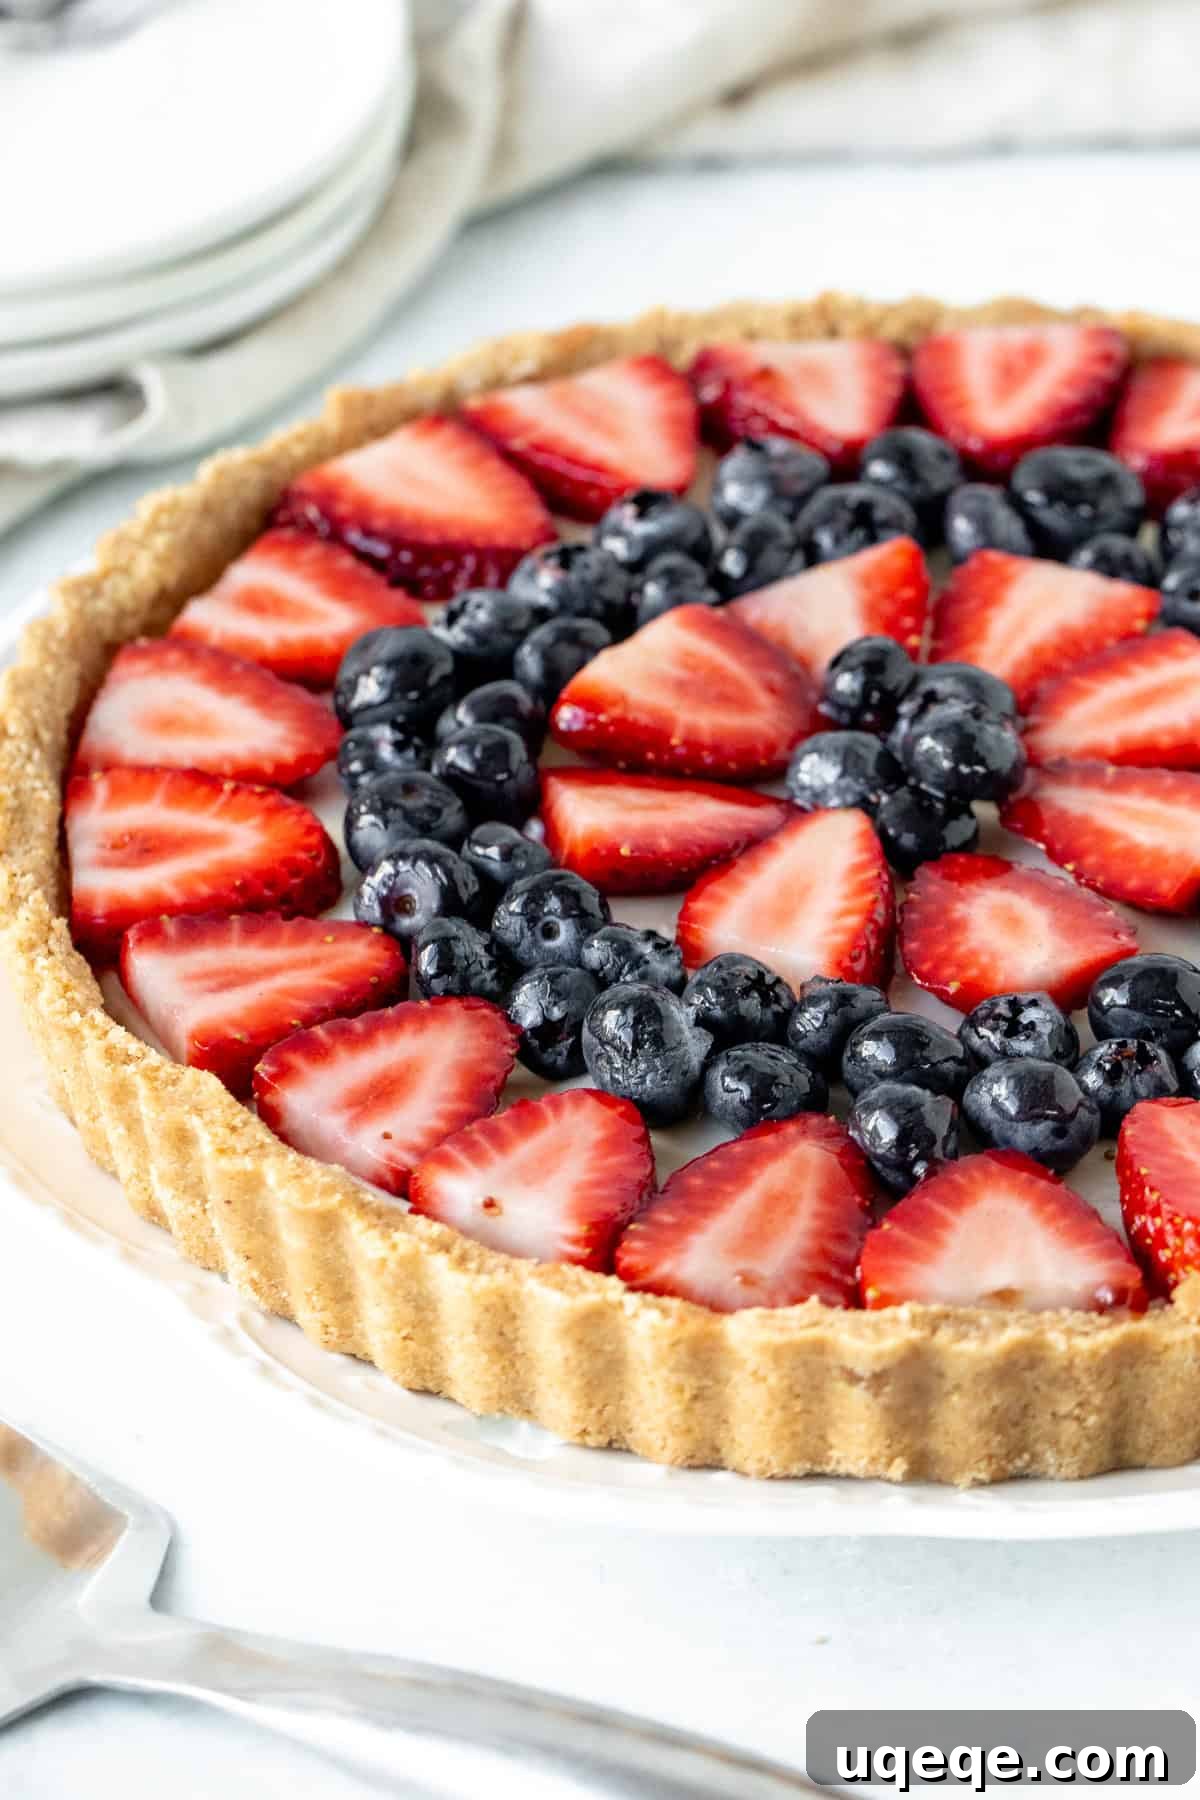
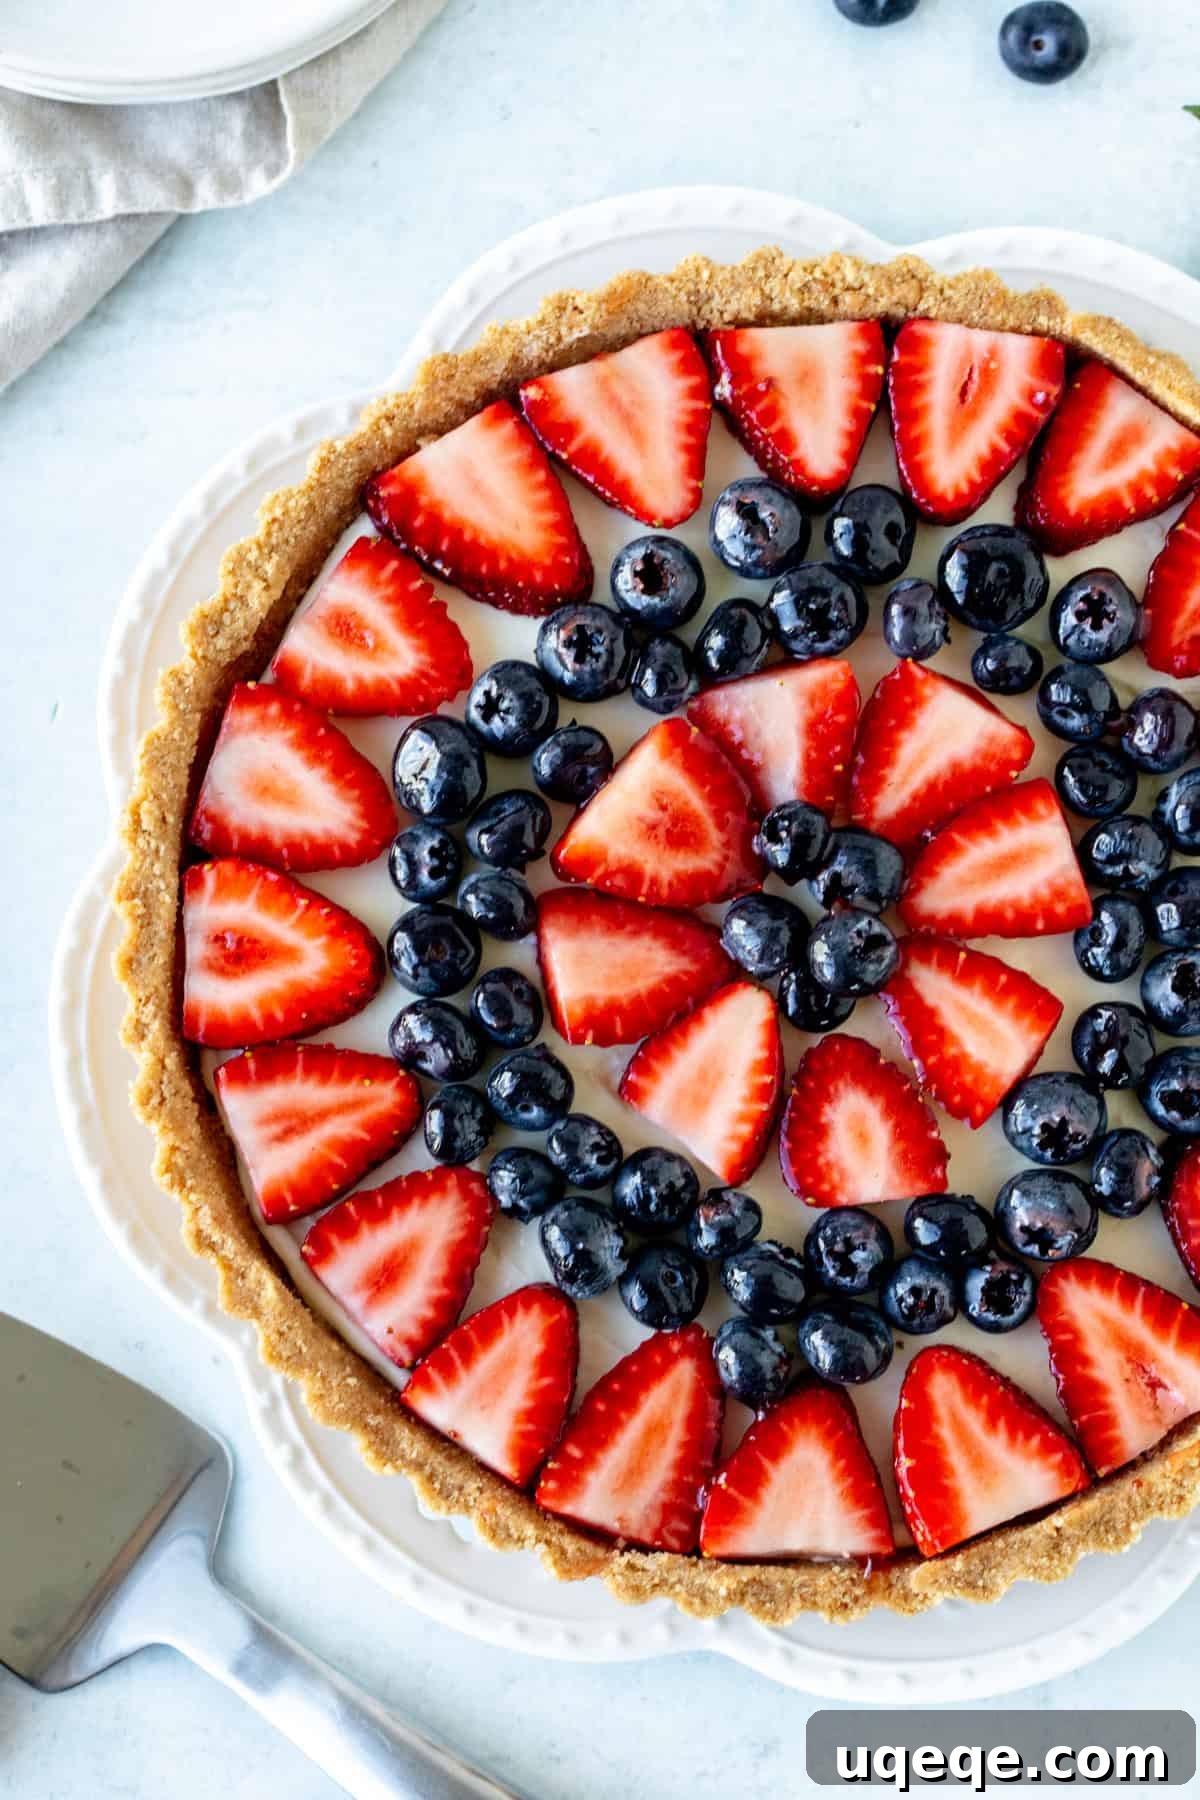
- Arrange Fresh Fruit: Once your tart filling is thoroughly set and firm, carefully arrange your chosen fresh fruits on top. You can create an elegant pattern, alternate colors for visual interest, or simply scatter them appealingly over the surface. Classic combinations like sliced strawberries and whole blueberries are always a hit, but feel free to let your creativity and the season guide your choices.
- Apply the Glaze (Optional): For that coveted professional, glossy finish, prepare a simple jam glaze. Place 2 tablespoons of strawberry or apricot jam in a small, microwave-safe bowl. Heat it in the microwave for approximately 20-30 seconds, or until the jam is melted and easily brushable. Using a clean pastry brush, gently brush the warm, melted jam over the arranged fruit. This not only imparts a beautiful sheen but also helps to lightly protect the fruit and enhance its natural colors. If you’re not serving the tart immediately after glazing, return it to the refrigerator.
Expert Tips for Serving, Storage, and Variations
To ensure your no-bake fruit tart is presented flawlessly, tastes its best, and remains fresh, consider these helpful tips:
- Effortless Tart Removal and Slicing: When it’s time to serve your chilled tart, carefully lift the tart out of the outer ring of your loose-bottom tart pan. It is crucial to leave the tart positioned on its metal bottom disc. Attempting to remove the entire tart from this base can cause the delicate crust or filling to crack or fall apart, especially when it’s very cold. Simply place the tart, still on its metal base, directly onto your serving platter or cake stand. For clean, neat slices, use a thin, sharp knife. For even cleaner cuts, dip your knife in hot water and wipe it clean between each slice, especially when cutting through the creamy filling.
- Optimal Serving Temperature: This tart is best enjoyed chilled. However, for maximum flavor and ease of slicing, remove it from the refrigerator about 15-20 minutes before you plan to cut and serve it. This allows the filling to soften just slightly, enhancing its creamy texture and allowing the flavors to truly shine.
- Timing for Fruit Topping: While the crust and filling can be prepared ahead of time, for the freshest appearance and best quality, it is always recommended to arrange the fresh fruit topping right before you intend to serve the tart. This prevents the fruit from potentially weeping juice onto the filling or losing its vibrant sheen over extended refrigeration.
- Storage Guidelines: Store any leftover no-bake fruit tart covered tightly with plastic wrap or in an airtight container in the refrigerator. It will maintain its deliciousness for up to 3 to 4 days. While the graham cracker crust might soften slightly over time due to moisture from the filling, the flavors will remain delightful. Freezing is generally not recommended for this particular tart, as the texture of the cream cheese filling and the fresh fruit may change upon thawing, becoming less appealing.
- Customization and Variations:
- Crust Alternatives: Beyond graham crackers and digestive biscuits, consider shortbread cookies or vanilla wafers for a different flavor profile. For a gluten-free option, use gluten-free graham crackers or cookies.
- Filling Flavors: While the lemon juice provides a wonderful tang, you can experiment with a hint of vanilla extract, almond extract, or even a touch of orange zest in the cream cheese filling for subtle flavor variations.
- Fruit Combinations: Don’t limit yourself to berries! Thinly sliced peaches, nectarines, plums, cherries (pitted), or even a tropical mix of mango and passionfruit can create stunning and delicious tarts.
- Glaze Options: Besides strawberry or apricot jam, clear apple jelly can also be melted and brushed over the fruit for a neutral, glossy finish that allows the fruit’s natural colors to pop.
Why This No-Bake Fruit Tart is Your Ultimate Summer Dessert Solution
With its straightforward preparation, refreshing flavors, and absolutely stunning presentation, this no-bake fruit tart stands out as the perfect dessert for summer and beyond. The delightful combination of a perfectly crisp graham cracker crust, a luscious and perfectly balanced cream cheese filling, and a generous topping of fresh, juicy seasonal fruits creates a harmonious blend of textures and tastes that is simply irresistible. It’s an ideal choice when you want to create something truly special without spending hours in a hot kitchen.
Whether you’re celebrating a special occasion, hosting a casual get-together, or simply craving a light and flavorful sweet treat, this fruit tart delivers on all fronts. Its versatility allows for endless customization with your favorite fruits, making it a dessert you can revisit again and again throughout the year. We encourage you to try this recipe and experience the joy of creating a beautiful, delicious, and stress-free dessert that everyone will adore!
If you’re as passionate about easy, fruit-focused desserts as we are, be sure to explore these other fantastic recipes that celebrate fresh flavors and simple techniques, perfect for satisfying your sweet tooth:
- Brownie Fruit Pizza: A fudgy, chewy brownie base generously topped with a creamy frosting and a colorful array of fresh fruit.
- Blueberry Cheesecake Icebox Cake: Layers of crisp graham crackers, velvety no-bake cheesecake filling, and sweet, juicy blueberries, creating a refreshing stacked dessert.
- Strawberry Cream Cheese Pie: A delightful, creamy, and vibrant pie bursting with the fresh taste of strawberries, all nestled in a simple crust.
No-Bake Fruit Tart
This easy, no-bake fruit tart is the perfect dessert for summer. It has a crunchy graham crust, cream cheese filling, and fresh fruit on top. Simple, elegant, delicious!
Prep Time: 30 minutes
Chilling Time: 30 minutes
Total Time: 1 hour
Servings: 10 slices
By: Fiona Dowling
Rate Recipe
Print Recipe
Equipment
- 9-inch (23 cm) loose bottom tart pan
- Large mixing bowls
- Electric mixer (handheld or stand mixer)
- Rubber spatula
- Pastry brush (optional, for glaze)
Ingredients
For the Graham Crust:
- 1 1/2 cups graham crumbs (about 180-200 grams)
- 1/4 cup granulated sugar (50 grams)
- 6 tablespoons unsalted butter (85 grams), melted
For the Cream Cheese Filling:
- 1/2 cup whipping cream (120 ml), 33-35% MF (heavy cream), very cold
- 8 ounces cream cheese (226 grams), full-fat, brick style, softened to room temperature
- 3/4 cup powdered sugar (82.5 grams)
- 1 teaspoon lemon juice, freshly squeezed
For the Topping:
- 2 cups fresh fruit (e.g., sliced strawberries, blueberries, raspberries, about 300 grams in total)
- 2 tablespoons strawberry jam or apricot jam (for optional glaze)
Instructions
Graham Crust
- Combine Crust Ingredients: In a medium bowl, combine the graham crumbs, granulated sugar, and melted butter. Stir with a fork until thoroughly mixed and the crumbs are evenly moistened, resembling wet sand.
- Press into Pan: Press the mixture firmly and evenly into the bottom and up the sides of a 9-inch (23 cm) loose-bottom tart pan. Ensure it’s well compacted to form a sturdy crust.
- Chill Crust: Place the prepared tart crust in the refrigerator to chill for at least 15-20 minutes while you prepare the filling.
Cream Cheese Filling
- Whip Cream: In a clean, chilled bowl, beat the very cold whipping cream with an electric mixer until stiff peaks form. Set aside in the refrigerator.
- Prepare Cream Cheese Mixture: In a separate, larger bowl, beat the softened cream cheese, powdered sugar, and lemon juice with an electric mixer until the mixture is completely smooth, creamy, and lump-free. Scrape down the sides and bottom of the bowl periodically to ensure even mixing.
- Fold in Whipped Cream: Using a rubber spatula, gently fold the whipped cream into the cream cheese mixture until it’s an even consistency and no streaks of whipped cream remain. Be careful not to overmix, which can deflate the cream.
- Fill and Chill Tart: Spoon the cream cheese filling into the chilled graham cracker crust and spread it into an even layer. Return the filled tart to the refrigerator and chill for at least 30 minutes, or until the filling is fully set and firm.
Topping
- Arrange Fruit: Just before serving, artfully arrange your chosen fresh fruit on top of the chilled tart.
- Apply Optional Glaze: For a glossy finish, melt the jam in a microwave-safe bowl for about 20-30 seconds until warm and brushable. Use a pastry brush to lightly coat the fruit with the melted jam.
- Serve: When ready to serve, carefully remove the outer ring of the tart pan, keeping the tart on its metal base. Slice with a thin, sharp knife and serve chilled.
Notes
- Graham Crumbs Substitute: Digestive biscuit crumbs can be used in place of graham crumbs. If using digestives, consider reducing the granulated sugar in the crust to 2 tablespoons, as digestives tend to be sweeter.
- Fruit Variety: The tart is highly versatile with fruit choices. Excellent options include sliced strawberries, blueberries, raspberries, blackberries, sliced kiwi, fresh mandarin orange segments, or sliced mango. Use what’s seasonal for the best flavor.
- Storage: Store the finished tart covered in the refrigerator for up to 4 days. For optimal freshness and appearance, it’s best to add the fruit topping right before serving, especially with delicate sliced fruits.
- Nutrition Disclaimer: The nutritional details provided are an estimate only and are based on one slice, assuming the tart is cut into 10 uniform pieces. Values may vary based on specific ingredients and brands used.
Nutrition (Estimated per 1 slice serving):
- Calories: 286 kcal
- Carbohydrates: 35 g
- Protein: 3 g
- Fat: 16 g
- Saturated Fat: 9 g
- Polyunsaturated Fat: 1 g
- Monounsaturated Fat: 4 g
- Trans Fat: 0.3 g
- Cholesterol: 41 mg
- Sodium: 159 mg
- Potassium: 100 mg
- Fiber: 1 g
- Sugar: 25 g
- Vitamin A: 658 IU
- Vitamin C: 2 mg
- Calcium: 37 mg
- Iron: 1 mg
Did you try this recipe? We’d love to hear about it! Please take a moment to rate the recipe and leave a comment below with your thoughts and experience.