
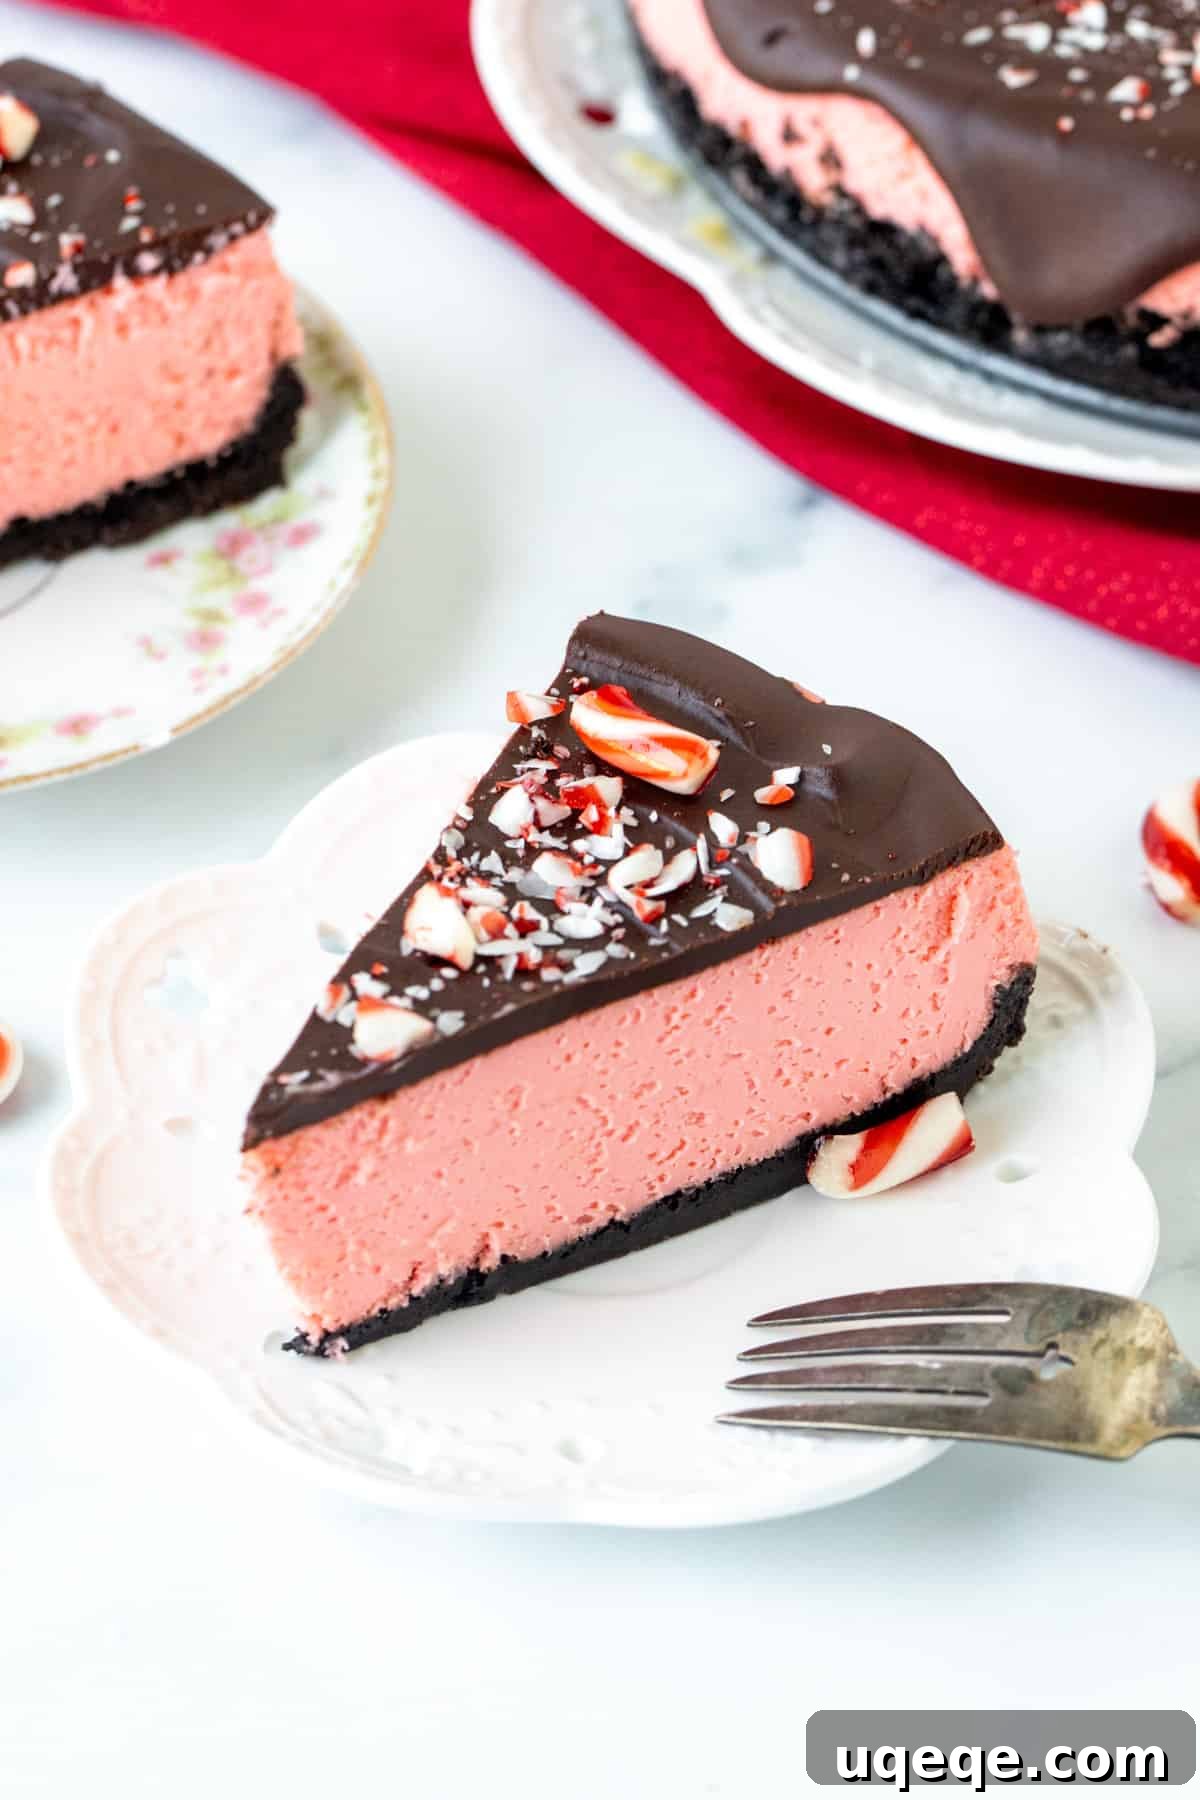
Peppermint Cheesecake: A Decadent Holiday Delight with Oreo Crust and Chocolate Ganache
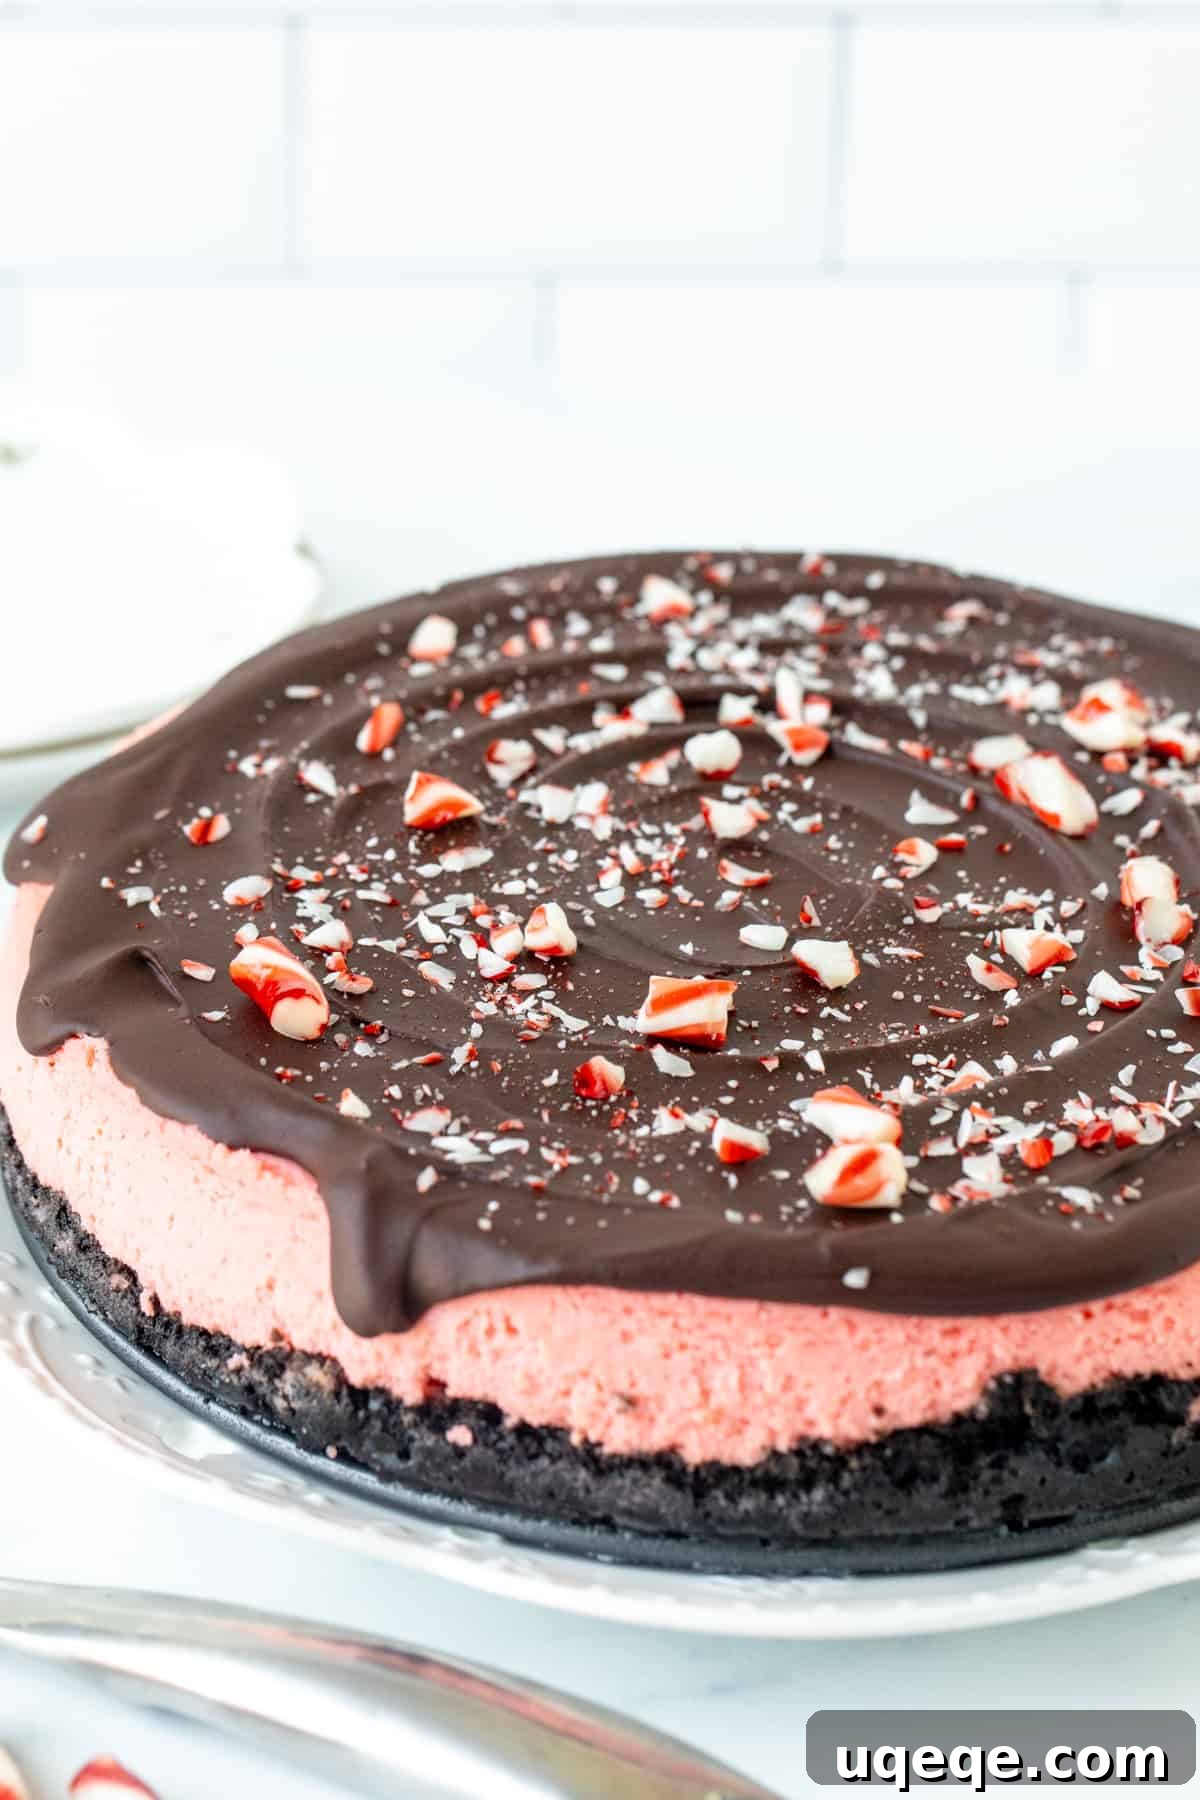
Prepare to dazzle your holiday guests with this truly spectacular Peppermint Cheesecake. Imagine a rich, creamy peppermint filling nestled atop a crisp Oreo cookie crust, generously draped in a glossy chocolate ganache, and finished with a festive sprinkle of crushed candy canes. This isn’t just a dessert; it’s a showstopper that promises a perfect blend of refreshing peppermint, deep chocolate, and luxurious creaminess in every bite. Its silky-smooth texture, achieved without being overly dense, combined with its stunning visual appeal, makes it an absolute must-bake for your Christmas celebrations or any festive occasion.
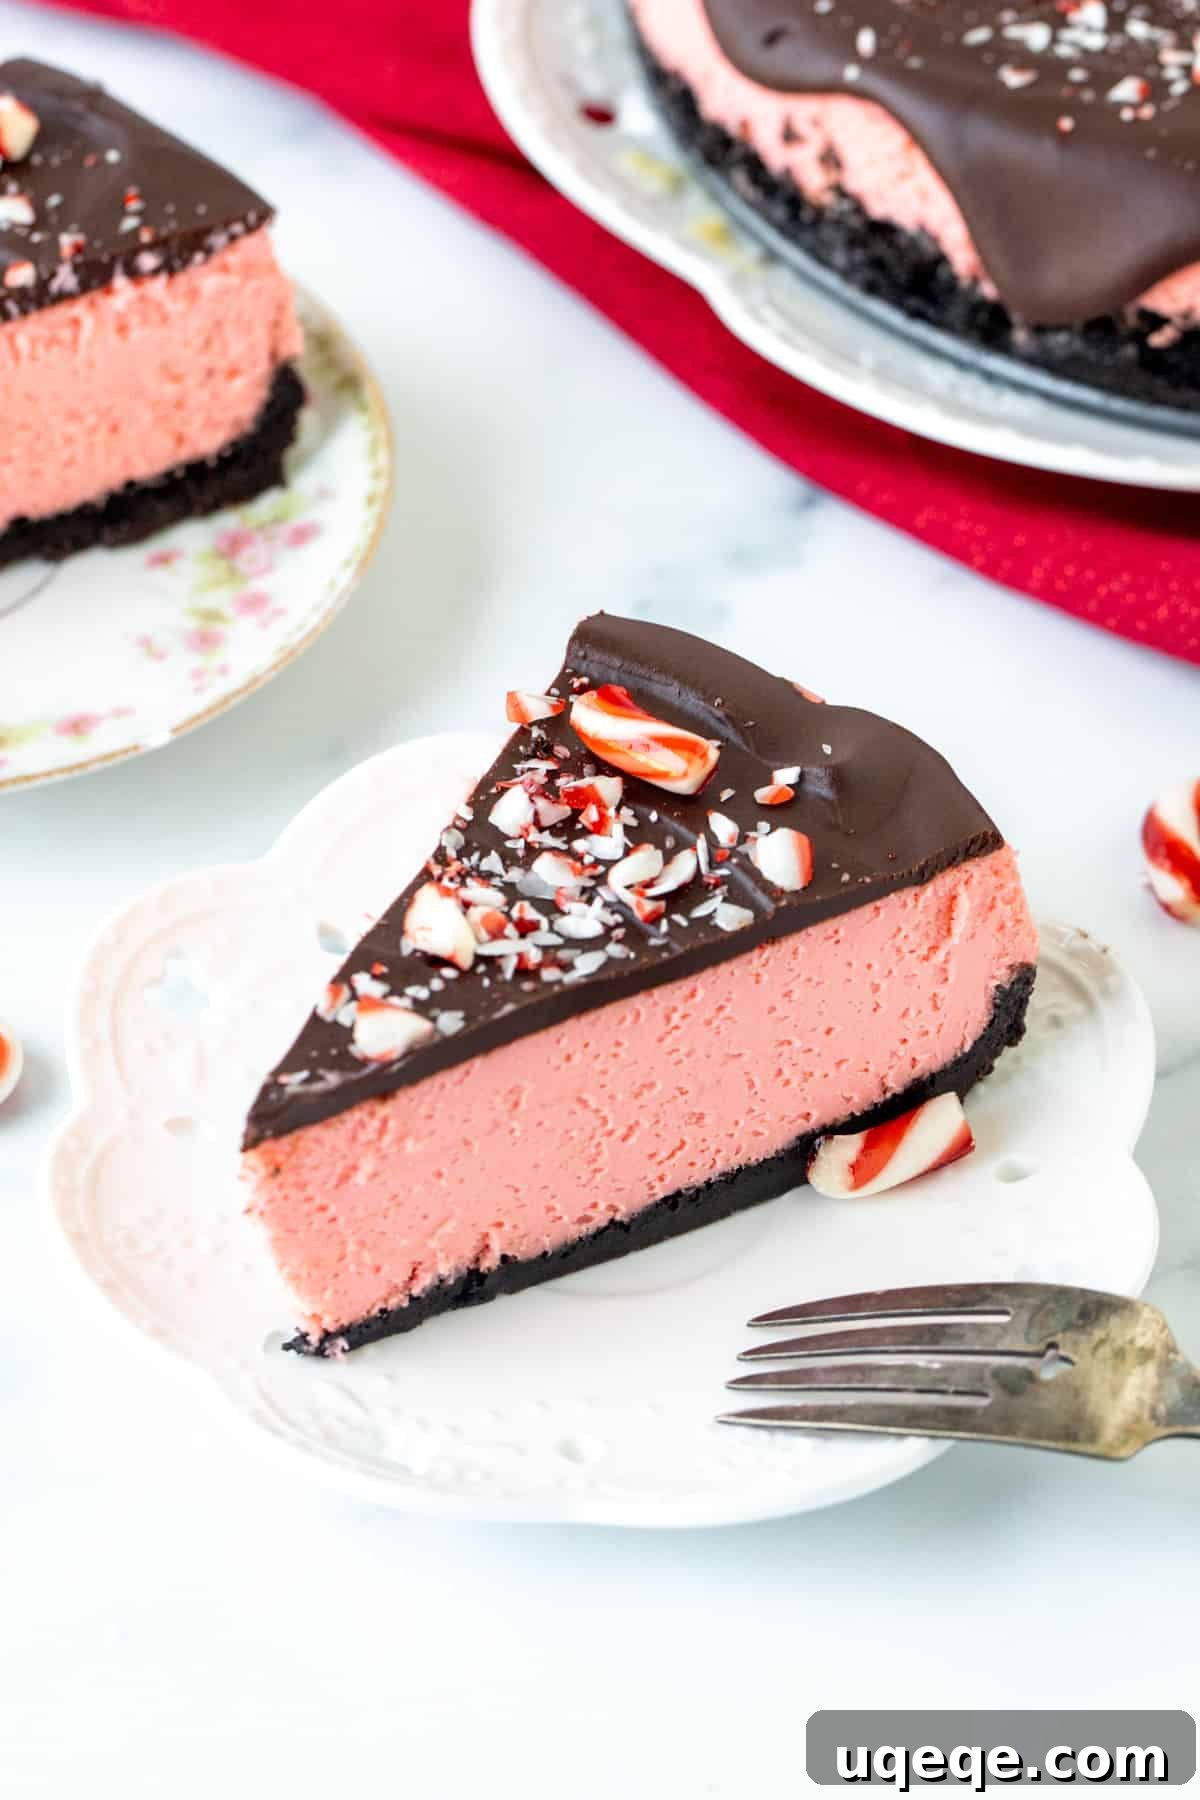
This recipe has been meticulously refined and updated on November 18, 2023, with enhanced photos, clearer recipe tips, and a slightly adjusted method to ensure your cheesecake turns out flawlessly every single time.
Why This Peppermint Cheesecake Will Be Your Holiday Favorite
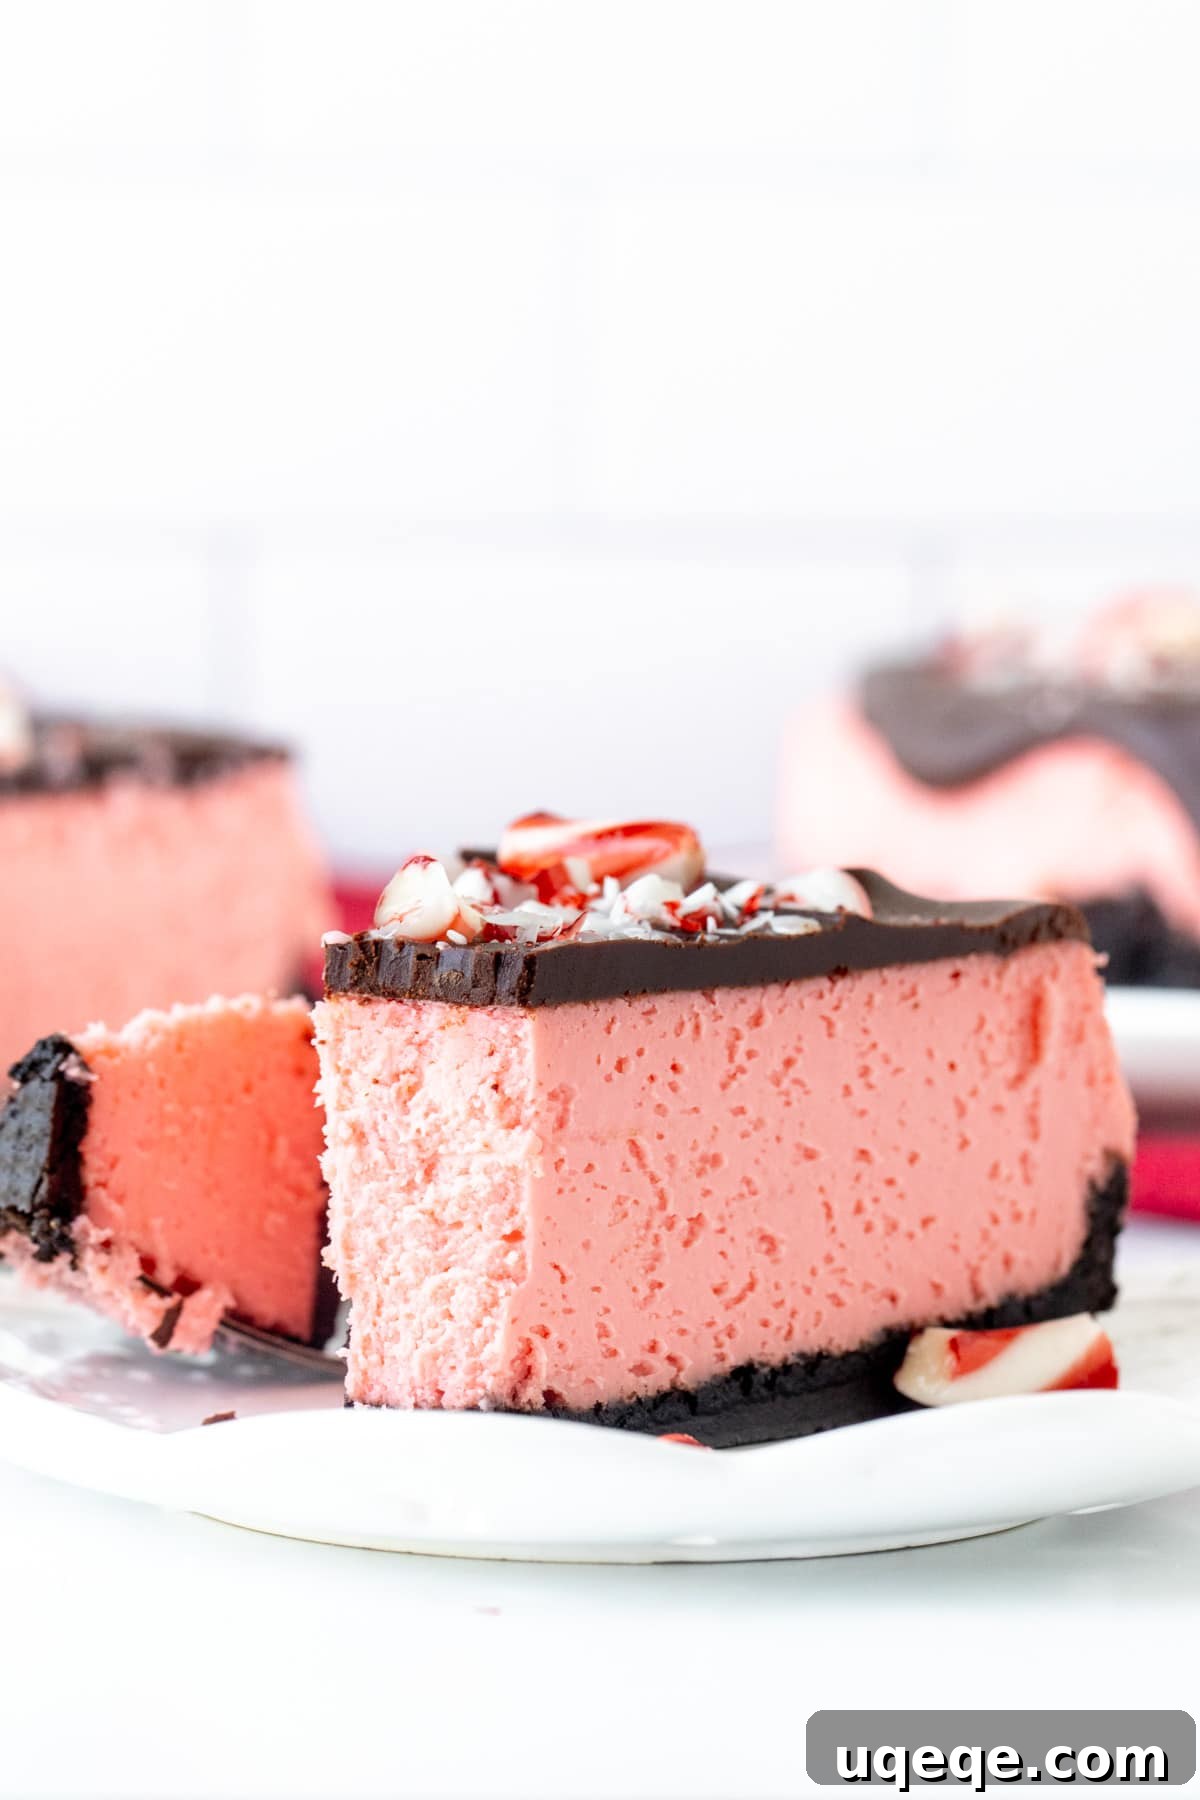
If you’re searching for a unique and utterly delicious dessert to make your Christmas feast unforgettable, look no further than this exquisite candy cane-flavored cheesecake. Its vibrant peppermint essence perfectly complements the decadent sweetness, creating a harmonious flavor profile that sings of the holidays. The filling boasts a velvety smoothness that melts in your mouth, striking a perfect balance between rich and light, never feeling too heavy. Beyond its incredible taste, the beautiful contrast of the pale pink peppermint filling against the dark chocolate Oreo crust and glossy ganache transforms this cheesecake into a true centerpiece. It’s a dessert that not only tastes incredible but also looks absolutely breathtaking on any holiday table, making it a guaranteed crowd-pleaser and a conversation starter.
Crafting the Perfect Peppermint Cheesecake: A Step-by-Step Guide
The Foundation: A Decadent Oreo Cookie Crust
Every exceptional cheesecake begins with an outstanding crust, and ours features a supremely crunchy Oreo cookie crust. For the best results, I always recommend using whole Oreo cookies—both the chocolate wafers and their creamy filling. Pulsing them in a food processor yields a fine crumb that retains the slight chewiness and richness from the filling, helping the crust bind together more effectively than pre-made Oreo baking crumbs. Once finely crushed, these cookie crumbs are combined with melted unsalted butter. This buttery mixture is then pressed firmly into the bottom of your springform pan, extending slightly up the sides to form a subtle, elegant lip. This creates a sturdy and flavorful base that perfectly balances the creamy filling.
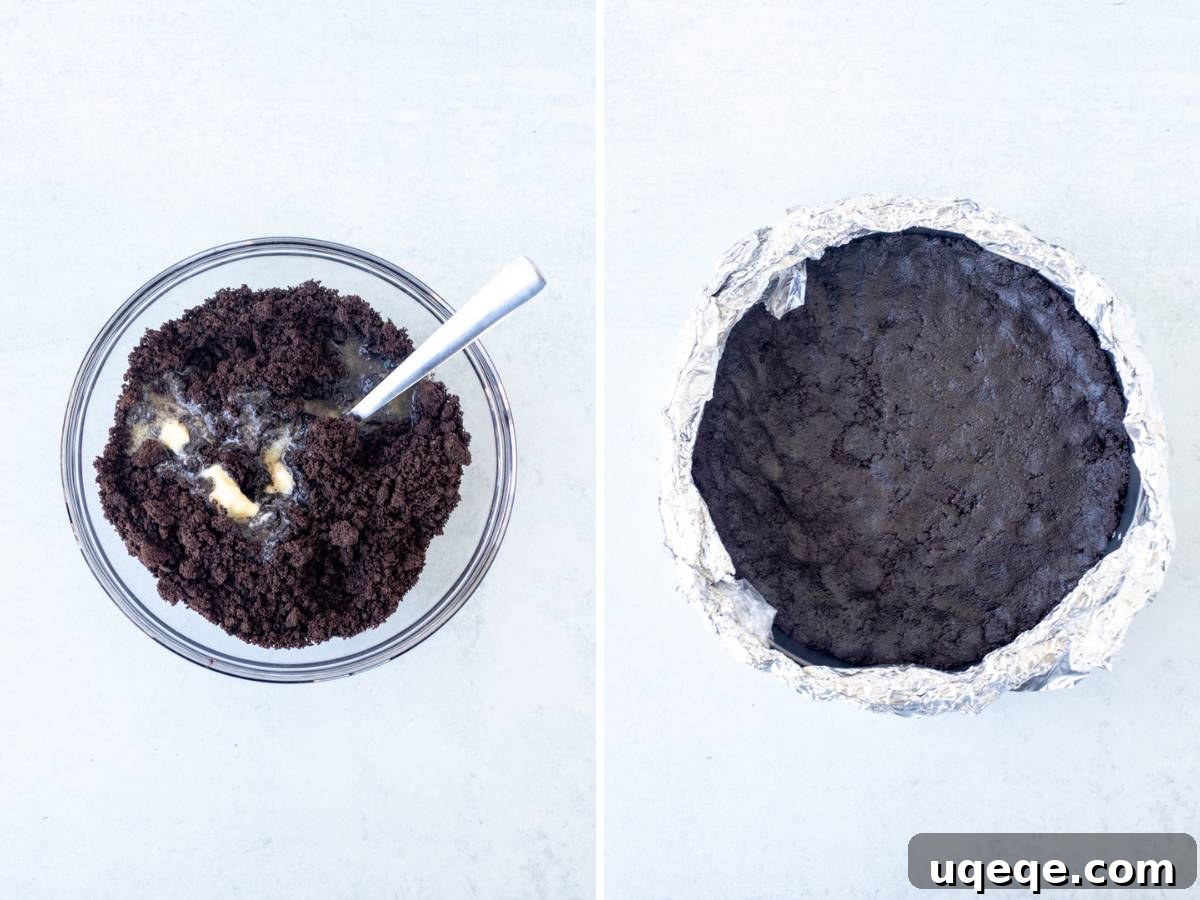
Pro Tip for the Crust: While you could simply freeze the crust as you prepare the filling, I strongly advocate for baking the crust on its own for 10 minutes. This crucial step toasts the cookie crumbs, enhancing their flavor and ensuring a much crunchier, more stable base that won’t become soggy when the cheesecake filling is added. It’s a small extra step that makes a significant difference in the final texture of your peppermint cheesecake.
The Star: Velvety Smooth Peppermint Cheesecake Filling
Now, let’s turn our attention to the star of the show: the irresistibly smooth and creamy peppermint filling. This luxurious filling is crafted from a harmonious blend of full-fat cream cheese, granulated sugar, aromatic peppermint extract, tangy sour cream, a touch of cornstarch, and eggs. Each ingredient plays a vital role in achieving the perfect balance of flavor and texture. The sour cream is particularly important, as it contributes to the signature velvety texture, adding a subtle tang that prevents the cheesecake from being overly sweet and ensures a light, melt-in-your-mouth consistency. The cornstarch acts as a crucial stabilizer, helping the cheesecake set beautifully and significantly reducing the risk of unsightly cracks forming during baking and cooling.
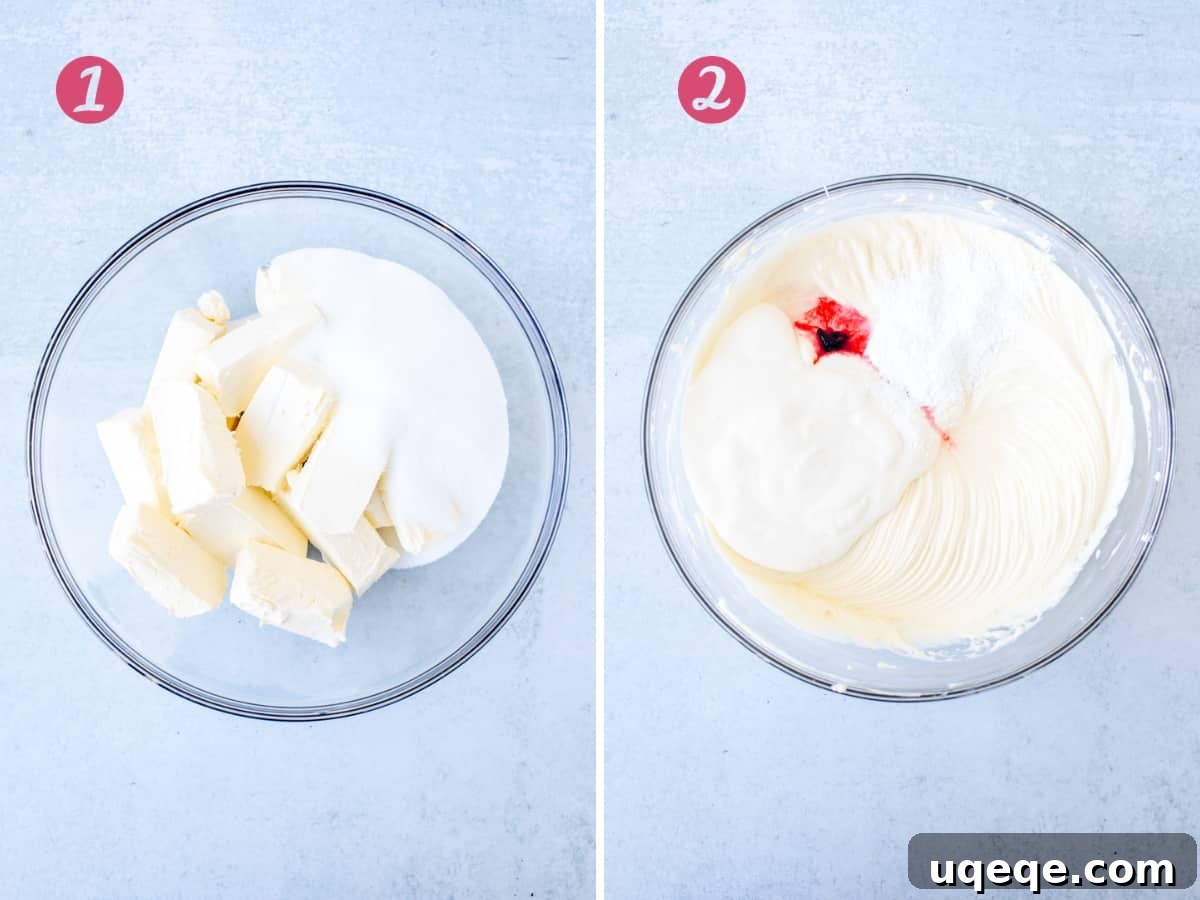
- Begin by ensuring your cream cheese is at room temperature. Beat the softened cream cheese together with the granulated sugar until the mixture is completely smooth and wonderfully creamy. This initial step is your best opportunity to eliminate any potential clumps from the cream cheese, ensuring a seamless texture. Always remember to pause your mixer and thoroughly scrape down the sides and bottom of the bowl to incorporate all ingredients evenly.
- Next, incorporate the sour cream, sifted cornstarch, peppermint extract, and a few drops of optional red food coloring. Sifting the cornstarch is essential to prevent any lumps from forming in your silky batter. The cornstarch not only helps the cheesecake set properly but also plays a key role in minimizing the chances of cracks appearing on the surface.
- In a separate small bowl, gently whisk together the three large eggs and two additional egg yolks. Whisking them separately helps to break them down evenly before they are added to the main batter.
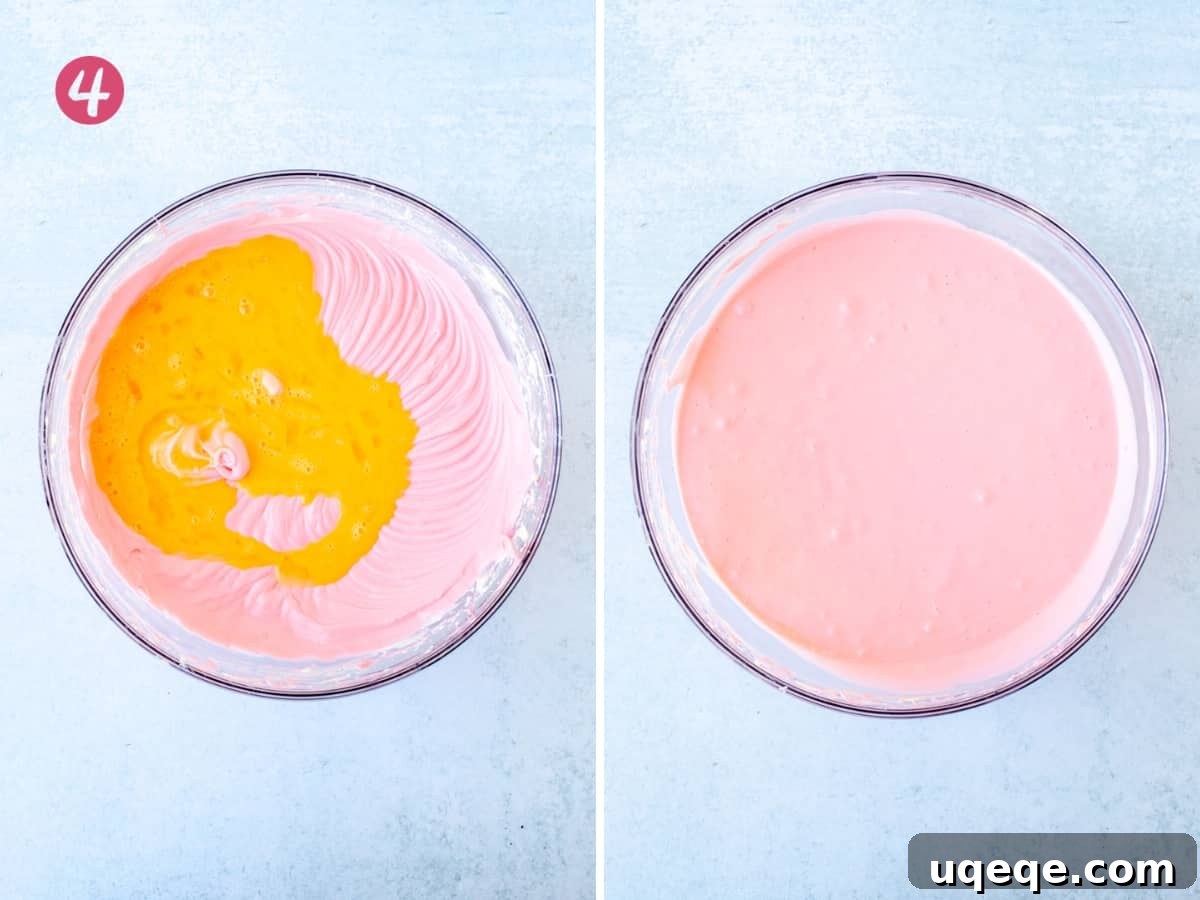
- Finally, and with great care, beat the whisked eggs into the cream cheese mixture. It’s best to add them in two stages, about half at a time, and mix on a very low speed. The cardinal rule here is: do not overmix! Overmixing the batter, especially after the eggs have been added, can introduce too much air, leading to a cracked cheesecake. Mix only until the eggs are just incorporated and no streaks of egg yolk are visible. The batter will become noticeably thinner at this point, indicating it’s ready for baking.
Achieving the Ideal Peppermint Flavor and Hue
Pro Tip on Peppermint Extract: The amount of peppermint extract you use is a matter of personal preference, typically ranging from 1 to 2 teaspoons. Start by adding 1 teaspoon. Crucially, taste test the cheesecake batter *before* you incorporate the eggs. If you desire a stronger peppermint essence, gradually mix in more extract until it reaches your preferred intensity. Remember, the flavor mellows slightly during baking, so a robust initial taste is often ideal. For that classic festive look, a few drops of red food coloring can be added along with the extract to give your peppermint cheesecake a beautiful, soft pink hue, evocative of candy canes. You can adjust the amount of food coloring to achieve your desired shade.
The Secret to Success: Baking with a Water Bath
To ensure your cheesecake bakes evenly, remains incredibly creamy, and minimizes the dreaded surface cracks, the water bath method is absolutely essential. This technique involves tightly wrapping your springform pan and then placing it inside a larger roasting pan. About ½ to 1 inch of hot water is then carefully poured into the roasting pan around the cheesecake. The gentle, moist heat created by the water bath regulates the baking temperature, preventing the edges of the cheesecake from cooking too quickly and creating a humid environment that locks moisture into the cheesecake, resulting in an exceptionally smooth and luscious texture.
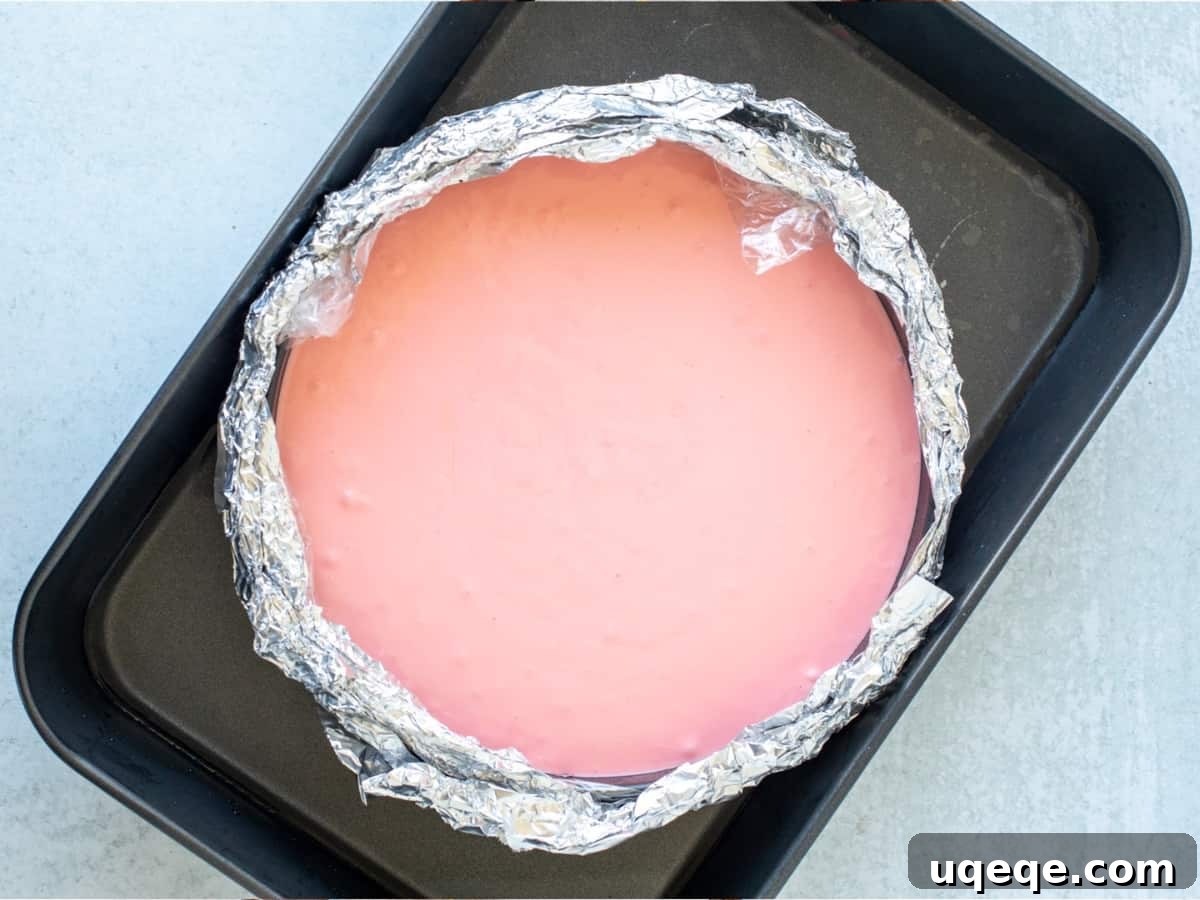
Pro Tip for a Leak-Proof Water Bath: Preventing water from seeping into your cheesecake is paramount. I highly recommend a two-layer wrapping approach. First, encase your springform pan in a disposable plastic oven bag (the kind typically used for turkeys). You might need to trim the bag slightly, then pull it taut and secure it with one of the ties that come with the oven bags. Following this, wrap the pan multiple times—at least four layers—with heavy-duty aluminum foil, ensuring both the bottom and sides are completely covered and all seams are tightly sealed. If your springform pan is known for its exceptionally tight seal, you *might* be able to skip the oven bag and rely solely on the aluminum foil, but ensure you wrap it very securely to prevent any leaks.
The Elegant Finish: Rich Chocolate Ganache Topping
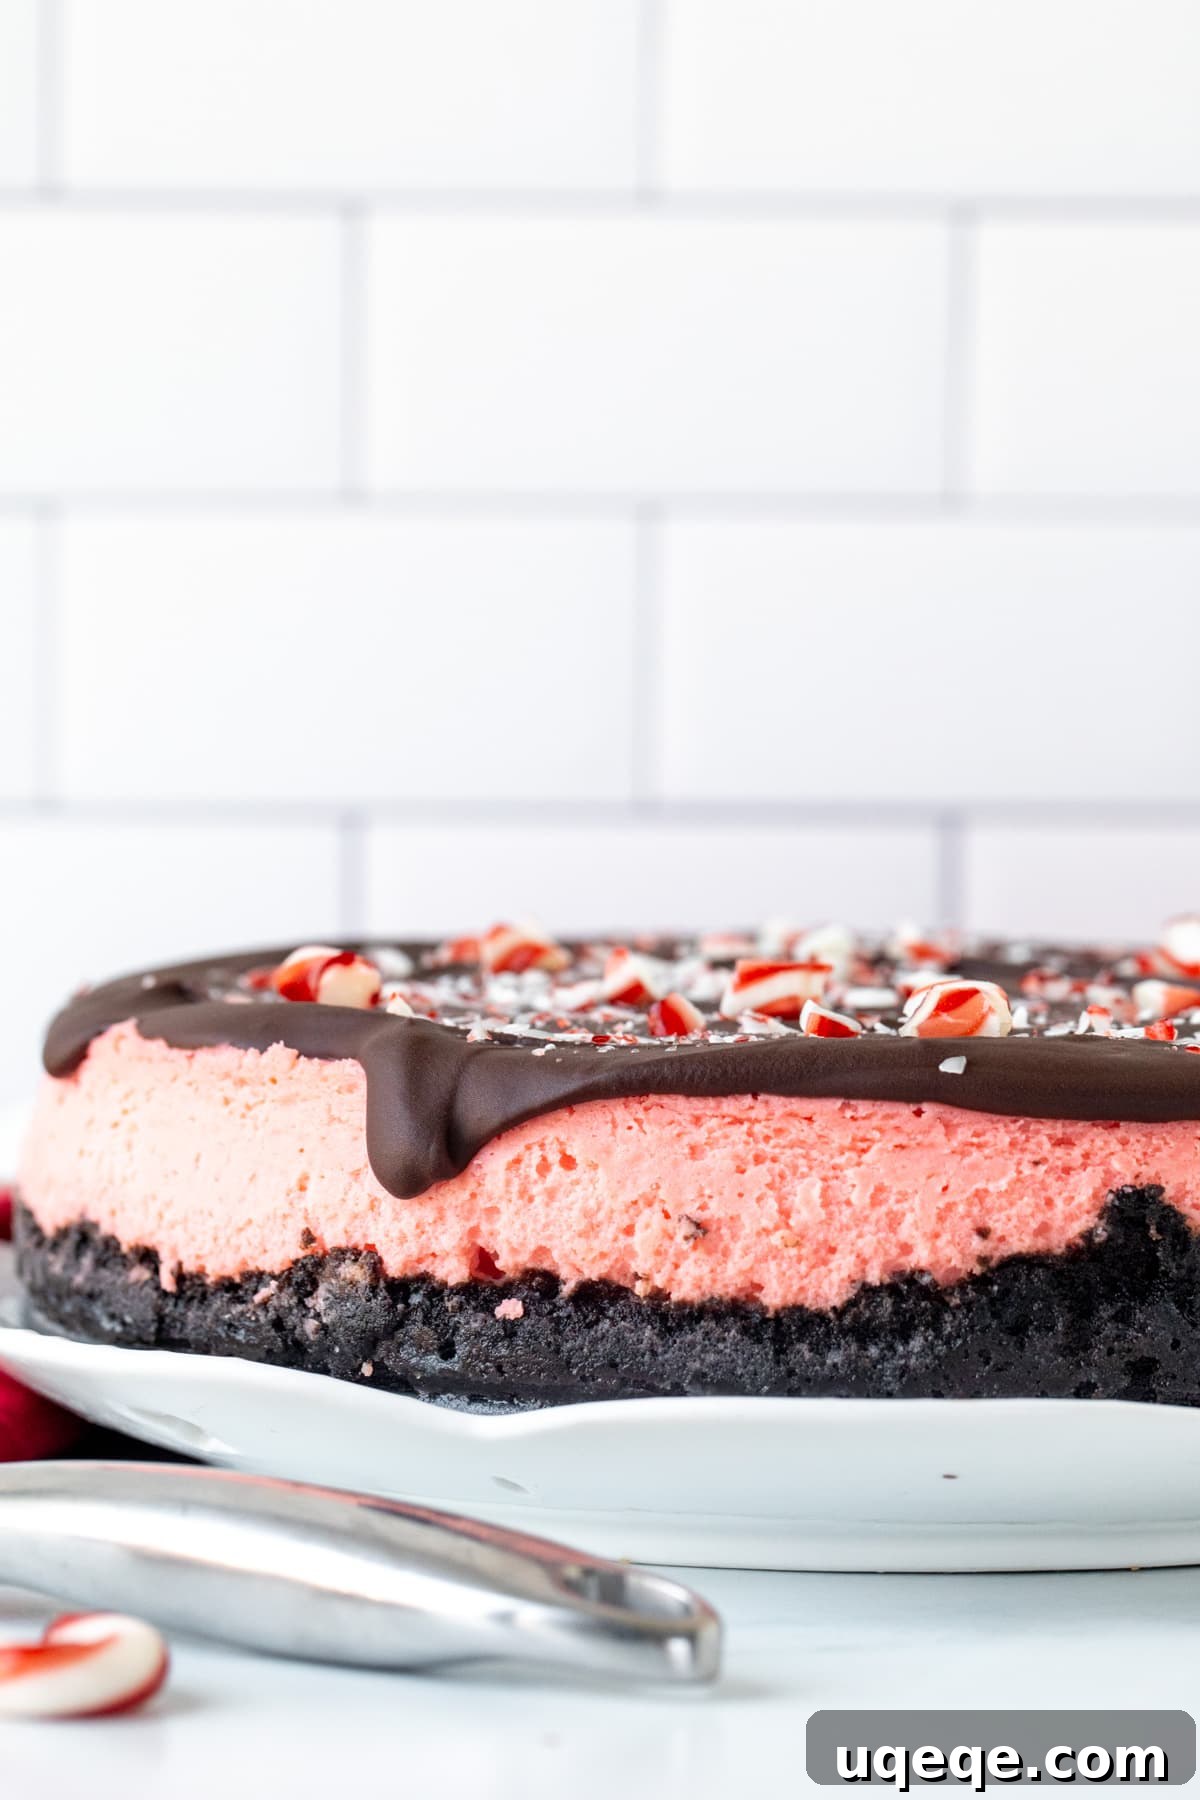
Once your peppermint cheesecake has baked and cooled to perfection, it’s time for the crowning glory: a luxurious, glossy, and impossibly creamy chocolate ganache topping. Creating ganache is surprisingly simple. Begin by finely chopping high-quality semi-sweet chocolate and placing it in a heatproof bowl. Then, gently heat heavy cream until it’s simmering, almost boiling, and pour it directly over the chopped chocolate. Allow the hot cream to sit for a few minutes; this gives the chocolate time to soften. After a brief wait, whisk the mixture until it transforms into a uniform, smooth, and irresistibly shiny ganache. The rich, slightly bitter notes of the chocolate are a magnificent counterpoint to the bright, refreshing peppermint flavor of the cheesecake.
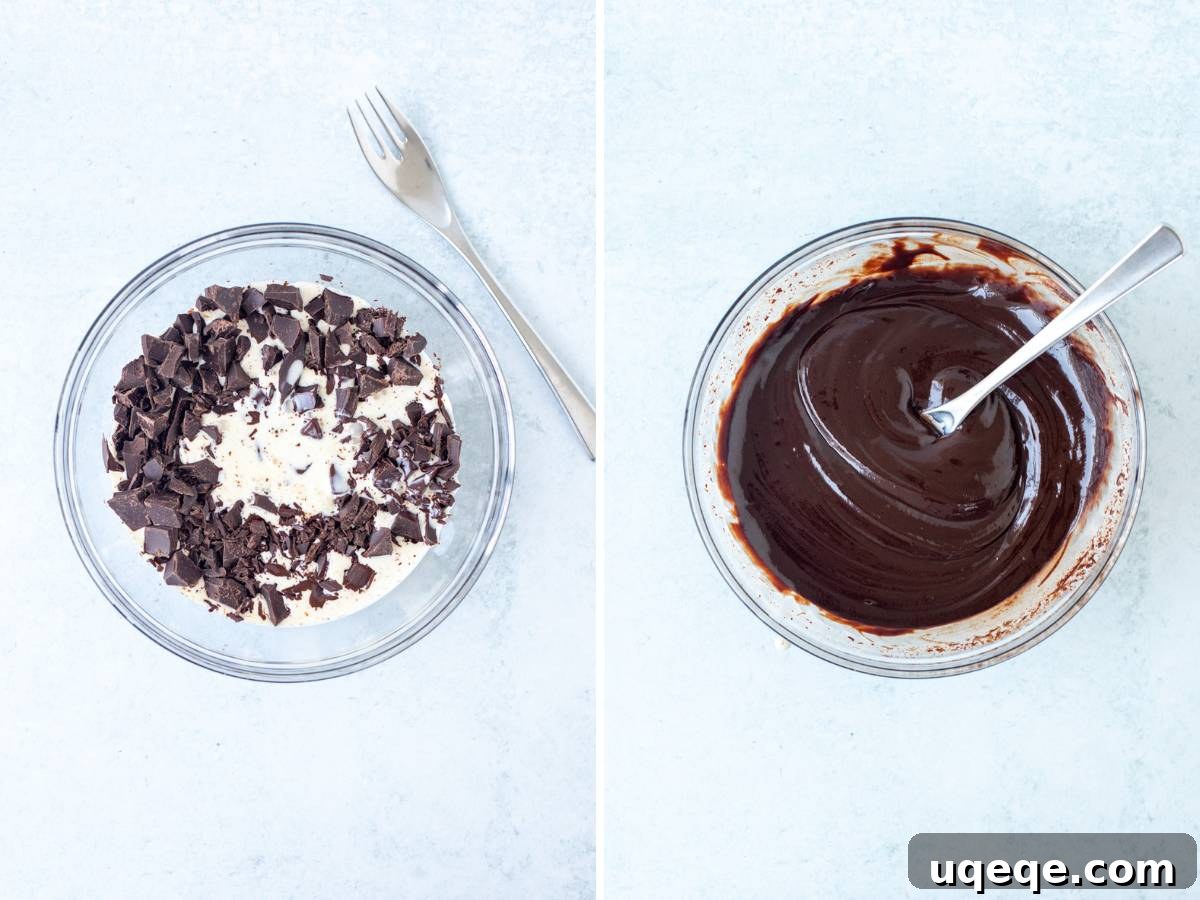
This beautiful ganache is then poured over the completely cooled and chilled cheesecake. You can add it at any point during the cheesecake’s chilling process in the refrigerator. Not only does this chocolate layer add an incredible depth of flavor and texture, but it also serves a practical purpose: it elegantly conceals any minor cracks or imperfections that might have occurred on the surface of your cheesecake, ensuring a picture-perfect presentation every time. Finally, just before serving, sprinkle generously with vibrant crushed candy canes for an extra pop of color, texture, and holiday cheer.
Essential Tips & Tricks for Cheesecake Perfection
Achieving a flawless peppermint cheesecake is easier than you think with these expert tips:
- Room Temperature Ingredients are Key: This cannot be stressed enough! Ensure your cream cheese, eggs, and sour cream are at true room temperature before you begin mixing. Cold ingredients do not emulsify properly, leading to a lumpy batter and increasing the likelihood of cracks in your finished cheesecake. Take them out of the fridge at least 30 minutes to an hour beforehand.
- Secure Your Springform Pan: Before placing your cheesecake in the water bath, meticulously wrap the springform pan. A loose wrap is a recipe for a soggy crust. Follow the pro tip above to create an impenetrable barrier against water leakage.
- Patience is a Virtue (and Prevents Cracks!): Cheesecake is not a quick dessert. It requires ample time to cool slowly and then chill thoroughly in the refrigerator. Resist the urge to rush the cooling process; sudden temperature changes are a primary cause of cracks. Allow the cheesecake to cool in the water bath until room temperature, then transfer to the fridge for a minimum of 6 hours, or ideally, overnight.
- Garnish Just Before Serving: While tempting to decorate ahead, only add the crushed candy canes right before you plan to serve. Candy canes can absorb moisture from the refrigerator and start to melt or become sticky, losing their crisp texture and vibrant appearance.
- Do Not Overmix: As mentioned in the filling instructions, overmixing, especially after eggs are added, incorporates too much air. This air expands during baking and then collapses during cooling, leading to cracks. Mix only until ingredients are just combined.
- Tap to Release Air Bubbles: After pouring the batter into the crust, gently tap the springform pan on the counter a few times. This helps to release any large air bubbles trapped in the batter, contributing to a smoother cheesecake texture and fewer surface imperfections.
Creative Variations & Adaptations for Every Occasion
While this classic peppermint cheesecake is perfect as is, it’s also wonderfully adaptable! Here are a few ideas to customize your dessert:
- White Chocolate Ganache: For a different yet equally elegant topping, swap the dark chocolate ganache for a luxurious white chocolate ganache. This provides a softer visual contrast and a sweeter, creamier finish that still pairs beautifully with peppermint.
- Seasonal Color Changes: Think beyond Christmas! Tint the cheesecake filling green instead of pink to create a festive dessert perfect for St. Patrick’s Day or any spring celebration. A few drops of green food coloring is all it takes to transform its appearance.
- Quick No-Bake Peppermint Cheesecake: If you’re short on time or prefer a no-bake option, you can still enjoy these delightful flavors.
- Prepare the Oreo crust exactly as instructed in this recipe.
- For the filling, use a trusted no-bake cheesecake recipe (such as this easy no-bake cheesecake recipe), but omit any lemon juice. Instead, fold in 1-2 teaspoons of peppermint extract and a few drops of red food coloring at the same stage you would typically add vanilla extract.
- Avoid adding the chocolate ganache on top of a no-bake filling, as its warmth can cause the filling to melt or become unstable. Simply adorn your no-bake cheesecake with crushed candy canes just before serving.
- Double Chocolate Peppermint Cheesecake: For the ultimate chocolate lover, consider a full chocolate peppermint experience. You can explore a dedicated chocolate peppermint cheesecake recipe that incorporates chocolate directly into the cheesecake filling itself.
Frequently Asked Questions About Peppermint Cheesecake
Here are answers to some common questions about making and enjoying this festive dessert:
- How do I prevent my cheesecake from cracking? The key is to avoid overmixing the batter (especially after adding eggs), use room temperature ingredients, bake in a water bath, and allow for slow, gradual cooling. Do not open the oven door during baking, and let it cool inside the turned-off oven with the door ajar before removing.
- Can I make this cheesecake ahead of time? Absolutely! Cheesecake is an excellent make-ahead dessert. You can bake it up to 2-3 days in advance. Store it covered in the refrigerator. Add the chocolate ganache and crushed candy canes just before serving for the best presentation and texture.
- What kind of cream cheese should I use? Always opt for full-fat, brick-style cream cheese. Avoid low-fat, whipped, or spreadable varieties, as they contain too much water and stabilizers that will negatively impact the cheesecake’s texture and ability to set.
- Can I freeze peppermint cheesecake? Yes, cheesecake freezes beautifully. Once completely chilled, remove it from the springform pan. You can freeze it whole or in slices. Wrap it tightly in plastic wrap, then a layer of aluminum foil. It will keep for up to 1-2 months. Thaw overnight in the refrigerator before serving.
- Why is sour cream important? Sour cream adds moisture, a delicate tang that balances the sweetness, and contributes significantly to the cheesecake’s signature smooth, velvety texture. It also helps tenderize the batter, preventing it from becoming rubbery.
Peppermint Cheesecake
Equipment
- 9-inch (23 cm) springform pan
- Large roasting pan (big enough for the springform pan to fit inside)
- Food processor (optional, for crushing Oreos)
- Electric mixer (stand or hand mixer)
- Heatproof bowl
- Small whisk
Ingredients
Oreo Crust
- 30 Oreo cookies, wafers and filling
- 1/3 cup unsalted butter, melted
Cheesecake Filling
- 24 oz (680 grams) cream cheese, full-fat, brick-style, room temperature
- 1 1/4 cup (250 grams) granulated sugar
- 1 cup (240 ml) sour cream, room temperature
- 1 tablespoon cornstarch (AKA cornflour in the UK and Australia, or 2 tablespoons all-purpose flour)
- 1-2 teaspoons peppermint extract, to taste
- 2-4 drops red food coloring, optional
- 3 large eggs, room temperature
- 2 large egg yolks, room temperature (discard the whites)
Chocolate Ganache
- 6 oz (170 grams) semi-sweet chocolate, finely chopped
- 2/3 cup (120 ml) heavy cream, 33-35% MF
- 2 crushed candy canes, for topping
- Whipped cream, for decorating (optional)
For the Waterbath
- Hot water
Measurements provided in US Customary. For Metric conversions, please use a reliable converter.
Instructions
- Preheat the oven to 325°F (170°C).
- Prepare the springform pan: Wrap the outside of a 9-inch (23 cm) springform pan. For best protection, first wrap with a disposable plastic oven bag (trimming if necessary), then secure with a tie. Over this, wrap the outside at least 4 times with heavy-duty aluminum foil, ensuring the bottom and sides are completely covered and all seams are tightly sealed to prevent water leakage.
Oreo Crust
- Add the whole Oreo cookies (wafers and filling) to a food processor and process until fine crumbs are formed. Alternatively, place them in a resealable plastic bag and crush with a rolling pin.
- Combine the crushed cookies and melted butter. You can either pulse a few times in the food processor or mix thoroughly in a bowl with a fork until well combined.
- Press the mixture firmly and evenly into the bottom of the prepared springform pan, extending a slight lip around the edges.
- Bake the crust for 10 minutes in the preheated oven. Remove from the oven but keep the oven turned on and the pan wrapped.
Cheesecake Filling
- In a large mixing bowl, using an electric mixer, beat the room temperature cream cheese and granulated sugar together until the mixture is light, soft, and completely creamy, about 2-3 minutes. Stop the mixer and scrape down the sides and bottom of the bowl thoroughly to ensure no lumps remain.
- Add in the room temperature sour cream, sifted cornstarch, 1 teaspoon of peppermint extract, and 1-2 drops of red food coloring (if using, for a pink hue). Beat on low speed until all ingredients are just incorporated and the mixture is smooth. Taste the batter at this point; if you prefer a stronger peppermint flavor, add a little more extract to your taste, along with more food coloring if desired.
- In a separate small bowl, whisk together the 3 large eggs and 2 additional egg yolks until just combined.
- With the mixer on the lowest speed, very carefully beat the egg mixture into the cream cheese batter, adding about half at a time. Mix only until the eggs are just incorporated and no visible streaks of egg remain. It is crucial not to overmix at this stage, as overmixing can lead to cracks in the cheesecake.
- Pour the finished cheesecake batter evenly into the springform pan, directly over the pre-baked Oreo crust. Gently tap the pan on the counter a few times to release any large air bubbles.
Baking & Cooling the Cheesecake
- Carefully place the wrapped springform pan with the cheesecake batter into the center of a large roasting pan.
- Pour hot water into the roasting pan around the springform pan, creating a water bath. The water level should reach approximately ½ to 1 inch up the sides of the springform pan. Be careful not to splash water into the cheesecake batter.
- Carefully transfer the entire roasting pan assembly into the preheated oven. Bake for 50-60 minutes. The cheesecake is ready when the edges appear set, but the center still has a slight, gentle wobble (like firm Jell-O or pudding, not liquid) if you gently nudge the pan.
- Once baked, turn off the oven but leave the cheesecake in the water bath inside the oven with the door slightly ajar for 1 hour. This slow cooling helps prevent cracks.
- Remove the roasting pan from the oven. Carefully take the springform pan out of the water bath. Allow the cheesecake, still in its springform pan, to cool completely to room temperature on a wire rack.
- Once at room temperature, cover the springform pan tightly with plastic wrap and transfer the cheesecake to the refrigerator to chill for at least 6 hours, or preferably overnight, to allow it to set fully.
Chocolate Ganache
- Once the cheesecake is thoroughly chilled, prepare the chocolate ganache. Place the finely chopped semi-sweet chocolate in a heatproof bowl.
- Heat the heavy cream in a microwave-safe measuring cup in 30-second intervals until it is steaming and almost boiling (but not fully boiling over).
- Pour the hot cream directly over the chopped chocolate in the bowl and let it sit undisturbed for 2 minutes to allow the chocolate to melt.
- After 2 minutes, whisk the mixture gently but consistently until it becomes completely smooth, glossy, and uniform. If any small pieces of chocolate remain, microwave the ganache on medium power for an additional 15-30 seconds, then whisk again until smooth. Do not use high power.
- Remove the chilled cheesecake from the refrigerator. Carefully run a thin, sharp knife (not a table knife) around the inner edge of the springform pan. Unclasp and remove the outer ring of the pan.
- Gently blot any condensation or moisture from the top surface of the cheesecake using a paper towel.
- Pour the prepared chocolate ganache over the top of the cheesecake, allowing it to naturally drip elegantly down the sides.
- Return the cheesecake to the refrigerator to allow the ganache to set, typically for another 30-60 minutes, or until ready to serve.
- When you are ready to serve, crush the candy canes (a rolling pin works great for this) and sprinkle them generously over the top of the cheesecake. Slice with a thin, sharp knife, wiping the blade clean between each slice for a clean cut. Ensure you slice all the way through the Oreo crust. Enjoy!
Notes
- Room Temperature Ingredients: Cream cheese, sour cream, and eggs must be at room temperature to ensure a smooth, lump-free batter and prevent cracking. Take them out of the fridge approximately 30-60 minutes before you start baking. For cream cheese, unwrap and cut into cubes to speed up warming. Eggs can be placed in a bowl of warm water for 10-15 minutes.
- Cream Cheese Selection: Always use full-fat, brick-style cream cheese. Avoid low-fat, spreadable, or whipped varieties, as their different compositions will compromise the cheesecake’s texture and ability to set properly.
- Sour Cream Alternatives: I used 7% MF sour cream for this recipe. If sour cream is unavailable, plain full-fat Greek yogurt (not flavored) can be a suitable substitute for a similar consistency and tang.
- Peppermint Extract: This essential ingredient is typically found in the baking aisle alongside vanilla extract. Adjust the quantity to achieve your desired intensity.
- Eggs and Yolks: You will need a total of 5 eggs for this recipe: 3 whole large eggs, plus the yolks from 2 additional large eggs (discard the whites). The extra yolks add richness and help create a denser, creamier texture.
- Chocolate Choice for Ganache: For the ganache, semi-sweet or dark chocolate (around 50-65% cocoa content) works best to balance the peppermint flavor. While finely chopped chocolate bars are preferred for a smoother ganache, good quality chocolate chips can also be used.
- Make-Ahead and Storage Instructions:
- Make Ahead: This cheesecake requires significant chilling time, making it an ideal make-ahead dessert. You can bake the cheesecake and prepare the ganache 1-2 days in advance. Store the covered cheesecake in the fridge. Apply the ganache a few hours before serving. Remember to only add the crushed candy canes just before presentation to maintain their crispness and vibrant look.
- Storage: Store any leftover peppermint cheesecake covered tightly in an airtight container or with plastic wrap in the refrigerator for up to 4 days. Freezing instructions are provided in the FAQ section above.
Nutrition
Carbohydrates: 55g,
Protein: 9g,
Fat: 46g,
Saturated Fat: 25g,
Polyunsaturated Fat: 3g,
Monounsaturated Fat: 14g,
Trans Fat: 0.2g,
Cholesterol: 175mg,
Sodium: 325mg,
Potassium: 285mg,
Fiber: 2g,
Sugar: 41g,
Vitamin A: 1349IU,
Vitamin C: 0.3mg,
Calcium: 111mg,
Iron: 5mg
More Festive Peppermint Desserts You’ll Love
If you’re enchanted by the refreshing taste of peppermint, here are a few other delightful recipes to add to your holiday baking repertoire:
- Candy Cane Brownies: Fudgy, rich brownies topped with a swirl of peppermint frosting and crushed candy canes.
- Peppermint Candy Cane Cupcakes: Light and fluffy chocolate cupcakes with a creamy peppermint buttercream, perfect for individual servings.
- Candy Cane White Chocolate Chip Cookies: Chewy cookies packed with white chocolate chips and festive candy cane pieces, a holiday classic.
This candy cane cheesecake is truly a culinary masterpiece: creamy, intensely peppermint-y, and utterly irresistible with its delightful Oreo cookie crust and sophisticated chocolate ganache topping. It’s not merely a dessert; it’s a celebration of holiday flavors and textures, designed to impress and delight. Every guest will fall head over heels for its velvety smooth texture and exquisite creamy peppermint flavor. Make it this holiday season and create lasting sweet memories!