
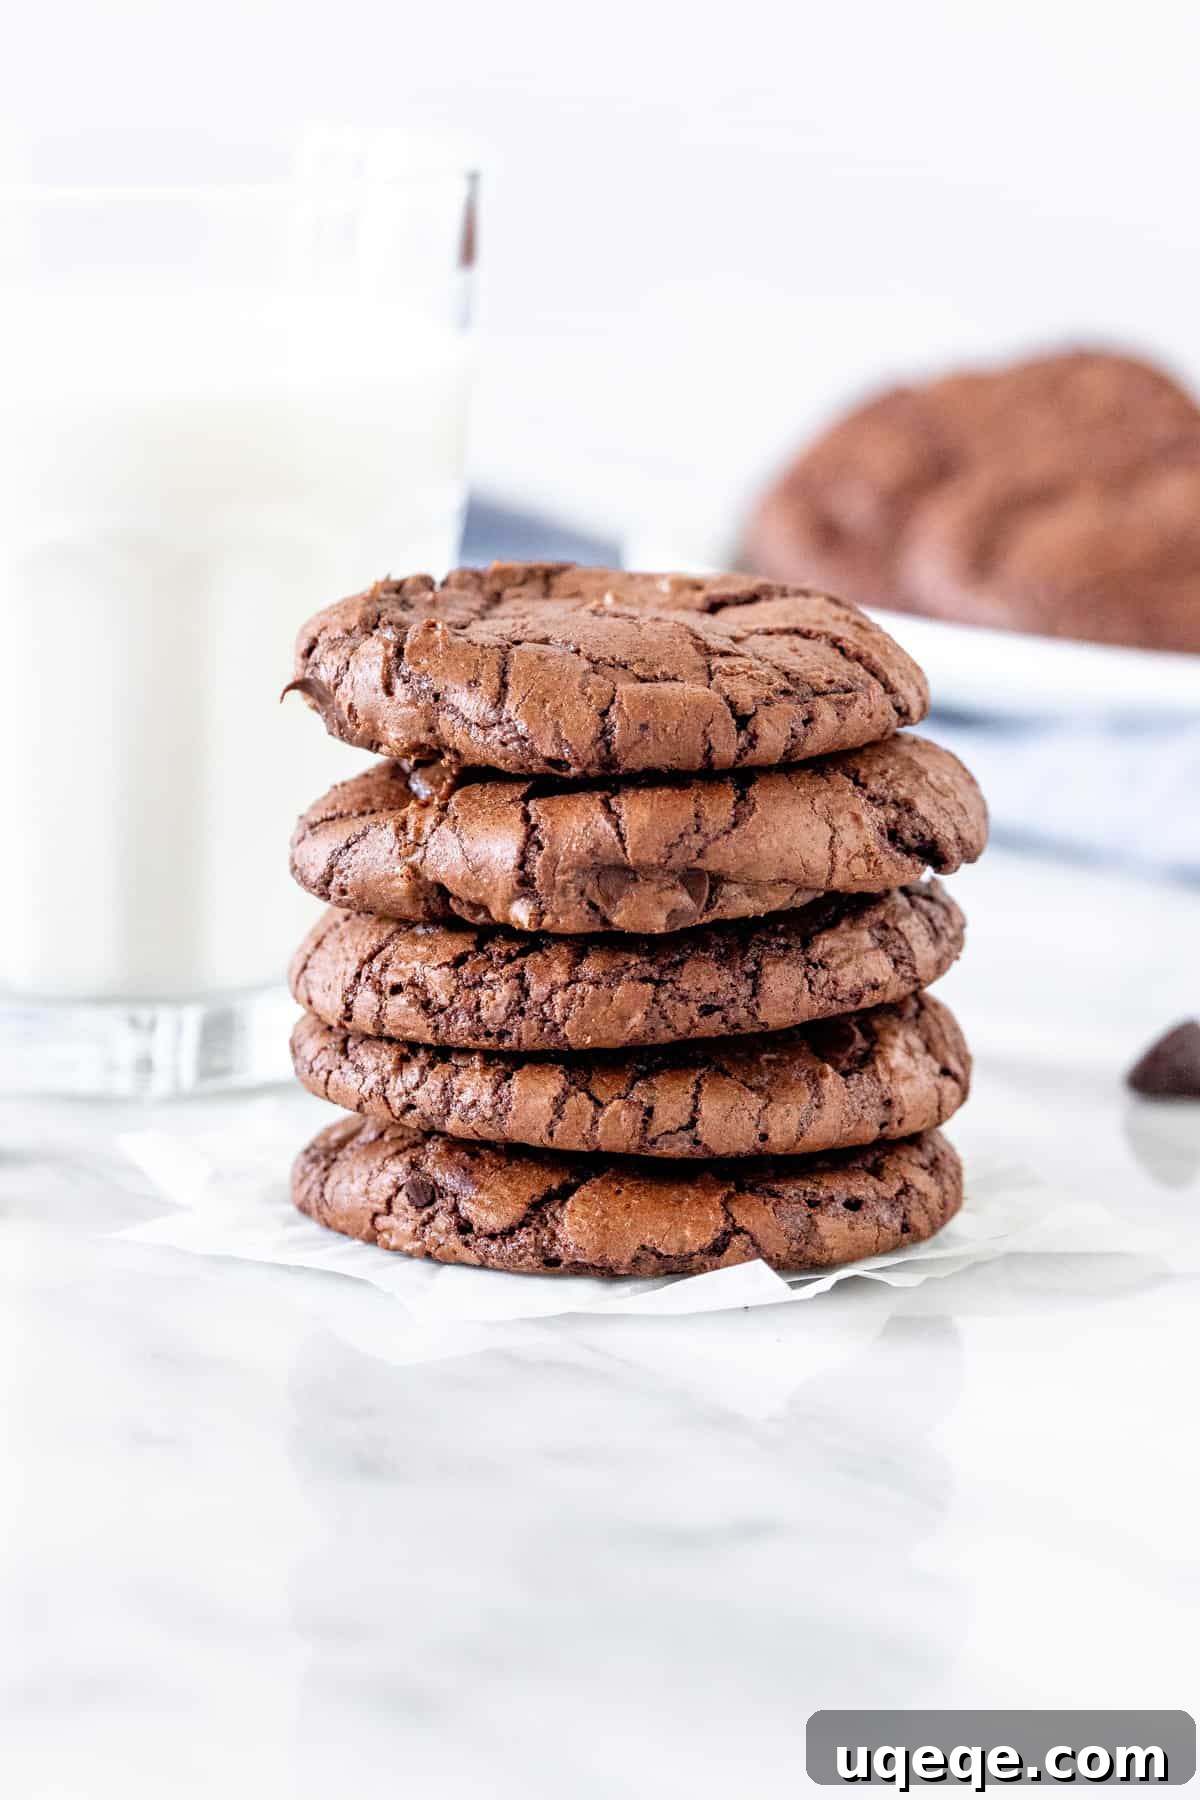
Imagine your favorite fudgy, intensely chocolatey brownie, perfectly miniaturized into a portable, bite-sized cookie. These aren’t just ordinary chocolate cookies; they are a true celebration of all things brownie – capturing the rich flavor, decadent chewiness, and signature crinkly tops that brownie lovers adore. Each cookie offers a blissful journey into chocolate heaven, making them an irresistible treat for any occasion, from casual snacking to elegant dessert platters.
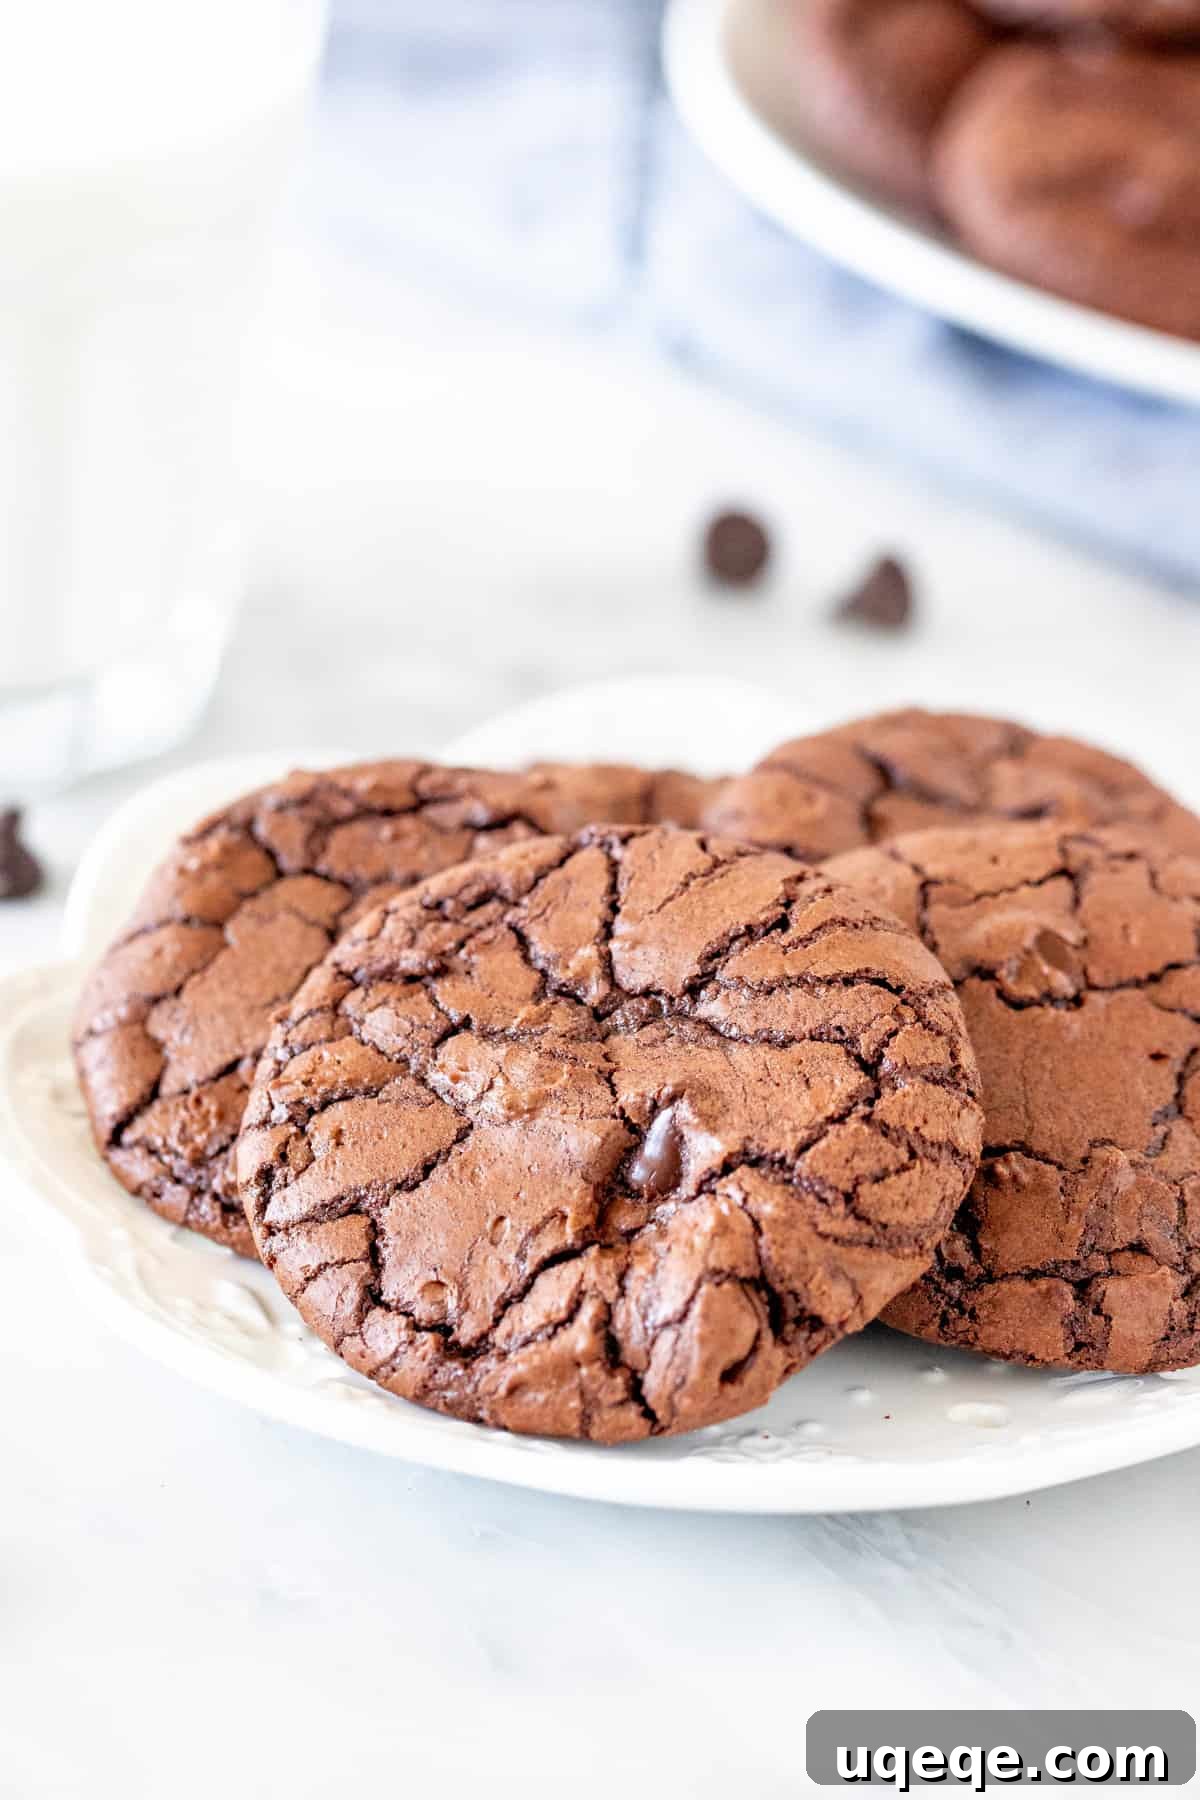
The Ultimate Fudgy Brownie Cookies
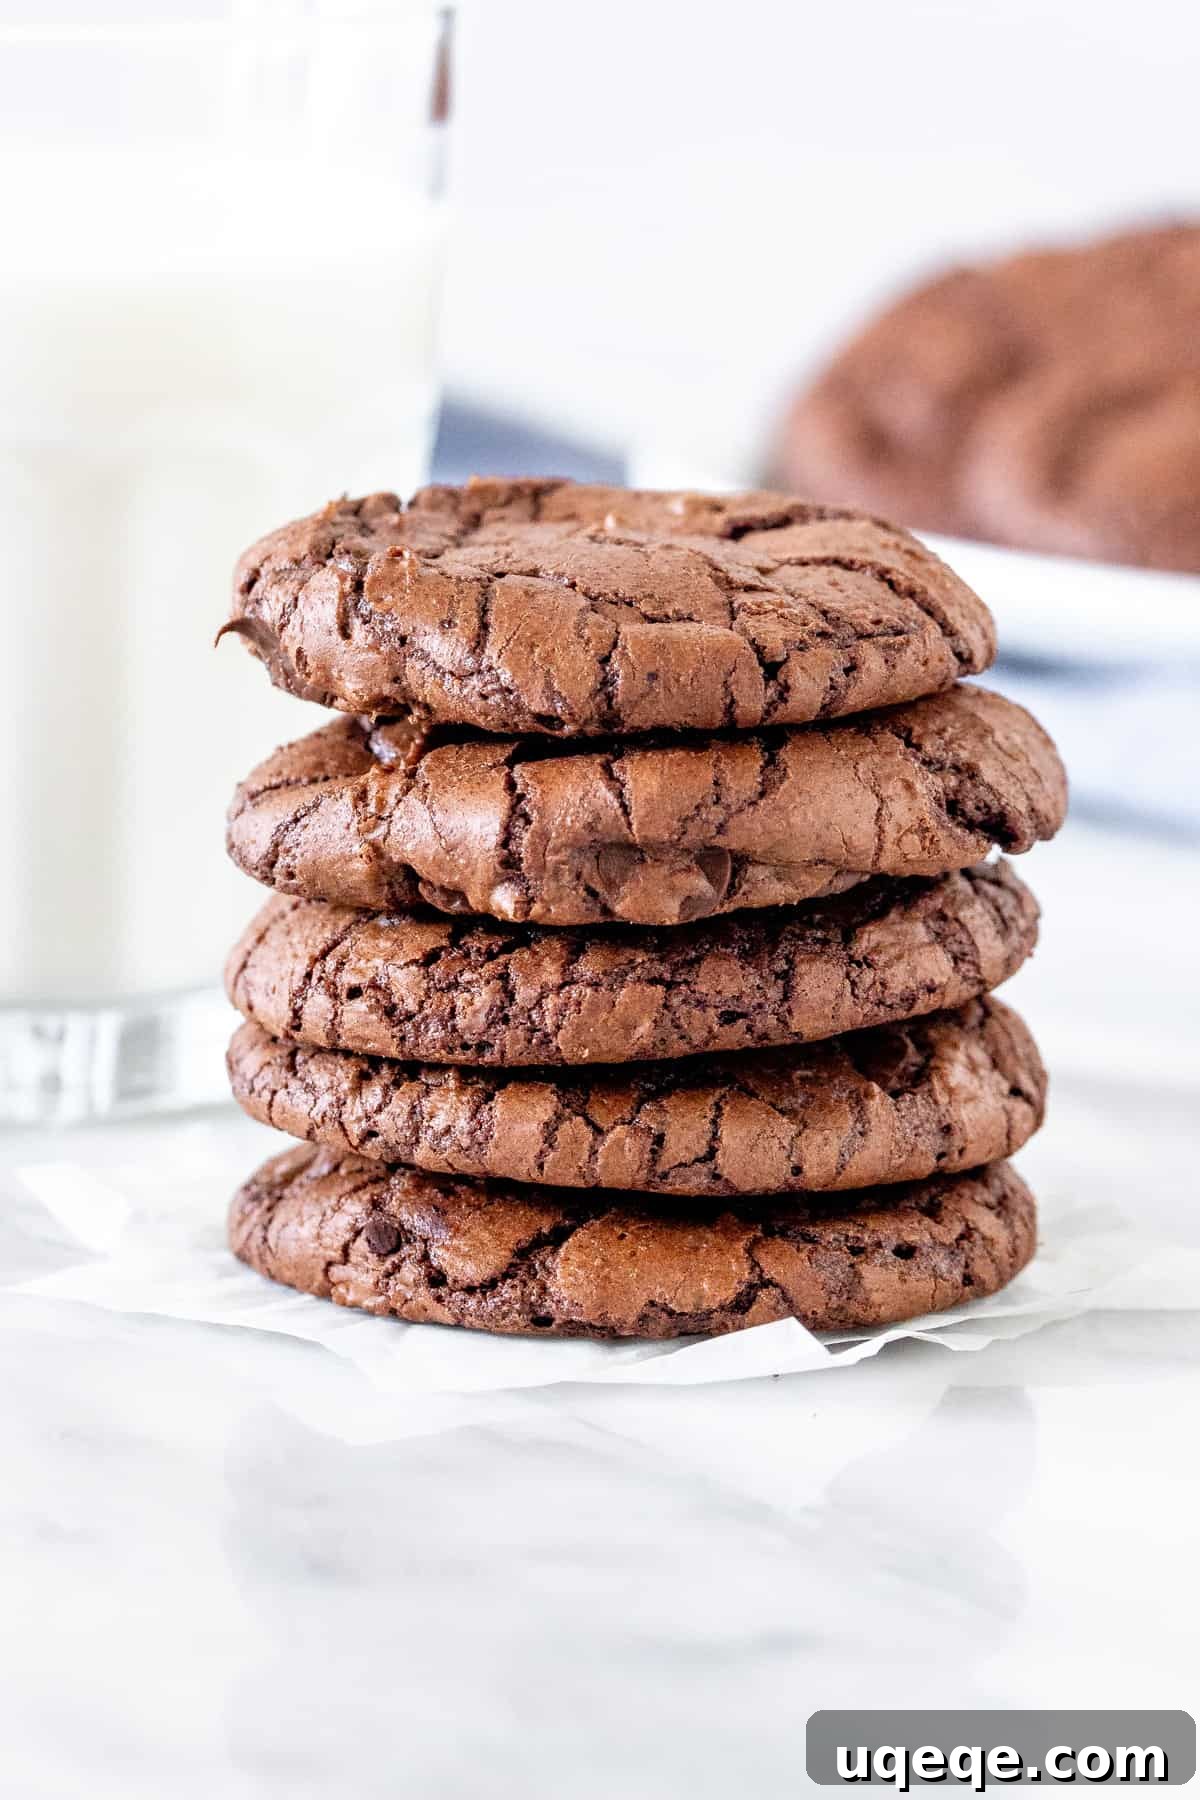
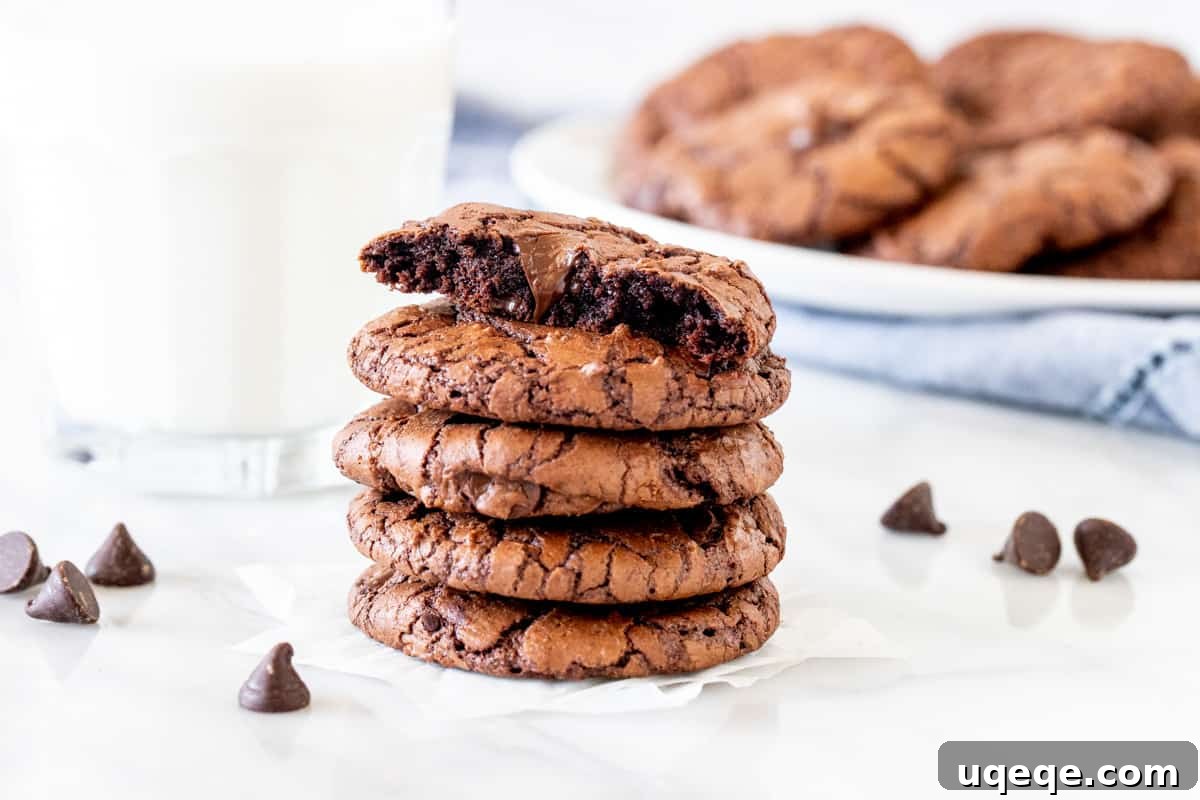
For those who find themselves constantly caught between the satisfying chewiness of a classic cookie and the deep, rich indulgence of a fudgy brownie, these brownie cookies offer the absolute best of both worlds. They promise an extraordinary, complex chocolate flavor, a feat achieved by masterfully combining both high-quality melted dark chocolate and unsweetened cocoa powder directly into the batter. The resulting texture is nothing short of perfection: intensely fudgy and exquisitely moist on the inside, with a delightful, satisfying chew that gives way to that distinctive, delicate, and beautifully crinkled crust – the undisputed hallmark of a truly exceptional brownie.
Forget the disappointment of dry, cakey imitations. Our meticulously crafted recipe delivers an authentic, mouth-watering brownie experience, ingeniously transformed into a convenient, perfectly portioned, handheld format. Whether you consider yourself a seasoned baking enthusiast or are just beginning your culinary adventures, you’ll be genuinely amazed at how easily you can create these show-stopping treats. They are guaranteed to impress every palate and quickly become a cherished favorite in your recipe repertoire.
The Quest for the Perfect Brownie Cookie Texture: Achieving Fudginess and Structure
Crafting a brownie cookie that genuinely tastes like a deep, rich brownie, yet maintains the structural integrity of a traditional cookie, is a delicate and often challenging balancing act in the world of baking. If you’ve ever experimented with baking traditional fudge brownies versus classic chocolate cookies, you’ll immediately recognize that brownie batter is typically thinner, more fluid, and possesses a characteristic glossy sheen. This fundamental difference primarily stems from the varying proportions of flour and other dry ingredients relative to the fat content, such as butter or oil. Brownies, by their very nature, contain significantly less flour, which is the precise reason they achieve their signature fudgy, dense, and moist texture, rather than a light, airy, or cake-like crumb.
My primary culinary objective for this recipe was twofold: to flawlessly replicate that luscious, melt-in-your-mouth brownie interior, while simultaneously ensuring that the cookies wouldn’t succumb to the heat and spread into a formless, unappealing puddle on the baking sheet. The key to successfully achieving this delicate balance lies in two critical factors: minimizing the flour content as much as possible, and harnessing the unique properties of melted chocolate. Simply reducing flour, however, is not a complete solution; the dough still requires a robust structural component to bind all the ingredients together and enable it to maintain its distinct cookie shape throughout the baking process.
This is precisely where the magic of melted dark chocolate truly shines through. Beyond its indisputable and profound contribution to a rich, deep, and complex chocolate flavor, the melted chocolate acts as an exceptional natural binder. Its inherent fats and cocoa solids work in harmony to effectively solidify the dough as it cools and bakes. This provides the essential structure required to prevent excessive spreading, all without necessitating the addition of excess flour. The inclusion of too much flour would invariably lead to a drier, more cakey, and ultimately less desirable cookie, detracting from the intended fudgy outcome. This careful and considered ingredient ratio ensures that each and every bite delivers the authentic dense, moist, and wonderfully chewy characteristics of a classic brownie, all while being encased in a sturdy, delightful, and perfectly formed cookie that you can easily hold and savor. It’s a testament to a deep understanding of ingredient roles and how their precise interactions culminate in the creation of this truly perfect hybrid treat.
Essential Ingredients for Irresistible Brownie Cookies: A Closer Look
The selection and quality of the ingredients you incorporate into this recipe will significantly influence the final taste, texture, and overall success of your brownie cookies. Here’s a detailed look at each key component and its vital role:
- All-Purpose Flour: For paramount accuracy in baking, always employ the “spoon and level” method when measuring your all-purpose flour. This technique involves lightly spooning the flour into a dry measuring cup until overflowing, then leveling off the excess with a straight edge. Scooping flour directly with the measuring cup can compact it, leading to an overabundance of flour, which in turn results in dry, disappointingly cakey cookies. Conversely, using too little flour could cause the cookies to spread excessively and lose their shape. Our recipe intentionally maintains a low flour content to guarantee that sought-after fudgy outcome.
- Unsweetened Cocoa Powder: This ingredient is crucial for imparting a profound depth of chocolate flavor that beautifully complements the melted chocolate. For a darker hue and a smoother, less bitter chocolate taste, consider using Dutch-processed cocoa powder. It interacts differently with baking powder, so be mindful of that if making substitutions in other recipes, but it works perfectly here.
- Baking Powder: A carefully measured touch of baking powder is included to provide a slight lift to the cookies, preventing them from becoming overly dense and contributing to the delicate formation of those signature crinkly tops. It helps create a tender crumb without making them cakey.
- Salt: Often underestimated, salt is a critically important ingredient. It acts as a flavor enhancer, balancing the inherent sweetness of the cookies and brilliantly intensifying all the magnificent chocolate flavors. Under no circumstances should you omit this vital component!
- Unsalted Butter: Melting the butter alongside the chocolate is a deliberate step that aids in creating a perfectly cohesive, smooth, and glossy batter. Using unsalted butter grants you precise control over the overall saltiness of your recipe, allowing you to adjust it to your preference.
- Dark Chocolate (50-70% Cocoa Solids): This ingredient is absolutely paramount for achieving the rich, intense, and deeply satisfying chocolate flavor that defines these brownie cookies. I wholeheartedly recommend opting for a high-quality dark chocolate bar (ideally around 70% cocoa) to ensure the very best results. While semi-sweet chocolate (typically 40-50% cocoa) can be used for a slightly milder flavor profile, it’s advisable to steer clear of bittersweet chocolate (often 100% cocoa solids) as its strong bitterness can overpower the other flavors and potentially lead to a drier cookie. Finely chopping the chocolate before melting is essential; it ensures even and smooth melting, preventing any burnt or seized bits.
- Large Eggs: Eggs play a multifaceted role in these cookies, contributing significantly to both their structure and luxurious richness. The specific technique of beating them vigorously with granulated sugar is absolutely vital for cultivating those beautiful, delicate crinkly tops. Eggs also emulsify the fats and liquids, creating a stable batter.
- Granulated Sugar: Beyond merely providing sweetness, granulated sugar is a critical player in developing the unique texture and captivating appearance of these brownie cookies. When beaten vigorously with the eggs, the sugar dissolves and, crucially, forms a stable emulsion that effectively traps air. This combination of aeration and fully dissolved sugar creates a delicate, glassy, meringue-like layer on the surface of the cookies during baking, which then bakes into the highly coveted crinkly crust.
- Chocolate Chips: While technically optional, incorporating chocolate chips is a highly recommended addition for creating delightful pockets of gooey, melty chocolate throughout the cookies. Both dark and semi-sweet chocolate chips work wonderfully, adding another layer of texture and intensified chocolate flavor.
Baking Mastery: Tips and Cookie Science for Perfect Crinkly-Top Brownie Cookies
While the full recipe card below provides a concise summary, truly mastering these brownie cookies comes from understanding the ‘why’ behind each step. Delving into the cookie science ensures you achieve exceptional results every time. Here’s an expanded, detailed guide to baking perfection:
- Precision Preparation for Success: Always begin by preheating your oven precisely to 350°F (175°C). An accurately preheated oven is crucial for even baking and consistent results. Simultaneously, line two large baking sheets with either parchment paper or high-quality silicone baking mats. This preparatory step is absolutely critical, as it not only prevents the notoriously sticky brownie cookies from adhering to the pan but also ensures their easy and intact removal once baked. Skipping this small step can lead to significant frustration during cleanup and potentially damage your perfectly fudgy creations.
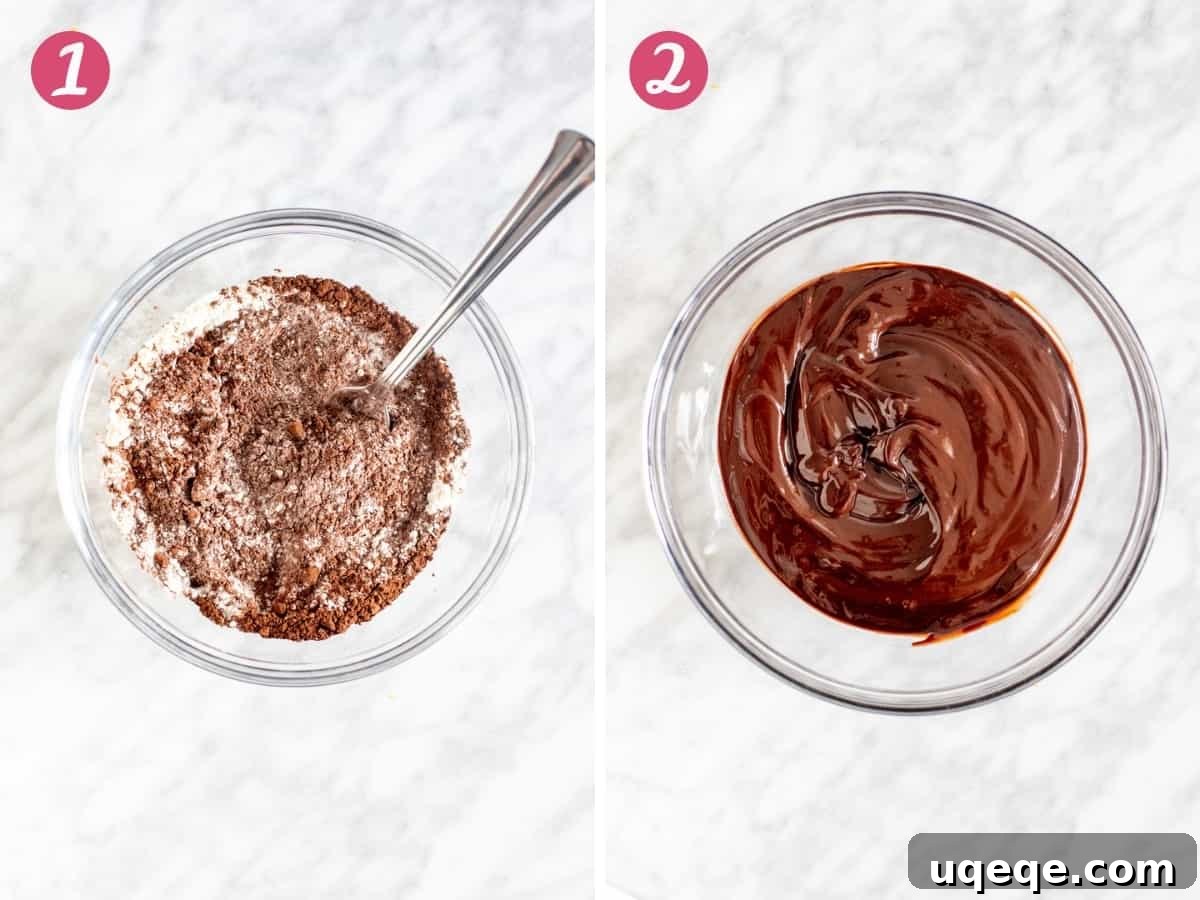
- The Art of Whisking Dry Ingredients: In a medium-sized bowl, meticulously combine your all-purpose flour (remembering the essential spoon and level method for accuracy!), unsweetened cocoa powder, baking powder, and a precise quarter teaspoon of salt. Whisking these dry ingredients together thoroughly serves a vital purpose: it ensures that they are evenly distributed throughout the mixture, effectively eliminating any potential lumps of baking powder or concentrated pockets of unmixed cocoa. This uniformity is fundamental for guaranteeing consistent flavor, proper leavening, and an ideal texture in every single cookie.
- Melting Chocolate and Butter with Precision: Begin by finely chopping your chosen dark chocolate. For optimal flavor and texture, aim for a chocolate with 50-70% cocoa solids; 70% offers a particularly deep and rich profile without any unwanted bitterness. Place the finely chopped chocolate and the pre-sliced unsalted butter into a heatproof bowl. Gently melt this mixture using a microwave in short bursts (e.g., 30-45 seconds at a time) on medium power, ensuring you stir thoroughly after each interval until the mixture is completely smooth, luscious, and glossy. Alternatively, you can opt for the classic double boiler method for a more controlled melt. The paramount rule here is to melt the chocolate gently and slowly, vigilantly avoiding any scorching, which can cause the chocolate to seize and ruin the entire mixture’s texture and flavor. This beautifully melted chocolate-butter blend forms the rich, foundational base of our extraordinary brownie cookies.
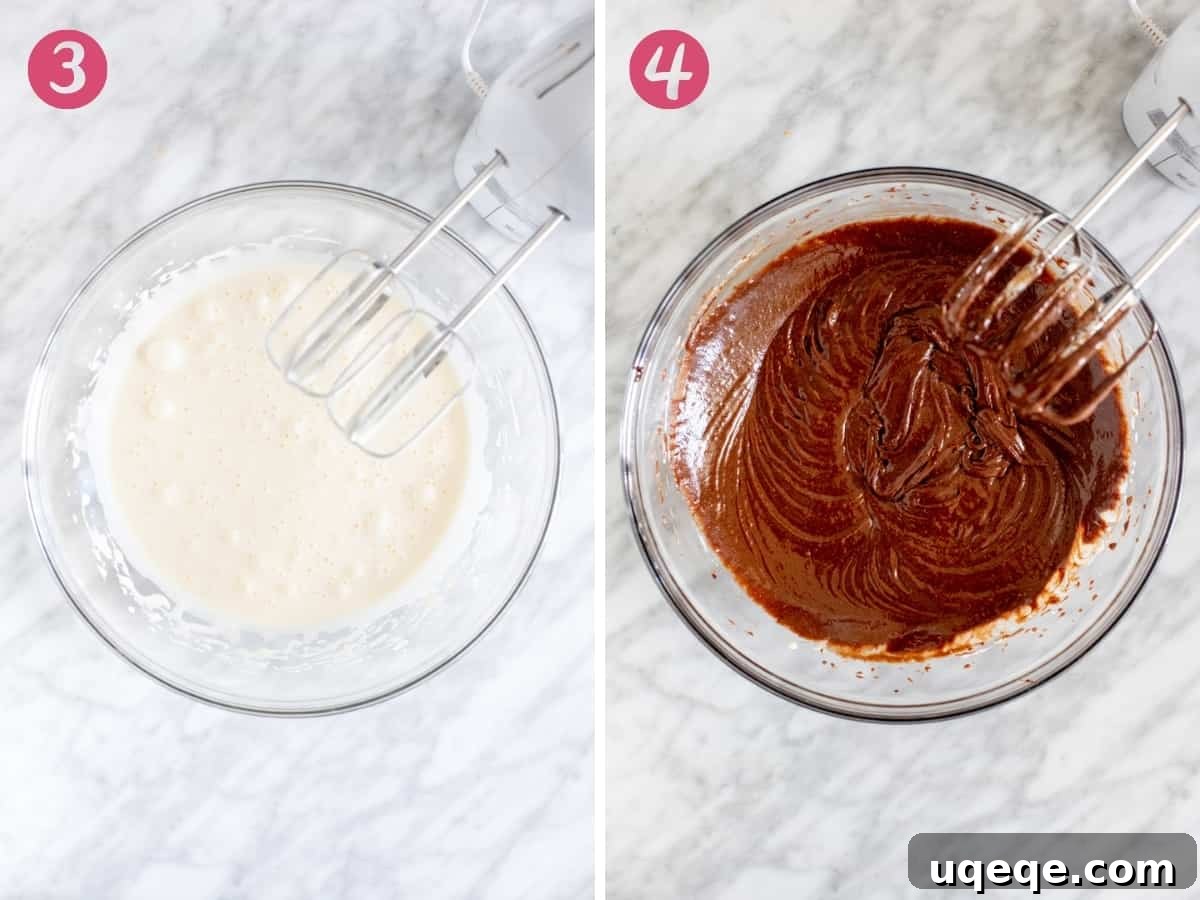
- Mastering the Eggs and Sugar for the Ultimate Crinkly Tops: In a separate, larger mixing bowl, combine the large eggs and granulated sugar. This particular step is, arguably, the single most critical element for successfully achieving those visually stunning, shiny, and beautifully crinkled tops – a hallmark that is instantly reminiscent of a truly classic brownie. Utilizing an electric mixer (either a handheld model or a powerful stand mixer fitted with a whisk attachment), beat the eggs and sugar on a medium-high speed for a sustained period of 1-2 minutes. Your objective is to observe the mixture transforming; it should become noticeably pale in color, significantly thicken in consistency, and, most importantly, form a distinct “ribbon” when the whisk or beater is lifted (meaning the batter falls back into the bowl in a slow, continuous stream that briefly holds its shape on the surface before gently dissolving). This vigorous aeration, combined with the complete dissolution of the sugar crystals, creates a highly stable, meringue-like layer that, during the baking process, develops into the delicate, glassy, and signature crinkled crust.
- The Gentle Integration of Wet Ingredients: Once your egg and sugar mixture has reached its optimal pale and thick “ribbon” stage, gently pour the slightly cooled (but still fluid) melted chocolate and butter mixture into it. Mix on a low speed, or carefully fold with a spatula, until the two mixtures are just combined and have achieved a uniform, glossy color. While overmixing at this specific stage isn’t typically a major concern, ensuring everything is well integrated is key to maintaining the rich, consistent texture of the final cookie.
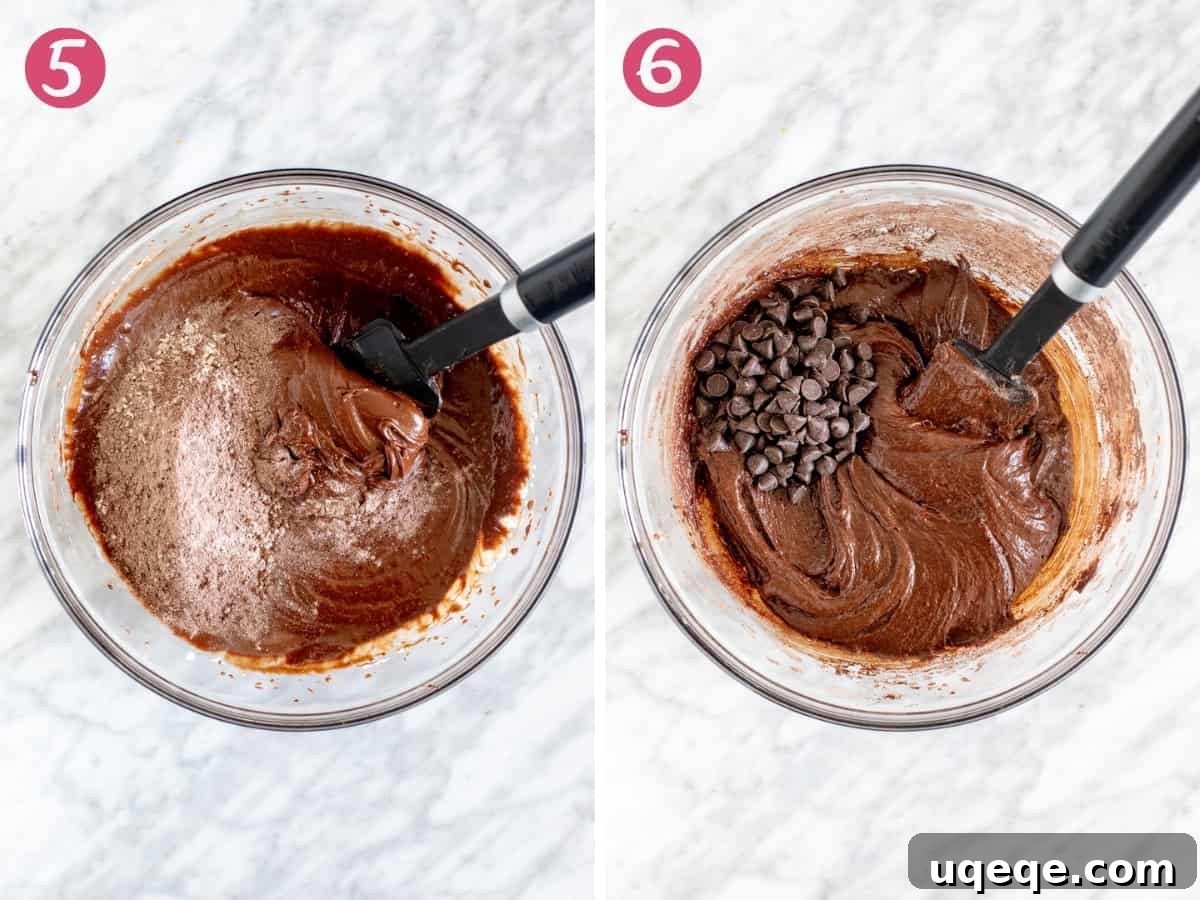
- Incorporating Dry Ingredients with a Light Touch: Now, add the previously whisked dry ingredients to your vibrant, glossy wet mixture. Stir *gently* with a sturdy spatula, or mix on the absolute lowest speed of your electric mixer, until the ingredients are *just* combined and you no longer see prominent streaks of dry flour. A few faint streaks are perfectly acceptable at this juncture. It is absolutely crucial to exercise extreme caution against overmixing, as excessive agitation will rapidly develop the gluten in the flour, resulting in a tougher, less tender, and ultimately less fudgy cookie texture – precisely what we aim to avoid. The resulting batter, at this stage, will be characteristically thick, brilliantly glossy, and undeniably sticky – rest assured, this is precisely the perfect consistency you are striving for to achieve truly fudgy brownie cookies.
- The Final Flourish: Folding in Chocolate Chips: Once your main batter is perfectly mixed, gently fold in your chosen chocolate chips. Whether you opt for dark or semi-sweet varieties, they will both complement the intense brownie flavor beautifully. This addition provides an extra layer of delightful chocolatey goodness and introduces a varied texture, creating pockets of soft, melted chocolate within the fudgy cookie.
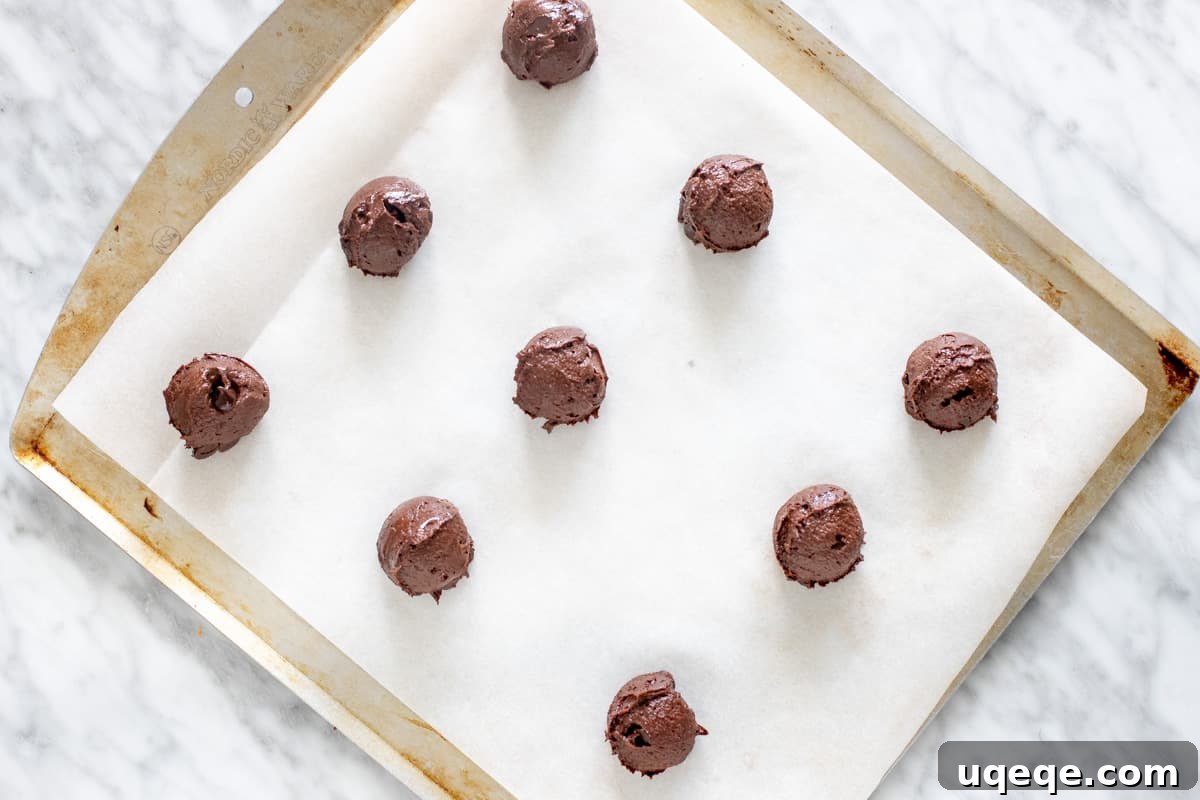
- Mastering the Scoop and Spacing: Given the exceptionally sticky nature of this brownie cookie dough, utilizing a cookie scoop (with an approximate capacity of 1 to 1.5 tablespoons) is highly, highly recommended. For the smoothest operation and to prevent the dough from stubbornly clinging, lightly spray your scoop with a non-stick cooking spray before use. Drop rounded mounds of dough onto your prepared baking sheets, ensuring that each dough ball is spaced approximately 2 inches apart. This generous spacing is vital; it allows for proper air circulation and even heat distribution during baking, preventing the cookies from melding together into one giant, uneven mass. This recipe typically yields around 32 perfectly sized cookies, each slightly smaller than a golf ball.
- Baking to Fudgy Perfection: Place one cookie sheet at a time onto the middle rack of your preheated oven. Baking time will typically range between 9-11 minutes. The cookies are perfectly done when their edges appear visibly set, their tops possess a distinct, slightly shiny appearance, and those beautiful, delicate crinkles have gracefully formed across the entire surface. It’s important to note that the very centers of the cookies might still appear slightly soft or gooey; this is absolutely normal and desirable, as they will continue to firm up beautifully as they cool. Critically, avoid the temptation to overbake, as doing so will inevitably lead to a drier, more cake-like texture, sacrificing the desired fudginess. Keep a very close eye on them during the final minutes of baking.
- The Essential Cooling Process: Once triumphantly removed from the oven, resist the urge to immediately move them. Allow the cookies to cool undisturbed on the baking sheet for a crucial period of at least 5-10 minutes. This vital cooling time on the hot sheet allows them to gently firm up and set, preventing them from breaking apart when handled. After this initial cooling, carefully transfer them to a wire rack using a thin, flexible metal spatula to cool completely. Cooling on a wire rack ensures proper air circulation around all sides of the cookie, preventing the bottoms from becoming soggy and promoting an even, stable texture.
Troubleshooting Common Brownie Cookie Issues (and How to Fix Them)
Even the most experienced bakers can occasionally encounter minor hiccups. Here are some solutions to common brownie cookie problems, empowering you to bake with confidence:
- My cookies spread too much! This common issue can stem from several factors: your oven temperature might be running too low (an oven thermometer is a baker’s best friend!), the dough could have been too warm before baking (a quick 15-20 minute chill in the refrigerator can often resolve this), or you might have inaccurately measured the flour (too little) or butter (too much). Ensuring your oven is accurately calibrated and your ingredients are precisely measured is key.
- My cookies are dry and cakey. The most frequent culprit behind dry, cakey cookies is overbaking. Vigilantly monitor the baking time and remove them from the oven when the edges are just set and those signature crinkles have formed. Remember, the centers will continue to set as they cool. Other contributing factors can include using too much flour, or inadvertently reducing the fat content (e.g., opting for low-fat butter or significantly less chocolate).
- I didn’t get crinkly tops! This usually indicates that the eggs and granulated sugar were not beaten together sufficiently. The mixture *must* be beaten until it is noticeably pale, thick, and forms a slow-dissolving “ribbon” when the beaters are lifted. The powerful combination of aeration and fully dissolved sugar is absolutely fundamental for achieving that distinctive, delicate crinkled texture.
- The cookies taste too bitter. If your cookies have an unexpectedly bitter taste, review your chocolate choice. This can occur if you’ve used a very high percentage dark chocolate (e.g., 85% cocoa or more) or added too much unsweetened cocoa powder without a corresponding balance of sugar. It’s best to stick to the recommended 50-70% dark chocolate range for optimal flavor balance.
Storage and Freezing Brownie Cookies for Lasting Freshness
Proper storage techniques are paramount to preserving the delectable fudginess and freshness of your homemade brownie cookies for an extended period. Once baked, it is absolutely essential to allow the cookies to cool completely on a wire rack before attempting to store them. This crucial step prevents any condensation from forming within the storage container, which could otherwise lead to soggy, unappetizing cookies.
- Room Temperature Storage: For immediate enjoyment, store your fully cooled brownie cookies in an airtight container at room temperature. They will retain their peak freshness and fudgy texture for up to 5 days. If you need to stack multiple layers of cookies, intersperse them with sheets of parchment paper to prevent them from sticking together.
- Freezing Baked Brownie Cookies: These exceptional cookies freeze remarkably well, making them ideal for meal prepping or simply having a decadent treat on hand! Once they are completely cooled, arrange the cookies in a single layer on a baking sheet and “flash freeze” them for approximately one hour, or until they are solid. This prevents them from sticking together when stored in bulk. Once solid, transfer the cookies to a freezer-safe airtight container or a heavy-duty freezer bag. Again, separating layers with wax paper is a good practice. They can be confidently frozen for up to 2 months without significant loss of quality. To thaw, simply transfer the frozen cookies to the refrigerator overnight, or allow them to come to room temperature for a few hours. For a quick warm treat, you can even microwave them for 10-15 seconds.
- Freezing Cookie Dough (Not Recommended): Unlike many conventional drop cookie doughs, the unique consistency of this brownie cookie dough – characterized by its high fat and low flour content – makes it exceptionally sticky. Consequently, freezing the raw dough balls is generally not recommended for this specific recipe. Doing so can significantly alter the baked texture and make the dough considerably harder to work with after thawing. For the very best results and to preserve the intended fudgy texture, it’s advisable to stick to freezing the *baked* and cooled cookies.
Variations to Elevate Your Brownie Cookies Beyond the Classic
While these fudgy, intensely chocolatey brownie cookies are truly perfect in their classic form, they also serve as an incredibly versatile and forgiving canvas for an array of creative additions and flavor enhancements. Don’t hesitate to experiment and make them your own!
- Nutty Crunch: For those who appreciate a delightful textural contrast and an earthy undertone, fold in about 1/2 cup of finely chopped walnuts or pecans along with your chocolate chips. The nuts add a satisfying crunch that beautifully complements the fudgy interior.
- Flaky Sea Salt Perfection: Elevate the gourmet appeal and enhance the chocolate’s complexity by sprinkling a delicate pinch of flaky sea salt (such as Maldon) on top of each cookie dough ball just before they go into the oven. The subtle saltiness provides a brilliant counterpoint to the sweetness.
- Espresso Powder Boost: To truly intensify and deepen the rich chocolate flavor without making the cookies taste distinctly like coffee, add 1 teaspoon of instant espresso powder or fine coffee grounds to the dry ingredients. It’s a secret baker’s trick for making chocolate taste “more chocolatey.”
- Diverse Chocolate Explorations: Don’t limit yourself to just one type of chocolate chip! Experiment with different varieties of chocolate chips or even chopped chocolate chunks – white chocolate, milk chocolate, or a vibrant mix of all three for a multi-layered chocolate experience.
- Minty Fresh Twist: For a refreshing holiday-inspired treat, incorporate 1/2 teaspoon of pure peppermint extract into the wet ingredients alongside the vanilla extract (if using, or add a touch).
- Spicy Kick: A tiny pinch of cayenne pepper (1/8 to 1/4 teaspoon) added to the dry ingredients can introduce a subtle, warming heat that beautifully complements dark chocolate, creating a Mexican hot chocolate-inspired cookie.
- Dried Fruit Infusion: For a chewy, fruity counterpoint, fold in 1/2 cup of dried cherries, cranberries, or even chopped dried figs. Their tanginess pairs wonderfully with the rich chocolate.
More Chocolatey Treats to Love From Our Kitchen
If you’ve utterly fallen in love with these fudgy, chewy, and exquisitely moist brownie cookies, complete with their captivating crinkly tops, then you are definitely in for a treat! Our kitchen is brimming with even more delightful chocolate-centric recipes that promise to satisfy every craving. Explore these other beloved creations:
- Triple Chocolate Fudge Brownies: Prepare for the ultimate decadent brownie experience, meticulously packed with three distinct kinds of rich chocolate for an unparalleled depth of flavor.
- Cookie Dough Brownies: This incredible creation features a super fudgy brownie base generously topped with a luscious, irresistible layer of edible chocolate chip cookie dough – truly a dessert dream come true!
- Flourless Brownies: Discover these intensely rich, wonderfully dense, and naturally gluten-free brownies that are so incredibly satisfying, you won’t miss the flour one bit.
- Soft Batch Double Chocolate Cookies: For those moments when you simply crave the timeless comfort of a classic, soft, and delightfully chewy double chocolate chip cookie, this recipe delivers perfection.
Brownie Cookies Recipe
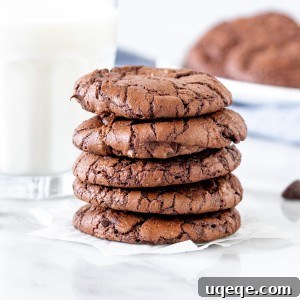
Brownie Cookies
Cook: 9-11 mins
Total: ~45 mins
Servings: 32 cookies
Equipment
- Cookie Sheets
- Parchment Paper or Silicone Baking Mats
- Mixing Bowls (medium and large)
- Whisk
- Electric Mixer (handheld or stand mixer)
- Cookie Scoop (1 to 1.5 tablespoon capacity)
- Metal Spatula
- Wire Rack
Ingredients
- 1/2 cup (62.5 grams) all-purpose flour, spooned & leveled
- 1/4 cup (20 grams) unsweetened cocoa powder
- 1 teaspoon baking powder
- 1/4 teaspoon salt
- 1/2 cup (112 grams) unsalted butter, sliced into 6-8 pieces
- 8 ounces (226 grams) dark chocolate, 50-70% cocoa, finely chopped
- 2 large eggs
- 1 1/4 cup (250 grams) granulated sugar
- 1/2 cup chocolate chips (dark or semi-sweet)
Instructions
- Preheat the oven to 350°F (175°C). Line two large cookie sheets with parchment paper or silicone baking mats.
- In a medium bowl, whisk together the flour, cocoa powder, baking powder, and salt until there are no lumps. Set aside.
- In a heatproof bowl, combine the finely chopped dark chocolate and sliced butter. Microwave on medium power in 30-45 second intervals, stirring thoroughly after each, until the mixture is smooth and glossy. Be careful not to overheat. Set aside to cool slightly.
- In a large bowl, using an electric mixer, beat the eggs and granulated sugar on medium-high speed for 1-2 minutes until the mixture is very pale, thick, and forms a slow-dissolving ribbon when the beaters are lifted.
- Pour the slightly cooled melted chocolate and butter mixture into the egg mixture. Mix on low speed until just combined and uniformly colored, about 30 seconds.
- Gradually add the whisked dry ingredients to the wet mixture. Mix on low speed, or gently fold with a spatula, until just combined and no streaks of flour remain. Be careful not to overmix. The batter will be thick, glossy, and sticky.
- Fold in the chocolate chips until evenly distributed.
- Lightly spray a cookie scoop (1-1.5 tablespoon capacity) or a regular tablespoon with non-stick cooking spray. Scoop out mounds of dough and drop them onto the prepared baking sheets, ensuring they are about 2 inches apart.
- Bake one cookie sheet at a time on the middle rack for 9-11 minutes, or until the edges are set, the tops are shiny, and have developed crinkles. The centers may still appear slightly soft.
- Allow the cookies to cool on the baking sheet for 5-10 minutes to firm up before carefully transferring them to a wire rack to cool completely.
Notes
- Flour Measurement: For accurate results, always whisk your flour before spooning it into a dry measuring cup and leveling off the top. Scooping directly with the measuring cup can pack too much flour, leading to dry cookies.
- Chocolate Choice: For a deep, rich flavor, 70% dark chocolate is ideal. You can use any dark chocolate between 50-70%. Semi-sweet chocolate (around 40-50% cocoa) can be used for a milder flavor, but avoid bittersweet (100% cocoa solids) as it can make the cookies too dry and bitter.
- Storage: Store fully cooled cookies in an airtight container at room temperature for up to 5 days. For longer storage, freeze baked and cooled cookies in an airtight container or freezer bag for up to 2 months. Thaw in the refrigerator or at room temperature.
- Freezing Dough: Due to the sticky nature and specific consistency of this brownie cookie dough, freezing raw dough balls is not recommended as it may negatively impact the baked texture.
- Nutrition Information: The provided nutrition data is an estimate based on 1 cookie, assuming a yield of 32 equally sized cookies. This can vary based on specific ingredients and portion sizes.
Nutrition (per cookie, estimated)
Carbohydrates: 15 g
Protein: 1 g
Fat: 7 g
Saturated Fat: 4 g
Polyunsaturated Fat: 1 g
Monounsaturated Fat: 2 g
Trans Fat: 1 g
Cholesterol: 20 mg
Sodium: 27 mg
Potassium: 81 mg
Fiber: 1 g
Sugar: 11 g
Vitamin A: 115 IU
Vitamin C: 1 mg
Calcium: 18 mg
Iron: 1 mg