
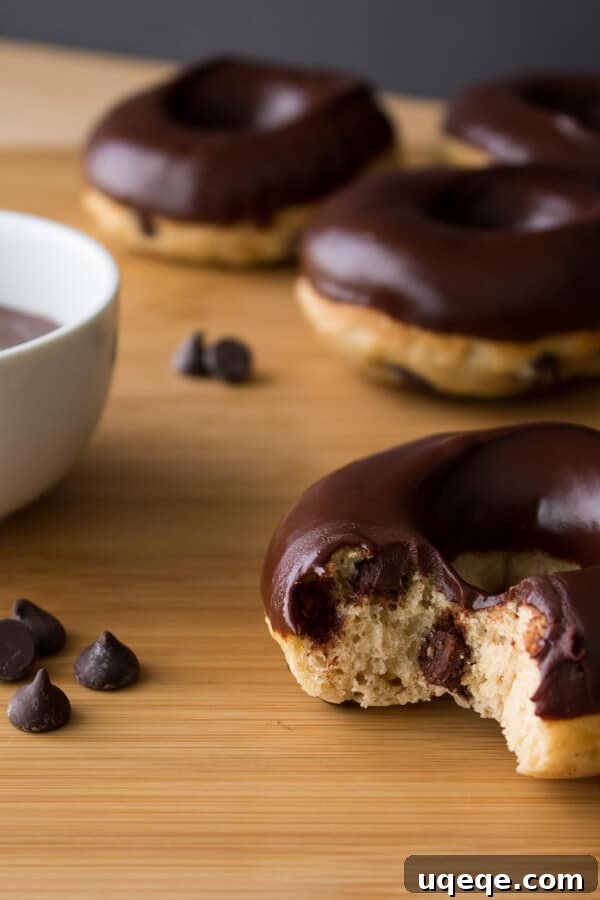
Irresistible Baked Chocolate Chip Doughnuts with Silky Chocolate Glaze
Prepare to fall in love with these delightful chocolate chip doughnuts, baked to perfection and generously coated in a rich chocolate glaze. It’s the ultimate combination of chocolate chips and fluffy cake doughnuts – a treat that never disappoints!
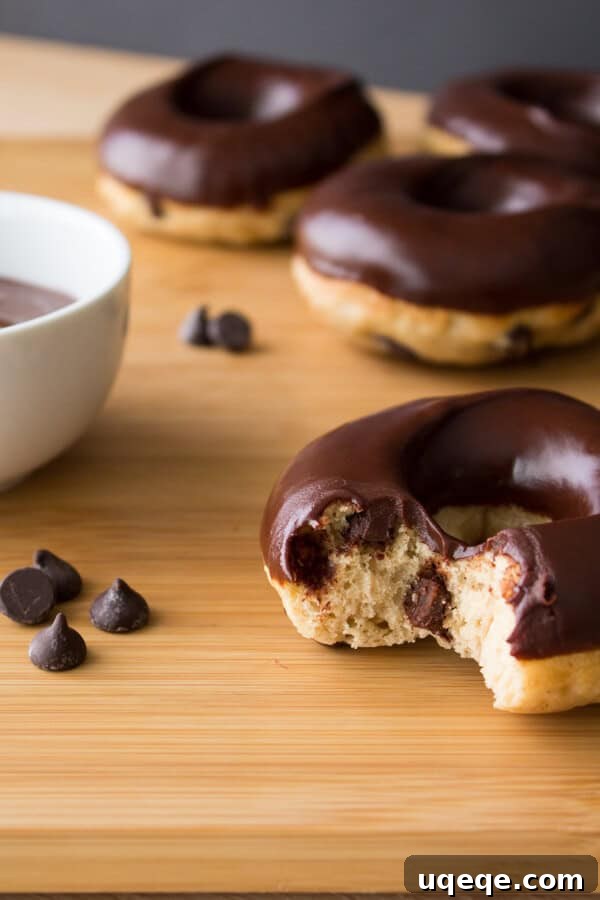
The Sweet Inspiration Behind These Baked Beauties
There’s something uniquely satisfying about a spontaneous shopping trip, especially when it leads to unexpected culinary adventures. Just last Saturday, a casual outing turned into a delightful discovery: bakeware was on sale! The universe, it seemed, was whispering sweet nothings of flour and sugar into my ear. Naturally, I couldn’t resist. Two new spring-form pans (more on those later!) and, most importantly, a second doughnut pan found their way into my basket. The kitchen gods were truly smiling, and I knew exactly what I had to do.
Staring at my new doughnut pan, my mind immediately drifted to possibilities. A quick rummage through the pantry revealed a bag of trusty chocolate chips. And then, the idea sparked: Chocolate Chip Doughnuts. Was it a widely recognized thing? Perhaps not as common as their muffin counterparts, but the concept felt undeniably right. After all, chocolate chip muffins are a universally adored classic. And who can ever turn down a tender, flavorful cake doughnut? Combining the best of both worlds felt like a stroke of genius. Thus, the mission was clear: these Baked Chocolate Chip Doughnuts were about to become a very delicious “thing” in my kitchen, and soon, hopefully, in yours too!
What truly sets these chocolate chip doughnuts apart is their incredible flavor and texture. Imagine the comfort of a warm chocolate chip muffin, but with the distinct, light, and airy crumb of a perfectly baked cake doughnut. They offer a delightful contrast of melt-in-your-mouth cake and pockets of gooey chocolate, all elevated by the irresistible allure of a glossy chocolate glaze. Plus, they come together remarkably faster than most muffin recipes, making them an ideal choice for a quick breakfast treat or a last-minute dessert.
Why You’ll Love Baked Doughnuts: A Healthier, Easier Indulgence
While classic fried doughnuts hold a special place in our hearts, baked doughnuts offer a fantastic alternative that’s both easier to make and often preferred for a lighter texture. There’s no hot oil to contend with, which means less mess in your kitchen and a significantly quicker cleanup process. This recipe capitalizes on the simplicity of using a doughnut pan to create perfectly shaped, uniformly baked doughnuts every single time. It’s a method that promises tender, fluffy results without the extra calories or heavy feeling that can sometimes accompany their fried counterparts. For those who appreciate the convenience of home baking and a slightly healthier indulgence, these baked chocolate chip doughnuts are a game-changer. They provide all the joy and deliciousness of a traditional doughnut with a fraction of the fuss.
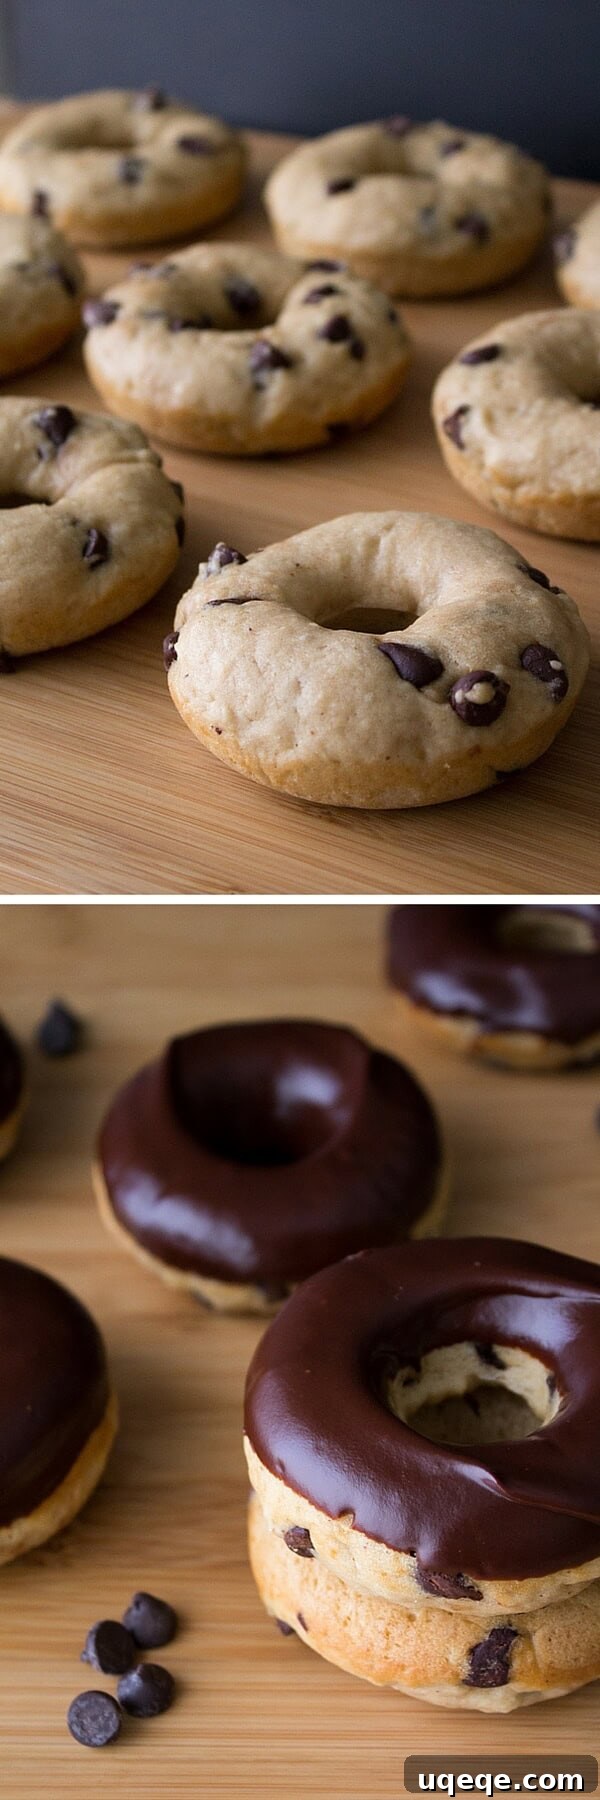
The Secret to Perfectly Flavorful Doughnuts: Key Ingredients Explained
Crafting truly exceptional chocolate chip doughnuts hinges on a few crucial ingredients that elevate them from good to absolutely incredible. Each component plays a vital role in achieving that coveted bakery-style taste and texture. Let’s delve into what makes these doughnuts so special:
- Melted Unsalted Butter: Unlike many doughnut recipes that opt for oil, this recipe specifically calls for melted unsalted butter. This isn’t just a casual choice; it’s a foundational decision for flavor. Since the doughnut base is a delightful vanilla, the rich, nutty notes of melted butter permeate every bite, imparting a depth of flavor that oil simply cannot replicate. It contributes to a moist crumb and a more luxurious overall taste, making your doughnuts taste like they came from a gourmet bakery. Using unsalted butter gives you control over the salt content in the recipe.
- The Magic of Nutmeg: If there’s one ingredient you absolutely shouldn’t skip, it’s nutmeg. You might associate spices mainly with gingerbread or pumpkin pie, but a small touch of freshly grated (or high-quality ground) nutmeg is the unsung hero of classic doughnut flavor. It doesn’t make the doughnuts taste like a “spice cake”; instead, it provides that warm, subtly aromatic background note that is instantly recognizable as quintessential bakery-style doughnut goodness. This humble spice truly makes all the difference, giving your homemade doughnuts an authentic, irresistible aroma and taste.
- Buttermilk for Tender Crumb: For an incredibly soft, tender, and moist crumb, buttermilk is indispensable. Its natural acidity reacts with the baking soda, creating a light and airy texture while also tenderizing the batter. This interaction is key to achieving that desirable fluffy doughnut consistency. If you don’t have buttermilk on hand, don’t fret! You can easily make your own by adding 1 teaspoon of white vinegar or lemon juice to 6 tablespoons of regular milk and letting it sit for 5 minutes until it slightly curdles. This quick DIY substitute works wonders.
- Balancing Sweetness: Granulated and Brown Sugar: This recipe uses a thoughtful combination of both granulated sugar and brown sugar. Granulated sugar provides crispness and general sweetness, contributing to the delicate crust of the doughnut. Brown sugar, on the other hand, adds a deeper, more complex caramel-like flavor and significantly contributes to the doughnuts’ moisture, ensuring a soft, chewy texture that lasts.
- All-Purpose Flour: The backbone of our doughnut structure. For the best results, remember to measure your flour correctly by spooning it into your measuring cup and leveling it off with a straight edge, rather than scooping directly. Scooping can compact the flour, leading to too much flour in the recipe and resulting in dry, dense doughnuts.
- Baking Powder and Baking Soda: These two leavening agents work in perfect tandem. Baking powder provides the initial lift, giving the doughnuts their fluffy structure. Baking soda specifically reacts with the acidity of the buttermilk, generating carbon dioxide bubbles that further lighten the batter and ensure the doughnuts rise beautifully.
- Large Egg: The egg acts as a crucial binder, holding all the ingredients together. It also adds richness to the batter and contributes significantly to the overall structure and moisture of the doughnuts. For optimal emulsion with other ingredients, ensure your egg is at room temperature.
- Pure Vanilla Extract: A crucial flavor enhancer that complements the butter and nutmeg beautifully, rounding out the overall taste profile and adding a comforting warmth to the doughnuts.
- Quality Chocolate Chips: The star of the show! Whether you prefer semi-sweet, dark, or milk chocolate, the chips melt into delightful pockets of gooey goodness throughout the doughnut. Don’t be shy with them; they add both intense chocolate flavor and a wonderful textural contrast to the soft cake.
The Effortless Process of Baking Your Doughnuts
One of the many joys of making these cake doughnuts is how quickly they come together. The process is straightforward, even for novice bakers, ensuring you’ll have warm, fresh doughnuts in no time. Precision in mixing and filling is key for the best results, but don’t worry – it’s all incredibly manageable!
Step-by-Step Doughnut Batter Preparation:
- Preheat and Prepare Your Pan: Begin by preheating your oven to 350°F (175°C). Lightly spray a standard 6-cavity doughnut pan with non-stick cooking spray, ensuring every crevice is coated to prevent sticking. Set it aside.
- Combine Dry Ingredients: In a large mixing bowl, whisk together the all-purpose flour, granulated sugar, brown sugar, baking powder, baking soda, nutmeg, and salt. Whisking ensures these ingredients are evenly distributed, which is essential for uniform leavening and flavor in your doughnuts.
- Mix Wet Ingredients: In a separate, medium-sized bowl, whisk together the cooled melted butter, large egg (at room temperature), buttermilk (also at room temperature), and pure vanilla extract. Ensure these are well combined to create a smooth, homogenous mixture.
- Combine Wet and Dry: Pour the wet ingredients into the bowl with the dry ingredients. Using a hand whisk, gently mix until just combined. Be careful not to overmix! Overmixing can develop the gluten in the flour too much, leading to tough, dense doughnuts rather than light and airy ones. A few small lumps in the batter are perfectly acceptable and often indicate that you haven’t overmixed.
- Fold in Chocolate Chips: Once the batter is nearly combined, gently fold in the chocolate chips using a large rubber spatula or a wooden spoon. Distribute them evenly throughout the batter, ensuring every bite will have a delightful burst of chocolate.
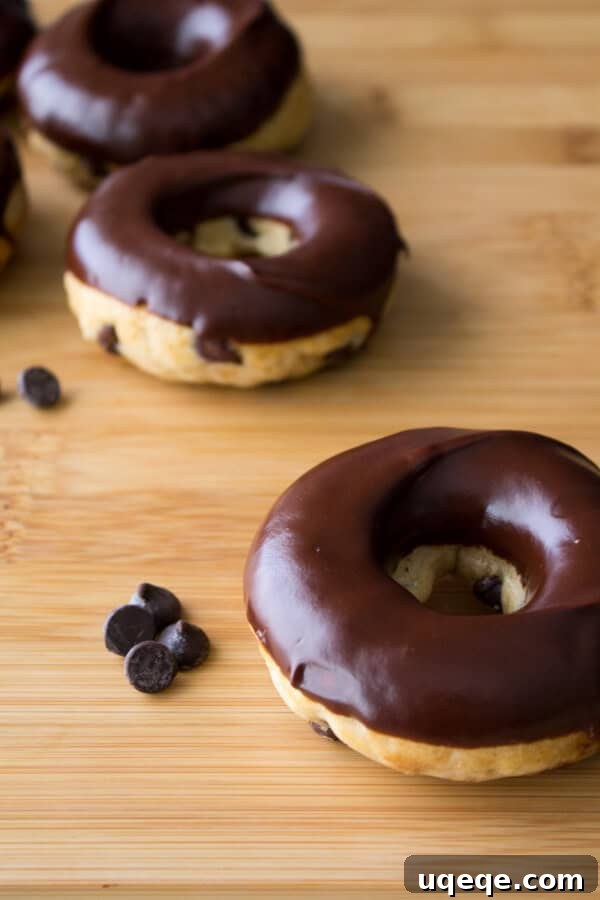
Filling the Doughnut Pan: The Ziplock Bag Trick for Perfect Shapes
Getting the batter neatly into the doughnut pan can sometimes be a little tricky, leading to uneven shapes or messy edges. However, I have a favorite method that guarantees uniform, perfectly shaped doughnuts every time: the ziplock bag technique. It’s simple, effective, and keeps cleanup to a minimum.
- Prepare Your Bag: Take a large, sturdy ziplock bag (gallon-sized works well) and carefully spoon all of your prepared doughnut batter into it. Press out any excess air and securely seal the bag closed.
- Snip the Corner: Using kitchen shears or a sharp knife, carefully cut off one of the bottom corner tips of the bag. You’ll want an opening roughly 1/2 to 3/4 inch wide – wide enough for the chocolate chips to pass through easily, but not so wide that you lose control.
- Pipe into Pan: Hold the bag like a piping bag, twisting the top to create pressure, and gently squeeze the batter into the cavities of your prepared doughnut pan. Fill each cavity to about 2/3 to 3/4 full. This allows ample room for the doughnuts to rise beautifully during baking without overflowing and losing their classic shape.
- Alternative Method: While spooning the batter directly into the pan is an option, the ziplock bag method offers superior control, resulting in beautifully uniform doughnut shapes with minimal mess. It’s a small trick that makes a big difference in the final presentation.
- Bake to Perfection: Place the filled doughnut pan into your preheated oven. Bake for 8-10 minutes, or until the doughnuts lightly spring back when gently touched with your fingertip. Their edges should be faintly golden. Be careful not to overbake, as this can lead to dry doughnuts.
- Cooling Process: Allow the baked doughnuts to cool in their pan for about 10 minutes. This helps them firm up slightly before you attempt to remove them. After 10 minutes, carefully invert the pan onto a wire rack to fully remove the doughnuts and allow them to cool completely. Cooling on a wire rack ensures air circulates around them, preventing sogginess.
The Grand Finale: Decadent Chocolate Glaze
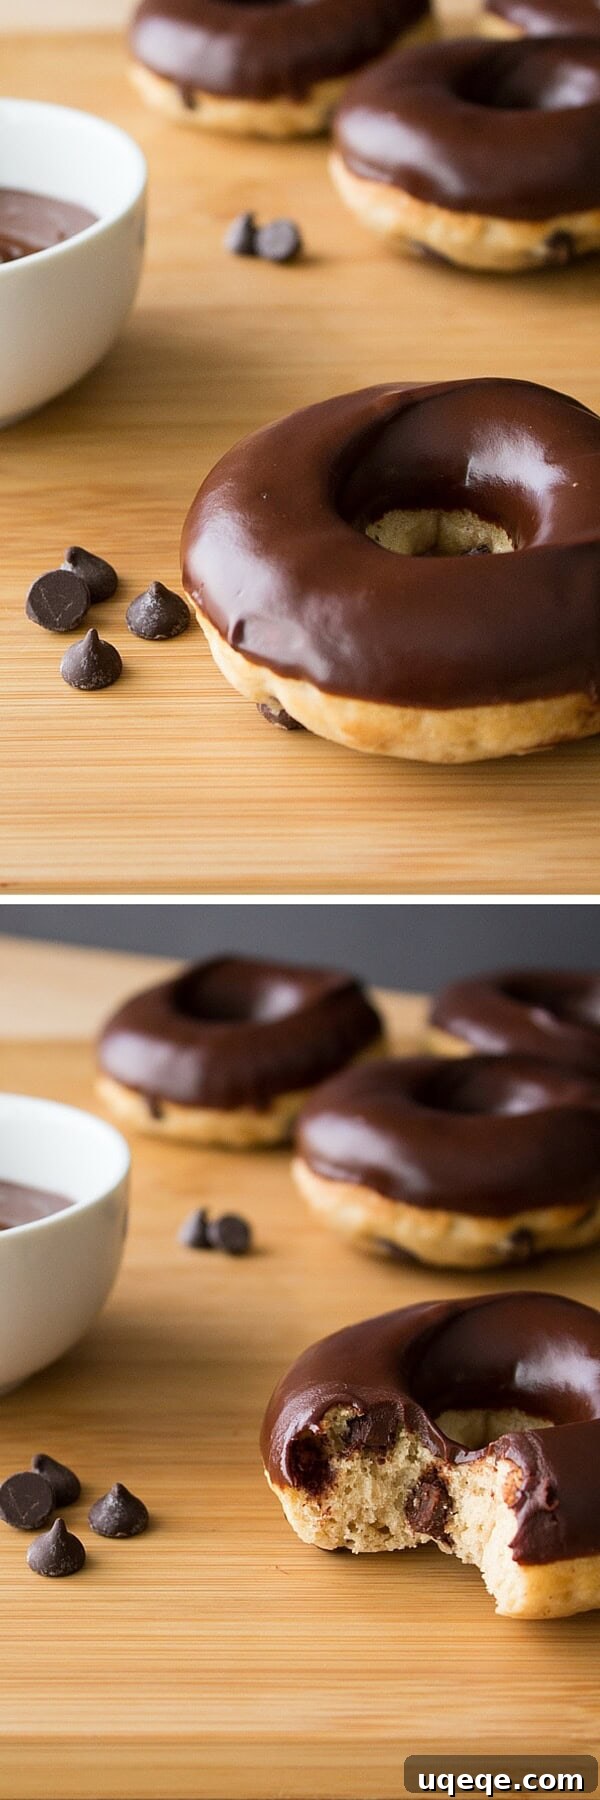
No doughnut is truly complete without a luscious topping, and for these chocolate chip delights, a rich, glossy chocolate glaze is an absolute must. This recipe features a super quick, yet incredibly decadent chocolate ganache glaze that not only adds a burst of intense chocolate flavor but also provides a professional, irresistible finish that will have everyone reaching for more.
Crafting Your Silky Chocolate Glaze:
- Melt Ingredients: In a microwave-safe bowl, combine the chocolate chips (again, your choice of semi-sweet, dark, or milk), whipping cream, and butter. Microwave in short bursts of 20-30 seconds, stirring well after each interval, until the chocolate is fully melted and the mixture is smooth and glossy. For a more gentle and controlled melt, you can alternatively use a double boiler: place the ingredients in a heatproof bowl set over a saucepan of simmering water, stirring until smooth.
- Add Corn Syrup for Shine: Once the chocolate mixture is perfectly smooth and free of lumps, stir in the corn syrup until well combined. This secret ingredient is key to achieving that beautiful, shiny, and smooth consistency that makes the glaze look and feel truly professional, almost like liquid glass.
- Dipping Time: Ensure your freshly baked doughnuts are completely cooled before glazing. Dip the tops of the doughnuts into the warm, luscious chocolate glaze, allowing any excess to drip off gently back into the bowl. For an even thicker layer, you can double-dip after the first layer has slightly set.
- Set and Enjoy: Place the glazed doughnuts back on the wire rack and let the glaze set completely. As it cools, the glaze will firm up slightly, creating a perfect, beautiful shell of chocolatey goodness. This usually takes about 15-30 minutes, depending on the temperature of your kitchen.
The contrast between the soft, cakey doughnut, the delightful bursts of melted chocolate chips within, and the smooth, rich chocolate glaze on top is truly a symphony of textures and flavors. Each bite offers a comforting taste of homemade perfection. Get ready to say hello to your new favorite breakfast, brunch item, or anytime-snack!
Chocolate Chip Doughnuts
By:
Fiona Dowling
Chocolate Chip Doughnuts with Chocolate Glaze. Because with chocolate chips & baked cake doughnuts – you can’t go wrong!
15 mins
10 mins
25 mins
6 doughnuts
Ingredients
For the Doughnuts
- 1 cup all-purpose flour, spooned and leveled
- 3 tablespoons granulated sugar
- 1 tablespoon brown sugar
- 1 teaspoon baking powder
- 1/4 teaspoon baking soda
- 1/8 teaspoon nutmeg
- 1/4 teaspoon salt, to taste
- 2 tablespoons unsalted butter, melted and cooled
- 1 large egg, room temperature
- 6 tablespoons buttermilk, room temperature*
- 1 teaspoon vanilla extract
- 1/4 cup plus 2 tablespoons chocolate chips (semi-sweet, dark or milk)
For the Chocolate Glaze
- 1/2 cup chocolate chips (semi-sweet, dark or milk)
- 1 tablespoon whipping cream
- 2 teaspoons butter
- 1 tablespoon corn syrup
Instructions
Preparation & Baking
- Preheat the oven to 350°F (175°C). Spray a doughnut pan with non-stick cooking spray and set aside.
- In a large bowl, whisk together the dry ingredients (flour, granulated sugar, brown sugar, baking powder, baking soda, nutmeg, and salt) using a hand whisk. In a separate bowl, whisk together the melted butter, egg, buttermilk, and vanilla extract. Pour the wet ingredients into the dry and whisk to combine. Once almost combined, fold in the chocolate chips using a large rubber spatula or wooden spoon.
- Spoon the batter into your doughnut pan until each cavity is 2/3 or 3/4 full. Alternatively, spoon the batter into a large ziplock bag, zip closed the bag, and cut one of the bottom corners off. Use the ziplock bag to pipe the batter into the doughnut cavities for uniform shapes. Bake doughnuts for 8-10 minutes, until they lightly spring back when touched with your fingertip.
- Allow doughnuts to cool in their pan for 10 minutes, then carefully remove them and continue to cool completely on a wire rack.
Making the Glaze & Glazing
- While the doughnuts are cooling, make the chocolate glaze. In a microwave-safe bowl, melt together the chocolate chips, butter, and whipping cream in short 30-second bursts, stirring well after each, until the chocolate is melted and smooth. Alternatively, melt them together over a double boiler. Once the chocolate is melted and smooth, stir in the corn syrup until well combined.
- Dip the tops of the completely cooled doughnuts into the glaze, allowing any excess to drip off. Place the glazed doughnuts on a wire rack and allow the glaze to set before serving.
Notes
*If you don’t have buttermilk, add 1 teaspoon of white vinegar or lemon juice to 6 tablespoons of regular milk and let it sit for 5 minutes until it slightly curdles before using.
Nutrition
Calories: 426kcal per doughnut (estimated)
Serving Suggestions & Storage Tips
These delightful baked chocolate chip doughnuts are incredibly versatile. They make a fantastic addition to a weekend brunch spread, a comforting breakfast on a chilly morning, or an indulgent treat with your afternoon coffee or tea. Serve them slightly warm for the best experience, where the chocolate chips are still a bit gooey and the glaze is perfectly set. Pair them with a tall glass of cold milk, a robust cup of freshly brewed coffee, or even a scoop of vanilla ice cream for a truly decadent dessert experience.
To keep your doughnuts fresh, store them in an airtight container at room temperature for up to 2-3 days. While they are undoubtedly best enjoyed fresh on the day they are baked, they will retain their softness and flavor for a couple of days if stored properly. If you wish to extend their freshness even further, you can store them in the refrigerator, but allow them to come to room temperature or gently warm them in the microwave for a few seconds before serving for optimal taste and texture. They are so delicious, though, that they rarely last long enough to worry about long-term storage!
Get Creative: Doughnut Variations to Explore
This recipe provides a fantastic foundation for experimentation and customization. Once you’ve mastered the basic chocolate chip doughnut, feel free to unleash your inner baker and try some exciting variations to suit your taste or occasion:
- Different Chocolate Types: Experiment with white chocolate chips for a sweeter, creamier flavor, dark chocolate chunks for a more intense cocoa hit, or even a mix of different chocolates for varying flavor profiles in each bite.
- Exciting Add-ins: Fold in a tablespoon of finely chopped nuts like pecans, walnuts, or almonds for added crunch and earthy flavor. A sprinkle of mini marshmallows can create a delightful s’mores-like twist, especially when warmed slightly.
- Alternative Glazes: While the silky chocolate glaze is divine, consider other options. A simple vanilla glaze made with powdered sugar and milk is always a hit. A tangy lemon glaze can offer a refreshing contrast, or a simple toss in cinnamon sugar can evoke classic fried doughnut flavors.
- Festive Sprinkles: For a celebratory or whimsical touch, add some colorful sprinkles over the wet glaze before it sets. This is perfect for birthdays, holidays, or simply brightening up your day.
- Spices: While nutmeg is key, a tiny pinch of cinnamon could also be added to the dry ingredients for an even warmer spice note, though be careful not to overpower the delicate chocolate flavor.
No matter how you choose to customize them, these baked chocolate chip doughnuts are destined to become a beloved staple in your recipe collection. They’re proof that homemade treats are truly the best, offering warmth, flavor, and a touch of joy with every bite. Happy baking!