
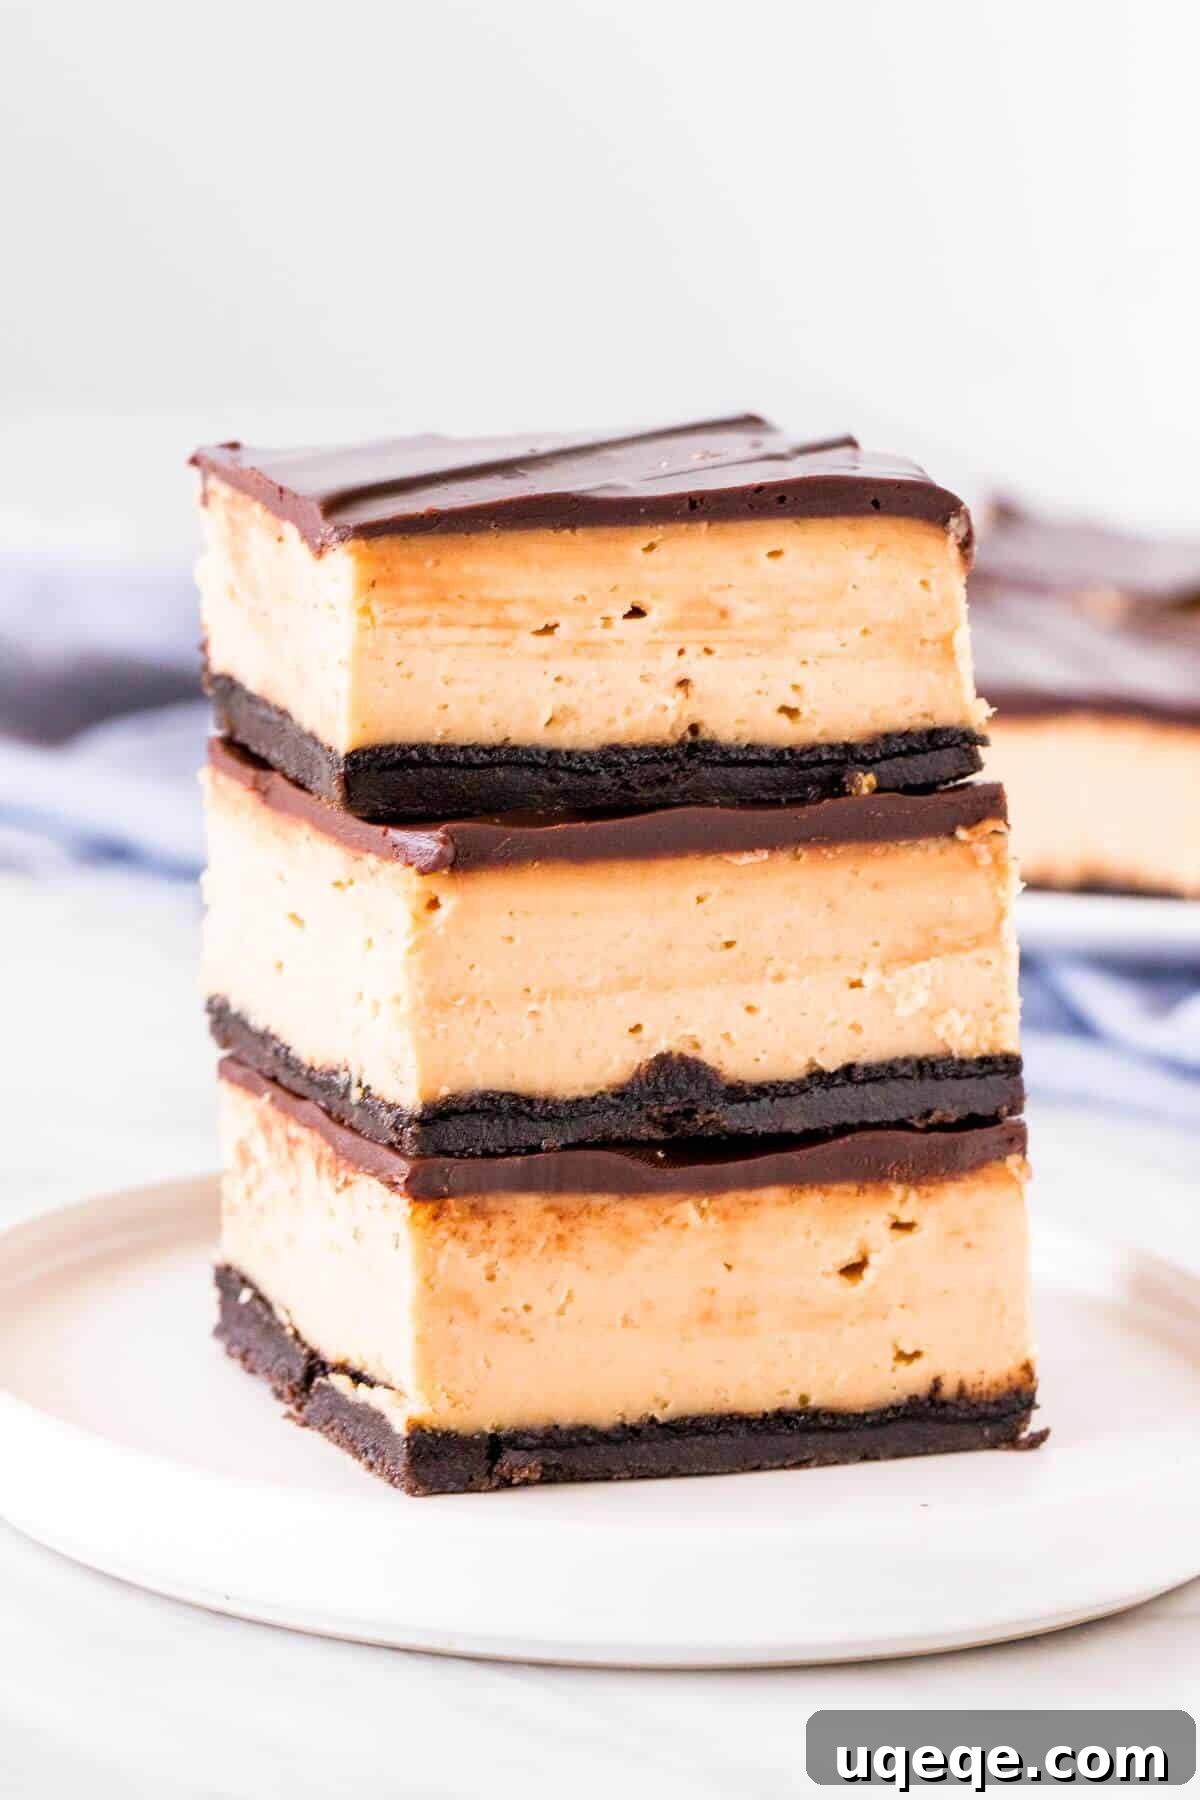
Prepare to be amazed by the **Ultimate Peanut Butter Cheesecake Bars** – a symphony of textures and flavors that will captivate any dessert lover. Imagine a remarkably creamy peanut butter cheesecake filling, perfectly complemented by a satisfyingly crunchy Oreo cookie crust, all crowned with a decadent chocolate ganache topping. This recipe isn’t just a treat; it’s the pinnacle of peanut butter perfection, designed to impress with every bite. We’re about to unveil all the professional tips and tricks to help you bake the most exquisite peanut butter cheesecake possible.
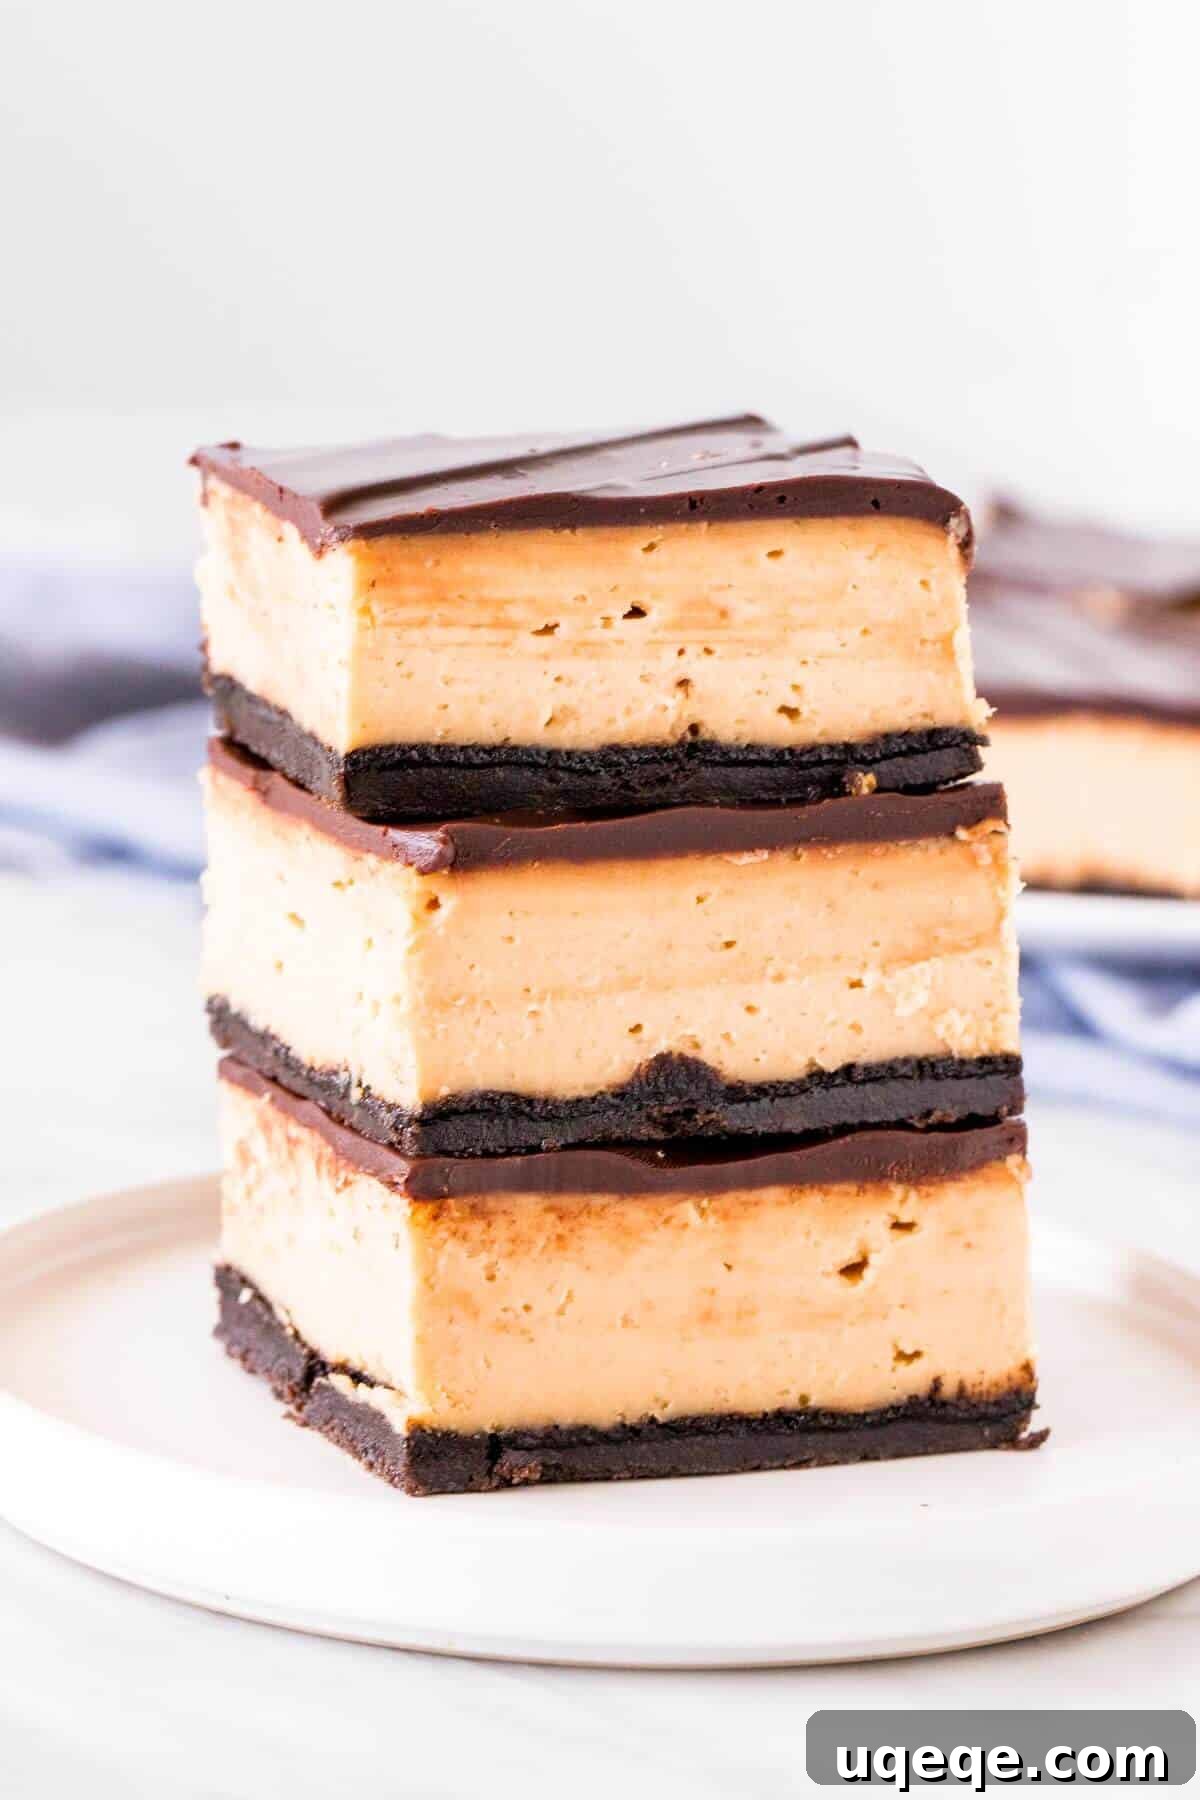
**This recipe was significantly updated on October 25, 2020. The revised version features a new, even creamier cheesecake recipe, enhanced photography, and additional baking tips for an unparalleled dessert experience.**
Indulge in Decadence: The Perfect Peanut Butter Cheesecake Bars
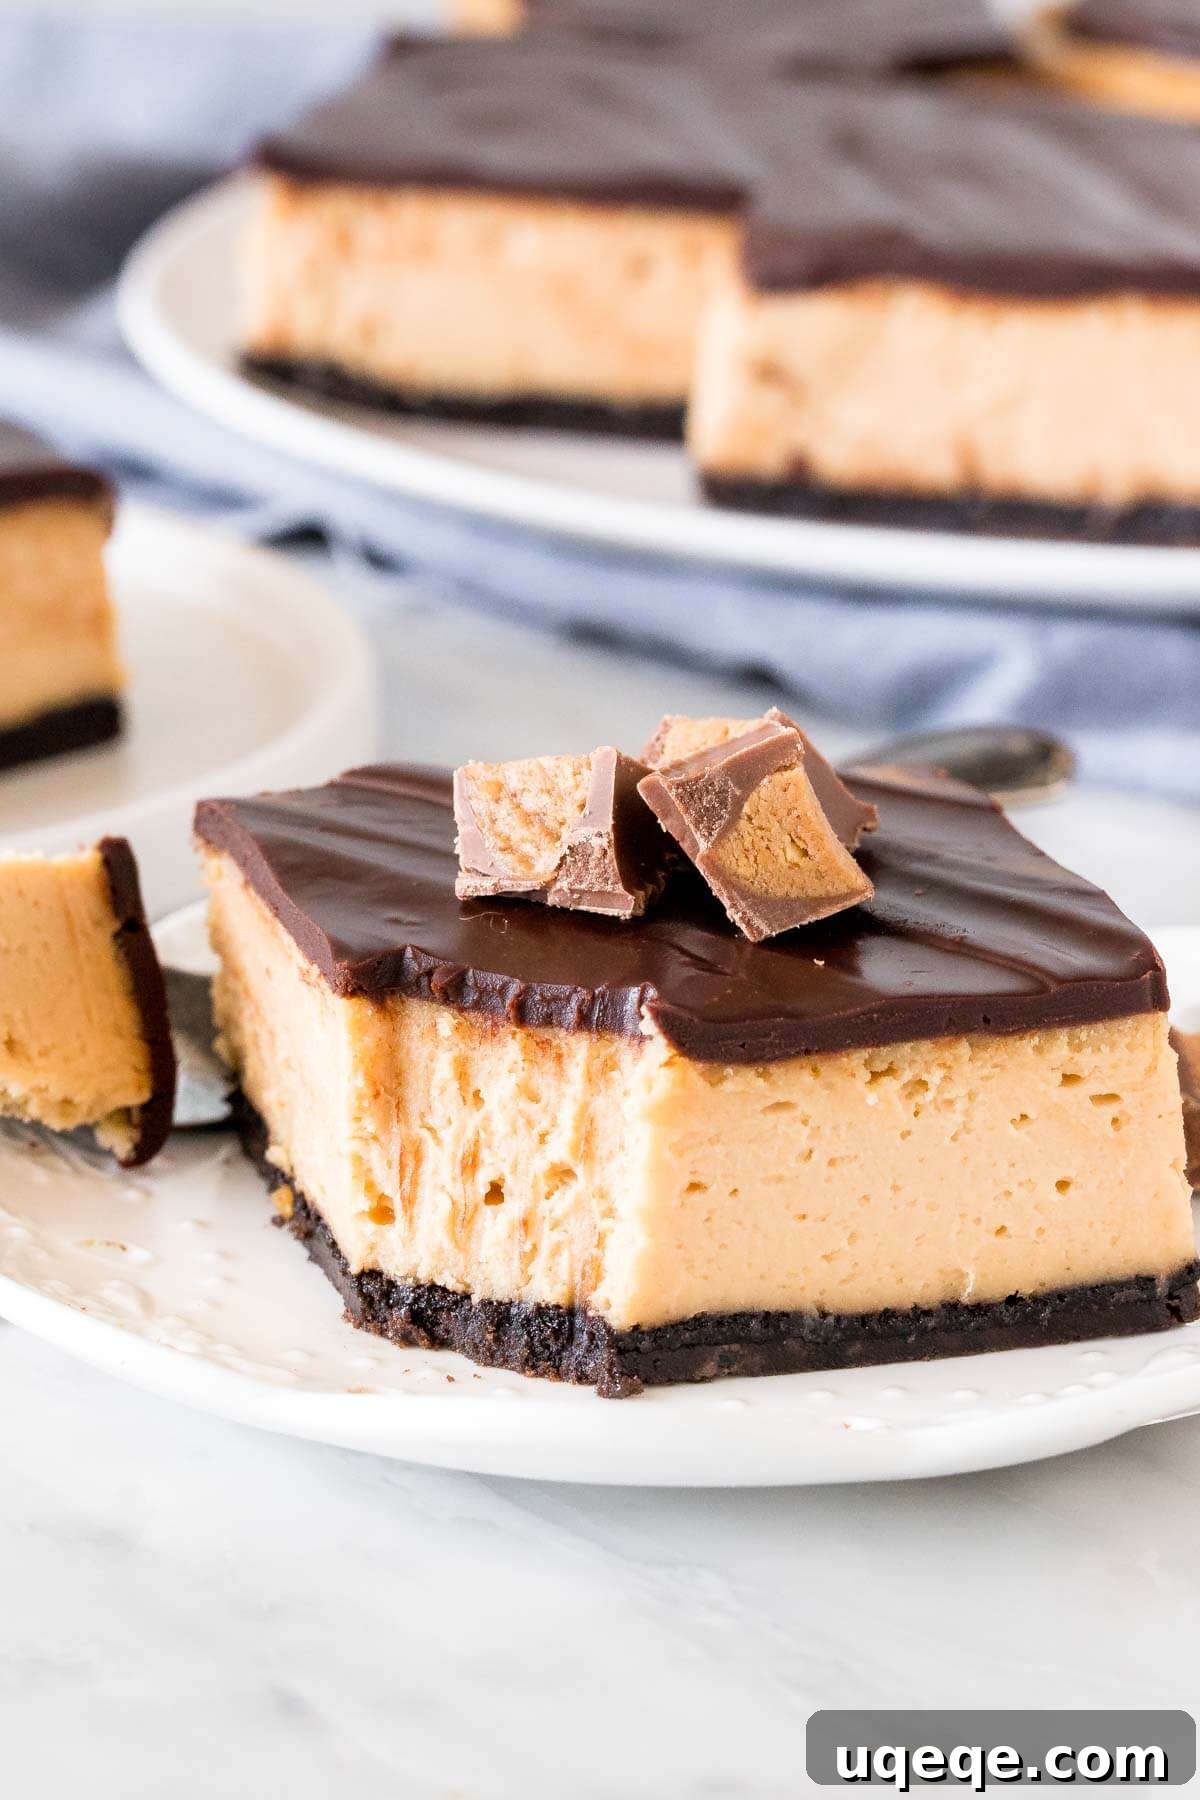
If you adore the irresistible combination of peanut butter and chocolate, these Peanut Butter Cheesecake Bars are about to become your new favorite obsession. Building on the beloved flavors of our no-bake peanut butter cheesecake, this baked rendition elevates the experience to new heights. It’s truly like a harmonious marriage between a classic peanut butter cup and a velvety New York-style cheesecake, resulting in a dessert that ticks every box on your indulgence checklist.
What makes this cheesecake recipe stand out as truly exceptional? It’s a combination of thoughtfully balanced elements that deliver an unforgettable dessert:
- A Robust, Crunchy Chocolate Cookie Crust: Our signature crust, made from rich Oreo cookies, offers a delightful crunch and a deep chocolate flavor that perfectly cradles the creamy filling. It’s the ideal foundation for this luxurious dessert.
- Silky Smooth and Creamy Texture: Achieving the perfect cheesecake texture is an art. This recipe guarantees a filling that is incredibly smooth, dense, and melts in your mouth, without being overly heavy.
- Rich Peanut Butter Flavor with a Tangy Twist: The star of the show, the peanut butter cheesecake filling, boasts an intense peanut buttery taste. It’s balanced with just the right amount of tanginess from the cream cheese and sour cream, ensuring it’s never too sweet and always satisfying.
- A Luxurious Chocolate Topping: To complete this masterpiece, a glossy chocolate ganache topping adds another layer of richness and visually seals the deal, creating a truly irresistible dessert.
Opting for cheesecake bars instead of a traditional round springform pan simplifies the baking process significantly. By using a standard 9×13 inch pan, we streamline preparation and reduce the bake time. More importantly, this method eliminates the need for a water bath, a common deterrent for many home bakers, making decadent cheesecake much more accessible. Plus, cutting perfectly portioned bars for sharing (or enjoying all to yourself!) becomes incredibly easy.
The Journey to Peanut Butter Cheesecake Perfection
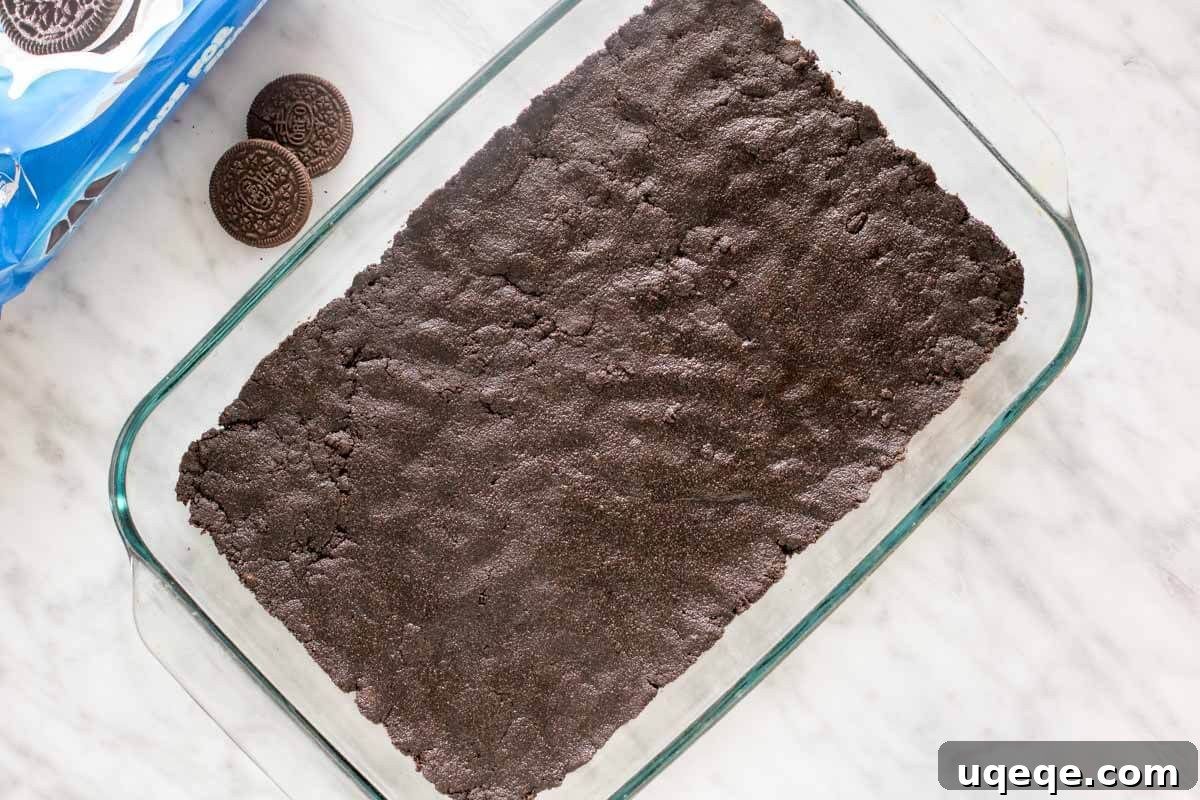
Every exceptional cheesecake begins with an outstanding crust, and our Oreo cookie crust sets the stage for pure indulgence. The process starts by finely crushing whole Oreo cookies, including both the wafers and their creamy filling. This inclusion of the filling is crucial, as it not only enhances the chocolate flavor but also acts as a binder, helping to create a stable and wonderfully delicious base for your cheesecake.
Once the cookies are transformed into fine crumbs, they are thoroughly mixed with melted unsalted butter. This mixture is then firmly pressed into the bottom of your prepared 9×13 inch pan, forming an even and compact layer. A key step for achieving optimal texture is to bake the crust first. This initial bake, typically for about 10 minutes, ensures that the crust becomes wonderfully crunchy and holds its shape beautifully once the creamy filling is added. A pre-baked crust provides a distinct textural contrast against the soft cheesecake, elevating the overall sensory experience.
The Silky Smooth Peanut Butter Filling: Secrets to Success
The heart of these cheesecake bars lies in their rich, creamy, and undeniably peanut buttery filling. You’ll notice from the outset that this batter is thicker than many traditional cheesecake recipes, a direct result of the dense nature of peanut butter. This inherent thickness requires careful handling to ensure the final product remains smooth and moist, never dry or crumbly.
To achieve that signature velvety texture, always start with full-fat, brick-style cream cheese. Cream cheese in a tub or a low-fat variety simply won’t yield the desired richness and stability essential for a truly great cheesecake. Begin by beating the softened cream cheese with granulated sugar until the mixture is incredibly smooth and lump-free. Scrape down the sides of the bowl frequently to ensure everything is evenly incorporated.
Next, the star ingredient – creamy peanut butter – is folded in. It’s vital to use a standard creamy peanut butter for this recipe; natural or whipped varieties can introduce too much oil or air, negatively impacting the cheesecake’s texture. After the peanut butter, sour cream is gently mixed into the batter. Sour cream plays a pivotal role here, contributing a subtle tang that balances the sweetness and richness of the peanut butter, while also lending a lighter, smoother consistency to the cheesecake. Its slightly thinner texture compared to cream cheese helps prevent the batter from becoming too dense.
Finally, the eggs are incorporated. This is perhaps the most crucial stage for preventing cracks in your baked cheesecake. Whisk the eggs lightly in a separate bowl before adding them to the batter. Then, with the mixer on its lowest speed, beat the eggs into the cheesecake mixture just until they are combined. The golden rule here is to avoid over-mixing at all costs. Over-beating introduces excessive air into the batter, and as this air expands and contracts during baking and cooling, it significantly increases the likelihood of unsightly cracks forming on the cheesecake surface. A gentle touch ensures a flawless, crack-free finish.
A Note on Recipe Evolution: In previous versions of this recipe, we utilized 1/2 cup of sour cream and 5 eggs. Through rigorous testing, we discovered that adjusting these quantities to 3/4 cup of sour cream and 3 large eggs remarkably improved the cheesecake. This updated ratio significantly reduces the risk of cracking while simultaneously enhancing the overall creaminess and luxurious mouthfeel of the final product.
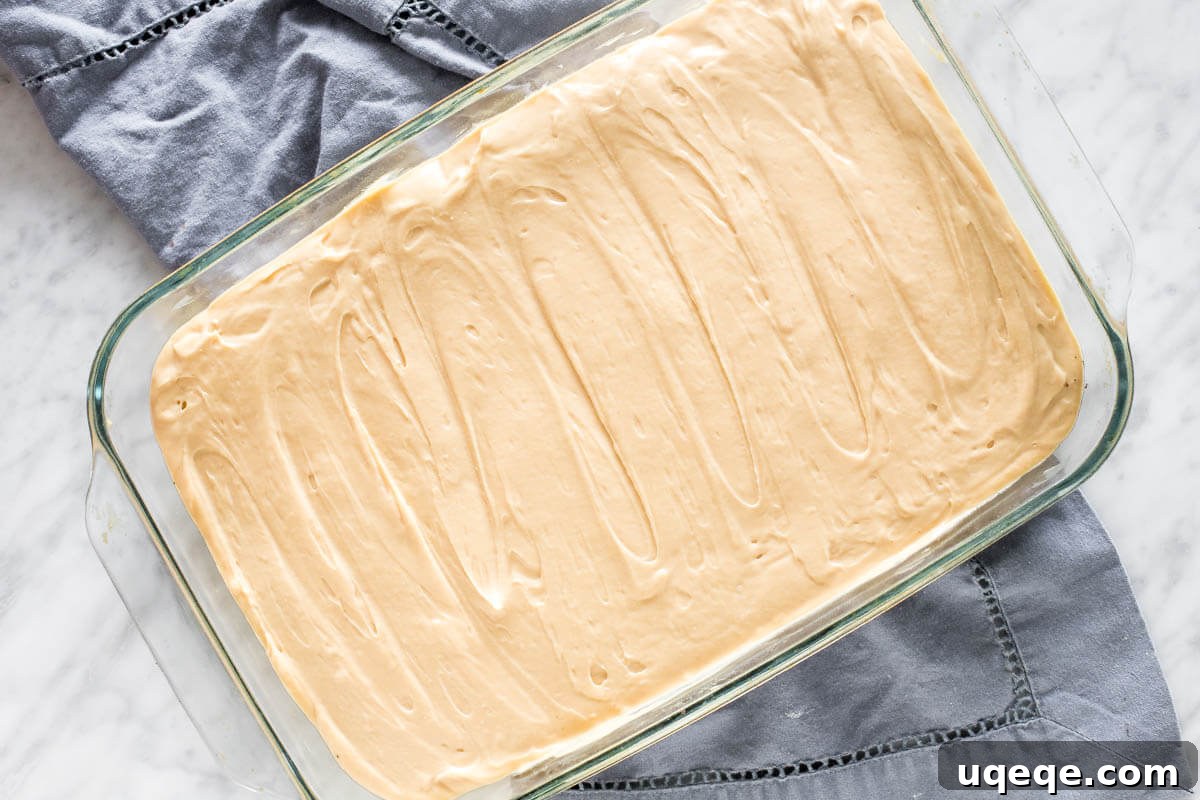
Your peanut butter cheesecake will bake for approximately 35-40 minutes in the preheated oven. Knowing when it’s perfectly done is key. The cheesecake should appear mostly set around the edges, but the very center will still have a slight, delicate wobble. If you gently nudge the pan, it should jiggle slightly but shouldn’t look like liquid. If you observe any significant cracks forming on the surface, it’s a clear indication that your cheesecake is fully baked and should be removed from the oven immediately. Trust your instincts and these visual cues for a perfectly baked cheesecake every time.
The Critical Steps: Cooling, Chilling & Serving Your Cheesecake
Patience is truly a virtue when it comes to baking cheesecake, especially during the cooling and chilling phases. These steps are absolutely paramount to achieving the ideal texture, preventing cracks, and allowing the flavors to fully meld and deepen. Rushing this process can result in a less-than-perfect cheesecake, so commit to giving your creation ample time to rest and transform.
Once the cheesecake finishes baking, resist the urge to pull it out of the oven immediately. Instead, turn off the oven and prop the oven door open about 6 inches. Allow the cheesecake to cool slowly within the gradually cooling oven for approximately 30 minutes. This gradual temperature change minimizes the shock to the cheesecake, significantly reducing the chance of cracks. After this initial cooling period, remove the pan from the oven and let it continue to cool completely at room temperature. Ensure it’s fully cooled before moving to the next stage.
Once the cheesecake has reached room temperature, cover the pan tightly with plastic wrap and transfer it to the refrigerator. This chilling period is non-negotiable and should last for a minimum of 6 hours, though preferably overnight. During this crucial time, the cheesecake firm up, achieving its characteristic dense and creamy texture. More importantly, the individual flavors of the cream cheese, peanut butter, and sour cream will harmoniously marry together, intensifying into that perfect, balanced cheesecake taste you crave.
Given the imperative nature of slow cooling and extensive chilling, it’s highly recommended to prepare these peanut butter cheesecake bars the night before you plan to serve them. This allows the cheesecake ample time to develop its perfect flavor and texture, ensuring it’s ready for topping and slicing the next day.
On the day of serving, you can then prepare the decadent chocolate ganache topping. This luscious ganache adds a layer of sophisticated sweetness that beautifully complements the rich peanut butter flavor. After applying the ganache, pop the cheesecake back into the fridge for a short period to allow the topping to set slightly before serving.
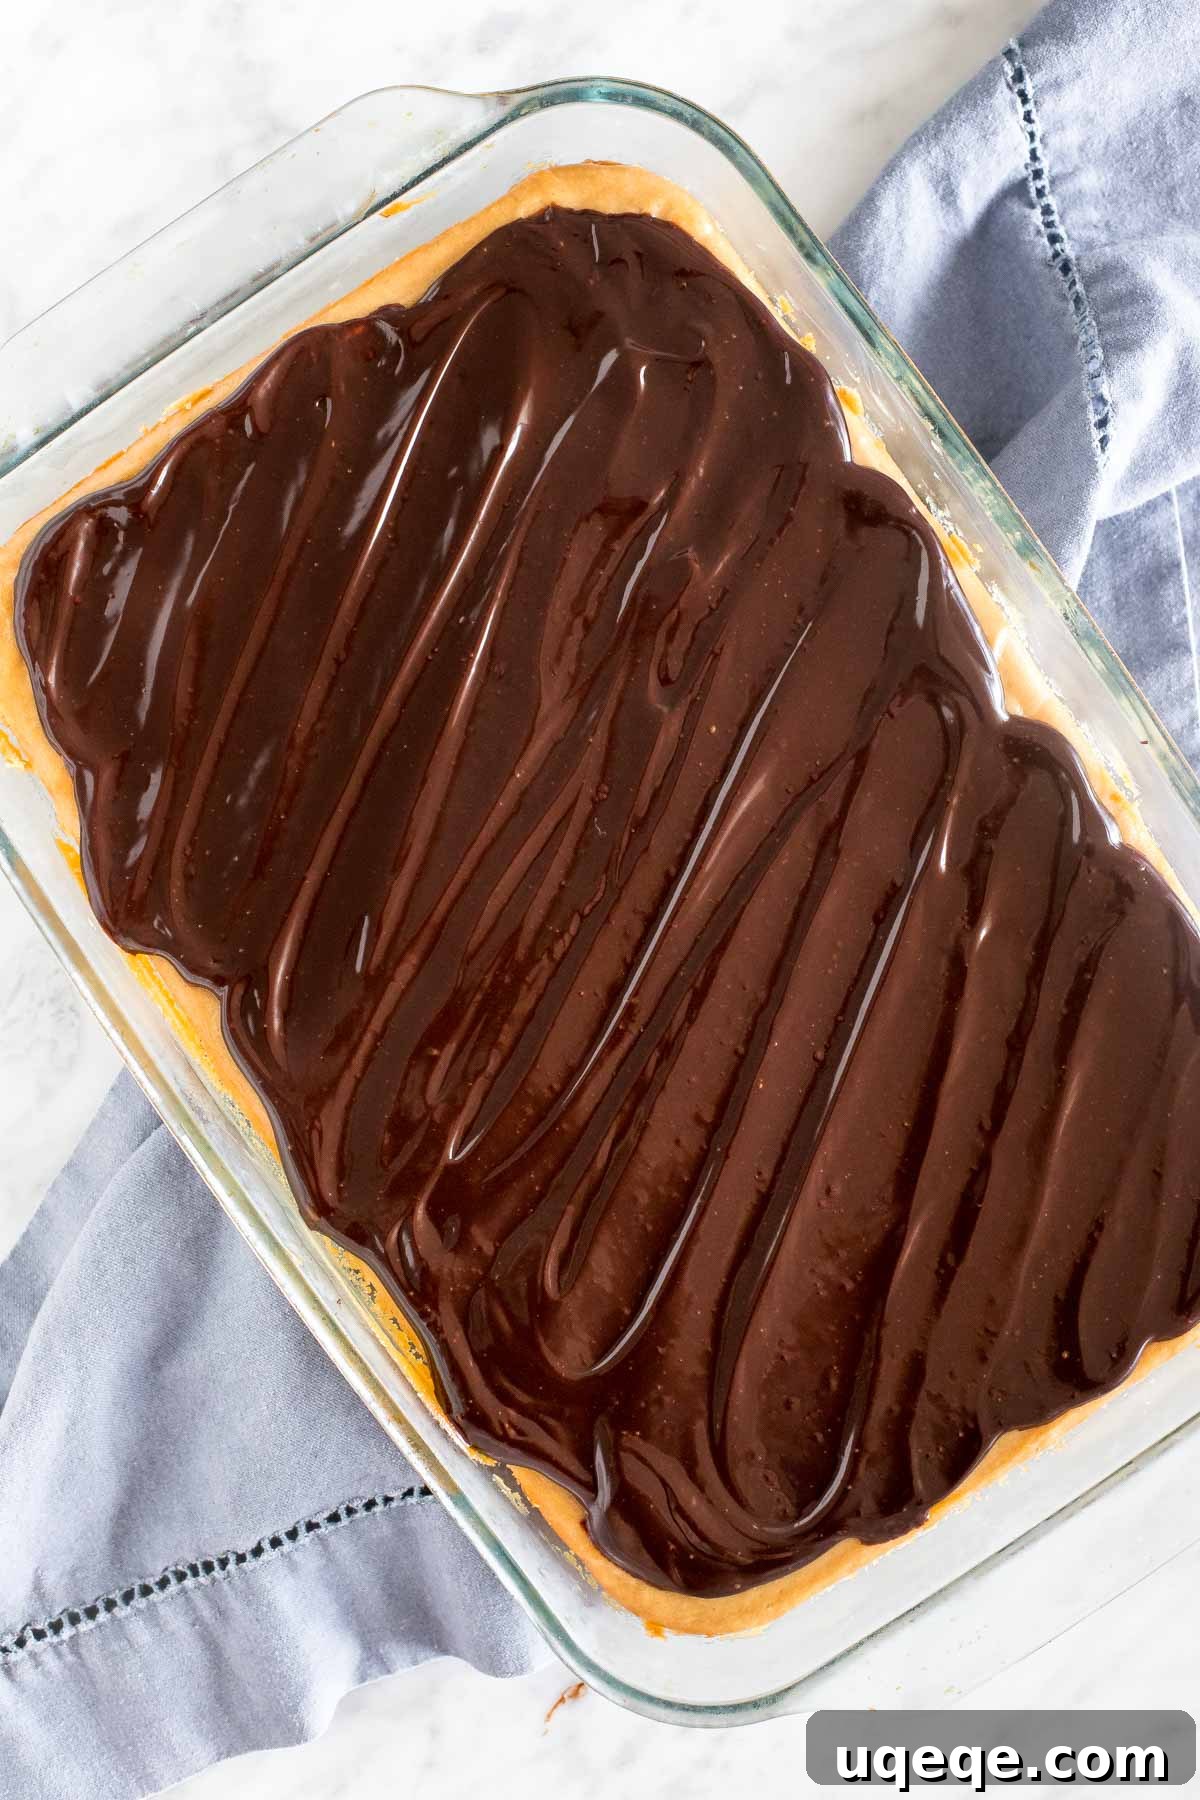
Finishing Touches: Decadent Chocolate Ganache
The final touch for these extraordinary Peanut Butter Cheesecake Bars is a simple yet incredibly luxurious chocolate ganache. This smooth, glossy topping is created by melting finely chopped dark chocolate with hot whipping cream. You can customize the chocolate type to your preference, with 50% cacao dark chocolate offering a balanced bitterness that perfectly cuts through the sweetness, or semi-sweet chocolate for a slightly sweeter finish.
While the ganache is highly recommended for that classic peanut butter and chocolate pairing, it’s also entirely optional. You could serve the bars plain, allowing the pure peanut butter flavor to shine, or offer the ganache on the side for guests to drizzle over their own slices. For an extra touch of indulgence, consider sprinkling a few chopped peanut butter cups over the chocolate topping – they always disappear fast!
With its creamy, tangy peanut butter filling, silky smooth texture, delightful cookie crust, and a luxurious chocolate topping, this peanut butter cheesecake represents my ultimate vision of peanut butter heaven. It’s a dessert that’s rich, satisfying, and utterly irresistible.
If your love for peanut butter knows no bounds, be sure to explore these other fantastic peanut butter treats that are equally delicious and satisfying:
- Effortless No-Bake Peanut Butter Pie
- Drumstick Cake – A Dreamy Peanut Butter Ice Cream Cake
- Simple No-Bake Peanut Butter Cheesecake
Peanut Butter Cheesecake Squares
Fiona Dowling
45
45
7
8
30
15 pieces
Rate Recipe
Print Recipe
Ingredients
For the Oreo Cookie Crust
- 34 Oreo cookies, wafers and filling
- 1/2 cup unsalted butter, melted
For the Peanut Butter Cheesecake
- 24 oz brick-style cream cheese*, softened to room temperature
- 1 cup granulated sugar
- 1 and 1/4 cup creamy peanut butter*, do not use natural or whipped
- 1 teaspoon vanilla extract
- 3/4 cup sour cream*, room temperature
- 3 large eggs, room temperature
For the Topping
- 8 oz dark chocolate*, I like to use 50% or semi-sweet works too
- 1/2 cup whipping cream, 33-35% MF
Instructions
-
Preheat your oven to 325°F (160°C). Lightly spray a 9×13 inch (23×33 cm) glass or ceramic baking pan with cooking spray to prevent sticking.
Oreo Crust Preparation
-
Finely pulse the Oreo cookies, including both the wafers and their creamy filling, in a food processor until they form fine, even crumbs. If you don’t have a food processor, place the cookies in a sturdy freezer bag and crush them thoroughly with a rolling pin until uniformly fine.
-
In a medium bowl, combine the crushed Oreo crumbs with the melted unsalted butter. Mix well until all the crumbs are moistened.
-
Press this mixture firmly and evenly into the bottom of your lightly greased 9×13 inch pan. Use the bottom of a glass or a flat measuring cup to create a compact crust.
-
Bake the crust in the preheated oven for 10 minutes. This step is essential for a crispy, stable crust. After baking, remove the pan from the oven but keep the oven turned on for the cheesecake filling.
Peanut Butter Cheesecake Filling
-
In a very large mixing bowl, using an electric mixer, beat the softened cream cheese and granulated sugar together until the mixture is exceptionally smooth and creamy. Ensure there are no lumps of cream cheese remaining. Stop the mixer and scrape down the sides of the bowl as needed to ensure complete incorporation.
-
Add the creamy peanut butter and vanilla extract to the cream cheese mixture. Beat on medium speed until fully combined and smooth. Double-check the bottom and sides of the bowl for any hidden cream cheese lumps.
-
Gently mix in the room temperature sour cream until the batter is smooth and uniform. Sour cream helps create a lighter, creamier texture.
-
In a small separate bowl, lightly whisk the large eggs. With your electric mixer set to the lowest speed, slowly beat the whisked eggs into the cheesecake batter until *just* combined. It is critically important not to over-mix at this stage, as excessive beating after adding eggs can introduce too much air, leading to cracks in the finished cheesecake.
-
Carefully pour the prepared cheesecake batter over the pre-baked Oreo crust in the pan. Gently smooth the top with a spatula to create an even layer.
-
Bake in the preheated oven for approximately 35-40 minutes. The cheesecake is done when the edges appear mostly set, but the very center still has a slight, delicate wobble when you gently nudge the pan. It should not look liquidy. If you notice any large cracks starting to form, your cheesecake is definitely ready and should be removed from the oven. A small wobble is perfectly fine and desired.
-
Immediately after baking, turn off the oven and open the oven door about 6 inches. Allow the cheesecake to cool slowly inside the turned-off oven for approximately 30 minutes. This gradual cooling prevents sudden temperature changes that can cause cracking. Remove the cheesecake from the oven and continue to cool it completely at room temperature. Once at room temperature, cover the pan tightly with plastic wrap and chill it in the refrigerator for at least 6 hours, or ideally overnight, for the best texture and flavor development.
Chocolate Ganache Topping & Serving
-
Once the cheesecake has been thoroughly chilled in the refrigerator for at least 6 hours (or overnight), it’s time to prepare the luscious chocolate ganache topping.
-
Finely chop your dark chocolate into very small, uniform pieces and place them in a heatproof bowl. Smaller pieces will melt more easily and evenly.
-
Heat the whipping cream either in a microwave-safe bowl (in 30-second intervals, stirring between each) or in a small saucepan on the stovetop until it’s very hot and just beginning to simmer, but not boiling rapidly.
-
Pour the very hot cream directly over the finely chopped chocolate in the heatproof bowl. Let it sit undisturbed for 2-4 minutes to allow the hot cream to melt the chocolate. Then, gently whisk the mixture until it becomes completely smooth and glossy. If any small chocolate pieces remain unmelted, you can microwave the ganache for short 15-second intervals on medium power, stirring well after each interval, until perfectly smooth.
-
Pour the warm ganache evenly over the chilled cheesecake, spreading it gently with a spatula to create a smooth, appealing top layer. Return the cheesecake to the refrigerator to allow the ganache to set, typically for at least 30 minutes, or until you are ready to serve.
-
To serve, use a sharp, thin knife (not a thick table knife) to slice the cheesecake into even bars. Make sure to press all the way through the crunchy Oreo crust. For the cleanest slices, wipe the knife blade clean with a warm, damp cloth after each cut.
Notes
- Cream Cheese Selection: For the best results and a truly authentic cheesecake texture, it is imperative to use full-fat, brick-style cream cheese. Avoid using spreadable cream cheese from a tub or any low-fat varieties, as these will not provide the necessary fat content and density for a perfectly rich and firm cheesecake.
- Peanut Butter Type: This recipe specifically calls for smooth, creamy peanut butter. Natural peanut butter (which often separates oil) or whipped peanut butter are not suitable substitutes. These types can negatively impact the cheesecake’s emulsion and texture by distributing excess oil or air unevenly throughout the batter.
- Temperature of Ingredients: Ensure that your cream cheese, sour cream, and eggs are all at room temperature before you begin mixing. This is a critical step that helps all ingredients combine smoothly and evenly, preventing lumps and ensuring a consistent batter. Take them out of the refrigerator and measure them approximately 30 minutes to an hour before you start preparing the crust.
- Preparation and Make-Ahead Tips: To simplify your dessert preparation and ensure optimal flavor, it is highly recommended to make the cheesecake bars the night before you intend to serve them. The extended chilling period of at least 6 hours (preferably overnight) is essential for the cheesecake to fully set and for the flavors to deepen and meld beautifully. You can then prepare and add the chocolate ganache topping on the morning or afternoon of the day you plan to serve, returning the cheesecake to the fridge until it’s time for dessert.
- Storage: Store any leftover Peanut Butter Cheesecake Bars covered tightly with plastic wrap or in an airtight container in the refrigerator for up to 5 days.
- Nutrition Information Disclaimer: The nutritional information provided is an estimate only. It is calculated based on an assumption of 1 piece, with the entire 9×13-inch pan being sliced into 15 equal and generous portions. Actual nutritional values may vary depending on exact ingredients and serving sizes.
Nutrition
Calories: 670kcal
Carbohydrates: 46g
Protein: 13g
Fat: 50g
Saturated Fat: 24g
Cholesterol: 121mg
Sodium: 400mg
Potassium: 405mg
Fiber: 4g
Sugar: 32g
Vitamin A: 1046IU
Vitamin C: 1mg
Calcium: 96mg
Iron: 5mg
Like this recipe? Rate and comment below!