
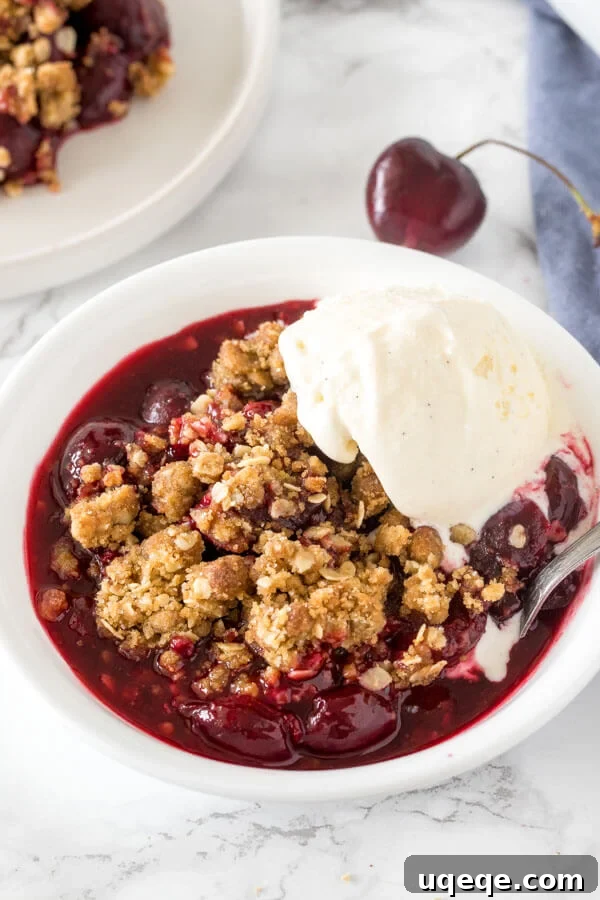
This easy cherry crisp is the perfect recipe to showcase sweet, juicy cherries. A rich layer of homemade cherry filling is topped with a golden brown sugar and oatmeal crumble, baked to perfection. Serve warm with a generous scoop of creamy vanilla ice cream for the ultimate ending to any meal. 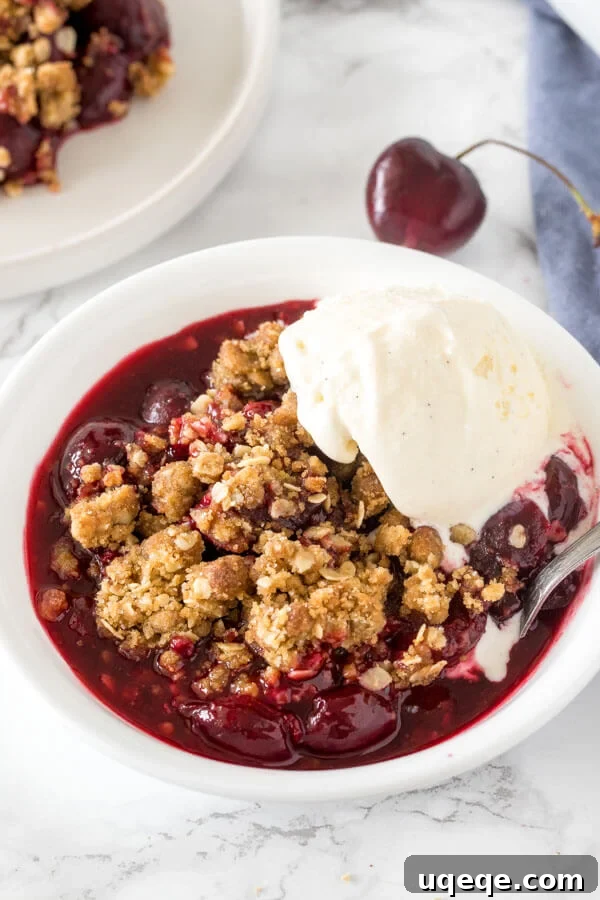
Every summer, the arrival of fresh, plump cherries at local farmer’s markets and grocery stores fills me with an unparalleled excitement. There’s truly nothing quite like the experience of biting into a perfectly ripe, extra sweet cherry. And when it comes to celebrating the peak of cherry season, this homemade cherry crisp stands out as the absolute ideal recipe.
Not only are fruit crisps inherently simpler to prepare than a traditional pie, but they also allow the vibrant, natural flavor of the fruit to take center stage. In this recipe, the sweet and tangy cherries are 100% the star of the show. The crunchy oatmeal crisp topping, infused with rich brown sugar, provides a delightful texture contrast without overshadowing the juicy fruit beneath. I absolutely adore serving it warm with a scoop of melty vanilla ice cream for dessert, but I confess, I’ve been known to sneak a cold serving straight from the fridge for breakfast!
Why You’ll Love This Easy Cherry Crisp Recipe
There are countless reasons why this easy cherry crisp will become your go-to summer dessert. It’s more than just a recipe; it’s an experience:
- Effortlessly Delicious: Forget complicated pie crusts. This crisp offers all the comforting flavors of a fruit pie with significantly less fuss.
- Celebrates Fresh Cherries: Designed to highlight the natural sweetness and juiciness of fresh summer cherries, ensuring every bite bursts with fruit flavor.
- Perfect Texture Contrast: Enjoy the irresistible combination of tender, warm cherry filling with a golden, crunchy brown sugar oatmeal topping.
- Versatile Serving: Fantastic served warm with ice cream or whipped cream, and surprisingly delightful chilled for a breakfast treat.
- Family Favorite: A classic comfort dessert that appeals to everyone, making it perfect for potlucks, gatherings, or a cozy night in.
The Star of the Show: Fresh Cherries
The foundation of an outstanding cherry crisp lies in the quality of your cherries. While frozen cherries are an option (and we’ll discuss how to use them), fresh, ripe cherries truly make all the difference. When selecting cherries, look for those that are firm, plump, and have a deep, consistent color. Avoid any that are soft, shriveled, or bruised. Sweet varieties like Bing, Rainier, or Chelan are perfect for this recipe, offering a delightful natural sugar content. If you opt for sour cherries, a simple adjustment to the sugar quantity in the filling will ensure a perfectly balanced flavor profile.
Essential Ingredients for Your Perfect Cherry Crisp
Crafting this delightful dessert requires simple, wholesome ingredients. Each component plays a crucial role in building the layers of flavor and texture that make this cherry crisp so special.
For the Luscious Cherry Filling
- Fresh Cherries: The hero of our dish! Approximately 32 ounces (about 6 cups) of pitted and halved sweet cherries are needed. These will become wonderfully tender and juicy.
- Granulated Sugar: Balances the tartness of the cherries and enhances their natural sweetness. The amount can be adjusted based on the sweetness of your cherries and personal preference.
- Fresh Lemon Juice: A splash of lemon juice is key. It brightens the flavor of the cherries, preventing the filling from tasting flat, and helps activate the cornstarch for thickening.
- Cornstarch: This is our secret weapon for a perfectly thick and glossy cherry filling. It prevents the crisp from being too watery, ensuring the filling stays delightfully saucy.
- Ground Cinnamon: A hint of warm cinnamon beautifully complements the fruit, adding a comforting depth of flavor without overpowering the cherries.
For the Irresistible Oatmeal Crumble Topping
- All-Purpose Flour: Provides the structure for our crumble, binding the ingredients together to create that signature crisp texture.
- Quick-Cooking Oats: Essential for the distinct chewiness and rustic appeal of the crisp topping. Quick oats integrate well and bake up nicely. While rolled oats (old-fashioned) can be used, they will yield a chewier, more substantial topping. Avoid instant or steel-cut oats.
- Brown Sugar: Adds a wonderful caramel-like sweetness and moisture to the crumble. The molasses in brown sugar also contributes to the golden-brown color.
- Unsalted Butter: Melted butter binds all the dry ingredients together, creating clumps that crisp up beautifully in the oven, providing richness and flavor.
- Optional: Slivered Almonds: For an added layer of texture and nutty flavor, stir in about 1/2 cup of slivered almonds (or chopped pecans/walnuts) into the crumble mixture.
Step-by-Step Guide to Making Homemade Cherry Crisp
Let’s walk through the process of creating this delectable cherry crisp, from preparing the fruit to baking it to golden perfection.
Preparing Your Fresh Cherries
The first step, and arguably the most tedious, is pitting the fresh cherries. This is definitely the “hardest” part of the entire recipe, but a little patience here pays off. You can invest in a dedicated cherry pitter, which makes the job quick and clean. Alternatively, a small paring knife can be used to carefully cut around the pit and remove it, then slice the cherries in half. Once the pitting is done, the rest of the process is incredibly straightforward!
Crafting the Silky Cherry Filling
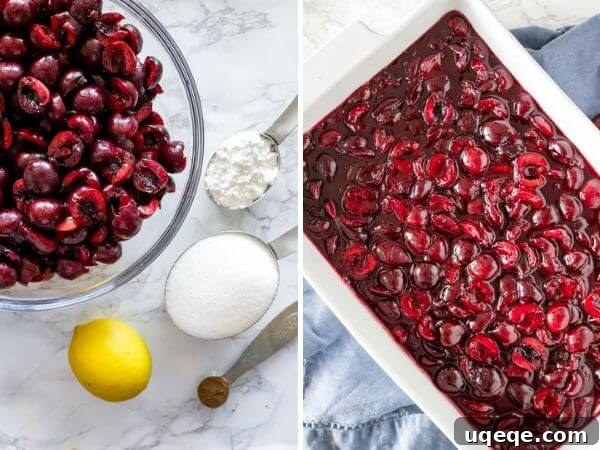
Once your cherries are prepped, it’s time to create the vibrant filling. In a very large stock pot, combine the pitted and halved cherries with the granulated sugar, fresh lemon juice, cornstarch, and ground cinnamon. Toss everything gently with a spoon until the cherries are uniformly coated with the dry ingredients.
Place the pot over low to medium heat and stir occasionally. Initially, you’ll notice the cherries beginning to release their natural juices, creating a lovely red liquid in the pot. As the mixture continues to heat, the cornstarch will begin to work its magic, and the juices will gradually start to thicken. This gentle boiling step is crucial, especially for cherries, which have a somewhat thicker skin compared to other fruits. It allows the cherries to soften properly and release their full flavor, essentially creating a luscious, homemade cherry pie filling right on your stovetop. Continue to cook until the juices have visibly thickened, which typically takes about 10-15 minutes.
After the filling has thickened to a syrupy consistency, remove it from the heat. Carefully pour this aromatic cherry mixture into a 9×13 inch glass or ceramic baking pan, spreading it evenly across the bottom.
Tip for Frozen Cherries:
If you’re using frozen cherries for this crisp, you’ll need to adjust the cooking time for the filling slightly. Frozen cherries release more water as they thaw and cook, so you’ll need to boil the mixture down for an additional 5-10 minutes (or longer) to thicken the juices and evaporate the excess water from the ice crystals. Ensure the filling reaches the desired thick consistency before transferring to the baking dish.
Creating the Golden Oatmeal Crumble
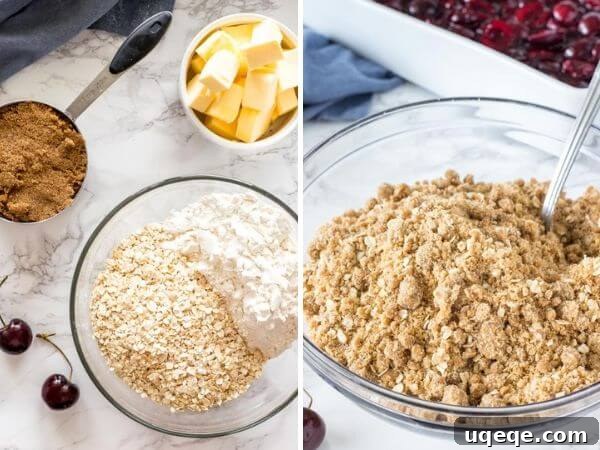
While your cherry filling is on the stove, you can prepare the delightful crumble topping. In a medium-sized mixing bowl, combine the all-purpose flour, quick-cooking oats, and brown sugar. Stir these dry ingredients together thoroughly, ensuring they are well combined.
Next, pour in the melted unsalted butter. Using a fork or your fingertips, mix the butter into the dry ingredients. Continue mixing until the mixture resembles damp sand and forms small, moist crumbs. This is the perfect consistency for sprinkling and will bake up into a wonderfully crisp and golden topping.
Assembling and Baking Your Crisp
Once both the cherry filling and the crumble topping are ready, it’s time to assemble your masterpiece. Preheat your oven to 375°F (190°C). Evenly sprinkle the oatmeal crumble topping over the warm cherry filling in the baking pan. Make sure to cover the entire surface for maximum crunch in every bite.
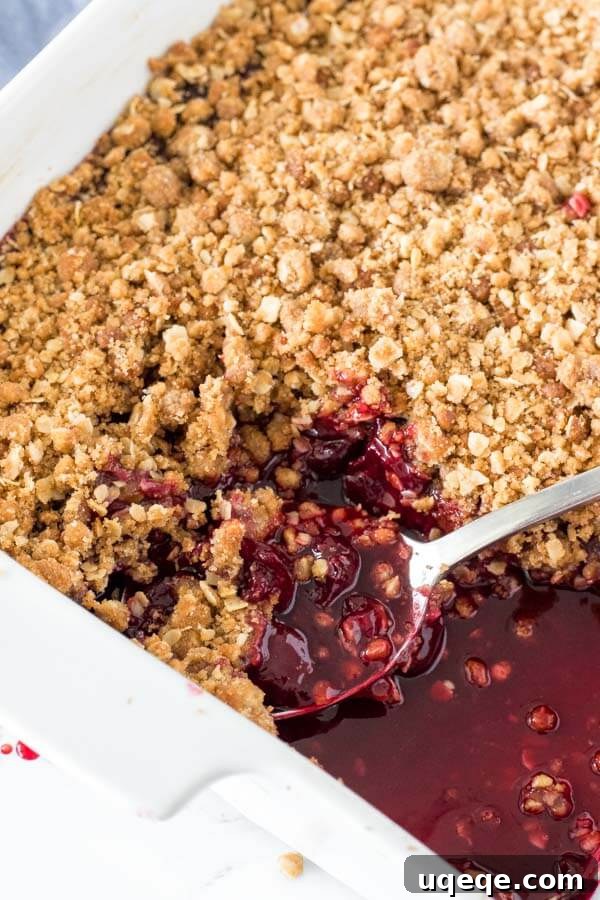
Transfer the pan to the preheated oven and bake for 25-30 minutes, or until the crumble topping is beautifully golden brown and you see the vibrant cherry juices bubbling invitingly around the edges. If you notice the topping browning too quickly before the cherries are sufficiently bubbly, simply tent a piece of aluminum foil loosely over the top of the pan and continue baking until done. This prevents over-browning while allowing the filling to fully cook.
Variations and Substitutions for Your Cherry Crisp
This cherry crisp recipe is incredibly adaptable, allowing for delightful variations to suit your taste or what you have on hand.
Cherry Crisp with Sour Cherries
This recipe was specifically developed to use sweet, fresh cherries. However, if you prefer or only have access to sour cherries (like Montmorency), you can absolutely use them! I highly recommend doubling the amount of sugar in the cherry filling layer to balance their tartness, ensuring your crisp is perfectly sweet and tangy.
Cherry Crisp with Canned Cherry Pie Filling: A Convenient Shortcut
For those times when you need a quick dessert or fresh cherries aren’t in season, you can use pre-made cherry pie filling. Simply empty two 21-ounce cans of your favorite cherry pie filling into the bottom of your 9×13 inch baking pan. Prepare the oatmeal crumble topping as directed in the recipe and sprinkle it evenly over the canned cherry layer. The baking time will remain approximately the same.
Other Fruit Combinations
While cherry crisp is divine, the crumble topping is versatile enough for other fruits. Consider swapping out or combining cherries with:
- Mixed Berries: A combination of strawberries, blueberries, raspberries, and blackberries.
- Peaches: Sliced fresh peaches make a wonderful summer crisp.
- Apples: A classic apple crisp is always a hit, perfect for fall.
- Rhubarb: A fantastic tangy option, often paired with strawberries.
Nutty Additions to the Crumble
As mentioned, 1/2 cup of slivered almonds can be added to the crisp topping for extra crunch and flavor. You could also try chopped pecans or walnuts for a different nutty twist. Toasting the nuts lightly before adding them can enhance their flavor even further.
Gluten-Free Cherry Crisp
To make this recipe gluten-free, simply substitute the all-purpose flour in the crumble topping with a 1:1 gluten-free baking flour blend. Ensure your quick-cooking oats are certified gluten-free, as oats can sometimes be cross-contaminated during processing.
Serving Suggestions for Your Cherry Crisp
This cherry crisp is a showstopper on its own, but its warm, fruity goodness pairs beautifully with a few simple additions:
- Classic Vanilla Ice Cream: The ultimate pairing! The cold, creamy ice cream slowly melts into the warm cherry crisp, creating a delightful contrast in temperature and texture.
- Fresh Whipped Cream: A dollop of lightly sweetened homemade whipped cream adds an airy, luxurious touch.
- Custard or Crème Anglaise: For a more refined dessert experience, serve with a pour of warm vanilla custard.
- For Breakfast: Don’t underestimate this crisp’s versatility! It’s absolutely delicious chilled, especially when topped with a spoonful of plain Greek yogurt for a decadent breakfast or brunch item.
Storage and Reheating Tips
While cherry crisp is best enjoyed fresh from the oven, leftovers are equally delightful. Here’s how to store and reheat your crisp:
- Storage: Allow the cherry crisp to cool completely before covering it tightly with plastic wrap or aluminum foil. Store it in the refrigerator for up to 3-4 days.
- Reheating: To reheat, you can place individual servings in the microwave for 30-60 seconds until warm. For a crispier topping, reheat the entire dish (or a larger portion) in an oven preheated to 350°F (175°C) for 15-20 minutes, or until heated through and the topping is crunchy again.
- Freezing: You can freeze baked cherry crisp, tightly wrapped, for up to 2-3 months. Thaw in the refrigerator overnight and reheat as directed above.
Homemade Cherry Crisp Recipe
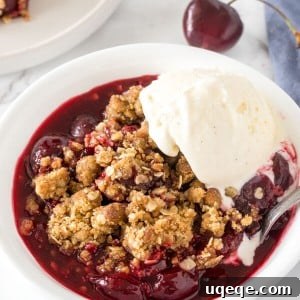
Cherry Crisp
By: Fiona Dowling
Fresh cherry crisp with juicy berries & crunchy brown sugar oatmeal crumble topping. Make it during cherry season for the perfect summer dessert.
Prep: 30 mins | Cook: 30 mins | Total: 1 hr | Servings: 15 people
Ingredients
Cherry Filling
- 32 oz cherries*, pitted and sliced in half
- 3/4 cup sugar
- 3 tablespoons lemon juice, freshly squeezed
- 1/4 cup cornstarch
- 1/2 teaspoons cinnamon
Oatmeal Crumble
- 1 cup all-purpose flour
- 1 cup quick-cooking oats**
- 1 cup brown sugar
- 1/2 cup unsalted butter, melted
Instructions
- Preheat the oven to 375°F degrees.
Cherry Filling
- Add the cherries, sugar, lemon juice, cornstarch, and cinnamon to a very large stock pot. Toss with a spoon until the cherries are evenly covered.
- Heat the mixture over low heat, stirring occasionally. The cherries will first start to release their juices, and then the mixture will start to thicken.
- After the juices have thickened (about 10-15 minutes), remove from the heat.
- Pour the mixture into a 9×13 inch glass or ceramic pan.
Crumble Topping
- In a medium bowl, stir together the flour, oats, and brown sugar.
- Stir in the melted butter. The mixture should look like wet sand.
- Crumble the oatmeal topping over the top of the cherries.
- Bake in the oven for 25-30 minutes, or until you see the top starting to brown and cherries bubbling through. If the top is getting too brown, tent a piece of aluminum foil over top and continue baking.
Notes
- *If using frozen berries, they’ll need to boil for 5-10 minutes longer.
- **Large rolled oats or large flake oats work too. Do not use instant or steel-cut oats.
- Recipe can be halved and made in an 8×8 or 9×9 inch ceramic or glass pan.
- Store leftovers covered in the fridge.
Frequently Asked Questions (FAQ)
Here are some common questions about making cherry crisp:
- Do I have to pit fresh cherries?
- Yes, it’s essential to pit fresh cherries before using them in the crisp for a pleasant eating experience. No one wants to bite into a pit!
- What’s the difference between a crisp and a crumble?
- The terms are often used interchangeably. Generally, a “crisp” topping contains oats, which become crispy when baked, while a “crumble” topping is more streusel-like, made primarily from flour, sugar, and butter, forming a crumbly texture. This recipe, with its oats, falls squarely into the “crisp” category.
- Can I make cherry crisp ahead of time?
- You can prepare the cherry filling and the crumble topping separately a day in advance and store them in the refrigerator. Assemble and bake just before serving for the best results.
- How do I know when my cherry crisp is done?
- The crisp is done when the topping is golden brown and the cherry filling is visibly bubbling around the edges of the pan. The bubbling indicates that the filling has heated through and thickened properly.
Other Delicious Cherry Recipes
If you’re a fan of cherries, be sure to try these other favorite recipes:
- Cherry Almond Bars
- Black Forest Brownies
- Cherry Crisp Bars