
No-Churn Mint Chip Ice Cream Cake: The Easiest Homemade Indulgence
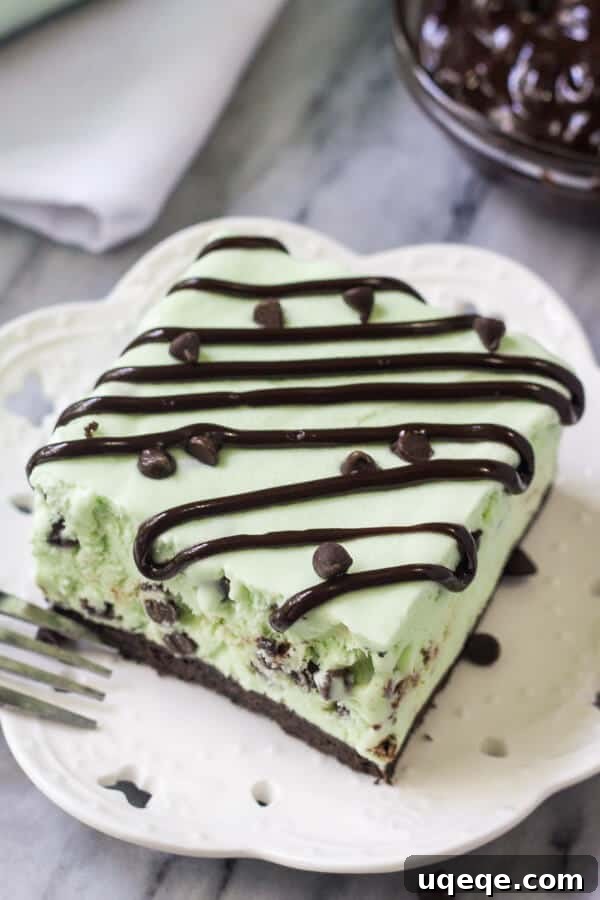
Prepare to be amazed by the sheer simplicity and incredible flavor of this No-Churn Mint Chip Ice Cream Cake. Featuring a decadent Oreo cookie crust and a layer of the creamiest, dreamiest mint chip ice cream you’ll ever taste, this homemade dessert is a true showstopper. The best part? You can create this masterpiece completely from scratch, right in your own kitchen, without needing a single specialty appliance like an ice cream maker. It’s so easy, yet delivers an impressive, professional-quality result that will have everyone asking for seconds!
The Irresistible Allure of Mint Chip Ice Cream
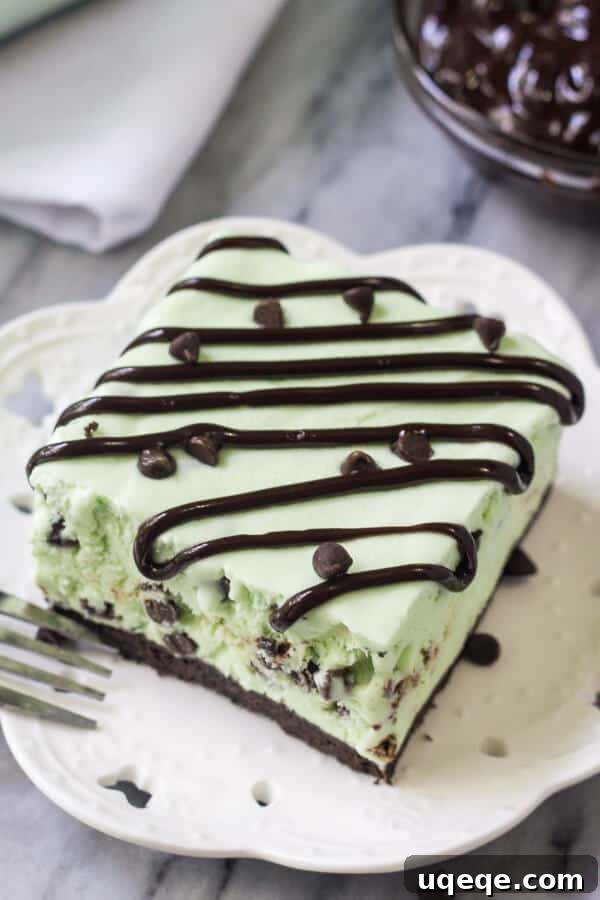
There’s something uniquely captivating about mint chip ice cream. That perfect marriage of cool, refreshing mint, rich, creamy texture, and delightful bursts of chocolate creates an unforgettable taste experience. For many, it’s a nostalgic flavor, conjuring memories of childhood summers and messy t-shirts, a testament to how quickly one can devour this vibrant green delight. Even as adults, the addiction to this “dynamite” combination remains strong, promising pure bliss with every spoonful. This cake takes that beloved flavor to a whole new level, transforming it into an elegant, yet approachable, frozen dessert.
After successfully crafting a homemade peanut butter ice cream cake, it became clear that its refreshing cousin, the mint chip, deserved its own moment in the spotlight. This recipe brings you that same dedication to homemade deliciousness, ensuring every bite of this No-Churn Mint Chip Ice Cream Cake is utterly divine.
Why Go No-Churn for Your Ice Cream Cake?
The concept of “no-churn” ice cream has revolutionized homemade desserts, making them accessible to everyone, regardless of kitchen equipment. The biggest advantage, of course, is the complete elimination of an ice cream maker. This means no bulky machinery, no pre-freezing bowls for hours, and no complicated steps. If you have a mixing bowl and an electric mixer (or even strong arms and a whisk!), you’re well on your way to creating lusciously smooth ice cream.
But the benefits extend beyond convenience. No-churn ice cream often boasts an incredibly creamy, almost cloud-like texture that rivals traditional churned versions. This is due to the unique combination of heavy whipping cream and sweetened condensed milk, which, when properly aerated and combined, freeze into a delightful consistency without the need for constant churning to prevent ice crystals.
The Magic Behind No-Churn Ice Cream
The secret lies in two simple yet powerful ingredients:
- Heavy Whipping Cream: When beaten, it incorporates air, creating a light, fluffy base. This trapped air prevents the mixture from freezing into a solid block, yielding a soft, scoopable texture.
- Sweetened Condensed Milk: This ingredient is a double threat. Its high sugar content acts as an anti-freeze, keeping the ice cream soft, while its thick, creamy consistency contributes to the overall richness and smoothness. It also eliminates the need for cooking a custard base, simplifying the process immensely.
Together, these ingredients form a perfect foundation for homemade ice cream. Simply whip the cream until stiff peaks form, then gently fold in the sweetened condensed milk along with your chosen flavorings. Pop it in the freezer, and voilà! You have creamy, smooth, and deliciously rich ice cream without any fancy equipment – a total win for any home baker.
Crafting Your Perfect Mint Chip Ice Cream Cake
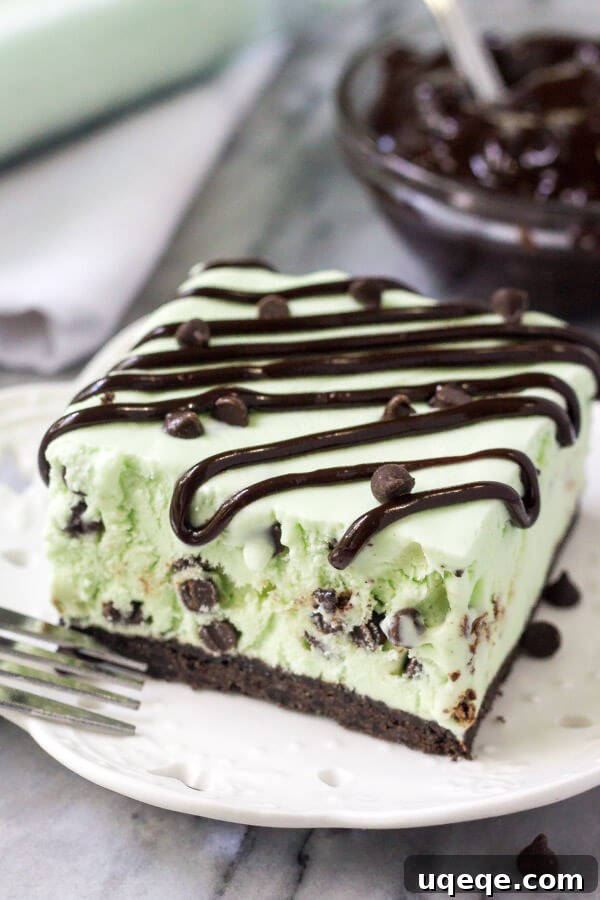
Building this mint chip ice cream cake is straightforward, yet incredibly satisfying. Each layer contributes to a symphony of textures and flavors that will delight your palate.
The Ultimate Oreo Cookie Crust
Every great ice cream cake starts with an outstanding crust, and this Oreo cookie crust is nothing short of perfection. It’s wonderfully crunchy, providing a delightful contrast to the smooth ice cream, and its chocolatey notes perfectly complement the mint. To prepare it, simply:
- Finely crush your Oreo cookies. You can do this in a food processor for speed and uniformity, or by placing them in a Ziploc bag and crushing them with a rolling pin.
- Melt some unsalted butter.
- Combine the Oreo crumbs and melted butter in a bowl until they resemble wet sand.
- Press this mixture firmly and evenly into the bottom of a 9×13 inch pan. A flat-bottomed glass or the back of a spoon works well for this. The key is to get it as compact as possible to ensure a stable crust.
- Pop the crust into the fridge to chill while you prepare the ice cream layer. This helps it set and prevents it from becoming too crumbly when you slice into the cake.
This simple crust not only adds incredible flavor and texture but also serves as a sturdy base for your frozen dessert.
Creating the Creamy Mint Chip Layer
Now for the star of the show – the mint chip ice cream! Building on the no-churn technique, this layer comes together quickly and effortlessly:
- In a large, chilled mixing bowl, beat your cold heavy whipping cream until stiff peaks form. This means when you lift the beaters, the cream stands up straight and holds its shape. Be careful not to over-whip, as it can turn grainy.
- In a separate medium bowl, combine the sweetened condensed milk, peppermint extract, and vanilla extract. This is also where you’ll add your green food coloring if you desire that classic mint chip hue. Start with a few drops and add more until you reach your preferred shade.
- Gently fold the sweetened condensed milk mixture into the whipped cream. Use a spatula and a light hand, folding from the bottom up, until everything is just combined. Avoid overmixing, as this can deflate the whipped cream and result in a less airy ice cream.
- Finally, fold in your mini chocolate chips. Mini chips are ideal for ice cream as they distribute better and maintain a pleasant texture when frozen, providing a delightful crunch with every bite.
The result is a light, airy, and wonderfully minty ice cream base, ready for its place in the cake.
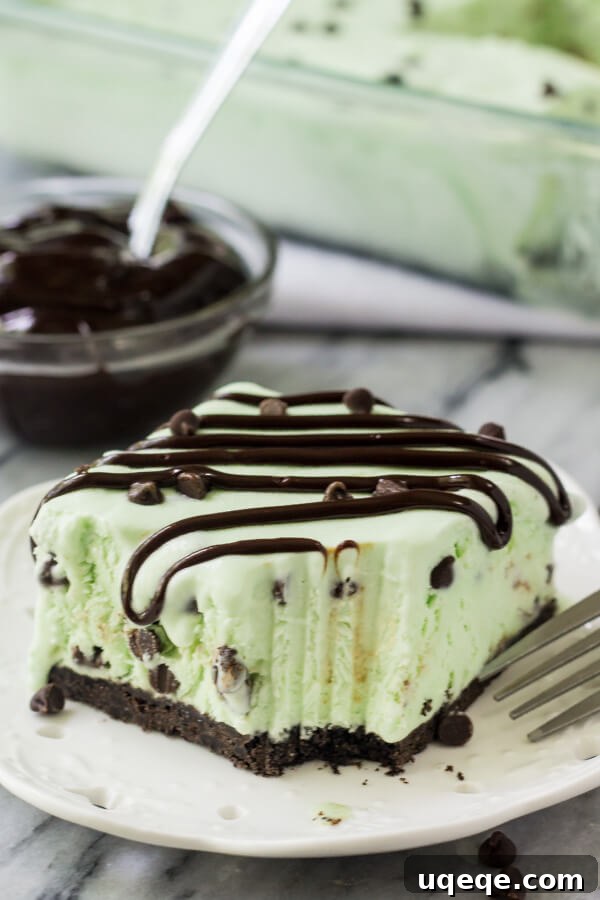
Assembling and Freezing Your Masterpiece
With your crust chilled and your mint chip ice cream prepared, assembly is the final easy step before the freezer does its magic:
- Evenly spread the homemade mint chip ice cream mixture over your chilled Oreo cookie crust in the 9×13 inch pan. Use a spatula to smooth the top for an attractive finish.
- Once the ice cream layer is smooth, cover the pan tightly with plastic wrap or aluminum foil. This prevents freezer burn and keeps your ice cream fresh.
- Place the entire pan into the freezer. For best results, allow it to chill for at least 6 hours, or preferably overnight. The longer it freezes, the firmer and easier it will be to slice.
In less time than it would take to drive to a store to buy a pre-made ice cream cake, you’ll have created a genuinely delicious, homemade dessert that tastes infinitely better. The waiting is the hardest part, but trust us, it’s worth it!
Tips for Success and Delicious Variations
To ensure your No-Churn Mint Chip Ice Cream Cake turns out perfectly every time, and to spark your creativity for future desserts, consider these tips and variations:
Serving Suggestions & Topping Ideas
While delicious on its own, a few extra touches can elevate your ice cream cake:
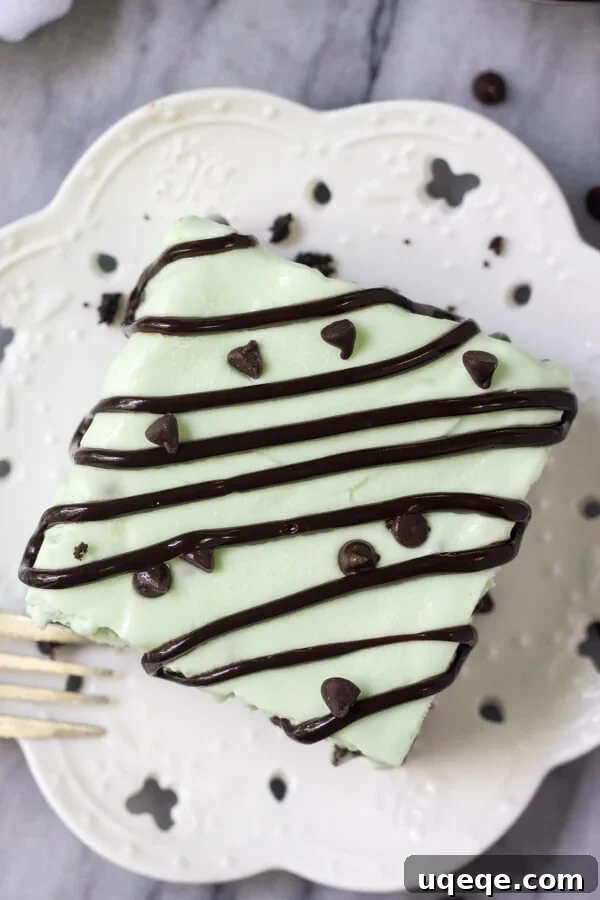
- Warm Fudge Sauce: A drizzle of warm fudge sauce is a classic pairing, adding richness and a gooey texture that contrasts beautifully with the cold cake.
- Whipped Cream: A generous dollop of freshly whipped cream can add an extra layer of lightness.
- More Chocolate: Sprinkle with extra mini chocolate chips, chocolate shavings, or even a dusting of cocoa powder.
- Fresh Mint: A sprig of fresh mint can add an elegant garnish and enhance the minty aroma.
- Cookie Crumbs: A scattering of extra Oreo crumbs provides another textural dimension.
Creative Flavor Twists & Crust Alternatives
This recipe is highly adaptable. Feel free to experiment!
- Mint Oreo Ice Cream Cake: Instead of mini chocolate chips, fold in crushed Oreo cookies into your mint ice cream base. This creates a delightful “cookies and cream” twist.
- Different Crusts: While Oreo is a winner, you could try a graham cracker crust, a chocolate wafer crust, or even a brownie base for an extra layer of decadence.
- Extract Alternatives: Experiment with other flavor extracts in your no-churn base for different ice cream cakes – think strawberry, coffee, or even almond.
- Mix-in Mania: Beyond chocolate chips, consider adding chopped nuts, sprinkles, cookie dough bits, or swirls of caramel or raspberry sauce to your ice cream layer.
Troubleshooting Common Ice Cream Cake Challenges
- Ice Cream Too Hard: Ensure your sweetened condensed milk is incorporated fully, as its sugar content helps keep it soft. Also, allowing the cake to sit at room temperature for 5-10 minutes before slicing will help it soften to the perfect consistency.
- Crust Too Crumbly or Soggy: Make sure the butter is thoroughly mixed with the crumbs and pressed firmly. Chilling the crust adequately also helps it hold together. A soggy crust can occur if the ice cream layer isn’t fully frozen before being added, or if it thaws and refreezes improperly.
- Flavor Not Strong Enough: Adjust the amount of peppermint extract to your liking. Start with the recommended amount, then taste a small portion of the mixture before freezing and add more if desired.
Storing Your Homemade Ice Cream Cake
To keep your No-Churn Mint Chip Ice Cream Cake at its best, ensure it’s well-covered. Once sliced, cover any remaining cake tightly with plastic wrap or aluminum foil and return it to the freezer. It will remain delicious for up to 1-2 weeks. For longer storage, you can place individual slices in airtight containers.
No-Churn Mint Chip Ice Cream Cake Recipe
Mint Chip Ice Cream Cake
By: Fiona Dowling
This No-Churn Mint Chip Ice Cream Cake features a delicious Oreo cookie crust and the creamiest mint chip ice cream, made effortlessly without an ice cream maker. An easy, homemade ice cream cake that’s perfect for any occasion!
Prep Time: 15 mins | Freezing Time: 6+ hours | Servings: 18 slices
Pin Recipe |
Print Recipe
Ingredients
Oreo Cookie Crust
- 2 1/2 cups Oreo cookie crumbs (about 25-30 sandwich cookies)
- 1/2 cup unsalted butter, melted
Mint Chip Ice Cream Layer
- 3 cups cold heavy whipping cream
- 1.5 cans (21 oz total) sweetened condensed milk
- 1 tablespoon peppermint extract
- 1 teaspoon vanilla extract
- 5-10 drops green food coloring (optional, for desired color)
- 1 cup mini chocolate chips
Instructions
- In a medium bowl, combine the Oreo cookie crumbs and melted unsalted butter. Stir until the crumbs are thoroughly moistened.
- Press the mixture evenly into the bottom of a lightly greased 9×13 inch baking pan. Use the bottom of a glass or a spatula to compact it firmly. Place the pan in the refrigerator to chill while you prepare the ice cream layer.
- In a large, clean mixing bowl, beat the cold heavy whipping cream with an electric mixer on high speed until stiff peaks form. The cream should hold its shape when the beaters are lifted.
- In a separate medium bowl, stir together the sweetened condensed milk, peppermint extract, vanilla extract, and green food coloring (if using). Mix until well combined and the color is uniform.
- Gently fold the sweetened condensed milk mixture into the whipped cream using a spatula. Be careful not to deflate the whipped cream; fold until no streaks remain and the mixture is evenly combined. Then, gently fold in the mini chocolate chips.
- Pour the mint chip ice cream mixture over the chilled Oreo cookie crust in the prepared pan. Smooth the top with a spatula.
- Cover the pan tightly with plastic wrap or aluminum foil. Transfer the cake to the freezer and chill for at least 6 hours, or preferably overnight, until completely firm.
- Before serving, remove the cake from the freezer and let it sit at room temperature for 5-10 minutes. This will allow it to soften slightly, making it easier to slice. Slice and serve with a drizzle of warm fudge sauce, if desired.
Nutrition (per slice)
Calories: 461 kcal
We hope you love this refreshing and easy No-Churn Mint Chip Ice Cream Cake! If you enjoyed making and tasting this recipe, we’d love for you to rate it and leave a comment below sharing your experience.