

Indulge in the sublime pleasure of homemade chocolate chip walnut cookies that are wonderfully thick, delightfully chewy, and bursting with an irresistible flavor profile. This exceptional recipe masterfully combines the nutty warmth of toasted walnuts, the comforting essence of rich vanilla, and an abundance of decadent chocolate chips. Moving beyond the traditional, these nutty chocolate chip cookies require minimal effort yet deliver a sophisticated taste that rivals your favorite bakery’s finest creations. Prepare to elevate your cookie baking game and impress everyone with these truly special treats!

The Ultimate Thick & Gooey Walnut Chocolate Chip Cookies: A Bakery Secret at Home
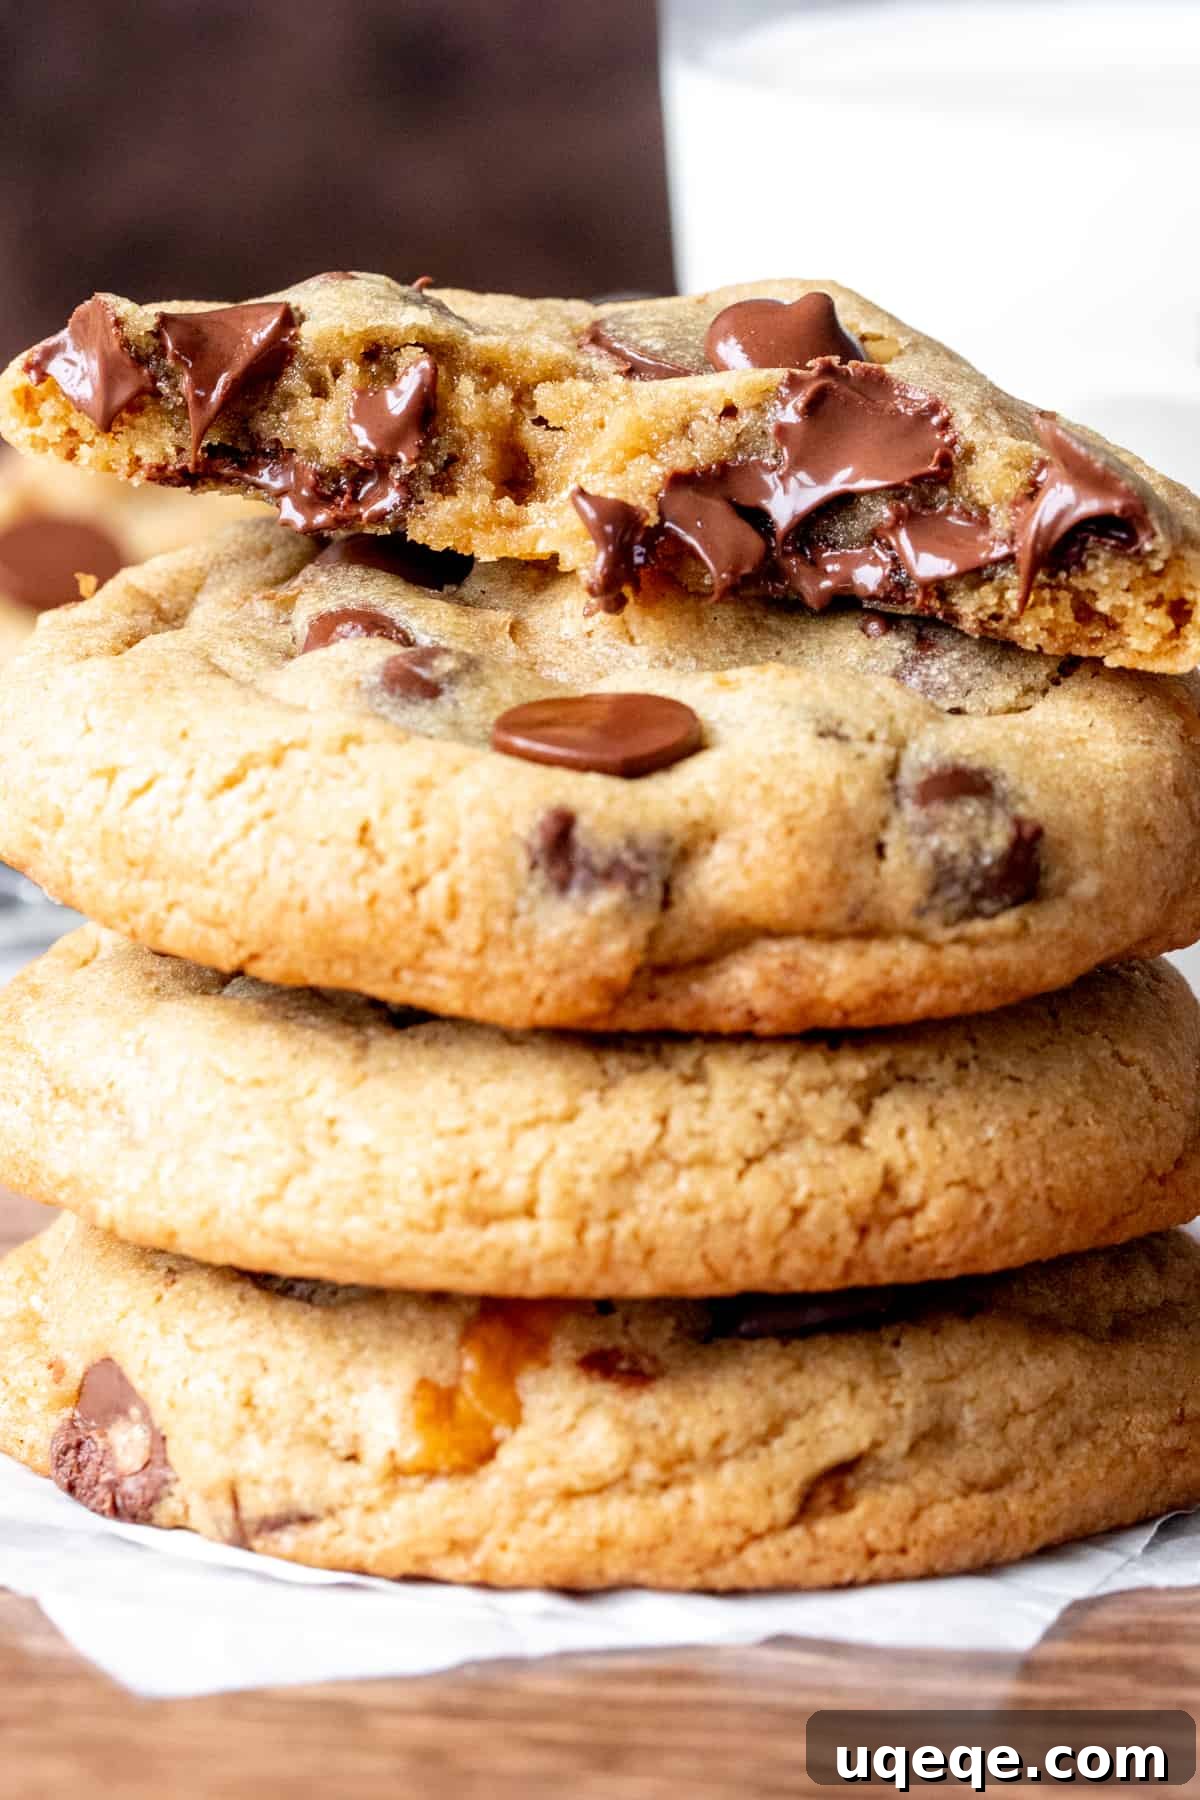
If your heart beats for chocolate chip cookies that offer a truly satisfying experience – perfectly gooey in the middle, boasting crisp, golden edges, and packed with an explosion of rich flavors – then these chocolate chip walnut cookies are about to become your new obsession. This beloved recipe isn’t just another cookie; it’s a carefully adapted masterpiece, building upon our renowned bakery-style chocolate chip cookie foundation. The result? A cookie that’s not only incredibly flavorful but also infused with a delightful nuttiness, all thanks to the star ingredient: walnuts.
What truly sets this recipe apart is its incredible convenience. Forget the endless waiting game that often comes with cookie recipes; there’s absolutely no need to chill the dough! This means you can swiftly transition from gathering your ingredients to pulling warm, freshly baked cookies straight from the oven in a fraction of the time compared to many other recipes. This speed doesn’t compromise on quality, however. Each cookie is crafted to be extra thick, creating the perfect canvas for generously embedding them with an abundance of chocolate chips, ensuring a molten chocolate delight in every single bite. Prepare for a cookie experience that’s both effortless and utterly luxurious.
Why These Walnut Chocolate Chip Cookies Are a Must-Try
Beyond their alluring texture, these cookies offer a unique balance of flavors. The subtle bitterness and earthy notes of walnuts perfectly complement the sweet, comforting embrace of chocolate. It’s a classic pairing that elevates the traditional chocolate chip cookie into something more sophisticated and memorable. The combination of brown and granulated sugars ensures a complex sweetness, while a touch of vanilla extract adds a warm, inviting aroma that fills your kitchen. Each ingredient plays a crucial role in delivering a cookie that not only tastes incredible but also feels like a cozy, homemade hug.
Unlocking Bakery-Style Perfection: Essential Tips for Your Walnut Chocolate Chip Cookies
Crafting cookies that consistently achieve that coveted bakery-quality requires a few essential techniques and key ingredients. Pay close attention to these insights, and you’ll be on your way to baking batches of flawless chocolate chip walnut cookies every time.
- Embrace the Flavor of Toasted Walnuts: This isn’t merely an optional step; it’s a game-changer for enhancing the depth of flavor in your cookies. Toasting walnuts prior to mixing them into the dough transforms their natural oils, releasing a more intense, aromatic, and less bitter nutty essence. The difference is truly remarkable and will elevate your cookies from good to extraordinary.

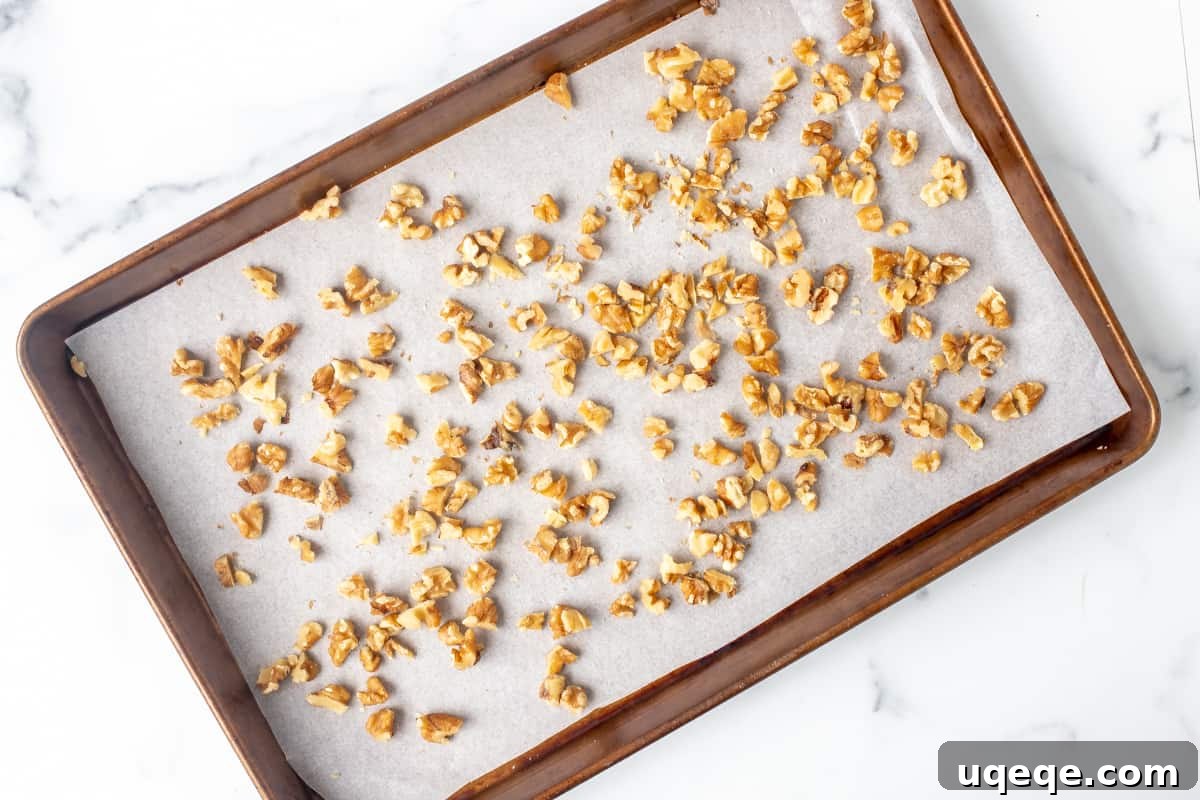
To toast your walnuts, simply spread the chopped nuts in a single, even layer on a baking sheet. Place them in a preheated oven at 350°F (180°C) for 5-10 minutes. Keep a watchful eye on them, as nuts can burn quickly. You’ll know they’re ready when a fragrant, nutty aroma fills your kitchen. This simple step infuses every bite with a richer, more profound walnut flavor that truly makes these cookies stand out. Trust us, your taste buds will thank you for it. - The Secret Power of Cold Butter: Our recipe specifically calls for cold butter, a foundational element borrowed from many professional bakery techniques. The temperature of your butter plays a pivotal role in the final texture of your cookies. Unlike softened or melted butter, cold butter melts more slowly in the oven, releasing steam that creates pockets of air, resulting in a chewier interior. It also prevents the cookies from spreading too rapidly, ensuring those desired thick centers and wonderfully crispy edges. For ease of mixing, chop your cold butter into small, uniform cubes before adding it to the batter. It’s crucial that the butter is genuinely cold – not frozen, but definitely not softened or beginning to melt, as this will alter the cookie’s structure. The slight resistance of cold butter during mixing contributes to the unique texture we’re aiming for.
- Cornstarch: Your Key to Unrivaled Tenderness: For our readers in Australia and the UK, this is also known as cornflour! Cornstarch is a surprisingly powerful ingredient that works wonders in cookie baking. Even a small amount significantly contributes to the tender, melt-in-your-mouth quality of the cookies, helping to achieve those perfectly gooey centers we all crave. It acts as a tenderizer, inhibiting gluten development in the flour, which in turn prevents the cookies from becoming tough or overly dense. Including cornstarch ensures a consistently soft and delicate crumb, making each bite exceptionally satisfying and truly bakery-worthy.
- Precision with Flour: The Foundation of Perfect Texture: If you’ve ever baked cookies that turned out disappointingly dry, crumbly, or overly dense, the culprit was most likely too much flour. Achieving the ideal texture for these thick chocolate chip walnut cookies means using precisely the right amount of flour – enough to give them structure and thickness, but not so much that they lose their moisture and become dry. Accurate flour measurement is paramount. The best method is to first whisk your flour to aerate it, then gently spoon it into a dry measuring cup, leveling off the excess with the back of a knife. Never scoop directly from the flour bag, as this compacts the flour, leading to an over-measurement. For the most consistently accurate results, and a foolproof path to perfect cookies, always measure your flour using a digital kitchen scale. This ensures a consistent weight every time, guaranteeing your cookies are never dry but always delightfully tender.

Mastering the Art of Freezing: Cookie Dough & Baked Cookies for Any Occasion
One of the many joys of baking, especially with a recipe as delicious as these chocolate chip walnut cookies, is the ability to prepare ahead. Cookie dough freezes beautifully, making it an absolute lifesaver for those impromptu cookie cravings or when you need a quick, impressive dessert without the fuss of starting from scratch. Freezing cookie dough offers unparalleled convenience and ensures you always have a fresh, warm treat within reach.
Freezing Raw Cookie Dough Balls
To freeze your dough for future baking, begin by scooping the dough into individual balls, exactly as if you were preparing to bake them immediately. Once formed, place these dough balls onto a parchment-lined baking sheet, making sure they don’t touch. Flash freeze them for about 30-60 minutes, or until they are firm enough to handle without sticking. This step prevents the dough balls from clumping together in the freezer. After flash freezing, transfer the firm cookie dough balls into a freezer-safe bag or an airtight container. Squeeze out as much air as possible before sealing to prevent freezer burn. Label the bag with the date and type of cookie. Your frozen cookie dough will remain fresh and ready to bake for up to 3 months. When you’re ready to enjoy, simply preheat your oven as directed in the recipe, place the frozen dough balls on your lined cookie sheets, and bake. They’ll typically require just 1-2 minutes longer in the oven than freshly made dough, yielding the same incredible results.
Freezing Baked & Cooled Cookies
Baked and cooled chocolate chip walnut cookies can also be frozen, providing another fantastic option for meal prep or long-term storage. Once your cookies have completely cooled to room temperature, arrange them in a single layer in an airtight freezer-safe container. For added protection against sticking and freezer burn, I highly recommend placing a sheet of wax paper or parchment paper between layers of cookies if stacking. This small step ensures your cookies maintain their perfect shape and texture. Properly stored, baked cookies can be frozen for up to 1-2 months. For the best results when thawing, transfer the frozen cookies to the refrigerator overnight. Once thawed, allow them to come to room temperature on your countertop before serving. Thawing them slowly and gently helps preserve their delightful chewy texture and prevents them from becoming dry or crumbly. Reheat briefly in the microwave for a “just-baked” experience if desired.
Craving More Nutty Delights? Explore These Recipes!
If you find yourself enchanted by the rich, comforting flavors that nuts bring to baking, then you’ll undoubtedly love these other fantastic recipes from our collection:
- Brown Butter Pecan Chocolate Chip Cookies: A sophisticated twist on a classic, featuring nutty brown butter and crunchy pecans.
- Maple Walnut Fudge: Indulge in creamy, sweet fudge studded with walnuts and infused with the warmth of maple.
- Pecan Pie Bars: All the incredible flavor of traditional pecan pie, conveniently baked into an easy-to-eat bar form.

☆
☆
☆
☆
Chocolate Chip Walnut Cookies
Rate Recipe
Print Recipe
Equipment
-
Cookie Sheets
-
Parchment Paper
-
Electric Mixer (stand or hand mixer)
-
Large Mixing Bowls
Ingredients
- 1/2 cup chopped walnuts
- 1 2/3 cup all-purpose flour
- 2 teaspoons cornstarch, (or cornflour)
- 1/2 teaspoon baking powder
- 1/2 teaspoon baking soda
- 1/2 teaspoon coarse salt, feel free to adjust to taste
- 1/2 cup unsalted butter, cold & cut into 1-inch chunks
- 1/2 cup brown sugar, packed
- 1/2 cup granulated sugar
- 1 1/2 teaspoons vanilla extract
- 1 large egg
- 3/4 cup chocolate chips
Instructions
-
Preheat your oven to 350°F (180°C, or 170°C for a fan-forced oven).
-
Spread the chopped walnuts evenly in a single layer on a separate cookie sheet.
-
Bake the walnuts in the preheated oven for 8-10 minutes, or until you detect a fragrant, nutty aroma. Be vigilant and ensure the nuts do not burn. Once toasted, remove them from the oven, but leave the oven turned on for the cookies.
-
Prepare your baking sheets by lining them with parchment paper. This prevents sticking and ensures even baking.
-
In a medium-sized bowl, whisk together the dry ingredients: flour, cornstarch, baking powder, baking soda, and salt. Set aside.
-
In a large mixing bowl, using an electric mixer, beat the cold butter chunks, brown sugar, and granulated sugar together until the mixture is light and fluffy. This can take a few minutes due to the cold butter.
-
Add the large egg and vanilla extract to the butter mixture, beating until just combined. Remember to scrape down the sides and bottom of the bowl with a spatula to ensure all ingredients are thoroughly incorporated.
-
With the mixer set to a low speed, gradually add the dry flour mixture into the wet butter mixture. Beat until just combined, taking care not to overmix. The cookie dough will be noticeably thick.
-
Gently fold in the toasted walnuts and chocolate chips. For a professional, “bakery-fresh” look, reserve a few extra chocolate chips to dot on top of each cookie just before baking.
-
Form the cookie dough into generous balls, using approximately 3 tablespoons of dough for each. You can achieve this with a large cookie scoop or two scoops from a medium-sized one. This recipe typically yields 10-11 very large, substantial cookies.
-
Place the cookie dough balls at least 2 inches apart on your lined cookie sheets. Bake one cookie sheet at a time in the preheated oven for 10-12 minutes, or until the edges are golden brown and the tops appear just set. While one batch is baking, keep any unbaked cookie dough balls refrigerated to maintain their cold temperature, which helps with optimal texture and spread.
-
Once baked, allow the cookies to cool on the cookie sheet for a minimum of 10 minutes. This crucial cooling time allows the cookies to set and firm up properly, preventing them from falling apart. If desired, gently press a few reserved chocolate chips onto the tops of the warm cookies for an extra appealing finish. Transfer to a wire rack to cool completely.
Notes
- Walnuts: For accurate measurement, always chop your walnuts first, then measure the amount specified. While optional, toasting the walnuts is highly recommended as it significantly enhances their flavor profile and aroma, adding a complex depth to your cookies.
- Smaller Cookie Variations: If you prefer to make smaller cookies, reduce the dough size to about 1.5 tablespoons per ball. When baking smaller cookies, adjust the baking time to 8-10 minutes, keeping an eye on them for golden edges and set tops.
- Freezing Cookie Dough for Later: Cookie dough balls are excellent for freezing. After forming, flash freeze them on a baking sheet until firm, then transfer to a freezer-safe bag or airtight container. They can be frozen for up to 3 months. To bake from frozen, simply place them on a lined baking sheet and bake as directed in the recipe. Expect to add an extra 1-2 minutes to the baking time.
- Optimal Storage: To maintain their freshness and delicious chewy texture, store baked cookies in an airtight container at room temperature for up to 4 days. While they are still delightful after a few days, cookies are truly at their absolute best when enjoyed fresh, straight from the oven or shortly after cooling.
- Nutrition Information: The nutritional details provided are an estimate only. They are based on one large cookie, assuming the recipe yields 10 equally sized cookies. Please note that you may be able to get 11 large cookies from this recipe, which would slightly alter the per-cookie nutritional values.
Nutrition
Enjoyed this recipe? Your feedback helps! Rate and comment below!