
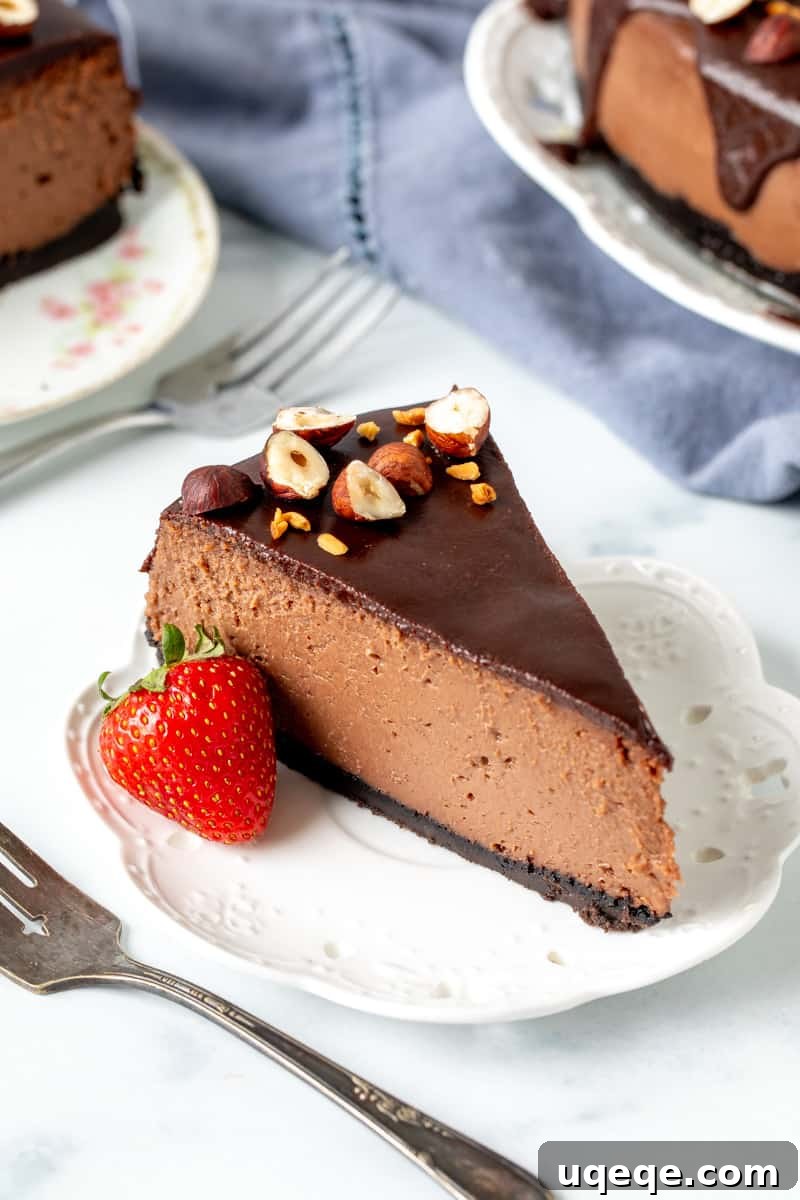
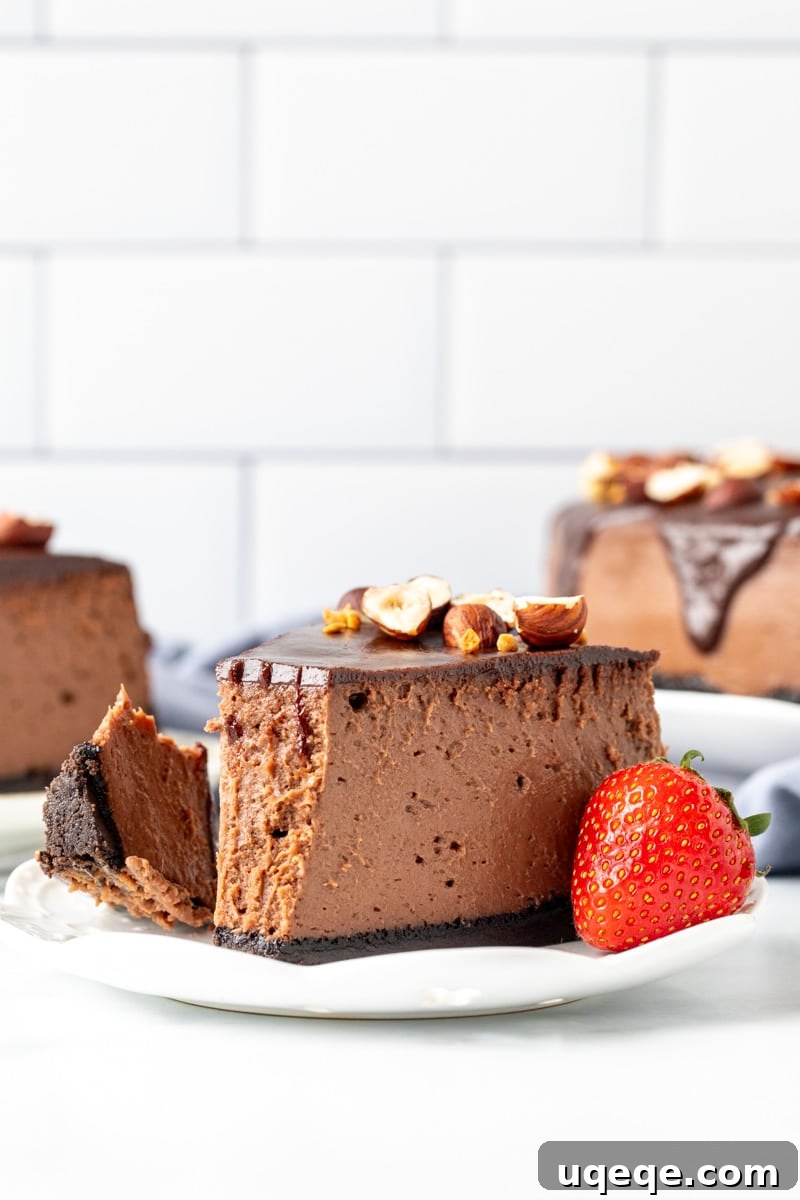
Prepare to be enchanted by this utterly decadent Nutella cheesecake, a true culinary masterpiece that promises to delight every chocolate and hazelnut lover. Imagine a remarkably rich and incredibly creamy cheesecake infused with the distinctive flavor of Nutella, all resting upon a perfectly crunchy Oreo cookie crust. To elevate this dessert to an even higher plane of indulgence, it’s generously crowned with a silky Nutella ganache, creating a truly stunning presentation and an unforgettable taste experience that will impress any guest at your dinner table.
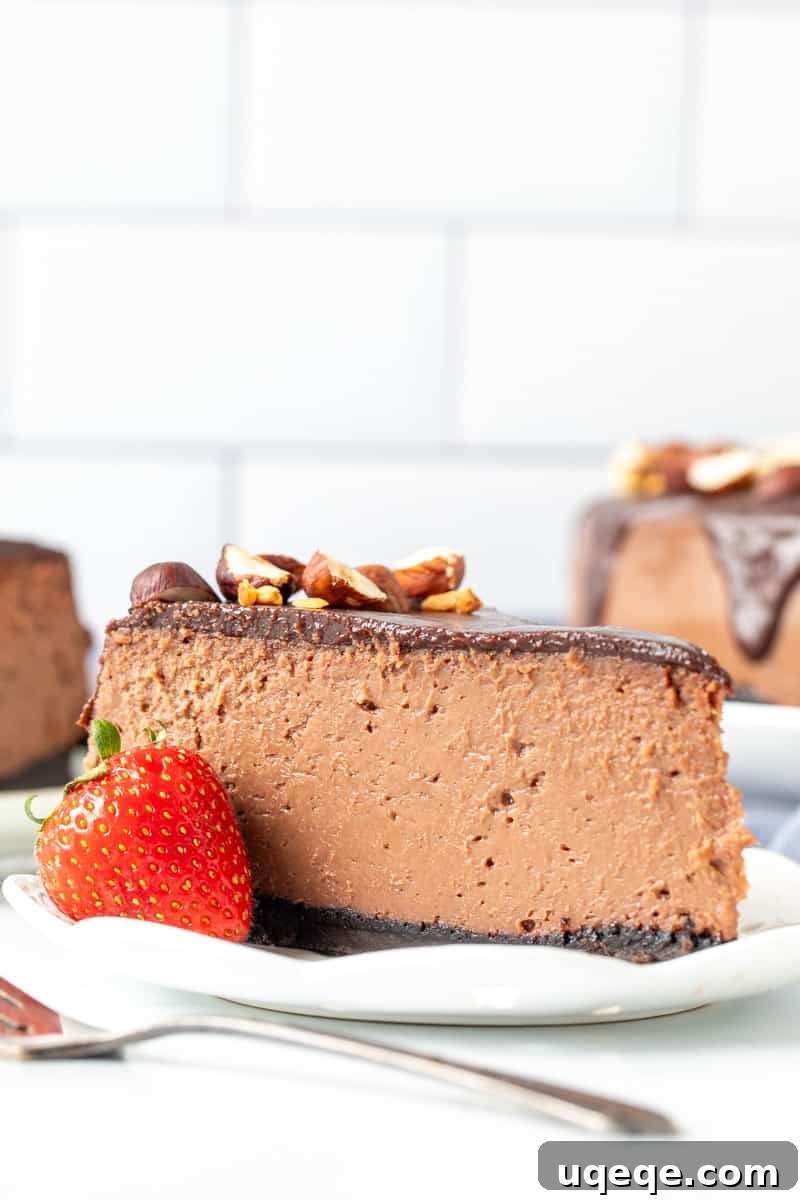
Experience the Dreamy Creaminess: Nutella Cheesecake with an Irresistible Oreo Crust
This Nutella cheesecake isn’t just a dessert; it’s an experience. It represents a significant upgrade from your traditional New York Cheesecake or even a classic chocolate cheesecake. The harmonious blend of chocolate and hazelnut creates a flavor profile that is profoundly rich without being overly sweet, achieving a perfect balance. The texture is what truly sets this cheesecake apart – it’s incredibly creamy and smooth, yet delightfully light, avoiding the dense consistency often found in lesser cheesecakes. The crispy, chocolatey Oreo crust provides a delightful textural contrast, while the glossy Nutella ganache topping adds an extra layer of hazelnut goodness and a beautiful, professional finish. You’ll find that the baked cheesecake filling almost melts in your mouth, resembling a luxurious mousse, making every forkful a moment of pure bliss.
Crafting Your Nutella Cheesecake: A Step-by-Step Guide to Perfection
While the ingredients for a high-quality cheesecake can sometimes be an investment, the end result of this homemade Nutella cheesecake is absolutely priceless. To ensure your success and make the most of your baking efforts, we’ve outlined a comprehensive step-by-step guide with detailed photos and essential tips. The secret to this cheesecake’s unparalleled creamy texture lies in a specific baking technique: the water bath. Before you even begin preparing the crust or the filling, proper pan preparation is key.
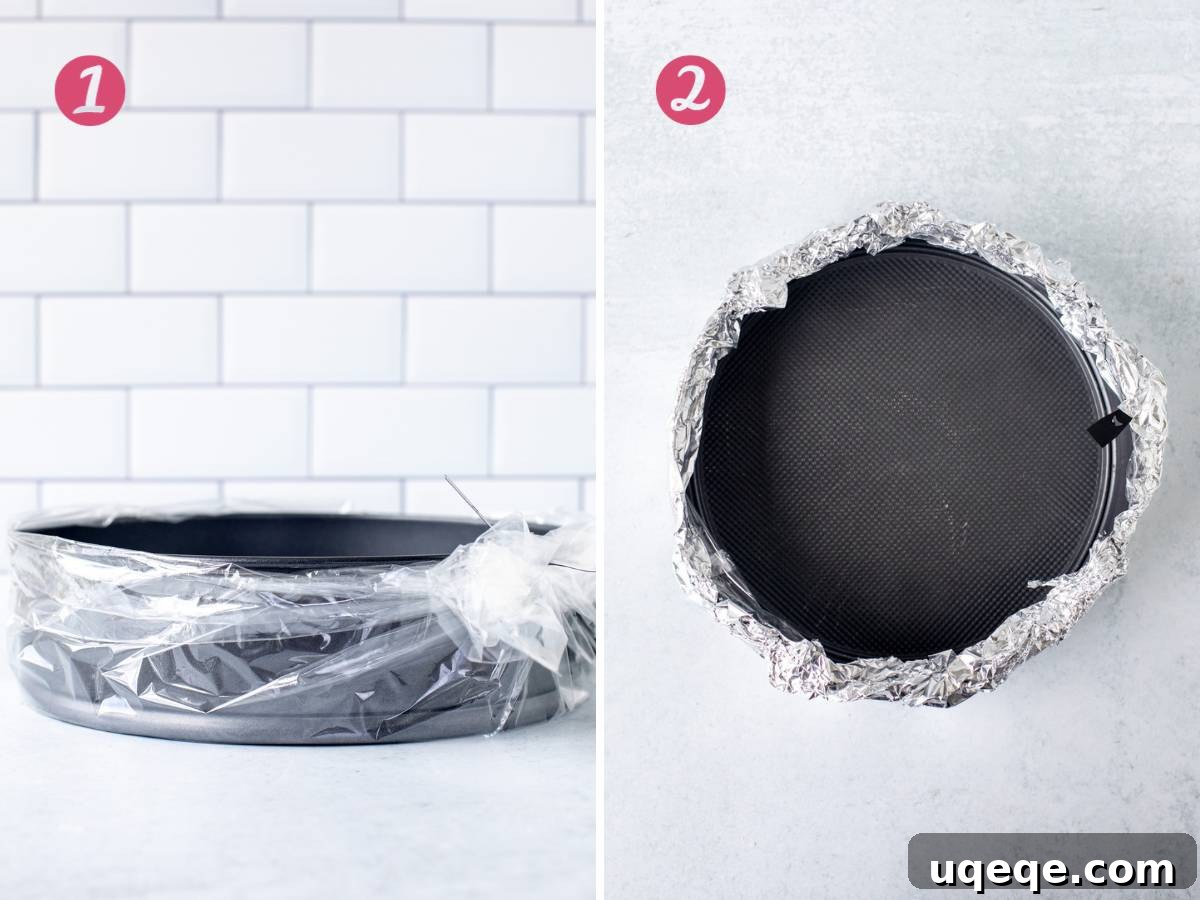
Preparing Your Springform Pan for a Water Bath
- Secure the Pan: Start by wrapping the exterior of your springform pan with an oven bag or a slow cooker liner. This crucial step acts as a barrier, significantly minimizing the risk of water seeping into your cheesecake batter during the water bath, which could otherwise compromise its texture.
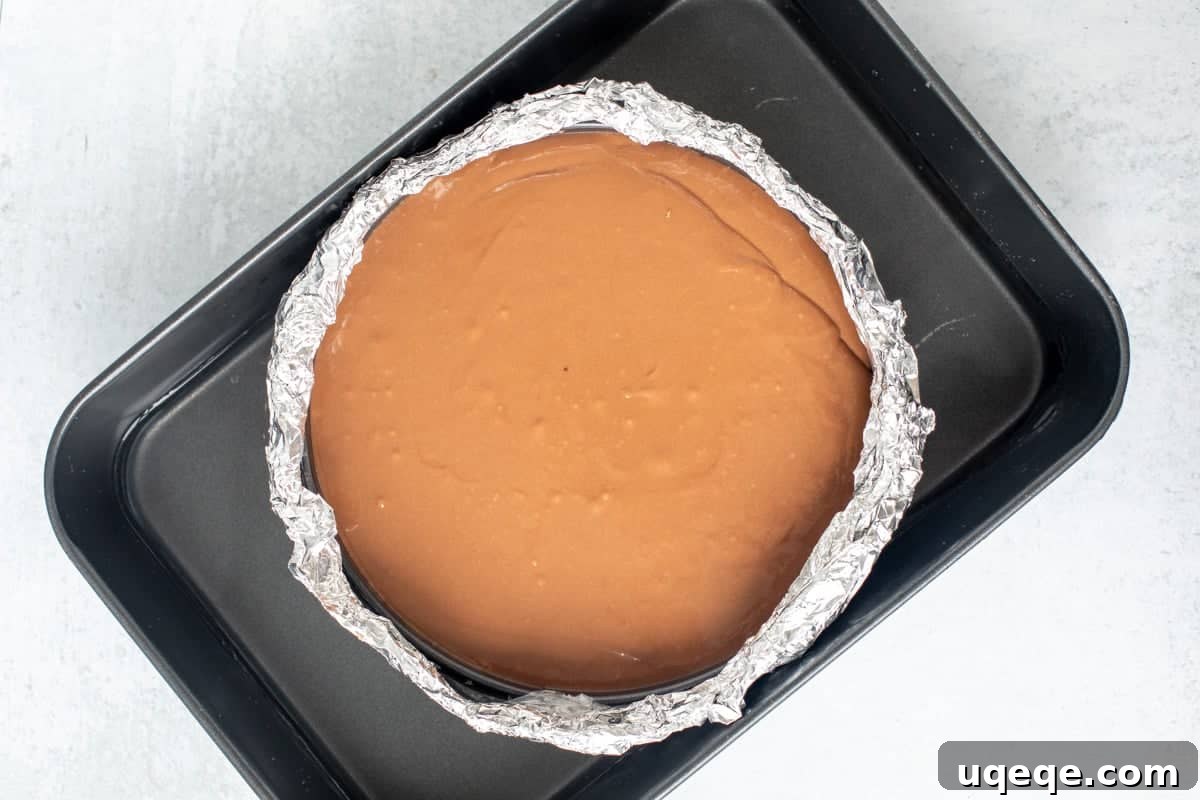
- Aluminum Foil Wrap: Follow up by wrapping the entire outside of the pan with heavy-duty aluminum foil. For maximum protection, we recommend wrapping it at least four times, ensuring both the bottom and sides are thoroughly covered and all seams are securely sealed. If you skipped the oven bag in step one, it’s absolutely vital to wrap the pan exceptionally well with foil to prevent any moisture ingress.
Creating the Perfect Oreo Crust
Once your pan is expertly prepared, it’s time to create the irresistible foundation for your cheesecake – the Oreo crust. This simple yet crucial layer adds a delightful crunch and rich chocolate flavor.
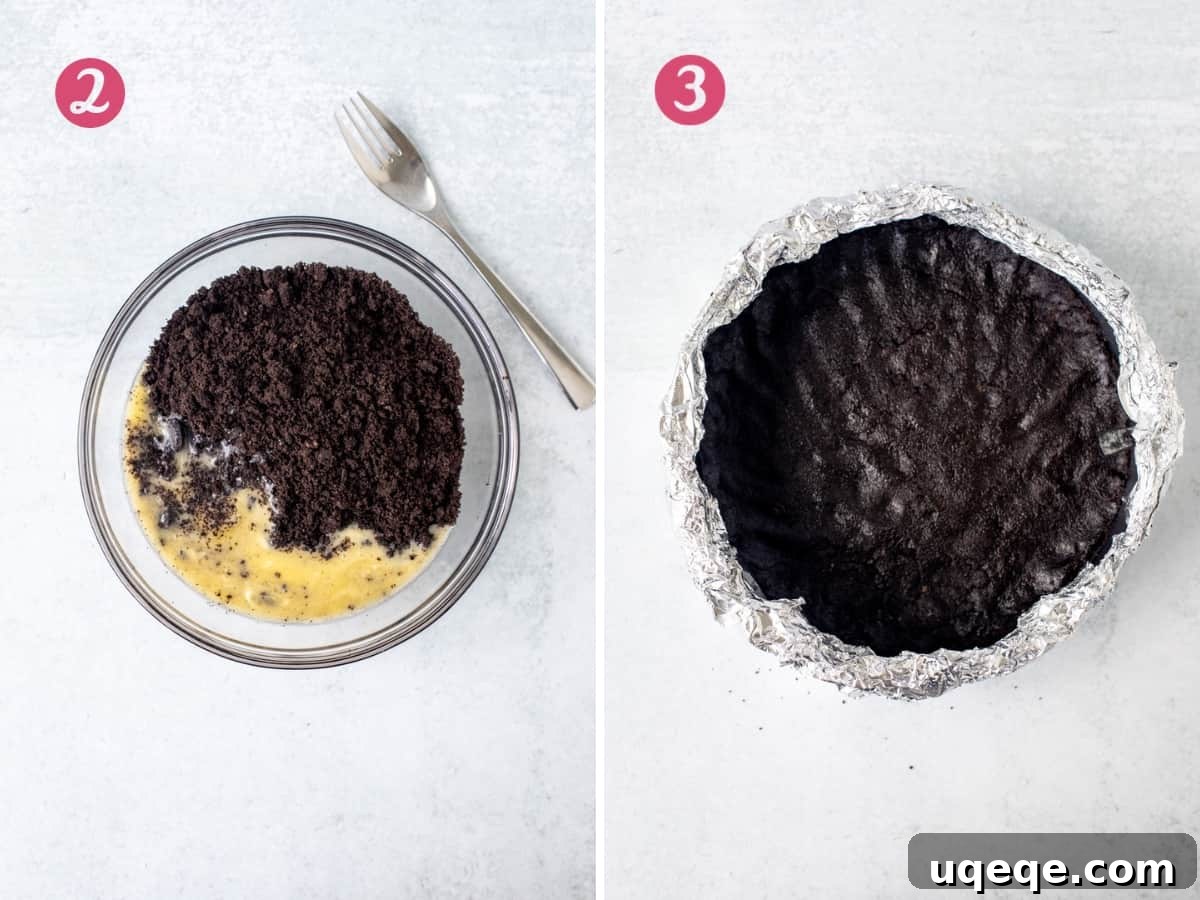
- Crush the Oreos: Take whole Oreo cookies, including both the chocolate wafers and their creamy filling, and crush them until they resemble fine crumbs. A food processor makes this task quick and effortless with just a few short pulses. If you don’t have a food processor, a freezer bag and a rolling pin will do the job perfectly.
- Combine with Butter: In a bowl, thoroughly mix the crushed Oreo crumbs with melted unsalted butter. Alternatively, if using a food processor, add the melted butter directly to the crumbs and pulse a few more times until combined.
- Press into Pan: Press the buttery cookie mixture firmly into the bottom of your prepared springform pan. Ensure you create a slight lip around the edge of the crust, which helps contain the filling and adds visual appeal.
- Pre-bake for Crunch: Bake the crust on its own for approximately 10 minutes. This pre-baking step is essential for achieving a sturdier and wonderfully crunchy crust – a definite bonus for any cheesecake!
Mixing the Dreamy Nutella Cheesecake Filling
While your Oreo crust is cooling slightly, you can begin preparing the star of the show: the incredibly smooth and rich Nutella cheesecake filling.
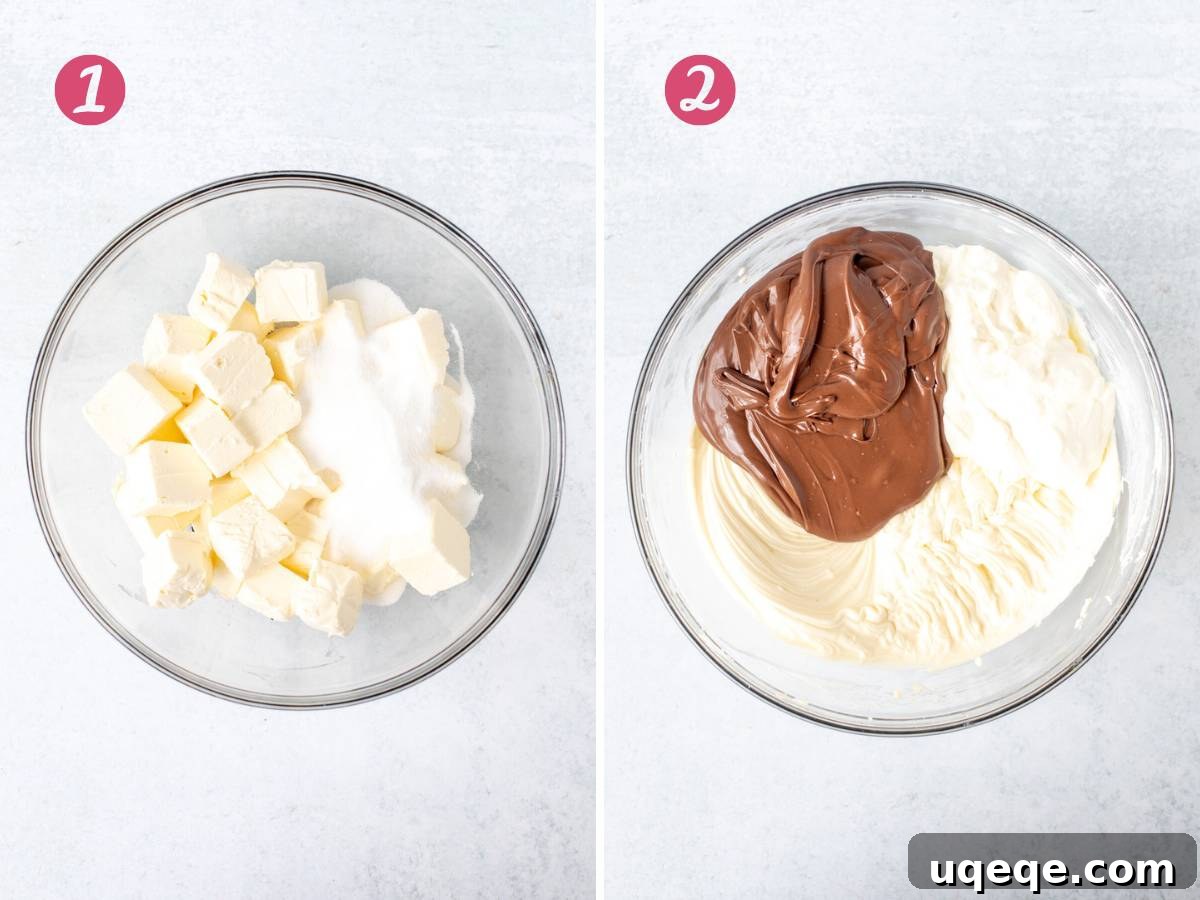
- Cream Cheese and Sugar Base: In a large mixing bowl, beat together the softened full-fat cream cheese and granulated sugar until the mixture is light, fluffy, and completely smooth. This step typically takes a few minutes, and it’s vital to eliminate any lumps for a truly silky cheesecake. Periodically turn off your mixer and use a rubber spatula to scrape down the bottom and sides of the bowl, ensuring all ingredients are fully incorporated.
- Incorporate Nutella and Sour Cream: Next, add the Nutella and sour cream to the cream cheese mixture. Continue beating until everything is thoroughly combined and smooth. At this stage, the mixture will be quite thick, which is perfectly normal and expected.
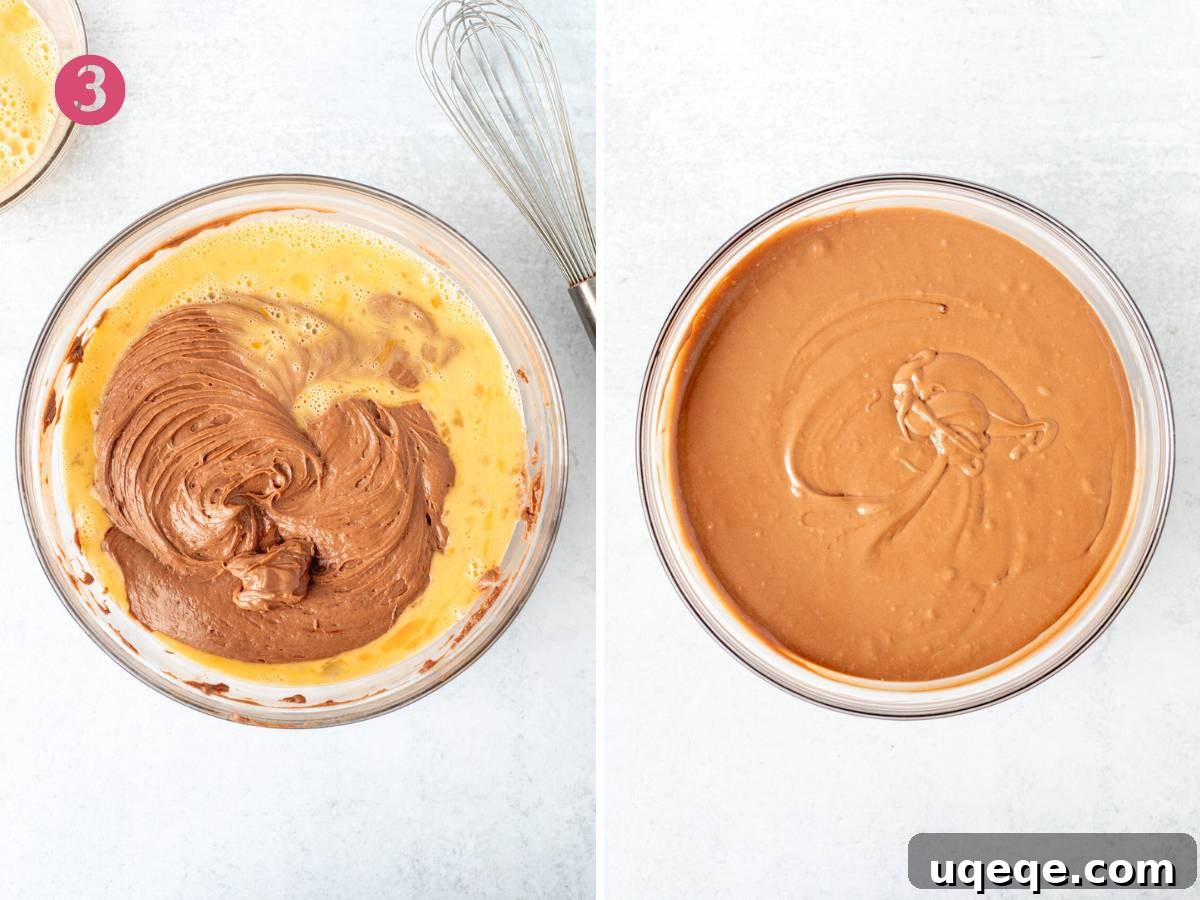
- Gently Fold in Eggs: This is a critical step for preventing cracks in your cheesecake. First, lightly whisk your eggs in a separate bowl until just combined. Then, gradually add the whisked eggs to the cheesecake batter, about half at a time, folding them in gently by hand with a wire whisk. The key here is to avoid overmixing the batter after the eggs are added, as excessive air incorporation can lead to an uneven rise and unsightly cracks in your finished cheesecake.
Baking and Cooling Your Masterpiece in a Water Bath
Now, it’s time for the magic of the water bath – a technique that ensures your Nutella cheesecake bakes evenly and gently, resulting in that coveted creamy texture and preventing cracks. A water bath works by adding steam to the oven environment, which helps maintain consistent moisture and stabilizes the temperature around the cheesecake. This gentle heat transfer allows the cheesecake to bake slowly and uniformly.
- Prepare for the Water Bath: Pour the luscious Nutella cheesecake batter into your prepared springform pan (which should still be wrapped in foil). Carefully place this pan in the center of a larger roasting pan.
- Add Boiling Water: Pour about 1 to 1.5 inches of boiling water into the roasting pan. The water level should reach roughly one-third to half-way up the sides of the springform pan. Be careful not to splash water into the cheesecake batter itself.
- Bake to Perfection: Transfer the entire roasting pan assembly into your preheated oven. Bake for approximately 50-60 minutes. The cheesecake is done when the edges appear set, but there’s still a slight, gentle wobble in the very center, similar to the consistency of a bowl of pudding or Jell-O. To test for doneness, simply give the roasting pan a very gentle nudge to observe the wobble.
- Slow Cooling is Key: Once baked, turn off the oven and leave the cheesecake inside with the oven door slightly ajar for about 30-60 minutes. This gradual cooling prevents drastic temperature changes that can lead to cracks. After this, carefully remove the cheesecake (still in its water bath) from the oven and allow it to cool completely to room temperature on a wire rack. Then, gently trace around the outside edge of the cheesecake with a thin, sharp knife to help prevent sticking.
Essential Tips for a Flawless Nutella Cheesecake
Making a show-stopping homemade cheesecake is surprisingly straightforward, but it does benefit from some careful attention to detail. Given that the ingredients are a bit of an investment, taking a moment to review these expert tips will significantly boost your chances of achieving a perfect, crack-free, and incredibly creamy Nutella cheesecake every time.
- Room Temperature Ingredients are Non-Negotiable: Always ensure your cream cheese, sour cream, and eggs are at room temperature before you begin mixing. This means taking them out of the fridge at least 30-60 minutes prior to baking. Room temperature ingredients blend much more smoothly and evenly, preventing lumps and ensuring a homogenous, velvety batter. For quicker warming, place eggs in a bowl of warm (not hot) water for about 10-15 minutes.
- Choose Full-Fat, Brick-Style Cream Cheese: For the iconic creamy texture that defines a great cheesecake, full-fat, brick-style cream cheese is essential. Avoid low-fat, whipped, or spreadable varieties, as these contain too much water and will result in a less luxurious, possibly grainy texture. Similarly, opt for full-fat sour cream.
- Sour Cream Alternative: In a pinch, if sour cream is unavailable, you can substitute it with an equal amount of full-fat, plain Greek yogurt for a similar tang and creaminess.
- Nutella: The Star Ingredient: This recipe requires a substantial amount of Nutella – you’ll need approximately 1 ¾ cups for the cheesecake filling and an additional ¾ cup for the ganache topping. A 35.2 oz (1 kg) tub of Nutella is usually perfect for this, leaving you with a little leftover for other treats. We strongly advise against using homemade Nutella, as its consistency can vary significantly from commercially prepared Nutella, potentially leading to separation and adding unwanted oil to your batter. Stick with the classic for predictable, delicious results.
- Prevent Lumps, Scrape the Bowl: When mixing the cheesecake filling, particularly when combining the cream cheese and sugar, pause your mixer periodically. Use a spatula to scrape down the sides and bottom of the bowl thoroughly. This prevents any unmixed pockets of cream cheese or sugar from forming, ensuring your filling is perfectly smooth and lump-free.
- Do Not Overmix: After adding the eggs, mix the batter as little as possible. Overmixing incorporates too much air, which can cause the cheesecake to puff up in the oven and then fall dramatically, leading to cracks. Gently folding in the whisked eggs by hand is the best approach.
Make-Ahead Strategies and Serving Suggestions
One of the beauties of this Nutella cheesecake is that it’s an ideal dessert for making in advance, allowing you to enjoy a stress-free serving day. The cheesecake requires a leisurely cooling period followed by at least 6 hours of chilling in the refrigerator before it can be truly enjoyed. For the best results and convenience, we highly recommend baking your cheesecake the day before you plan to serve it.
- Overnight Chill: After baking, allow the cheesecake to cool completely in its water bath until it reaches room temperature. Once cooled, carefully lift the springform pan out of the roasting pan, cover it gently with aluminum foil, and place it in the refrigerator to chill overnight. This extended chilling time is crucial for the cheesecake to firm up properly and for the flavors to fully develop.
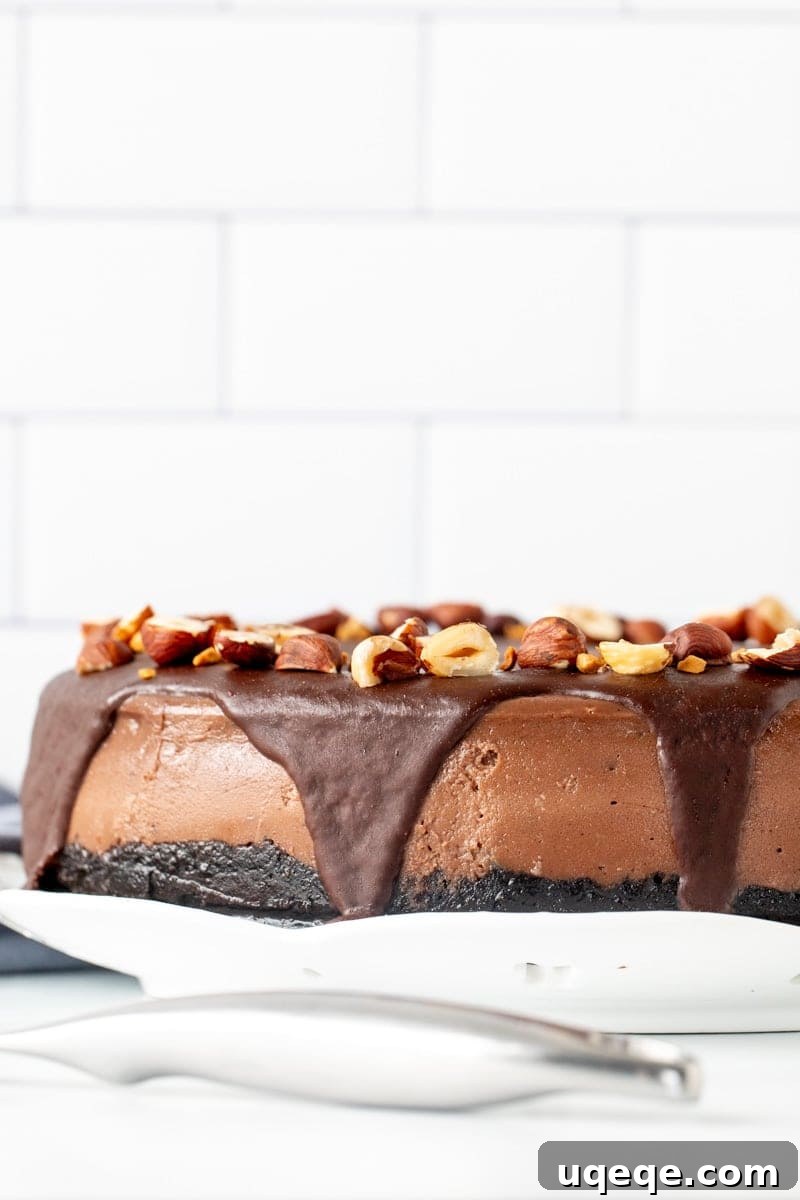
- Ganache Timing: The next day, at any point when you have free time, you can prepare the exquisite Nutella ganache topping. Once made, pour it over the chilled cheesecake and return it to the fridge until you are ready to serve. This allows the ganache to set slightly and adhere beautifully to the cheesecake.
- Interactive Serving Idea: For a more interactive and customizable dessert experience, consider making the Nutella ganache just before serving. Pour the warm, glossy ganache into an elegant gravy boat or small pitcher, allowing each guest to drizzle their slice of Nutella cheesecake with the deliciously creamy sauce to their heart’s content.
- Garnish for Elegance: Don’t forget the finishing touches! A sprinkle of toasted hazelnuts adds a lovely crunch and complements the Nutella flavor perfectly. Fresh berries, like raspberries or sliced strawberries, can also provide a bright, fresh contrast to the rich chocolate-hazelnut notes.
If you’re still craving more delightful chocolate cheesecake recipes after indulging in this Nutella masterpiece, be sure to explore these other fantastic options:
- Chocolate Cheesecake Bars
- Oreo Cheesecake
- No Bake Chocolate Cheesecake
Or for more irresistible Nutella-infused treats, don’t forget to try:
- Nutella Chocolate Chip Cookies
- Nutella Brownies
- or Nutella Mug Cake
Nutella Cheesecake
By: Fiona Dowling
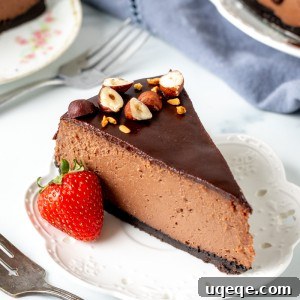
This decadent Nutella cheesecake is rich, creamy, and brimming with the irresistible flavor of Nutella. With its crisp Oreo cookie crust and a lavish Nutella ganache topping, it’s a truly stunning dessert designed to impress your guests and satisfy even the most intense chocolate cravings!
Prep: 1 hr
Cook: 55 mins
Cooling and Chilling: 7 hrs
Total: 9 hrs
Servings: 12 pieces
Pin Recipe |
Rate Recipe |
Print Recipe
Equipment
- 9-inch springform pan
- Large Roasting Pan
- Food Processor (optional, for crushing Oreos)
- Electric Mixer (stand or hand-held)
- Wire Whisk
- Rubber Spatula
- Heatproof Glass Bowl (for ganache)
Ingredients
Oreo Crust
- 30 Oreo cookies (wafers and filling)
- 1/3 cup unsalted butter (75 grams), melted
Cheesecake Filling
- 20 oz full-fat cream cheese (568 grams), brick style, softened to room temperature
- 3/4 cup granulated sugar (150 grams)
- 1 3/4 cups Nutella
- 3/4 cup sour cream (180 grams), full-fat, at room temperature
- 4 large eggs, at room temperature, lightly whisked
- Boiling water, for the water bath
Nutella Ganache
- 3/4 cups Nutella
- 1/2 cup heavy cream (120 ml)
- Toasted hazelnuts, optional, for topping
Instructions
- Preparation: Preheat the oven to 350°F (180°C) and position the oven rack in the lower third. Wrap the outside of a 9-inch (23-cm) springform pan with an oven bag or slow cooker liner. Secure tightly. Then, wrap the outside of the pan with aluminum foil at least 3-4 times, ensuring the bottom and sides are fully covered and all seams are sealed to prevent water leakage.
Oreo Crust
- Crush Oreos: Add the Oreos to a food processor and pulse until they become fine crumbs. Alternatively, place them in a freezer bag and crush with a rolling pin.
- Mix Crust: Combine the Oreo crumbs and melted butter in a bowl with a fork, or add the melted butter to the food processor and pulse a few times.
- Press Crust: Press the mixture evenly into the bottom of the prepared springform pan, creating a slight lip around the edge.
- Bake Crust: Bake in the preheated oven for 10 minutes. Remove from the oven and keep the oven turned on.
Cheesecake Filling
- Cream Cheese Base: In a very large bowl, using an electric mixer, beat the room temperature cream cheese and granulated sugar until soft, smooth, and creamy, ensuring no lumps remain. Stop the mixer periodically to scrape down the sides and bottom of the bowl.
- Add Nutella & Sour Cream: Mix in the Nutella and sour cream until the mixture is smooth and fully combined. Scrape down the bowl again.
- Incorporate Eggs: Ensure your large eggs are lightly whisked in a separate bowl. Then, gently whisk the whisked eggs into the batter, about half at a time, using a wire whisk. Mix by hand to avoid overmixing, which can lead to cracks.
Baking & Cooling the Cheesecake
- Prepare Water Bath: Place the springform pan (still wrapped in foil) in the middle of a large roasting pan. Pour the cheesecake batter into the springform pan and gently smooth the top.
- Add Water: Carefully pour boiling water into the roasting pan so that there is about 1/2 to 1 inch of water surrounding the springform pan.
- Bake: Place the entire roasting pan assembly into the preheated oven. Bake for approximately 50-60 minutes, or until the top appears mostly set but there is still a slight wobble in the center of the cheesecake when gently nudged.
- Cool Slowly: Turn off the oven, leave the oven door slightly ajar, and allow the cheesecake to cool inside the water bath within the oven for 30-60 minutes. This slow cooling helps prevent cracks.
- Chill: Remove the water bath from the oven. Gently trace around the outside edge of the cheesecake with a thin, sharp knife to release it from the pan sides. Let the cheesecake cool completely to room temperature on a wire rack. Once cool, cover the springform pan with foil and place it in the fridge to chill for at least 6 hours, or ideally, overnight.
Nutella Ganache
- Melt Nutella: Measure out the Nutella and place it in a heatproof glass bowl.
- Heat Cream: Heat the heavy cream in a small saucepan or microwave until it’s hot but not boiling. This can be done over low heat on the stovetop or in 30-second intervals in the microwave.
- Combine Ganache: Pour the hot cream over the Nutella. Let it sit for a minute, then whisk gently until the mixture is completely smooth and glossy.
- Unmold Cheesecake: Take the chilled cheesecake out of the fridge. Trace around the edges of the cake again with a thin, sharp knife, then carefully unclamp and remove the outer ring of the springform pan. If there is any condensation on the top of the cheesecake, gently blot it off with a paper towel.
- Apply Ganache & Serve: Pour the warm Nutella ganache evenly over the top of the cheesecake, allowing it to elegantly drip down the sides. Optionally, sprinkle toasted hazelnuts around the edges for added texture and visual appeal. Return the cheesecake to the fridge until you are ready to serve.
Notes
- Room Temperature Ingredients: For the smoothest batter and best results, ensure cream cheese, sour cream, and eggs are at room temperature. Take them out of the fridge about 30-60 minutes before you start. Cut cream cheese into cubes to speed up softening.
- Nutella Quantity: For both the cheesecake filling and topping, you will need approximately one 33.5 ounce (1 kg) jar of Nutella. You will have a small amount leftover. If you decide not to make the Nutella topping, one 13 ounce (400 gram) jar will be sufficient for the filling.
- Make Ahead Tips: This cheesecake is perfect for making ahead. Bake it the day before you plan to serve. After it has fully cooled, chill it overnight in the fridge. You can prepare and add the ganache topping at any point while the cheesecake is chilling, then return it to the fridge until ready to serve.
- Serving Tips: For clean, precise slices, ensure the cheesecake is thoroughly chilled directly from the fridge. Use a thin, sharp knife (not a butter knife) and make sure to slice all the way through the Oreo crust. Wipe the knife clean after each slice for the best presentation.
- Nutrition: The provided nutritional details are an estimate only, based on 1 slice with Nutella glaze, assuming the cheesecake is cut into 12 uniform pieces. You can easily get 14 or 15 slices from a single cake, which would adjust the per-serving values.
- Storage: Store any leftover cheesecake covered tightly in an airtight container in the fridge for up to 4 days. Baked and cooled cheesecake (without the glaze) can be wrapped tightly in plastic wrap and then foil, and frozen for up to 2 months. Thaw in the refrigerator overnight before serving and adding the ganache.
Nutrition
Calories: 815 kcal
Carbohydrates: 76g
Protein: 10g
Fat: 53g
Saturated Fat: 36g
Polyunsaturated Fat: 2g
Monounsaturated Fat: 10g
Trans Fat: 0.2g
Cholesterol: 127mg
Sodium: 316mg
Potassium: 433mg
Fiber: 4g
Sugar: 61g
Vitamin A: 1097IU
Vitamin C: 0.2mg
Calcium: 149mg
Iron: 7mg
Like this recipe? Rate and comment below!