
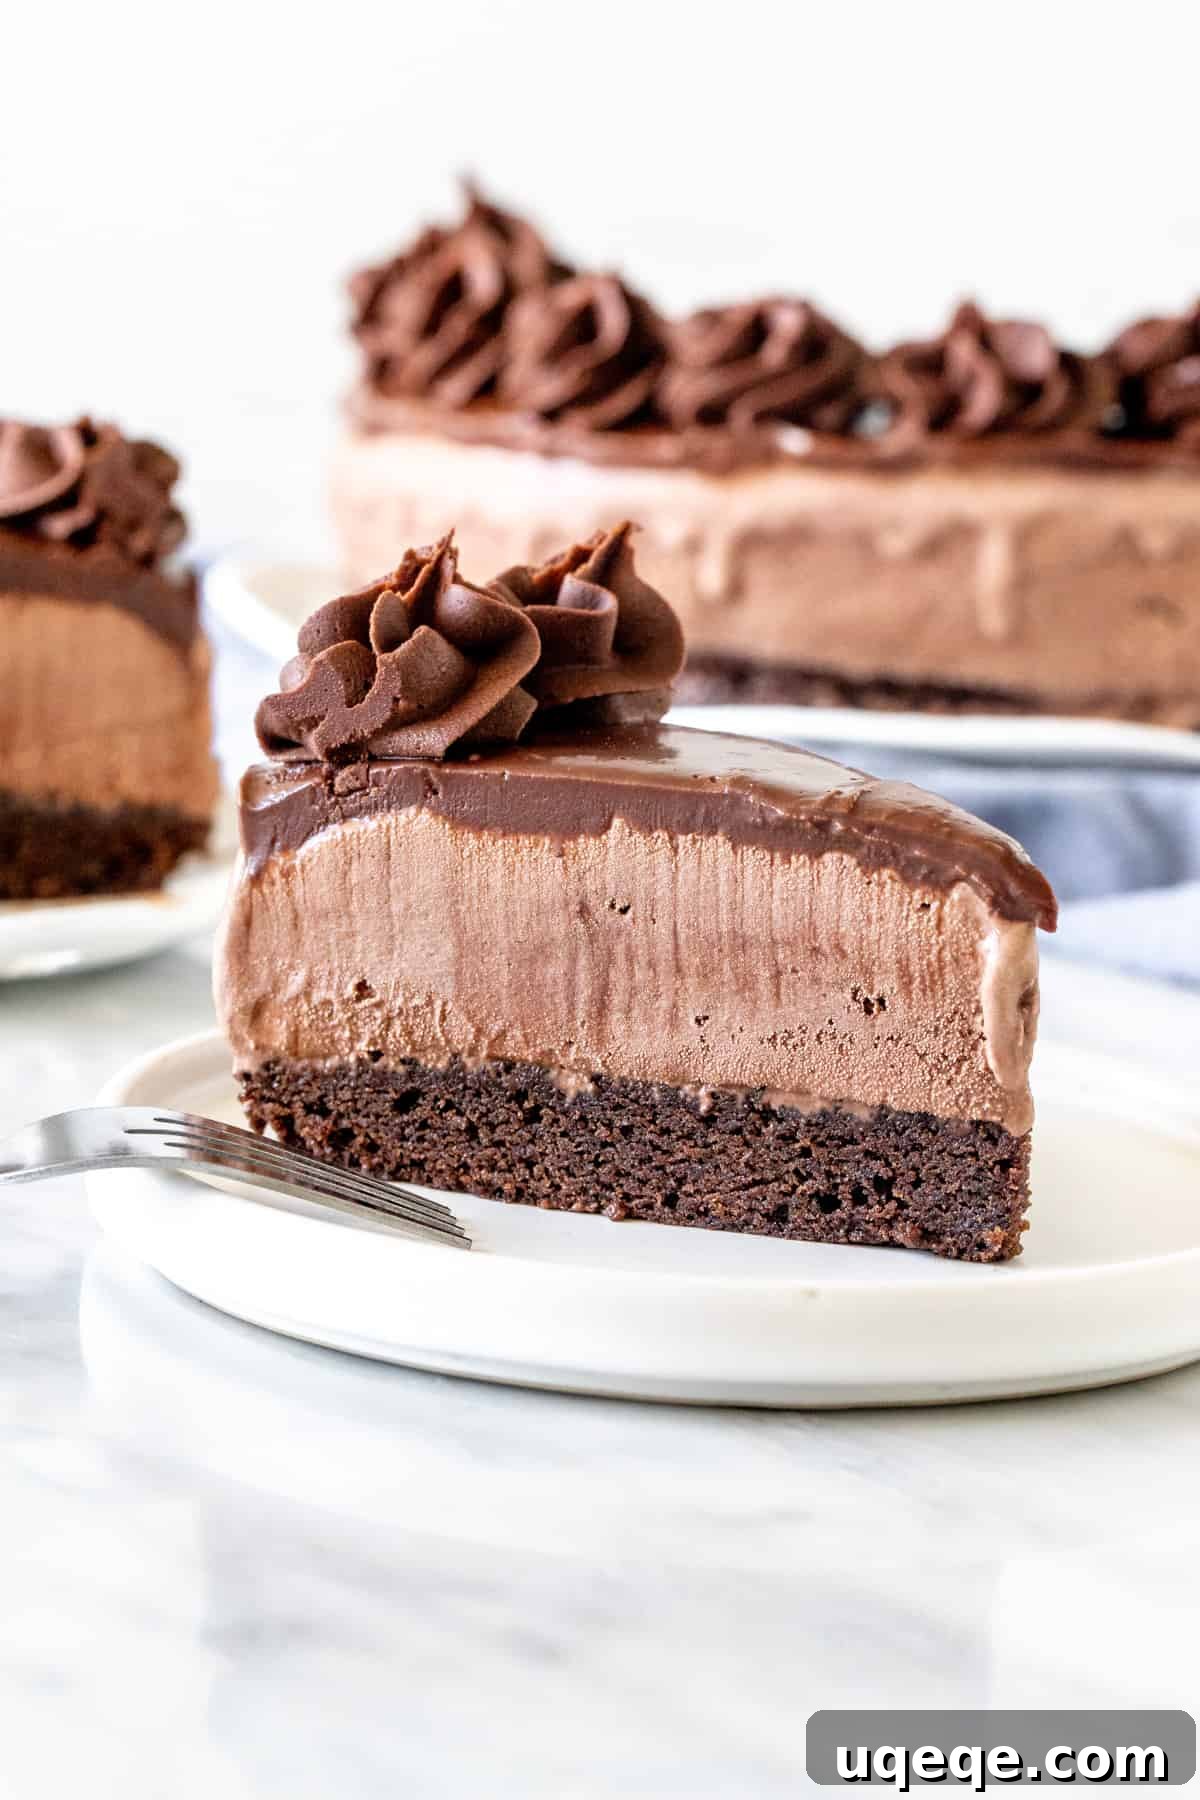
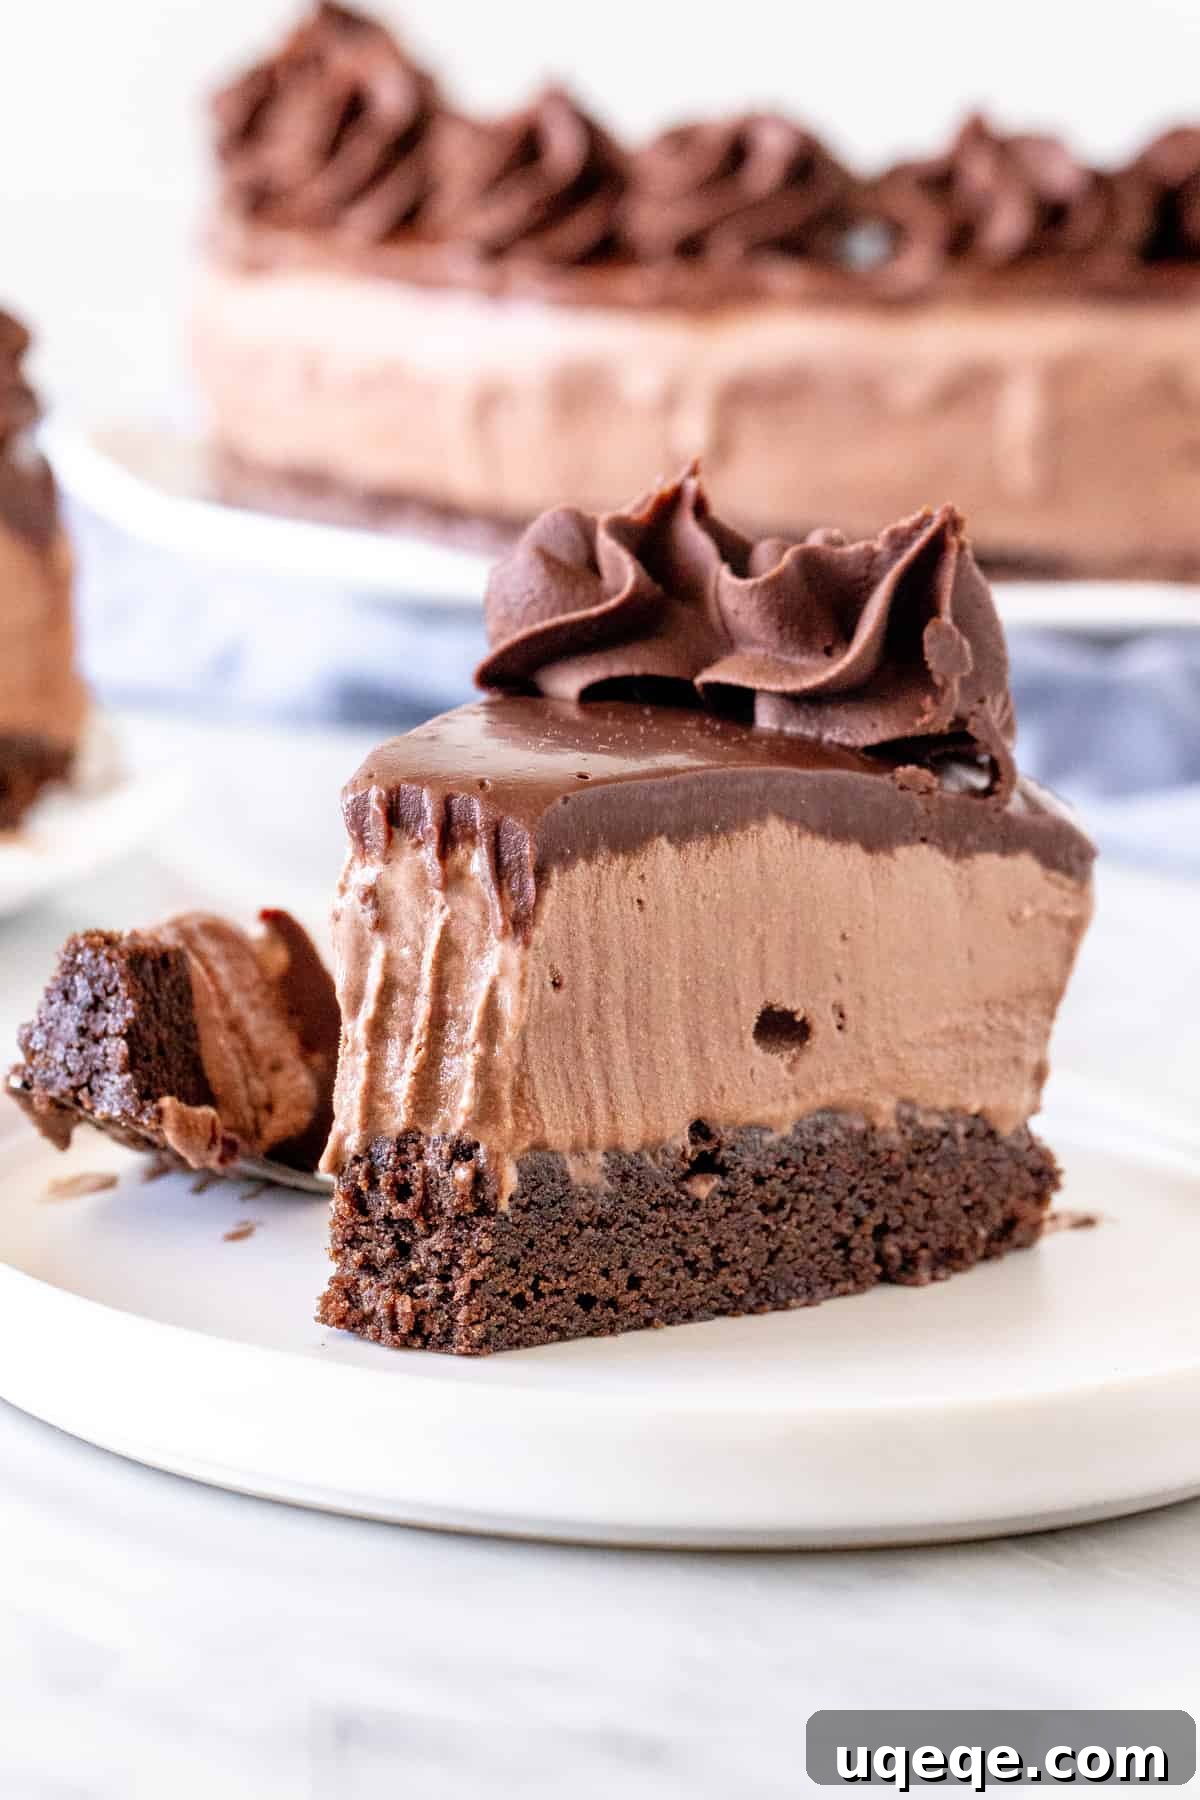
Prepare to dive into a world of unparalleled chocolate indulgence with this show-stopping Homemade Chocolate Ice Cream Cake. Imagine a rich, fudgy brownie base, crowned with layers of cold, creamy chocolate ice cream, generously drizzled with decadent chocolate fudge, and elegantly finished with a swirl of velvety chocolate frosting. This isn’t just a dessert; it’s an experience meticulously crafted for the true chocolate lover. Despite its impressive appearance and rich layers, this recipe is surprisingly easy to prepare, making it the perfect treat for warm weather gatherings, special occasions, or simply when you crave an extraordinary chocolate fix.
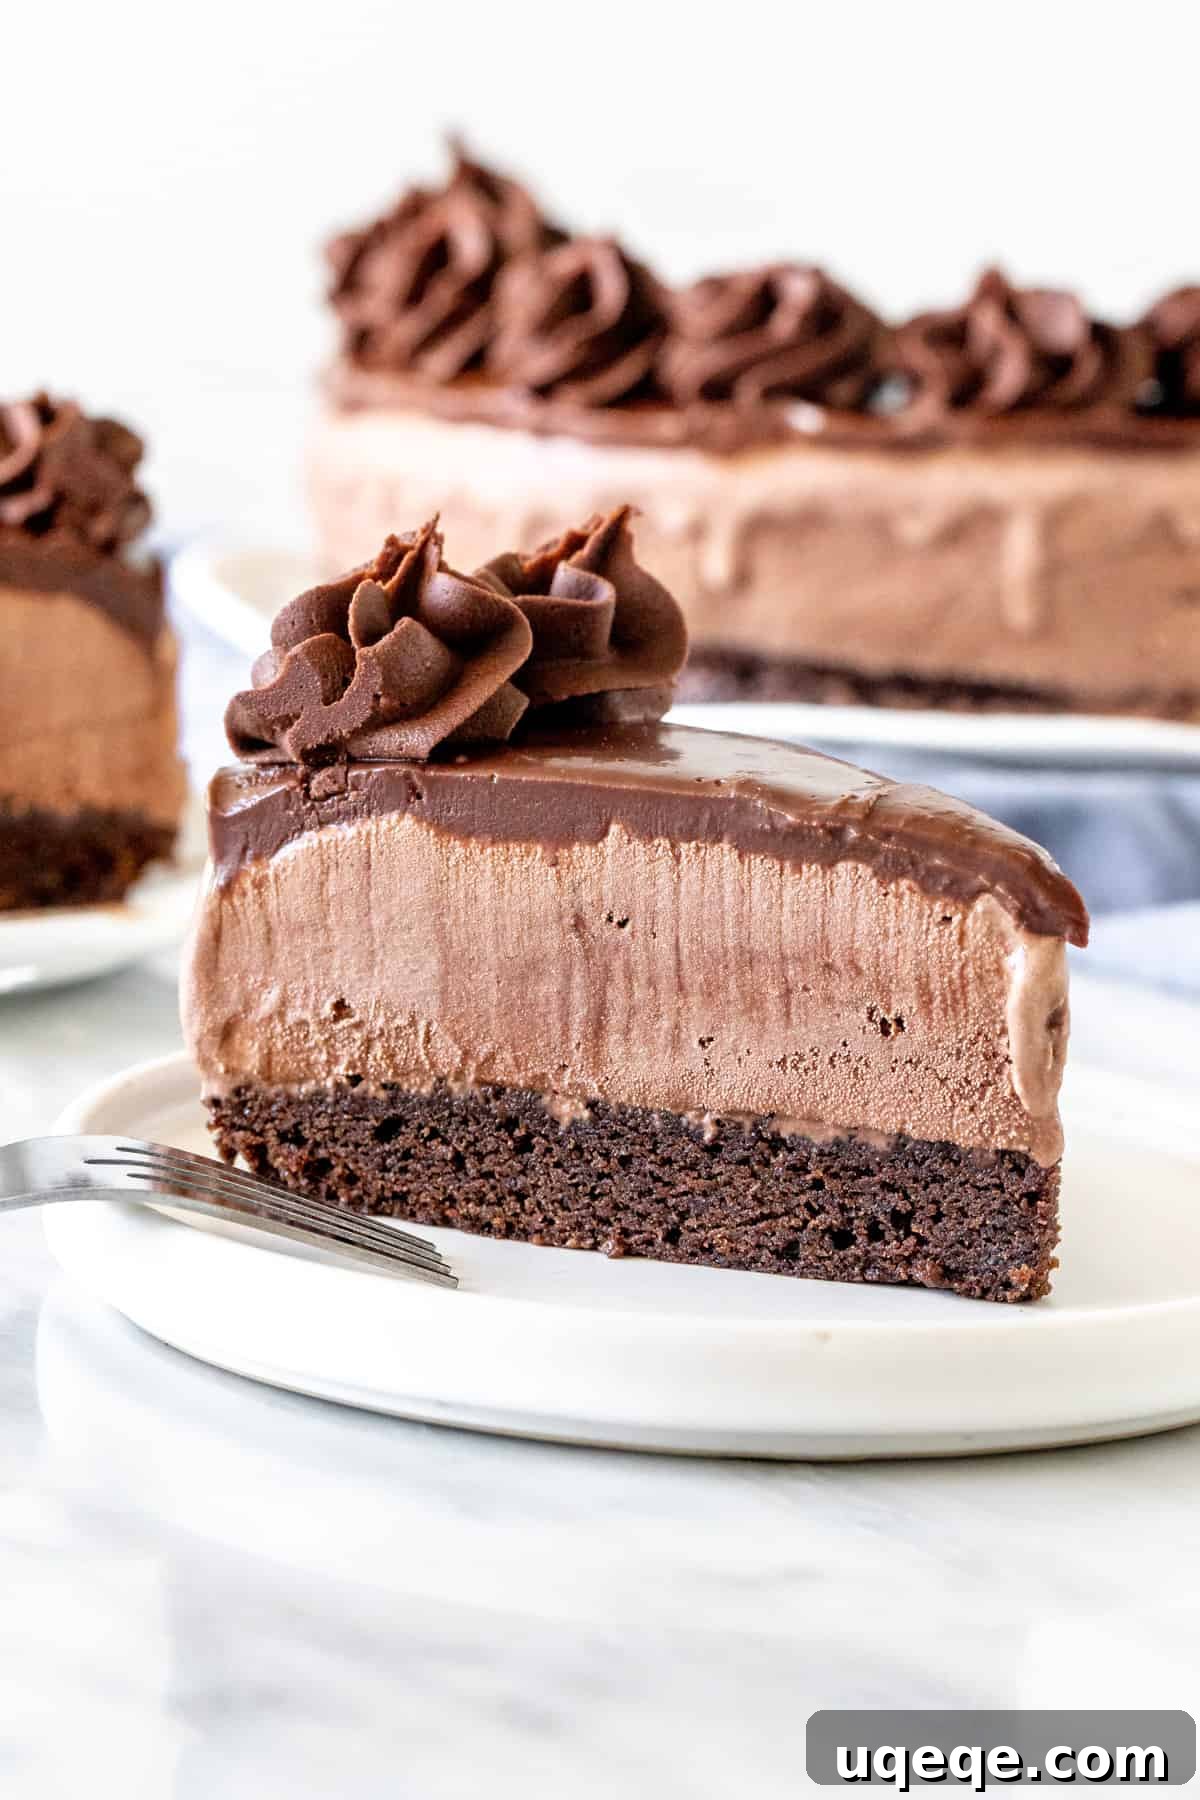
The Ultimate Homemade Chocolate Ice Cream Cake
For those who believe there’s no such thing as too much chocolate, this decadent chocolate ice cream cake is truly a dream come true. It meticulously combines four irresistible layers of chocolate goodness, creating a dessert that is both visually stunning and incredibly delicious. Each slice promises a symphony of textures and flavors – from the dense, chewy brownie to the refreshing, smooth ice cream, all enhanced by rich, glossy fudge and a touch of elegant frosting.
Crafting this masterpiece requires minimal effort in the kitchen, but careful planning is key to ensure each layer sets perfectly. The magic primarily happens in the freezer, allowing you to space out the preparation over two days. Typically, I bake the brownie base and assemble the primary ice cream layer a day before serving. This allows ample time for the ice cream to firm up beautifully, ensuring clean, perfect slices. The final touches, like the chocolate ganache and decorative frosting, can then be added on the day of serving, making for a fresh and spectacular presentation.
Crafting Your Masterpiece: Tips & Tricks for Success
Creating a homemade ice cream cake that impresses doesn’t have to be complicated. With a few key tips and tricks, you can ensure every layer is perfect, from the fudgy foundation to the icy top. Let’s walk through the essential steps to make your chocolate ice cream cake an unforgettable treat.
The Foundation: A Perfect Brownie Base
The journey to the ultimate chocolate ice cream cake begins with its base: a rich, fudgy brownie. This layer not only adds incredible chocolate flavor but also provides a sturdy foundation for the creamy layers above. You have flexibility here; you can use your favorite brownie recipe designed for an 8×8 or 9×9 inch (20×20 or 23×23 cm) square pan, or opt for a convenient box mix. For a quick and reliably chewy brownie, I highly recommend my one-bowl chewy brownie recipe (just omit the chocolate chips for this application).
Baking in a Springform Pan: For ice cream cakes, a 9-inch (23 cm) round springform pan is indispensable. Its removable sides make unmolding a breeze, ensuring your cake retains its beautiful shape. When baking the brownie, wrap the outside of the springform pan with aluminum foil. This simple trick provides an extra layer of protection against leaks, especially if your pan’s seal isn’t perfectly tight. Lightly grease the bottom and sides before pouring in the batter. The baking time will be approximately the same as specified for an 8×8 or 9×9 inch square pan, typically 25-30 minutes, or until a toothpick inserted into the center comes out with a few moist crumbs.
Pro Tip: Avoid brownies with large, unmelted chocolate chips. While delicious in a regular brownie, frozen chocolate chips become extremely hard and can make slicing the ice cream cake very challenging. If you want extra chocolate in your brownie base, ensure it’s melted into the batter for a smooth, cohesive texture when frozen.
The Heart: Creamy Chocolate Ice Cream Layer
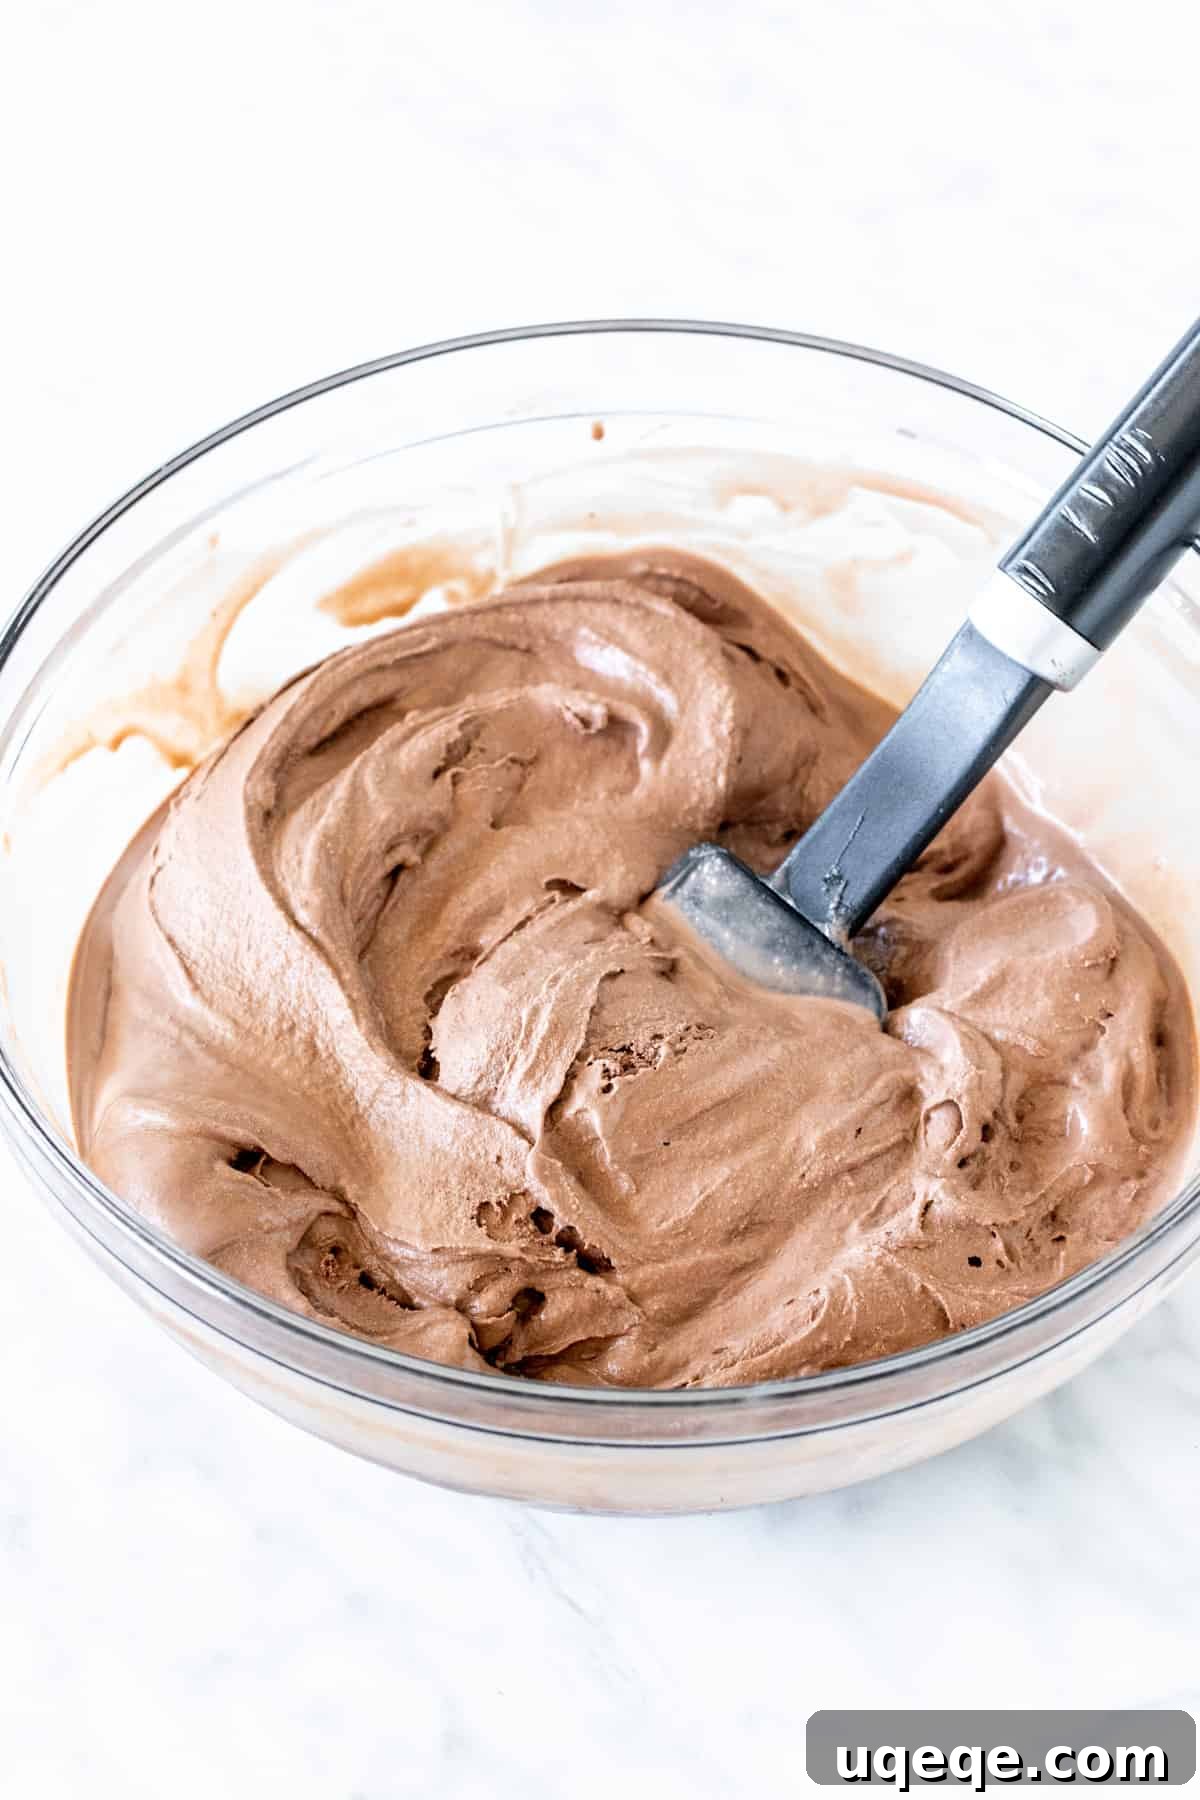
Once your brownie base is completely cooled, it’s time for the star of the show: the chocolate ice cream. The key to a smooth, evenly distributed ice cream layer is allowing it to soften properly before spreading. Take your 1.5-quart (approx. 1.5 liters) chocolate ice cream out of the freezer and let it sit at room temperature for about 20-30 minutes. It should be soft enough to stir but not completely melted.
Transfer the softened ice cream to a large bowl and stir it vigorously until it reaches a smooth, consistent texture, much like soft-serve ice cream. This step is crucial. It eliminates any hard spots or ice crystals and makes the ice cream pliable enough to spread effortlessly over the brownie base. A smooth consistency ensures an even layer that will freeze uniformly, preventing air pockets and creating a perfect surface for your toppings. Once spread, cover the pan tightly with plastic wrap or foil and place it back in the freezer. This layer requires significant time to firm up completely, ideally overnight (at least 12 hours) to achieve the necessary solid structure.
Decadent Toppings: Elevating Your Chocolate Ice Cream Cake
The toppings are where your chocolate ice cream cake truly transforms from delicious to divine. It’s best to add these elements on the day you plan to serve, ensuring they are fresh and vibrant. The chocolate ice cream layer must be fully hardened before you introduce any warm or semi-liquid toppings like ganache.
The Glaze: Rich Chocolate Ganache
A silky, glossy chocolate ganache adds an intense chocolate flavor and a beautiful sheen to the top of your ice cream cake. This elegant topping is simple to make and instantly elevates the dessert. To create it, finely chop semi-sweet chocolate and place it in a heatproof bowl. Heat heavy cream until it’s almost boiling, then pour it over the chopped chocolate. Let it sit for a few minutes to allow the chocolate to melt, then whisk until smooth and lustrous. If any chocolate pieces remain, a quick, gentle microwave pulse (on medium power) can help achieve that perfect consistency. Once smooth, pour the ganache over the hardened ice cream layer, spreading it evenly. Return the cake to the freezer to set the ganache.
The Flourish: Elegant Chocolate Frosting
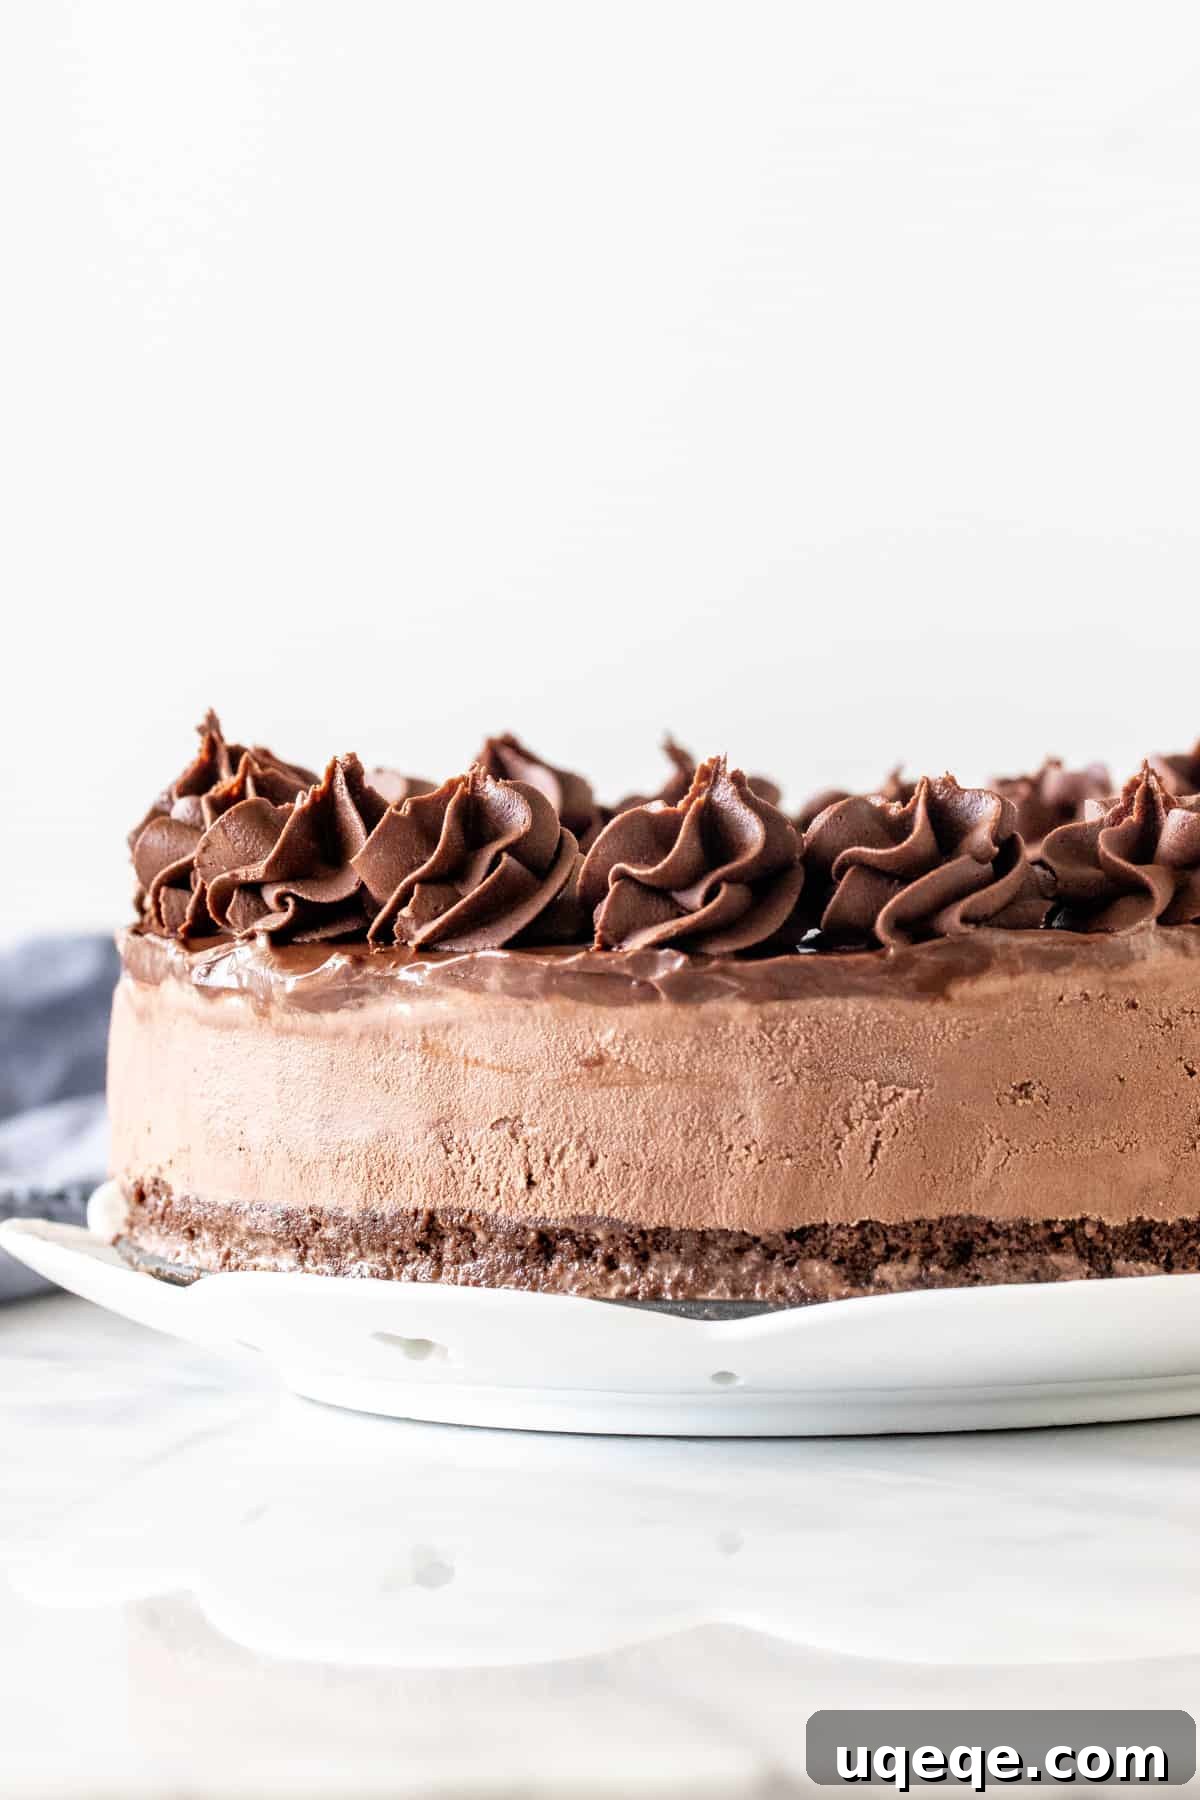
To truly give your cake a show-stopping finish and an extra dose of chocolate, a homemade chocolate frosting piped around the edges is perfect. This adds not only visual appeal with beautiful rosettes or swirls but also a delightful creamy texture contrast. Our recipe includes a simple yet delicious chocolate buttercream frosting. You’ll beat softened unsalted butter until creamy, then gradually incorporate cocoa powder and powdered sugar, alternating with small amounts of whipping cream or milk until you achieve your desired sweetness and piping consistency. Transfer the frosting to a piping bag fitted with a star tip (like a 1M tip) and pipe elegant decorations around the top edge of the cake. This final touch makes your cake look professionally crafted and adds another layer of rich chocolate flavor.
Beyond the Classic: Creative Topping Alternatives
While the combination of chocolate ganache and frosting is wonderfully decadent, feel free to customize your ice cream cake with other fantastic toppings based on your preferences or what you have on hand. Here are some inspiring ideas:
- Simple Whipped Cream: For a lighter contrast, whip ½ cup of heavy cream with 2 tablespoons of powdered sugar until stiff peaks form. Spread an even layer on top of the cake for a classic, airy finish.
- Drizzled Sauces: Serve individual slices plain and let guests drizzle their piece with warm chocolate sauce, hot fudge, or even caramel sauce for an extra touch of indulgence.
- Crunchy Delights: Sprinkle crushed Oreo cookies, chocolate chip cookies, chopped nuts (like pecans or walnuts), or even toasted coconut flakes over the ganache or ice cream layer for added texture and flavor.
- Fresh Fruit: For a refreshing twist, add some fresh raspberries or strawberries on top of the ganache or whipped cream. The tartness of the fruit beautifully complements the rich chocolate.
- Candy Toppings: Crushed candy bars, mini chocolate candies, or sprinkles can add a fun, festive touch, especially if you’re making this for a birthday celebration.
Whether you go for the full chocolate overload with ganache and frosting or choose one of these delicious alternatives, this homemade chocolate ice cream cake promises to be the ultimate cold and creamy dessert for any occasion. Its simple prep means more time enjoying the sunshine, or simply more time to savor that well-deserved chocolate moment.
Serving and Storing Your Chocolate Ice Cream Cake
Once your magnificent chocolate ice cream cake is fully assembled and frozen, serving it beautifully is the final step. To ensure perfect slices, take the cake out of the freezer and let it sit on the counter for 5-10 minutes. This slight softening makes it easier to cut through the frozen layers without damaging the cake.
Gently trace around the outer edges of the pan with a thin, sharp knife before unclamping the outer ring of the springform pan. Use a sharp, thin knife to slice the cake, making sure to cut all the way through the brownie base. For exceptionally clean cuts, wipe the knife clean with a warm, damp cloth after each slice. This prevents sticky residue from transferring between slices and gives your cake a professional appearance.
Any leftover cake can be stored, covered tightly, in the freezer for up to 2 weeks. Make sure the pan or container is sealed well to prevent freezer burn, ensuring your cake remains fresh and delicious for future cravings.
More Irresistible Ice Cream Cake Recipes to Love:
- Strawberry Shortcake Ice Cream Cake
- Oreo Ice Cream Cake
- Drumstick Cake
- Mint Chip Ice Cream Cake
Chocolate Ice Cream Cake
Rate Recipe
Print Recipe
Equipment
-
9-inch springform pan
Ingredients
Brownie Base* (or use your favorite recipe)
- 1/2 cup vegetable oil (120 ml) , or canola
- 1 1/4 cup granulated sugar (250 grams)
- 2 large eggs
- 1 large egg yolk, discard the egg white
- 1 teaspoon vanilla extract
- 3/4 cup all-purpose flour (94 grams)
- 3/4 cup cocoa powder (60 grams)
Ice Cream Layer
- 1.5 quart chocolate ice cream (about 1.5 litres)
Chocolate Ganache*
- 3 ounces semi-sweet chocolate (85 grams)
- 1/3 cup heavy cream (80 ml)
Chocolate Frosting*
- 1/3 cup unsalted butter (74 grams), softened
- 1/4 cup cocoa powder (20 grams)
- 1 – 2 cups powdered sugar (110 – 220 grams)
- 1-3 tablespoons whipping cream (15-45 ml), or milk
Instructions
Brownie Base
-
Preheat your oven to 350°F (180°C).
-
Prepare a 9-inch (23 cm) springform pan by wrapping its exterior with aluminum foil to prevent any leaks during baking. Lightly grease the bottom and sides of the pan with cooking spray or butter.
-
In a medium-sized mixing bowl, whisk together the vegetable or canola oil and granulated sugar until well combined. Incorporate the 2 large eggs, the additional large egg yolk, and the vanilla extract, whisking until the mixture is smooth and slightly lighter in color.
-
Gradually stir in the all-purpose flour and cocoa powder. Mix just until no dry streaks remain and the batter is evenly combined. Be careful not to overmix.
-
Pour the brownie batter into the prepared springform pan. Bake for 25-30 minutes, or until an inserted toothpick comes out clean or with only a few moist crumbs attached. Remove from the oven and allow the brownie base to cool completely on a wire rack before proceeding to the next step.
Ice Cream Layer
-
Remove the chocolate ice cream from the freezer and let it sit at room temperature for 20-30 minutes to soften. It should be soft enough to stir but not melted.
-
Transfer the softened ice cream to a large bowl. Stir it vigorously with a spoon or spatula until it reaches a smooth, uniform consistency, similar to soft-serve ice cream. This ensures an even layer and prevents ice crystals.
-
Evenly spread the softened, stirred ice cream over the completely cooled brownie base in the springform pan.
-
Cover the pan tightly with plastic wrap or aluminum foil to prevent freezer burn. Place it in the freezer for at least 12 hours, or preferably overnight, to allow the ice cream layer to firm up completely.
Chocolate Ganache (Optional)
-
Finely chop the semi-sweet chocolate and place it in a heatproof bowl. The finer the chop, the faster it will melt.
-
Heat the heavy cream in a small saucepan over medium heat, or in the microwave, until it is just simmering or almost boiling.
-
Pour the hot cream directly over the chopped chocolate. Let it sit undisturbed for 2-3 minutes to allow the heat from the cream to melt the chocolate.
-
After 2-3 minutes, whisk the mixture gently starting from the center and working outwards until it is completely smooth and glossy. If any chocolate chunks remain, microwave on medium power for 30-45 seconds (avoid high power) and whisk again until smooth.
-
Remove the chilled ice cream cake from the freezer. Pour the warm ganache evenly over the hardened ice cream layer, spreading it gently to the edges if desired. Cover the pan again and return it to the freezer for at least 30 minutes to allow the ganache to set.
Chocolate Frosting (Optional)
-
In a medium bowl, beat the softened unsalted butter with an electric mixer until it is light and creamy.
-
Add 1 cup of powdered sugar and mix until no lumps remain. Then, beat in the cocoa powder until fully incorporated.
-
Gradually add the remaining powdered sugar (up to another 1 cup), about ½ cup at a time, alternating with spoonfuls of whipping cream or milk (1-3 tablespoons total) until your desired sweetness and piping consistency are achieved. The frosting should be thick enough to hold its shape.
-
Transfer the chocolate frosting to a piping bag fitted with your preferred decorative tip (a 1M star tip is excellent for rosettes). Pipe decorative rosettes or a border around the top edges of the cake. Serve immediately for best results, or return the cake to the freezer until ready to serve.
Serving
-
Before serving, take the ice cream cake out of the freezer and let it sit on the counter for 5-10 minutes to soften slightly. This will make it easier to slice.
-
Gently run a thin, sharp knife around the outer edges of the cake inside the springform pan before unclamping and removing the outer ring.
-
Slice the cake using a sharp, thin knife. Ensure you cut all the way through the firm brownie base. For the cleanest cuts, wipe your knife clean with a warm, damp cloth after each slice.
Notes
- This recipe is versatile and can also be made in a 10-inch (25 cm) springform pan. If using a larger pan, the brownie base will be slightly thinner, and its bake time will likely be reduced to about 20-25 minutes.
- For the brownie base, feel free to substitute the provided recipe with your absolute favorite brownie recipe that’s designed for an 8×8 or 9×9 inch (20×20 or 23×23 cm) pan. You can also use a good quality boxed brownie mix for convenience. Remember the key tip: avoid adding unmelted chocolate chips to the brownie base, as they become very hard when frozen and make slicing extremely difficult. Melted chocolate incorporated into the batter is perfectly fine.
- Instead of the chocolate ganache and frosting combination, you have many options for topping your ice cream cake to suit your taste:
- Use only the chocolate ganache for a sleek, intense chocolate top.
- Apply only the chocolate frosting for a classic, creamy finish.
- For a lighter topping, beat 1/2 cup of heavy whipping cream with 2 tablespoons of powdered sugar until stiff peaks form, then spread it evenly over the cake.
- Leave the cake plain after the ice cream layer has set, and simply drizzle each slice with chocolate sauce, hot fudge, or caramel sauce just before serving.
- Sprinkle crushed Oreo cookies, graham crackers, or your favorite cookie crumbs over the ice cream or ganache layer for an added crunch.
- Combine any of these options for a personalized touch!
- Store the finished ice cream cake covered tightly in the freezer for up to 2 weeks. Ensure it’s well-wrapped to prevent any freezer burn, which can affect the texture and taste.
- Nutrition information provided is an estimate only. It is calculated based on 1 slice of cake with both ganache and frosting, assuming the cake is divided into 12 equal pieces and all the frosting is utilized. Individual results may vary based on specific ingredients and serving sizes.
Nutrition
Carbohydrates: 98g,
Protein: 9g,
Fat: 35g,
Saturated Fat: 23g,
Trans Fat: 1g,
Cholesterol: 111mg,
Sodium: 109mg,
Potassium: 474mg,
Fiber: 5g,
Sugar: 83g,
Vitamin A: 834IU,
Vitamin C: 1mg,
Calcium: 157mg,
Iron: 3mg
Like this recipe? Rate and comment below!