
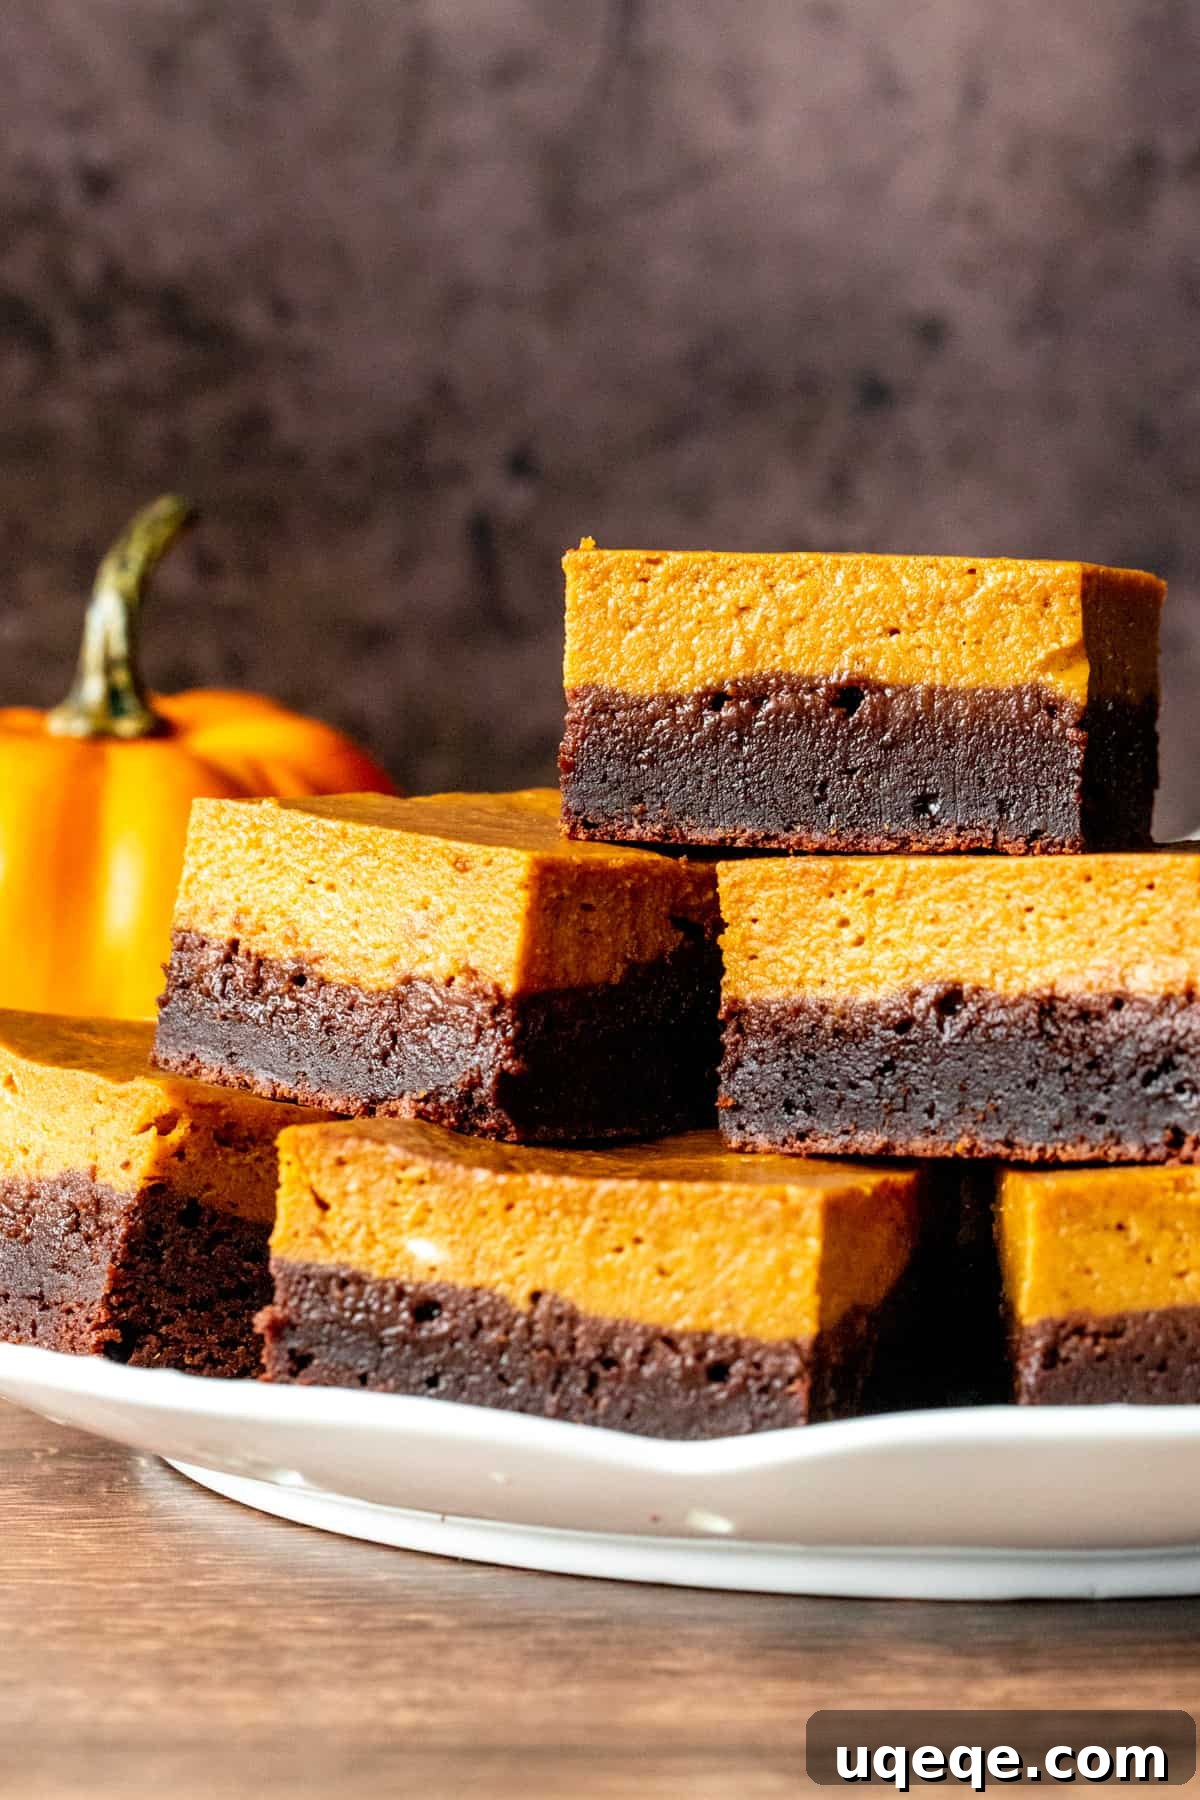
Decadent Pumpkin Brownies: Your New Favorite Fall Layered Dessert
As the leaves begin to turn and the air grows crisp, there’s no better way to embrace the autumn season than with a delightful homemade treat. And if you’re like us, few things capture the spirit of fall quite like pumpkin, especially when paired with the timeless comfort of rich chocolate. Prepare to be enchanted by our ultimate **Pumpkin Brownies** – a truly decadent creation that flawlessly marries the deep, fudgy notes of a classic brownie with the smooth, warmly spiced essence of pumpkin pie.
This isn’t just another brownie recipe; it’s a culinary experience. Imagine sinking your teeth into a dense, intensely chocolatey brownie base, so rich it almost tastes like fudge, perfectly complemented by a luscious, creamy pumpkin pie layer infused with traditional fall spices. The contrast in textures and flavors is simply irresistible, offering a sophisticated sweetness that’s not overwhelming but utterly satisfying. These layered pumpkin brownies are guaranteed to be a showstopper at any gathering, from casual family dinners to festive holiday celebrations.
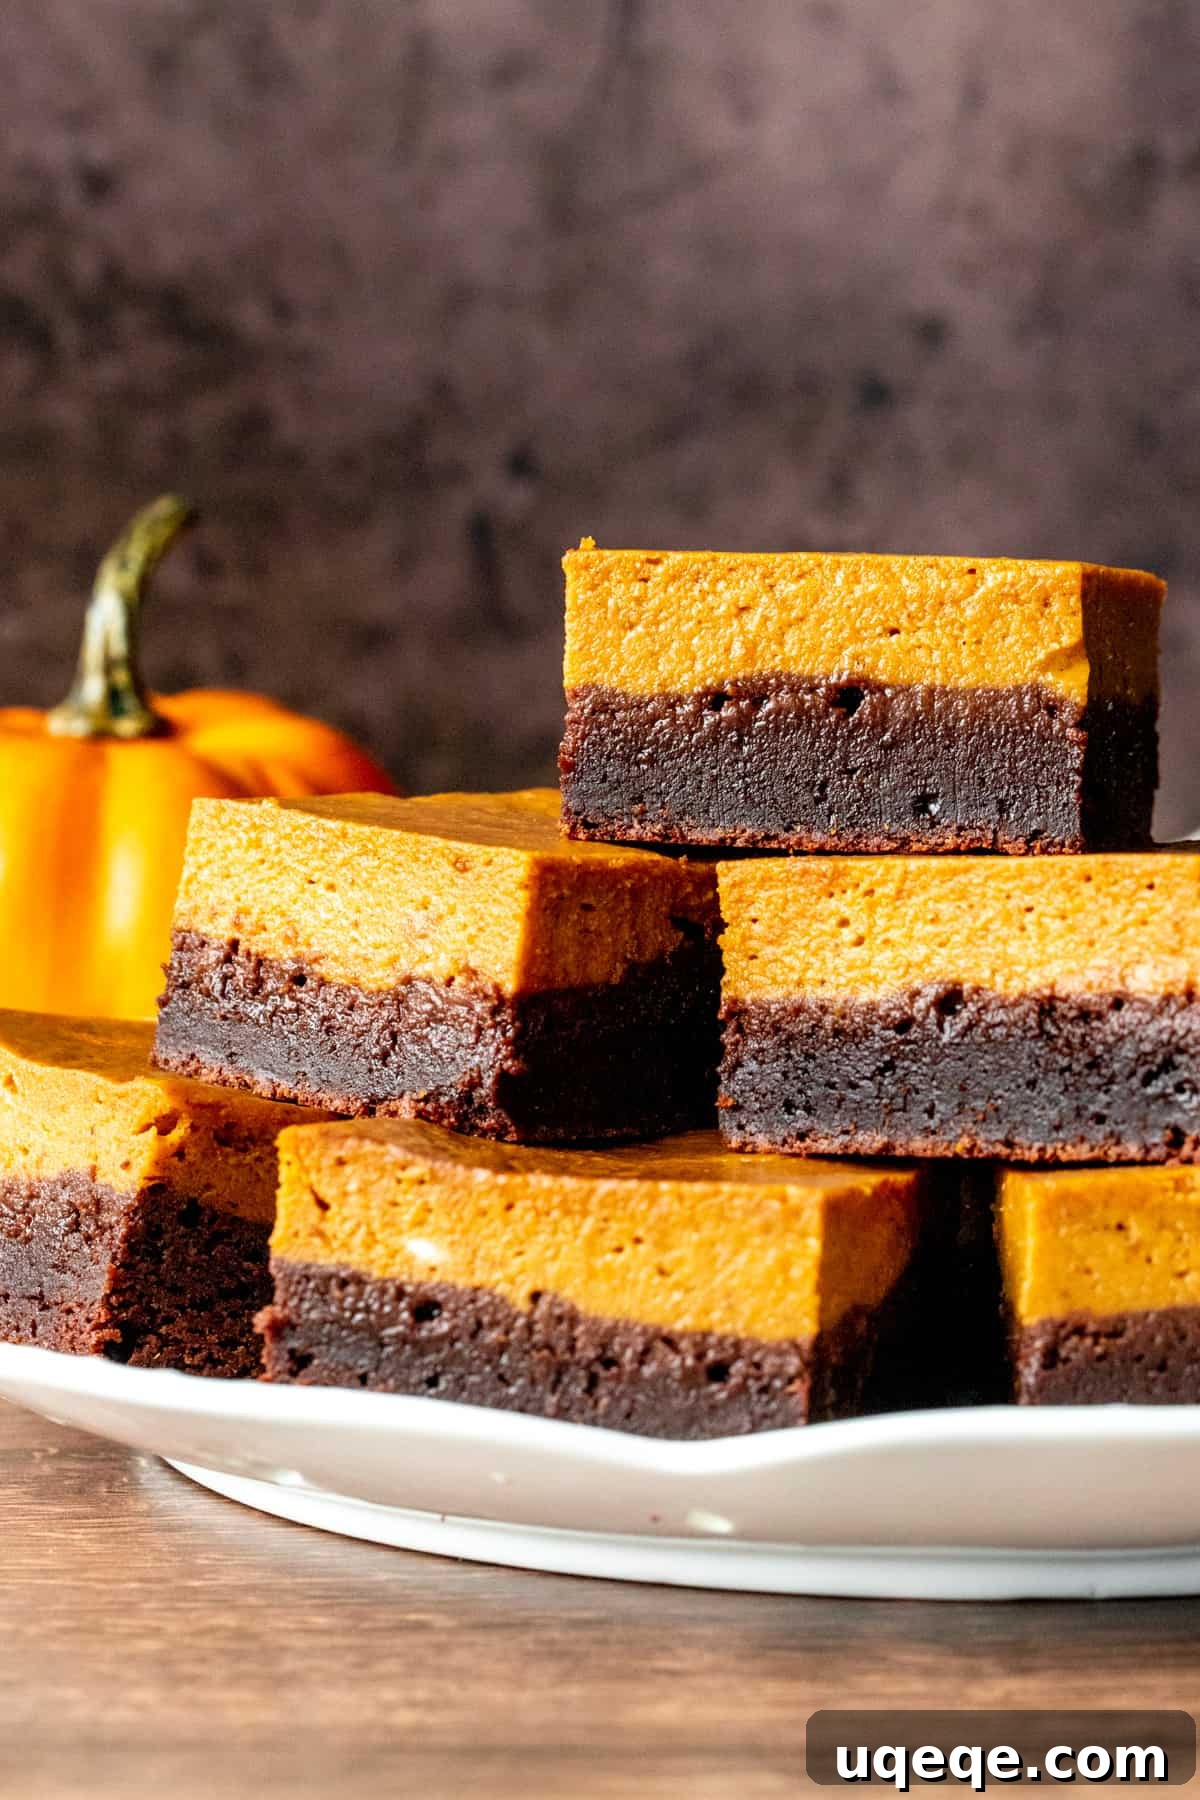
Why These Pumpkin Brownies Are an Absolute Must-Try This Fall
If you’re a devoted brownie enthusiast, you know that the perfect brownie should be nothing short of fudgy, gooey, and deeply satisfying. These pumpkin brownies take that beloved foundation and elevate it to an art form, making them the quintessential fall dessert. The bottom layer is a masterpiece of dark chocolate intensity – a thick, dense brownie that delivers a truly fudge-like chewiness. It’s rich, dark, and provides the perfect counterpoint to the vibrant top layer.
Resting elegantly above is the creamy pumpkin pie layer, a symphony of warm spices that evoke feelings of cozy autumn evenings. We’re talking cinnamon, nutmeg, ginger, and cloves, all blended harmoniously with smooth pumpkin puree to create a velvety, aromatic custard. The brilliance of this dessert lies in its balance: the robust, slightly bitter notes of dark chocolate beautifully intertwine with the sweet, earthy warmth of pumpkin, creating a flavor profile that is profoundly decadent yet never excessively sweet. It’s an unexpected pairing that simply works, transforming two classic desserts into one unforgettable treat. If you’ve never ventured into the delightful world of chocolate and pumpkin together, these brownies are your perfect introduction.
Crafting Your Perfect Pumpkin Brownies: A Step-by-Step Guide
Creating these sensational layered pumpkin brownies involves two distinct but straightforward stages: preparing the rich brownie base and then the creamy pumpkin pie topping. Each layer is simple to assemble, and together they create a visually stunning and incredibly delicious dessert that will impress everyone.
The Fudgy Brownie Layer: Building the Foundation
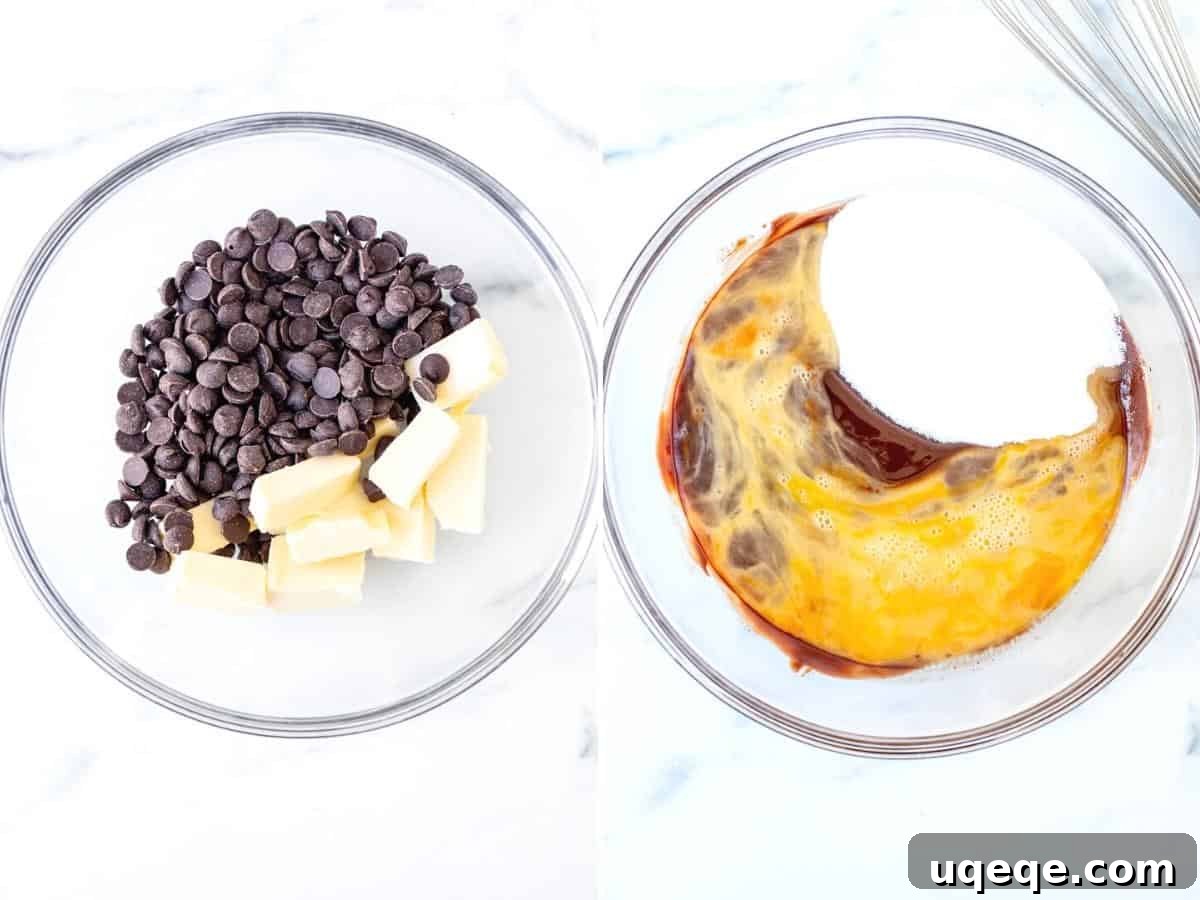
Let’s begin with the star of the show for any brownie lover – the base. This fudgy brownie layer is what makes these pumpkin brownies truly special. Start by combining unsalted butter and finely chopped dark chocolate in a large, microwave-safe bowl. Gently melt them together in short intervals, stirring diligently after each to achieve a smooth, glossy consistency. The key here is low and slow melting to prevent the chocolate from seizing or burning. Alternatively, a classic double boiler method works wonderfully for this step, offering a more controlled melting environment. Once melted and slightly cooled, whisk in the granulated sugar, well-beaten large eggs, and a splash of vanilla extract until the mixture is cohesive and no egg streaks remain. This step incorporates air and helps create that signature crackly brownie top.
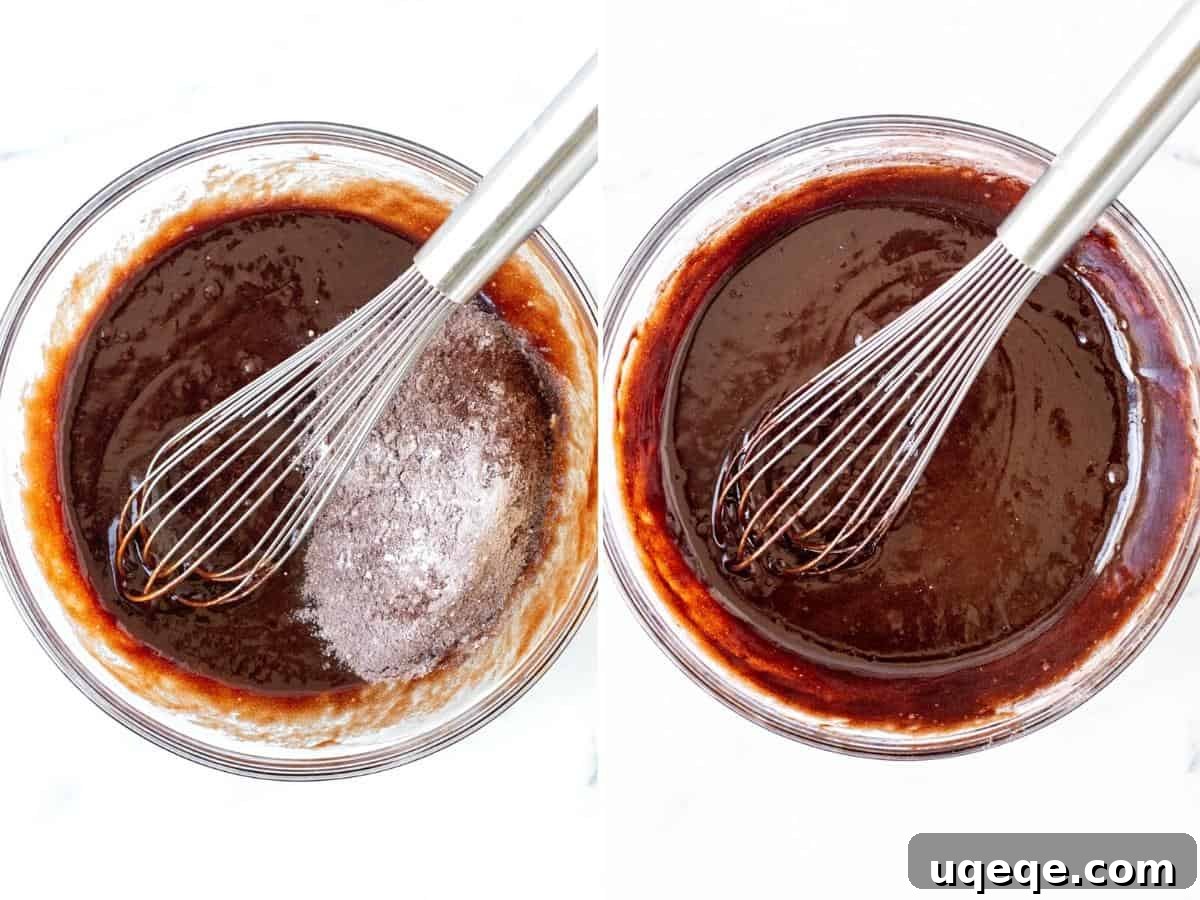
Next, gently fold in the all-purpose flour, cocoa powder, and a pinch of salt. For the smoothest possible batter, especially if your cocoa or flour tends to be lumpy, it’s a good idea to sift them into the wet ingredients. This ensures a lump-free batter and an even texture in your baked brownies. Once combined, set this rich, chocolatey batter aside while you prepare the vibrant pumpkin layer. This gives the flavors a moment to meld and ensures your brownie base is ready to welcome its spiced companion.
The Creamy Pumpkin Pie Layer: Adding the Autumnal Touch
Now for the luscious top layer that brings all the fall magic! For the pumpkin pie layer, simplicity is key. In a separate bowl, whisk together all the ingredients: brown sugar, one large egg, cornstarch (or cornflour), a generous blend of fall spices (cinnamon, nutmeg, ginger powder, and ground cloves), pure vanilla extract, evaporated milk, and the star ingredient – pure pumpkin puree. It’s crucial to ensure your brown sugar is soft and free of lumps before whisking; if it’s compacted, break it up or whisk it on its own first for a smooth consistency. Similarly, if your cornstarch appears lumpy, a quick sift into the mixture will guarantee a silky-smooth pumpkin custard. This layer is lighter and creamier, providing a beautiful contrast to the dense brownie below.
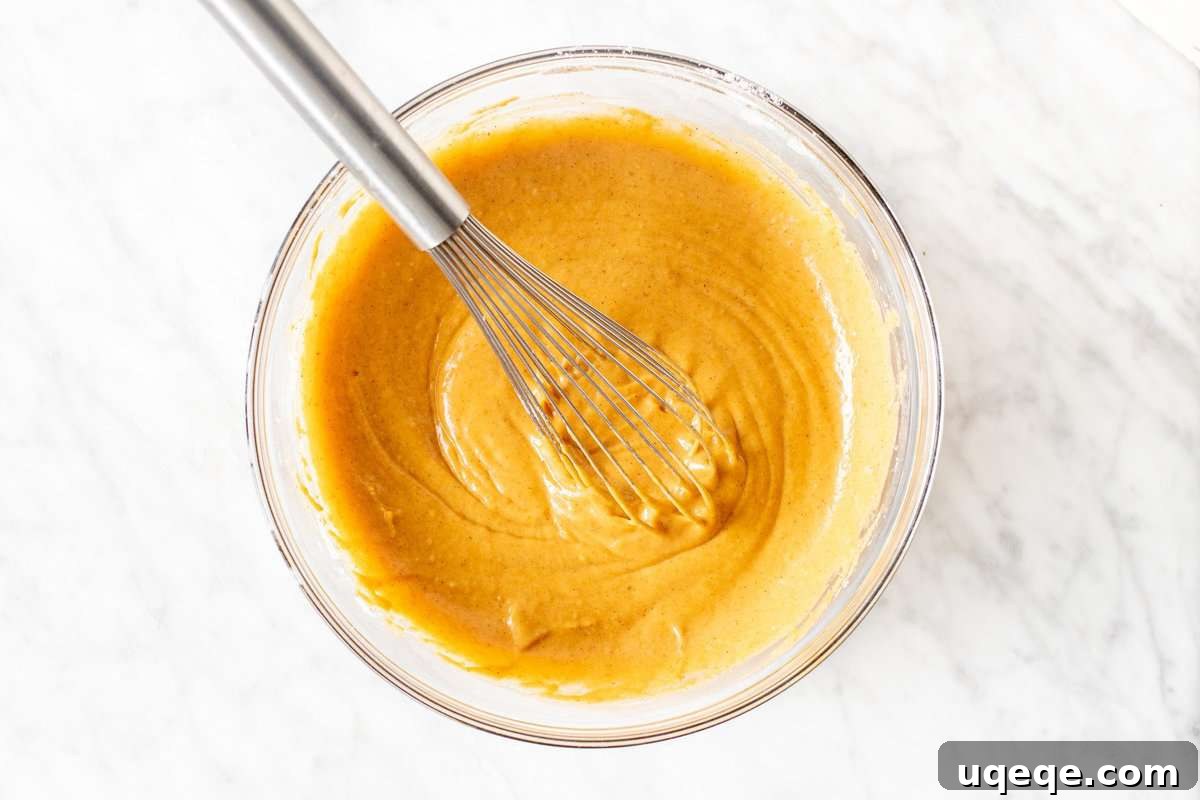
Assembling and Baking for Perfect Layers
With both batters ready, it’s time to bring these layers together. Begin by pouring the fudgy brownie batter into your prepared pan, spreading it evenly across the bottom. This dense brownie layer *must* be on the bottom, as it provides the structural integrity for the lighter pumpkin layer above. Once the brownie layer is smooth, carefully spoon the pumpkin pie mixture over the top. The trick here is to be gentle; avoid pouring it directly from a height, which can disturb the brownie layer and prevent those beautifully defined layers from forming. Instead, spoon it strategically over the brownie, then gently spread it out until it forms an even, vibrant orange blanket.
Bake your layered pumpkin brownies in a preheated oven until the pumpkin layer is mostly set. A good test for doneness is to give the pan a gentle nudge: the pumpkin layer should have a very slight, almost imperceptible wobble in the center, but it should not appear liquid or sloshy, like a glass of milk. Overbaking can lead to a dry pumpkin layer, so keep an eye on it. Once baked, the most crucial step follows: cooling. These brownies require significant cooling time – at least 4 hours, and ideally longer in the refrigerator – to allow the pumpkin pie layer to fully set and achieve its perfect creamy texture. Patience is key for picture-perfect slices!
Essential Baking Tips & Tricks for Flawless Pumpkin Brownies
Achieving bakery-quality pumpkin brownies is easier than you think with these expert tips:
- Pan Size Matters: This recipe is designed for an 8×8 inch (20×20 cm) baking pan, which yields generously thick layers. If you opt for a 9×9 inch (23×23 cm) pan, your layers will be slightly thinner, and the baking time will likely be reduced to approximately 40 minutes. Always keep an eye on your oven, as individual appliances can vary. For a larger crowd, consider doubling the recipe and using a 9×13 inch (23×33 cm) pan, increasing the bake time to 50-60 minutes. Remember to simply grease the larger pan without lining with foil when doubling.
- Choosing Your Chocolate: For the brownie layer, we highly recommend using 70% dark chocolate for a rich, deep flavor that beautifully contrasts the sweet pumpkin. However, if you prefer a slightly sweeter brownie, feel free to use dark chocolate between 50-70% cacao, or even a good quality semi-sweet chocolate. Whatever you choose, avoid unsweetened baking chocolate, as it will make your brownies too bitter.
- Pure Pumpkin Power: It is absolutely critical to use 100% pure pumpkin puree for the pumpkin layer, not canned pumpkin pie filling. Pumpkin pie filling contains added sugars and spices, which will alter the flavor and texture of your pumpkin layer significantly. Canned pumpkin puree is readily available and offers consistent results, making it a reliable choice over homemade puree for this recipe.
- Measure with Precision: Both the pumpkin puree and evaporated milk amounts are specified as 1 cup each. Resist the urge to simply dump the entire contents of a can into your mixture! Cans often contain more than one cup, and precise measurements are essential for the perfect consistency and set of your pumpkin layer.
- Cooling is Non-Negotiable: We cannot stress this enough: these brownies *must* be cooled completely before slicing, a process that typically takes around 4 hours. This extended cooling period allows the delicate pumpkin layer to set properly, preventing a runny or crumbly texture when cut. After cooling at room temperature, transfer them to the refrigerator for at least 2 hours to ensure they are firm enough for clean, beautiful slices.
- Storage Savvy: Once fully cooled and sliced, store your delicious pumpkin brownies in an airtight container in the refrigerator. They will maintain their freshness and incredible flavor for up to 5 days, making them perfect for make-ahead dessert planning.
- The Gentle Touch: When spreading the pumpkin layer over the brownie batter, do so gently and evenly. Pouring it from a height or spreading too vigorously can disturb the brownie layer, leading to uneven or swirling layers rather than distinct, beautiful strata.
- Knife Cleanliness: For the cleanest possible cuts, always use a sharp knife. Wipe the knife clean with a damp cloth between each slice to prevent crumbs from smudging your layers.
Serving Suggestions for Your Perfect Pumpkin Brownies
While these pumpkin brownies are undeniably delicious on their own, a few simple additions can elevate them even further. Consider serving them with a dollop of freshly whipped cream, perhaps infused with a hint of vanilla or a sprinkle of cinnamon for an extra touch of seasonal flavor. A light dusting of powdered sugar adds an elegant finish, or for even more indulgence, a drizzle of caramel sauce or a sprinkle of toasted pecans would be delightful. These brownies are perfect for holiday dessert tables, autumn potlucks, or simply as a comforting treat with a warm cup of coffee or tea.
Explore More Fall Delights
If you’ve fallen in love with the harmonious combination of pumpkin and chocolate, you’re in for a treat! Discover more delectable fall-inspired desserts and treats from our collection:
- Pumpkin Cheesecake Brownies
- Pumpkin Chocolate Chip Cake
- Pumpkin Oreo Cheesecake
- Oatmeal Pumpkin Chocolate Chip Cookies
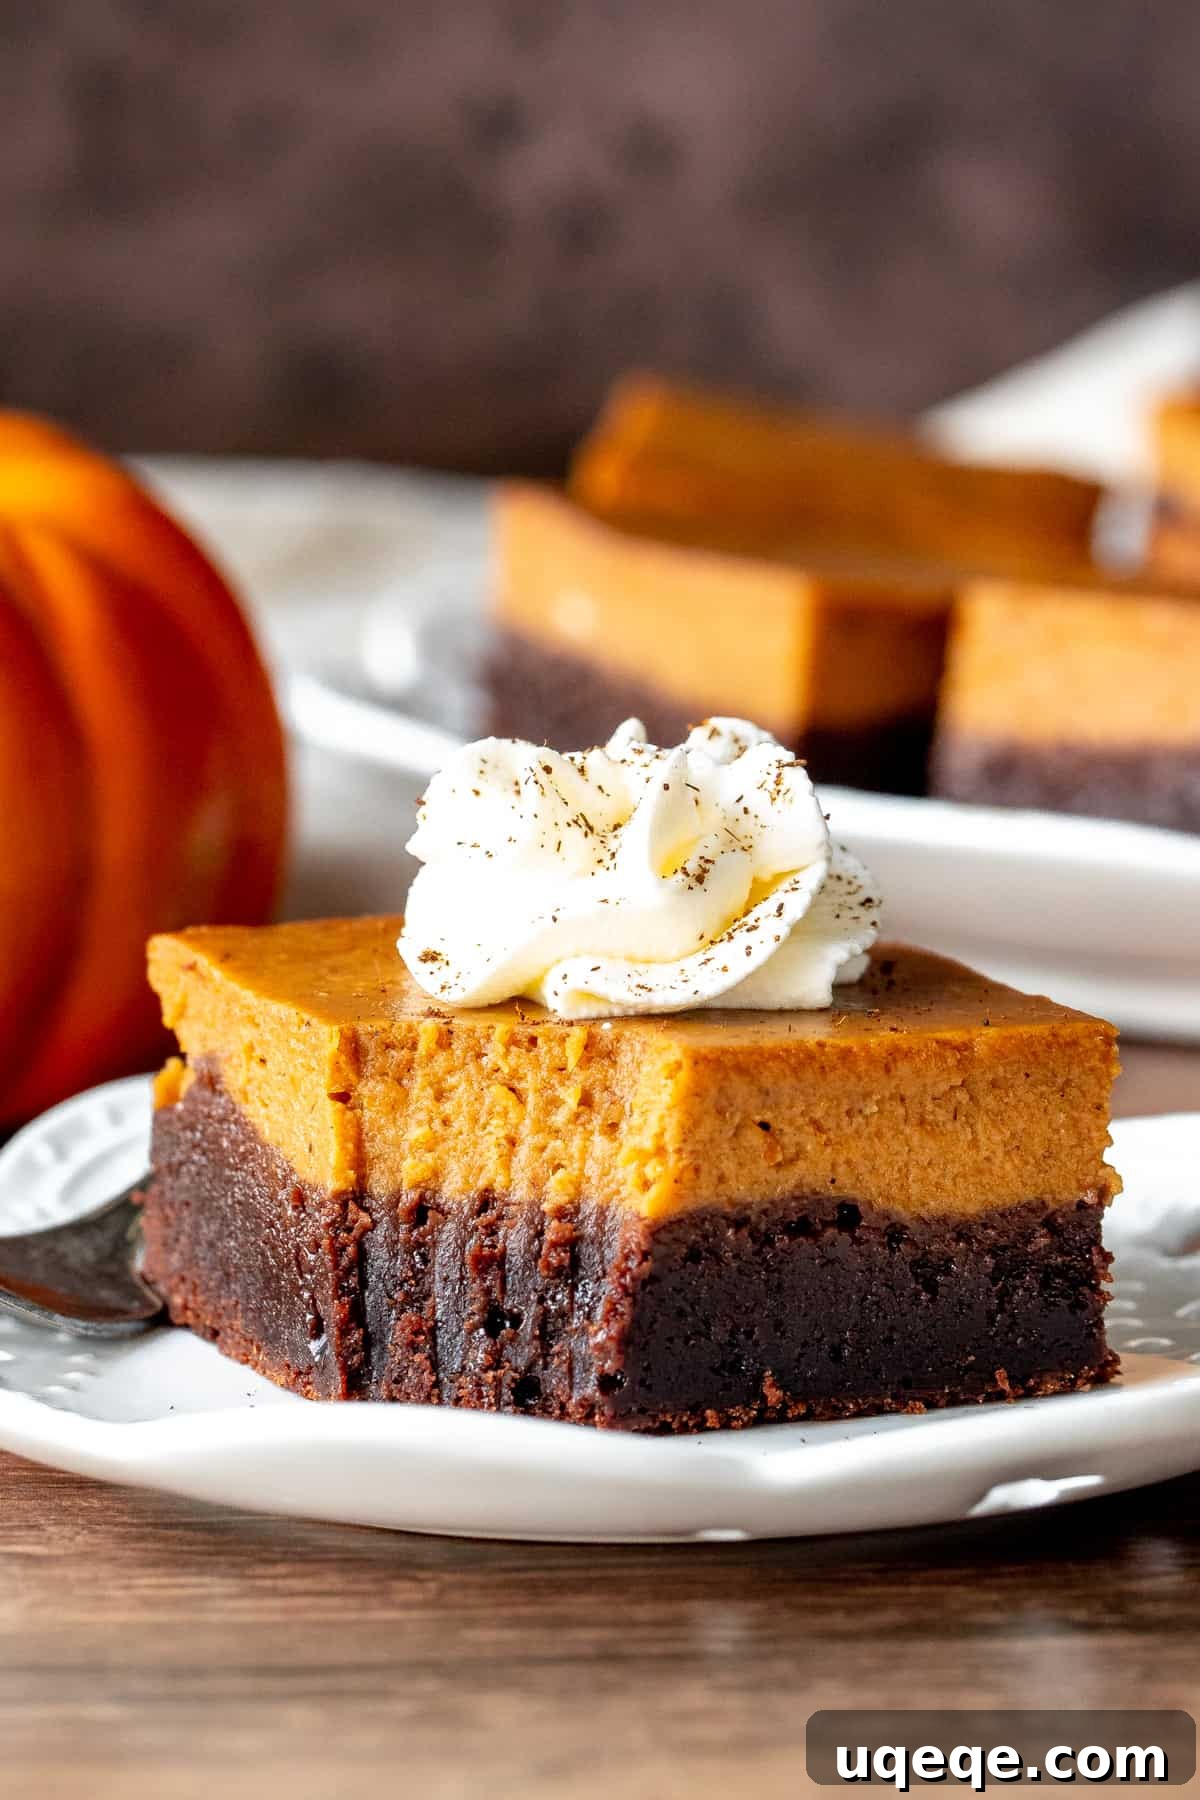
Pumpkin Brownies Recipe
By: Fiona Dowling
Fudgy brownie and pumpkin pie combine for this delicious fall treat. A layer of rich chocolate brownie on the bottom pairs perfectly with a creamy pumpkin pie layer on top. Decadent and a little different – add these pumpkin brownies to your fall baking!
Prep Time: 30 mins
Cook Time: 50 mins
Cooling & Chilling: 3 hrs
Total Time: 4 hrs 20 mins
Servings: 12 brownies
Like this recipe? Rate and comment below! Print Recipe
Equipment
- 8×8 inch (20×20 cm) pan (a 9×9 inch / 23×23 cm pan will also work, adjust bake time)
Ingredients
Brownie Layer
- 1/2 cup unsalted butter, cut into about 8 pieces
- 4 ounces dark chocolate, finely chopped (50-70% cacao recommended)
- 1 cup granulated sugar
- 2 large eggs, whisked
- 1/2 cup all-purpose flour
- 2 tablespoons cocoa powder
- 1/4 teaspoon salt
Pumpkin Pie Layer
- 1 cup pumpkin puree, (ensure it’s 100% pure pumpkin, NOT pie filling)
- 1 cup evaporated milk, (measure accurately, NOT the entire can)
- 1 large egg
- 1 teaspoon vanilla extract
- 1/2 cup brown sugar
- 1 teaspoon cinnamon
- 1/4 teaspoon nutmeg
- 1/8 teaspoon ginger powder
- 1/8 teaspoon ground cloves
- 1 tablespoon cornstarch (AKA cornflour)
Instructions
- Preheat your oven to 325°F (170°C or 160°C fan forced). Line an 8×8 inch (20×20 cm) baking pan with aluminum foil, leaving enough overhang on the sides to easily lift the brownies out later. Lightly grease the foil.
Brownie Layer
- In a large, microwave-safe bowl, combine the chopped butter and finely chopped dark chocolate. Melt them together in the microwave using 45-second intervals on medium power, stirring thoroughly after each interval until the mixture is completely smooth. Alternatively, you can melt these ingredients together using a double boiler.
- Allow the melted chocolate mixture to cool slightly. Then, whisk in the granulated sugar, pre-whisked eggs, and vanilla extract until all ingredients are well combined and no streaks of egg are visible.
- Sift in the all-purpose flour, cocoa powder, and salt. Whisk until just combined, being careful not to overmix the batter. If your cocoa powder is lumpy, sifting it beforehand will ensure a smooth batter.
- Set the brownie batter aside while you prepare the pumpkin layer.
Pumpkin Layer
- In a separate medium bowl, whisk together all the ingredients for the pumpkin layer: pumpkin puree, evaporated milk, large egg, vanilla extract, brown sugar, cinnamon, nutmeg, ginger powder, ground cloves, and cornstarch. Continue whisking until the mixture is smooth and you no longer see any lumps of sugar or cornstarch. If cornstarch is lumpy, sift it into the mixture first.
Assembling & Baking the Brownies
- Spoon the brownie batter into your prepared baking pan. Using an offset spatula or the back of a spoon, carefully spread the batter into an even layer across the bottom of the pan.
- Next, gently spoon the pumpkin pie layer over the brownie layer. Distribute it carefully across the surface, then use an offset spatula or the back of a spoon to spread it into an even layer, ensuring not to disturb the brownie layer underneath.
- Bake in the preheated oven for approximately 50 minutes. The brownies are done when the pumpkin layer has a very slight wobble in the center when the pan is gently nudged, but it should not appear liquid or jiggly.
- Remove the pan from the oven and allow the brownies to cool completely at room temperature within their pan. This is a crucial step. Once cooled, transfer the pan to the refrigerator to chill for at least 2 hours. This chilling time is essential for the pumpkin pie layer to fully set and firm up.
- When you’re ready to slice, use the foil overhang to lift the entire slab of brownies out of the pan and place it onto a clean cutting board. For neat, clean slices, use a sharp knife (not a table knife) and wipe the blade clean between each cut.
Notes
- Pan Sizes:
- This recipe can also be made in a 9×9 inch (23×23 cm) pan. The layers will be thinner, and the bake time will be closer to 40 minutes.
- To make a larger batch, use a 9×13 inch (23×33 cm) pan. For this size, do not line the pan with foil; simply grease it thoroughly. Double all ingredients for both layers. For the pumpkin layer specifically, it’s generally fine to use one 15-ounce can of pumpkin puree (which is almost 2 cups) and one 15-ounce can of evaporated milk (also nearly 2 cups). The bake time will be approximately 50-60 minutes for this larger size.
- Chocolate Selection: We recommend using dark chocolate with a cacao percentage between 50-70%. Semi-sweet chocolate also works well if you prefer a sweeter brownie flavor.
- Pumpkin Puree vs. Pie Filling: Always ensure you are using 100% pure pumpkin puree, not canned pumpkin pie filling. Pumpkin pie filling contains added spices and sweeteners that are not accounted for in this recipe and will alter the final taste and texture.
- Bake Time Variations: Oven temperatures can vary significantly, and desired doneness for brownies (gooey vs. firm) also differs. Always use the visual and wobble tests described in the instructions to determine when your brownies are perfectly baked.
- Cooling and Chilling: These steps are absolutely vital for the pumpkin layer to set correctly and ensure your brownies slice beautifully. Do not skip or rush them.
- Storage: Store cooled and sliced pumpkin brownies in an airtight container in the refrigerator for up to 5 days.
- Nutrition Information: The provided nutritional details are an estimate only, based on a single brownie slice, assuming the recipe yields 12 equal-sized portions.
Nutrition
Calories: 337kcal, Carbohydrates: 48g, Protein: 5g, Fat: 15g, Saturated Fat: 9g, Polyunsaturated Fat: 1g, Monounsaturated Fat: 4g, Trans Fat: 0.3g, Cholesterol: 73mg, Sodium: 98mg, Potassium: 238mg, Fiber: 2g, Sugar: 40g, Vitamin A: 3537IU, Vitamin C: 1mg, Calcium: 96mg, Iron: 2mg