
Indulge in the ultimate treat with these unbelievably chewy and moist Oreo Blondies! Bursting with the beloved cookies and cream flavor from generously chopped Oreo cookies, these bars feature a perfect crinkly top and a rich, buttery vanilla base. Exceptionally easy to prepare in a single bowl, they are a guaranteed crowd-pleaser and a truly addictive dessert. If you adore cookies n’ cream, prepare to fall in love! 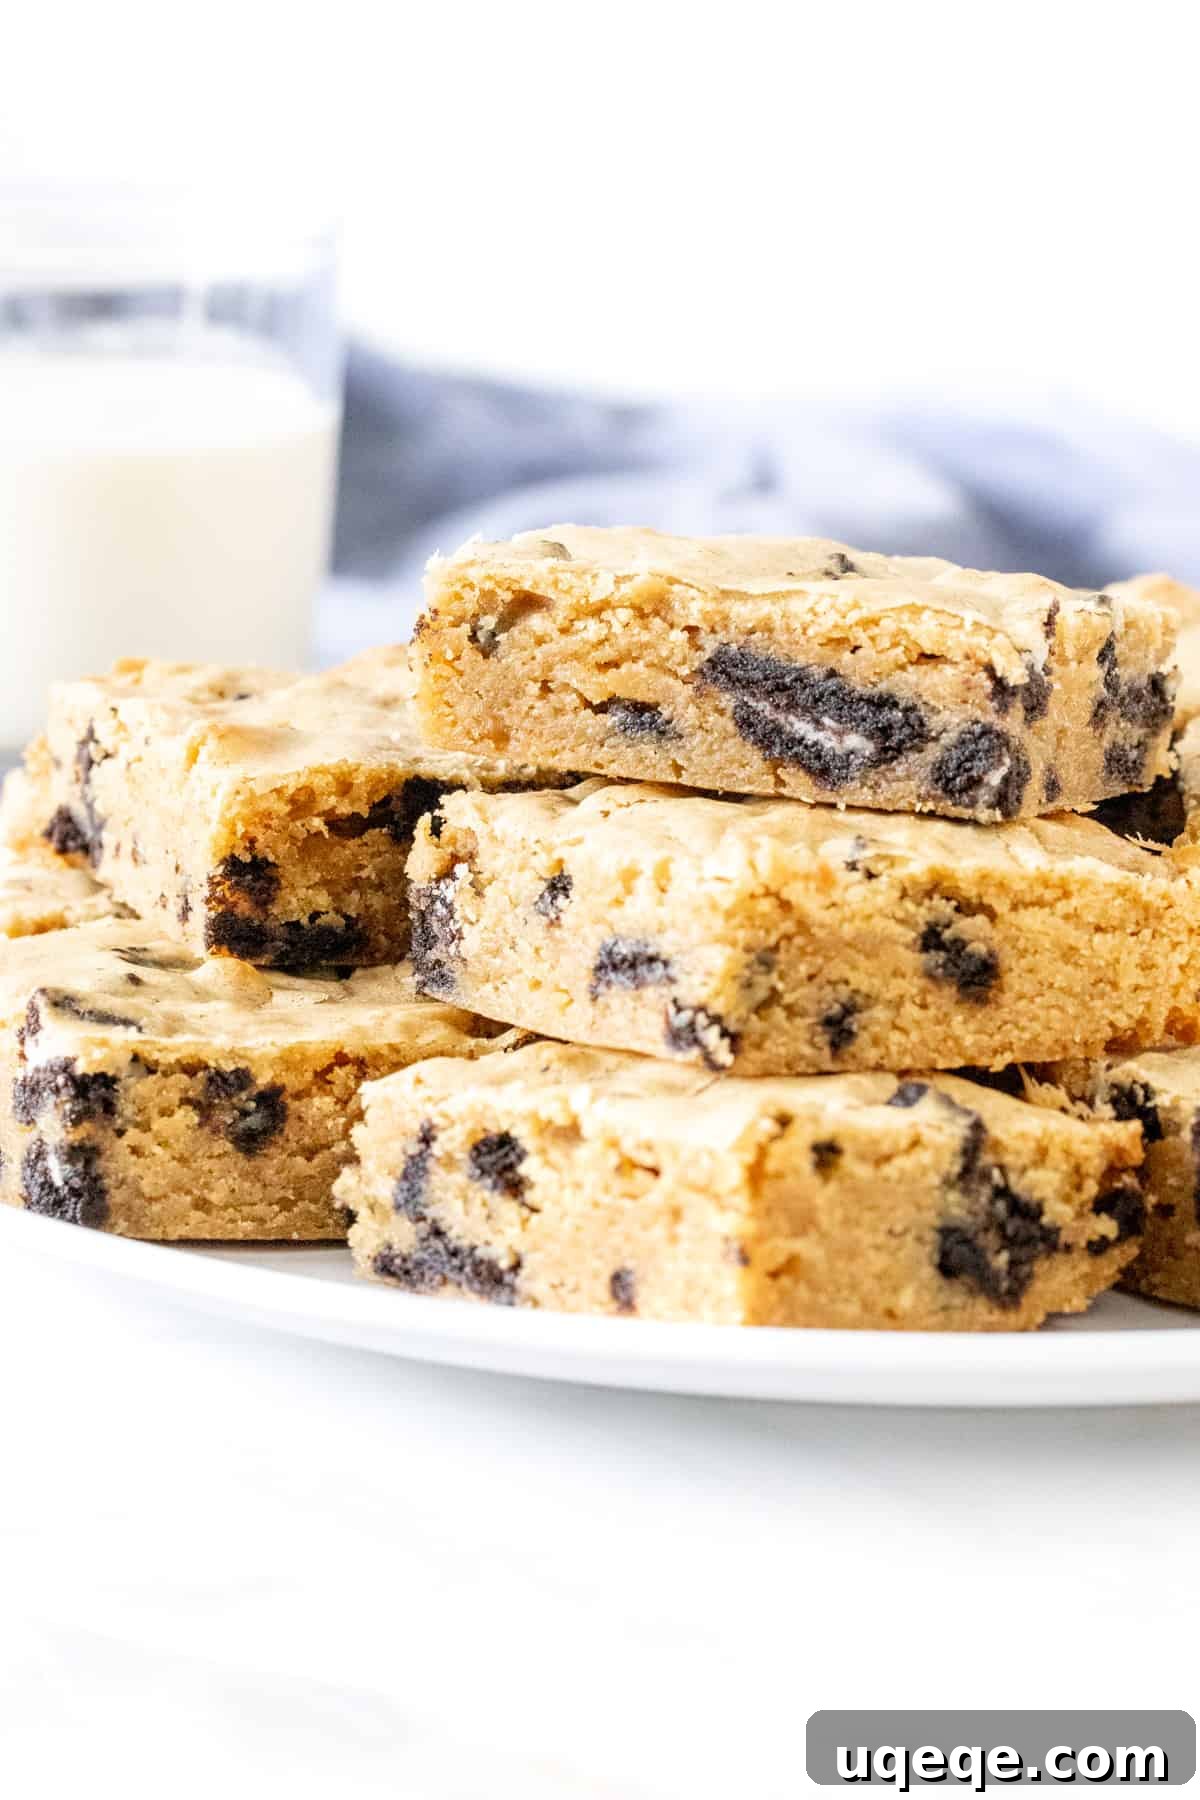
Ultimate Chewy Oreo Blondies: The Best Cookies and Cream Bar Recipe
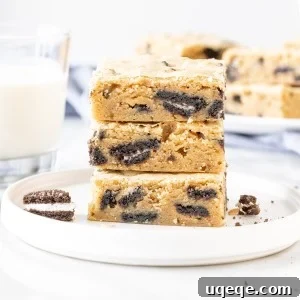
Move over brownies, there’s a new star in the dessert bar galaxy: our seriously addictive Oreo Blondies! While I’ve always been a fan of classic Oreo brownies and even ventured into decadent cookie dough Oreo brownies, these blondies offer a uniquely irresistible experience. They strike a perfect balance, delivering intense Oreo flavor without being overly rich, making them dangerously easy to devour. Each bite offers a delightful contrast of textures: the soft, chewy blondie base, studded with crunchy bits of Oreo cookies and pockets of sweet cream filling.
What makes these blondies truly exceptional? It’s their signature chewy texture, a moist interior, and those beautiful, thin, crinkly tops that bakers often chase – much like the coveted “fudge brownie” crust. The blondie itself boasts a deep, buttery vanilla flavor, perfectly complemented by the subtle caramel notes from brown sugar. When you stir in the chopped Oreos, they naturally break down a bit, ensuring that every square is infused with that iconic cookies n’ cream goodness, from the crisp cookie pieces to the luscious cream filling. They’re a symphony of flavors and textures, promising a delightful treat for any cookie lover.
What Makes a Blondie So Special?
For those new to the world of blondies, imagine a brownie without the cocoa. A blondie is a dessert bar known for its rich butterscotch or vanilla flavor profile, often featuring brown sugar as a key ingredient. This brown sugar is crucial, as it imparts a distinct caramel note and contributes significantly to the signature chewy texture that defines a perfect blondie. Unlike a brownie, which gets its depth from chocolate, blondies celebrate the nuanced flavors of butter, brown sugar, and vanilla. They are incredibly versatile, serving as a fantastic canvas for various mix-ins, from chocolate chips and nuts to, of course, our star ingredient: Oreo cookies.
The beauty of a blondie lies in its simplicity and comforting taste. It’s less intense than a chocolate brownie, offering a sweeter, more mellow experience. When done right, blondies should be dense yet tender, with a slightly crisp edge and a wonderfully soft center. The addition of Oreos elevates this classic to a new level, transforming it into a dynamic dessert that balances the sweet, creamy notes of the cookie with the warm, buttery depth of the blondie base.
The Irresistible Allure of Oreo Cookies
Who can resist an Oreo? America’s best-selling cookie has captivated taste buds for over a century with its iconic chocolate wafers and sweet cream filling. But beyond its historical appeal, Oreos bring a unique magic to baked goods. In these blondies, the chopped cookies provide not just a burst of familiar flavor but also a delightful textural contrast. As they’re folded into the batter, some pieces retain their crunch, while others soften, and the cream filling disperses, creating pockets of lusciousness throughout. This ensures that every bite is an adventure, a perfect harmony of chewiness from the blondie and varying textures from the cookie.
Using Oreos in blondies is a strategic choice. While Oreo brownies are delicious, they can sometimes overwhelm the palate with double chocolate intensity. Blondies, with their lighter flavor profile, allow the distinct taste of the Oreo cookie and its cream filling to truly shine. The vanilla-butterscotch notes of the blondie beautifully complement the chocolate and cream, making for a more balanced and ultimately, more “Oreo-forward” experience. It’s a match made in dessert heaven, promising a nostalgic yet novel treat.
Ingredients You’ll Need for Perfect Oreo Blondies
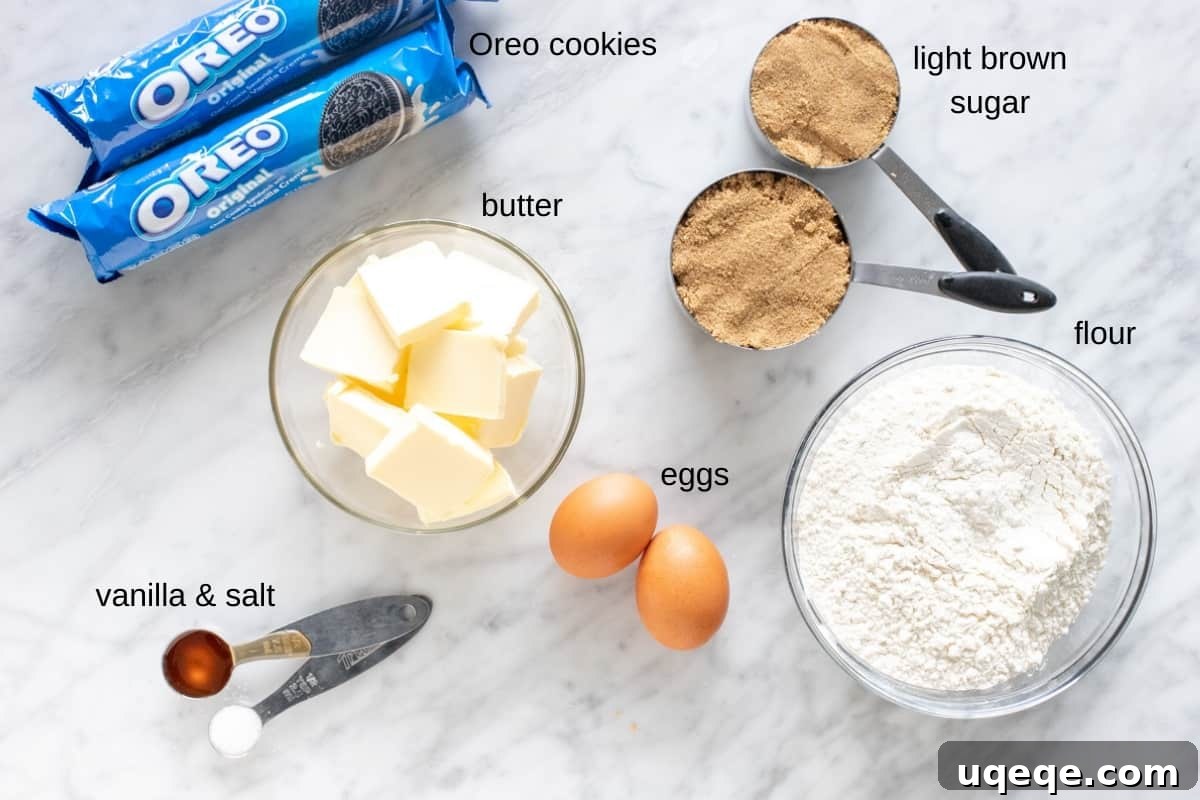
Crafting these delectable Oreo blondies requires just a handful of common pantry staples. Each ingredient plays a vital role in achieving that coveted chewy texture, moist crumb, and signature crinkly top. Here’s what you’ll gather:
- Unsalted Butter (1 cup / 226 grams): The foundation of any good blondie, butter provides rich flavor and essential moisture. Using unsalted butter gives you control over the overall saltiness of the recipe. If you only have salted butter, simply omit the 1/2 teaspoon of salt from the recipe. Melting the butter before combining it with sugar is key to achieving that shiny, crinkly top.
- Light Brown Sugar (1 1/2 cups / 350 grams, lightly packed): This is the secret ingredient for chewiness and depth of flavor. Light brown sugar contains molasses, which contributes to the blondies’ soft, chewy texture and delicious caramel notes. Crucially, do not substitute light brown sugar with granulated white sugar entirely. If dark brown sugar is your only option, use a blend of 3/4 cup dark brown sugar and 3/4 cup granulated sugar for a similar effect, though the flavor will be slightly more intense.
- Large Eggs (2): Eggs act as a binder, provide structure, and add richness to the blondies. They also contribute to the tenderness of the bars and are instrumental in creating that desirable crinkly top when combined with melted butter and sugar. Ensure they are at room temperature for better emulsification with the other ingredients.
- Vanilla Extract (2 teaspoons): A generous amount of vanilla is essential for enhancing the classic sweet, aromatic flavor of the blondie. Use good quality pure vanilla extract for the best results.
- All-Purpose Flour (2 1/4 cups / 281.25 grams): This provides the necessary structure without making the blondies tough or dry. The specific amount ensures a perfectly chewy bar that holds its shape. Sifting isn’t typically necessary for blondies, but ensure it’s lightly scooped and leveled for accuracy.
- Salt (1/2 teaspoon): A small but mighty ingredient, salt is crucial for balancing the sweetness of the sugar and Oreos, enhancing all the other flavors in the blondies. If using salted butter, remember to omit this.
- Chopped Oreos (2 cups, approximately 20-24 cookies): This is where the magic happens! You’ll want a good mix of sizes – some larger chunks for chewiness, smaller pieces for flavor distribution, and even some crumbs to ensure every part of the blondie has that cookies n’ cream essence. Roughly chop them by hand or pulse briefly in a food processor. Don’t be shy with the quantity; it’s 100% worth it for ultimate flavor.
Baking These Blondies: A Simple One-Bowl Method
One of the best aspects of this Oreo blondie recipe is its straightforward, no-fuss approach. You won’t need a stand mixer, and everything comes together beautifully in just one bowl. It’s a testament to how easy delicious homemade treats can be!
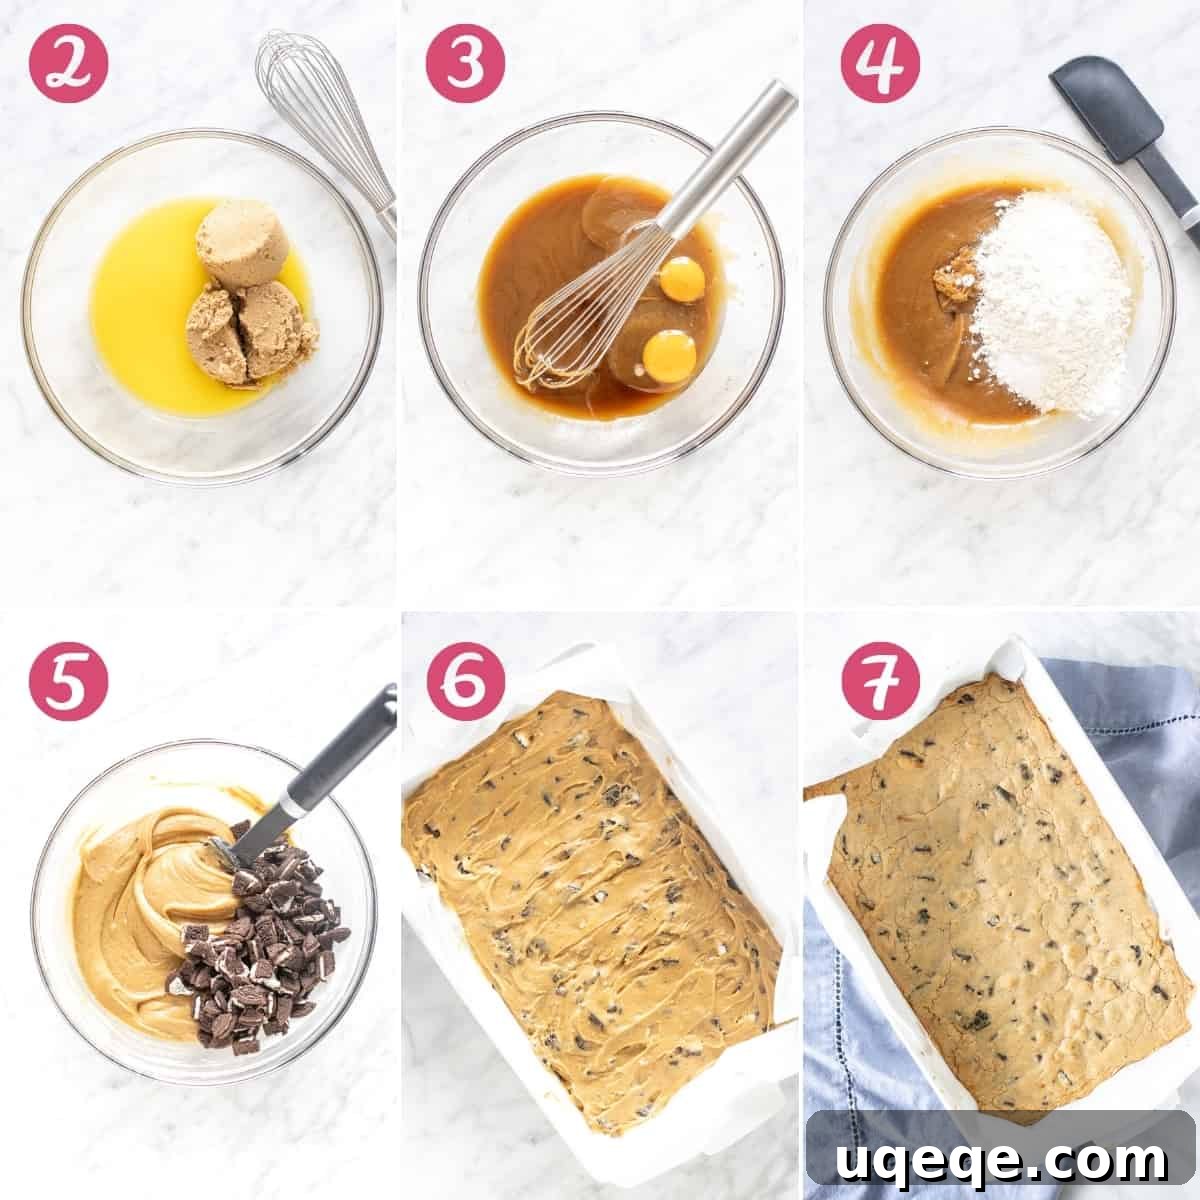
- Prepare Your Pan & Preheat Oven: Start by preheating your oven to 350°F (180°C, or 160°C for a fan-forced oven). Line a 9×13 inch (23×33 cm) baking pan with parchment paper, leaving an overhang on the longer sides. This overhang will act as handles, making it incredibly easy to lift the cooled blondies out of the pan for clean slicing. If you don’t have parchment, lightly grease the pan instead, ensuring all sides and corners are covered.
- Melt Butter & Whisk with Sugar: In a large mixing bowl, melt the unsalted butter. Once melted, add the light brown sugar to the bowl. Whisk these two ingredients together vigorously. This step is crucial for achieving the desired chewy texture and that beautiful crinkly top. Continue whisking for 1-2 minutes until the butter and sugar are fully incorporated and the mixture looks consistently smooth, not separated or greasy. This creates an emulsion that traps moisture and contributes to the perfect blondie texture.
- Incorporate Eggs & Vanilla: Next, whisk in the large eggs and vanilla extract. Continue to whisk until the mixture is uniform and smooth, with no visible streaks of egg yolk or egg white. Thorough mixing here ensures even distribution of moisture and richness throughout the batter.
- Gently Fold in Dry Ingredients: Add the all-purpose flour and salt to the wet ingredients. Using a spatula, gently fold these dry ingredients into the batter until just combined. Be careful not to overmix, as this can develop the gluten in the flour too much, leading to tough blondies. If you spot a few small lumps of flour, a quick whisk until they disappear is fine, but resist the urge to keep mixing beyond that point.
- Stir in the Star – Oreos: Finally, fold in the chopped Oreos. Don’t worry if some of the cookies break down further into smaller pieces or crumbs during this process; this is expected and actually desirable! These varied textures contribute to the overall “cookies n’ cream” experience, ensuring every bite is packed with flavor.
- Spread into Pan: Spoon the blondie batter into your prepared baking pan. Use the back of a spoon or an offset spatula to spread the batter evenly across the pan. If you used parchment paper, the batter might try to slide around a bit, but with a little patience, you’ll get it into an even layer.
- Bake to Perfection: Transfer the pan to your preheated oven and bake for approximately 25-30 minutes. The blondies are ready when the top looks set, slightly golden, and an inserted toothpick comes out clean or with a few moist crumbs attached. Avoid overbaking, as this can result in dry, crumbly bars rather than moist and chewy ones.
Pro Tip for Clean Slicing:
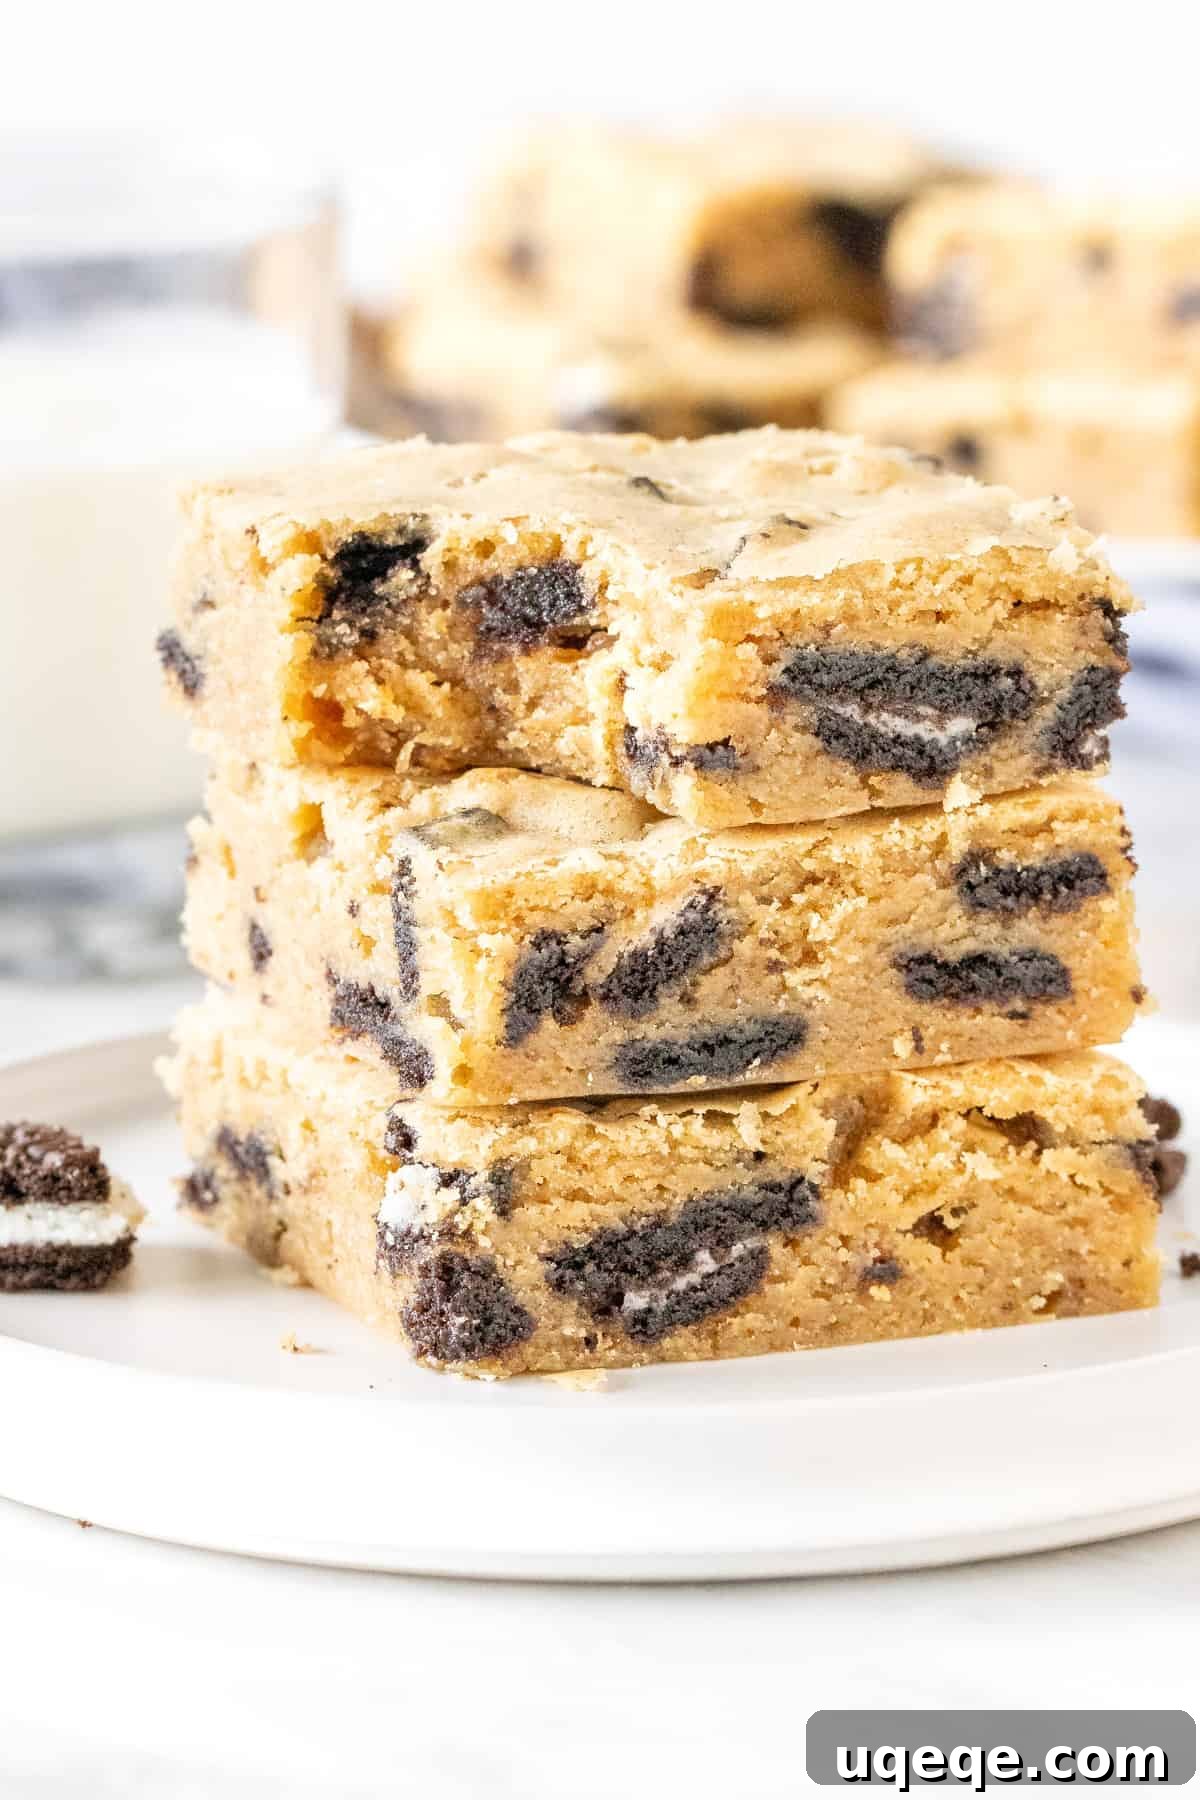
Patience is a virtue when it comes to cutting these blondies! For the cleanest, most perfect slices, it is absolutely essential to wait for the bars to cool completely to room temperature before attempting to cut them. Warm blondies are soft and will crumble or stick to your knife. Once fully cooled, if you lined the pan with parchment paper, use the overhang to gently lift the entire slab of blondies out of the pan. Place them on a cutting board and use a sharp, non-serrated knife to slice them into squares. If you lightly greased the pan, you can slice them directly in the pan.
Why These Oreo Blondies Will Become Your New Favorite
In summary, these Oreo blondies aren’t just another dessert; they’re a revelation. Here’s why they’re destined to become a beloved staple in your baking repertoire:
- Unbelievably Chewy: The perfect ratio of ingredients, especially the brown sugar, ensures a satisfyingly chewy texture throughout.
- Moist with Crinkly Tops: They boast a tender, moist interior crowned with that coveted shiny, crinkly top that signals a perfectly baked bar.
- Rich Buttery Vanilla Flavor: A robust base of buttery vanilla, subtly enhanced by warm caramel notes from the brown sugar, creates an exquisite foundation.
- Packed with Oreos: Every bite delivers a generous amount of chopped Oreos, providing bursts of chocolatey cookie and sweet cream.
- Incredibly Simple to Make: With a one-bowl, no-mixer method, this recipe is perfect for bakers of all skill levels, from beginners to seasoned pros.
- A Unique Take on a Classic: They offer a refreshing alternative to traditional brownies, highlighting the beloved cookies and cream flavor in a new, exciting way.
- Perfect for Sharing: Whether for a potluck, party, or family dessert, these bars are easy to transport and always disappear fast!
Tips for Blondie Baking Success
To ensure your Oreo blondies turn out perfectly every time, keep these simple tips in mind:
- Don’t Overmix: After adding the flour, mix until just combined. Overmixing can lead to a tougher, denser blondie.
- Accurate Measurements: Baking is a science! Use proper measuring cups and spoons, especially for flour. If possible, weigh your ingredients for the most precise results.
- Room Temperature Eggs: Room temperature eggs incorporate more smoothly into the batter, leading to a more uniform and tender crumb.
- Customize Your Chop: Experiment with how you chop your Oreos. A mix of fine crumbs and larger chunks provides varied textures, but feel free to go for mostly chunky or mostly fine, depending on your preference.
- Monitor Your Oven: Oven temperatures can vary. Keep an eye on your blondies during the last few minutes of baking. They should be set around the edges but might still look a little soft in the very center – this is good for chewiness!
- Chill for Easier Cutting: While cooling completely at room temperature is sufficient, chilling the blondies in the refrigerator for 30 minutes to an hour before slicing can make for even cleaner, sharper cuts.
Blondie Variations and Serving Suggestions
While these Oreo blondies are perfect as is, you can always get creative! For added texture, consider mixing in a handful of white chocolate chips or chopped nuts like pecans or walnuts. A swirl of caramel or peanut butter through the batter before baking could also offer an exciting twist. You could even try different flavors of Oreos, like mint or peanut butter, for a unique take!
These chewy bars are fantastic on their own, perhaps with a tall glass of cold milk, but they also make a wonderful dessert when served warm with a scoop of vanilla bean ice cream and a drizzle of chocolate sauce. They are also excellent with a cup of coffee or tea, making them a versatile treat for any time of day.
More Oreo Treats to Love
If you find yourself utterly captivated by the magic of Oreos in dessert, you’re in luck! There’s a whole world of Oreo-infused delights waiting to be explored. Here are some other fantastic recipes featuring everyone’s favorite cookie:
- Oreo Cheesecake: A rich, creamy cheesecake on an Oreo crust, studded with cookie pieces.
- No-Bake Oreo Pie: An incredibly easy, chilled dessert with a crunchy Oreo base and fluffy cream filling.
- Oreo Brownies: For the ultimate chocolate lover, fudgy brownies packed with Oreo chunks.
- Oreo Cheesecake Cookies: Soft, chewy cookies with a cheesecake-like tang and chunks of Oreos.
Oreo Blondies
Rate Recipe
Print Recipe
Equipment
- 9×13 inch (23x33cm) baking pan
Ingredients
- 1 cup unsalted butter (226 grams), melted
- 1 1/2 cups light brown sugar (350 grams), lightly packed
- 2 large eggs
- 2 teaspoons vanilla extract
- 2 1/4 cups all-purpose flour (281.25 grams)
- 1/2 teaspoon salt
- 2 cups chopped Oreos, about 20-24 Oreos, depending on how small you chop them
Instructions
- Preheat the oven to 350F (180C or 160C on a fan-forced oven). Lightly grease a 9×13 inch (23×33 cm) baking pan, or line with parchment paper so that there’s an overhang around the edges.
- Whisk together the melted butter and sugar in a large bowl. Continue whisking until the butter no longer looks separate from the brown sugar.
- Whisk in the eggs and vanilla extract until there are no pieces of egg yolk or egg white.
- Gently stir in the flour and salt. If you see lumps of flour, whisk the batter until they disappear.
- Stir in the chopped Oreos. It’s totally ok and expected that some will fall apart.
- Spoon the batter into the prepared pan and smooth the top.
- Bake in the preheated oven for 25-30 minutes, or until the top looks set and an inserted toothpick comes out clean or with a few moist crumbs.
- Let the bars cool fully before slicing for cleaner, easier cuts.
- If the pan is lined with parchment paper, lift the bars out of the pan using the overhang of the parchment from the long edge of the pan. Place the bars on a cutting board and slice using a sharp knife.
Notes
- Butter: If you only have salted butter, that’s fine. Omit the salt from the recipe if using salted butter.
- Light Brown Sugar: Light brown sugar can be substituted with 3/4 cup dark brown sugar and 3/4 cup granulated sugar. Do not substitute light brown sugar with granulated (white) sugar.
- Storage: Store bars in an airtight container at room temperature for up to 4 days. Cooled bars can be frozen for up to 2 months, then thaw overnight in the fridge and bring to room temperature before enjoying.
- Nutrition: Nutrition information is an estimate only and based on 1 bar, assuming the pan is sliced into 18 equal pieces.
Nutrition
Carbohydrates: 43g,
Protein: 3g,
Fat: 14g,
Saturated Fat: 8g,
Polyunsaturated Fat: 1g,
Monounsaturated Fat: 4g,
Trans Fat: 1g,
Cholesterol: 48mg,
Sodium: 161mg,
Potassium: 91mg,
Fiber: 1g,
Sugar: 25g,
Vitamin A: 346IU,
Calcium: 28mg,
Iron: 2mg
Like this recipe? Rate and comment below!