
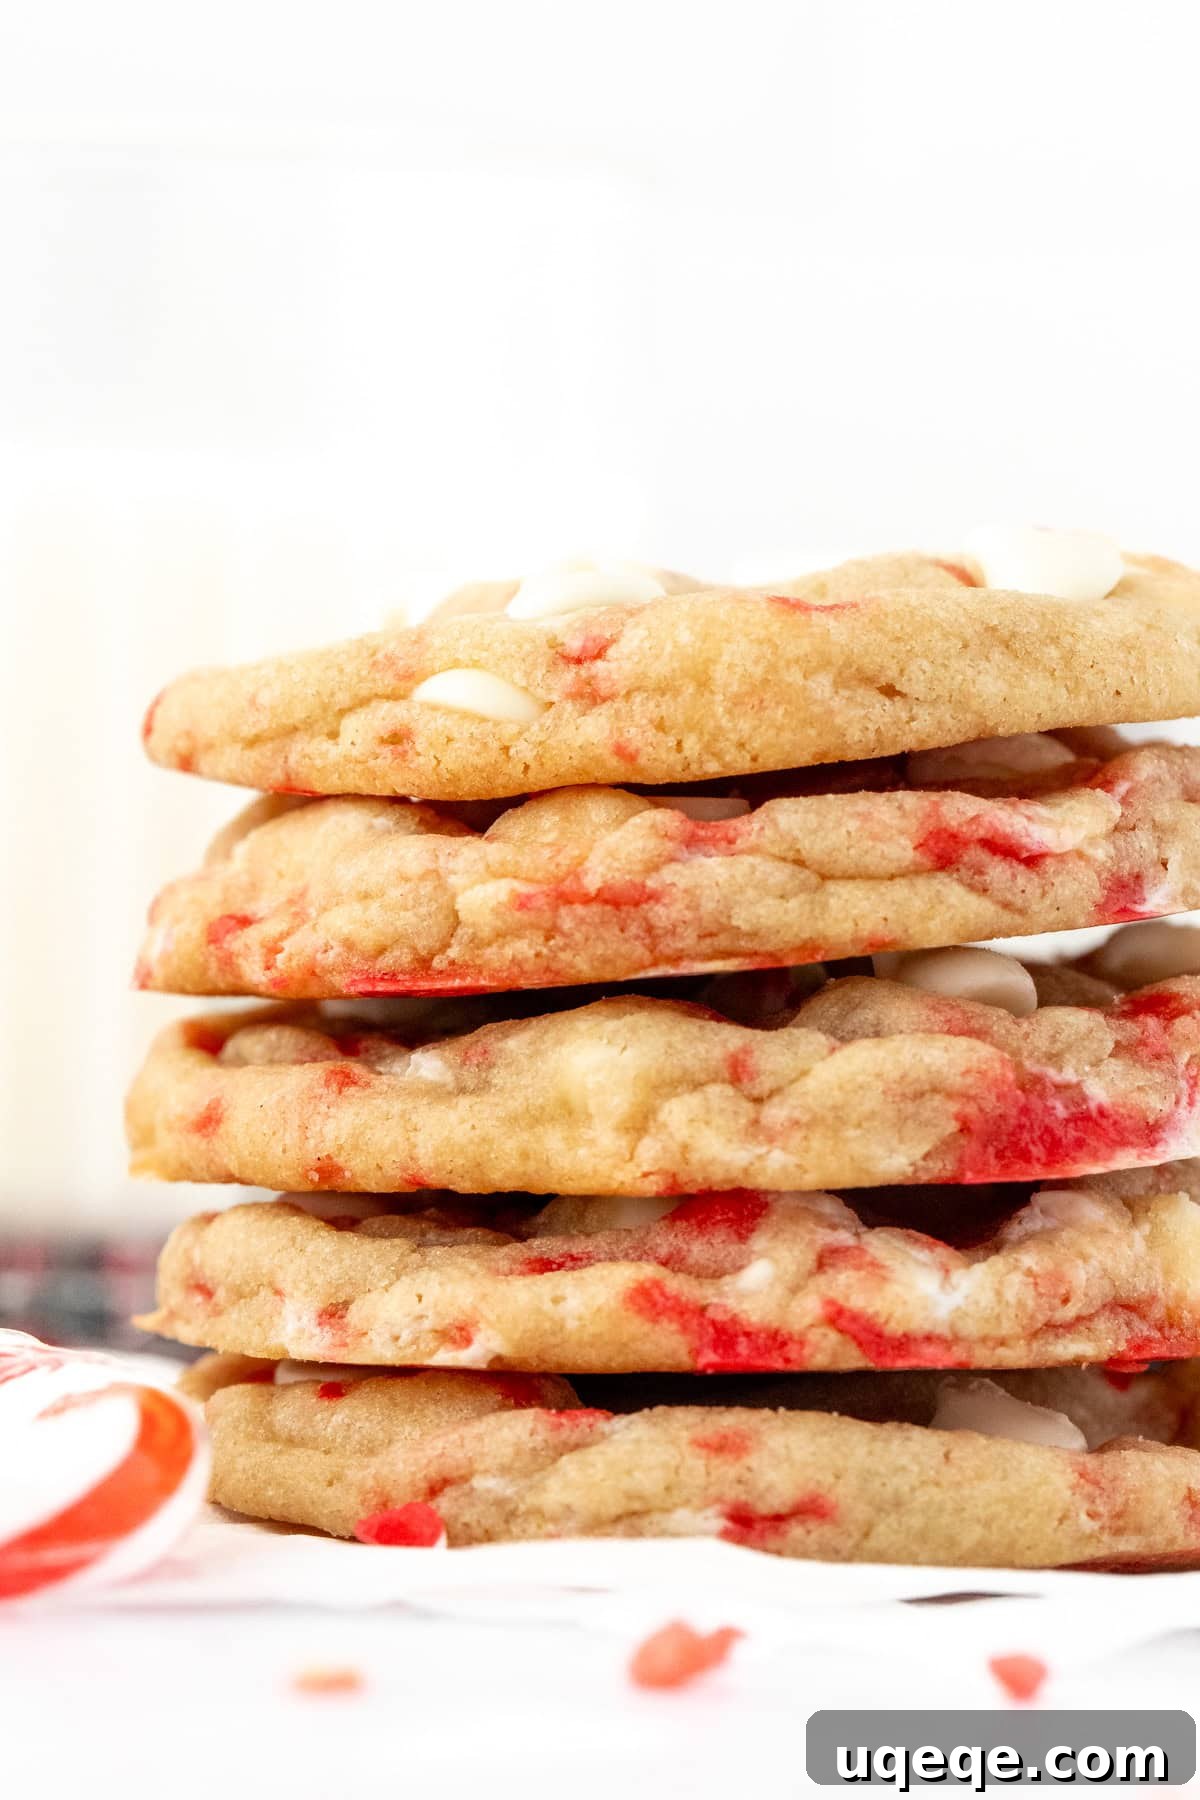
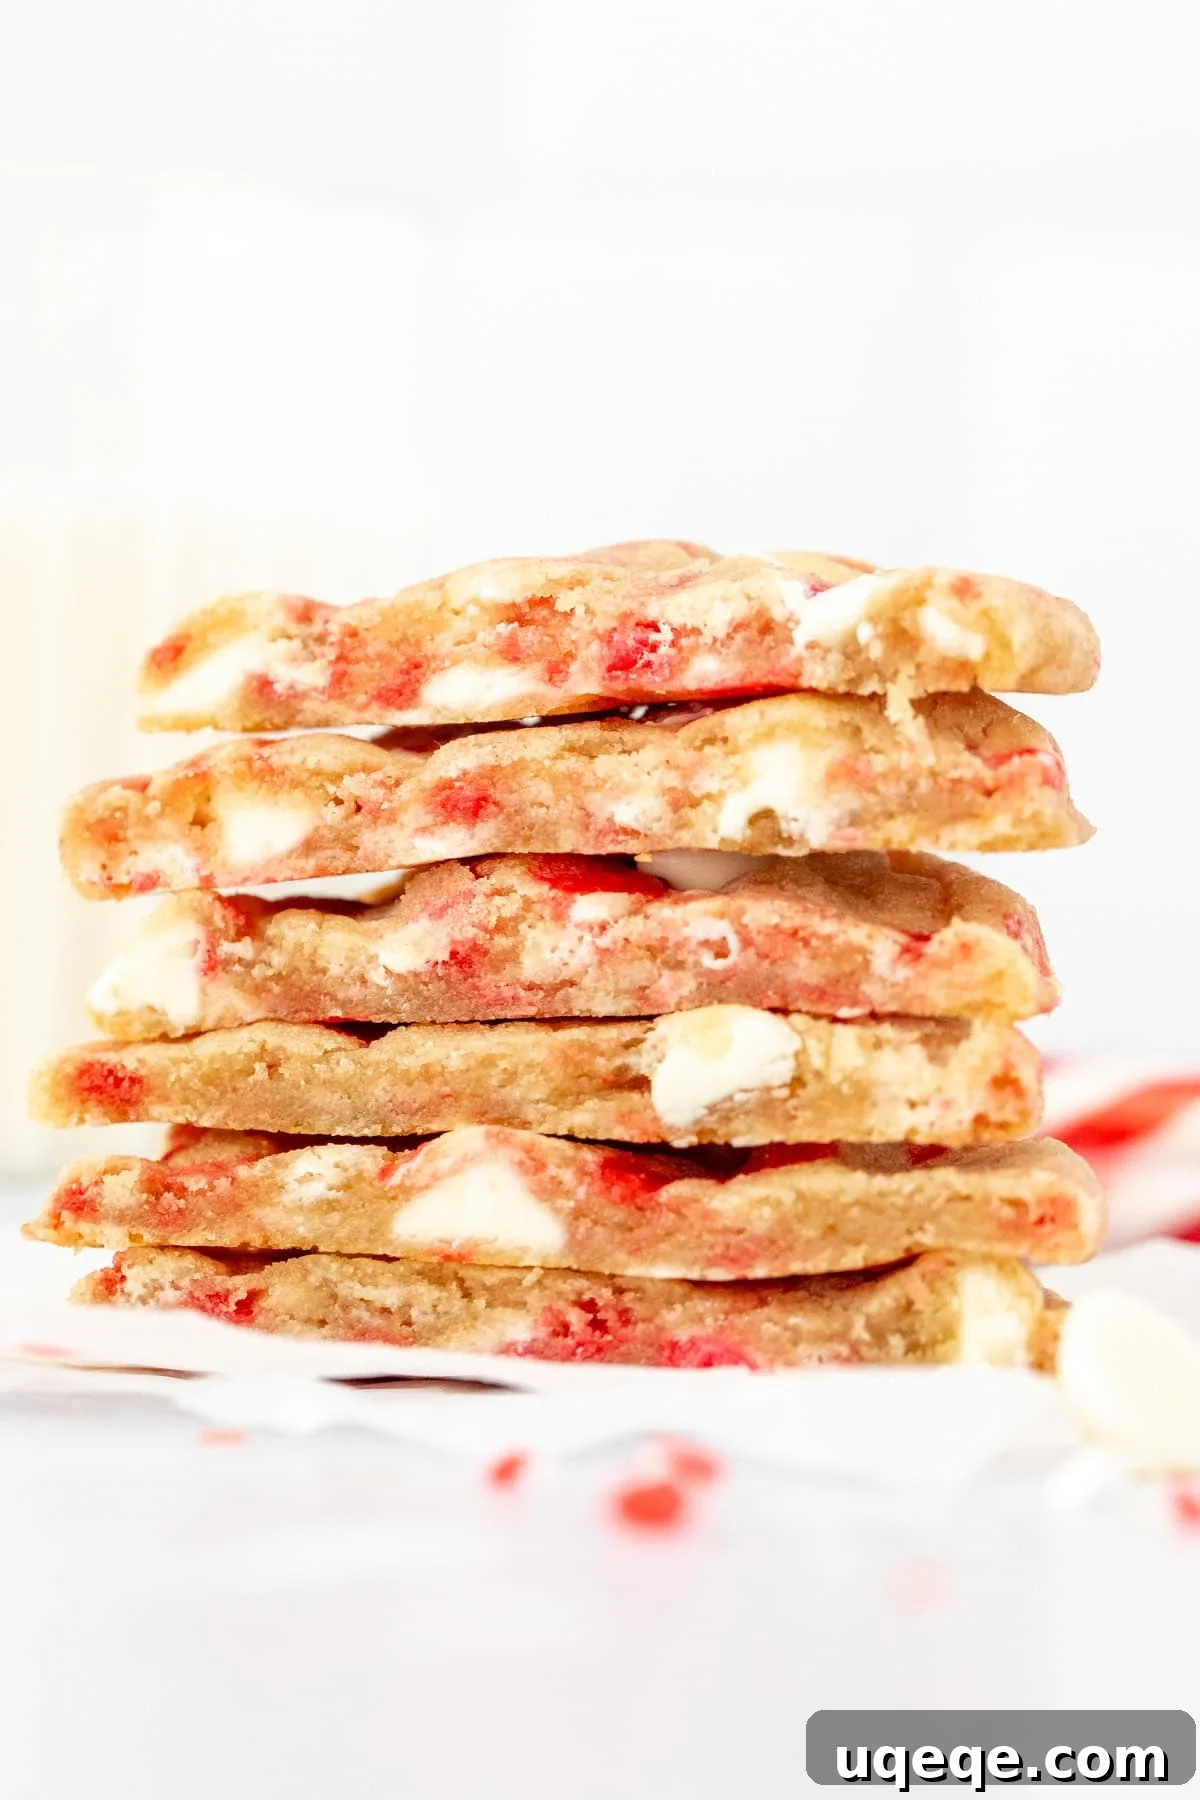
Get ready to infuse your holiday season with the irresistible magic of these **White Chocolate Candy Cane Cookies**. These aren’t just any Christmas cookies; they’re a delightful twist on your favorite chocolate chip cookies, elevated with the cool, refreshing burst of peppermint and the smooth, creamy sweetness of white chocolate. Every bite promises a soft, chewy texture with wonderfully crisp edges, all complemented by the delightful crunch of crushed candy canes.
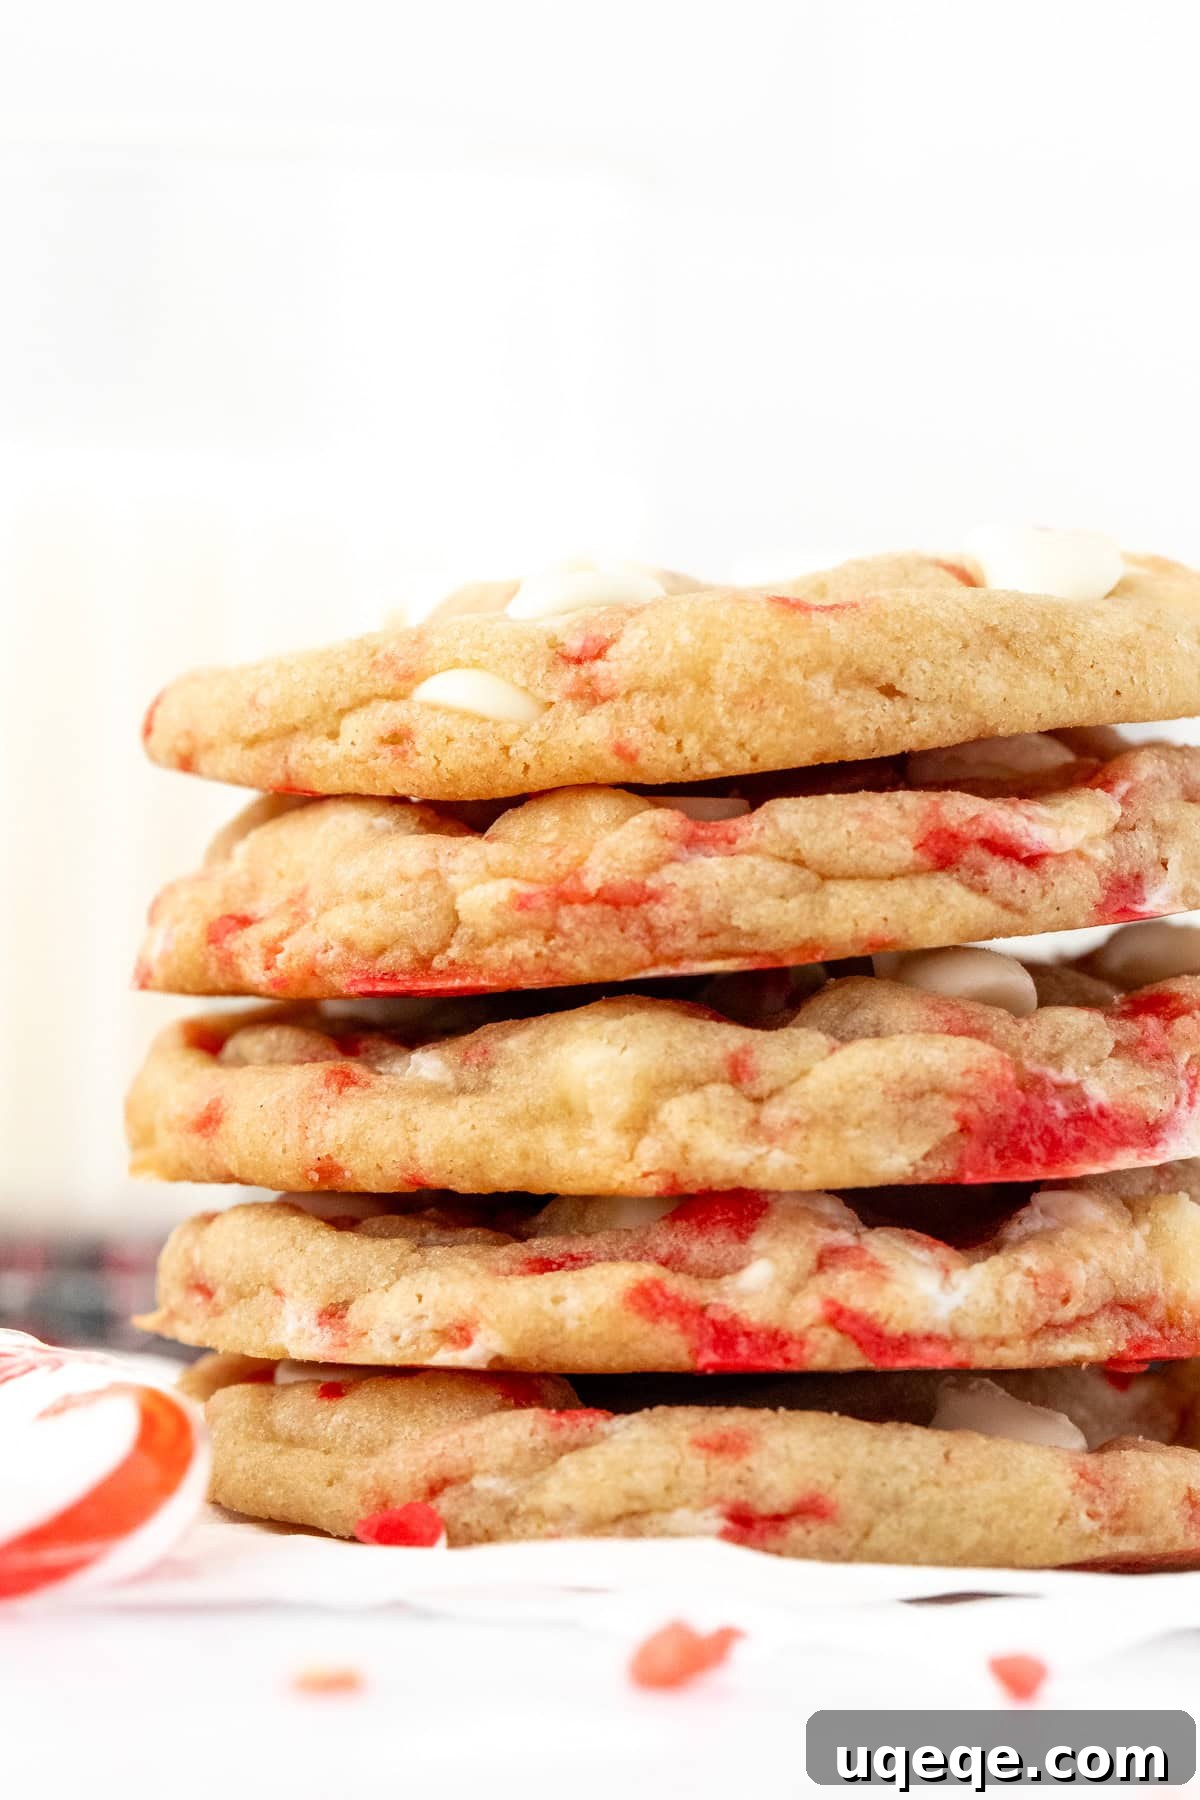
Christmas baking is a cherished tradition, and no holiday cookie tray is complete without a standout recipe. These white chocolate peppermint cookies are designed to be that showstopper – beautiful, festive, and incredibly easy to make. Whether you’re a seasoned baker or just starting your holiday culinary adventures, this recipe will quickly become a beloved staple in your collection.
Why These White Chocolate Candy Cane Cookies Are a Must-Bake This Holiday Season
The combination of white chocolate and peppermint is a classic holiday pairing for a reason. The richness of white chocolate perfectly balances the invigorating zing of peppermint, creating a flavor profile that is both comforting and exciting. Beyond taste, the vibrant red and white hues from the candy canes make these cookies a visual treat, instantly adding a festive touch to any celebration. They’re not just a dessert; they’re a statement of holiday cheer!
But it’s not just about flavor and looks; the texture of these cookies is truly exceptional. We’ve perfected a recipe that yields cookies that are perfectly soft and chewy in the center, with a slight crispness around the edges that adds an addictive quality. The crushed candy cane pieces aren’t just for flavor; they introduce a fantastic textural contrast, making each mouthful a delightful experience. These cookies are guaranteed to be a hit at your next holiday gathering, cookie exchange, or simply as a cozy treat with a cup of hot cocoa.
Essential Ingredients for Perfect Peppermint Cookies
Creating these heavenly white chocolate candy cane cookies starts with a few key ingredients. Each component plays a vital role in achieving that perfect balance of flavor and texture. Here’s what you’ll need and some tips for success:
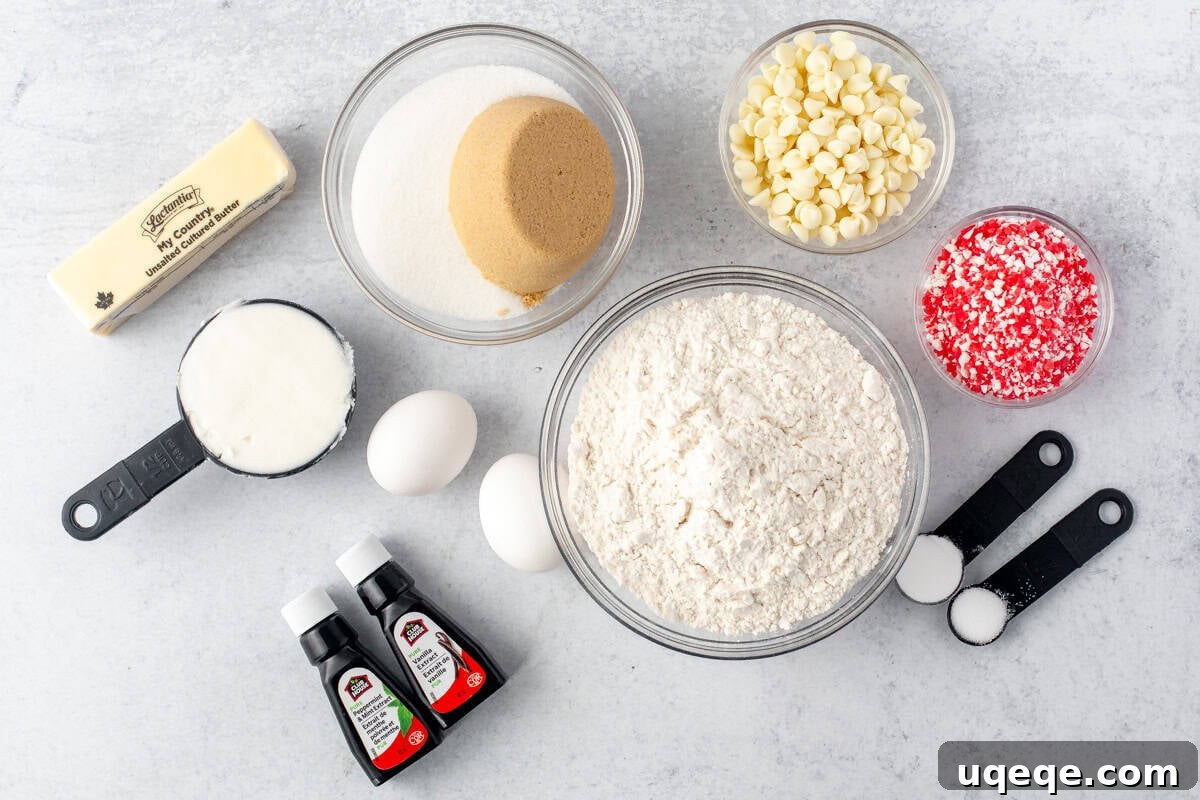
- Unsalted Butter (1/2 cup): Using unsalted butter gives you control over the overall saltiness of the cookies. Make sure it’s softened to room temperature for optimal creaming with the sugars. If you only have salted butter, simply omit the 1/2 teaspoon of salt from the recipe.
- Shortening (1/2 cup): This is a secret weapon for achieving perfect cookie texture! While butter adds incredible flavor, shortening helps to prevent excessive cookie spread, ensuring your cookies stay thick and chewy without needing to chill the dough for hours. This is key for an easy, no-chill Christmas cookie recipe.
- Granulated Sugar (1 cup): Provides sweetness and contributes to the crispness of the cookie edges.
- Brown Sugar (3/4 cup): Light or dark brown sugar will work, but I typically use light brown. Brown sugar adds moisture and a lovely caramel note, contributing to the cookies’ chewiness and depth of flavor.
- Vanilla Extract (1 teaspoon): A staple in almost any cookie recipe, vanilla enhances all the other flavors.
- Peppermint Extract (1 teaspoon): This is where the holiday magic happens! For a pronounced peppermint flavor, don’t skip this. If you prefer a subtle hint, you can reduce the amount or even omit it if you’re only relying on candy canes for flavor.
- Large Eggs (2): Ensure your eggs are at room temperature. This helps them incorporate more easily and evenly into the butter mixture, creating a smoother dough.
- All-Purpose Flour (3 cups): Proper measurement is crucial here. Too much flour can lead to dry, crumbly cookies, while too little can result in excessive spreading. Use the “spoon and level” method: spoon flour into your measuring cup, then level it off with a straight edge.
- Baking Soda (1 teaspoon): The leavening agent that helps the cookies rise and achieve that soft, chewy interior.
- Salt (1/2 teaspoon): Balances the sweetness and brings out all the delicious flavors.
- Crushed Candy Canes (3/4 cup): The star of these festive cookies! They provide the signature peppermint flavor and a delightful crunch.
- White Chocolate Chips (1 1/4 cup): Creamy white chocolate complements the peppermint beautifully. We’ll use most in the dough and save a handful for pressing on top of the warm cookies for an extra visual appeal and melty goodness.
Pro Tip for Using Only Butter
If you prefer to use exclusively butter instead of a butter-shortening blend, that’s perfectly fine! Simply use 1 cup (224 grams) of unsalted butter and increase the all-purpose flour by 1/4 cup, for a total of 3 1/4 cups. This slight adjustment in flour helps to maintain the cookie’s structure and prevent excessive spreading, even without the shortening. After mixing the dough, it’s also advisable to chill it for at least 30 minutes before baking.
Easy Crushed Candy Cane Solution
While crushing candy canes yourself can be fun, it can also be a sticky and messy affair. To save time and effort, I highly recommend purchasing pre-crushed candy canes (often labeled as “peppermint crunch”). These are widely available at baking supply stores and online during the holiday season. It significantly streamlines the process, leaving you with more time to enjoy the baking!

Simple Steps to Bake Your White Chocolate Candy Cane Cookies
One of the best features of this white chocolate candy cane cookie recipe is its simplicity. It follows the classic chocolate chip cookie method, meaning it’s incredibly straightforward and doesn’t require any complicated techniques or chilling time (unless you opt for the all-butter variation). You’ll have a batch of delicious, festive cookies ready in no time!
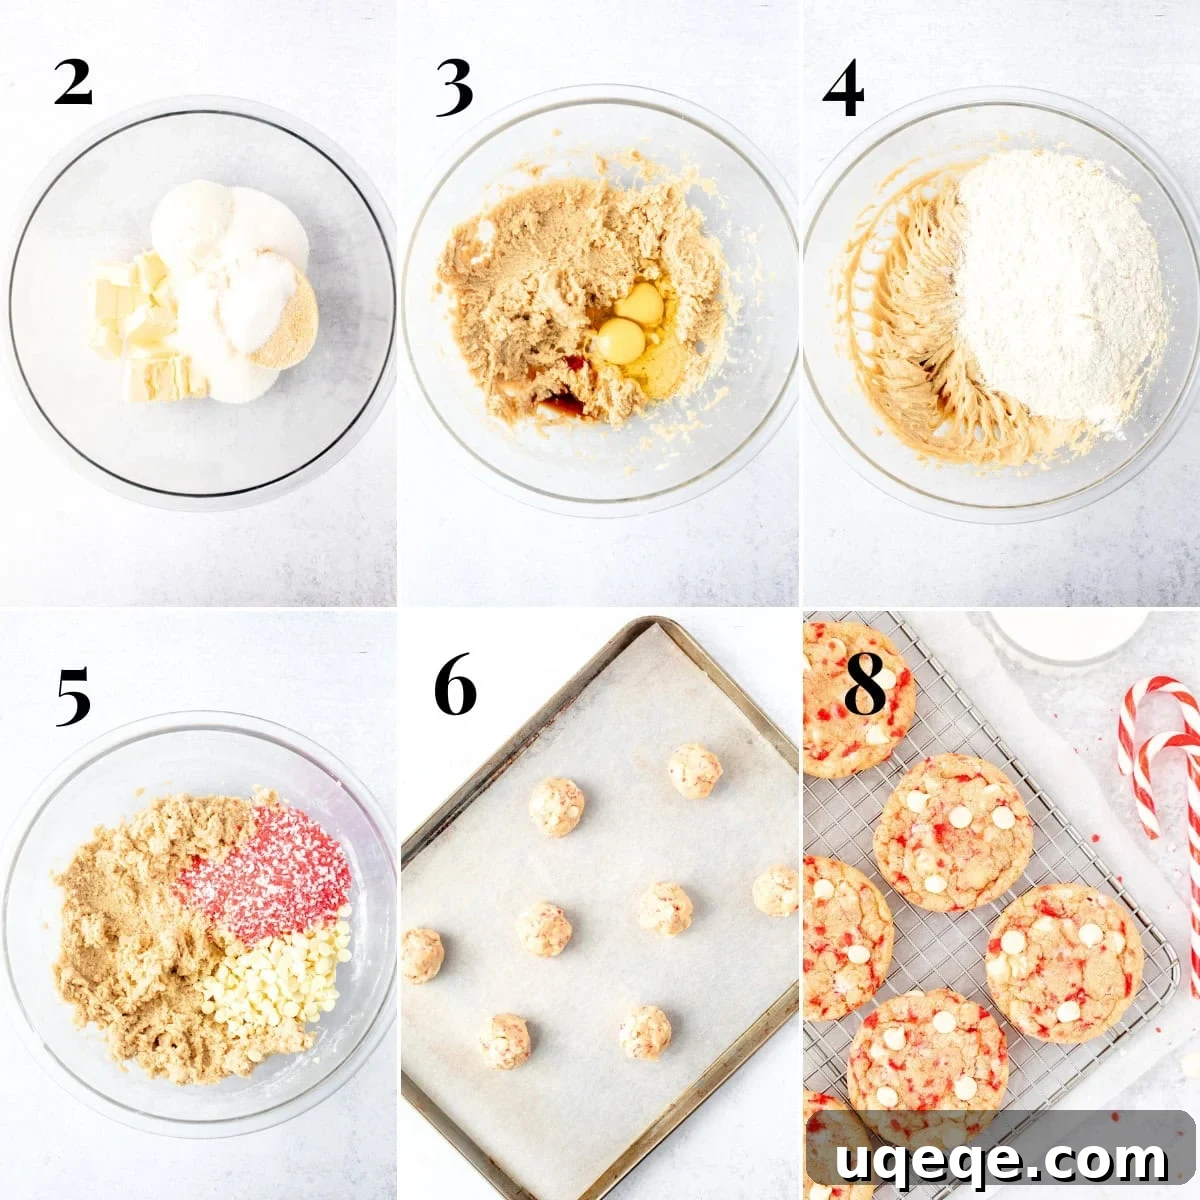
- Prepare Your Baking Station: Start by preheating your oven to 350°F (180°C). Line your baking sheets with parchment paper or silicone baking mats. This prevents sticking and ensures even baking.
- Cream the Fats and Sugars: In a large mixing bowl, combine the softened unsalted butter, shortening, granulated sugar, and brown sugar. Beat these ingredients together with an electric mixer on medium speed for about 2 minutes, or until the mixture is light, fluffy, and no visible lumps of butter remain. This step incorporates air, which contributes to the cookies’ soft texture.
- Incorporate Wet Ingredients: Add the vanilla extract and peppermint extract to the creamed mixture. Then, add the large eggs one at a time, beating well after each addition until fully combined. Ensure your eggs are at room temperature for the best emulsion.
- Mix in the Dry Ingredients: Reduce your mixer speed to low. Gradually add the all-purpose flour, baking soda, and salt to the wet ingredients. Mix until just combined. Be careful not to overmix, as this can lead to tough cookies. A good test for dough consistency: squeeze a small amount of dough between your fingers. If it feels overly sticky (a little grease is normal), mix in an additional 1-2 tablespoons of flour, one at a time, until it reaches a soft, pliable consistency.
- Stir in the Goodies: Gently fold in the crushed candy canes and 1 cup of the white chocolate chips using a spatula or spoon. Distribute them evenly throughout the dough.
- Form the Cookie Balls: Scoop the cookie dough into balls, approximately 1 to 1 1/2 tablespoons in size. A cookie scoop helps ensure uniform cookies that bake evenly. Place the dough balls about 2 inches apart on your prepared baking sheets. For slightly thicker cookies, try forming the dough balls to be taller than they are wide.
- Bake to Perfection: Bake one sheet at a time in the middle rack of your preheated oven for 8-10 minutes. The cookies are done when the edges are lightly golden and the centers look just set (they might still look slightly soft).
- Cool and Garnish: As soon as the cookies come out of the oven, immediately press a few extra white chocolate chips (from your reserved 1/4 cup) onto the tops of each warm cookie. This creates a beautiful, melted white chocolate swirl on top. Let the cookies cool on the baking sheets for at least 10 minutes before transferring them to a wire rack to cool completely. This crucial step helps them set and prevents them from breaking.
Make-Ahead Tips for Stress-Free Holiday Baking
The holidays are busy, and anything that helps streamline your baking is a true gift! These white chocolate candy cane cookies are perfect for preparing in advance, allowing you to enjoy fresh-baked goodness with minimal effort when the time comes.
Preparing Dough in Advance:
You can prepare the cookie dough up to 48 hours before you plan to bake. Simply cover the bowl tightly with plastic wrap and refrigerate. When you’re ready to bake, let the dough sit at room temperature for about 15-20 minutes to soften slightly before forming into balls and baking as directed.
Freezing Cookie Dough for Later:
Freezing cookie dough balls is a fantastic way to have fresh, warm cookies on demand! The dough can be frozen for up to 2 months.
- Form the dough into individual balls as instructed in the recipe.
- Place the dough balls on a plate or small baking sheet, ensuring they aren’t touching, and cover with plastic wrap.
- Refrigerate for about 30 minutes until the dough balls are firm. This prevents them from sticking together in the freezer.
- Once firm, transfer the frozen dough balls to a freezer-safe bag or airtight container. Label with the date.
- When you’re ready to bake, preheat your oven and line cookie sheets as usual. Bake the cookies directly from frozen – no need to thaw! They may require an extra 1-2 minutes of baking time, so keep an eye on them.
Serving and Storage Suggestions
These delightful candy cane cookies are wonderful served warm, right out of the oven, with the white chocolate still slightly gooey. They’re also fantastic once fully cooled, retaining their soft, chewy texture. Serve them as part of a holiday dessert platter, alongside coffee or hot chocolate, or package them up beautifully for a thoughtful homemade gift.
Storage:
Store baked and cooled cookies in an airtight container at room temperature for up to 4 days. For extended freshness, you can refrigerate them for up to 7 days. While fresh cookies are always best, properly stored cookies maintain their deliciousness. For longer storage, baked and cooled cookies can also be frozen. Place a sheet of wax paper or parchment paper between layers to prevent them from sticking together, then transfer to a freezer-safe bag or container. Thaw them in the refrigerator overnight or at room temperature for a few hours.
Frequently Asked Questions About White Chocolate Candy Cane Cookies
Even simple recipes can sometimes raise questions. Here are some common queries to help you perfect your white chocolate candy cane cookies:
Q: My cookies spread too much. What went wrong?
A: Several factors can cause cookies to spread excessively. Ensure your butter and shortening aren’t too soft or melted when you start; they should be softened but still cool to the touch. Accurately measuring your flour is also crucial; too little flour means less structure. Using cold eggs (instead of room temperature) can also affect consistency. If using an all-butter recipe, chilling the dough is highly recommended to prevent spreading.
Q: Can I use different types of chocolate?
A: Absolutely! While white chocolate is traditional for this recipe, you can experiment. Milk chocolate chips or dark chocolate chips would create a wonderful contrasting flavor. You could even use a mix of white and dark chocolate for a “zebra” effect!
Q: How can I ensure my candy canes don’t melt away completely?
A: The key is to add the crushed candy canes towards the end of the mixing process and bake the cookies just until set. Overmixing or overbaking can cause them to dissolve. Also, make sure you’re using actual candy cane pieces and not just peppermint candies, as their composition might differ.
Q: Can I make these cookies without peppermint extract?
A: Yes, you can! If you prefer a milder peppermint flavor or want to let the white chocolate truly shine, you can omit the peppermint extract. The crushed candy canes will still impart a lovely minty hint, but it will be less intense.
Q: What’s the best way to crush candy canes if I don’t buy them pre-crushed?
A: Place the unwrapped candy canes in a sturdy Ziploc bag, remove excess air, and seal it. Then, use a rolling pin, meat tenderizer, or the bottom of a heavy pan to gently crush them until you reach your desired consistency. Be careful not to create a fine powder unless that’s what you prefer.
Other Delicious Holiday Treats to Try
If you’re a fan of the delightful combination of white chocolate and peppermint, you’re in for a treat! These candy cane cookies are just the beginning. Explore these other fantastic holiday recipes:
- White Chocolate Peppermint Fudge
- Candy Cane Brownies
- Chocolate Peppermint Cheesecake
- Candy Cane Chocolate Cupcakes

White Chocolate Candy Cane Cookies Recipe
By: Fiona Dowling
These white chocolate candy cane cookies are the perfect holiday chocolate chip cookie recipe. They’re soft, chewy, filled with Christmas cheer & super pretty!
Prep time: 15 mins
Cook time: 10 mins
Total time: 45 mins (includes cooling)
Yields: 40 cookies
Equipment
- Cookie Sheets
- Parchment Paper or Silicone Baking Mats
- Electric Mixer (stand or hand mixer)
- Large Mixing Bowls
- Spatula or Wooden Spoon
Ingredients
- ½ cup (112 grams) unsalted butter, softened
- ½ cup shortening
- 1 cup (200 grams) granulated sugar
- ¾ cup (158 grams) brown sugar, light or dark (light recommended)
- 1 teaspoon vanilla extract
- 1 teaspoon peppermint extract
- 2 large eggs, at room temperature
- 3 cups (375 grams) all-purpose flour
- 1 teaspoon baking soda
- ½ teaspoon salt
- ¾ cup crushed candy canes
- 1¼ cup (about 225 grams) white chocolate chips, divided
Instructions
- Preheat your oven to 350℉ (180℃) degrees. Line cookie sheets with parchment paper or silicone baking mats.
- In a large bowl, using an electric mixer, beat together the softened butter, shortening, granulated sugar, and brown sugar until the mixture is light and fluffy (this usually takes about 2 minutes).
- Add in the vanilla extract and peppermint extract, mixing briefly. Then, beat in the eggs one at a time, ensuring each is fully incorporated before adding the next.
- Reduce the mixer speed to low. Gradually add the all-purpose flour, baking soda, and salt to the wet ingredients. Mix until just combined, being careful not to overmix. If the dough feels too sticky to handle when squeezed between your fingers (a little grease is normal), add 1-2 extra tablespoons of flour, one at a time, until it reaches a soft, pliable consistency. (You may need up to 3¼ cups total flour if substituting all butter).
- Gently fold in the crushed candy canes and 1 cup of the white chocolate chips using a spatula or spoon until evenly distributed.
- Form the dough into balls, approximately 1 to 1½ tablespoons in size. Place them about 2 inches apart on the lined cookie sheets. For thicker cookies, shape the dough balls to be taller than they are wide.
- Bake one sheet at a time for 8-10 minutes, or until the edges are lightly golden and the tops look just set (they might still appear slightly soft in the center).
- Immediately upon removing the cookies from the oven, press a few extra white chocolate chips (from the remaining ¼ cup) onto the tops of each warm cookie.
- Allow the cookies to cool on the baking sheet for 10 minutes before carefully transferring them to a wire rack to cool completely.
Notes
- Shortening Substitution: If you prefer to use entirely butter, use 1 cup (224 grams) unsalted butter and 3¼ cups all-purpose flour. After stirring in the chocolate chips and crushed candy canes, cover the bowl and refrigerate the dough for at least 30 minutes before forming into balls and baking.
- Making Larger Cookies: For larger cookies, form dough balls about 3 tablespoons in size. Shape them so they are taller than they are wide. Bake for 12-14 minutes, or until the tops look just set. It is highly recommended to chill the dough for at least 30 minutes first if making larger cookies to prevent spreading.
- Storage: Store these festive cookies in an airtight container at room temperature for up to 4 days, or in the refrigerator for up to 7 days. For longer storage, baked and cooled cookies can be placed in a freezer bag or freezer-safe container for up to 2 months. Place sheets of wax paper or parchment paper between cookie layers to avoid sticking. Thaw in the refrigerator or at room temperature.
- Nutrition Information: The provided nutrition details are an estimate only, based on 1 cookie and assuming the recipe yields 36 uniform cookies.
Nutrition
Calories: 147kcal, Carbohydrates: 20g, Protein: 2g, Fat: 7g, Saturated Fat: 3g, Polyunsaturated Fat: 1g, Monounsaturated Fat: 2g, Trans Fat: 0.4g, Cholesterol: 17mg, Sodium: 67mg, Potassium: 36mg, Fiber: 0.3g, Sugar: 12g, Vitamin A: 86IU, Vitamin C: 0.03mg, Calcium: 18mg, Iron: 1mg