
The Ultimate Apple Crisp Cheesecake: A Must-Try Fall Dessert Recipe
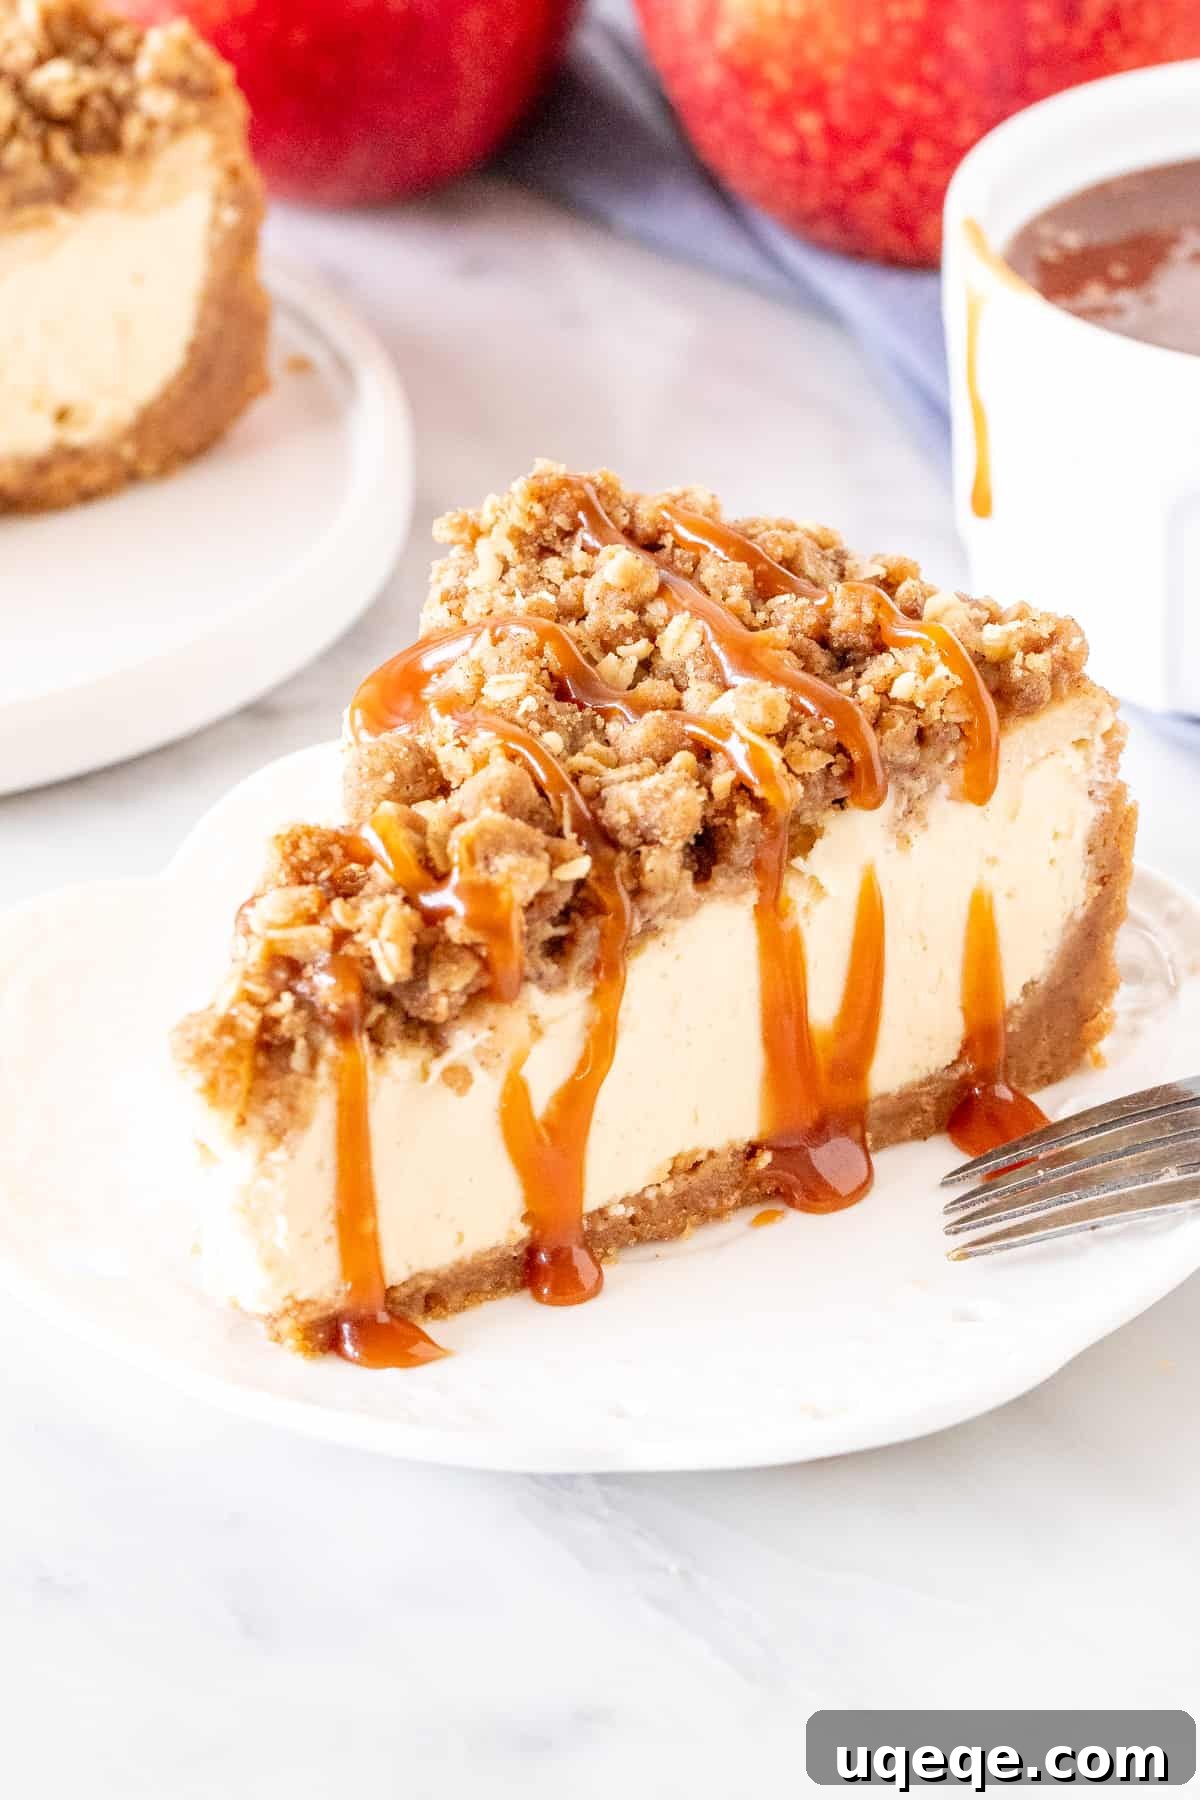
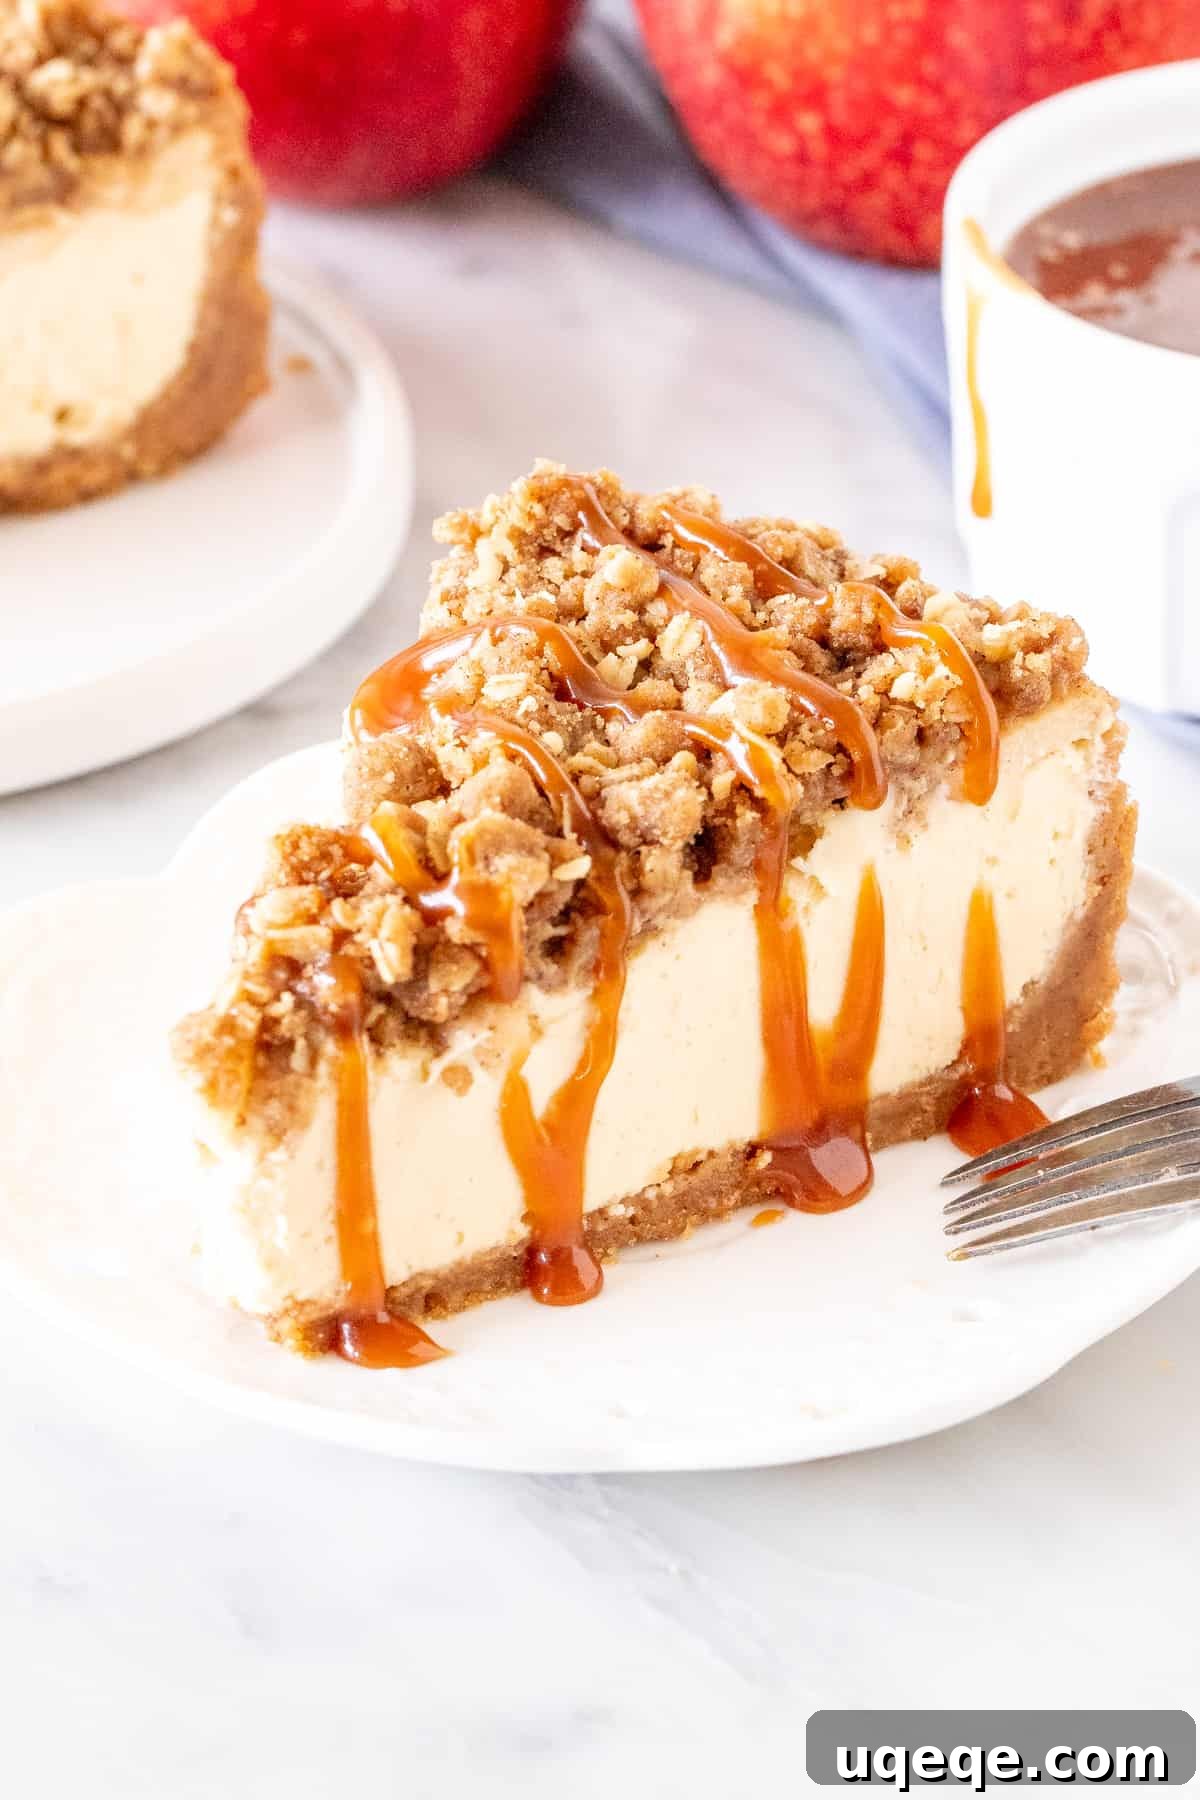
As the leaves begin to turn and the air grows crisp, there’s a unique longing for comforting, spiced desserts. Our **Apple Crisp Cheesecake** flawlessly blends the hearty, autumnal flavors of a classic apple crisp with the luxurious, creamy indulgence of a New York-style cheesecake. This dessert is more than just a recipe; it’s an experience, featuring a perfectly balanced symphony of textures and tastes: a sturdy, cinnamon-spiced graham cracker crust, a velvety smooth and tangy vanilla cheesecake filling, a layer of tender, sweet cinnamon apples, and a golden, crunchy oatmeal crumble topping. Crowned with an optional drizzle of rich salted caramel, this cheesecake transforms into an unforgettable treat, ideal for special occasions, holiday gatherings like Thanksgiving, or simply to celebrate the abundance of apple season.
Forget the dilemma of choosing between apple crisp and cheesecake—this innovative dessert delivers the very best of both worlds. The satisfying crunch of the crust, the silkiness of the cheesecake, the soft bite of the apples, and the crisp texture of the oat topping create a multi-dimensional sensory delight. It’s a dessert that not only captivates the palate but also evokes the cozy essence of autumn.
Crafting Your Masterpiece: A Detailed Guide to Apple Crisp Cheesecake
Creating this exceptional Apple Crisp Cheesecake involves four key components: the robust graham cracker crust, the luscious cheesecake batter, the flavorful cinnamon apple layer, and the signature crunchy crisp topping. While it requires a bit of time and attention to detail, each step is designed to be manageable, leading to a truly rewarding outcome. Like all great cheesecakes, patience is paramount, especially during the crucial chilling phase. We recommend preparing this dessert a full day before you plan to serve it, allowing it to chill in the refrigerator for at least 6 hours, or ideally overnight. This ensures the cheesecake achieves its perfect dense, creamy consistency and allows all the intricate flavors to fully meld together.
Step 1: The Sturdy Cinnamon Graham Cracker Crust
The journey to an impeccable Apple Crisp Cheesecake begins with its foundation: a thick, flavorful, and incredibly crunchy graham cracker crust. This crust isn’t merely a base; it’s an integral part of the dessert’s character. To create it, you’ll combine finely crushed graham cracker crumbs with a touch of aromatic brown sugar and a generous hint of ground cinnamon. These dry ingredients are then blended with melted unsalted butter, resulting in a mixture that resembles moist sand. This mixture is then firmly pressed into the bottom and approximately halfway up the sides of your prepared 9-inch springform pan. The secret to its enduring crunchiness lies in a brief pre-bake in a preheated oven for about 8-10 minutes. This essential step helps to solidify the crust, ensuring it remains wonderfully crisp and sturdy, even when faced with the moist cheesecake filling.
Step 2: The Hearty Cinnamon Apple Layer
While your crust is pre-baking, you can efficiently prepare the star of the “apple crisp” component: the spiced cinnamon apples. For this layer, choose two large, firm, and slightly tart apples, such as Granny Smith or Gala. These varieties hold their shape well during baking and offer a delightful tang that perfectly balances the sweetness of the cheesecake. Begin by peeling, coring, and slicing the apples into very thin, uniform pieces. Thin slices are crucial for ensuring the apples soften sufficiently and distribute evenly throughout the cheesecake. Once sliced, gently toss the apples with brown sugar and cinnamon. The brown sugar not only adds sweetness but also helps to draw out some moisture, contributing to tender, flavorful apples. Place the prepared apples in the refrigerator to keep them fresh until you’re ready to assemble the cheesecake.
Step 3: The Irresistible Oatmeal Crumble Topping
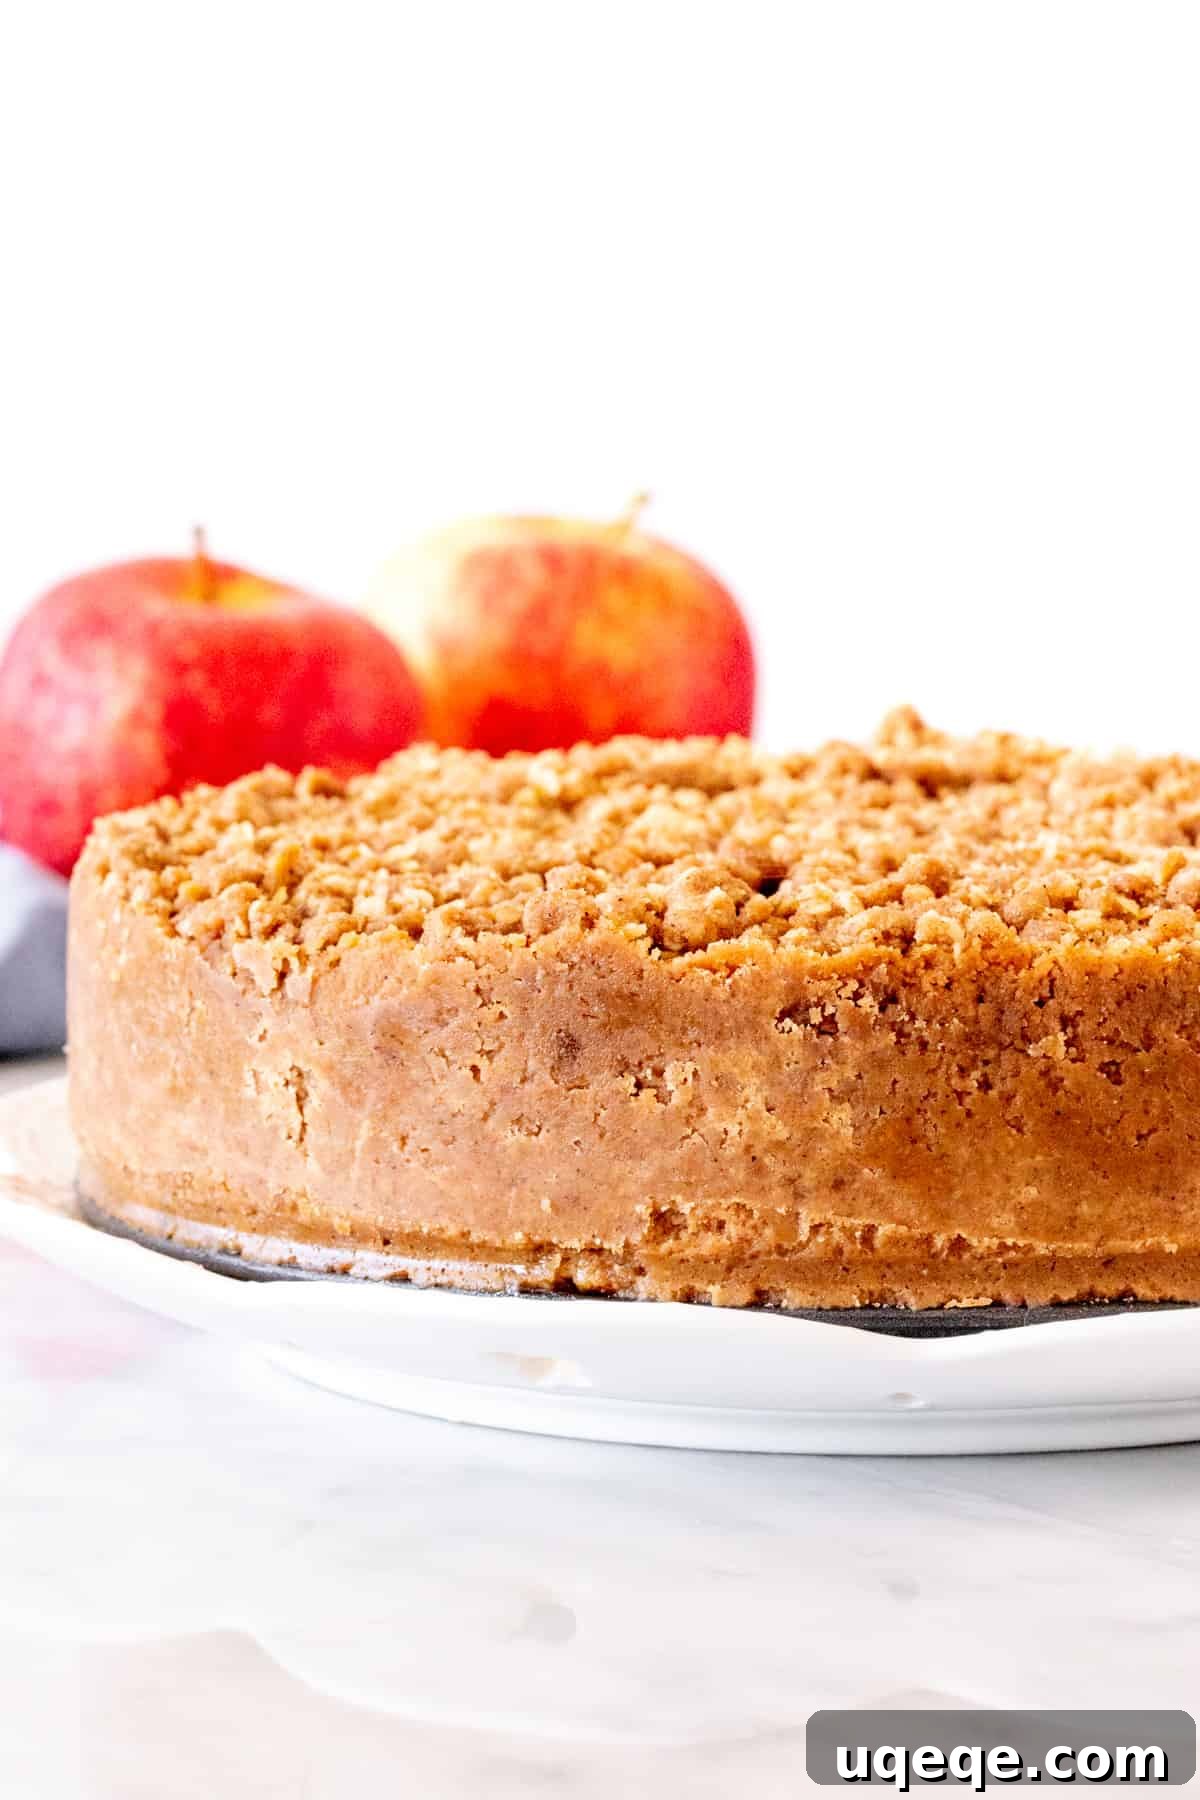
No apple crisp-inspired dessert would be complete without a delightful crumble topping. This component adds a crucial textural contrast and an extra layer of warm, spiced flavor. Our crisp topping is a simple blend of all-purpose flour, rich brown sugar, fragrant cinnamon, and quick oats. These dry ingredients are combined, and then melted unsalted butter is stirred in until the mixture is crumbly but can form small, cohesive clumps when squeezed. A deliberate choice for this recipe is the use of quick oats over old-fashioned oats. Quick oats create smaller, finer crumbles, which are significantly easier to slice through once the cheesecake is baked and set, ensuring clean cuts and a pleasant eating experience. This topping will bake up golden brown and wonderfully crunchy, providing the perfect crown for your cheesecake.
Step 4: The Silky-Smooth Cheesecake Filling
The cheesecake filling is the luxurious heart of this dessert, delivering that signature creamy texture and tangy vanilla flavor. The key to its perfection lies in using room-temperature ingredients and mindful mixing. Start with full-fat, brick-style cream cheese—avoiding low-fat or tub varieties is essential for proper richness and consistency. Beat the cream cheese with both granulated sugar and brown sugar until the mixture is exceptionally smooth and light, with absolutely no lumps. Incorporate a hint of cinnamon here, deepening the overall flavor profile, along with cornstarch. The cornstarch acts as a crucial stabilizer, helping the cheesecake set beautifully and significantly minimizing the dreaded cheesecake cracks. Next, gently mix in the room-temperature sour cream and pure vanilla extract for that classic tangy depth. Finally, add the large eggs, one at a time, mixing only until they are just combined. Overmixing the eggs can incorporate too much air, which can cause the cheesecake to puff up in the oven and then crack as it cools. Scrape down the sides of the bowl frequently to ensure a uniformly smooth batter.
Assembling and Baking: The Path to Cheesecake Perfection
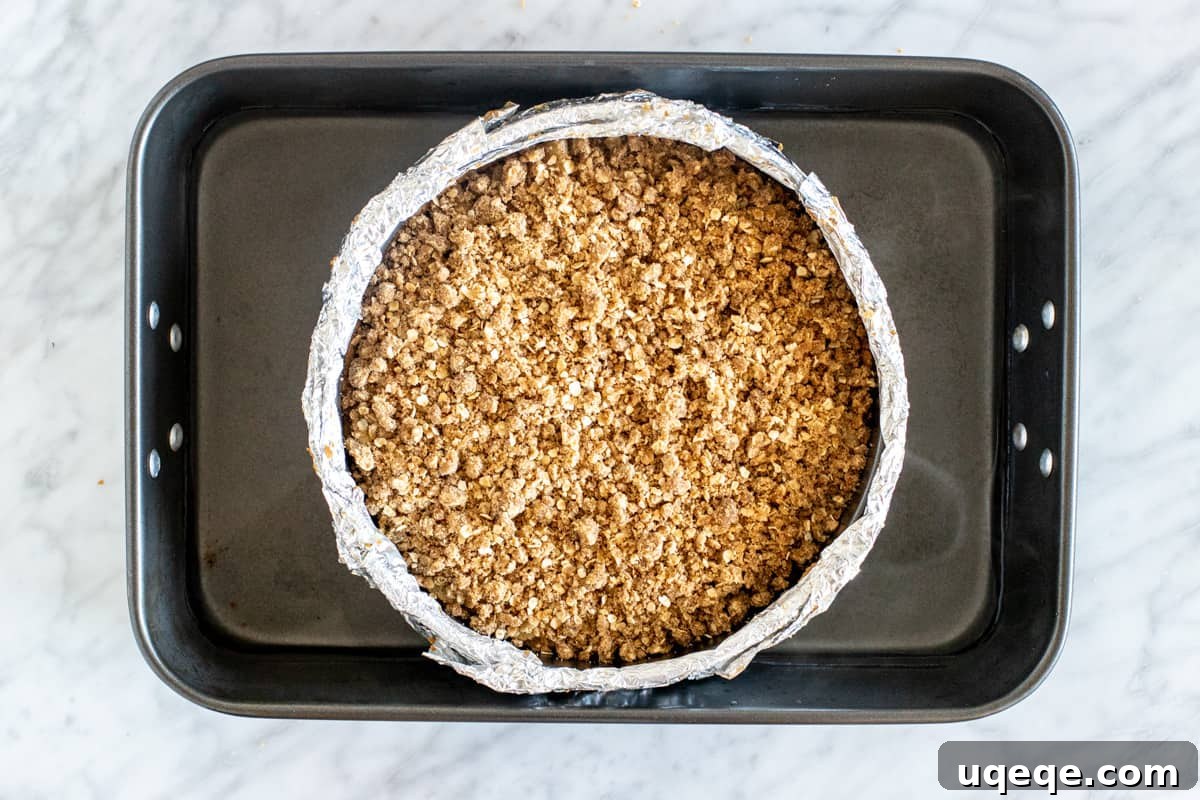
With all components prepared, it’s time for the final assembly before baking. Carefully pour the smooth cheesecake filling over the pre-baked graham cracker crust in your foil-wrapped springform pan. Use an offset spatula or the back of a spoon to gently smooth the top of the filling, creating an even surface. Next, artfully arrange the thinly sliced cinnamon apples in an even layer over the cheesecake filling. A crucial tip here: if any liquid has collected at the bottom of the bowl with the apples, discard it; do not add it to the cheesecake, as excess moisture can affect the bake. Finally, generously sprinkle the prepared oatmeal crumble mixture over the apple layer. It may look like a lot, but it will bake down into a perfect, golden topping.
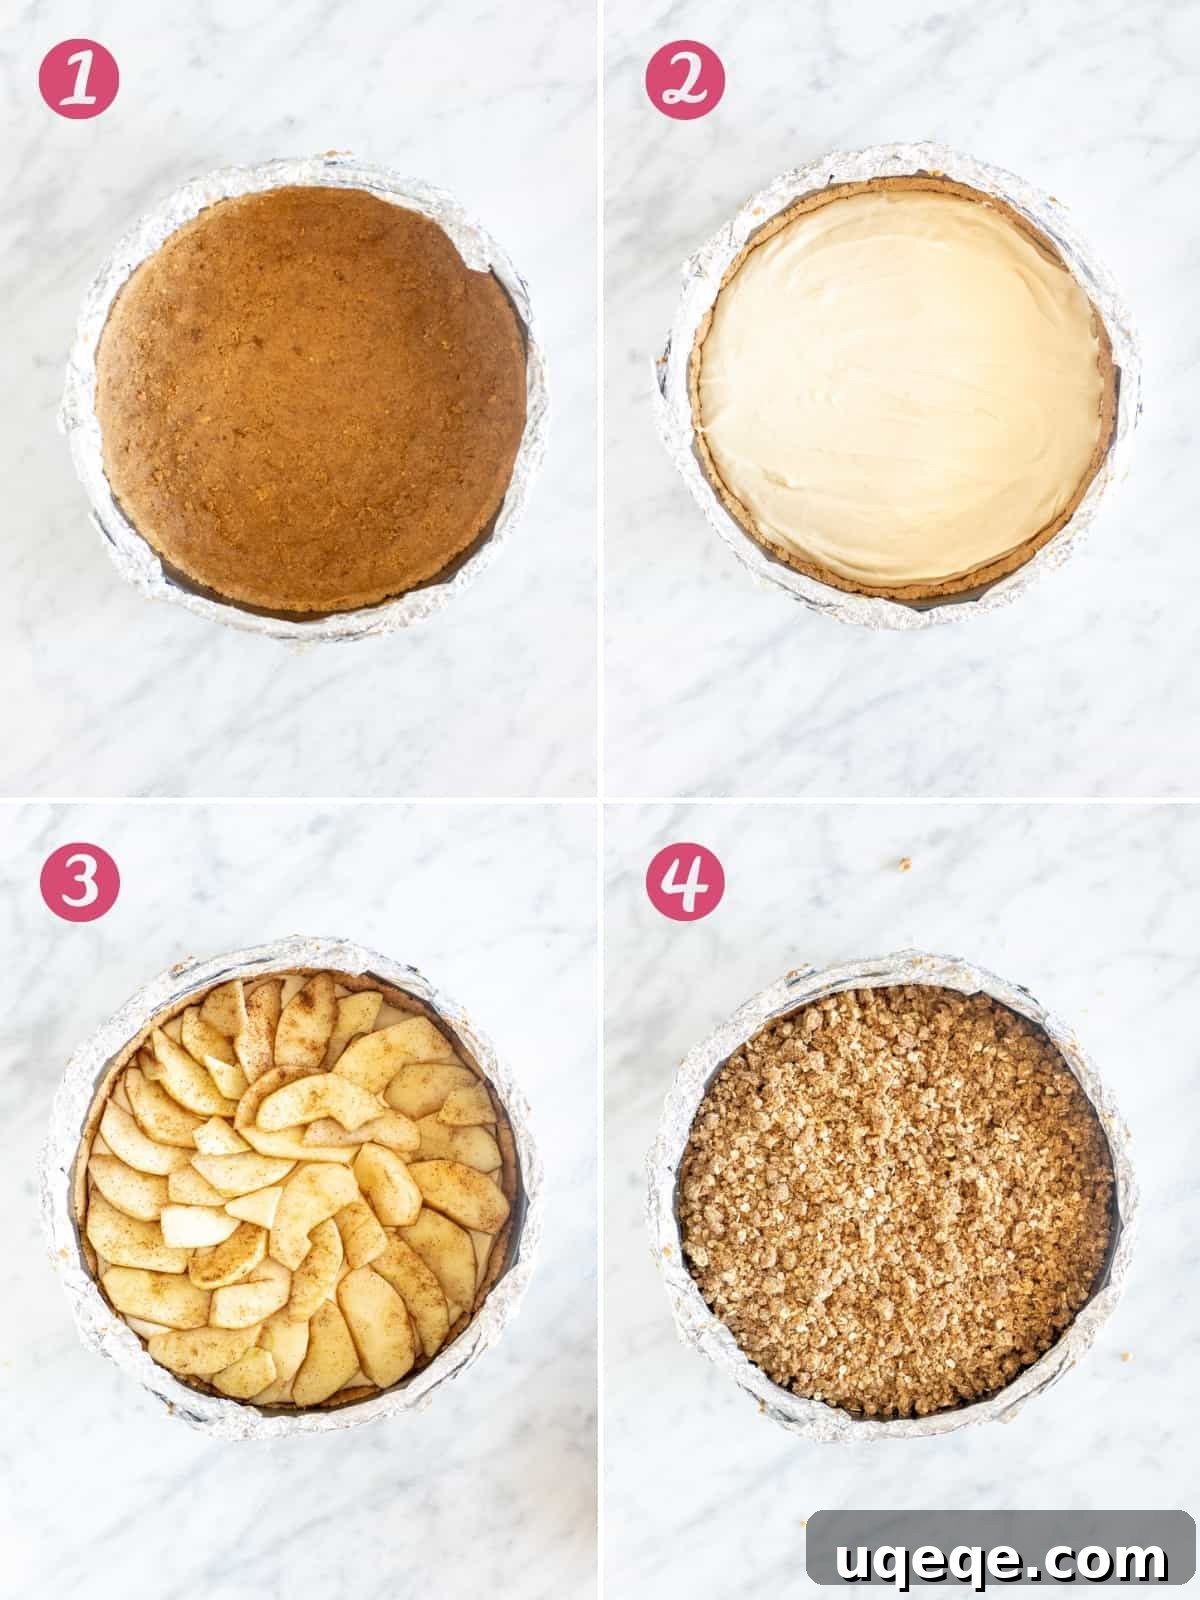
Important Layering Insight: Through extensive testing, we’ve discovered that placing the apple layer directly on the bottom crust can lead to a soggy crust, diminishing its desired crunch. Therefore, for the best results, always layer the cinnamon apples on top of the cheesecake filling.
The Essential Water Bath (Bain-Marie) for a Flawless Cheesecake
The elegant appearance of a crack-free, silky cheesecake is largely attributed to a technique called the water bath, or bain-marie. This method is indispensable for achieving the perfect cheesecake texture. Before you even start preparing your crust, take your 9-inch (23-cm) springform pan and wrap its exterior thoroughly with at least 3-4 layers of heavy-duty aluminum foil. Ensure all seams are completely sealed to prevent any water from seeping into the pan during baking. The water bath creates a moist, gentle cooking environment in the oven, preventing the cheesecake from drying out or baking too quickly around the edges. This even, consistent heat minimizes temperature fluctuations, which are the primary culprits behind cheesecake cracks. Once your cheesecake is assembled in its foil-wrapped springform pan, place it carefully into a larger roasting pan. Then, pour about 1/2 to 1 inch of boiling water into the roasting pan around the cheesecake. This entire setup—roasting pan with water and the cheesecake—is then transferred to your preheated oven to bake.
Note on Pre-Baking the Crust: It’s important to remember that the initial pre-baking of the graham cracker crust is done on its own, *without* the water bath. The water bath is introduced only when the cheesecake is fully assembled with its filling, apples, and crumble topping.
Expert Baking Tips for an Unforgettable Apple Crisp Cheesecake
- Achieve Room Temperature Ingredients: This tip cannot be stressed enough. Ensure your cream cheese, sour cream, and eggs are at true room temperature. This means taking them out of the refrigerator at least 30-60 minutes before you start mixing. Cold ingredients create lumps and prevent proper emulsification, resulting in a less smooth and potentially grainy cheesecake batter.
- Graham Cracker Substitutions: If you’re baking outside North America and graham cracker crumbs are unavailable, plain digestive biscuits are an excellent and commonly used substitute. Simply crush them finely to achieve the desired crumb texture for the crust.
- Selecting the Perfect Apples: The choice of apple significantly influences the overall flavor and texture. For optimal results, use crisp, slightly tart varieties such as Granny Smith or firm Gala apples. These apples maintain some structure after baking and their tartness provides a wonderful contrast to the rich, sweet cheesecake. Avoid soft or mealy apples like Red Delicious or McIntosh, which can become mushy.
- Oats for Optimal Crumble: Quick oats are recommended for the crisp topping as they produce smaller, more uniform crumbles that contribute to easier slicing of the cheesecake. While old-fashioned oats can be used, they will result in a chewier, larger crumble. Never use instant oats, as their fine texture will absorb too much moisture and lead to a dry, unpleasant topping.
- The Critical Cooling and Chilling Phase: After baking, allow the cheesecake to cool slowly within the roasting pan until it reaches room temperature. Then, transfer it to the refrigerator to chill for a minimum of 6 hours, or ideally overnight. This extended chilling time is absolutely essential for the cheesecake to fully set, firm up, and develop its dense, creamy consistency. Rushing this step will result in a wobbly, unset, and less flavorful cheesecake.
- Mastering the Clean Slice: To achieve beautifully clean slices, use a thin, sharp, non-serrated knife. For the best results, warm the knife under hot water, wipe it completely dry, and then make each slice. Clean the knife again between each cut. This technique helps the knife glide through all the layers—the crunchy crust, creamy filling, and crisp topping—without tearing or sticking. Don’t be discouraged if the first few slices aren’t perfect; practice improves technique!
Serving Suggestions and Storage Recommendations
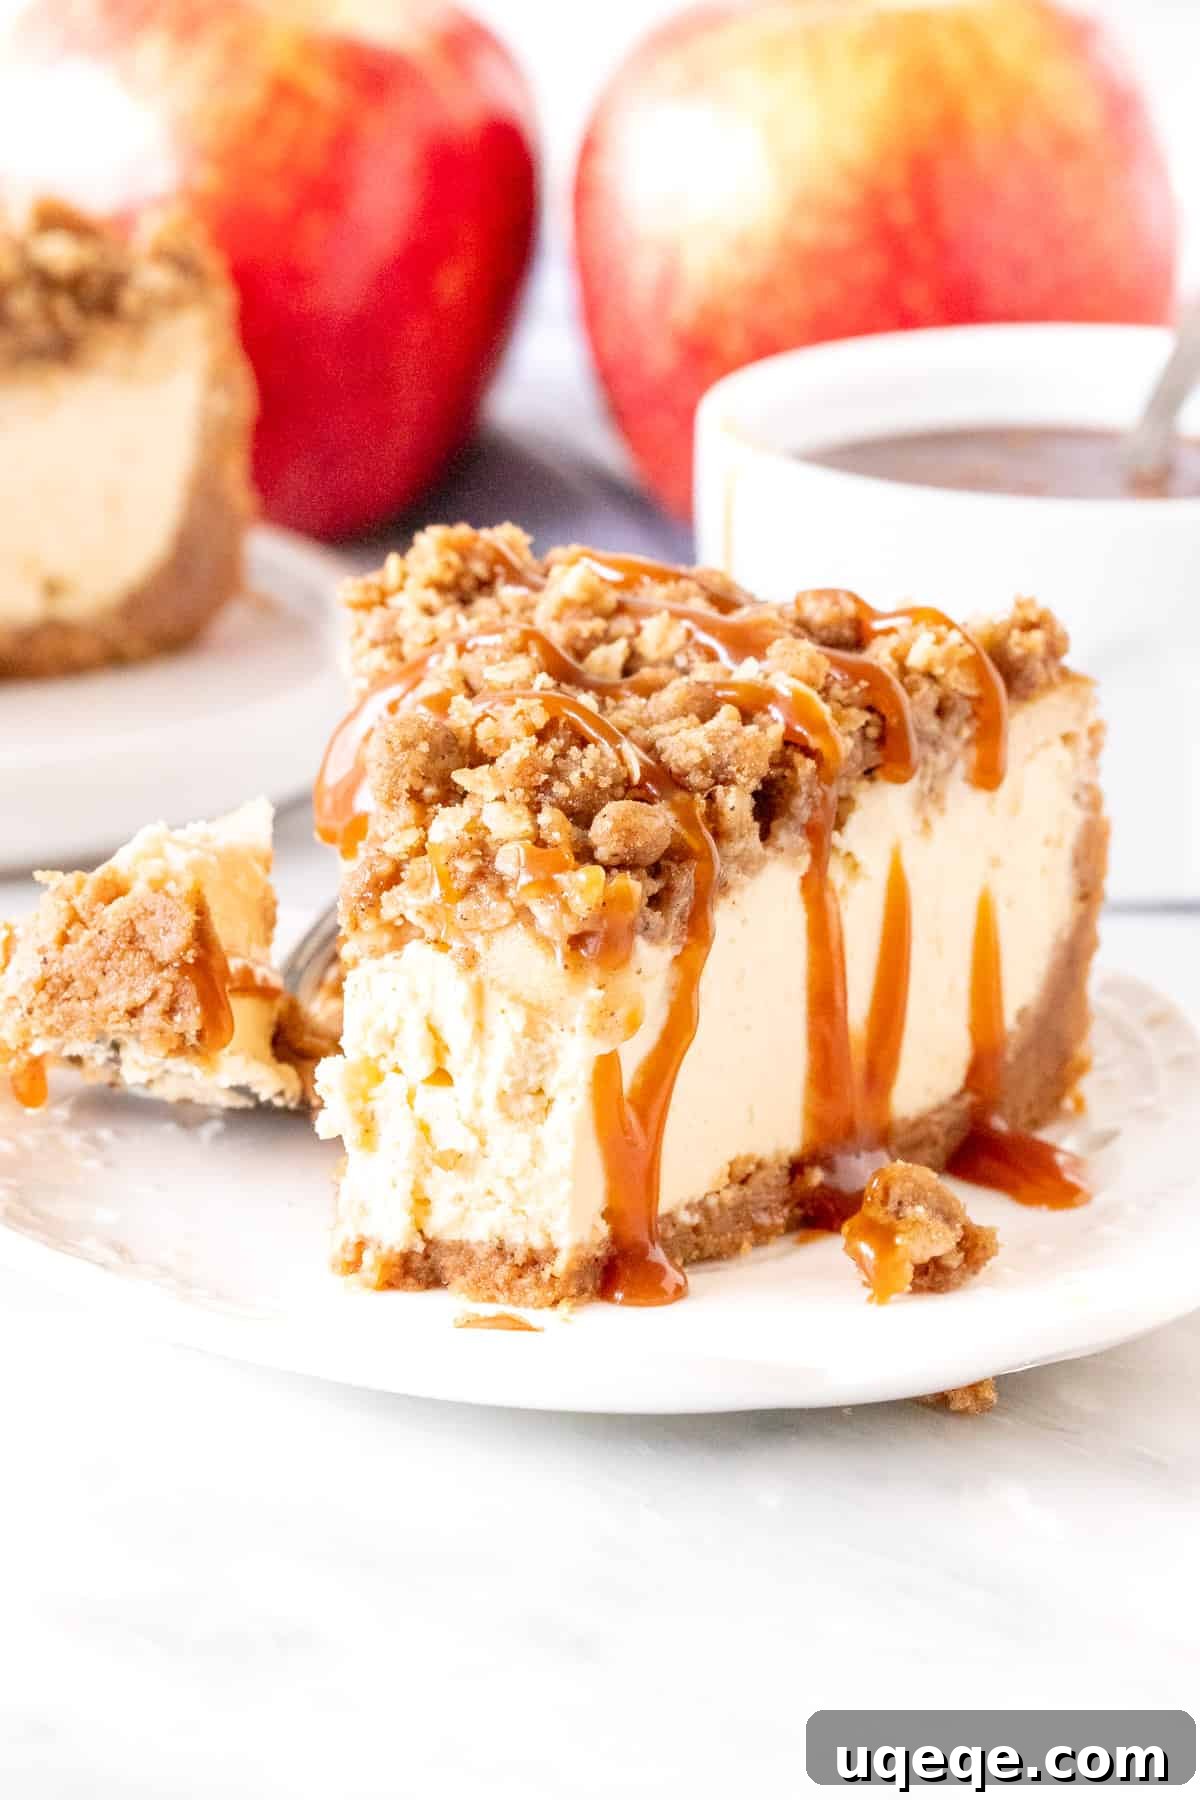
While this Apple Crisp Cheesecake is undeniably exquisite on its own, it truly shines with a few delightful enhancements. A generous drizzle of warm salted caramel sauce is highly recommended; its sweet and salty notes perfectly complement the cinnamon-spiced apples and the rich cheesecake. For an extra touch of decadence, consider serving each slice with a dollop of freshly whipped cream, a scoop of vanilla bean ice cream, or even a sprinkle of toasted pecans or walnuts for added texture.
Optimal Storage for Freshness
To preserve the incredible flavor and texture of your Apple Crisp Cheesecake, store any leftovers covered loosely with plastic wrap or aluminum foil in the refrigerator. It will remain wonderfully fresh and delicious for up to 4 days. While many cheesecakes can be frozen, we advise against freezing this particular recipe. The oatmeal crumble topping, a key textural element, tends to lose its desirable crispness and can become soggy after thawing, compromising the overall enjoyment of the dessert. For best results, enjoy it fresh within the recommended refrigeration period.
Explore More Fall Cheesecake Delights
If this Apple Crisp Cheesecake has ignited your passion for autumnal baking, you’ll love these other fantastic fall-inspired cheesecake recipes:
- Classic Pumpkin Cheesecake
- Decadent Pecan Pie Cheesecake
- Irresistible Caramel Apple Cheesecake
- Effortless No-Bake Pumpkin Cheesecake
Frequently Asked Questions (FAQs) About Apple Crisp Cheesecake
What type of pan is best for this cheesecake?
You will need a 9-inch (23-cm) springform pan for this recipe. Its removable sides are essential for easily releasing the finished cheesecake without damaging its delicate structure. Additionally, a large roasting pan is required to create the water bath around the springform pan during baking.
Can I prepare this Apple Crisp Cheesecake in advance?
Yes, absolutely! Making this cheesecake ahead of time is not only possible but highly recommended. Cheesecakes typically taste even better the day after they are baked, as this allows the flavors to deepen and the cheesecake to fully set, ensuring perfect slices. Simply cover it well and store it in the refrigerator overnight.
What if my cheesecake cracks during baking or cooling?
Cheesecake cracks are a common occurrence, even for experienced bakers, but they are often preventable. The main culprits include overmixing the batter (which incorporates too much air), baking at too high a temperature, or cooling the cheesecake too rapidly. Using a water bath, ensuring all ingredients are at room temperature, and avoiding overmixing the eggs are the best preventative measures. Even if a crack appears, your cheesecake will still be incredibly delicious, and any minor imperfections can easily be masked with the oatmeal crumble topping, a drizzle of caramel, or a dollop of whipped cream.
How do I know when the cheesecake is perfectly baked?
The cheesecake is done baking when the edges appear set and slightly puffed, but the very center (about 2-3 inches in diameter) still has a slight, gentle wobble when the pan is lightly nudged. It will continue to cook and firm up as it cools. Overbaking can lead to a dry texture and increases the likelihood of cracking.
Is the water bath truly necessary for this recipe?
While some cheesecake recipes can be adapted to bake without a water bath, it is strongly recommended for this Apple Crisp Cheesecake. The water bath creates a moist, consistent heat environment that is critical for achieving the signature silky-smooth texture and preventing cracks, especially with the added layers of apples and crumble that benefit from gentle, even baking.
Can I make this cheesecake gluten-free?
Yes, you can easily adapt this recipe to be gluten-free. Simply substitute traditional graham cracker crumbs with gluten-free graham cracker crumbs or gluten-free digestive biscuits for the crust. Ensure all other ingredients, such as oats, are certified gluten-free if a fully gluten-free dessert is desired.
We are confident that this Ultimate Apple Crisp Cheesecake will become a cherished part of your fall and holiday traditions. Enjoy the process of creating this magnificent dessert, and savor every delectable bite!