
The Ultimate Homemade Strawberry Pie: A Timeless Summer Dessert
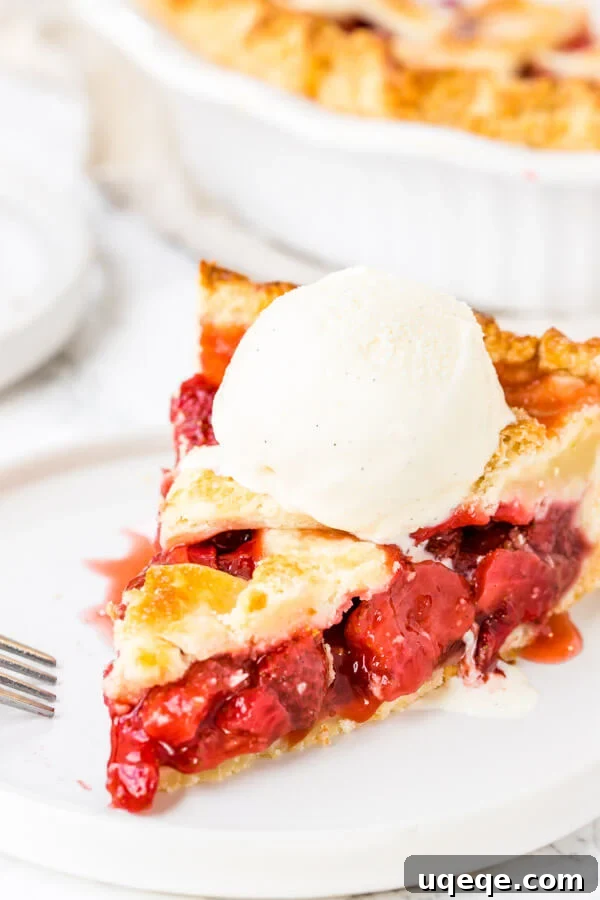
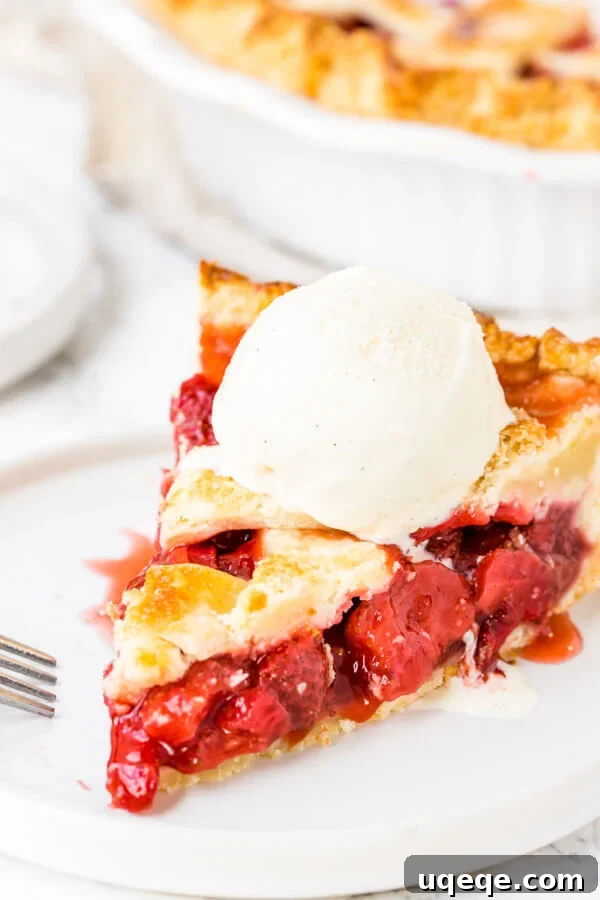
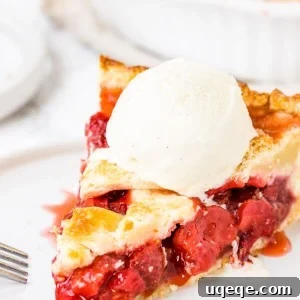
Embrace the bounty of berry season with a truly classic treat: a magnificent homemade strawberry pie. There’s an undeniable charm and nostalgic appeal to an old-fashioned pie crafted from scratch, especially when it showcases the vibrant flavor of fresh, ripe strawberries. This recipe promises a perfectly baked pie with a tender, flaky pastry crust that cradles a sweet, juicy filling, ensuring every bite is a delightful experience. Imagine serving a warm slice, topped with a generous scoop of creamy vanilla ice cream – it’s the ultimate indulgence and the quintessential dessert for peak strawberry season.
Our goal with this recipe is to capture the essence of traditional pie-making. We bypass quicker methods that rely on blind baking and gelatin-set fillings, opting instead for a wholesome approach where the strawberries bake directly in the oven, intensifying their natural sweetness and creating a deeply flavorful, naturally thickened filling. This results in a pie that’s not just delicious, but also deeply satisfying and truly homemade.
The Allure of a Perfectly Baked Strawberry Pie from Scratch
Creating a homemade strawberry pie is more than just baking a dessert; it’s an experience that celebrates fresh produce and the joy of traditional cooking. We believe that fruit pie recipes are among the finest ways to highlight the natural goodness of seasonal ingredients, and this baked strawberry pie is no exception. Its secret lies in a carefully balanced strawberry filling that’s wonderfully juicy and sweet, yet firm enough to hold its shape beautifully without becoming excessively watery. This delightful filling is then encased in a rich, flaky pie crust – a testament to true homemade goodness.
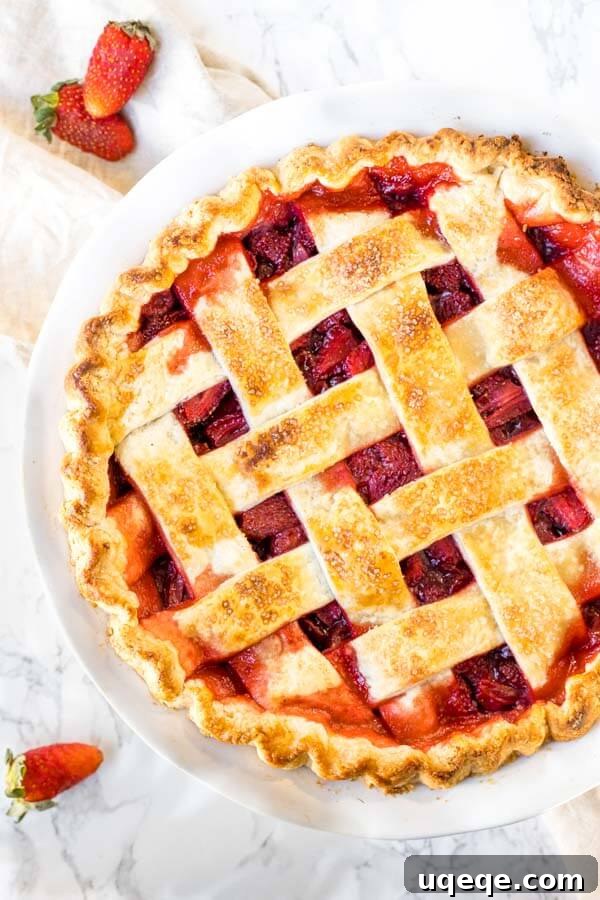
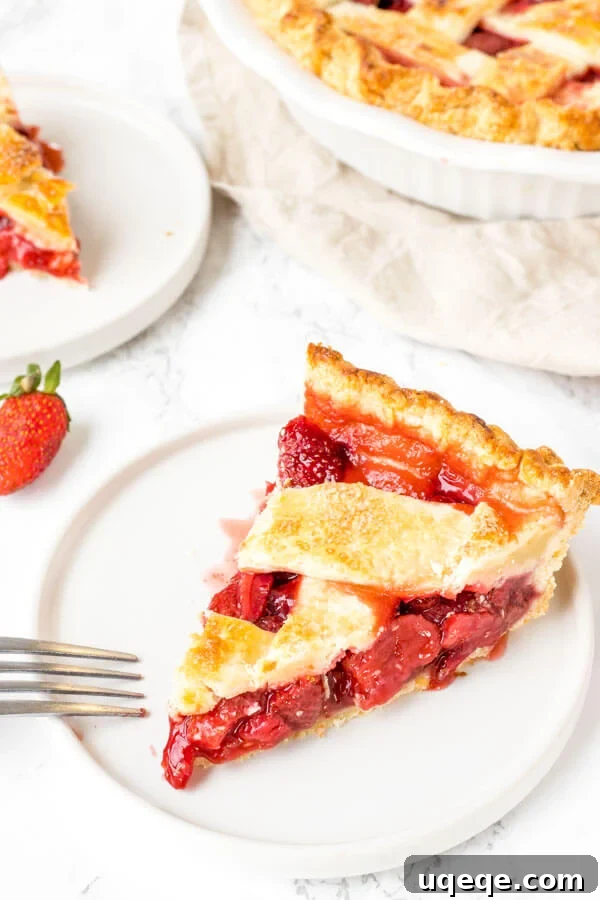
For the top crust, we’ve chosen an elegant lattice pattern. Not only does this design add a touch of artisanal beauty to your pie, but it also serves a practical purpose: allowing steam to escape during baking. This is crucial for preventing a soggy bottom crust and ensuring the filling cooks evenly to a perfect consistency. However, if you prefer a simpler aesthetic, a traditional double crust works just as well; simply remember to cut a few small slits in the top layer to vent the steam.
Unlike some contemporary strawberry pie recipes that call for baking the crust first (blind baking) and then adding a stovetop filling, often thickened with gelatin, our recipe takes a more authentic, traditional route. The entire pie, filling and crust combined, bakes in the oven. This method allows the flavors to meld and deepen over a longer baking period, resulting in a more integrated taste and a wonderfully natural texture that harks back to classic family recipes. It’s a process that ensures a superior pie experience, rich in both flavor and tradition.
Crafting the Luscious Strawberry Pie Filling: Ingredients and Harmony
Making the star of our pie – the strawberry pie filling – is incredibly simple, relying on fresh ingredients and a thoughtful blend of flavors. Each component plays a vital role in achieving that perfect balance of sweetness, tang, and thickness. Here’s a detailed look at what you’ll need to create this irresistible filling:
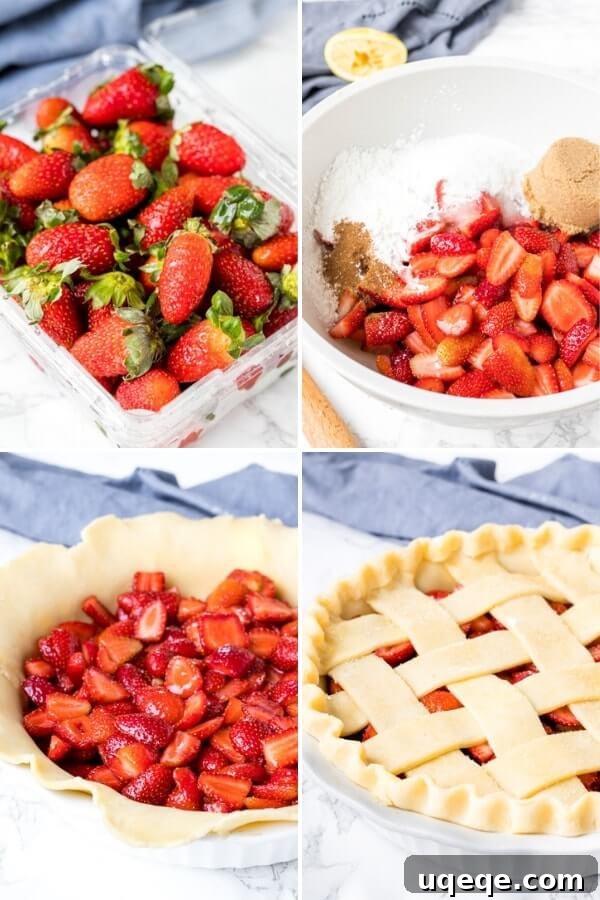
- 6 cups fresh strawberries: These should be hulled (stems removed) and uniformly sliced. Using peak-season, ripe strawberries is paramount for the best flavor and aroma.
- 1/4 cup cornstarch: This is our preferred thickening agent, crucial for achieving a firm yet lusciously juicy filling that won’t make your crust soggy.
- 1/3 cup white sugar: Provides a clean, crisp sweetness that highlights the natural sugars in the berries.
- 1/3 cup brown sugar: Adds a layer of depth and a subtle, warm caramel undertone, enriching the overall flavor profile.
- 1 teaspoon ground cinnamon: A small but mighty addition that introduces a hint of cozy spice, beautifully complementing the sweet fruit without overpowering it.
- 2 tablespoons fresh lemon juice: This ingredient is key! It brightens the flavor of the strawberries, prevents the pie from tasting overly sweet, and adds a refreshing tang that balances the richness.
- 1/4 teaspoon salt: A pinch of salt is essential for enhancing and harmonizing all the other flavors, making them more pronounced and well-rounded.
By combining both white and brown sugars, we achieve a more complex and nuanced sweetness than either could provide alone. The subtle warmth from the cinnamon adds an inviting aroma and a classic bakery touch. Fresh lemon juice is indispensable; it acts as a flavor enhancer, making the strawberries taste even more vibrant and ensuring the pie isn’t cloyingly sweet. You’ll gently stir all these ingredients together until the strawberries are evenly coated. As you mix, you’ll notice the sugars beginning to draw out the natural juices from the berries, creating a beautiful, glistening mixture ready for baking.
Achieving Perfection: How to Thicken Strawberry Pie Filling Without the Soup
One of the most common pitfalls in fruit pie baking is an overly juicy or “soupy” filling, which inevitably leads to a dreaded soggy bottom crust. This can be disappointing after all your hard work! The secret to a perfectly set, juicy yet firm strawberry pie filling lies in the right thickening agent and technique.
Generally, there are three main types of thickeners used for pie fillings: tapioca, all-purpose flour, or cornstarch. Each has unique properties:
- Tapioca: Often found in granular or pearl form, tapioca creates a very clear, glossy filling. It’s excellent for fruit pies but might not be a staple in every home kitchen.
- All-Purpose Flour: While readily available, flour can sometimes result in a cloudy filling and a slightly pasty texture if too much is used or if it’s not cooked sufficiently. It’s generally less potent as a thickener compared to cornstarch.
- Cornstarch: For our baked strawberry pie, cornstarch is the superior choice. It’s a highly effective thickening agent that provides a beautifully clear, glossy, and firm filling without imparting any noticeable flavor. Crucially, it ensures your delicate pie crust remains wonderfully flaky and crisp, preventing any sogginess, while the filling retains its delicious juiciness. Cornstarch is also a common pantry item, making it a convenient and reliable option for achieving consistent results.
When preparing the filling, the initial gentle stirring coats the berries in the cornstarch and sugars. During baking, the heat activates the cornstarch, which then absorbs the released strawberry juices, transforming them into a thick, glossy sauce. The crucial step to avoid excess liquid, as mentioned in our tips, is to use a slotted spoon when transferring the filling to the pie crust, leaving behind any accumulated liquid at the bottom of the mixing bowl. This simple precaution, combined with cornstarch, guarantees a structurally sound and incredibly delicious pie that slices beautifully every time.
The Essential Foundation: Choosing and Making Your Pie Crust for Strawberry Pie
A phenomenal strawberry pie is incomplete without an equally phenomenal crust. This flaky, buttery foundation provides the perfect textural contrast to the sweet and tender strawberry filling. While we’ve provided our go-to pie crust recipe below, please feel free to use your tried-and-true favorite, or even a high-quality store-bought refrigerated pie dough (ensure it’s dough, not pre-baked crusts, as you’ll need to roll it out).
Our recommended pie crust recipe is a classic, blending both shortening and cold unsalted butter. This combination is key to achieving the ideal balance of flakiness and rich flavor:
- Shortening: This fat is a powerhouse for creating an incredibly flaky crust. Its higher melting point and lack of water content contribute to distinct, airy layers. Shortening also makes the dough a little more forgiving and easier to handle, which is a bonus for new bakers.
- Cold Unsalted Butter: Butter is indispensable for imparting a rich, irresistible flavor that shortening alone cannot provide. Using cold butter, cut into small pieces, is vital. As the butter melts during baking, it releases steam, which separates the dough into those desired flaky layers, contributing to the crust’s tender texture.
For this homemade strawberry pie, you’ll need a double crust – one for the bottom and one for the top. You have creative freedom for the top layer:
- Lattice Pie Crust: This is the elegant option we’ve showcased. A lattice top involves weaving strips of dough over the filling. It’s not only visually stunning but also functional, allowing steam to escape and ensuring the filling sets properly while the bottom crust remains crisp.
- Traditional Double Crust: If you prefer a simpler, rustic look, you can use the second disc of dough to completely cover the filling. Just be sure to cut several small slits or decorative vents into the top crust using a sharp knife. These vents are absolutely essential for preventing steam buildup, which could otherwise cause the crust to puff up or even crack, and ensures the filling cooks evenly.
Whichever style you choose, starting with a well-made, chilled pie dough is the first step towards a truly memorable baked strawberry pie.
Expert Tips for Baking a Flawless Homemade Strawberry Pie
Baking a show-stopping strawberry pie is well within your reach with these essential tips. Paying attention to these details will ensure your pie is not just good, but truly spectacular:
- Prioritize Chilling the Pie Dough: This cannot be stressed enough. Cold dough is fundamental for a flaky crust. The tiny pockets of cold fat (butter and shortening) melt slowly in the oven, creating steam that puffs up the layers. Chill your dough for a minimum of 3 hours, or for ultimate convenience, you can prepare it up to 5 days in advance and keep it refrigerated.
- Insist on Fresh Strawberries: For the best flavor, texture, and structural integrity of your pie, use only fresh, ripe strawberries. Frozen berries release significantly more water due to ice crystal formation, leading to a much wetter and potentially soupy filling.
- Avoid Excess Liquid in the Filling: When transferring the prepared strawberry filling into your pie crust, always use a slotted spoon or your hands to scoop out the berries. Critically, do not pour any accumulated liquid from the bottom of the mixing bowl into the pie crust. This extra juice is a primary culprit for a soggy pie bottom.
- The Magic of an Egg Wash: For that irresistible golden-brown finish and a subtle, appealing sheen on your top crust, whisk one large egg with a tablespoon of water and brush it lightly over the dough before baking. A sprinkle of coarse sugar on top adds a beautiful sparkle and a delightful textural crunch.
- Protect Your Oven – Use a Baking Sheet: Always place your pie plate onto a larger baking sheet before sliding it into the oven. This simple but effective trick will catch any potential drips or fruit juices that might bubble over during baking, preventing burnt messes on the bottom of your oven and making cleanup significantly easier.
- Prevent Burning with an Aluminum Foil Tent: Pie crusts, especially the edges, tend to brown faster than the filling cooks. After the first 20-30 minutes of baking, if you notice the crust getting too dark, loosely tent a piece of aluminum foil over the entire pie or simply cover the edges with specialized pie crust shields. This allows the pie to continue baking evenly without over-browning.
- Patience is a Virtue: Cool Completely: This is arguably the most challenging but crucial tip. While the aroma of a freshly baked pie is intoxicating, resist the urge to slice it immediately. Allow your strawberry pie to cool at room temperature for at least 3 hours, and ideally longer (up to 4-6 hours). This extended cooling period is essential for the cornstarch to fully activate and for the fruit juices to thicken and set properly, ensuring that when you do slice, you get neat, beautiful wedges instead of a runny mess.
Serving and Storing Your Delicious Strawberry Pie
Once your magnificent homemade strawberry pie has patiently cooled to perfection, it’s finally ready to be enjoyed! A slice of this delectable pie is wonderful on its own, but it truly ascends to dessert heaven with the right accompaniments:
- Classic Vanilla Ice Cream: A generous scoop of rich, creamy vanilla ice cream is the ultimate pairing. Its cool sweetness perfectly complements the warm, juicy strawberry filling.
- Fresh Whipped Cream: A dollop of light, airy, unsweetened or lightly sweetened whipped cream adds a delicate contrast in texture and flavor.
- Simple Elegance: For a minimalist approach, a light dusting of powdered sugar over the top of the pie is all you need.
Make-Ahead & Storage Suggestions: This baked strawberry pie is an excellent dessert to prepare in advance, making it perfect for entertaining or busy schedules. After the pie has completely cooled to room temperature, you can lightly wrap the top loosely with aluminum foil or plastic wrap and refrigerate it. It holds up beautifully. Any leftover slices should also be stored covered in the refrigerator. The pie is best enjoyed within 3-4 days. While delicious cold, a gently reheated slice (either in the microwave for a minute or a low oven for 10-15 minutes) can bring back some of that freshly baked warmth and comfort.
Explore More Irresistible Strawberry Recipes
If you find yourself with an abundance of fresh strawberries, or simply can’t get enough of this fantastic fruit, we have even more delicious recipes to satisfy your cravings. Dive into these other strawberry-centric favorites:
- Creamy Strawberry Cream Cheese Pie
- Delightful Strawberry Cupcakes
- Homemade Strawberry Sauce (Perfect for Sundaes!)
- Easy No-Bake Strawberry Cheesecake
- Refreshing Strawberry Milkshake
Classic Homemade Strawberry Pie Recipe
By: Fiona Dowling
This homemade strawberry pie is an old-fashioned favorite. Sweet, juicy strawberries, flaky pastry and a scoop of vanilla ice cream make this baked strawberry pie the perfect dessert for strawberry season.
Prep Time: 30 mins
Cook Time: 1 hr
Chilling Pie Dough & Cooling the Pie: 6 hrs
Total Time: 1 hr 30 mins (active) + 6 hrs (passive)
Servings: 8 people
Ingredients
Pie Crust* (for a double crust)
- 2 1/2 cups all-purpose flour
- 2 teaspoons sugar
- 1/4 teaspoon salt
- 1/2 cup cold unsalted butter, cut into small pieces
- 1/2 cup cold shortening
- 4-6 tablespoons ice water
Strawberry Pie Filling
- 6 cups fresh strawberries, hulled & sliced
- 1/3 cup cornstarch
- 1/3 cup white sugar
- 1/3 cup brown sugar
- 1 teaspoon ground cinnamon
- 2 tablespoons fresh lemon juice
- 1/4 teaspoon salt
Egg Wash (Optional, for golden crust)
- 1 large egg, whisked
- Coarse sugar, for sprinkling
Instructions
For the Pie Crust
- In a large bowl, whisk together the flour, sugar, and salt.
- Using a pastry blender (or two forks and your fingers), cut the cold butter into the flour until it’s in small, pea-sized pieces. Then, cut the cold shortening into the flour mixture until both the butter and shortening are incorporated as small pea-sized pieces. The mixture should still appear crumbly.
- Using a rubber spatula or wooden spoon, gently fold in the ice water, 1 tablespoon at a time. Add just enough water until the flour is almost entirely incorporated and the dough just barely comes together. Be careful not to overmix, which can make the dough tough, or add too much water, making it sticky.
- Form the dough into a ball, ensuring any excess flour from the bottom of the bowl is incorporated.
- Divide the dough in half and gently shape each half into a round disc, approximately 1/2 inch thick. Wrap each disc tightly in plastic wrap and refrigerate for at least 3 hours. This crucial chilling period allows the gluten to relax and the fats to firm up, essential for a flaky crust.**
For the Strawberry Pie Filling
- In a large bowl, combine the sliced fresh strawberries, cornstarch, white sugar, brown sugar, cinnamon, fresh lemon juice, and salt.
- Gently stir the mixture with a spatula until the strawberries are evenly coated with the sugar and cornstarch blend. Set this aside while you prepare your pie crust.
Assembling and Baking the Pie
- Preheat your oven to 400°F (200°C). Prepare a baking sheet by placing it on the lower-middle rack of your oven (this will catch any potential drips).
- Remove one disc of chilled pie dough from the refrigerator. On a generously floured surface, use a well-floured rolling pin to roll out the dough into a circle approximately 12 inches in diameter and about 1/8 inch thick. Roll gently from the center outwards. (If the dough is too cold and rigid to roll, let it sit at room temperature for about 10 minutes to soften slightly).
- Carefully transfer the rolled-out pie dough into a 9-inch glass or ceramic pie plate. A helpful technique is to gently roll the dough over your rolling pin and then unroll it directly over the pie plate, allowing it to settle into the dish.
- Spoon the prepared strawberry filling into the bottom pie crust. IMPORTANT: Use a slotted spoon to transfer only the strawberries and their coating. Do not add any accumulated liquid from the bottom of the mixing bowl, as this excess juice is the main cause of a soupy pie.
- Place the pie plate with the bottom crust and filling back into the fridge while you prepare the top crust.
- Remove the second disc of dough from the fridge. On a well-floured surface, roll it out into another 12-inch circle, matching the thickness of the first.
- Using a sharp knife or a pizza cutter, cut the rolled dough into even strips, approximately 1/2 to 3/4 inches wide. These will be used to create your lattice top.
- To create the lattice: Arrange 4-5 strips vertically on top of the pie, ensuring they are evenly spaced. Fold back every other vertical strip halfway. Lay one horizontal strip over the unfolded vertical strips, then unfold the previously folded vertical strips back over the horizontal strip. Now, fold back the *other* set of vertical strips (the ones that were initially unfolded). Lay another horizontal strip, and continue this weaving pattern, alternating over and under, until the entire top of the pie is covered with a beautiful lattice.
- Trim any excess pastry dough from around the edges of the pie, leaving about a 1/2-inch overhang. Fold this overhang under itself, then crimp the edges decoratively using your fingers or the tines of a fork to create a seal between the top and bottom crusts.
- In a small bowl, whisk the large egg to create an egg wash. Lightly brush the entire top of the pie (including the lattice strips and crimped edges) with the egg wash. This will provide a beautiful golden sheen. Sprinkle generously with coarse sugar for added sparkle and a pleasant crunch.
- Place the pie on the prepared baking sheet and bake in the preheated oven at 400°F (200°C) for 20 minutes. After 20 minutes, reduce the oven temperature to 375°F (190°C) and continue baking for an additional 40-50 minutes, or until the crust is deeply golden brown and the filling is visibly bubbling thickly. If the crust begins to brown too quickly, loosely tent the pie with aluminum foil or use pie crust shields.
- Once baked, carefully remove the pie from the oven. This is the most crucial step for a perfect slice: allow the pie to cool completely at room temperature for at least 3 hours before slicing and serving. This extended cooling time is absolutely essential for the cornstarch to fully activate and for the fruit juices to thicken and set, ensuring neat, beautiful slices instead of a runny mess.
Notes
*Pie Dough Alternatives: Feel free to use a good quality store-bought pie dough (ensure it’s the raw, refrigerated kind, not pre-baked crusts), or your favorite homemade pie dough recipe. Just ensure you have enough for a double crust (two discs).
**Pie Dough Storage: Your homemade pie dough can be refrigerated for up to 5 days, making it an excellent component to prepare ahead of time for easier pie assembly on baking day.
Make-Ahead Tips for the Whole Pie: Strawberry pie is a fantastic dessert to bake the day before you plan to serve it. After it’s completely cooled to room temperature, loosely wrap the top with aluminum foil or plastic wrap and refrigerate. Store any leftover slices covered in the fridge for up to 3-4 days.