
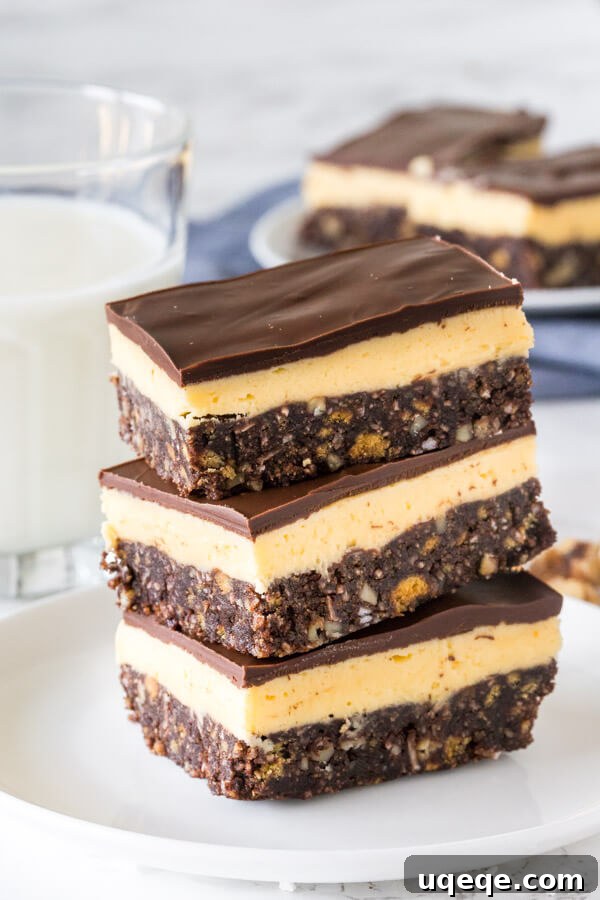
Experience the delight of classic, no-bake Nanaimo bars – a beloved Canadian treat featuring a rich chocolate coconut base, a velvety custard buttercream filling, and a perfectly smooth chocolate topping. This comprehensive guide will teach you how to master this iconic dessert, offering tips, variations, and even how to make them with or without traditional custard powder.
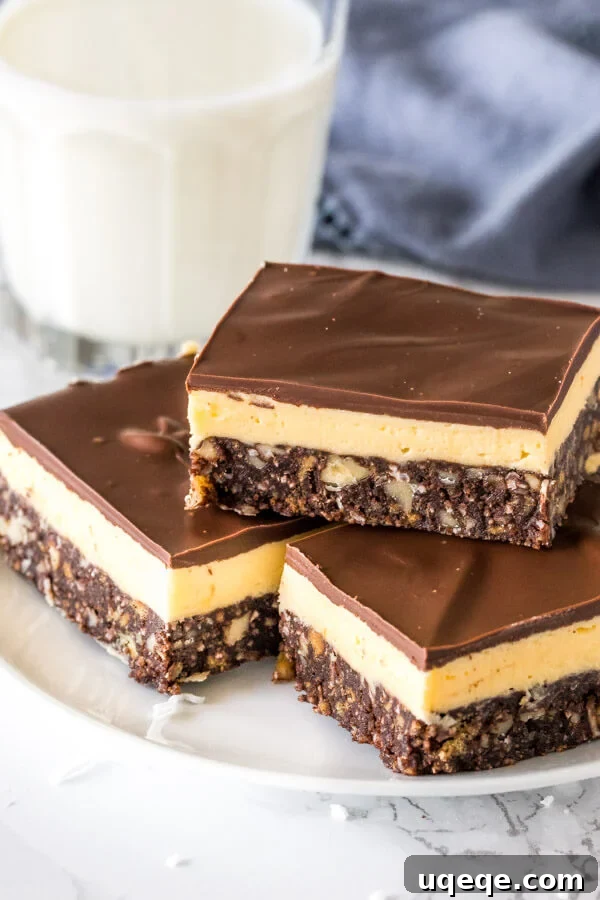
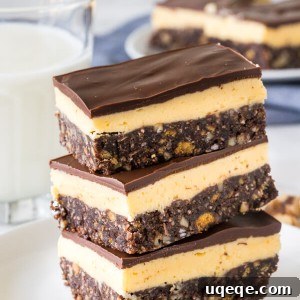
If you’ve never had the pleasure of tasting Nanaimo bars, prepare to embark on a truly delightful culinary journey. These effortless, no-bake dessert bars are a cornerstone of Canadian baking, cherished for their irresistible flavor and satisfying three-layered construction. Each bite delivers a harmonious blend of textures and tastes that make them utterly unique and addictive.
- The Base: A foundation of crushed graham crackers (or digestive biscuits), shredded coconut, and finely chopped walnuts, all bound together with a rich chocolate mixture. This layer provides a delightful chewiness and a hint of crunch that perfectly balances the sweetness.
- The Middle Layer: A thick, luscious buttercream infused with a distinctive vanilla custard flavor. This creamy filling is the heart of the Nanaimo bar, lending its characteristic pale yellow hue and smooth texture.
- The Topping: A generous layer of semi-sweet chocolate, expertly melted and spread evenly, which sets to a satisfying snap when sliced, encasing the layers in a glossy, irresistible finish.
As a Canadian, Nanaimo bars are an indispensable part of my holiday baking tradition. However, their popularity extends far beyond festive seasons; you’ll find these sweet, nostalgic treats in bakeries and grocery stores across the country year-round. They embody a retro charm, reminiscent of desserts lovingly prepared by grandmothers, making them a comforting and universally adored classic.
Nanaimo Bars: A Sweet Dive into Canadian History
The name “Nanaimo bars” – pronounced NA-NYE-MOE – hails from the picturesque city of Nanaimo, nestled on Vancouver Island in British Columbia, Canada. While the exact origins of this celebrated confection remain somewhat shrouded in mystery, its earliest recorded appearance in a cookbook dates back to 1953. This marked the beginning of its journey into Canadian culinary folklore, quickly becoming a staple in kitchens nationwide.
A pivotal moment in the Nanaimo bar’s history occurred in 1985 when the mayor of Nanaimo launched a competition to find the ultimate recipe. The winning entry, submitted by Joyce Hardcastle, became the benchmark for what many consider the “original” and “best” Nanaimo bar recipe. Today, most traditional recipes you encounter are variations or direct descendants of Hardcastle’s masterful creation. The simple yet ingenious combination of its three distinct layers has cemented its status as a timeless Canadian classic, beloved by generations. Its cultural significance is profound; for many, the taste of a Nanaimo bar evokes memories of childhood, family gatherings, and the warmth of Canadian hospitality.
Beyond the classic, the versatility of Nanaimo bars has inspired numerous creative interpretations. Enthusiasts have experimented with various flavorings for the middle layer, leading to delightful renditions such as mint, cappuccino, or even cherry Nanaimo bars. Each variation offers a fresh take on the traditional, yet the core essence of this three-layered marvel remains.
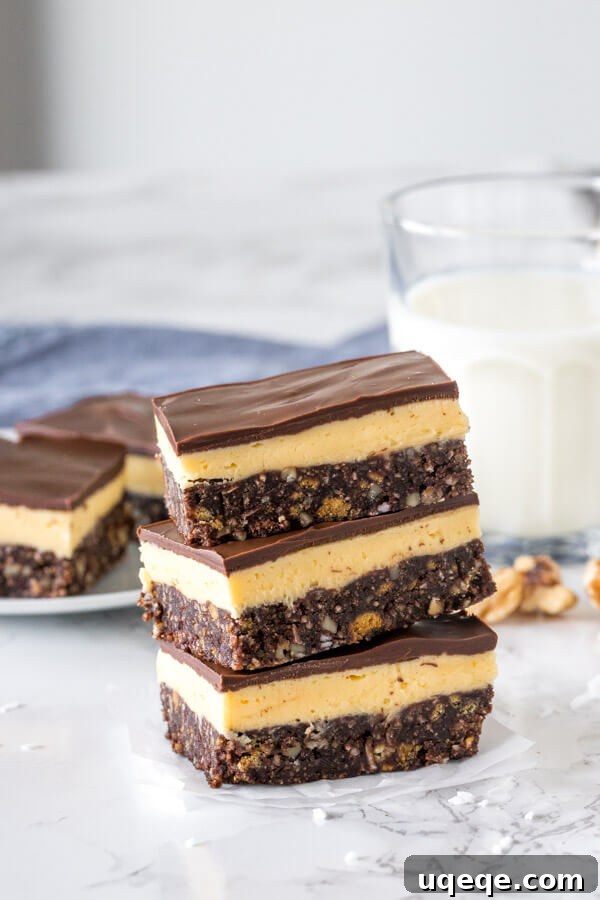
Crafting Your Own Classic Nanaimo Bars: A Step-by-Step Guide
While Nanaimo bars might appear intricate due to their three layers, they are surprisingly straightforward to make. The process involves a few distinct stages, each contributing to the final delectable result. Let’s break down how to create this easy, no-bake Canadian dessert in your own kitchen.
The Foundation: The Chocolate Coconut Base
The bottom layer is the foundational element, offering a chewy, slightly crunchy texture and a rich chocolate flavor. It’s packed with ingredients that provide both structure and depth of taste.
- First, we create a rich, smooth mixture by melting unsalted butter, granulated sugar, and cocoa powder together in a double boiler over low heat. This gentle heating ensures the ingredients combine perfectly without scorching.
- Once fully melted and smooth, remove the bowl from the heat and immediately whisk in one large egg. It is crucially important to whisk constantly and vigorously during this step. Continuous whisking prevents the egg from scrambling and ensures it emulsifies beautifully with the chocolate mixture, resulting in a smooth, glossy, and thickened base. The residual heat from the melted ingredients is sufficient to safely cook the egg, ensuring both safety and the desired binding consistency.
- Next, stir in the dry ingredients: graham cracker crumbs, shredded coconut, and finely chopped walnuts. The mixture will be quite thick. Press this flavorful mixture firmly and evenly into the bottom of a prepared pan. To help it set and become perfectly firm, place the pan in the freezer to harden for about 20 minutes while you prepare the filling.
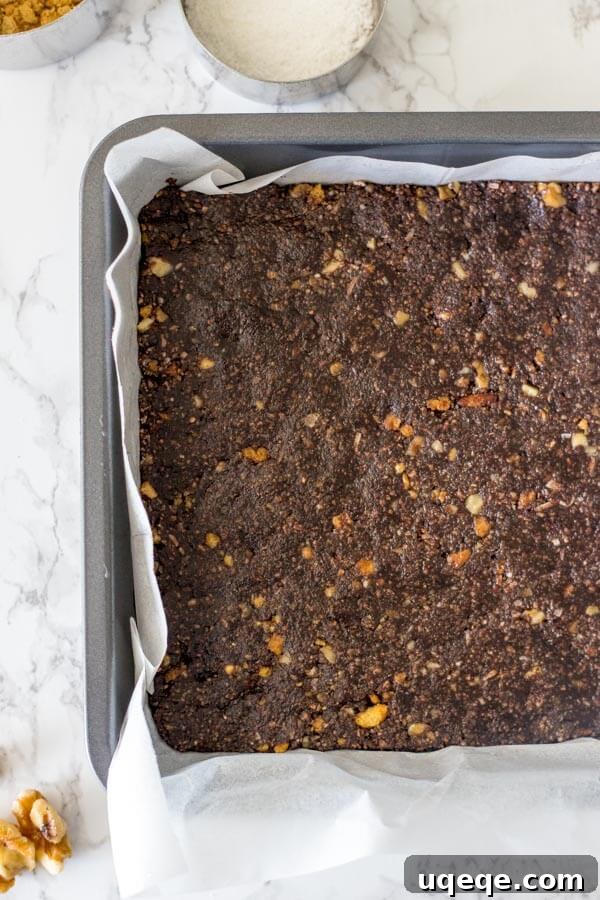
Ingredient Notes and Substitutions for the Base: If you’re outside of North America and can’t find graham crackers, digestive biscuits make an excellent substitute, providing a similar texture and mild sweetness. For the coconut, opt for finely shredded coconut as it integrates better and makes the bars easier to slice cleanly. While walnuts are traditional and offer a pleasing texture that aids in cutting, you can certainly experiment with other finely chopped nuts like pecans or almonds. Many find walnuts contribute to a smoother slice and a richer flavor profile.
The Heart: Custard Buttercream Middle Layer
This creamy, luscious layer is what truly defines the Nanaimo bar. It’s essentially a thick vanilla buttercream, elevated by the unique flavor and pale yellow hue imparted by custard powder.
Custard powder is key to achieving that authentic, creamy taste and characteristic color. However, if custard powder isn’t readily available where you are, don’t despair – you can absolutely make Nanaimo bars without custard powder. A fantastic alternative is plain vanilla pudding mix (instant or regular, but do not prepare the pudding; just use the dry powder). It provides a similar vanilla flavor and thickening properties.
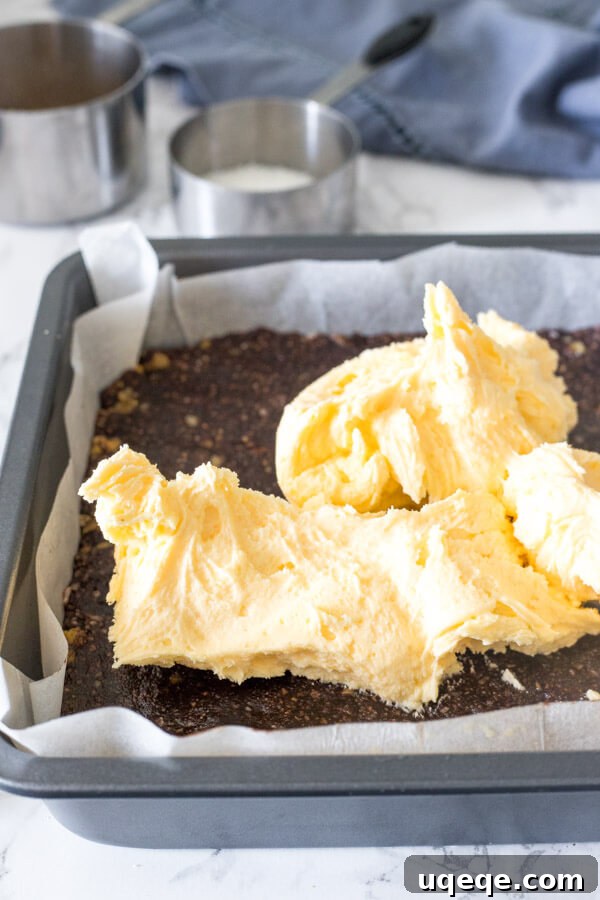
To prepare the filling, you’ll first cream together softened unsalted butter with the custard powder (or pudding mix) and a splash of heavy cream until the mixture is light and fluffy. Gradually beat in powdered sugar, adding it a little at a time until the mixture reaches a very thick, spreadable consistency – it should be noticeably thicker than standard frosting. This density is crucial for maintaining the bar’s structure. Once combined, carefully spread this creamy custard buttercream evenly over the chilled chocolate base. Return the pan to the refrigerator for at least 15 minutes to allow the middle layer to firm up, ensuring a clean separation between layers.
The Crown: The Chocolate Topping
The final layer is a smooth, glossy chocolate topping that caps off the Nanaimo bar with a delightful sweetness and a satisfying snap.
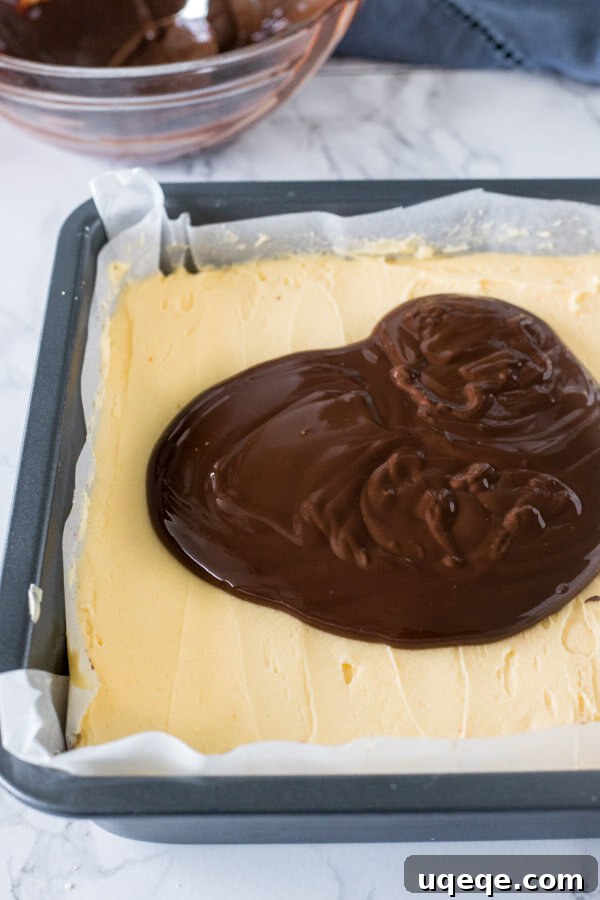
Traditionally, semi-sweet chocolate is used for this layer, offering a perfect balance to the sweet filling. A secret to achieving a beautifully glossy finish and making the bars easier to cut without cracking the chocolate is to incorporate a small amount of neutral oil (like vegetable or canola oil) into the melted chocolate. While some recipes suggest butter, oil tends to yield a more stable and less brittle topping, which is ideal for clean slicing. Melt the chocolate gently, either using a double boiler or carefully in the microwave (on medium power, stirring frequently to prevent burning). Once melted and smooth, stir in the oil. Pour this mixture over the chilled middle layer and spread it evenly to create a uniform surface. The bars then go back into the refrigerator to allow the chocolate topping to set completely.
Mastering the Cut: Achieving Perfect Nanaimo Bar Slices
One of the most common challenges when making Nanaimo bars is achieving clean, crisp slices without the chocolate topping cracking. With a few simple techniques, you can ensure your bars look as perfect as they taste:
- Don’t Skip the Oil: As mentioned, adding a touch of neutral oil to your melted chocolate topping is key. The oil makes the chocolate more pliable when set, reducing its brittleness and preventing cracks.
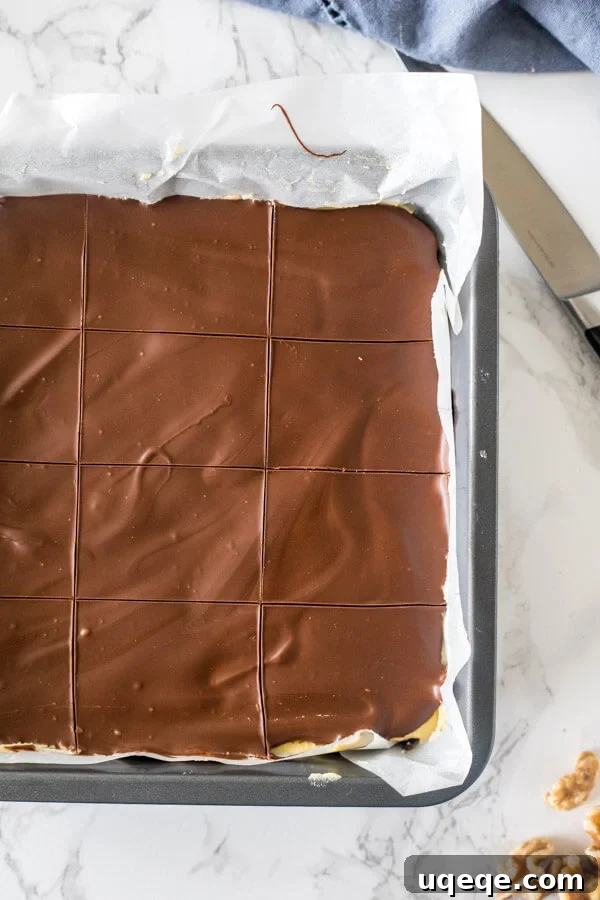
- Score While Setting: When the chocolate layer is about 75% set – firm enough to hold a mark but still slightly yielding (typically after 20-30 minutes in the fridge) – gently score the surface. Use a thin, sharp knife to lightly trace the lines where you intend to cut the bars. This initial scoring provides a guide and weakens the chocolate along the desired cuts, preventing large cracks later.
- Choose the Right Tool: Always use a thin, sharp knife, not a dull table knife. A clean, precise blade makes a significant difference in getting smooth edges. For best results, you can run your knife under hot water and wipe it dry between cuts.
- Temperature is Key: Avoid cutting the bars directly from the coldest part of the fridge. Extremely cold chocolate is more prone to cracking. Let the bars sit at room temperature for about 10-15 minutes before making the final cuts. This slight warming allows the chocolate to soften just enough for a clean slice.
Creative Variations and Customizations for Your Nanaimo Bars
While the classic Nanaimo bar is undeniably perfect, its simple structure makes it ripe for creative experimentation. Here are some popular variations and ideas for customizing your batch:
- Nanaimo Bars Without Coconut: If coconut isn’t your favorite, simply adjust the base layer. Use 2 1/4 cups of graham cracker crumbs and 3/4 cup of finely chopped walnuts to maintain the desired texture and volume.
- Nanaimo Bars Without Nuts: For a nut-free version, increase the shredded coconut and graham cracker crumbs. A good ratio is 2 cups of graham crumbs and 1 cup of shredded coconut for the base.
- For a Less Sweet Nanaimo Bar: If you prefer a treat that isn’t overwhelmingly sweet, there are a few adjustments you can make. Use unsweetened shredded coconut in the base layer. Reduce the powdered sugar in the middle layer by about 1/4 cup. For the topping, opt for a dark chocolate (60-70% cocoa) instead of semi-sweet, which will provide a pleasant bitterness to balance the sweetness.
- Mint Chocolate Nanaimo Bars: Add 1/2 to 1 teaspoon of mint extract to the middle layer along with the custard powder. You can also use green food coloring for a vibrant touch.
- Mocha Nanaimo Bars: Dissolve 1-2 teaspoons of instant espresso powder in 1 tablespoon of hot water, then add it to the buttercream filling for a rich coffee flavor.
- Peanut Butter Nanaimo Bars: Incorporate 1/4 cup of smooth peanut butter into the middle custard layer, reducing the butter slightly if needed for consistency.
- Gluten-Free Nanaimo Bars: Simply substitute traditional graham crackers with your favorite gluten-free graham cracker crumbs or digestive biscuits.
Serving and Storing Your Nanaimo Bars
Nanaimo bars are best enjoyed either chilled directly from the refrigerator or at cool room temperature. If serving from the fridge, allow them to sit out for 10-15 minutes to soften slightly for optimal texture. Store leftover bars in an airtight container at cool room temperature for up to 4 days, or in the refrigerator for up to 1 week. For longer storage, Nanaimo bars freeze beautifully in an airtight container for up to 3 months. Thaw them in the refrigerator before serving.
Other Beloved Canadian Desserts
If you’ve fallen in love with Nanaimo bars and are eager to explore more Canadian sweet treats, consider trying these delightful recipes:
- Confetti Squares
- Chocolate Confetti Squares
- Haystack Cookies
Nanaimo Bars
By: Fiona Dowling
Classic, no-bake Nanaimo bars with a chocolate coconut base, custard buttercream filling, and a layer of chocolate on top. Learn how to make this iconic Canadian dessert – with or without custard powder.
Prep: 30 mins
Chilling: 1 hr 30 mins
Total: 2 hrs
Servings: 16 bars
Rate Recipe
Print Recipe
Ingredients
Base
- 1/2 cup unsalted butter
- 1/3 cup cocoa powder
- 1/4 cup sugar
- 1 large egg
- 1 3/4 cups graham crumbs (or digestive cookie crumbs)
- 3/4 cup shredded coconut
- 1/2 cup chopped walnuts*, chopped very finely
Middle Layer
- 6 tablespoons unsalted butter, softened
- 2 tablespoons custard powder (or vanilla pudding mix)
- 3 tablespoons heavy cream
- 1 1/2 – 2 cups powdered sugar
Chocolate Topping
- 4 oz semi-sweet chocolate (or 50-60% dark chocolate)
- 2 teaspoons oil
Instructions
- Line an 8×8 or 9×9 inch pan with parchment paper (or lightly greased aluminum foil) leaving an overhang around the edges.
Base Layer
- Add about 1-2 cm (1/2 – 1 inch) of water to the bottom of a medium saucepan over low heat. Place a glass bowl on top so that the bottom of the bowl doesn’t touch the water, creating a double boiler.
- Add the butter, sugar, and cocoa powder to the glass bowl. Melt the ingredients together while stirring occasionally until smooth.
- Once completely melted, add in the egg while whisking constantly. Whisk the mixture until thick, glossy, and smooth.
- Carefully remove the bowl from the heat and stir in the graham crumbs, coconut, and chopped walnuts.
- Press the mixture evenly into the bottom of the prepared pan and place in the freezer to firm up for 20 minutes as you make the filling.
Middle Layer
- In a large bowl, beat the softened butter until light and fluffy.
- Mix in the custard powder and heavy cream until well combined.
- Slowly beat the powdered sugar in, a little at a time, until the mixture is very thick (thicker than normal frosting).
- Spread the custard buttercream evenly over the chilled base layer, and place in the fridge for at least 15 minutes to firm up.
Chocolate Layer
- Add the chocolate to a large heat-proof bowl.
- Melt the chocolate using a microwave on medium power for 45 seconds, then remove and stir. Repeat this process until the chocolate is completely melted and smooth. (Alternatively, melt using a double boiler).
- Stir in the oil until fully incorporated, which will make the chocolate glossy and easier to cut.
- Pour the melted chocolate mixture over the firm middle layer and spread the top smooth.
- Place the pan back in the fridge to allow the chocolate topping to set.
Cutting the Bars
- Once the chocolate is about 75% hardened (after 20 minutes or so in the fridge), score the bars by lightly tracing lines through the chocolate where you intend to cut them.
- Return the pan to the fridge until the chocolate is completely firm.
- When the chocolate is fully hardened, take the bars out of the fridge and let them warm up for 10-15 minutes at room temperature. This makes slicing much easier. Then, cut into bars along the lines that you scored earlier.
- Enjoy the bars cold from the fridge, or at cool room temperature.
Notes
*Walnuts can be substituted with finely chopped almonds or pecans. However, the bars tend to slice better with walnuts.
Store leftovers in an airtight container at room temperature for up to 4 days (if your house is cool), or in the fridge for up to 1 week. Bars can be frozen in an airtight container for up to 3 months. Thaw in the fridge.
This recipe can be doubled and made in a 9×13 inch pan.
Nutrition
Calories: 242kcal, Carbohydrates: 15g, Protein: 3g, Fat: 20g, Saturated Fat: 11g, Cholesterol: 49mg, Sodium: 85mg, Potassium: 129mg, Fiber: 2g, Sugar: 6g, Vitamin A: 375IU, Calcium: 29mg, Iron: 1.4mg