
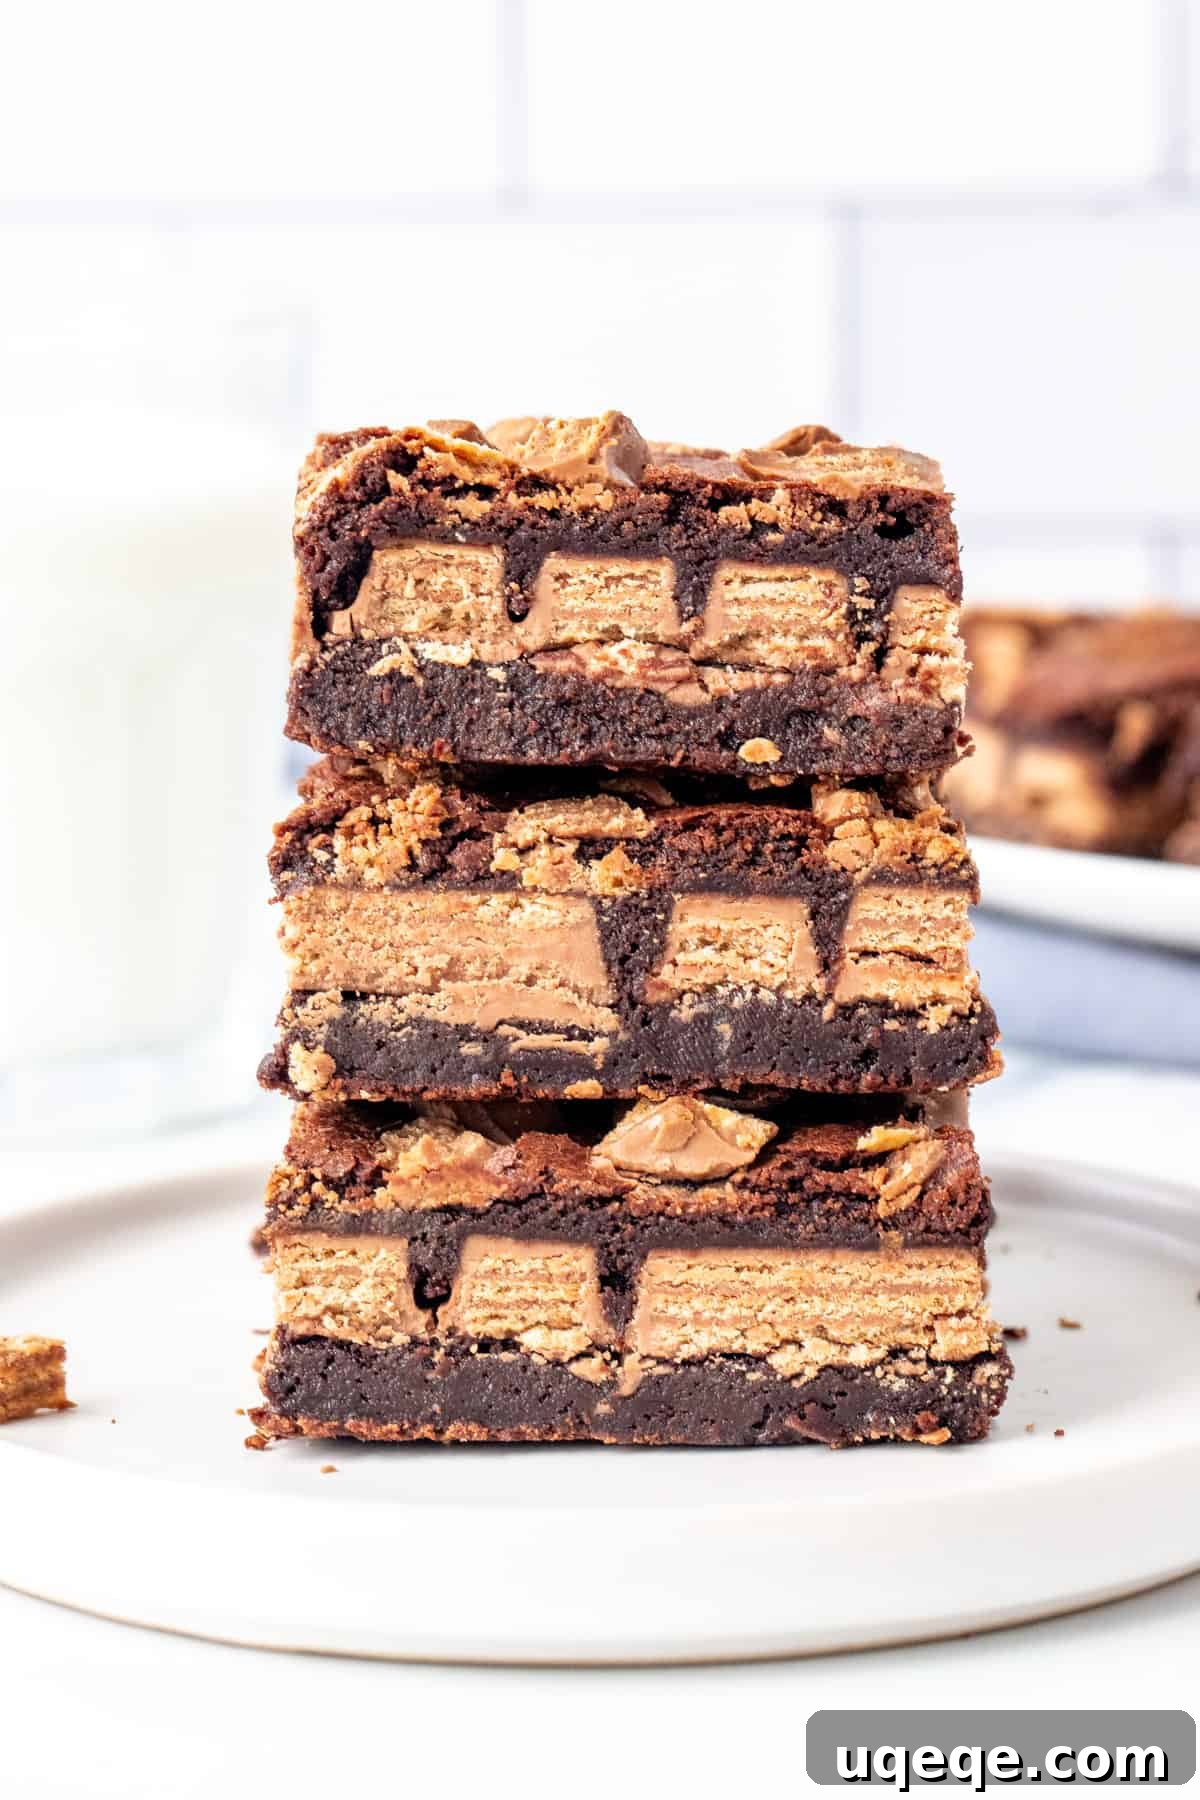
Ultimate Fudgy Kit Kat Brownies: A Decadent Treat with a Crunchy Twist
Prepare to elevate your brownie game with these unbelievably thick, fudgy, and utterly irresistible Kit Kat brownies. Imagine sinking your teeth into a rich, dense chocolate brownie, only to be met with the delightful crunch of classic Kit Kat bars nestled within. This recipe takes your favorite chocolate bar and transforms it into a truly spectacular dessert experience. To truly send them over the top, we finish these beauties with an extra sprinkle of crushed Kit Kats, creating a symphony of textures and flavors that will have everyone asking for more.
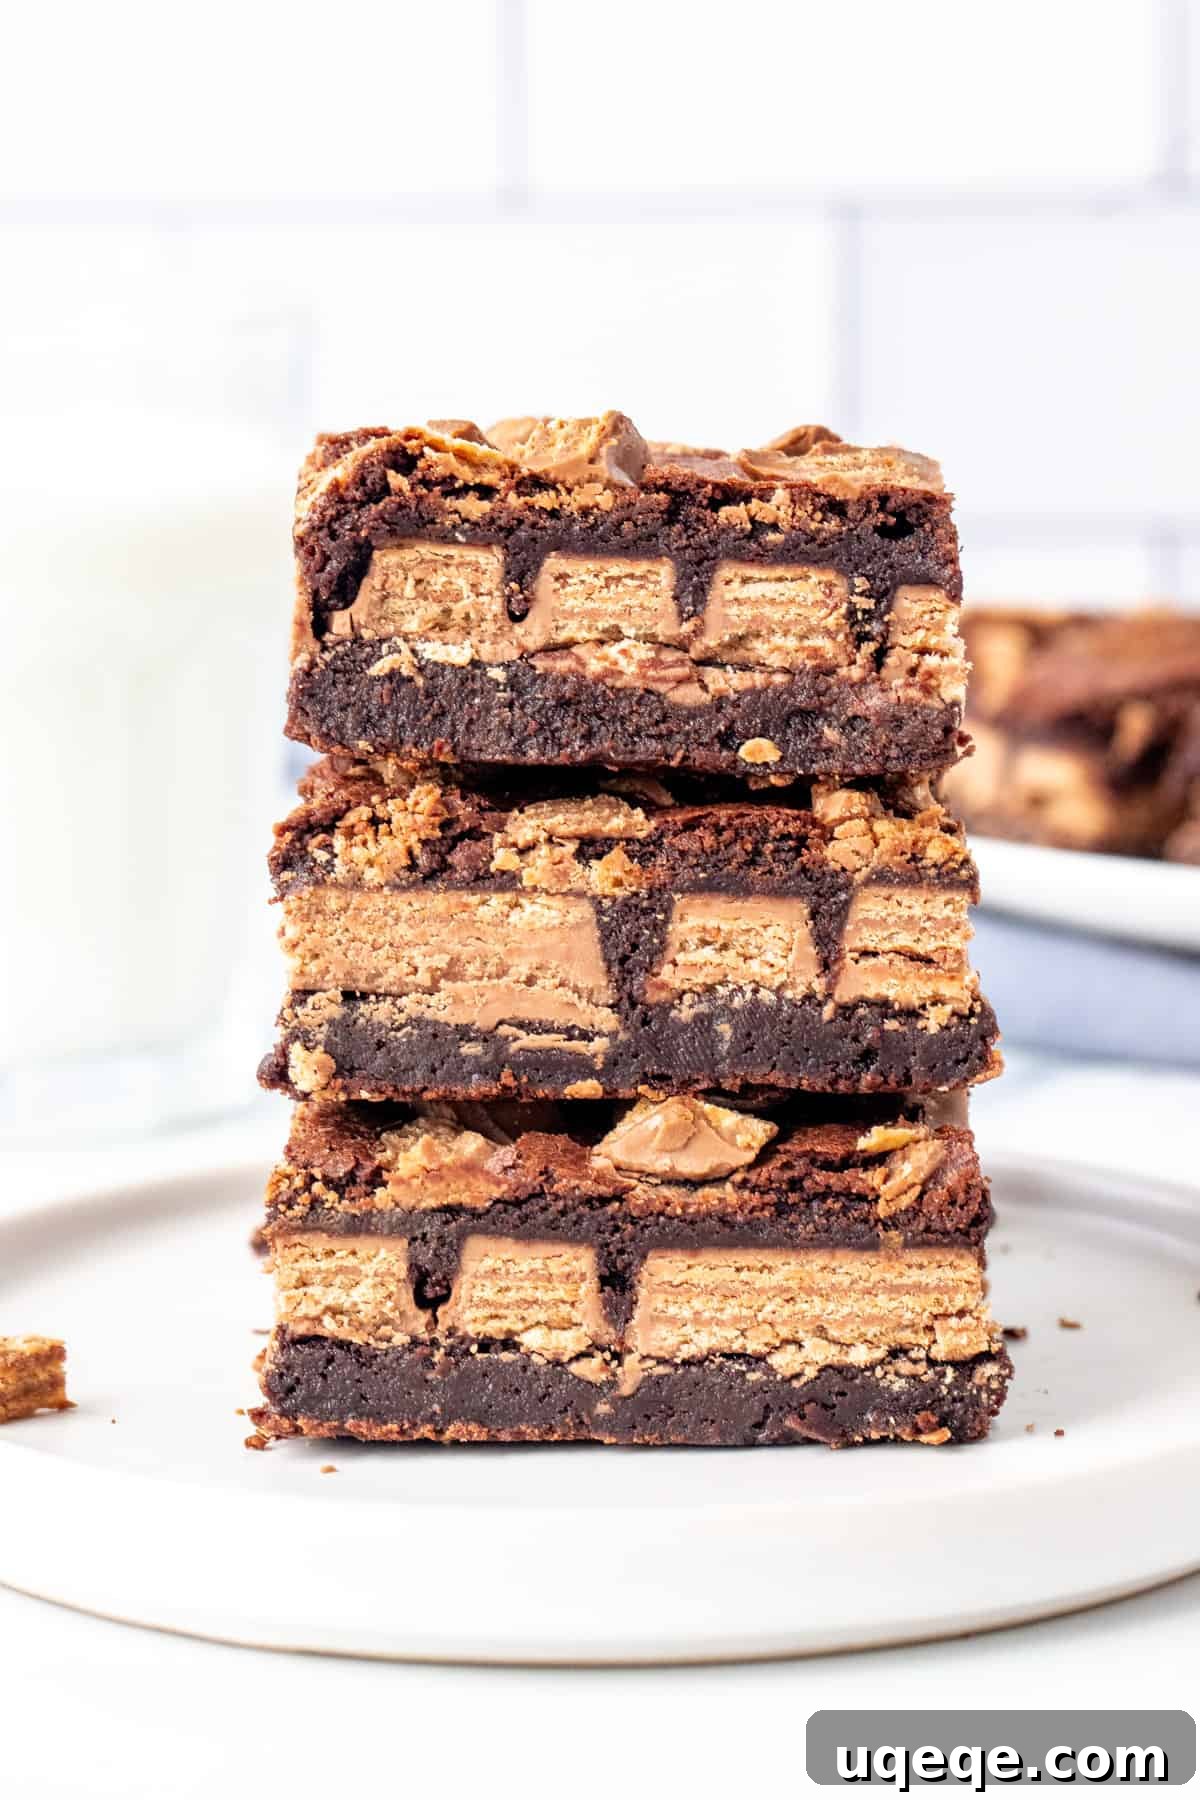
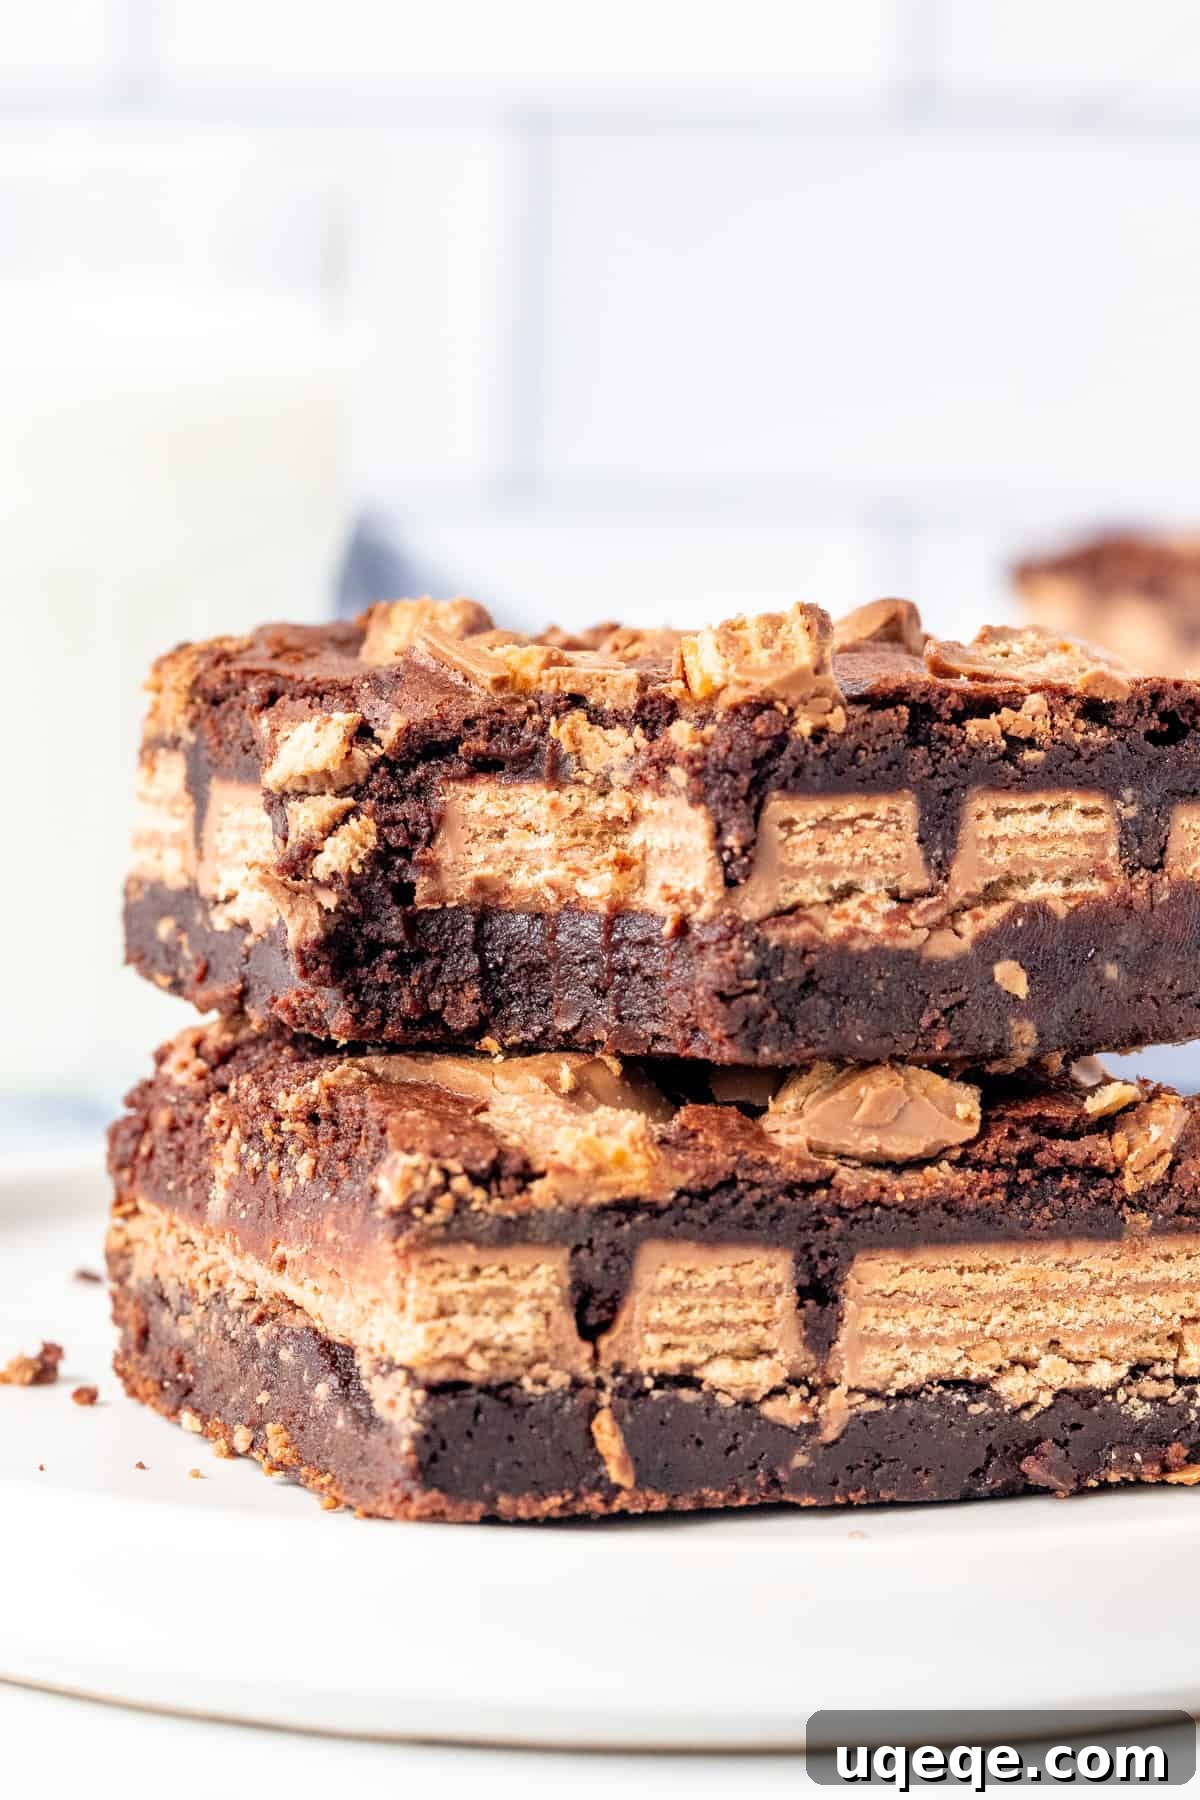
If you’re a connoisseur of next-level brownies or simply adore the iconic crisp wafer and milk chocolate of a Kit Kat, then this recipe is an absolute must-try. Each bite delivers a perfect balance: the deep, luxurious chewiness of a homemade brownie combined with the distinct, satisfying crunch of Kit Kat pieces. The interplay of these textures is truly captivating, and the robust chocolate flavor is nothing short of perfection. These brownies are also a fantastic solution for utilizing any leftover Halloween candy, turning a surplus into a sensational treat.
Why These Kit Kat Brownies Will Become Your New Favorite
Beyond their undeniable deliciousness, there are several reasons why these Kit Kat brownies stand out from the crowd:
- Unrivaled Texture Contrast: The magic lies in the juxtaposition of super fudgy, melt-in-your-mouth brownie batter with the crispy, chocolate-covered wafers of Kit Kats. It’s a textural dream!
- Intense Chocolate Flavor: We use real chocolate along with cocoa powder to create a profound chocolate base that beautifully complements the milk chocolate of the Kit Kats.
- Surprisingly Simple to Make: Despite their impressive appearance, these brownies follow a straightforward recipe, making them accessible even for novice bakers.
- Versatile for Any Occasion: Whether it’s a casual family dessert, a potluck, a bake sale, or a special celebration, these brownies are always a crowd-pleaser.
- Customizable Fun: While Kit Kats are the star, this recipe can inspire other candy-stuffed brownie creations.
Essential Ingredients for Your Fudgy Kit Kat Brownies
Creating these sensational brownies starts with a selection of common baking ingredients, each playing a crucial role in achieving that signature fudgy texture and rich flavor. Don’t underestimate the impact of quality ingredients!
Equipment
- 8×8 inch (20×20 cm) baking pan
- Large heatproof bowl
- Saucepan (for double boiler method) or Microwave-safe bowl
- Whisk
- Spatula or wooden spoon
- Parchment paper or aluminum foil
- Sharp knife (for clean slicing)
Brownie Ingredients (Yields 12 brownies)
- 1/2 cup (112 grams) unsalted butter: Provides richness and contributes to the fudgy texture.
- 6 ounces (170 grams) 50% dark chocolate or semi-sweet chocolate: Crucial for deep chocolate flavor. Finely chopped if using bars, or use chocolate chips.
- 1 cup (200 grams) granulated sugar: Sweetens the brownies and helps create that coveted shiny, crackly top.
- 2 large eggs, whisked: Act as a binder, provide structure, and add to the moistness.
- 1 teaspoon vanilla extract: Enhances the overall chocolate flavor and adds a warm aromatic note.
- 1/2 cup (56 grams) all-purpose flour: Just enough to bind the ingredients without making the brownies cakey.
- 1/4 cup (20 grams) cocoa powder: Boosts the chocolate intensity.
- 1/4 teaspoon salt: Balances the sweetness and amplifies the chocolate flavor.
- 6 Kit Kat bars (4-finger size recommended): The star of the show, providing the delightful crunch. You’ll use these for both stuffing and topping.
Step-by-Step Guide to Baking Your Decadent Kit Kat Brownies
Follow these detailed instructions to create brownies that are thick, rich, and perfectly studded with crunchy Kit Kats. Precision in baking often leads to the best results, so take your time with each step.
- Prepare Your Oven and Pan: Begin by preheating your oven to 350°F (180°C). If using a convection oven, set it to 170°C. Line an 8×8 inch (20×20 cm) baking pan with parchment paper or aluminum foil, ensuring there’s a generous overhang around the edges. This overhang acts as a sling, making it incredibly easy to lift the cooled brownies out of the pan for clean, effortless slicing. If parchment isn’t available, a light greasing of the pan will also work.
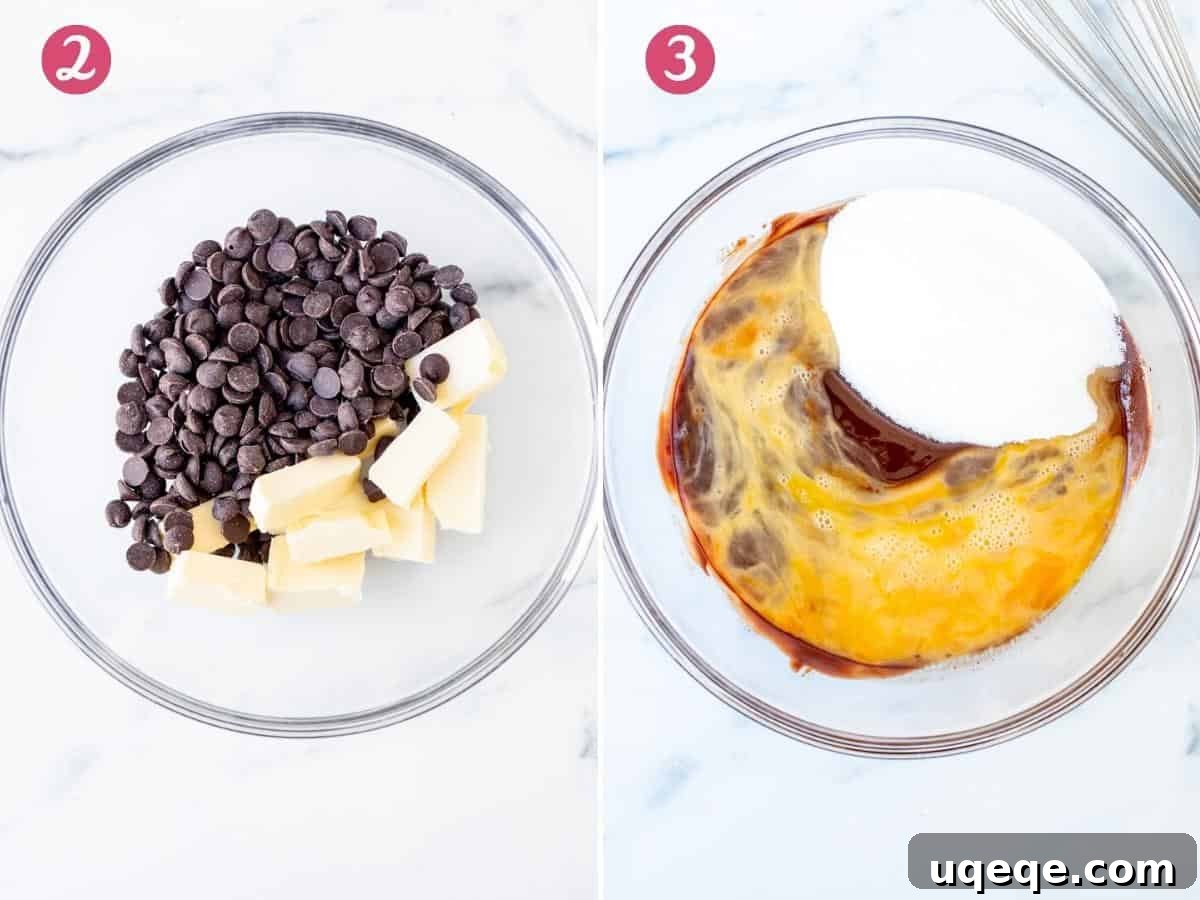
- Melt Butter and Chocolate Slowly: In a large heatproof bowl, combine the unsalted butter (chopped into cubes for faster melting) and the finely chopped 50% dark or semi-sweet chocolate (or chocolate chips). Melt these ingredients together slowly over low heat using either a double boiler method (a bowl set over a pot of simmering water) or in the microwave. If using the microwave, heat in short bursts of 30-45 seconds on medium power, stirring thoroughly after each interval. Resist the urge to use high power or longer intervals, as this can cause the chocolate to seize or become grainy, ruining the smooth texture.
- Incorporate Wet Ingredients: Once the butter and chocolate mixture is smooth and fully melted, whisk in the granulated sugar. Then, add the pre-whisked large eggs and the vanilla extract. Continue whisking until the mixture is well combined. At this stage, it’s normal for the batter to appear slightly grainy; this will smooth out as the dry ingredients are added.
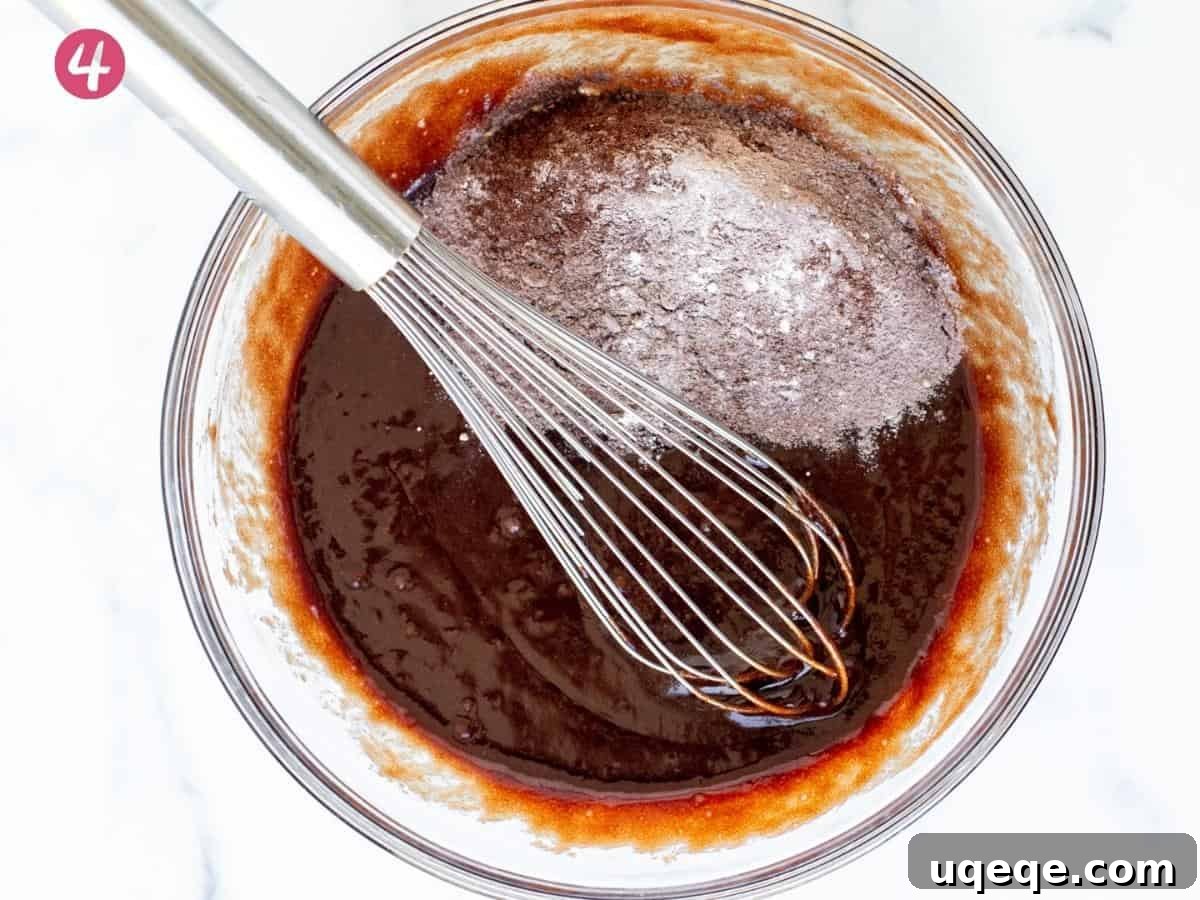
- Gently Fold in Dry Ingredients: Sift the all-purpose flour, cocoa powder, and salt directly into the wet ingredients. Sifting is particularly important if your flour or cocoa powder tends to be lumpy, as it ensures a smooth, uniform batter. Gently fold these dry ingredients into the mixture with a spatula or wooden spoon until just combined. Be careful not to overmix, as overmixing can develop the gluten in the flour, leading to tougher, cakey brownies rather than the desired fudgy consistency.
- Layer the Kit Kats: Now for the fun part – assembling your Kit Kat brownies!
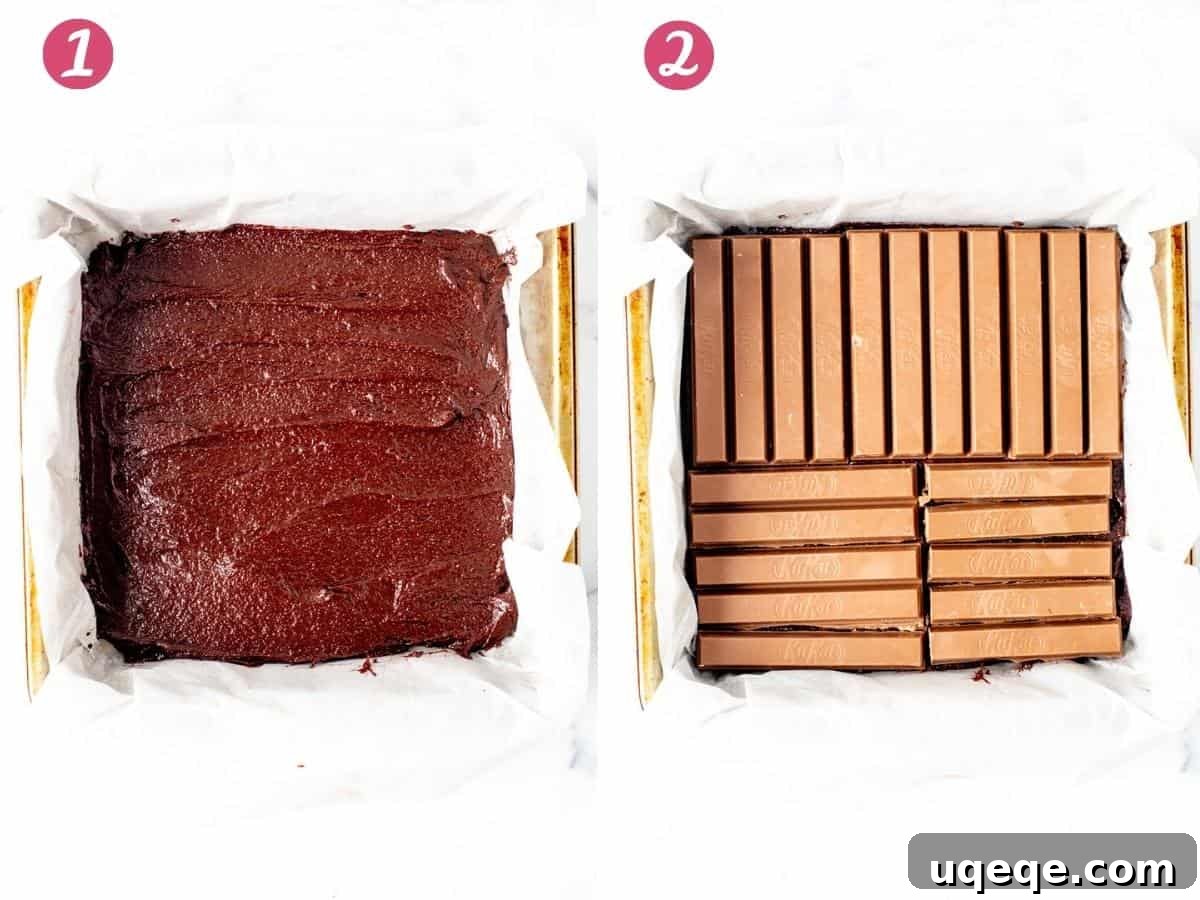
- Pour approximately half of the brownie batter into your prepared baking pan and spread it evenly to form the bottom layer.
- Carefully arrange a layer of Kit Kat fingers on top of the batter. To cover the entire pan efficiently, you may need to gently trim some of the Kit Kats to fit snugly. For an 8×8 inch pan, you’ll typically fit around 21 individual Kit Kat fingers (from about 5-6 four-finger bars), with some minor trimming.
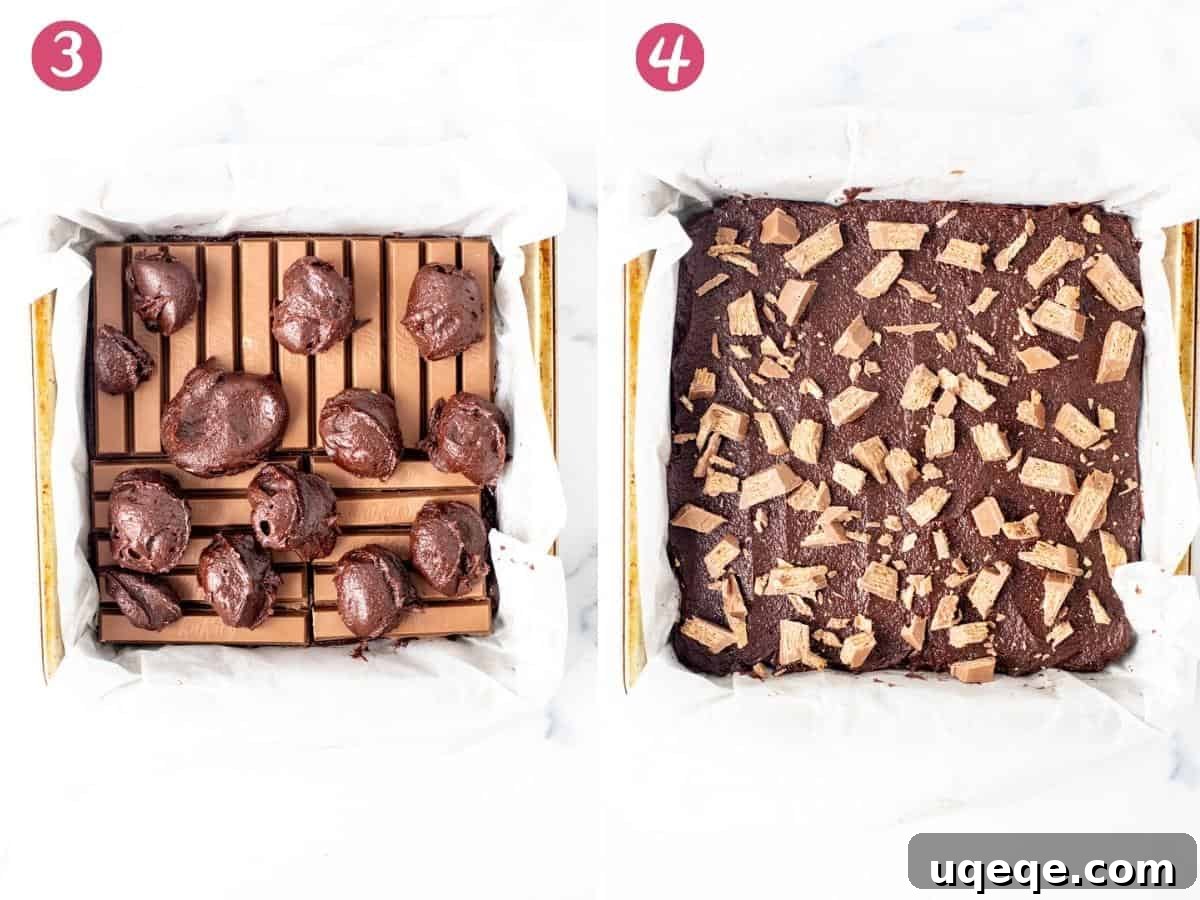
- With the remaining batter, carefully drop spoonfuls over the Kit Kat layer. This method makes it much easier to completely cover all the chocolate bars without disturbing their arrangement.
- Gently spread the top layer of batter to evenly cover the Kit Kats from edge to edge. For an extra textural element and visual appeal, you can optionally sprinkle a few chopped or crushed Kit Kat wafers on top before baking.

- Bake to Perfection: Transfer the pan to your preheated oven and bake for approximately 25-30 minutes. Baking times can vary slightly depending on your oven and your preference for gooiness. To check for doneness, insert a toothpick into the center of the brownies. It should come out with moist crumbs attached, but not wet batter. If it comes out completely clean, your brownies might be on the drier side.
- Crucial Cooling Step: This step is paramount for perfect brownies! It is extremely important to allow the brownies to cool completely, 100%, before attempting to slice them. This process can take a significant amount of time, typically 3-4 hours at room temperature, but patience is key. Cooling allows the brownies to set fully, resulting in clean, sharp cuts and a stable, fudgy texture. If you try to cut them warm, they will be crumbly and messy. Once completely cooled, use the parchment paper overhang to lift the entire slab of brownies out of the pan and onto a cutting board. Always use a sharp knife for the cleanest slices.
Expert Baking Tips for Flawless Kit Kat Brownies
Achieving the perfect brownie is an art, but these tips will help ensure your Kit Kat brownies are a resounding success every time.
- The Art of Cooling: As emphasized in the instructions, cooling is not optional. The internal structure of the brownies needs time to firm up. Rushing this step will lead to crumbly, misshapen brownies. Pop them in the fridge for 30-60 minutes after initial cooling for even firmer results.
- Choosing Your Chocolate Wisely: While 70% dark chocolate can be excellent for many brownie recipes, I’ve found it can be too rich when combined with the sweetness of Kit Kats. For this recipe, a 50% dark chocolate or a good quality semi-sweet chocolate works best, providing a balanced, decadent flavor that doesn’t overwhelm the palate. 6 ounces of chocolate typically equates to about 1 cup of chocolate chips.
- Don’t Overmix the Batter: Once you add the flour and cocoa, mix only until no dry streaks remain. Overmixing develops gluten, which can lead to tough, cake-like brownies instead of the desired fudgy texture.
- Pan Preparation Matters: The parchment paper overhang is a game-changer for easy removal and clean cuts. Don’t skip this simple step!
- The Sharp Knife Secret: For beautifully neat slices, use a very sharp knife. Wiping the knife clean with a damp cloth between each cut also helps prevent sticking and smudging.
Creative Variations and Customizations
While the classic Kit Kat brownie is phenomenal, feel free to experiment and make this recipe your own!
- Different Kit Kat Flavors: Explore other Kit Kat varieties like white chocolate, dark chocolate, or seasonal flavors for a unique twist.
- Add-ins Galore: Fold in a handful of chocolate chips, chopped nuts (like pecans or walnuts), or even a swirl of caramel into the batter for extra layers of flavor and texture.
- A Dash of Espresso: A teaspoon of instant espresso powder (dissolved in the vanilla) can deepen the chocolate flavor without adding a coffee taste.
- Nut-Free Option: This recipe is already nut-free if you use standard Kit Kats and ensure your chocolate is also processed in a nut-free facility, making it a safe choice for those with nut allergies.
Storage and Serving Suggestions
To enjoy your Kit Kat brownies at their best, follow these storage and serving tips:
- Storage: Store the cooled and sliced brownies in an airtight container at room temperature for up to 4 days. For longer storage, you can freeze individual brownies wrapped tightly in plastic wrap and then placed in a freezer-safe bag for up to 2-3 months. Thaw at room temperature before serving.
- Serving: These brownies are wonderful on their own, but they also pair beautifully with a scoop of vanilla bean ice cream, a drizzle of chocolate fudge sauce, or a dollop of fresh whipped cream.
Frequently Asked Questions (FAQ) About Kit Kat Brownies
- Can I double this recipe?
- Yes, you can easily double this recipe. If doubling, use a 9×13 inch (23×33 cm) baking pan and increase the baking time slightly, typically by 5-10 minutes, but still rely on the toothpick test for doneness.
- What if I don’t have an 8×8 inch pan?
- A 9×9 inch pan can also work, but your brownies will be slightly thinner, and the baking time might be a little shorter. Keep a close eye on them during the last few minutes of baking.
- How do I know when the brownies are done without overbaking?
- The toothpick test is your best friend. Insert a toothpick into the center; if it comes out with moist crumbs, they’re perfect. If it comes out with wet batter, they need more time. If it comes out completely clean, they might be slightly overbaked, but still delicious!
- Can I use milk chocolate instead of dark or semi-sweet?
- While you could, using milk chocolate for the brownie base might make the overall dessert excessively sweet when combined with the Kit Kats. The recommendation for 50% dark or semi-sweet is to provide a rich chocolate depth that balances the sweetness of the Kit Kats.
Explore More Decadent Brownie Recipes
If you’ve fallen in love with these Kit Kat brownies and are craving more inventive takes on this classic dessert, be sure to check out these other fantastic recipes:
- Reese’s Peanut Butter Cup Brownies
- Oreo Stuffed Brownies
- Classic Peanut Butter Brownies
- Swirled Cream Cheese Brownies
Nutritional Information
(Estimated values per serving, based on 12 servings and all 6 Kit Kat bars used)
| Nutrient | Amount |
|---|---|
| Calories | 255 kcal |
| Carbohydrates | 29g |
| Protein | 3g |
| Fat | 15g |
| Saturated Fat | 9g |
| Polyunsaturated Fat | 1g |
| Monounsaturated Fat | 4g |
| Trans Fat | 0.3g |
| Cholesterol | 52mg |
| Sodium | 65mg |
| Potassium | 150mg |
| Fiber | 2g |
| Sugar | 20g |
| Vitamin A | 287 IU |
| Calcium | 21mg |
| Iron | 2mg |
These Kit Kat brownies are more than just a dessert; they’re an experience. The perfect marriage of rich chocolate and crispy wafer creates a treat that’s impossible to resist. So, gather your ingredients, follow these steps, and prepare to bake a batch of brownies that will be remembered long after the last crumb is gone. Don’t forget to rate this recipe and share your creations in the comments below!