
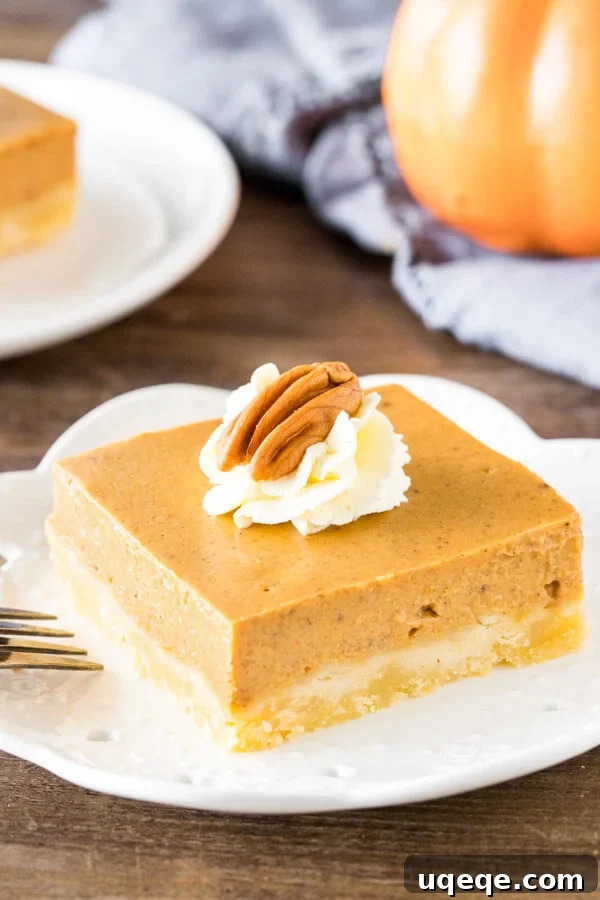
Forget the fuss of traditional pie! These easy pumpkin pie bars offer all the comforting flavors of your favorite holiday dessert, but in a convenient, crowd-pleasing format. Each bar boasts a delightfully buttery shortbread crust, perfectly complemented by a rich and creamy pumpkin pie filling infused with aromatic cinnamon, nutmeg, and the warm sweetness of brown sugar. Ideal for Thanksgiving feasts, autumn gatherings, or simply satisfying your seasonal cravings, these bars are a guaranteed hit that will have everyone asking for the recipe.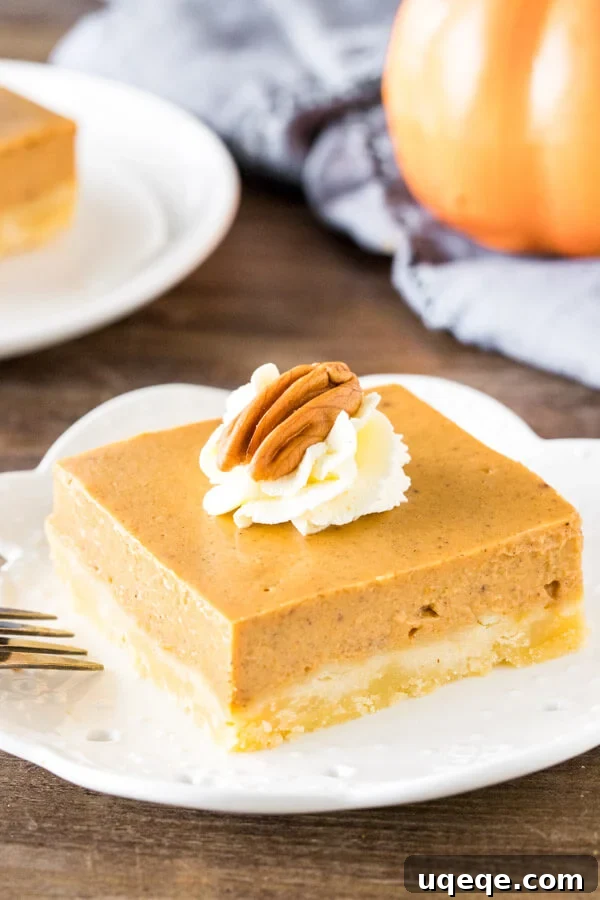
Why You’ll Love These Easy Pumpkin Pie Bars
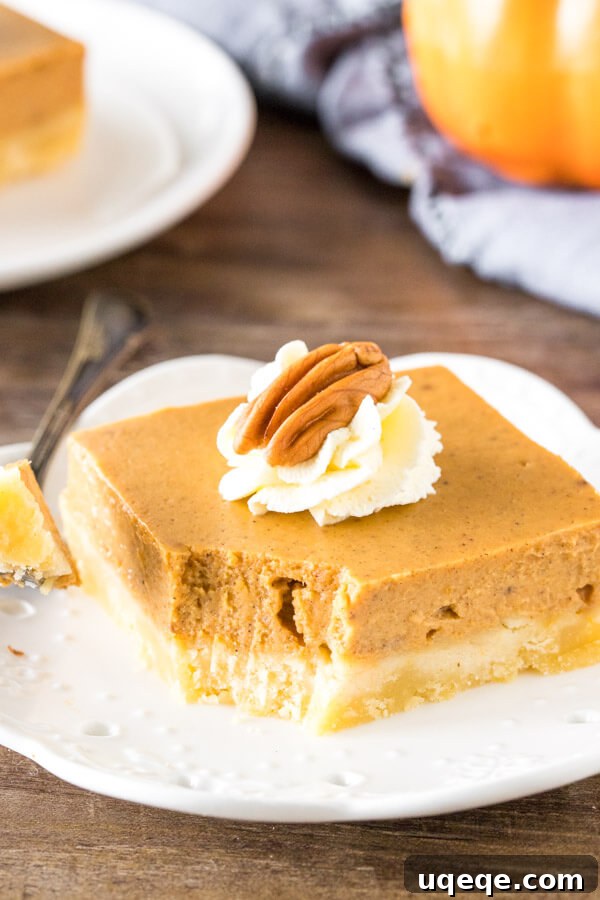
As pumpkin season fully embraces us and the anticipation of Thanksgiving builds, it’s time to elevate your dessert game with a recipe that’s both classic and innovative: pumpkin pie bars. While we cherish the traditional pumpkin pie, these bars offer a superior experience for several compelling reasons. They capture the quintessential pumpkin spice flavor and the lusciously creamy texture you adore in a classic pumpkin pie, but with a foundational twist – a firm, buttery shortbread-style cookie crust instead of a delicate pie crust.
The primary advantage lies in their incredible ease. You completely bypass the often-intimidating process of making and rolling out a traditional pie crust, saving you valuable time and effort, especially during busy holiday preparations. Furthermore, pumpkin pie bars are inherently designed to feed a larger crowd. Cutting neat, uniform slices from a rectangular pan is much simpler and yields more servings than portioning a round pie. They also typically bake in less time, allowing you to get your delicious dessert from oven to table (or fridge, for chilling!) more quickly. Perhaps the most celebrated benefit, however, is the enhanced ratio of buttery, crumbly crust to rich, creamy filling, making every bite an exquisite balance of textures and flavors. These bars offer a robust base that holds up beautifully, ensuring a perfect bite every single time.
The Secret to the Perfect Buttery Shortbread Crust
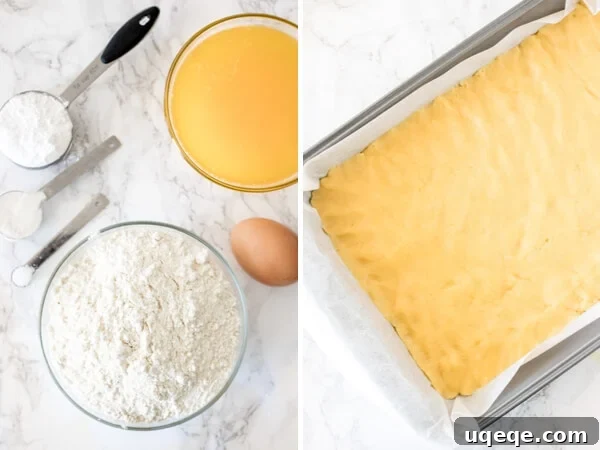
The foundation of these outstanding pumpkin pie bars is a simple yet incredibly flavorful base that falls somewhere between a classic shortbread and a tender sugar cookie. This crust not only provides a delicious contrast to the creamy filling but also eliminates the common issue of a soggy bottom often associated with traditional pumpkin pies. Crafting this base is straightforward, requiring just a few common pantry ingredients that combine to form a truly irresistible texture.
To create this dream crust, you will need:
- 2 cups all-purpose flour: The structural backbone of our cookie crust, providing a tender crumb.
- 1/4 cup powdered sugar: Adds a subtle sweetness and contributes to the melt-in-your-mouth texture that makes shortbread so appealing.
- 1 tablespoon cornstarch (also known as cornflour): This is a secret ingredient for tenderness! It helps to create a softer, more delicate crumb that isn’t too tough or dense.
- 1/4 teaspoon salt: A crucial flavor enhancer that balances the sweetness and brings out the richness of the butter.
- 3/4 cup unsalted butter, melted: Ensure you measure the butter first, then melt it. Melted butter makes it easy to combine with the dry ingredients and creates a uniform, tender crust. Unsalted butter allows you to control the salt content in the recipe.
- 1 large egg: Acts as a binder, helping to hold the crust together and giving it a slightly richer quality.
The process is wonderfully simple. Begin by whisking together the dry ingredients – flour, powdered sugar, cornstarch, and salt – in a medium bowl until well combined. This ensures even distribution of flavor and leavening. Next, pour in the melted butter and the whisked egg. Stir until a soft, crumbly dough forms. This dough is then pressed firmly and evenly into the bottom of a 9×13 inch baking pan that has been lined with parchment paper. The parchment paper is a critical step, as it creates an overhang around the edges, allowing you to effortlessly lift the cooled bars out of the pan for clean and easy slicing later.
Before adding the filling, this crust receives a crucial pre-bake for 10 minutes. This step is vital for preventing a soggy crust, ensuring that your pumpkin pie bars have a beautifully crisp and buttery base every time. Once baked, remove the pan from the oven, but keep the oven on as it will be needed shortly for the main bake.
Crafting the Rich and Creamy Pumpkin Pie Filling
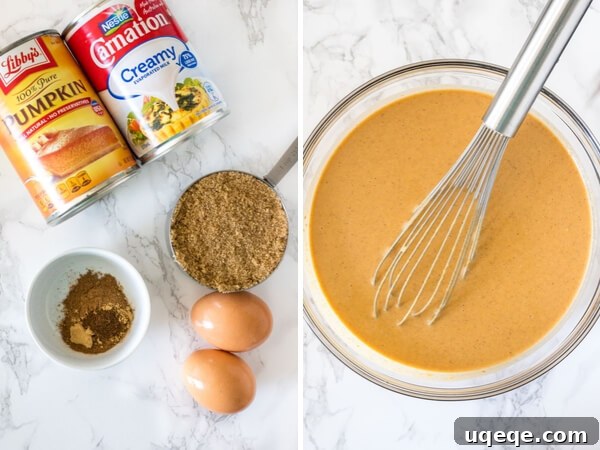
The heart of these pumpkin pie bars is, of course, the vibrant and aromatic pumpkin filling. This recipe draws inspiration from the classic, beloved Libby’s pumpkin pie, adapted to perfection for bar form. The result is a smooth, spiced, and utterly delicious filling that sets beautifully while retaining its signature creamy texture. Achieving this perfect consistency involves a precise blend of ingredients and a simple mixing technique.
For the sumptuous pumpkin pie filling, you’ll gather:
- One 15 oz can pure pumpkin: It’s essential to use pure pumpkin puree, not pumpkin pie filling, which often contains added spices and sugar that would throw off the balance of this recipe.
- One 15 oz can evaporated milk (not sweetened condensed milk): Evaporated milk is key to the filling’s creamy, rich texture and helps it set without being overly dense. You could substitute this with 1 1/2 cups of heavy cream for a similarly rich result. However, a crucial note: do not substitute evaporated milk with regular milk. Regular milk has a higher water content and lower fat, which will prevent the filling from setting properly and result in a runny consistency.
- 1 cup packed brown sugar: Unlike many traditional recipes that call for white sugar, we opt for brown sugar here. This choice is deliberate, as brown sugar introduces a wonderful depth of flavor, imparting subtle caramel notes that beautifully complement the pumpkin and spices, creating a more complex and inviting taste profile.
- 1 tablespoon cornstarch: This ingredient plays a vital role in the filling. It acts as a stabilizer and thickener, helping to bind the pie bars together and significantly reducing the chances of the filling cracking during baking and cooling. It contributes to that perfectly smooth, sliceable texture.
- 1 tablespoon pumpkin pie spice: The quintessential blend that defines pumpkin pie. If you don’t have a pre-mixed spice, you can easily make your own (details in the recipe notes below). This blend typically includes cinnamon, nutmeg, ginger, and cloves, delivering that warm, comforting aroma and taste.
- 2 large eggs: Eggs are essential binders in the filling, providing structure and contributing to the custard-like consistency. They help the filling set firm yet tender.
The preparation for the filling is remarkably straightforward. In a large bowl, begin by whisking together the brown sugar, pumpkin pie spice, and cornstarch. This initial step is important for breaking up any lumps in the brown sugar and ensuring the spices and cornstarch are evenly distributed before liquid ingredients are added. Then, whisk in the pure pumpkin puree, evaporated milk, and eggs until the mixture is completely smooth and uniform. Take your time to ensure there are no streaks or clumps. Once thoroughly combined, this velvety filling is ready to be poured directly over the partially baked shortbread crust in your prepared pan.
The bars then return to the oven to bake, transforming into a golden-brown, aromatic delight. This simple yet effective method ensures a perfectly balanced dessert where the rich, spiced pumpkin filling shines atop its sturdy, buttery base.
Essential Tips for Baking and Setting Success
Baking perfect pumpkin pie bars requires attention to a few crucial details, particularly regarding baking time and, most importantly, the cooling and chilling process. These steps are fundamental to achieving the ideal texture and ensuring your bars slice cleanly without crumbling or becoming too soft.
After you’ve poured the luscious pumpkin filling over the pre-baked shortbread crust, the pan goes back into your preheated oven. The bars will typically bake for approximately 40 to 50 minutes. The exact time can vary slightly depending on your oven, so it’s important to look for visual cues of doneness. You’ll know they are ready when the edges appear set and slightly puffed, and the center no longer wobbles excessively when gently shaken. A perfect indicator is inserting a toothpick into the center of the filling; it should come out clean or with a few moist crumbs attached, but not wet batter. Overbaking can lead to a dry filling or cracks, while underbaking means it won’t set properly.
Once baked, the journey to perfection is far from over. This is where patience truly pays off. Remove the bars from the oven and allow them to cool completely at room temperature. This initial cooling period allows the internal temperature to gradually decrease, preventing a sudden shock that can cause cracking and initiating the setting process. Once they have reached room temperature, which can take a couple of hours, cover the pan tightly with plastic wrap and transfer it to the refrigerator. This chilling step is absolutely critical and cannot be skipped. The bars need to chill for at least 4 hours, though overnight is even better, to set properly. During this time, the fats in the crust solidify, and the custard-like filling firms up, allowing for perfectly clean and firm slices. Attempting to slice the bars before they are fully chilled will result in a messy, crumbly outcome. Trust the process, and you’ll be rewarded with beautifully firm, creamy, and sliceable pumpkin pie bars.
Graham Cracker Crust Variation: A Classic Alternative
While the buttery shortbread crust offers a unique and delightful texture, some dessert lovers prefer the nostalgic crunch and distinct flavor of a graham cracker crust. If you’re looking for an alternative base for your pumpkin pie bars that’s equally easy and requires no pre-baking, a graham cracker crust is an excellent choice. It provides a sweet, slightly spiced counterpoint to the creamy pumpkin filling that many find irresistible.
To prepare these delicious pie bars with a graham cracker crust, you will simply stir together the following ingredients for the base:
- 2 cups graham cracker crumbs: You can buy pre-crushed graham cracker crumbs or crush whole graham crackers yourself using a food processor or by placing them in a Ziploc bag and crushing them with a rolling pin. Ensure the crumbs are finely ground for a uniform crust.
- 2 tablespoons brown sugar: Adds a touch of extra sweetness and a hint of caramel flavor that complements the graham crackers beautifully. You can adjust this amount to your preference.
- 1/3 cup unsalted butter, melted: The melted butter binds the crumbs together, creating a firm and flavorful crust. Again, unsalted butter is preferred to control the overall saltiness.
Once you have combined these three ingredients, simply press the mixture firmly and evenly into the bottom of your lined 9×13 inch baking pan. The beauty of this variation is that you will not need to prebake the crust if you’re using graham cracker crumbs. The direct baking with the filling will be sufficient to set the crust, offering a quicker preparation time without compromising on flavor or texture. This alternative provides a delightful change of pace while maintaining the ease and crowd-pleasing qualities of the pumpkin pie bars.
Serving Suggestions and Make-Ahead Brilliance
These easy pumpkin pie bars are not only simple to make but also incredibly versatile when it comes to serving and planning ahead, making them the perfect dessert for any occasion, especially during the bustling holiday season. Once your bars are perfectly chilled and ready to serve, the possibilities for enhancing their deliciousness are endless.
For a classic presentation, a dollop of freshly whipped cream is always a fantastic choice. The light, airy cream provides a beautiful contrast to the rich, dense filling. You can also sprinkle a pinch of cinnamon or nutmeg on top of the whipped cream for an extra touch of spice and visual appeal. For those who enjoy a little extra decadence, a drizzle of caramel sauce or a sprinkle of toasted pecans can elevate the bars to gourmet status. A scoop of vanilla bean ice cream or a side of spiced apple compote also pairs wonderfully, adding different textures and temperatures that make for a truly memorable dessert experience.
One of the greatest advantages of pumpkin pie bars is their make-ahead potential, which significantly reduces stress during busy times. I frequently prepare these the day before I plan to serve them. This allows ample time for the essential chilling period, ensuring they are perfectly set and easy to slice when guests arrive. Once the bars are fully cooled to room temperature and then thoroughly chilled in the refrigerator, they can be stored in an airtight container for up to 4 days. This makes them an excellent option for meal prepping your holiday desserts or having a delightful treat on hand throughout the week.
Beyond refrigeration, these bars are also freezer-friendly, offering an even longer storage solution. After the bars are completely cooled and chilled, you can freeze them in an airtight container for up to 3 months. When you’re ready to enjoy them, simply thaw them overnight in the refrigerator. This allows you to prepare a batch well in advance, giving you more time to focus on other festivities or enjoy a spontaneous pumpkin spice craving whenever it strikes. Just remember, proper cooling before freezing is key to maintaining their delicious texture upon thawing.
Common Questions and Troubleshooting
Even with an “easy” recipe, questions and minor hiccups can arise. Here are answers to some common concerns and tips to troubleshoot potential issues when making your pumpkin pie bars, ensuring your baking experience is smooth and successful every time.
Why did my crust turn out soggy?
A soggy crust is a common issue with many pie and bar recipes, but it’s easily preventable with these pumpkin pie bars. The most likely culprit is not pre-baking the shortbread crust. The initial 10-minute bake time for the crust helps to dry it out and creates a barrier against the wet pumpkin filling, preventing it from absorbing too much moisture. Ensure your oven is accurately preheated to 350°F (175°C) and you bake the crust for the full 10 minutes before adding the filling. If you used the graham cracker crust variation, a soggy crust is less likely as it doesn’t require pre-baking, but ensure your butter is fully melted and incorporated to bind the crumbs well.
Why did my pumpkin filling crack?
Cracks in the surface of your pumpkin pie filling are usually a sign of overbaking. When custards like pumpkin pie filling bake for too long, they lose too much moisture and contract, leading to cracks. Keep a close eye on your bars during the last 10-15 minutes of baking. The center should still have a slight “jiggle” when gently shaken, rather than being completely firm. It will continue to set as it cools. Also, rapid temperature changes can sometimes cause cracking. Ensure the bars cool gradually at room temperature before transferring them to the refrigerator.
My bars aren’t setting properly. What went wrong?
If your pumpkin pie bars are too soft or runny after cooling, there are a few possibilities. The most common reason is insufficient chilling time. The filling needs at least 4 hours (and preferably overnight) in the refrigerator to fully firm up. Another factor could be an incorrect ingredient substitution, particularly with the evaporated milk. Using regular milk instead of evaporated milk or heavy cream will result in a filling that doesn’t have enough fat and solids to set properly. Lastly, ensure you measured all ingredients accurately, especially the eggs and cornstarch, which are crucial for the filling’s structure.
Can I adjust the spice level?
Absolutely! The recipe uses 1 tablespoon of pumpkin pie spice, which provides a balanced flavor. If you prefer a milder spice, you can reduce it to 2 teaspoons. For a bolder, more intensely spiced flavor, you can increase it to 1.5 tablespoons. Feel free to experiment to find your perfect balance. You can also add a pinch of black pepper or a tiny amount of ground cardamom for a unique twist.
By keeping these tips in mind, you’ll be well on your way to creating flawless pumpkin pie bars that are sure to impress!
More Irresistible Fall Desserts
If you’ve enjoyed these pumpkin pie bars and are eager to explore more seasonal delights, be sure to try these other fantastic fall dessert recipes:
- Pecan Pie Bars
- Pumpkin Cheesecake
- Pumpkin Bundt Cake
- Pumpkin Cake with Caramel Cream Cheese Frosting
Pumpkin Pie Bars
Rate Recipe
Print Recipe
Ingredients
Shortbread Base
- 2 cups all-purpose flour
- 1/3 cup powdered sugar
- 1 tablespoon cornstarch
- 1/4 teaspoon salt
- 3/4 cup unsalted butter, melted
- 1 large egg, whisked
Pumpkin Pie Filling
- 1 15 oz can pure pumpkin
- 1 15 oz can evaporated milk*
- 1 cup packed brown sugar
- 1 tablespoon pumpkin pie spice*, or make your own – see recipe notes
- 1 tablespoon cornstarch
- 2 large eggs
Instructions
-
Preheat the oven to 350F degrees and position the oven rack in the middle of the oven.
-
Line a 9×13 inch pan with parchment paper, leaving an overhang around the edges.
Shortbread Base
-
In a medium bowl whisk together the flour, powdered sugar, cornstarch and salt.
-
Stir in the melted butter and egg.
-
Press the mixture into the bottom of the prepared pan.
-
Bake for 10 minutes, and remove from the oven (keep the oven turned on).
Pumpkin Pie Filling
-
In a large bowl whisk together the brown sugar, pumpkin pie spice and cornstarch to remove any lumps from the brown sugar.
-
Whisk in the pumpkin pie filling, evaporated milk and eggs until smooth.
-
Pour the filling over the base.
-
Bake in the preheated oven for 40-50 minutes, or until the middle no longer wobbles and an inserted toothpick comes out clean or with a few damp crumbs.
-
Remove from the oven and cool completely, then cover and place in the fridge for 4 hours to set.
Notes
To make your own pumpkin pie spice, use 1 1/2 teaspoons cinnamon, 1/2 teaspoon ginger powder, 1/2 teaspoon ground nutmeg, and 1/8 teaspoon ground cloves.
Storage & Make Ahead Tips:
Store bars in an airtight container in the fridge for up to 4 days. Bars can be frozen for up to 3 months in an airtight container, then thaw in the fridge. Ensure bars are fully cooled before freezing.
Nutrition