
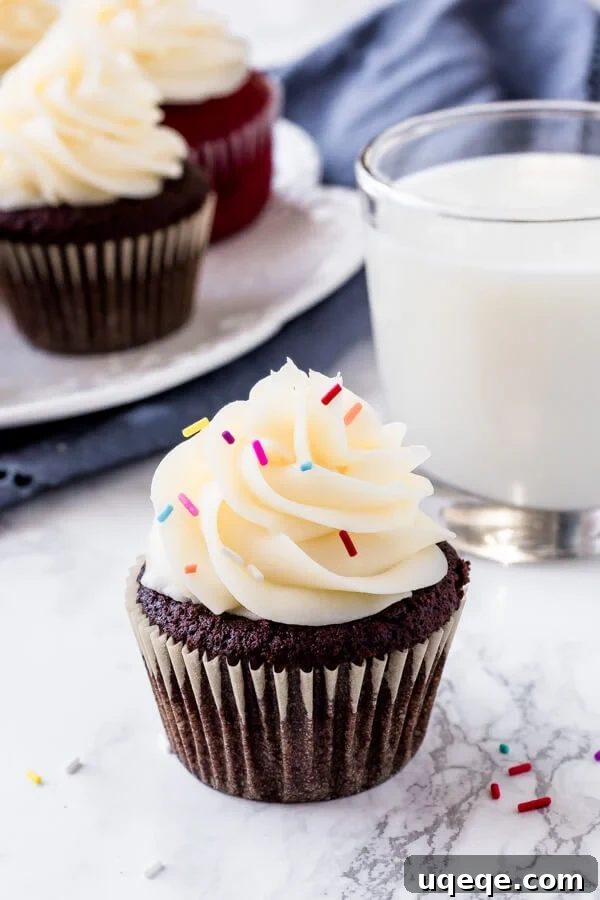
Craving a frosting that’s rich, creamy, and perfectly balanced between sweet and tangy? Look no further than this incredibly easy cream cheese frosting recipe. It’s designed to be wonderfully fluffy, extra smooth, and sturdy enough to pipe beautifully onto your favorite cakes and cupcakes. Whether you’re topping a classic carrot cake, a vibrant red velvet, or a moist banana cake, this frosting elevates every dessert. I’ve refined this recipe over countless batches to ensure it turns out perfectly every single time, making it my go-to choice in the kitchen. Prepare to discover all the secrets to crafting the best cream cheese frosting you’ve ever tasted!
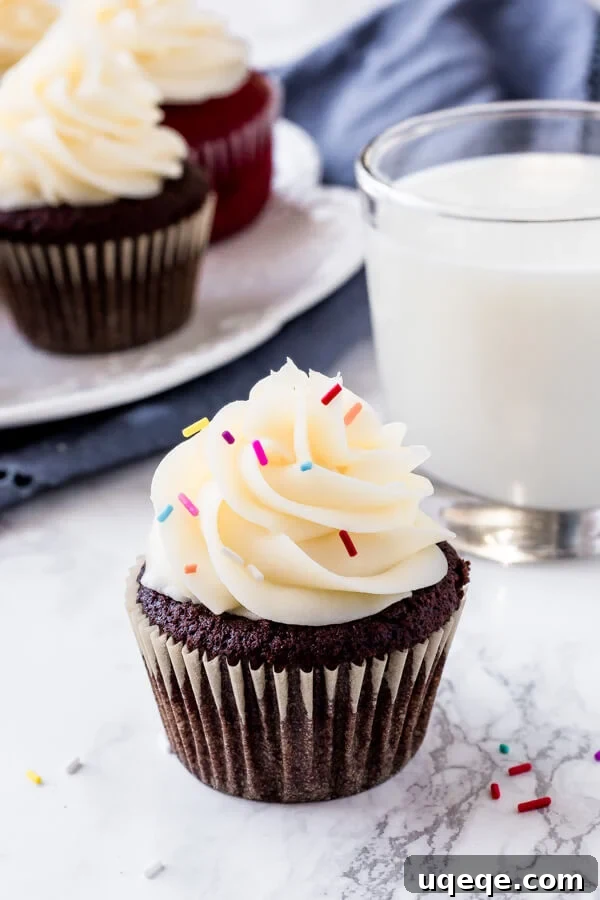
The Ultimate Guide to Making Perfect Cream Cheese Frosting
Cream cheese frosting holds a special place in the world of desserts, beloved for its distinctive flavor profile and delightful texture. Unlike traditional buttercreams that can sometimes be overwhelmingly sweet, cream cheese frosting offers a refreshing tang that beautifully cuts through richness, creating a harmonious balance. It’s a versatile topping that pairs exquisitely with a wide array of flavors, from spicy carrot cakes to chocolatey red velvet creations, fruity lemon blueberry cakes, and comforting banana breads.
While the concept of making cream cheese frosting seems straightforward, there are subtle nuances that differentiate a good frosting from a truly exceptional one. Many bakers encounter issues like thin, runny frosting, or a grainy texture that lacks the desired smoothness. This comprehensive guide will walk you through every step, providing invaluable tips and tricks to ensure your cream cheese frosting is always fluffy, stable, and utterly delicious. With just a few key ingredients and some expert advice, you’ll be whipping up bakery-quality frosting that holds its shape for intricate piping and spreads like a dream.
Essential Ingredients for Flawless Cream Cheese Frosting
Achieving the perfect cream cheese frosting starts with understanding the role of each ingredient. Quality and temperature are paramount here. Here’s what you’ll need and why each component is critical:
- 1/2 cup Unsalted Butter: Using unsalted butter allows you to control the overall saltiness of your frosting. It’s the base for emulsification and contributes significantly to the creamy texture. Crucially, the butter should be at perfect room temperature – soft enough to make a slight indentation when pressed, but not oily or melted. Cold butter will result in a lumpy frosting, while overly soft butter can make your frosting greasy and thin. If you only have salted butter, you can use it, but omit the additional salt from the recipe.
- 8 oz Full-Fat Cream Cheese (Brick-Style): This is non-negotiable for a thick, pipeable frosting. Avoid spreadable or “lite” cream cheese varieties at all costs. These products contain higher water content and often stabilizers that prevent them from thickening properly, leading to a runny, unusable frosting. Like butter, your cream cheese should be at room temperature for smooth, lump-free blending.
- 1 teaspoon Vanilla Extract: A good quality vanilla extract enhances the overall flavor, adding warmth and depth that complements the tanginess of the cream cheese. Feel free to experiment with pure vanilla bean paste for a more intense vanilla flavor and those beautiful speckled flecks.
- 1/4 teaspoon Salt: A small amount of salt is essential for balancing the sweetness of the powdered sugar and enhancing the flavors of the butter and cream cheese. It prevents the frosting from tasting flat and overly sweet.
- 3 cups Powdered Sugar (Confectioners’ Sugar): This provides the primary sweetness and, more importantly, the structure for your frosting. Powdered sugar contains a small amount of cornstarch, which helps absorb moisture and gives the frosting its body. Always sift your powdered sugar before adding it to prevent lumps and ensure a super smooth consistency.
- 1-2 tablespoons Whipping Cream (Optional, if needed): This ingredient acts as an adjuster for consistency. If your frosting is too thick, a tablespoon or two of cold whipping cream (or heavy cream) can help loosen it to the desired spreading or piping consistency without thinning it too much.
Mastering the Method: Step-by-Step Instructions for the Best Cream Cheese Frosting
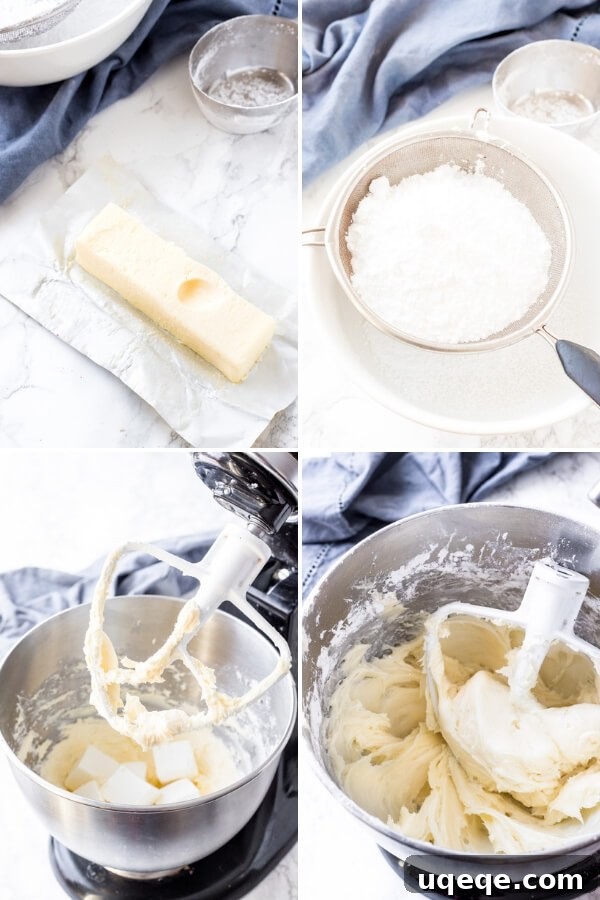
Follow these steps carefully to achieve a consistently perfect, fluffy, and stable cream cheese frosting:
- Cream the Butter: In a large mixing bowl, beat the room temperature unsalted butter with an electric mixer on medium-high speed for about 2 minutes. This step is crucial for incorporating air into the butter, making it light, fluffy, and noticeably lighter in color. This forms the stable, airy base for your frosting.
- Add the Cream Cheese: Reduce the mixer speed to low and add the room temperature full-fat cream cheese to the bowl. Beat just until it’s evenly combined and smooth. Be careful not to overmix at this stage, as overbeating cream cheese can break down its structure, leading to a runny frosting. The goal is simply to incorporate it with the butter.
- Flavor Boost: Stir in the vanilla extract and salt until well combined.
- Prepare the Sugar: In a separate bowl, sift the powdered sugar. If you plan to use cornstarch for extra stability (recommended for piping), sift it together with the powdered sugar. Sifting prevents any lumps from forming in your final frosting.
- Gradually Incorporate Powdered Sugar: With the mixer on its lowest speed, gradually add the sifted powdered sugar (and cornstarch, if using) to the butter and cream cheese mixture, about one cup at a time. Mix until each addition is just combined before adding the next. This prevents a “sugar cloud” and ensures even incorporation. Stop the mixer frequently to scrape down the sides of the bowl with a spatula, making sure all ingredients are fully mixed.
- Know When to Stop: Once all the powdered sugar is incorporated and the frosting appears thick, fluffy, and smooth, stop mixing immediately. This is perhaps the most critical tip. Continuing to beat the frosting with your electric mixer after it’s reached the desired consistency can actually overmix it, causing it to become thin and watery. It may seem counterintuitive, but overmixing is a common culprit for runny cream cheese frosting.
- Adjust Consistency (if needed): If your frosting feels a little too stiff, or you prefer a slightly less sweet taste, you can optionally beat in 1 to 2 tablespoons of cold whipping cream, adding it one tablespoon at a time, until your desired consistency is reached.
- Ready to Use: Transfer the finished frosting to a piping bag for decorating, or simply spread it onto your cooled cakes and cupcakes with an offset spatula or flat knife.
Expert Tips for Perfect Cream Cheese Frosting Every Time
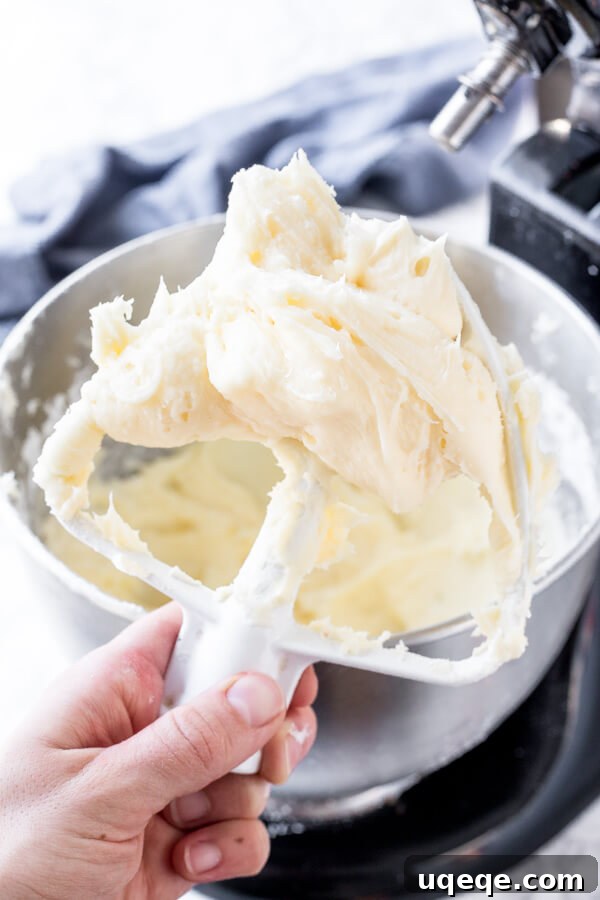
To ensure consistent success, keep these vital tips in mind:
- Perfect Room Temperature Ingredients: This cannot be stressed enough. Butter and cream cheese at the ideal room temperature (around 68-70°F / 20-21°C) will cream together smoothly, preventing lumps and ensuring a stable emulsion. Too cold, and it will be lumpy; too warm, and it will be greasy and unstable.
- Full-Fat, Brick-Style Cream Cheese ONLY: Resist the temptation to use anything else. Spreadable and low-fat versions have higher water content and different stabilizers that will inevitably lead to a runny, disappointing frosting.
- Always Sift Your Powdered Sugar: Even if it doesn’t look clumpy, powdered sugar can compress and form tiny lumps. Sifting ensures a silky-smooth frosting without any gritty texture.
- Beat the Butter Thoroughly First: Giving the butter a good beat on its own for at least 2 minutes creates a light, airy foundation that supports the other ingredients and makes for a truly fluffy frosting.
- Do NOT Overmix the Cream Cheese: Once the cream cheese is added, mix only until it’s just combined with the butter. Excessive beating breaks down the cream cheese’s emulsifiers, causing it to thin out rapidly.
- Add Liquids Sparingly: If you need to thin your frosting, do so with small additions of cold whipping cream, adding one tablespoon at a time until the perfect consistency is achieved.
Troubleshooting Common Cream Cheese Frosting Issues
How to Make Cream Cheese Frosting Thicker
If your cream cheese frosting turns out too thin, don’t despair! Here are several effective solutions:
- Chill the Frosting: Often, simply refrigerating the frosting for 20-30 minutes can help it firm up enough to be pipeable. This is a temporary fix, but useful if you need to firm it up quickly.
- Add Cornstarch: This is my favorite secret weapon for extra stability. Sift 1/4 cup of cornstarch with your powdered sugar, or add it gradually to already-made frosting (sift it in small amounts and mix on low). Cornstarch absorbs excess moisture and significantly improves the frosting’s body without making it overly sweet.
- Adjust Butter to Cream Cheese Ratio: For a naturally thicker frosting, you can experiment with slightly more butter and less cream cheese. For example, try 10 tablespoons (1/4 cup + 2 tablespoons) of unsalted butter with 6 oz of full-fat cream cheese, while keeping the powdered sugar amount the same.
- Add More Powdered Sugar: This is a classic method, but use it cautiously as it can make your frosting sweeter. Add a quarter cup of sifted powdered sugar at a time, mixing on low until just combined, then check the consistency.
What if My Frosting is Too Thick?
If your frosting is too stiff or hard to spread, you can easily adjust it by adding 1-2 tablespoons of cold whipping cream or milk, one teaspoon at a time, mixing on low speed until it reaches your desired consistency. Be sure to add liquids very slowly to avoid over-thinning.
Why is My Cream Cheese Frosting Lumpy or Grainy?
Lumpy or grainy frosting is usually due to two main reasons:
- Cold Ingredients: If your butter or cream cheese was too cold when you started, it won’t cream smoothly, leading to lumps. Ensure they are at proper room temperature.
- Unsifted Powdered Sugar: Powdered sugar often contains tiny clumps. Sifting is essential to break these down and ensure a uniform, smooth texture.
Storage, Freezing, and Make-Ahead Advice
Should Cream Cheese Frosting Be Refrigerated?
Yes, due to the dairy content, cream cheese frosting generally needs to be refrigerated. It can sit at cool room temperature (below 70°F or 21°C) in an airtight container for up to 8 hours. However, for longer storage or in warmer environments, it should be stored in the refrigerator. Always bring frosted cakes or cupcakes to room temperature for 1-2 hours before serving for the best flavor and texture.
Can You Freeze Cream Cheese Frosting?
Absolutely! Cream cheese frosting freezes beautifully. To freeze, transfer the frosting into a freezer-safe zip-top bag, pressing out as much air as possible before sealing. It can be stored in the freezer for up to 1 month. When you’re ready to use it, thaw the frosting in the refrigerator overnight. Once thawed, bring it to room temperature and re-whip it with an electric mixer until it’s smooth and creamy again. If needed, you can add a tiny splash of whipping cream or a tablespoon of powdered sugar during re-whipping to perfect its consistency.
Delightful Pairings: What to Frost
This versatile cream cheese frosting is incredible on a multitude of desserts. Its tangy sweetness is the perfect complement to rich and spiced cakes, making it a universal favorite. Here are some ideas for what to frost:
- Red Velvet Cupcakes
- Easy Red Velvet Cake
- Banana Cupcakes
- Banana Cake
- Lemon Blueberry Cake
- Carrot Cake
- Pumpkin Spice Cake
- Spice Cupcakes
Or try a delicious variation like this chocolate cream cheese frosting!
Recipe: Classic Cream Cheese Frosting
Ingredients
- 1/2 cup unsalted butter*
- 8 oz full-fat cream cheese**
- 1 teaspoon vanilla extract
- 1/4 teaspoon salt
- 3 cups powdered sugar
- 1/4 cup cornstarch, optional (for extra thick frosting)
- 1-2 tablespoons whipping cream, if needed
Instructions
- In a large bowl, using an electric mixer, beat the unsalted butter until it is very fluffy and light in color, about 2 minutes.
- Add the room temperature cream cheese to the bowl and beat until evenly combined and smooth. Be careful not to overmix.
- Stir in the vanilla extract and salt.
- In a separate bowl, sift the powdered sugar and the optional cornstarch together.
- With the mixer on low speed, gradually add the sifted powdered sugar mixture to the butter and cream cheese mixture, about 1 cup at a time. Mix until just combined after each addition. Scrape down the sides of the bowl as needed.
- Once all the powdered sugar is incorporated and the frosting is thick and creamy, stop mixing immediately to avoid thinning it out.
- If the frosting is too thick, beat in 1-2 tablespoons of cold whipping cream, one tablespoon at a time, until the desired consistency is reached.
- Transfer the frosting to a piping bag for decorating or spread it onto your cooled cakes or cupcakes using an offset spatula.
Notes
- *If using salted butter, omit the 1/4 teaspoon of salt from the recipe.
- **Ensure both butter and cream cheese are at proper room temperature for the best results.
- Frosted cakes and cupcakes can be stored at room temperature in an airtight container for up to 8 hours if your kitchen is cool (below 70°F/21°C). For longer storage, refrigerate them. Remove from the fridge 1-2 hours before serving to allow the frosting to soften.
- This recipe yields enough frosting for:
- 18 generously frosted cupcakes
- 24 cupcakes frosted with a knife
- One 9×13 inch sheet cake
- A 2-layer 8-inch round cake
- A 3-layer 9-inch cake with a thin layer of frosting
With this detailed guide and proven recipe, you now have all the knowledge and tips to create the ultimate cream cheese frosting. Say goodbye to runny, lumpy, or overly sweet frostings and hello to a perfectly fluffy, tangy, and stable topping for all your baking endeavors. Enjoy the process, and most importantly, enjoy the delicious results!