
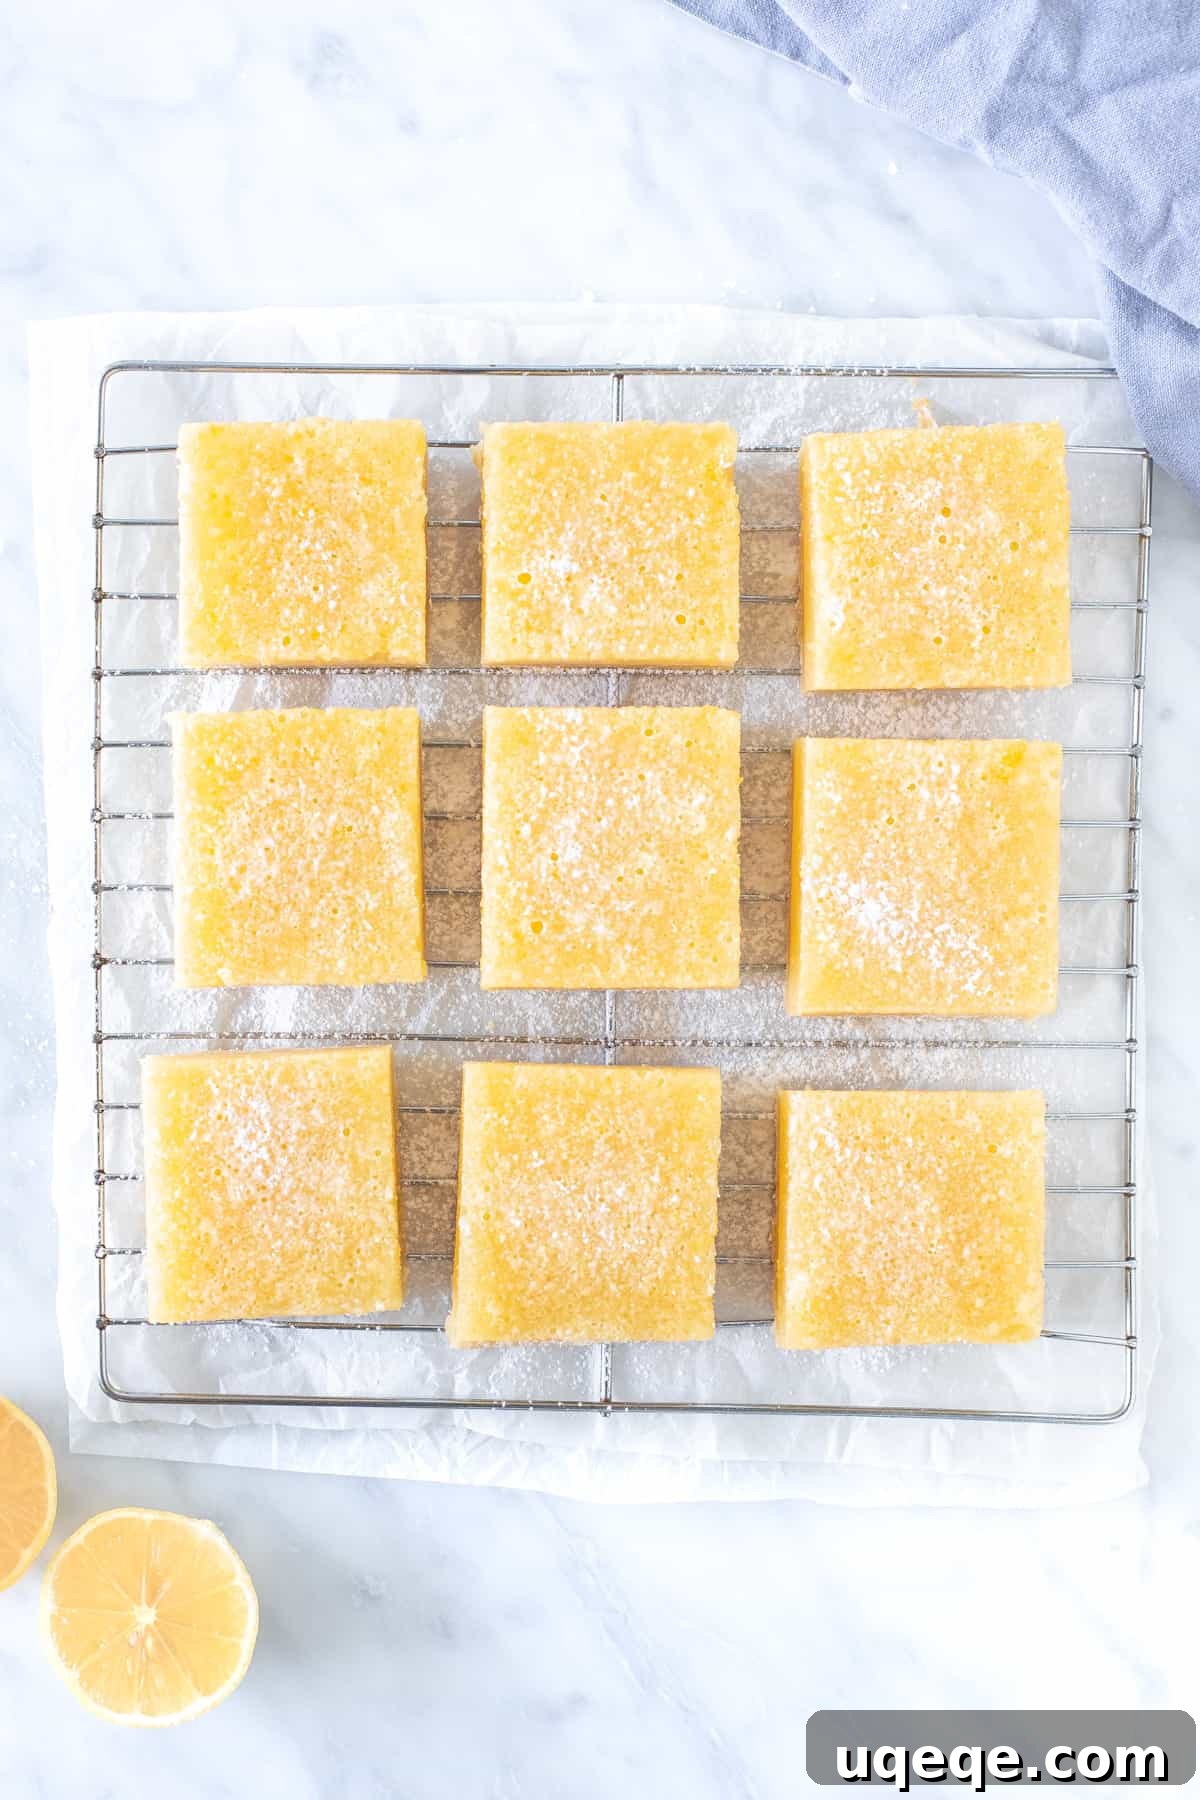
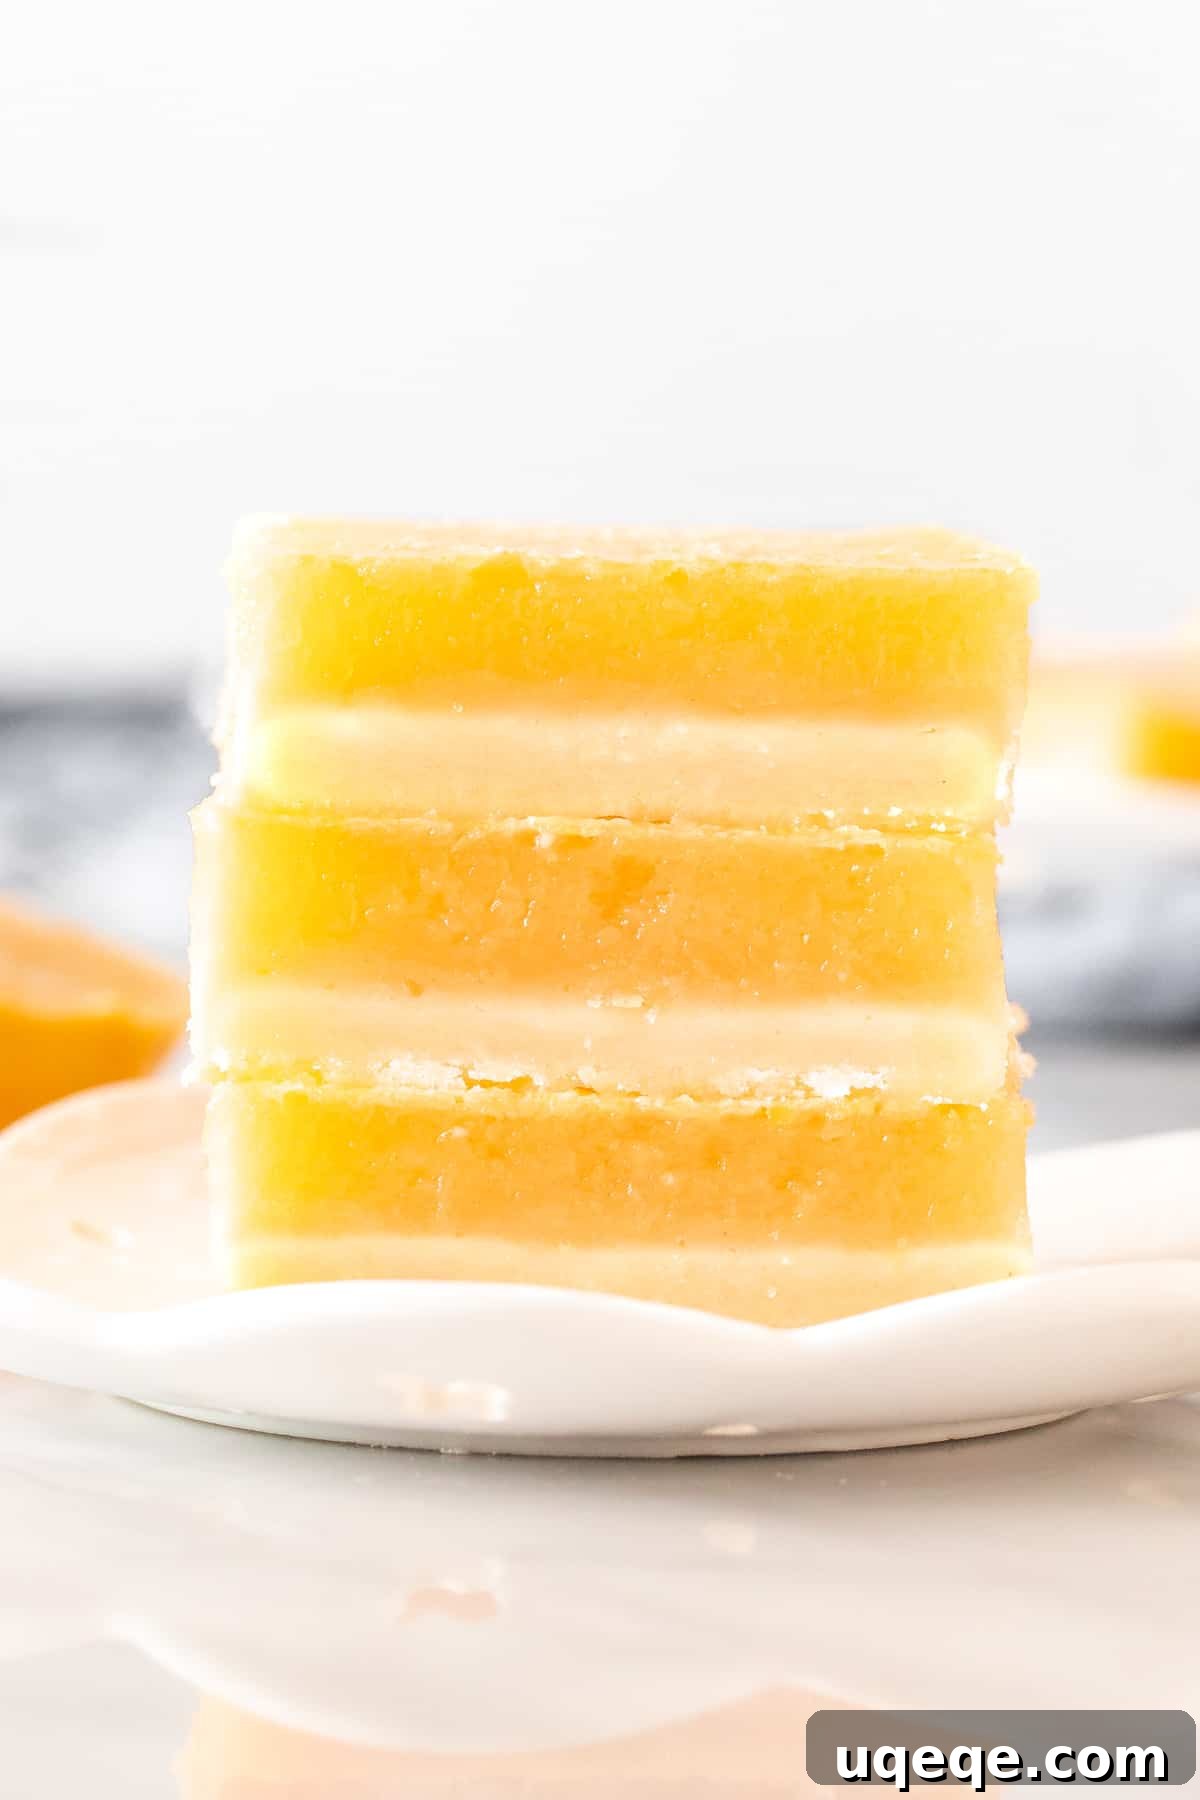
The Best Sweet & Tangy Lemon Bars: An Easy Homemade Recipe
Prepare to fall in love with these quintessential lemon bars, a delightful treat that truly embodies the essence of sunshine in every bite. This recipe yields lemon bars with an irresistible buttery shortbread base, perfectly complemented by a vibrantly sweet and tangy lemon filling. Requiring just seven simple ingredients, these bars not only come together effortlessly but also set beautifully, making them a fantastic choice for any baker looking for a reliable, crowd-pleasing dessert.
While the bright, zesty flavor profile makes them an absolute dream for spring and summer gatherings, lemons are available year-round, meaning these classic lemon bars can bring a burst of freshness to your table at any time. Forget overly sweet or intensely sour lemon desserts; this recipe strikes the ideal balance, ensuring each bite is pure bliss without overwhelming your palate. Every home baker should have this reliable lemon bar recipe in their culinary repertoire!
Why This is The Ultimate Lemon Bar Recipe
After numerous baking trials and taste tests, I’ve refined this recipe to perfection, addressing common pitfalls like overly sweet fillings, insufficient lemon flavor, or layers that refuse to set. This carefully crafted recipe stands out because:
- Perfectly Balanced Sweetness: The lemon layer achieves an exquisite harmony of sweet and tangy, offering a bright lemon flavor without being too puckeringly sour or excessively sugary.
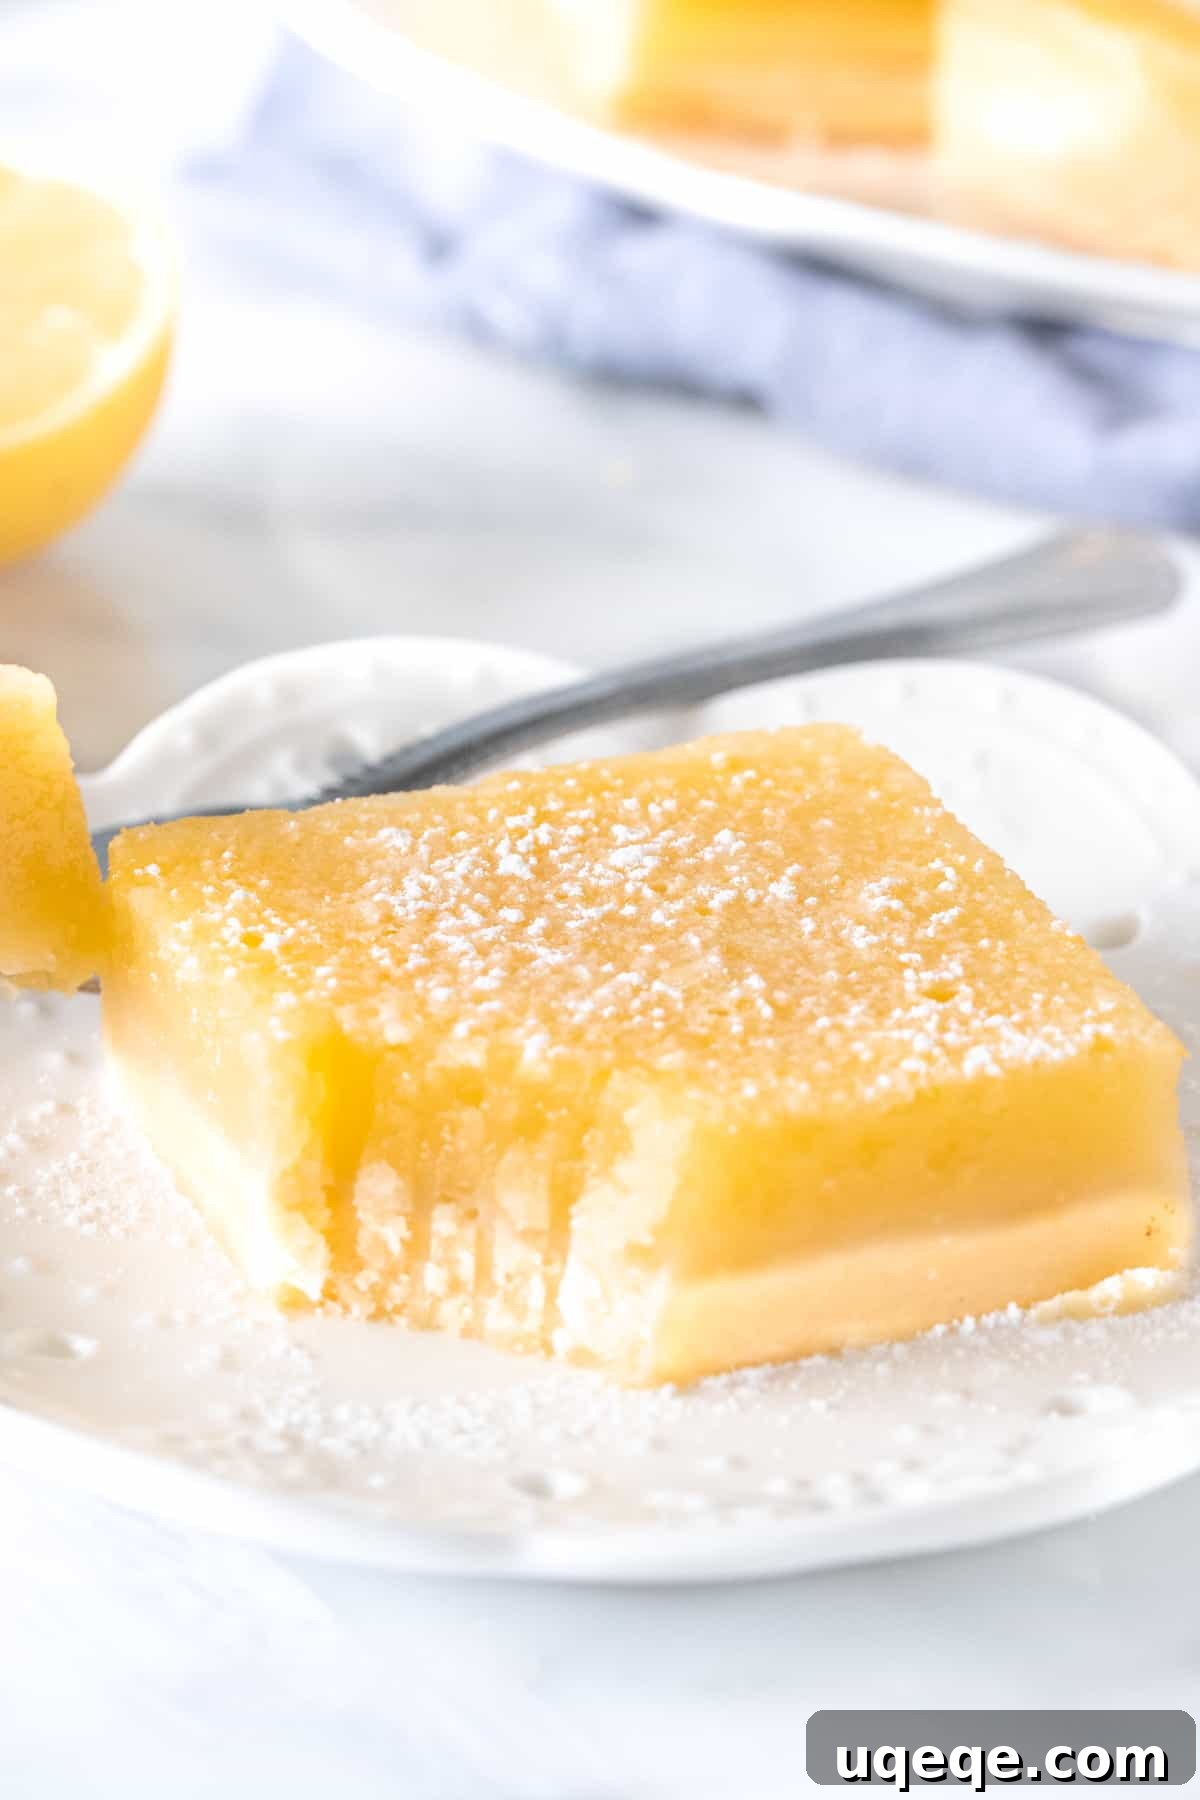
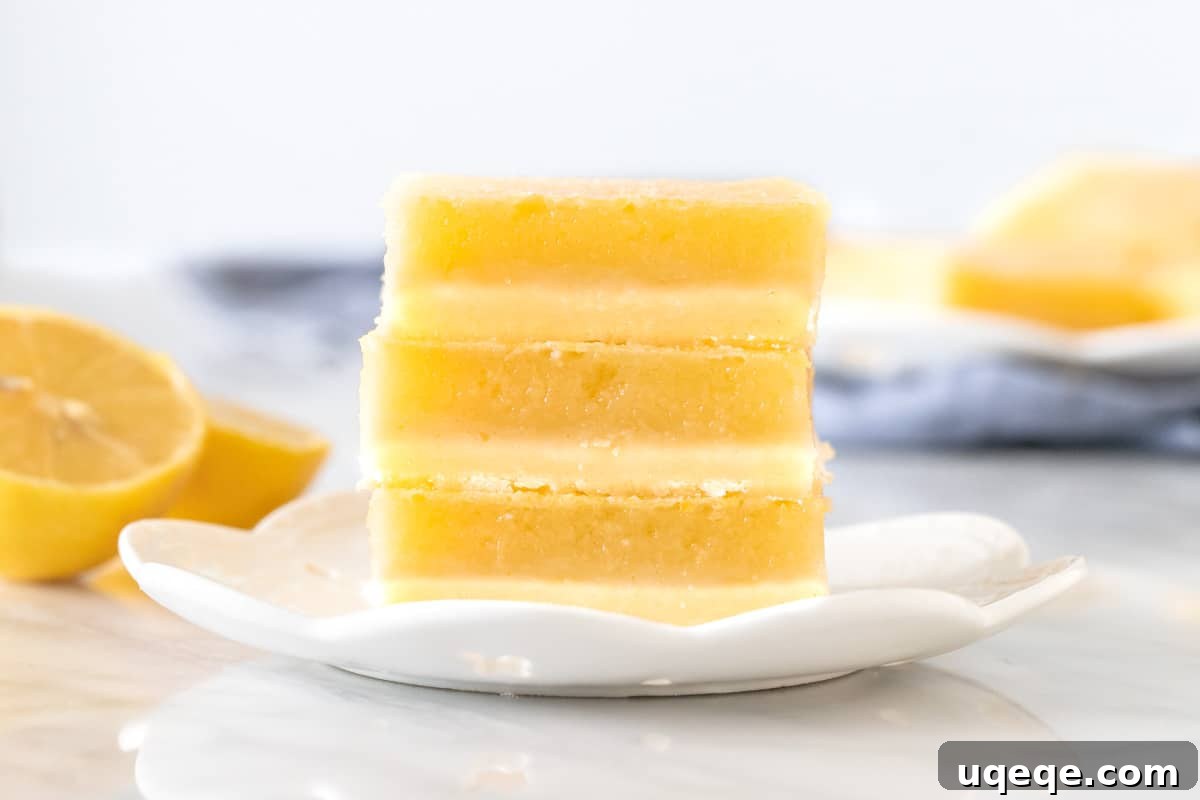
- Sturdy, Buttery Shortbread Base: The crust is generously thick and rich with butter, providing the ideal foundation and a delightful textural contrast to the smooth lemon curd. It’s robust enough to support the filling beautifully and balances its sweetness.
- Flawless Set Every Time: Say goodbye to runny lemon bars! This recipe ensures the lemon layer sets up perfectly, allowing for clean, easy slicing and serving.
- Incredibly Simple Steps: With straightforward instructions and minimal fuss, even novice bakers can achieve spectacular results. No complicated techniques or obscure ingredients required!
- Versatile Delight: While reminiscent of spring, these bars are a year-round pleasure, perfect for holidays, potlucks, or an everyday indulgence.
How to Make These Irresistible Lemon Bars
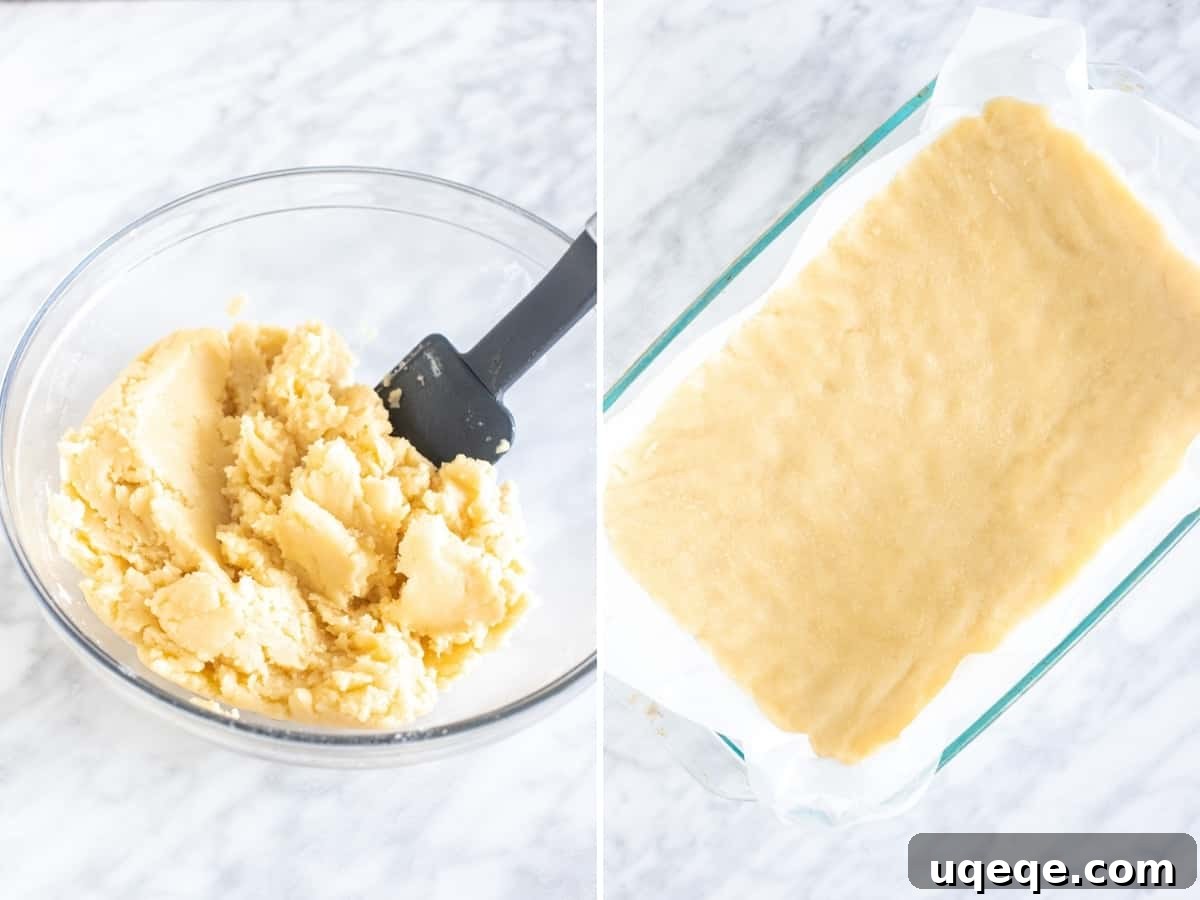
Making these lemon bars is a two-part process, both equally simple. You’ll begin with the shortbread base, which acts as the sturdy, buttery foundation for our bright lemon topping. To create this crust, you’ll first whisk together all-purpose flour, granulated sugar, corn starch (also known as cornflour), and a touch of salt in a large bowl. The corn starch is a subtle but important addition here, contributing to a wonderfully tender and soft shortbread texture, while the salt balances the overall sweetness of the dessert.
Once your dry ingredients are combined, you’ll stir in melted unsalted butter. The mixture will be thick and crumbly, resembling wet sand. Using your hands or the back of a spoon, press this dough firmly and evenly into the bottom of your parchment-lined baking pan. Make sure to press it right up to the edges, creating a slight lip to contain the lemon filling later. This crust then bakes in the oven for about 20-25 minutes, just until it begins to turn a light golden color around the edges and appears set.
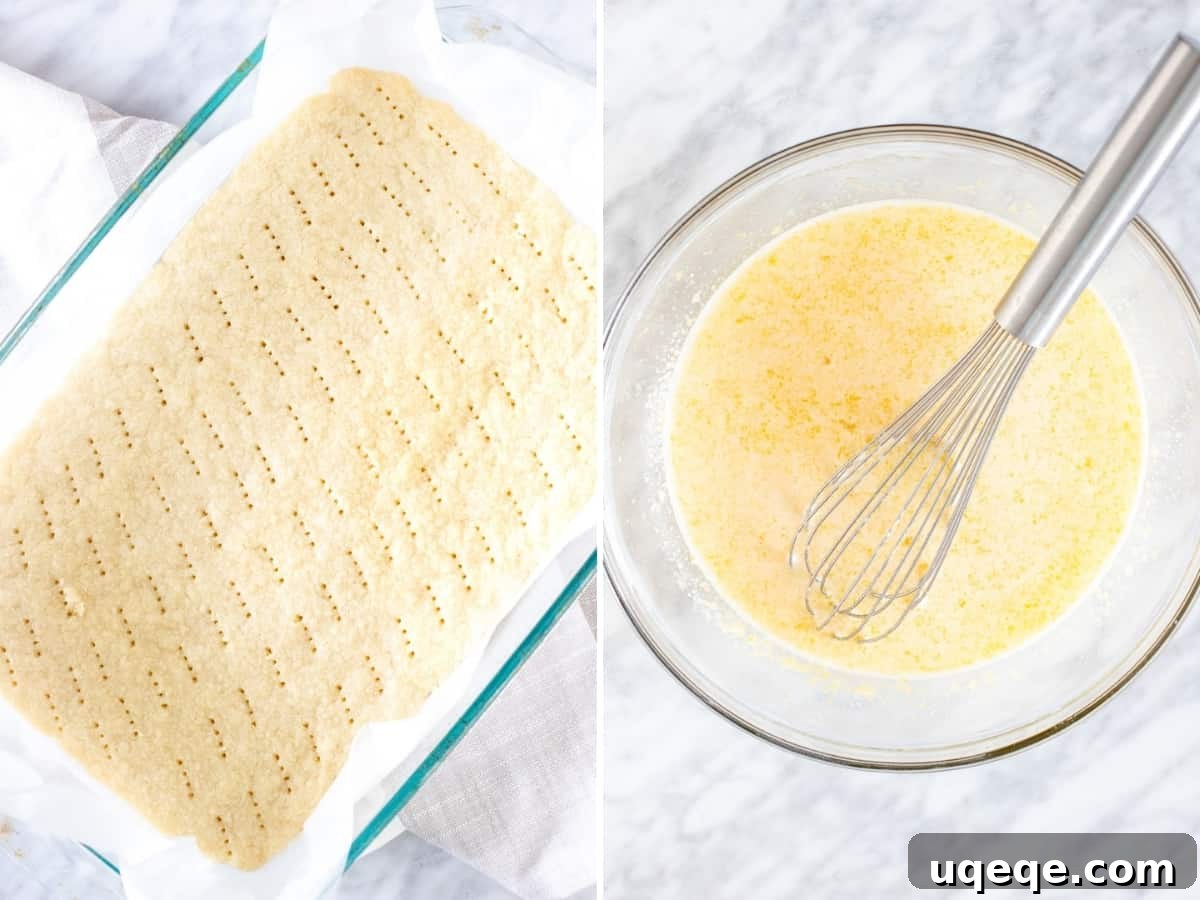
While your buttery shortbread base is par-baking, you’ll swiftly prepare the luscious lemon layer. This vibrant topping is incredibly easy to make: simply whisk together fresh large eggs, granulated sugar, corn starch, and freshly squeezed lemon juice. The corn starch here is key, acting as a powerful thickening agent that ensures your lemon curd sets beautifully without becoming gluey or opaque, as flour might.
Once the shortbread base finishes its initial bake, carefully remove it from the oven (but keep the oven on!). Before pouring the lemon mixture over, gently prick the top of the warm shortbread with the tines of a fork. Don’t press all the way through to the bottom of the pan; just enough to lightly pierce the surface. This crucial step helps the lemon layer adhere properly to the crust, preventing it from seeping underneath and creating a soggy crust.
Finally, pour the smooth lemon liquid evenly over the warm, pricked shortbread base. Return the pan to the oven for another 20-25 minutes. The lemon layer is done when the edges are set and the center no longer wobbles like a liquid when you gently nudge the pan. It will continue to firm up as it cools, so don’t worry if it still seems a little soft in the very center.
A Note on Corn Starch for Perfect Texture
Corn starch is a non-negotiable ingredient in this lemon bar recipe, essential for achieving that beautifully set, silky-smooth lemon layer. Unlike flour, corn starch provides superior thickening power and creates a more transparent, glossy finish, allowing the bright yellow hue of the lemon curd to shine through. It ensures the filling firms up reliably without becoming gummy or cloudy. Some recipes might suggest flour, but corn starch’s ability to thicken liquids more efficiently means you can use less for better results. Do not be tempted to omit it or substitute it with flour!
The Importance of Fresh Lemon Juice
For truly outstanding lemon bars, freshly squeezed lemon juice is paramount. Bottled lemon juice, while convenient, often contains preservatives and lacks the vibrant, complex aroma and balanced acidity of fresh lemons. Its flavor can be noticeably harsher and far too sour for baking delicate desserts like these. To yield the 1 cup of fresh lemon juice required for this recipe, you’ll typically need about 5-6 small lemons or 4-5 medium-to-large lemons. Investing a little time in squeezing fresh juice will elevate your lemon bars from good to absolutely phenomenal.
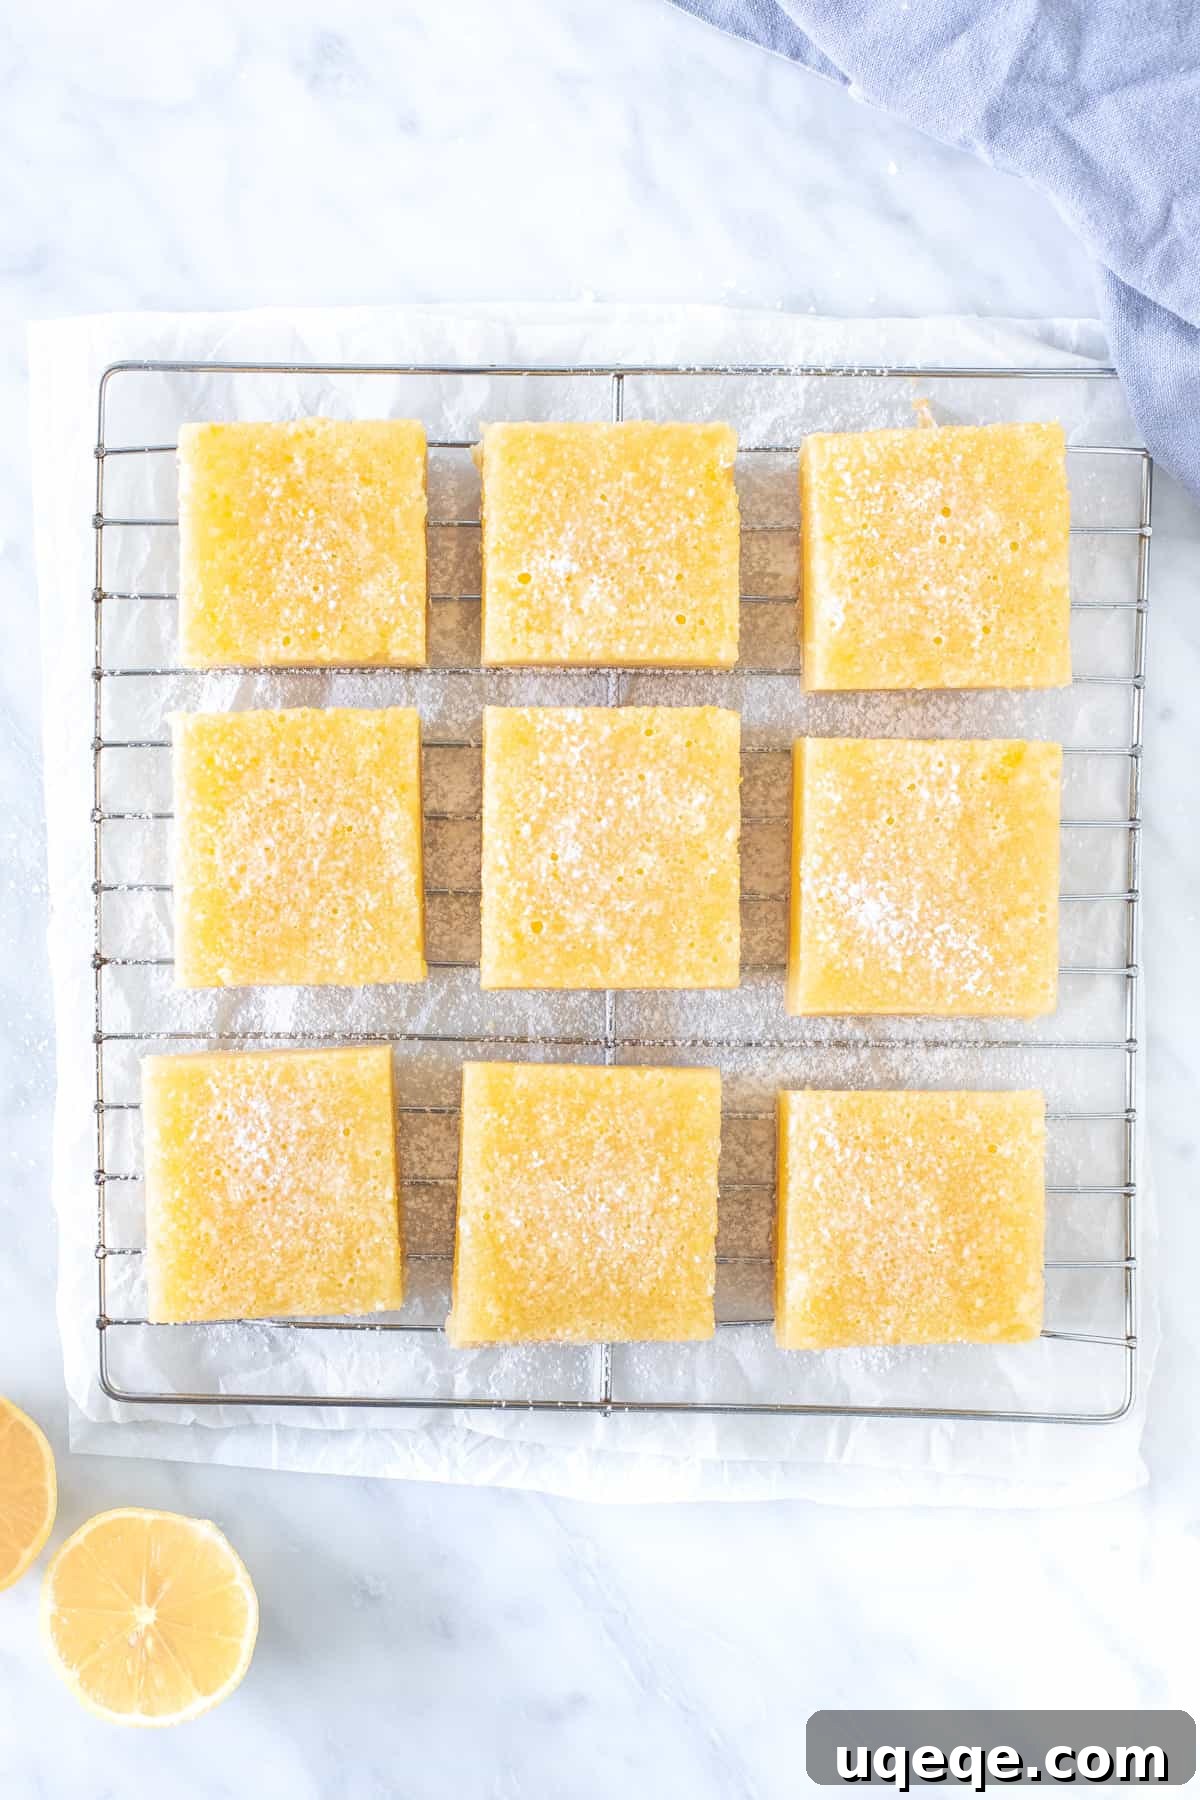
After the bars have baked and cooled completely, a delicate dusting of powdered sugar adds a classic, elegant finish and a subtle touch of extra sweetness. For an even more indulgent treat, consider serving them with a dollop of freshly whipped cream or a few fresh berries. The creamy texture of whipped cream beautifully contrasts with the tartness of the lemon, creating a truly luxurious experience.
Baking Tips & Tricks for Flawless Lemon Bars
Achieving bakery-quality lemon bars at home is easier than you think with these expert tips:
- Always Use Fresh Lemon Juice: As mentioned, this is critical. Bottled lemon juice will result in an inferior, overly sour taste and won’t give you the bright, natural flavor you desire.
- Don’t Skip Pricking the Base: After the initial bake, lightly pricking the shortbread crust with a fork helps the lemon filling “stick” to the base. This prevents the liquid lemon layer from seeping underneath the crust, which can lead to a soggy bottom or separation.
- Know When They’re Done: The lemon layer should appear set around the edges, and if you gently nudge the pan, the center should have only a slight, jiggly movement, not a liquid wobble. Small air bubbles on the surface are perfectly normal. Overbaking can lead to a rubbery texture, so keep an eye on them!
- Cool Completely and Chill: This is arguably the most crucial step for perfectly set, sliceable lemon bars. Allow them to cool at room temperature in the pan for about 1 hour. Then, transfer the pan to the refrigerator for at least 2-3 hours, or even overnight. This extended chilling time allows the corn starch to fully activate and the lemon layer to firm up completely, ensuring clean, sharp slices. Patience is key here!
- Line Your Pan Properly: Use parchment paper with an overhang on two sides. This creates “handles” that make it incredibly easy to lift the entire batch of chilled bars out of the pan before slicing, preventing any damage to the edges.
Frequently Asked Questions About Lemon Bars
Q: Can I use a different size baking pan?
A: Yes, this recipe can be halved and baked in an 8×8 inch (20×20 cm) pan. Adjust the baking times accordingly: the base will need about 20 minutes, and the lemon layer will need approximately 20 minutes as well, or until set.
Q: Why are my lemon bars runny?
A: The most common reason for runny lemon bars is insufficient chilling time. The lemon layer needs ample time in the refrigerator to fully set and firm up. Ensure you chill them for at least 2-3 hours, or preferably overnight. Underbaking the lemon layer can also contribute to a runny consistency; make sure the center has only a slight jiggle when nudged.
Q: How do I get clean slices?
A: To achieve perfectly clean slices, ensure your lemon bars are thoroughly chilled. Use a sharp knife and wipe the blade clean with a damp cloth after each cut to prevent stickiness and drag. Lifting the entire cooled slab out of the pan using the parchment paper overhang before slicing also helps prevent messy edges.
Q: Can I make lemon bars ahead of time?
A: Absolutely! Lemon bars are an excellent make-ahead dessert. They need significant chilling time anyway, so preparing them a day in advance is ideal. Store them in an airtight container in the refrigerator once fully cooled and sliced.
Storage and Freezing Lemon Bars
How to Store Lemon Bars
Once cooled and sliced, store leftover lemon bars in an airtight container in the refrigerator for up to 5 days. The cool environment maintains their firm texture and vibrant flavor. For best results, place parchment paper between layers if stacking to prevent sticking.
How to Freeze Lemon Bars
Lemon bars freeze beautifully, making them perfect for future enjoyment. To freeze, ensure the bars are completely cooled. You can freeze them whole in the slab or pre-cut. If freezing whole, wrap the entire slab tightly in plastic wrap, then a layer of aluminum foil. If freezing pre-cut bars, arrange them in a single layer on a baking sheet and freeze until solid, then transfer to an airtight freezer-safe container or bag, placing parchment paper between layers. They can be frozen for up to 2 months. To thaw, simply transfer them to the refrigerator overnight or for several hours before serving.
More Lemon Recipes to Brighten Your Day
If you adore the zesty goodness of lemons as much as we do, you’ll love exploring these other delightful lemon-infused treats:
- Luscious Lemon Bundt Cake
- Irresistible Lemon Blueberry Cake
- Delightful Lemon Cupcakes
Lemon Bars Recipe
By: Fiona Dowling
These are the perfect lemon bars with a buttery shortbread base and a sweet and tangy lemon layer. The bright lemon flavor tastes like sunshine – making these perfect for spring and summer. They only require 7 simple ingredients and set beautifully.
Prep Time: 30 mins
Cook Time: 45 mins
Cooling & Chilling: 3 hrs
Total Time: 4 hrs 15 mins
Servings: 18 bars
Equipment
- 9×13 inch (23 x 33 cm) baking pan*
Ingredients
Shortbread Base
- 2 1/4 cup all-purpose flour
- 1/2 cup granulated sugar
- 1 tablespoons corn starch
- 1/4 teaspoon salt
- 1 cup unsalted butter, melted
Lemon Layer
- 2 cups granulated sugar
- 1/3 cup corn starch
- 6 large eggs
- 1 cup lemon juice*, freshly squeezed
Instructions
- Preheat the oven to 325°F (160°C). Line a 9×13 inch pan with parchment paper, leaving an overhang around the edges for easy lifting.
Shortbread Base
- In a large bowl, whisk together the flour, sugar, corn starch, and salt until well combined.
- Stir in the melted butter until a thick, crumbly dough forms.
- Press the dough evenly into the bottom of the lined pan, extending a small lip around the edges to create a barrier for the lemon filling.
- Bake in the preheated oven for 20-25 minutes, or until the base appears set and the edges are just beginning to turn golden. While the base bakes, prepare the lemon layer. Remove the pan from the oven but keep the oven turned on.
Lemon Layer
- In a separate bowl, whisk together the sugar and cornstarch to remove any lumps. This helps create a smooth filling.
- Whisk in the eggs, followed by the freshly squeezed lemon juice, mixing until smooth and thoroughly combined.
- When the shortbread base is done baking, remove it from the oven. Gently prick the very top surface of the shortbread with a fork. This helps the lemon layer adhere to the base.
- Pour the lemon filling evenly over the warm, pricked shortbread base. Return the pan to the preheated oven (still at 325°F/160°C) and bake for another 20-25 minutes, or until the top looks set and no longer wobbles like a liquid when the pan is gently nudged.
- Remove the bars from the oven. Cool them in the pan at room temperature for about 1 hour. Then, transfer the pan to the refrigerator to chill for at least 2 hours, or preferably longer, to allow the lemon layer to fully firm up.
- When ready to slice, remove the chilled bars from the fridge. Use the parchment paper overhang from the horizontal sides of the pan to carefully lift the entire slab of lemon bars out of the pan.
- Place the slab on a cutting board and slice into 18 equal bars using a sharp knife. For an optional decorative touch and extra sweetness, sprinkle with powdered sugar just before serving.
Notes
- This recipe can be halved and made in an 8×8 inch (20×20 cm) pan. The bake time will be approximately 20 minutes for the base and about 20 minutes for the lemon layer.
- Store bars in an airtight container in the fridge for up to 5 days. For longer storage, bars can be wrapped tightly and frozen for up to 2 months in a freezer-safe container. Thaw in the fridge before serving.
- Make sure to use freshly squeezed lemon juice – do not use lemon juice from the bottle because it is typically too sour and lacks the fresh flavor. You’ll need about 5-6 small lemons or 4-5 large lemons for 1 cup of lemon juice.
- Nutrition information is an estimate only and based on 1 bar, assuming the pan is sliced into 18 equal pieces.
Nutrition (Estimated per bar)
Calories: 292 kcal,
Carbohydrates: 43g,
Protein: 4g,
Fat: 12g,
Saturated Fat: 7g,
Trans Fat: 1g,
Cholesterol: 89mg,
Sodium: 58mg,
Potassium: 57mg,
Fiber: 1g,
Sugar: 28g,
Vitamin A: 406IU,
Vitamin C: 5mg,
Calcium: 16mg,
Iron: 1mg