
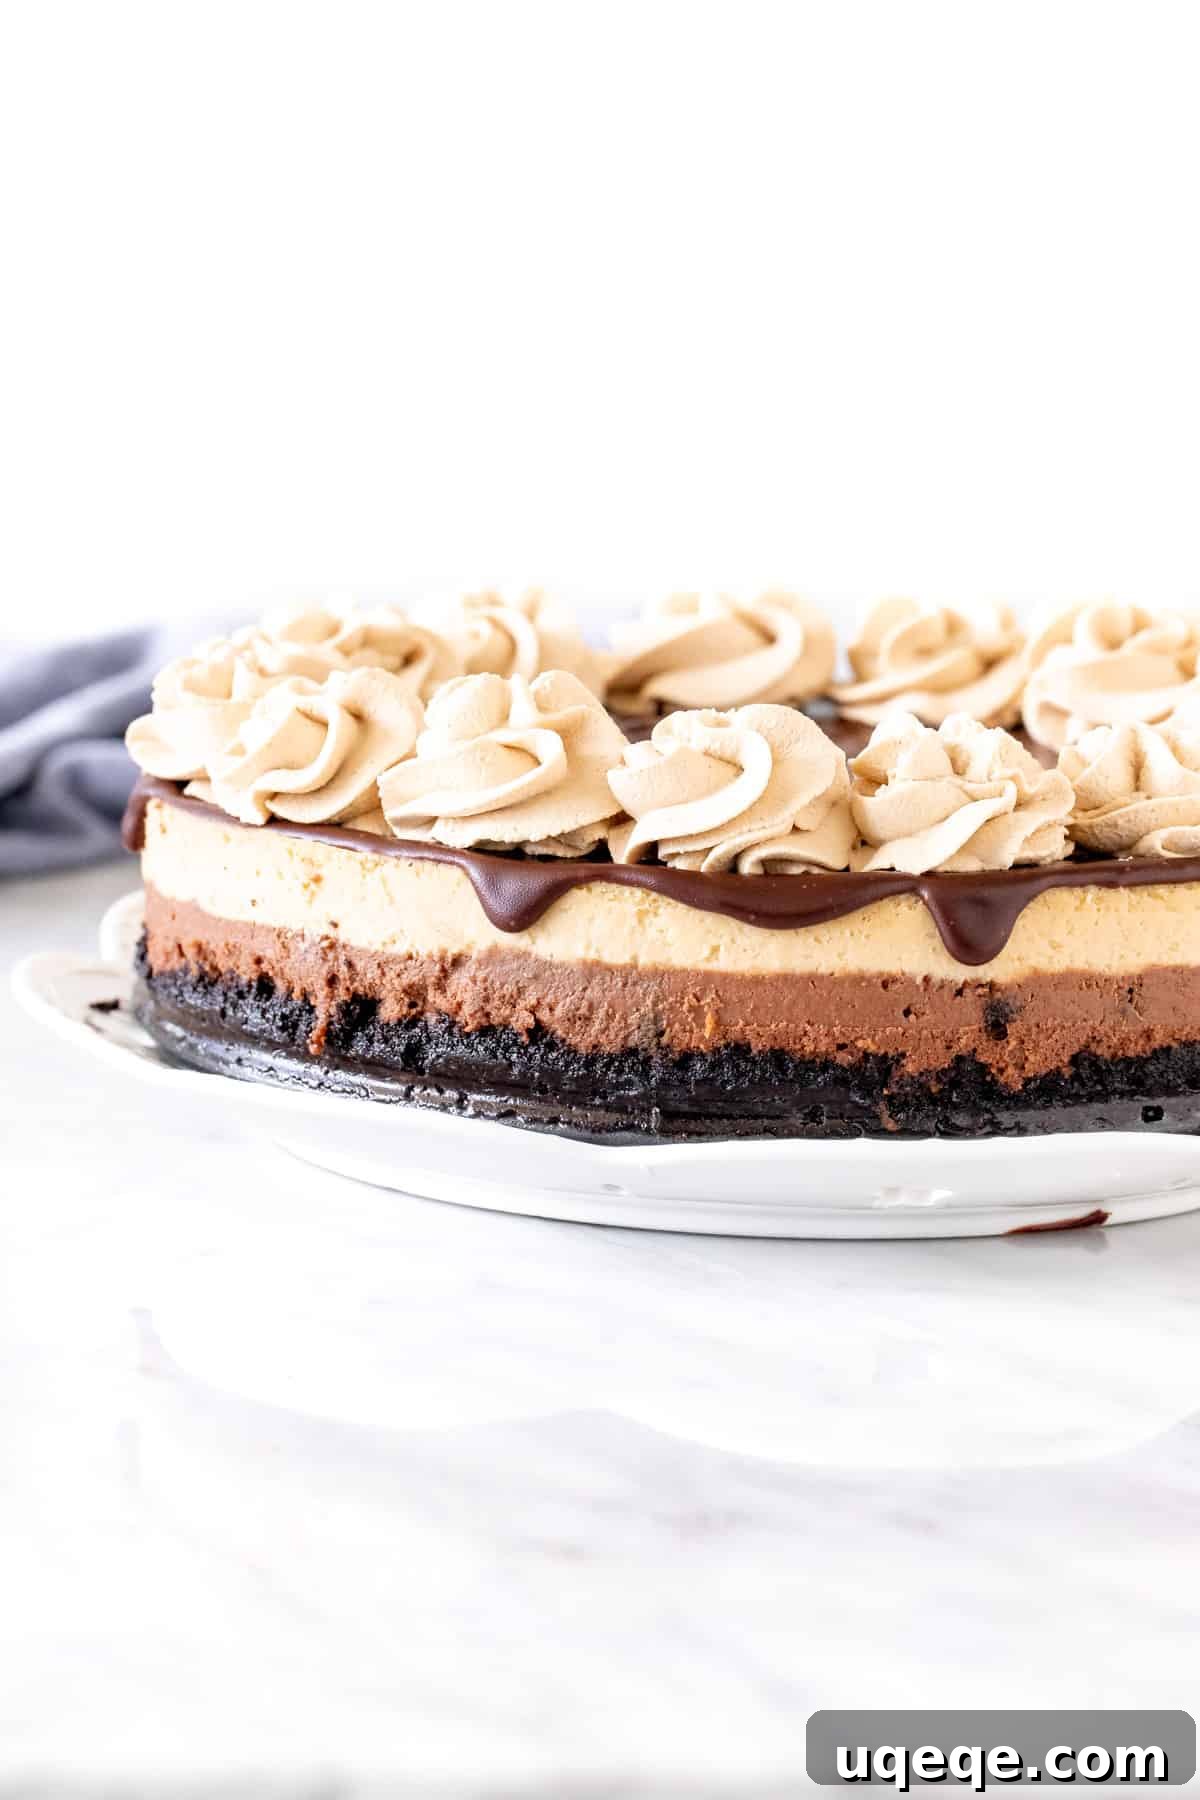
Indulge in the sublime harmony of coffee and chocolate with this exceptionally creamy, layered mocha cheesecake. Featuring a robust Oreo cookie crust, distinct layers of rich chocolate and vibrant coffee cheesecake, and crowned with a silky chocolate ganache and coffee-infused whipped cream, this dessert is a true masterpiece. It’s a decadent, grown-up treat that’s incredibly satisfying without being overly sweet, making it the perfect showstopper for any gathering.
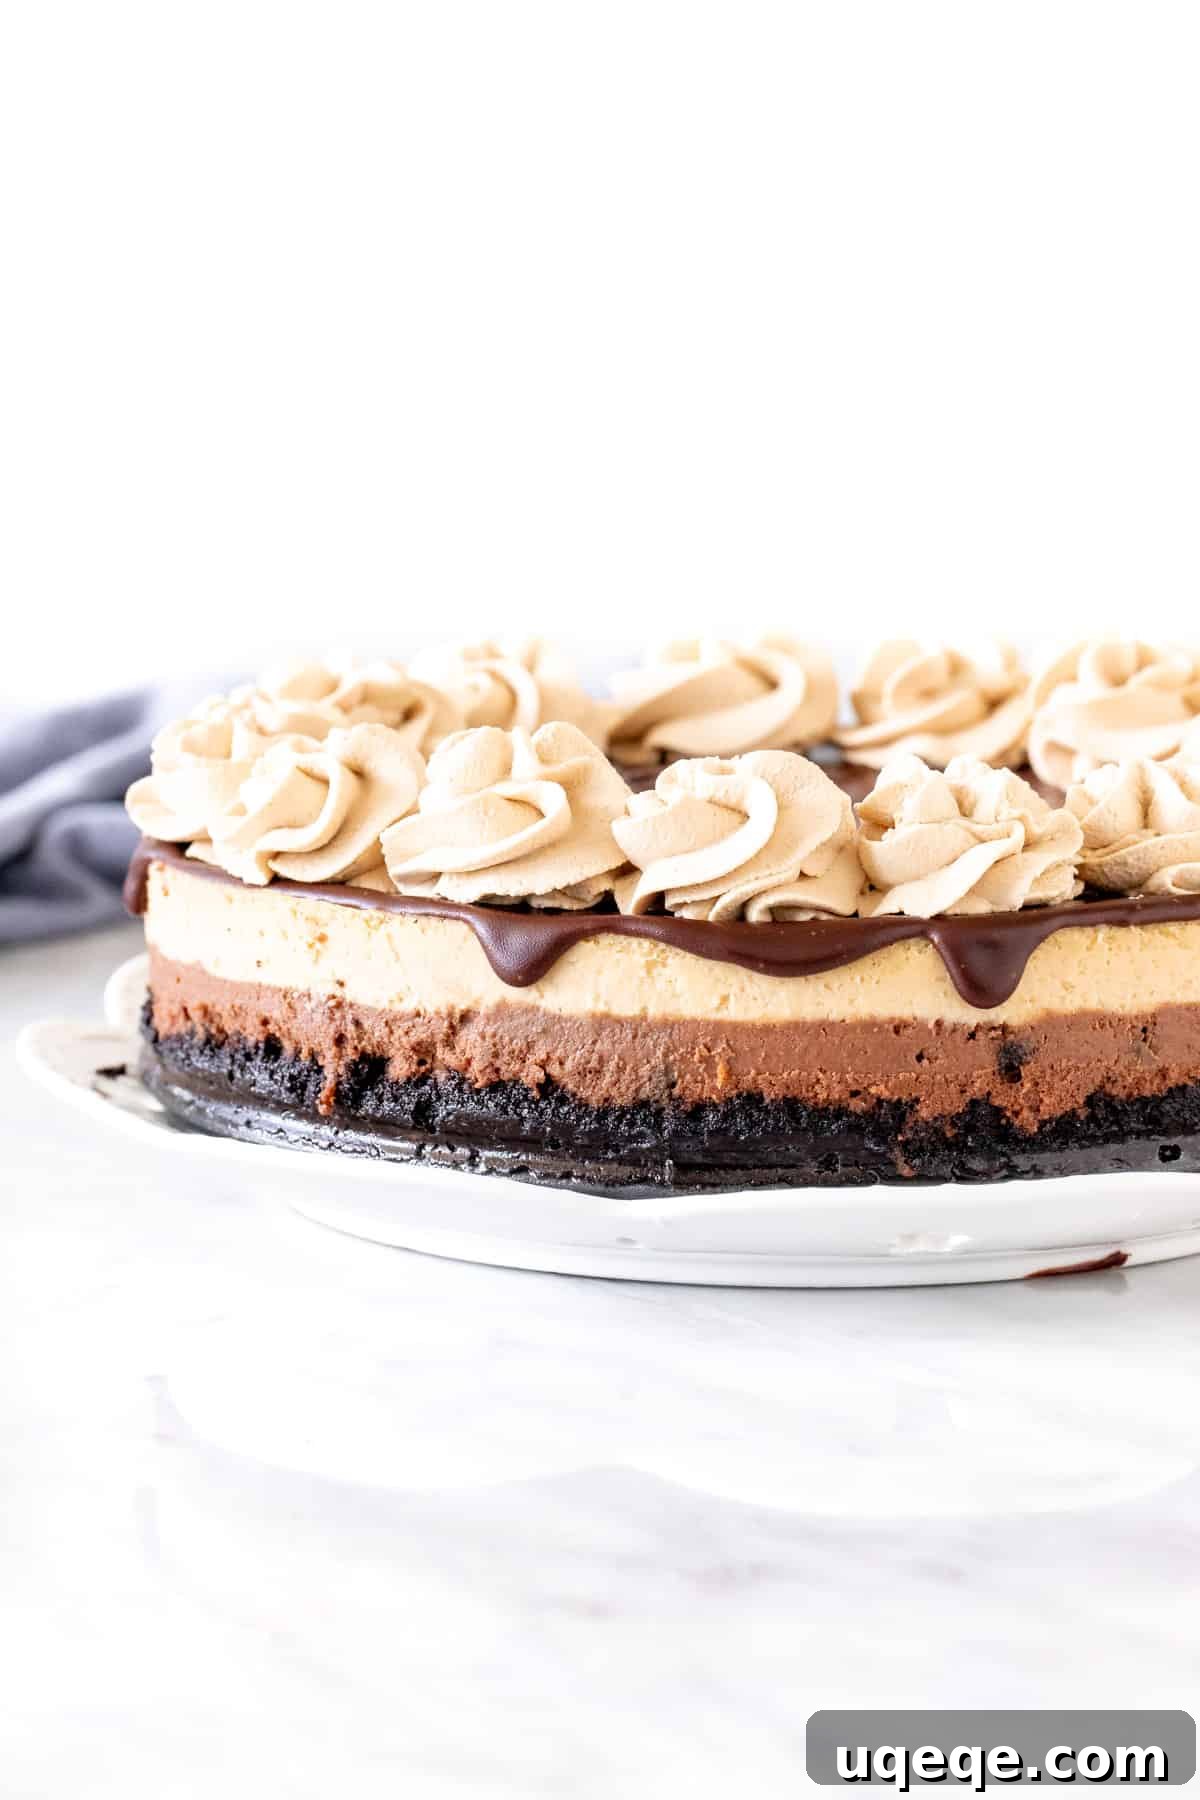
Decadent Layered Mocha Cheesecake: Your Guide to a Coffee & Chocolate Masterpiece
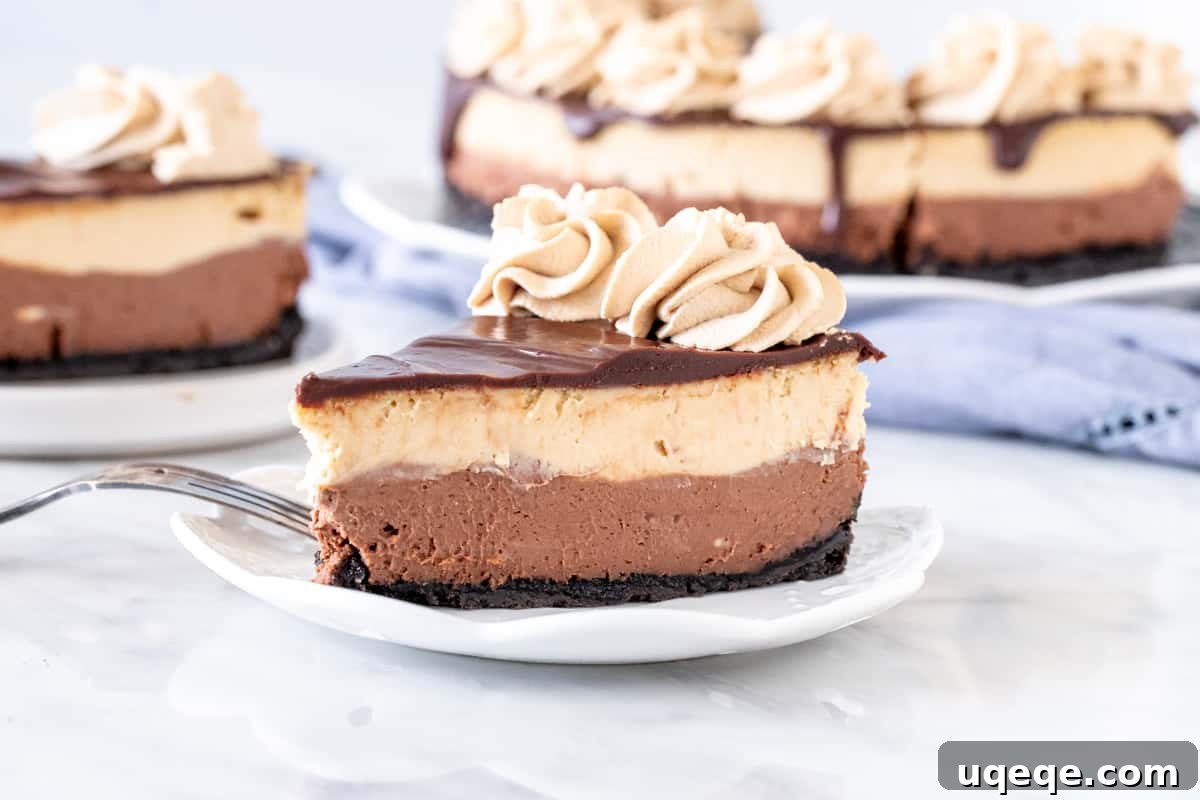
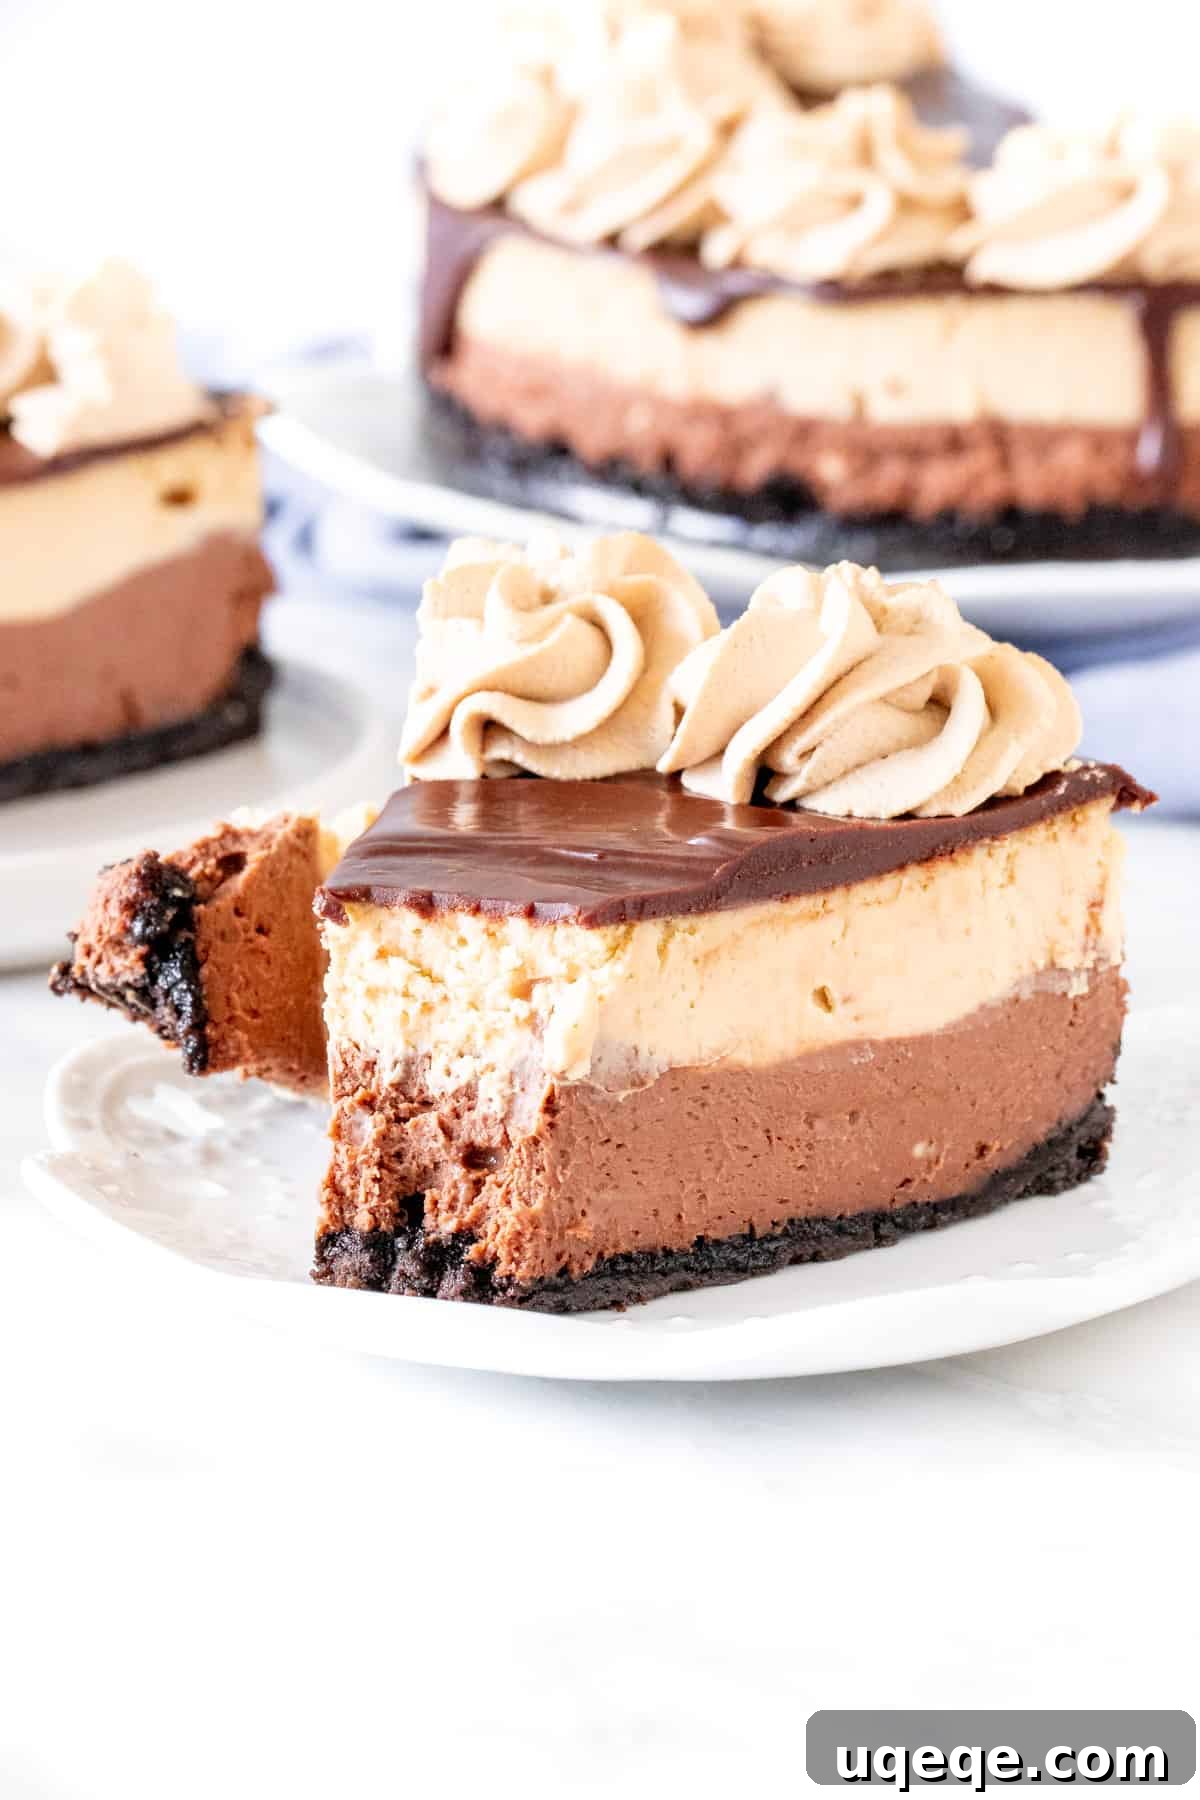
Prepare to be captivated by this layered mocha cheesecake, a dessert that truly embodies the best of both worlds. Every component is designed for maximum flavor and luxurious texture. It begins with a thick, wonderfully crunchy Oreo cookie crust, providing a delightful textural contrast to the smooth fillings. Above this inviting base sits a generous layer of tangy, deep chocolate cheesecake, followed by an equally luscious layer of aromatic coffee cheesecake. The grand finale is a glossy blanket of homemade chocolate ganache and swirls of light, coffee-infused whipped cream, creating a dessert that is not only visually stunning but also exquisitely balanced in taste. The complementary notes of coffee and chocolate create a richness that feels opulent yet never cloying, making it an ideal choice for sophisticated palates.
Crafting the Perfect Mocha Cheesecake Layers
This exceptional recipe is a thoughtful adaptation, drawing inspiration from my beloved chocolate cheesecake recipe and my popular coffee cheesecake recipe. The brilliance lies in combining the best elements of both to create a harmonious blend of flavors.
The Irresistible Oreo Cookie Crust
Every great cheesecake starts with an outstanding crust, and this mocha cheesecake is no exception. We begin with a thick, buttery Oreo cookie crust that provides the perfect foundation. To achieve this, you’ll need to finely crush whole Oreo cookies – both the chocolate wafers and their creamy filling – into fine crumbs. A food processor is ideal for this, ensuring an even consistency, but a freezer bag and a rolling pin work just as well for a more hands-on approach. Once crushed, these crumbs are mixed with melted unsalted butter. The mixture should resemble damp sand, indicating it’s ready to be pressed into the bottom and slightly up the sides of a 9-inch springform pan, forming a slight lip. This lip not only adds to the aesthetic appeal but also helps contain the creamy filling. The crust is then pre-baked for about 8-10 minutes, a crucial step that ensures it’s beautifully golden and wonderfully crunchy, providing a delightful textural contrast to the smooth cheesecake filling.
Preparing the Signature Dual Cheesecake Batter
One of the ingenious aspects of this recipe is its streamlined approach to creating two distinct cheesecake layers from a single base batter. This saves significant time and effort without compromising on flavor or texture. You’ll start by preparing a foundational cheesecake batter, combining softened full-fat cream cheese with granulated sugar until the mixture is incredibly smooth and free of any lumps. Next, eggs are incorporated one at a time, with gentle mixing and frequent scraping of the bowl to ensure everything is evenly combined. The key here is not to overmix, as excessive air can lead to cracks in the finished cheesecake.
Once the basic batter is ready, it’s divided precisely in half. One half will be transformed into the decadent chocolate layer, while the other will become the aromatic coffee layer. For the chocolate layer, finely chopped dark chocolate, melted into a small amount of hot whipping cream, is gently folded into one portion of the batter. This creates a rich, intense chocolate flavor and a slightly denser consistency. For the coffee layer, instant coffee powder is dissolved into the remaining hot whipping cream and then carefully whisked into the second portion of the batter, infusing it with a robust coffee essence.
The assembly is straightforward yet crucial for achieving distinct layers. The denser chocolate cheesecake batter is first poured evenly over the pre-baked Oreo crust. Then, with careful precision, the slightly lighter coffee cheesecake batter is gently spooned on top of the chocolate layer, creating two beautifully separated, complementary layers. This elegant combination is then ready for its careful baking process.
Mastering the Water Bath Technique for Creamy Cheesecake
Baking this mocha cheesecake in a water bath, also known as a bain-marie, is an essential technique for achieving its signature incredibly creamy texture and preventing unsightly cracks. This method creates a gentle, moist, and consistent heat environment around the cheesecake, which is crucial for its delicate structure. Here’s a detailed breakdown of how to properly set up and use a water bath:
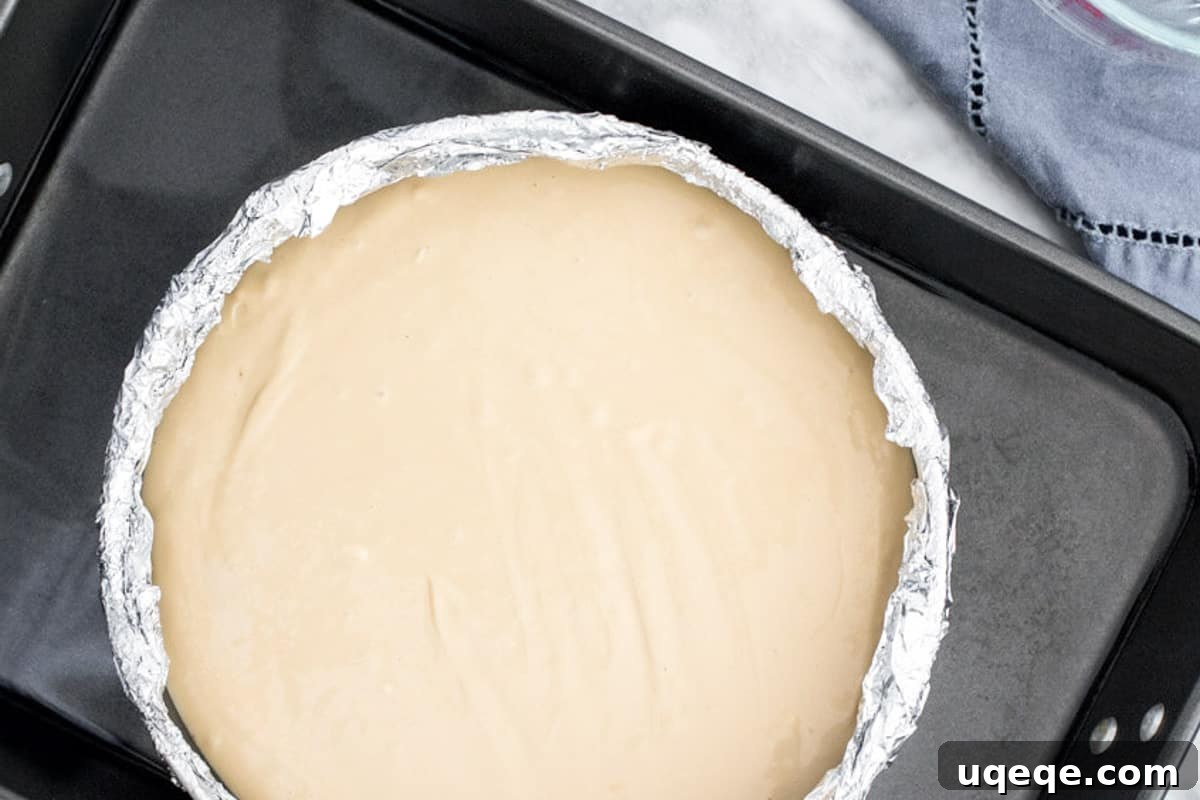
- Pan Preparation: Before you even start making the crust, thoroughly wrap the outside of your 9-inch (23 cm) springform pan with heavy-duty aluminum foil. It’s critical to wrap it at least three to four times, ensuring that all seams are completely covered. This meticulous wrapping prevents any water from seeping into the pan during baking, which could ruin your crust and cheesecake. The crust will be baked while the pan is wrapped.
- Roasting Pan Setup: Once the crust is baked and you’re ready to add the cheesecake batter, place the foil-wrapped springform pan (still wrapped!) directly in the center of a larger roasting pan. The roasting pan needs to be substantial enough to comfortably hold the springform pan with some clearance around the sides.
- Adding the Batter: Pour the prepared chocolate cheesecake batter over the cooled crust first, smoothing it gently. Then, very carefully spoon the coffee cheesecake batter evenly over the chocolate layer, maintaining clear separation.
- The Boiling Water: This is where the “water bath” comes in. With the springform pan safely nestled in the roasting pan, carefully pour about 1 inch (approximately 2.5 cm) of *boiling* water into the roasting pan. The boiling water ensures that the water bath immediately begins to create steam and maintain a stable temperature. Be careful not to splash water into the cheesecake batter itself.
- Baking: The entire assembly – the roasting pan containing the springform pan with the cheesecake and the hot water – then goes into the preheated oven to bake. The steam from the water bath surrounds the cheesecake, insulating it from direct oven heat, promoting even cooking, and infusing moisture, resulting in that perfectly smooth, crack-free, and incredibly creamy texture we all desire in a cheesecake.
Essential Baking Tips for Cheesecake Perfection
Achieving cheesecake perfection is within reach with a few key considerations. These tips will help ensure your mocha cheesecake turns out flawlessly every time:
- Make sure to use **full-fat, brick-style cream cheese**. This is non-negotiable for the proper texture and richness of your cheesecake. Low-fat, spreadable, or whipped cream cheese varieties contain too much water and emulsifiers, which will result in a grainy, soupy, or runny cheesecake.
- **Room temperature ingredients** are absolutely imperative for making cheesecake. Take your cream cheese and eggs out of the fridge at least 30 minutes, and ideally an hour, before you plan to start mixing the batter. Room temperature ingredients emulsify much better, combining smoothly and preventing lumps in your batter, which in turn leads to a silkier, more uniform cheesecake texture. Cold ingredients, especially cream cheese, will result in a lumpy batter and a less desirable final product.
- The **chocolate cheesecake layer must always go on the bottom**. This isn’t just for aesthetic reasons; the chocolate batter is inherently thicker and slightly denser than the coffee layer due to the melted chocolate. Placing the denser batter on the bottom provides a stable foundation and prevents the layers from mixing or the coffee layer from sinking during baking.
- **Cooling and chilling are critical stages** for cheesecake. After baking, the cheesecake must cool *slowly* in the turned-off oven (with the door slightly ajar) and then at room temperature. This gradual cooling process prevents drastic temperature changes that can lead to cracks. Once cooled, it needs to chill in the fridge for a minimum of 6 hours, or preferably overnight. This chilling time is essential for the cheesecake to fully set, firm up, and for the flavors to meld and deepen, resulting in that perfect, sliceable consistency. Plan to make your cheesecake the day before you intend to serve it for the best results. You can add the ganache topping any time on the serving day, then pop it back in the fridge to set.
Final Touches: Ganache, Whipped Cream & Serving
No mocha cheesecake would be complete without its luxurious toppings. The rich chocolate ganache and light coffee whipped cream are not just garnishes; they are integral parts of the flavor profile, adding layers of indulgence that elevate this dessert to truly gourmet status.
Creating Silky Chocolate Ganache
Chocolate ganache is surprisingly simple to make but delivers immense impact. For this cheesecake, you’ll need finely chopped dark chocolate (50-70% cocoa for a balanced flavor, but semi-sweet works beautifully too) and whipping cream. Heat the cream until it’s just about to boil, then pour it over the chopped chocolate. Let it sit undisturbed for a few minutes; this allows the hot cream to melt the chocolate gently. Then, whisk until the mixture is completely smooth and glossy. If any chocolate pieces remain, a quick 30-second burst in the microwave on medium power can help, followed by more whisking. Once ready, pour this luscious ganache over the chilled cheesecake. A flat knife or offset spatula can help spread it evenly to the edges, creating a perfect, glistening top layer that sets beautifully in the fridge.
Whipping Up Coffee-Infused Cream
The coffee whipped cream adds a delicate yet distinctly aromatic finish. For this, you’ll combine cold whipping cream with instant coffee powder. As you beat the mixture, the coffee powder will dissolve and infuse the cream with a wonderful mocha aroma and subtle bitterness that perfectly complements the sweetness of the cheesecake. Whip until stiff peaks form – the cream should hold its shape firmly. Transfer this airy cream to a piping bag fitted with your favorite tip (a Wilton 1M creates beautiful rosettes) and pipe elegant swirls or dollops around the edges of the cheesecake. This not only adds visual appeal but also another layer of coffee flavor.
Slicing and Presentation
For the most elegant presentation, ensure your cheesecake is thoroughly chilled before slicing. Use a thin, sharp knife (not a serrated or table knife) to cut through the layers and the firm Oreo crust. For perfectly clean slices, wipe the knife clean with a damp cloth after each cut. This prevents the layers from smudging and keeps each slice looking pristine. Serve chilled, perhaps with an extra sprinkle of cocoa powder or a few chocolate shavings, for a truly unforgettable dessert experience. This mocha cheesecake is inherently rich, so smaller slices are often preferred, allowing everyone to savor its complex flavors without feeling overwhelmed. It’s an ideal dessert for dinner parties, holidays, or any occasion that calls for something truly special.
Love cheesecake? Then be sure to try these other fantastic recipes:
- Classic New York Cheesecake
- No-Bake Chocolate Cheesecake
- Chocolate Chip Cheesecake
- Chocolate Cheesecake Bars
- Strawberry Cheesecake
Mocha Cheesecake
By: Fiona Dowling
This mocha cheesecake is extremely creamy with layers of chocolate and coffee cheesecake. Decadent, rich, and not too sweet – it’s the perfect grown-up cheesecake recipe.
Prep: 1 hr
Cook: 55 mins
Cooling & Chilling: 7 hrs
Total: 8 hrs 55 mins
Servings: 12 pieces
Rate Recipe
Print Recipe
Equipment
- 9-inch (23 cm) springform pan
- Large roasting pan (big enough for the springform pan to fit inside)
Ingredients
Oreo Crust
- 26 Oreo cookies
- 1/3 cup unsalted butter, melted
Cheesecake
- 5 ounces dark chocolate, 50-70%
- 1 cup whipping cream
- 1 1/2 teaspoons instant coffee powder
- 24 ounces full-fat cream cheese, room temperature
- 1 1/4 cup granulated sugar
- 1 tablespoon cornstarch
- 4 large eggs, room temperature
Chocolate Ganache
- 4 ounces dark chocolate, 50-70%, semi-sweet works too
- 1/2 cup whipping cream
Coffee Whipped Cream
- 1/2 cup whipping cream
- 1 teaspoon instant coffee powder
Instructions
- Preheat the oven to 350°F (180°C or 160°C in a fan-forced oven).
- Wrap the outside of a 9-inch (23-cm) springform pan with tin foil. Wrap the pan at least 3-4 times so that the bottom and sides are well covered, and all the seams are sealed to prevent leaks.
Oreo Crust
- Crush the Oreos (wafers and filling) in a food processor until fine crumbs. Alternatively, place them in a freezer bag and bash with a rolling pin.
- Mix the crushed cookies with the melted butter until well combined.
- Press the mixture evenly into the bottom of the prepared springform pan, extending slightly up the sides to create a small lip around the edge.
- Bake the crust in the preheated oven for 8-10 minutes. Remove from the oven, but leave the oven turned on.
Cheesecake Batter Preparation
- Finely chop 5 ounces of dark chocolate and place it in a heatproof bowl.
- Heat 1 cup of whipping cream until it is almost boiling.
- Pour 1/2 cup of the hot cream over the chopped chocolate. Let it sit undisturbed for 2-3 minutes to allow the chocolate to melt, then whisk until the mixture is smooth. If necessary, microwave on medium power for 30-second intervals, whisking in between, until completely smooth. Set aside.
- Whisk the 1 1/2 teaspoons of instant coffee powder into the remaining 1/2 cup of hot whipping cream until fully dissolved. Set aside.
- In a very large bowl, using an electric mixer, beat the room temperature cream cheese until it is smooth and creamy (this takes about 2 minutes).
- Add the granulated sugar and cornstarch to the cream cheese, and beat until just combined. Turn off the mixer and scrape down the sides of the bowl thoroughly to ensure there are no lumps.
- Beat in the 4 large eggs one at a time. After each egg, turn off the mixer and scrape down the sides of the bowl. Mix only until the egg yolk and white are just incorporated; avoid overmixing.
- Divide the cheesecake batter evenly into two separate bowls.
- Whisk the melted chocolate mixture (from step 9) into one half of the batter.
- Whisk the instant coffee powder dissolved in cream (from step 10) into the second bowl of batter.
Baking & Cooling
- Place the foil-wrapped springform pan (with the baked crust) in the middle of the large roasting pan.
- Carefully pour the chocolate cheesecake batter over the crust and gently smooth the top with an offset spatula.
- Very carefully spoon the coffee cheesecake batter on top of the chocolate layer, spreading it gently and evenly to ensure distinct layers.
- Pour about 1 inch (2.5 cm) of boiling water into the roasting pan, being careful not to get any water into the cheesecake.
- Place the large roasting pan (with the cheesecake inside) into the preheated oven. Bake for 50-65 minutes, or until the edges of the cheesecake appear set but the center still wobbles slightly like firm pudding or Jell-O when you gently nudge the pan.
- Carefully remove the roasting pan from the oven. Let the cheesecake cool in the water bath until it reaches room temperature.
- Once at room temperature, remove the springform pan from the roasting pan. Cover the cheesecake tightly with aluminum foil and place it in the fridge to chill for a minimum of 6 hours, or ideally overnight, to allow it to fully set and for flavors to develop.
Ganache, Whipped Cream & Serving
- After the cheesecake has chilled sufficiently, remove it from the fridge. Run a thin, sharp knife around the outer edge of the cheesecake before unclamping and removing the springform pan’s outer ring. If there’s any condensation on the surface, gently blot it with a paper towel.
- For the ganache, finely chop 4 ounces of dark chocolate (50-70% or semi-sweet) and place in a heatproof bowl.
- Heat 1/2 cup of whipping cream until it is almost boiling. Pour the hot cream over the chocolate. Let it sit for 2-3 minutes, then whisk until smooth and glossy.
- Pour the prepared ganache over the top of the chilled cheesecake. Use a flat knife or offset spatula to spread it evenly to the edges, creating a beautiful, smooth topping. Return the cheesecake to the fridge to allow the ganache to firm up, about 30 minutes.
- For the coffee whipped cream, combine 1/2 cup of cold whipping cream and 1 teaspoon of instant coffee powder in a chilled bowl. Beat with an electric mixer until stiff peaks form. The instant coffee powder will dissolve as you whip the cream.
- Transfer the whipped cream to a piping bag fitted with your desired piping tip (a Wilton 1M is recommended for rosettes). Pipe decorative rosettes or swirls around the edges of the cheesecake.
- To serve, slice the cheesecake using a sharp, thin knife (not a table knife). Be sure to cut all the way through the firm Oreo crust. For the cleanest cuts, wipe the knife clean with a damp cloth after each slice.
Notes
- Servings: This rich cheesecake will generously serve 12-15 pieces. Due to its decadent nature, a smaller slice is often very satisfying.
- Pan Sizes: While this recipe is designed for a 9-inch springform pan, it can also be made in a 10-inch springform pan. If using a 10-inch pan, the crust will be slightly thinner (and may not form a distinct lip), and the bake time will be closer to 35-45 minutes. There is too much batter for an 8-inch pan.
- Cream Cheese: It’s crucial to use full-fat, brick-style cream cheese. Avoid any products labeled “low fat,” “low calorie,” or cream cheese that comes in a tub, as their different compositions will negatively affect the texture.
- Room Temperature Ingredients: For a smooth, lump-free batter, ensure both cream cheese and eggs are at room temperature before you begin. Take them out of the fridge at least 30 minutes to an hour prior to starting the crust.
- Storage: Store any leftover mocha cheesecake covered tightly in the fridge (or in an airtight container) for up to 5 days.
- Nutrition: The nutrition information provided is an estimate only. It is based on 1 slice, including the ganache and whipped cream topping, assuming the cheesecake is sliced into 12 equal-sized pieces. Individual results may vary.
Nutrition
Calories: 733kcal, Carbohydrates: 53g, Protein: 9g, Fat: 55g, Saturated Fat: 31g, Polyunsaturated Fat: 3g, Monounsaturated Fat: 16g, Trans Fat: 1g, Cholesterol: 193mg, Sodium: 346mg, Potassium: 348mg, Fiber: 3g, Sugar: 38g, Vitamin A: 1601IU, Vitamin C: 1mg, Calcium: 114mg, Iron: 5mg
Like this recipe? We’d love to hear from you! Please take a moment to rate and comment below to share your experience.