
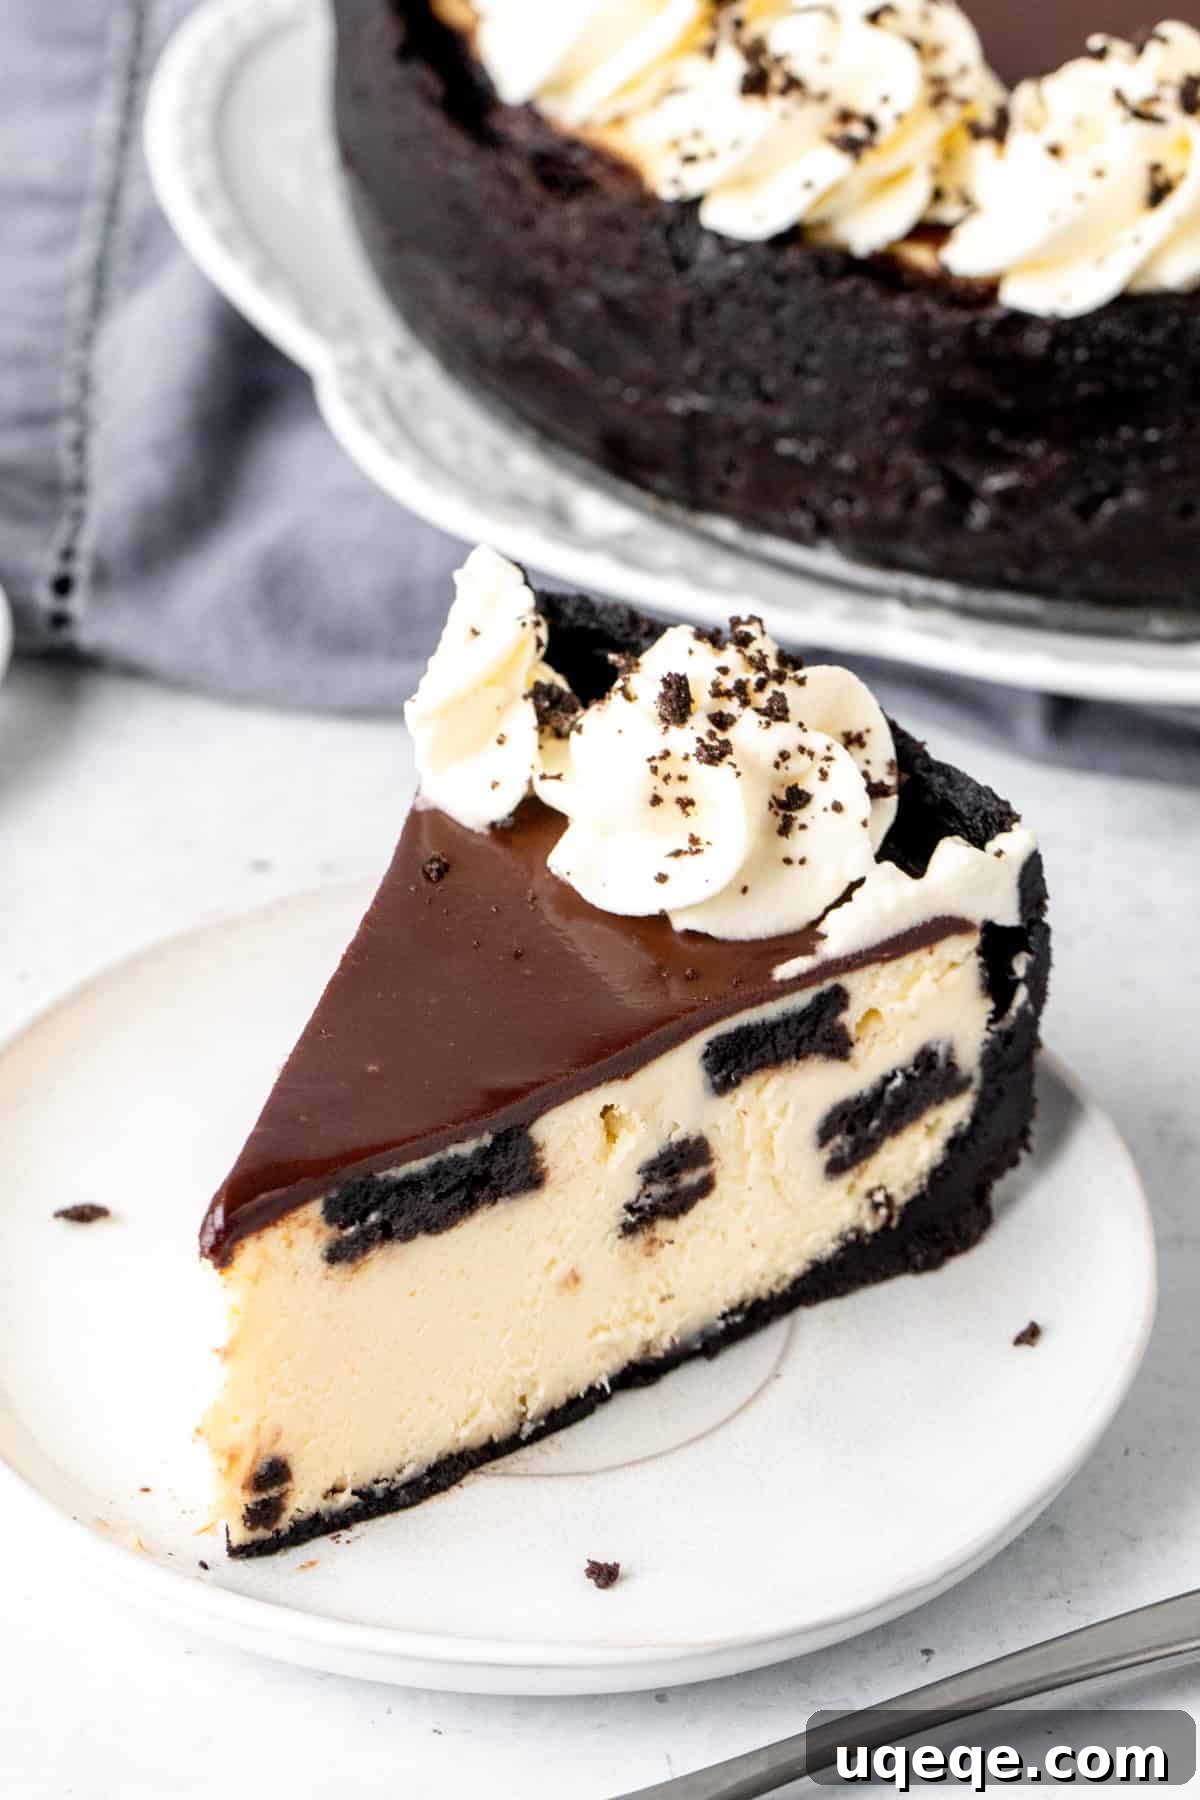
Welcome to the ultimate guide for creating the most exquisite **Oreo cheesecake** you’ll ever taste. This isn’t just a dessert; it’s a culinary masterpiece, beginning with a deeply satisfying, crunchy Oreo crust that sets the stage for what’s to come. Dive into a rich, velvety **New York-style cheesecake** filling, generously studded with chunks of America’s favorite cookie, ensuring a burst of cookies and cream delight in every single bite. Crowned with a luxurious chocolate ganache and elegantly swirled whipped cream, this cheesecake transcends ordinary desserts to become a truly showstopping experience. Our comprehensive recipe will walk you through every essential tip and trick, empowering you to bake a cheesecake that’s not only visually stunning but also boasts the professional quality of a five-star restaurant. Get ready to impress!
Why This Oreo Cheesecake is a Must-Try
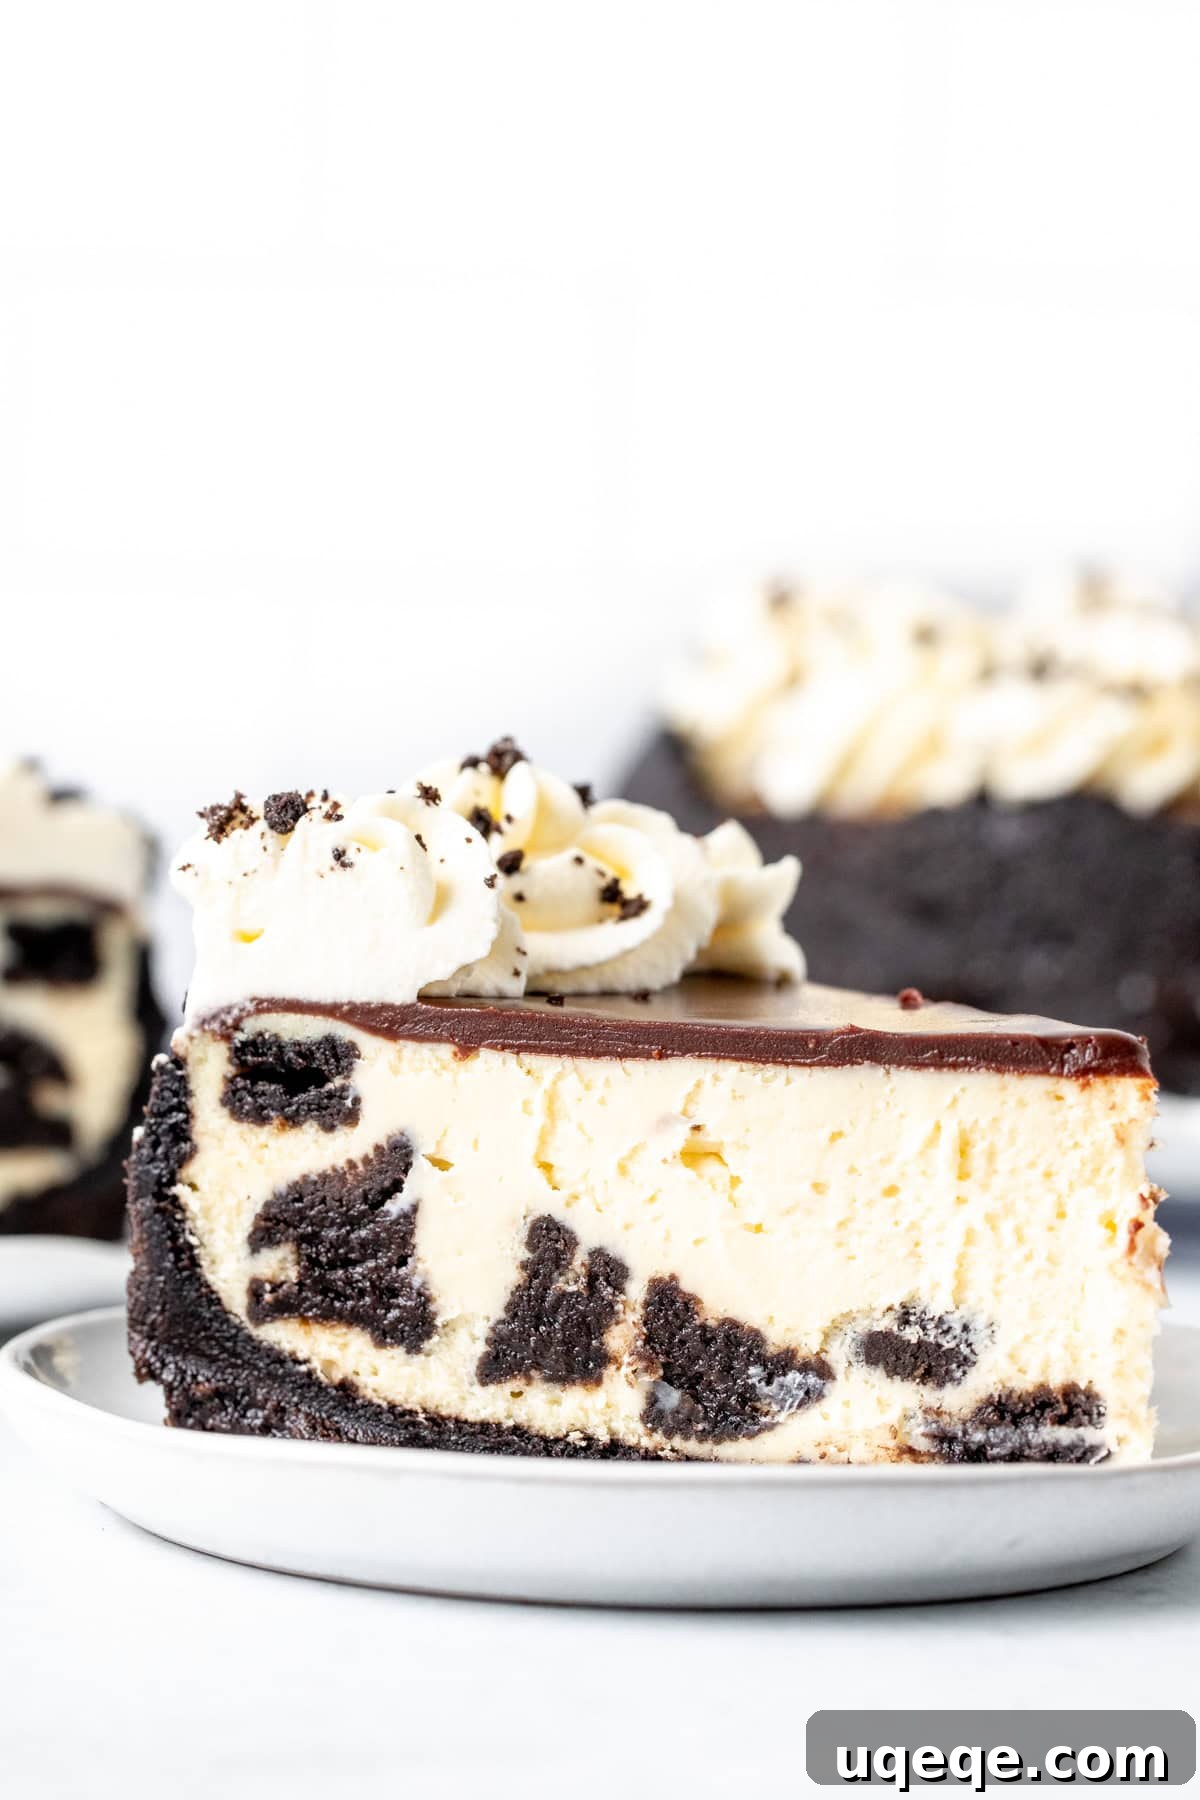
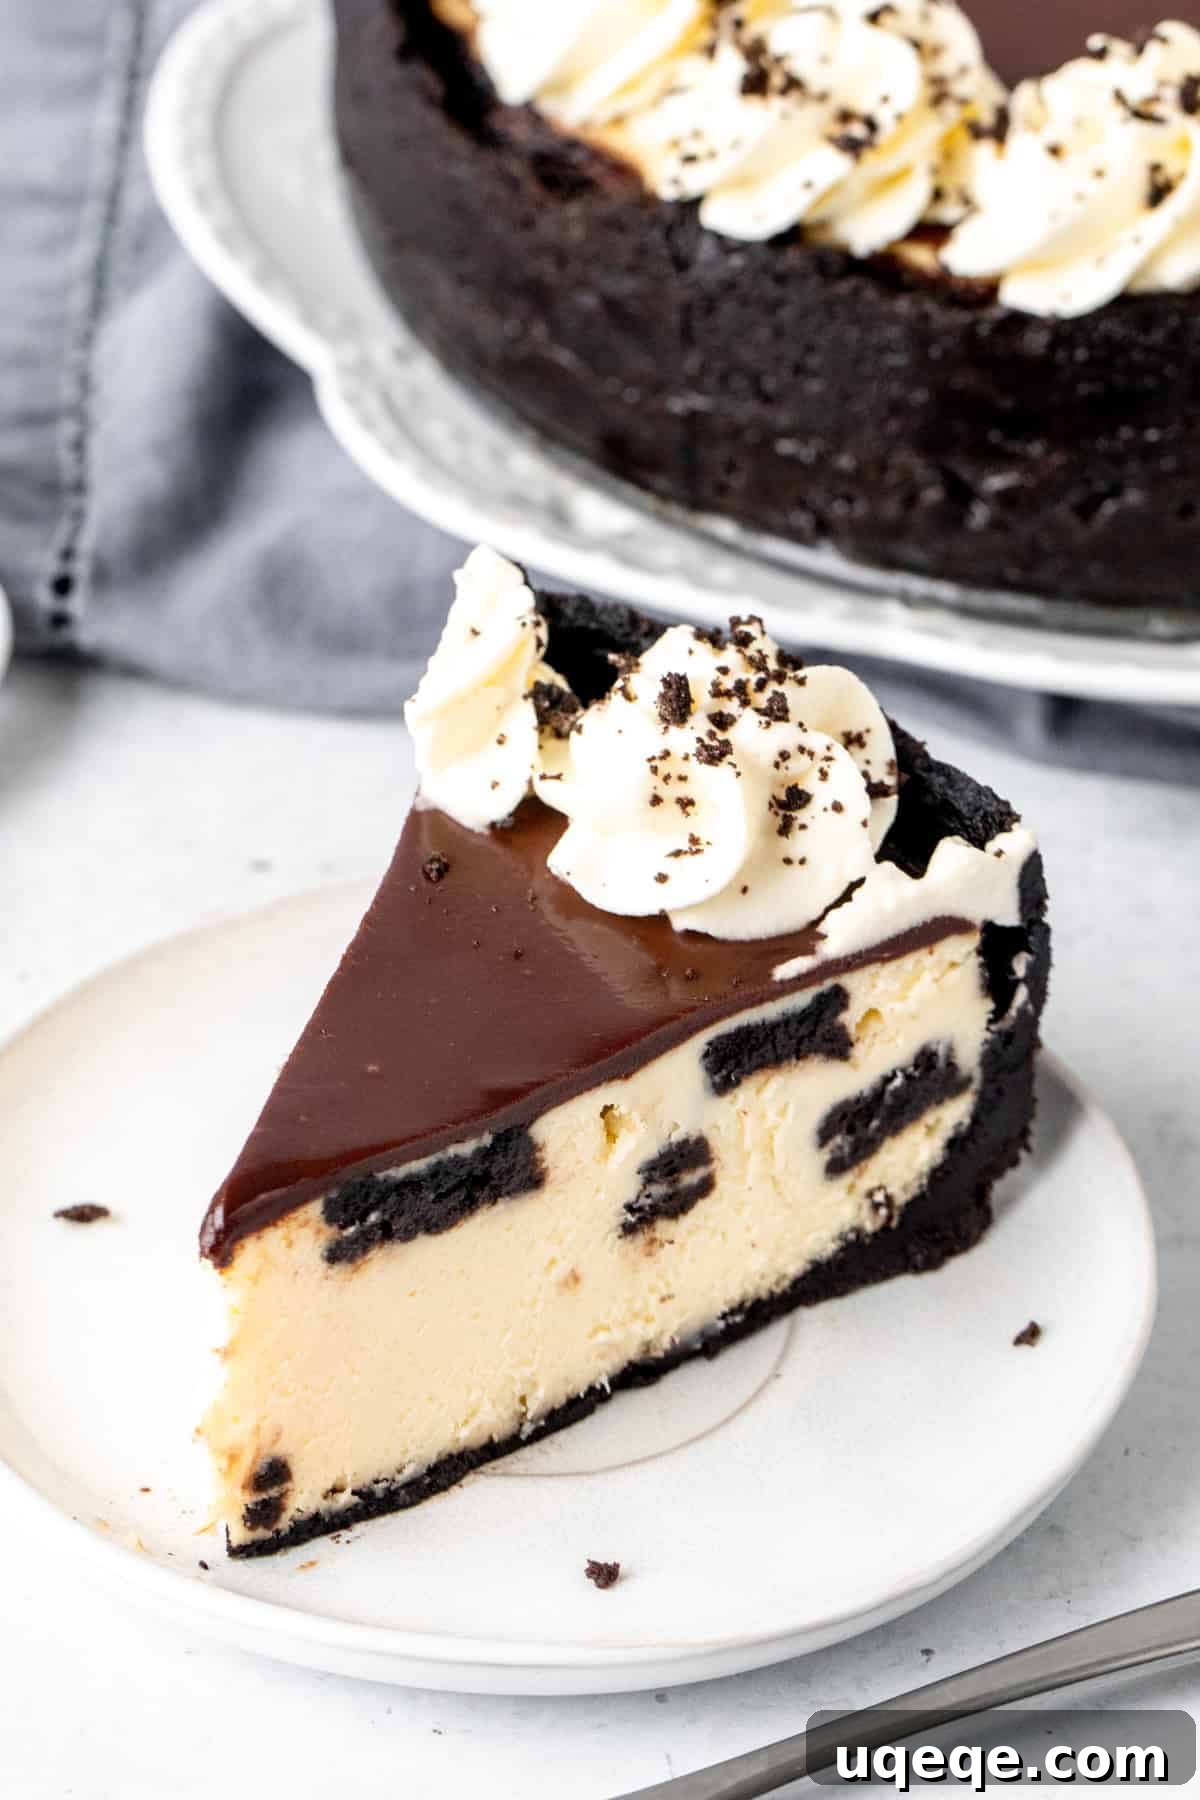
This **Oreo cheesecake recipe** is the perfect embodiment of indulgence, a divine creation for anyone who cherishes the classic cookies and cream flavor profile. Each element works in harmony: the crust provides an essential crunch and deep chocolate flavor, while the cheesecake filling is incredibly creamy, thick, and wonderfully smooth. Its slight tanginess is characteristic of an authentic New York cheesecake, perfectly balanced by the sweet, familiar crunch of crushed Oreo cookies folded throughout. This textural interplay creates a truly unforgettable dessert experience.
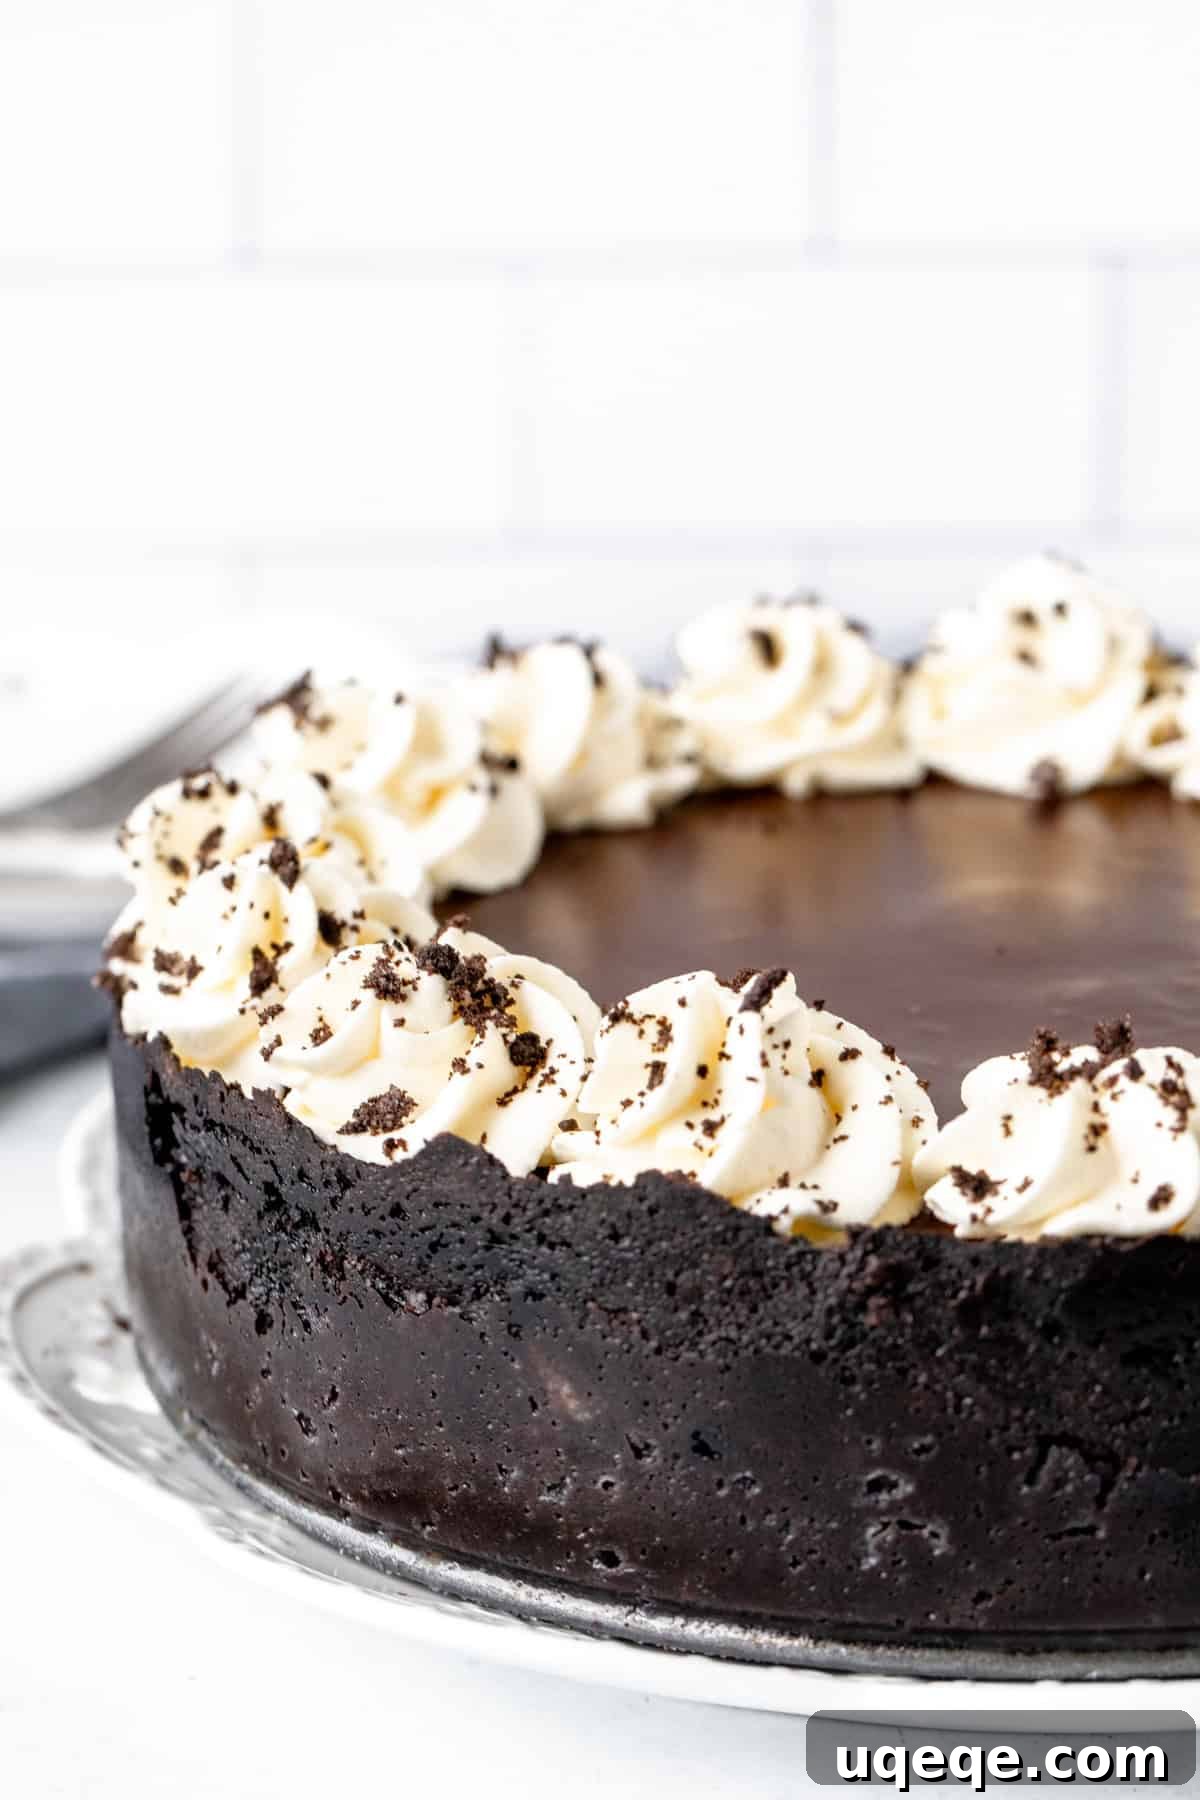
The crowning glory is a glossy, rich chocolate ganache, elegantly draped over the cheesecake, complemented by delicate swirls of freshly whipped cream. This combination not only adds another layer of flavor but also elevates the cheesecake’s presentation, making it ideal for special occasions or simply as a luxurious treat. It’s the ultimate fusion of vanilla and chocolate, a dream come true for **Oreo lovers** seeking a decadent and satisfying dessert.
Mastering the Art of Oreo Cheesecake
Baking a cheesecake can feel daunting, especially given that high-quality ingredients often come with a higher price tag. To ensure your efforts are rewarded with a magnificent dessert, I highly recommend reading through these detailed instructions and expert tips carefully before you begin. Precision and patience are your best allies in achieving cheesecake perfection.
Essential Preparation: Pan & Oven
- Prepare Your Springform Pan: Begin by thoroughly wrapping the exterior of a 9-inch (23 cm) springform pan with heavy-duty aluminum foil. You’ll need to wrap it at least three times, ensuring that both the bottom and sides are completely sealed and no seams are exposed. This creates a watertight barrier crucial for the water bath method. A light greasing of the inside of the pan will also help with easy removal later.
- Preheat the Oven: Set your oven to 325°F (170°C). Baking cheesecake at a slightly lower temperature helps to prevent cracking and ensures a slow, even bake, leading to a creamier texture. Position your oven rack to about 1/3 from the bottom for optimal heat distribution.
Crafting the Irresistible Oreo Crust
- Crush the Oreos: For the perfect crust, you’ll need to crush the entire Oreo cookie, including both the chocolate wafers and the creamy filling. A food processor makes this step quick and easy, yielding uniformly fine crumbs. Alternatively, if you don’t have a food processor, place the cookies in a sturdy freezer bag and crush them thoroughly with a rolling pin until fine.
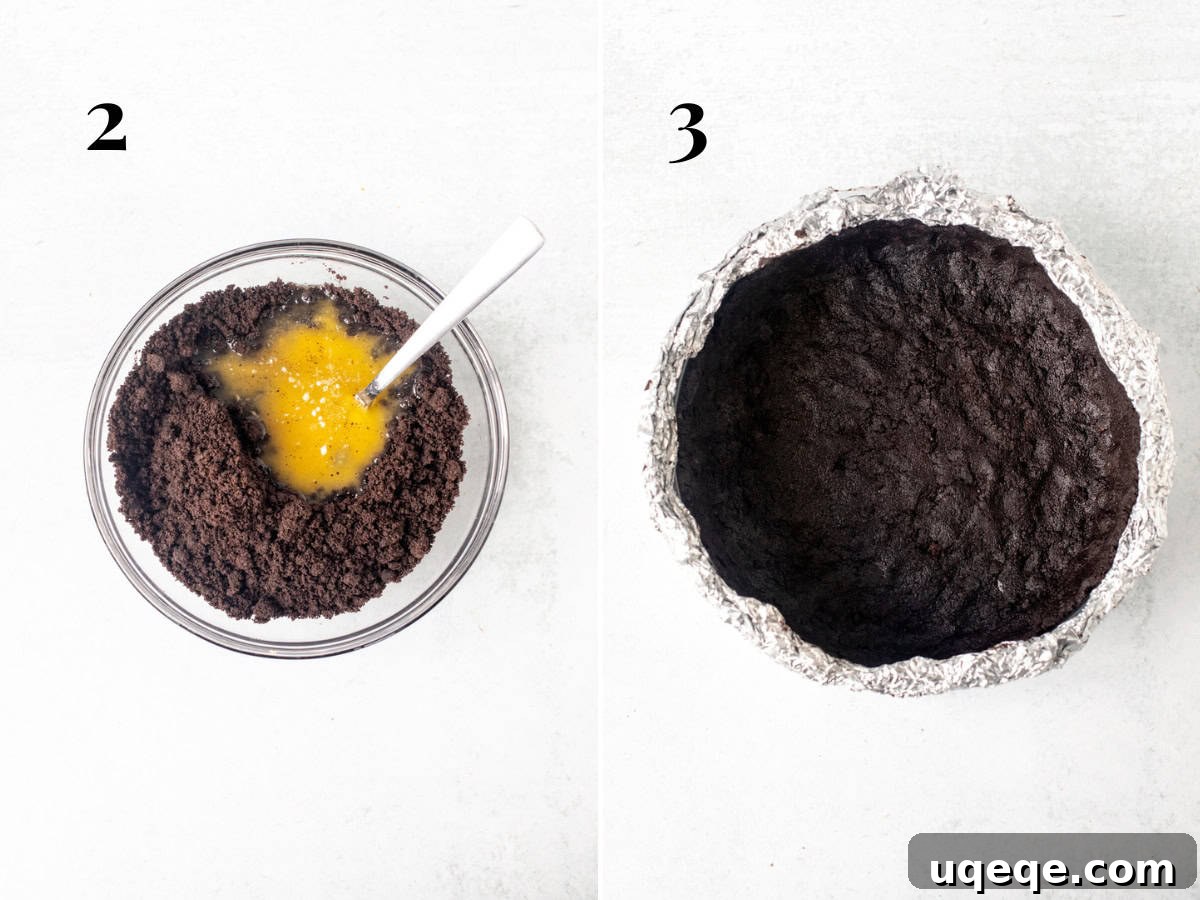
- Combine with Melted Butter: Transfer the crushed Oreo crumbs to a bowl and mix them with melted unsalted butter. If using a food processor, you can add the melted butter directly to the crumbs and pulse a few extra times until well combined. The mixture should resemble wet sand.
- Form the Crust: Press the Oreo-butter mixture firmly and evenly into the bottom of your prepared springform pan. Extend the crust about 1/2 to 2/3 of the way up the sides of the pan. Use the bottom of a glass or your fingers to compact it tightly. A well-compacted crust is key to preventing crumbling.
- Pre-Bake the Crust: Bake the crust in the preheated oven for 10 minutes. This step helps to set the crust, making it crispier and preventing it from becoming soggy once the filling is added. After baking, remove the pan from the oven, but keep the oven on as it will be needed for the cheesecake.
Whipping Up the Velvety Cheesecake Filling
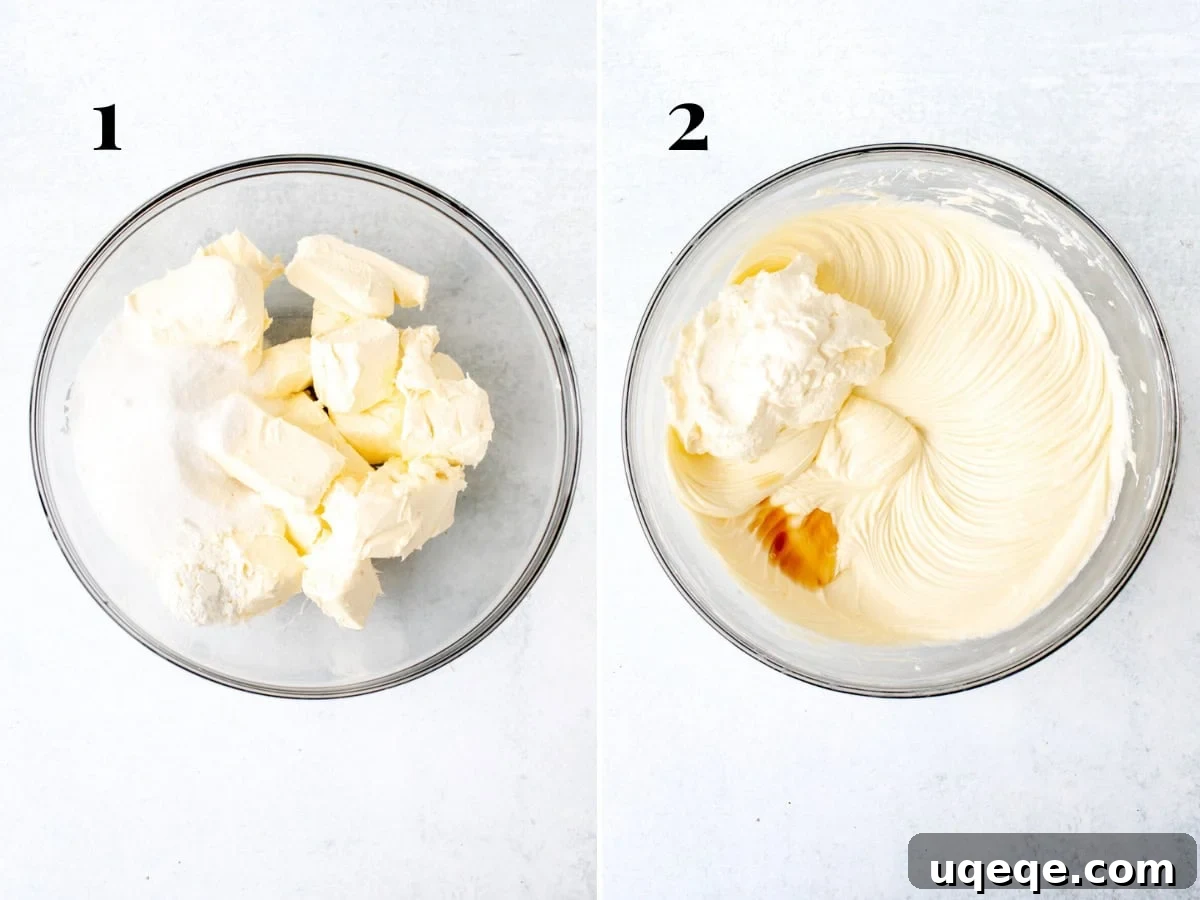
- Cream Cheese Base: In a very large mixing bowl, combine the full-fat, brick-style cream cheese (at room temperature), granulated sugar, and cornstarch. Beat this mixture on medium speed until it’s completely smooth and wonderfully creamy. Stop the mixer occasionally to scrape down the sides and bottom of the bowl. This ensures all ingredients are fully incorporated and prevents any lumps of cream cheese from forming. The cornstarch acts as a stabilizer, helping to bind the cheesecake and significantly reduce the risk of cracks during baking.
- Add Sour Cream and Vanilla: Next, beat in the room-temperature sour cream and pure vanilla extract. The addition of sour cream is a secret weapon for achieving an exceptionally smooth, rich, and slightly tangy cheesecake filling, distinguishing it from recipes that rely solely on cream cheese.
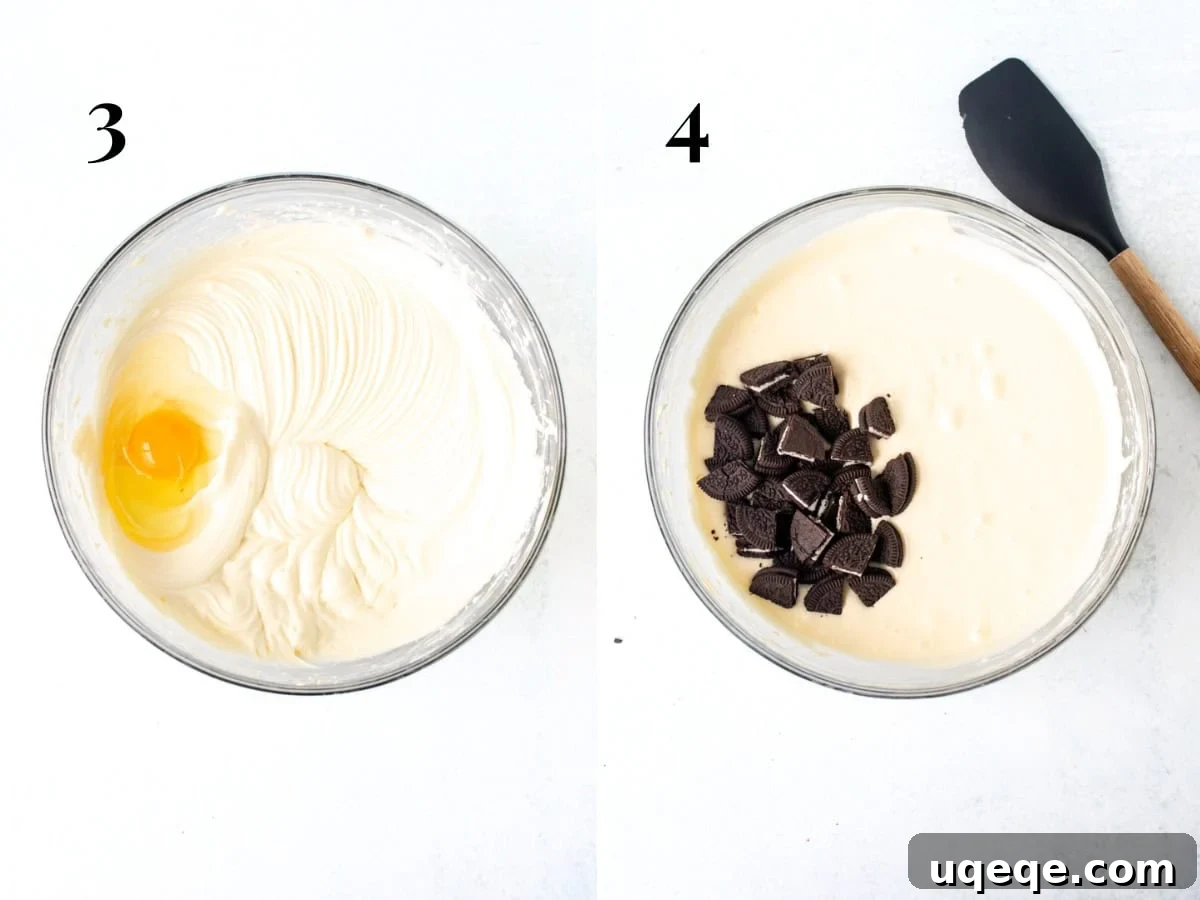
- Incorporate Eggs Gently: With the mixer on low speed, add the eggs one at a time. It’s crucial to mix *only* until each egg is just combined. Overmixing after the eggs are added introduces too much air into the batter, which can cause the cheesecake to puff up and then crack as it cools.
- Fold in Chopped Oreos: Finally, gently fold in the chopped Oreo cookies using a rubber spatula or wooden spoon. I typically fold in about two-thirds of the chopped cookies into the batter. The remaining one-third can be gently pressed onto the top of the cheesecake after it’s poured into the pan. This technique ensures that you have delightful cookie pieces throughout the filling and prevents all the Oreos from sinking to the bottom during baking.
Baking Your Masterpiece to Perfection
- Pour the Filling: Carefully pour the prepared cheesecake filling over the pre-baked Oreo crust in the springform pan. If you reserved any chopped Oreos, now is the time to scatter them over the top of the batter and gently press them down slightly so they are partially submerged. This creates an attractive and tasty visual element on the finished cheesecake.
- Set Up the Water Bath: Place the springform pan (still wrapped in foil) into the center of a larger roasting pan. Then, carefully pour boiling water into the roasting pan until it reaches about 1/2 to 1 inch (1-2 cm) up the sides of the springform pan. The water bath (bain-marie) is a critical step for cheesecakes. It provides a moist, even baking environment, helping to cook the cheesecake gently and preventing it from drying out, cracking, or becoming rubbery.
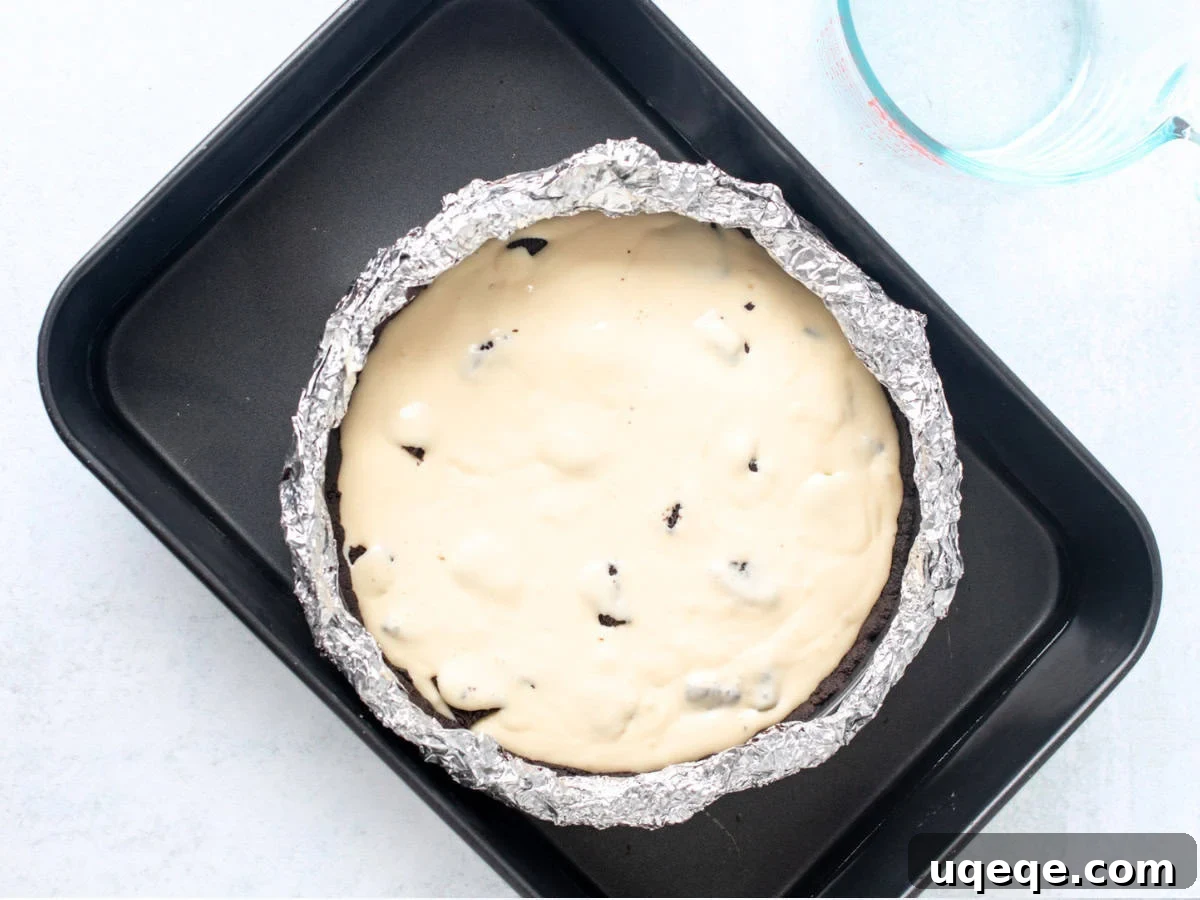
- Bake and Test for Doneness: Carefully transfer the roasting pan with the cheesecake into the preheated oven. Bake for approximately 50-60 minutes. The cheesecake is done when the edges appear set and firm, but the very center still has a slight, gentle wobble when you lightly nudge the pan. It should resemble the consistency of firm jello or pudding, not a liquid like milk. Avoid overbaking, as this is a common cause of cracks and a dry texture.
- Cooling Process: Once baked, turn off the oven and leave the cheesecake inside with the oven door slightly ajar for about 1 hour. This slow cooling prevents sudden temperature changes that can cause cracks. After an hour, remove the cheesecake from the oven and the water bath. Let it cool completely at room temperature on a wire rack until the sides of the springform pan are cool to the touch.
- Chill for Perfection: Cover the cooled cheesecake with plastic wrap and refrigerate for a minimum of 6 hours, or ideally, overnight. Chilling is paramount for a cheesecake’s texture, allowing it to firm up and develop its full flavor. It’s the most challenging step but also the most rewarding.
Decadent Chocolate Ganache & Whipped Cream Topping
Once your cheesecake is perfectly chilled, it’s time for the crowning touches that elevate it to a truly spectacular dessert.
- Prepare the Ganache: Finely chop 4 oz (113 grams) of semi-sweet chocolate. Place the chopped chocolate in a heat-proof bowl. In a small saucepan or microwave-safe bowl, heat 1/2 cup (120 ml) whipping cream until it is almost boiling, just simmering around the edges.
- Combine and Whisk: Pour the hot cream over the chopped chocolate. Let it sit undisturbed for 2 minutes to allow the heat to melt the chocolate. Then, gently whisk the mixture until it is smooth, glossy, and completely combined. If any small chocolate pieces remain, microwave for an additional 15-30 seconds on medium power (not high) and whisk again until silky smooth.
- Release from Pan: Remove the chilled cheesecake from the refrigerator. Very carefully run a thin knife around the outer edge of the cheesecake before unclamping and removing the springform pan ring. If you notice any condensation on the top of the cheesecake, gently blot it with a paper towel or a clean, lint-free tea towel.
- Pour the Ganache: Generously pour the warm (not hot!) chocolate ganache over the top of the cheesecake, allowing it to naturally drip down the sides for an elegant, rustic look.
- Decorate with Whipped Cream & Oreos: For an extra touch of beauty and flavor, pipe additional whipped cream rosettes around the edges of the cheesecake. Finish by sprinkling with a few extra chopped or crushed Oreo cookies.
Expert Tips for a Flawless Oreo Cheesecake
Making a restaurant-worthy cheesecake can seem intimidating, but with these proven tips, you’ll achieve a smooth, creamy, and crack-free dessert every time.
- Cream Cheese Matters: Always, without exception, use **full-fat, brick-style cream cheese**. Do not substitute with low-fat, whipped, or spreadable cream cheese (the kind that comes in a tub for bagels). These alternatives have too much water content and won’t give your cheesecake the essential thick, rich, and creamy texture.
- Room Temperature Ingredients are Key: This is a non-negotiable step. Ensure your cream cheese, sour cream, and eggs are at room temperature before you begin mixing. This allows them to combine seamlessly and evenly, preventing lumps and ensuring a smooth batter. Take them out of the refrigerator at least 30-60 minutes before you start preparing the crust.
- The Magic of a Water Bath (Bain-Marie): Baking your cheesecake in a water bath is one of the most effective ways to prevent cracks and guarantee a truly velvety-smooth texture. The gentle, moist heat helps the cheesecake bake evenly without drying out or rising too quickly. Remember to wrap your springform pan securely with at least three layers of heavy-duty aluminum foil to prevent water from seeping in.
- Preventing Cracks: Beyond the water bath, avoid overmixing the batter, especially after adding the eggs. Mix just until combined. Also, resist the urge to open the oven door during baking. Finally, allow the cheesecake to cool slowly in the oven with the door ajar before transferring it to room temperature and then to the refrigerator. Sudden temperature changes are a common culprit for cracks.
- Oreo Piece Preference: Some bakers prefer a finely crushed cookie texture throughout their cheesecake, while others enjoy larger chunks. For this recipe, I prefer chopping the Oreos into medium-sized pieces to ensure substantial cookies and cream texture in every bite. Feel free to adjust the size of your Oreo pieces to your personal preference.
- Patience During Chilling: The chilling phase is arguably the most crucial step for cheesecake. A minimum of 6 hours, but ideally overnight, is required for the cheesecake to fully set, firm up, and for its flavors to deepen and meld. Don’t rush this process!
- Cutting Perfect Slices: For clean, professional-looking slices, use a long, thin, sharp knife. Dip the knife in hot water and wipe it clean between each slice. This will help you glide through the creamy cheesecake and crunchy crust without tearing.
Frequently Asked Questions About Oreo Cheesecake
How many Oreos do I need for this recipe, and how many packages should I buy?
A standard 14.3 oz (405g) package of Oreos in the US typically contains 36 cookies. For this recipe, you’ll need approximately 30 cookies for the crunchy crust and an additional 12-15 cookies to fold into the creamy filling. If you plan to add extra crushed Oreos for decorating the top, you’ll definitely need more. Therefore, it’s safest to purchase **two standard packages** of Oreos to ensure you have enough for all components, plus a little extra for snacking! If you buy Oreos in smaller sleeves (common in some regions), a 137-gram sleeve usually contains about 14 cookies. In that case, you would need roughly four sleeves, or three if you opt out of the decorative topping.
Can I prepare this Oreo cheesecake in advance?
Absolutely, making cheesecake ahead of time is not only possible but highly recommended! Cheesecake is the quintessential make-ahead dessert because it requires a minimum of 6 hours to chill and set properly in the refrigerator before serving. I typically bake the cheesecake the day before I plan to serve it. This allows ample time for it to firm up and for the flavors to fully develop. The chocolate ganache and whipped cream topping can then be prepared and added on the morning of the serving day, ensuring maximum freshness and presentation.
How long does Oreo cheesecake stay fresh?
When stored properly, leftover cheesecake will maintain its deliciousness in the refrigerator for up to 1 week. Ensure it is tightly covered with plastic wrap or placed in an airtight container to prevent it from absorbing other food odors and to keep it moist.
Can I freeze cheesecake?
Yes, baked cheesecake freezes remarkably well! It’s a fantastic option for meal prep or for saving slices for later. To freeze, ensure the cheesecake is completely cooled and then wrap it very tightly with several layers of plastic wrap, followed by a layer of aluminum foil. Freeze for up to 2 months. When you’re ready to enjoy it, thaw the cheesecake overnight in the refrigerator. If you’re planning to freeze the cheesecake for future serving, I recommend adding the chocolate ganache topping *after* it has been thawed, rather than before freezing. This helps maintain the ganache’s perfect texture and sheen.
With these comprehensive instructions and expert tips, you are now equipped to create the most delicious, smooth, and creamy **Oreo cheesecake** imaginable. This dessert is truly a dream come true for **Oreo lovers**, offering a triple dose of cookies and cream bliss from its rich crust, decadent filling, and irresistible topping. Prepare yourself for rave reviews and empty plates – this is truly the perfect Oreo cheesecake!
And if your love for Oreos knows no bounds, be sure to explore these other fantastic recipes:
- Oreo Ice Cream Cake
- Oreo Brownies
- Oreo Marshmallow Brownies
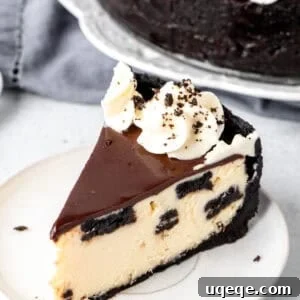
Oreo Cheesecake
Rate Recipe
Print Recipe
Equipment
-
9-inch (23 cm) springform pan
-
Large roasting pan (large enough for the springform pan to fit into)
-
Aluminum Foil
Ingredients
Oreo Crust
- 30 Oreo Cookies, wafers and filling
- 5 tablespoons unsalted butter (71 grams), melted
Oreo Cheesecake Filling
- 24 oz cream cheese (680 grams), full-fat, brick-style, room temperature
- 1 cup granulated sugar (200 grams)
- 1 tablespoon cornstarch, (AKA cornflour in the UK)
- 1 cup sour cream (240 ml), room temperature
- 1 teaspoon vanilla extract
- 3 large eggs, room temperature
- 12-15 Oreo cookies, chopped
- Boiling water, for the water bath
Topping
- 4 oz semi-sweet chocolate (113 grams), finely chopped, 50-60% dark chocolate works well
- 1/2 cup whipping cream (120 ml)
- Additional whipped cream, for decorating (optional)
- 4-5 Oreos, chopped or crushed, for decorating (optional)
Instructions
Initial Setup
-
Preheat the oven to 325°F (170°C) and position the oven rack to about 1/3 from the bottom.
-
Wrap the outside of a 9-inch springform pan with aluminum foil, wrapping at least 3 times to ensure the bottom and sides are completely sealed. Lightly grease the inside of the pan.
Oreo Cookie Crust
-
Crush the Oreo cookies (wafers and filling) in a food processor until fine crumbs, or place in a freezer bag and crush with a rolling pin.
-
Mix the cookie crumbs with the melted butter until well combined.
-
Press the mixture firmly into the bottom and about 1/2 to 2/3 of the way up the sides of the prepared springform pan.
-
Bake the crust in the preheated oven for 10 minutes. Remove from the oven, but keep the oven turned on.
Oreo Cheesecake Filling
-
In a very large bowl, beat the room temperature cream cheese, granulated sugar, and cornstarch until the mixture is creamy and smooth. Scrape down the sides and bottom of the bowl to ensure no lumps remain.
-
Beat in the room temperature sour cream and vanilla extract until just combined.
-
With the mixer on low speed, mix in the room temperature eggs one at a time, just until each egg is incorporated. Do not overmix.
-
Gently fold in about 2/3 of the chopped Oreo cookies using a rubber spatula or wooden spoon.
Baking & Cooling
-
Pour the cheesecake batter into the prepared pan. If desired, dot the top of the cheesecake with the reserved chopped Oreo pieces and gently press them down slightly into the batter.
-
Place the springform pan (wrapped in foil) in the middle of a large roasting pan.
-
Carefully pour about 1/2 – 1 inch (1-2 cm) of boiling water into the roasting pan around the springform pan.
-
Place the roasting pan with the cheesecake into the oven and bake for 50-60 minutes, or until the edges are set and the center has a slight wobble when gently nudged.
-
Turn off the oven and leave the cheesecake inside with the oven door slightly ajar for 1 hour. Then, remove the cheesecake from the roasting pan and allow it to cool completely at room temperature on a wire rack until the sides of the springform pan are cool.
-
Cover the cooled cheesecake tightly with plastic wrap and refrigerate for at least 6 hours, or ideally, overnight.
Topping & Serving
-
Finely chop the semi-sweet chocolate and place it in a heat-proof bowl.
-
Heat 1/2 cup whipping cream until it is almost boiling. Pour the hot cream over the chopped chocolate and let it sit for 2 minutes.
-
Whisk the mixture until smooth and glossy. If necessary, microwave on medium power for short bursts (15-30 seconds) and whisk again until smooth.
-
Remove the chilled cheesecake from the fridge. Gently trace around the outside of the cheesecake with a thin knife, then unclamp and remove the outer ring of the springform pan. Lightly blot any condensation on top with a paper towel.
-
Pour the chocolate ganache over the cheesecake, allowing it to drip attractively over the edges.
-
Optionally, decorate the cheesecake with additional piped whipped cream and sprinkle with chopped or crushed Oreos. Slice with a hot, clean knife for perfect servings.
Notes
- Cream Cheese: Use only full-fat, brick-style cream cheese. Avoid lite, spreadable, or whipped varieties.
- Cornstarch: Cornstarch helps stabilize the cheesecake and minimize cracking. 1 tablespoon of cornstarch (AKA cornflour) can be substituted with 2 tablespoons of all-purpose flour.
- Room Temperature Ingredients: Ensure cream cheese, sour cream, and eggs are at room temperature for smooth mixing and a lump-free batter.
- Chocolate Ganache: The chocolate ganache topping adds rich decadence. Feel free to omit it if you prefer a simpler cheesecake.
- Storage: Leftover cheesecake, tightly covered, can be stored in the refrigerator for up to 1 week.
- Freezing: Baked cheesecake freezes well for up to 2 months. Wrap tightly and thaw overnight in the fridge. For best results, add ganache after thawing if freezing for later.
- Nutrition: Nutrition information is an estimate based on 1 of 12 equal slices.
Nutrition
Carbohydrates: 56g,
Protein: 9g,
Fat: 44g,
Saturated Fat: 24g,
Polyunsaturated Fat: 3g,
Monounsaturated Fat: 14g,
Trans Fat: 0.2g,
Cholesterol: 139mg,
Sodium: 369mg,
Potassium: 280mg,
Fiber: 2g,
Sugar: 40g,
Vitamin A: 1245IU,
Vitamin C: 0.2mg,
Calcium: 104mg,
Iron: 6mg
Like this recipe? Rate and comment below!