
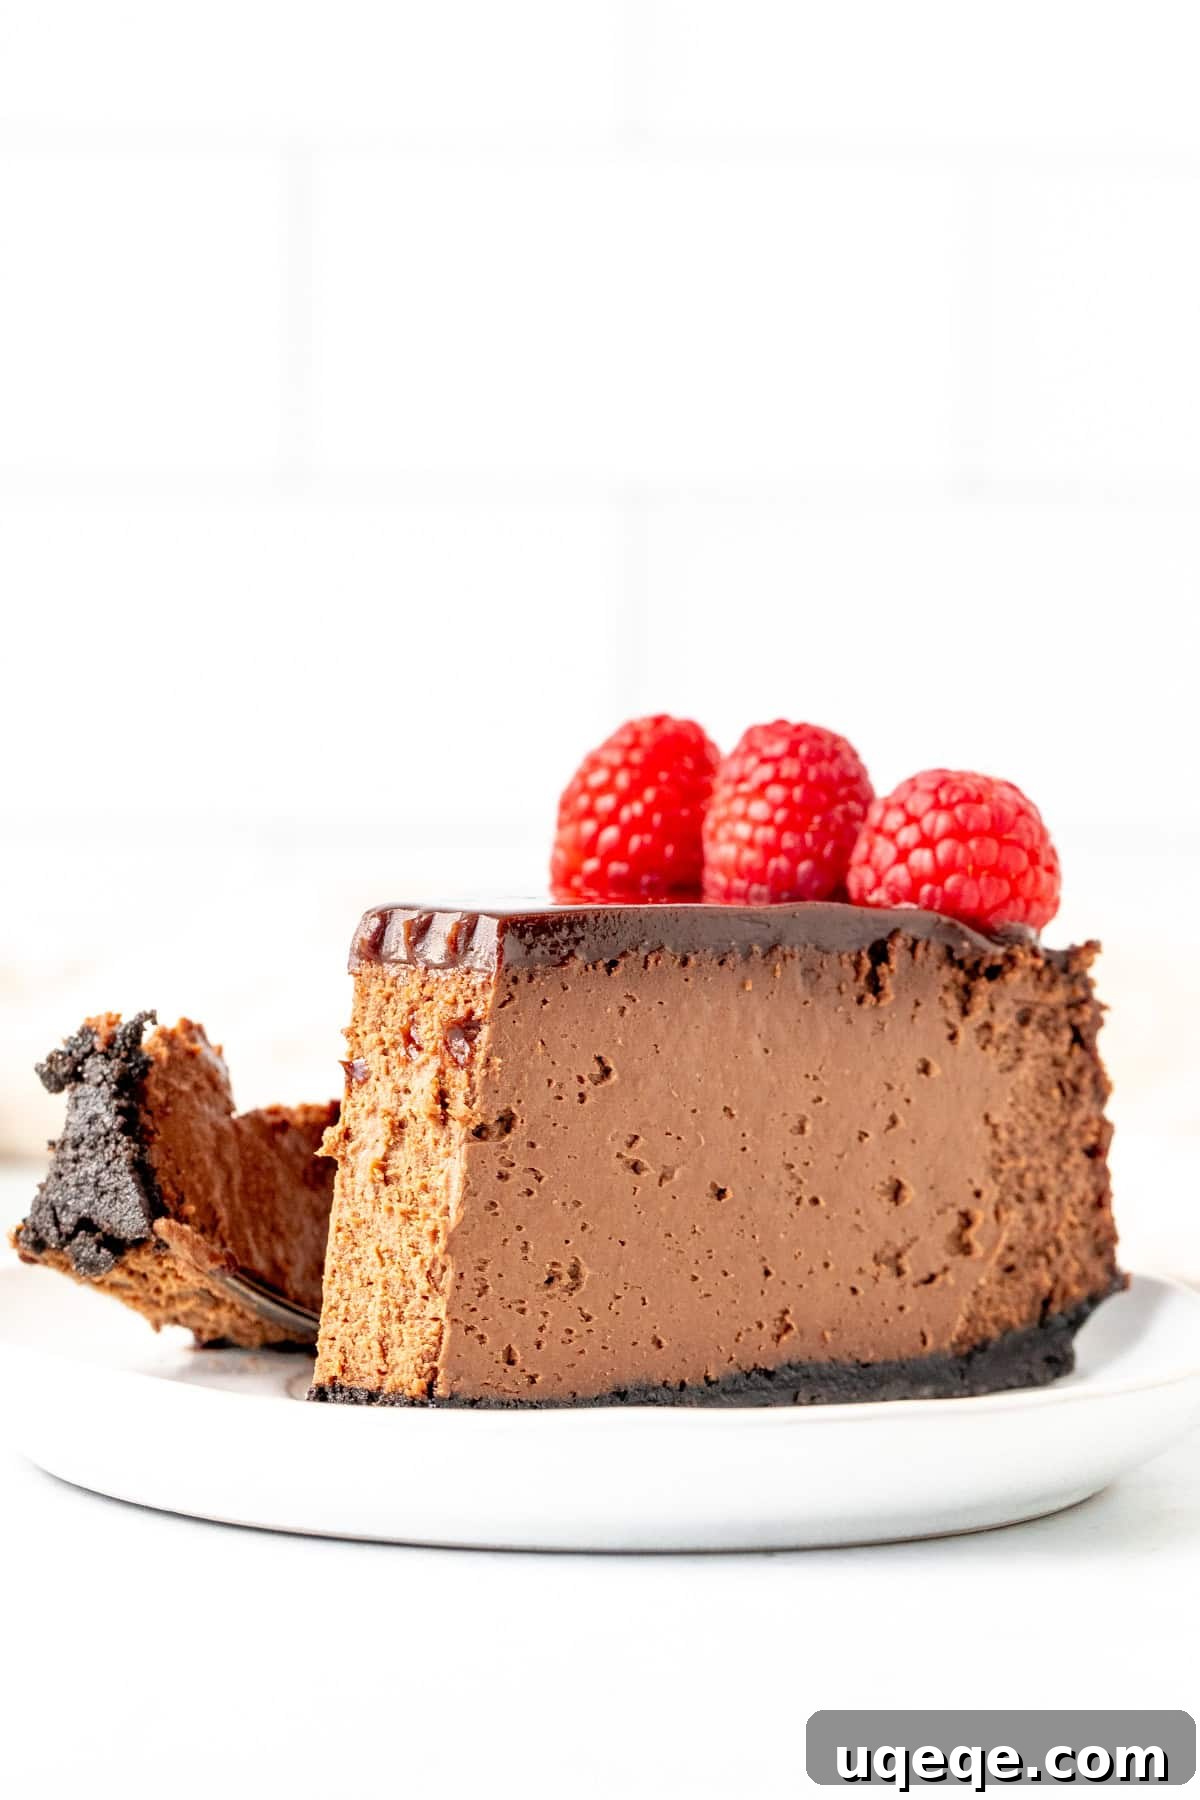
Indulge in the ultimate chocolate cheesecake experience! This truly decadent recipe delivers a rich chocolate flavor, an incredibly silky-smooth texture, a delightful Oreo cookie crust, and a glossy chocolate ganache finish. Master the secrets to crafting a restaurant-quality chocolate cheesecake right in your own kitchen.
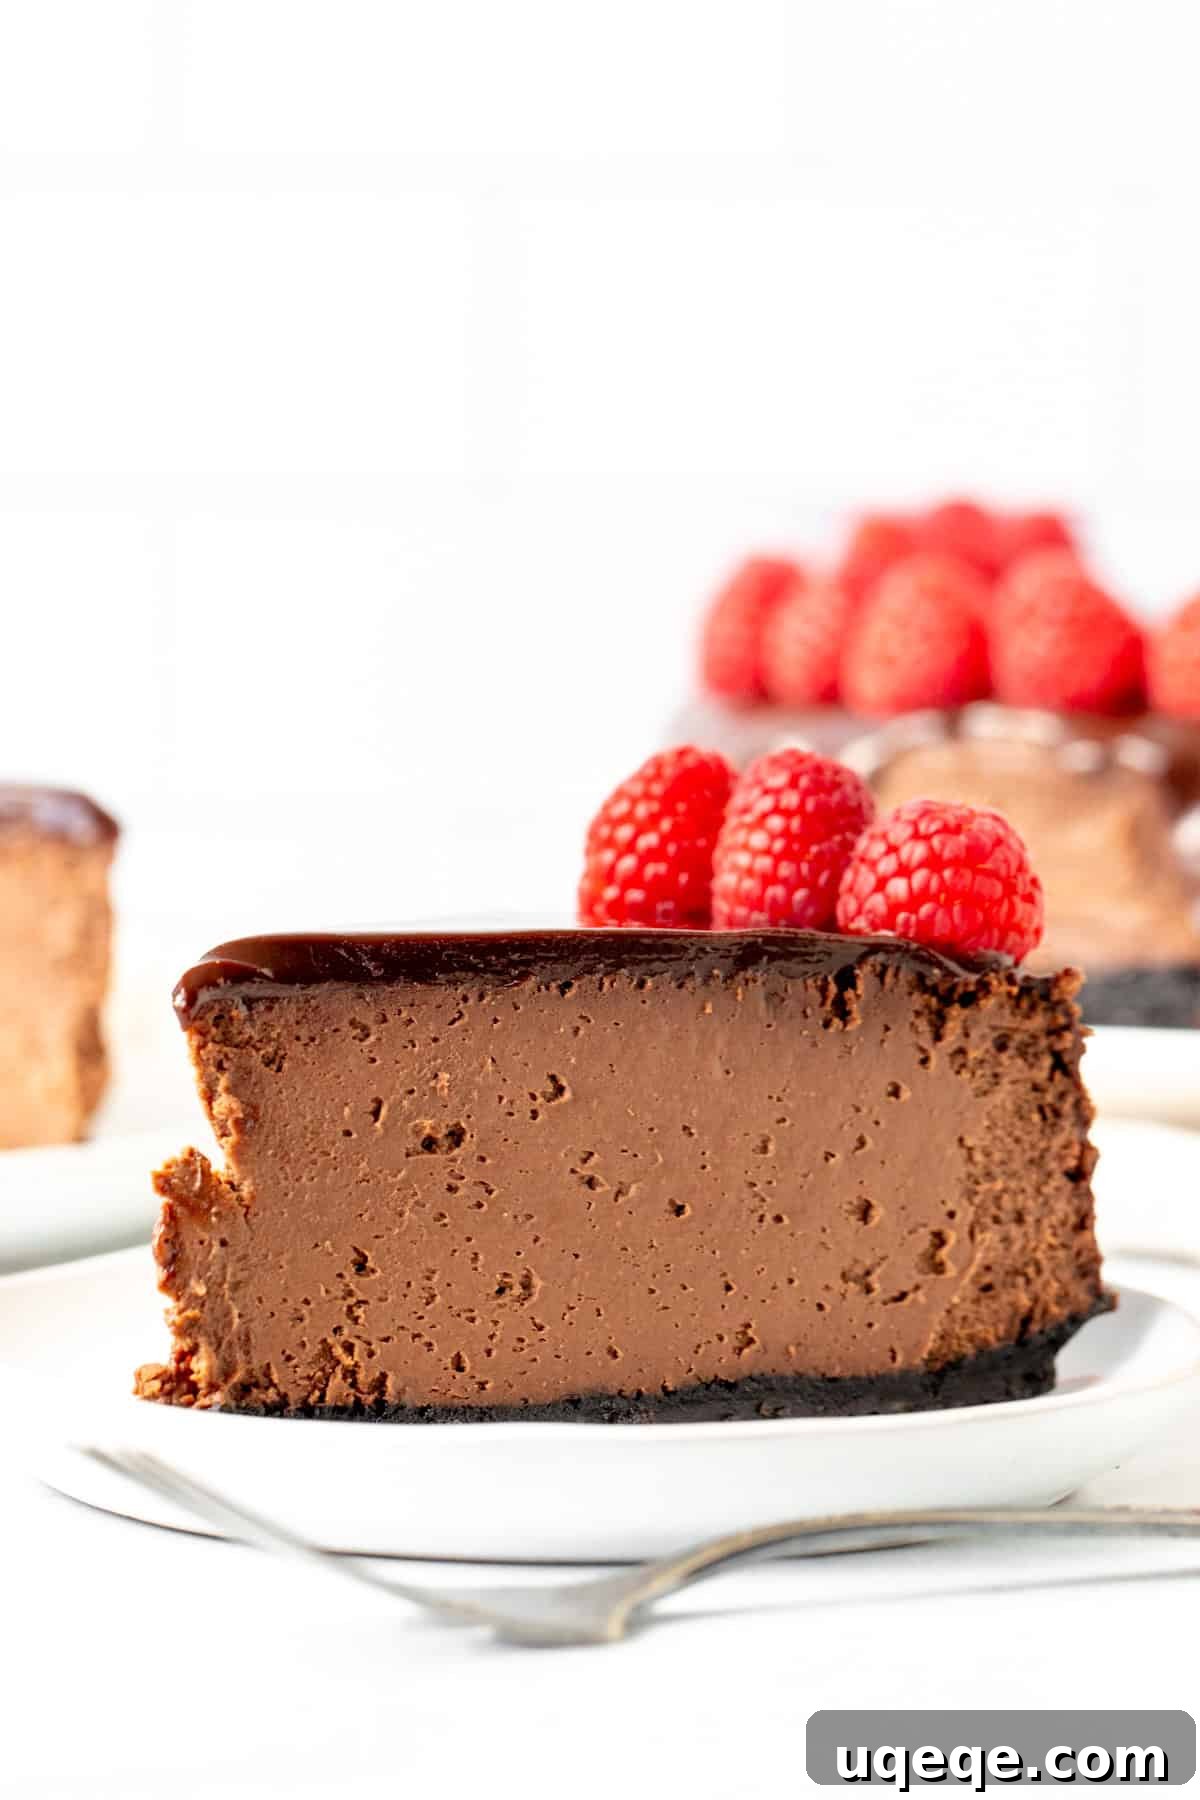
The Ultimate Triple Chocolate Cheesecake Recipe
After countless hours spent perfecting, testing, and taste-testing, I am thrilled to share what I confidently believe is the best chocolate cheesecake recipe you’ll ever make. This creation is designed to meet every expectation, ensuring a dessert that is not only visually stunning but also exquisitely delicious.
What makes this particular chocolate cheesecake stand out? It’s a harmonious blend of textures and intense flavors, meticulously balanced to achieve perfection:
- Irresistible Oreo Cookie Crust: A sturdy, crunchy base that perfectly complements the creamy filling and adds a delightful textural contrast.
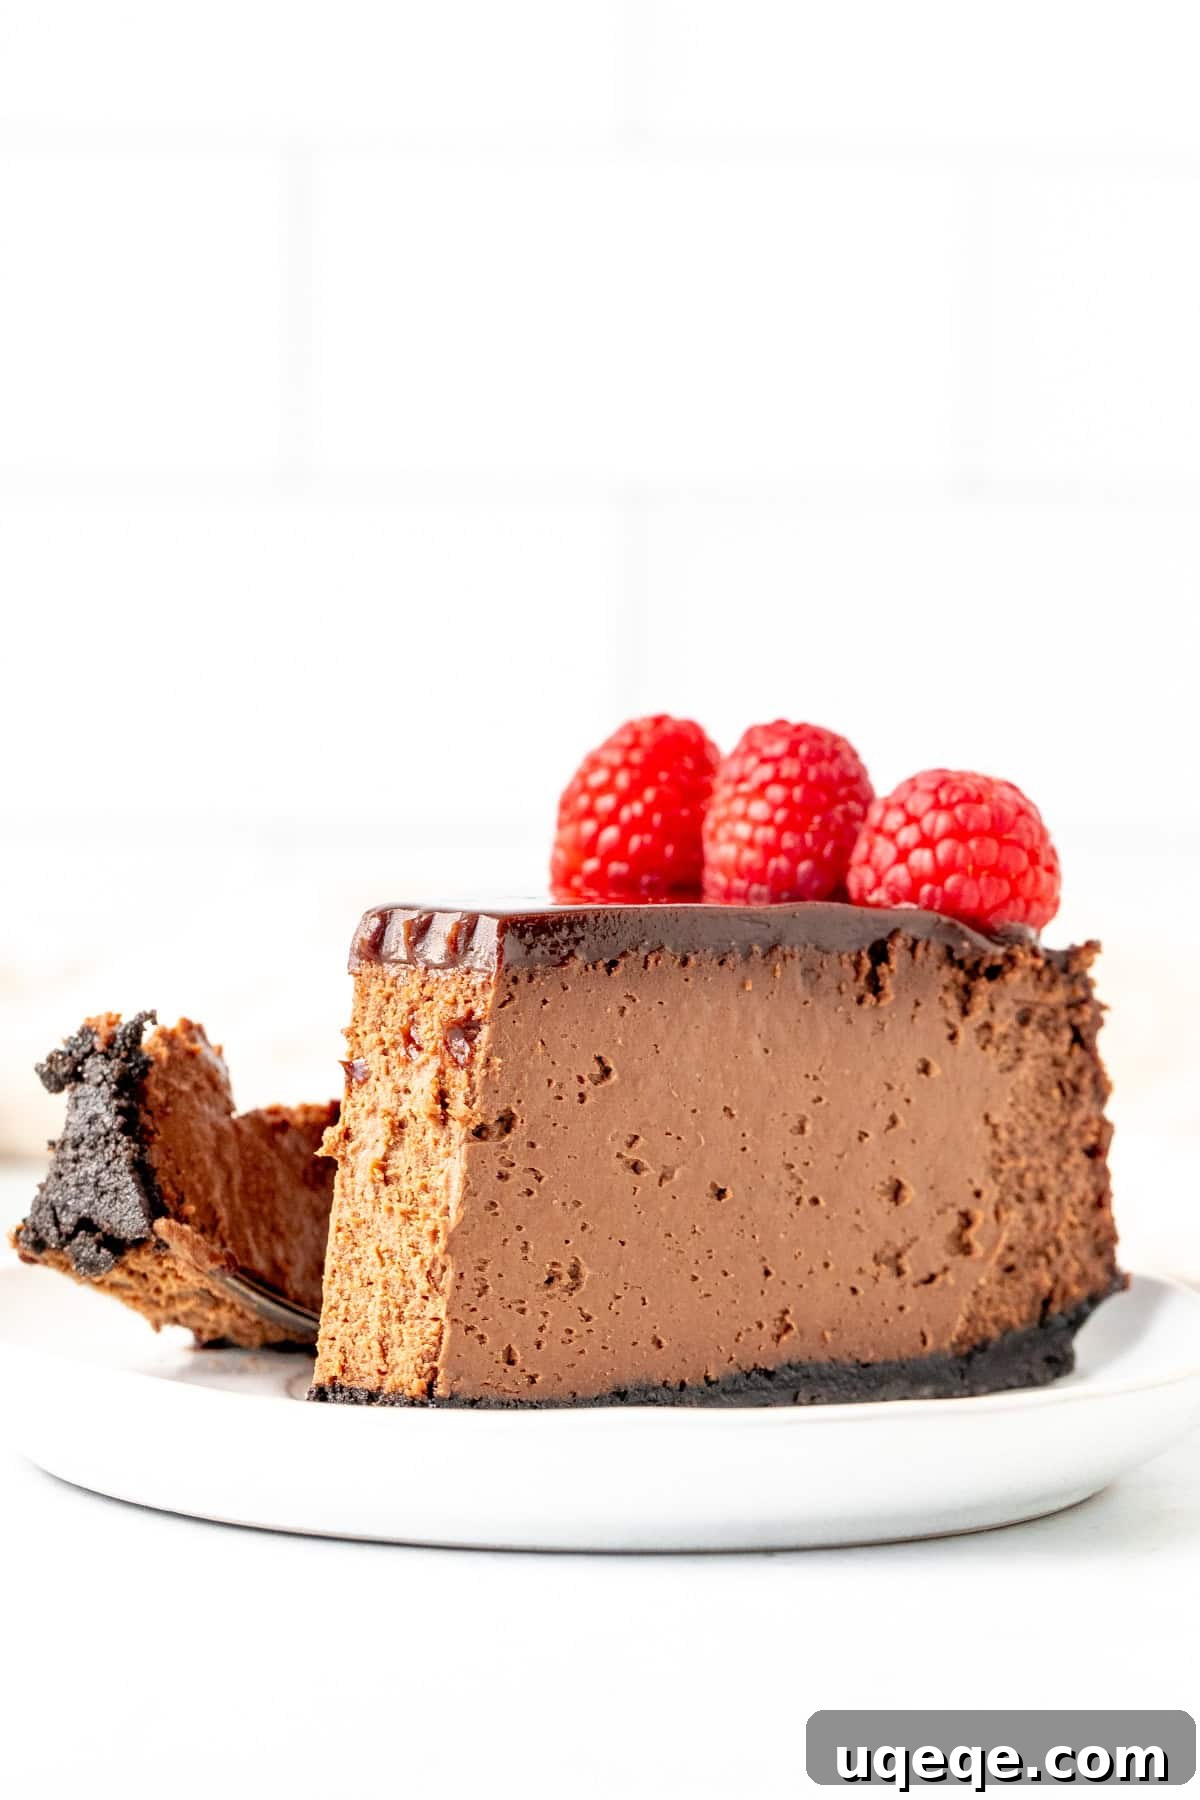
- Luxuriously Smooth Filling: Velvety and creamy, this cheesecake boasts a texture that melts in your mouth, completely free of any graininess.
- Deep, Rich Chocolate Flavor: A robust chocolate profile that is both decadent and complex, with just the right touch of tanginess, without being overly sweet.
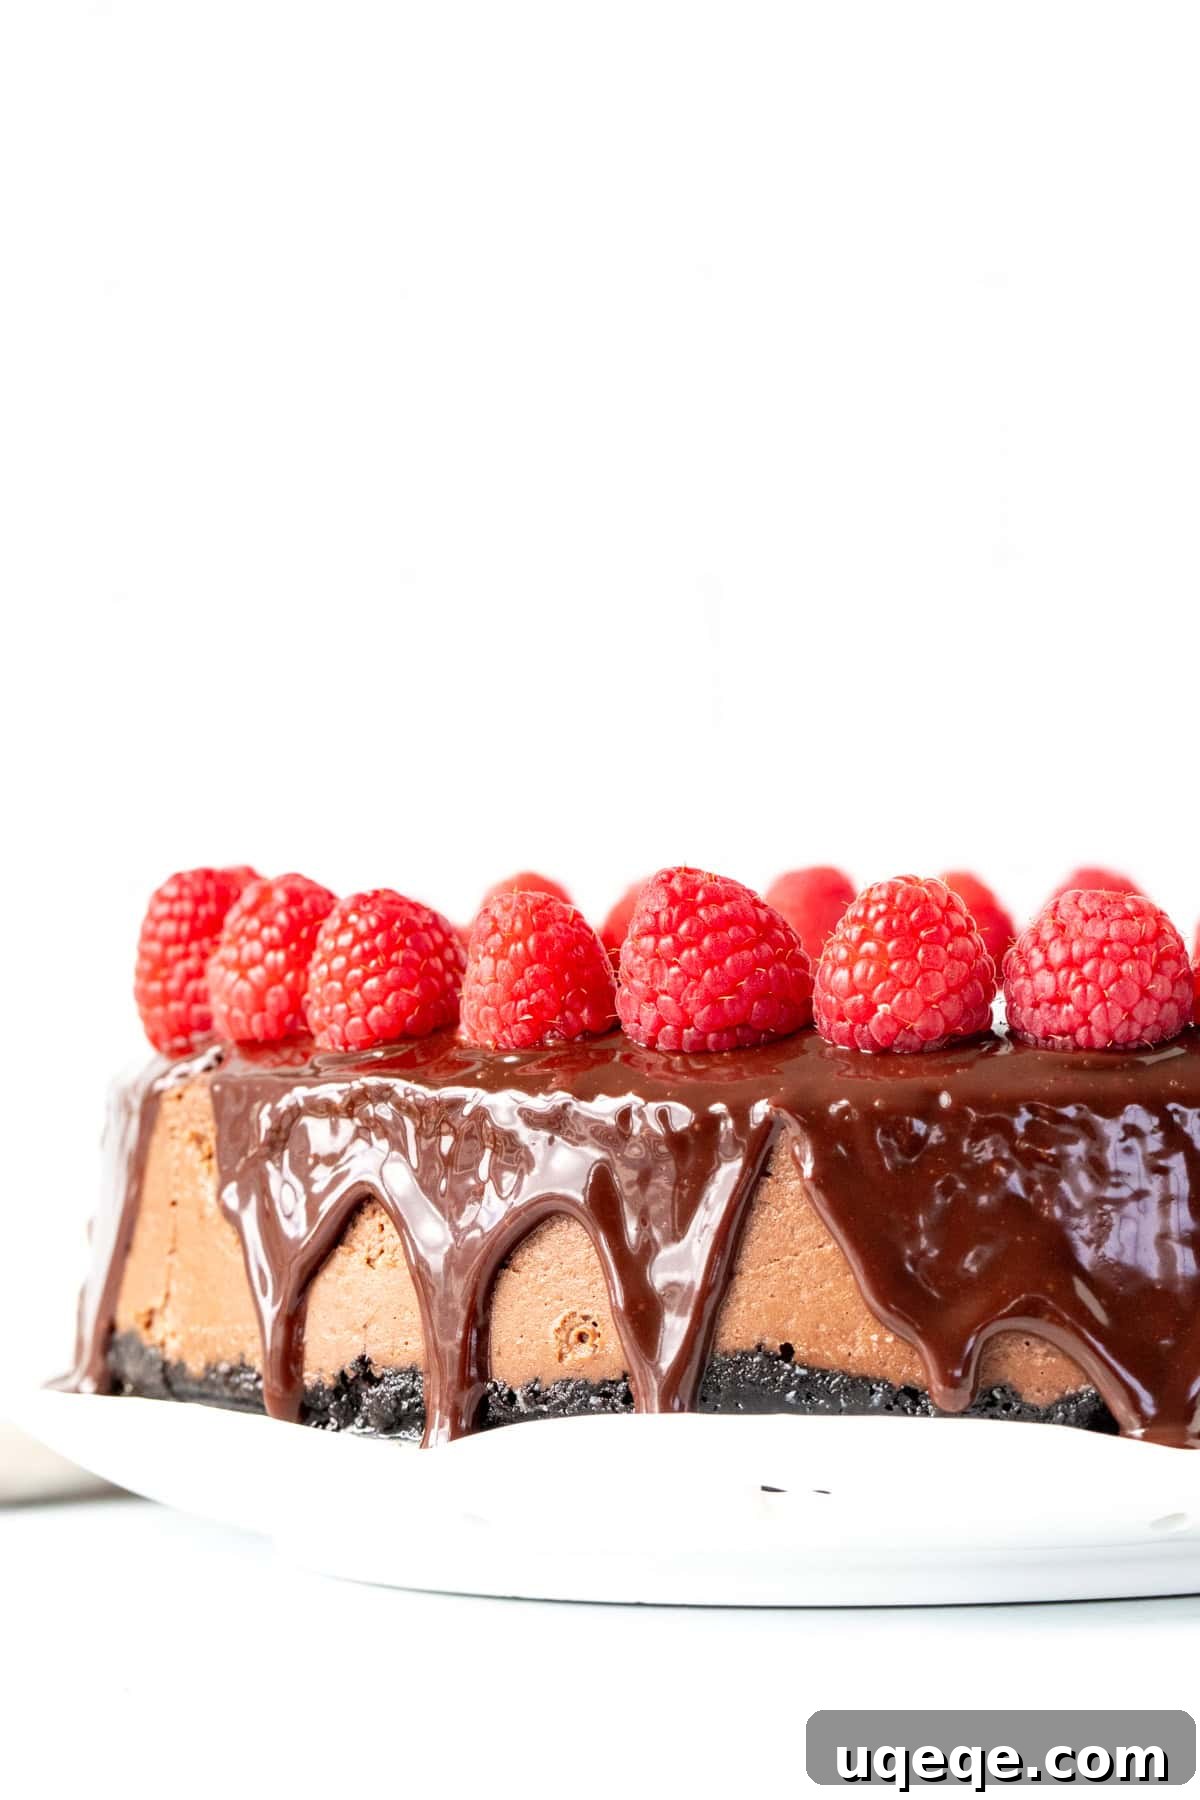
- Glistening Chocolate Ganache: A glossy, elegant topping that adds another layer of intense chocolate flavor and a beautiful finish.
This cheesecake is a celebration of chocolate, offering a triple dose of richness that makes it truly over-the-top. It’s an absolute dream for any devoted chocolate lover and, in my humble opinion, an elevated twist on the classic New York cheesecake. Despite its richness, the sweetness is perfectly moderated, ensuring a sophisticated dessert experience.
Given that quality ingredients for cheesecake can be a worthwhile investment, I’ve compiled an extensive collection of tips and tricks to guarantee your success. I strongly recommend reading through all the detailed instructions and advice carefully before you begin your baking adventure.
Essential Tips for Baking a Perfect Chocolate Cheesecake
Creating a flawless chocolate cheesecake requires attention to detail. These expert tips will help you achieve a perfectly smooth, crack-free, and deliciously rich dessert:
- Ensure All Ingredients Are at Room Temperature: This is arguably the most crucial step for a smooth, lump-free batter. Cold cream cheese, sour cream, and eggs will not emulsify properly, leading to a lumpy texture. Take these ingredients out of the refrigerator at least 30 minutes, ideally an hour, before you start mixing. Room temperature ingredients blend seamlessly, creating a uniform, velvety batter.
- The Magic of Sour Cream: Incorporating sour cream into your chocolate cheesecake batter is key to its luxurious texture. It not only contributes to an extra-smooth consistency and significantly reduces the risk of a grainy cheesecake but also adds a subtle tang that balances the sweetness and richness. It helps achieve a thick, yet incredibly tender and not overly dense, filling.
- Choosing the Right Dark Chocolate: For this recipe, a dark chocolate with approximately 70% cocoa content is ideal. You can go up to 80% if you prefer a more intense, darker chocolate flavor. However, I advise against using anything higher than 80% cocoa, as it can result in a bitter cheesecake. High-quality chocolate is essential for a truly outstanding flavor profile.
- Incorporate Eggs Last and Avoid Overmixing: Eggs are binders, but overmixing them introduces too much air into the batter. This air causes the cheesecake to puff up significantly during baking. As the cheesecake cools, this trapped air escapes, leading to the dreaded cracks and potential sinking. Beat in the eggs gently, just until they are fully combined, then stop. A few gentle stirs by hand can often be better than prolonged mixer use at this stage.
- A Springform Pan is Non-Negotiable: This recipe specifically calls for a 9-inch springform pan. Traditional sandwich tins have sides that are too low, and it’s practically impossible to remove a delicate cheesecake from them without damaging its structure. If you don’t own a springform pan, I recommend exploring alternative recipes like these delicious chocolate cheesecake bars, which can be baked in a standard 9×13 inch pan.
- Bake in a Water Bath for Perfection: The water bath (bain-marie) is your secret weapon against cracks and uneven baking. It provides a moist, even heat environment, insulating the cheesecake from the direct oven heat. This gentle, slow baking process prevents the edges from setting too quickly and drying out, which is particularly important for chocolate cheesecakes that can be prone to dryness. The added moisture keeps the cheesecake incredibly creamy and ensures a smooth, beautiful top.
- Slow Cooling Prevents Cracks: After baking, resist the urge to immediately pull the cheesecake from the oven. Sudden temperature changes are a common cause of cracks. Instead, turn off the oven, prop the door open slightly, and let the cheesecake cool gradually inside the oven for at least 30 minutes. This controlled cooling allows the cheesecake to adjust to the temperature change slowly and peacefully.
Step-by-Step Guide to Crafting Your Chocolate Cheesecake
1. Prepare Your Springform Pan for the Water Bath
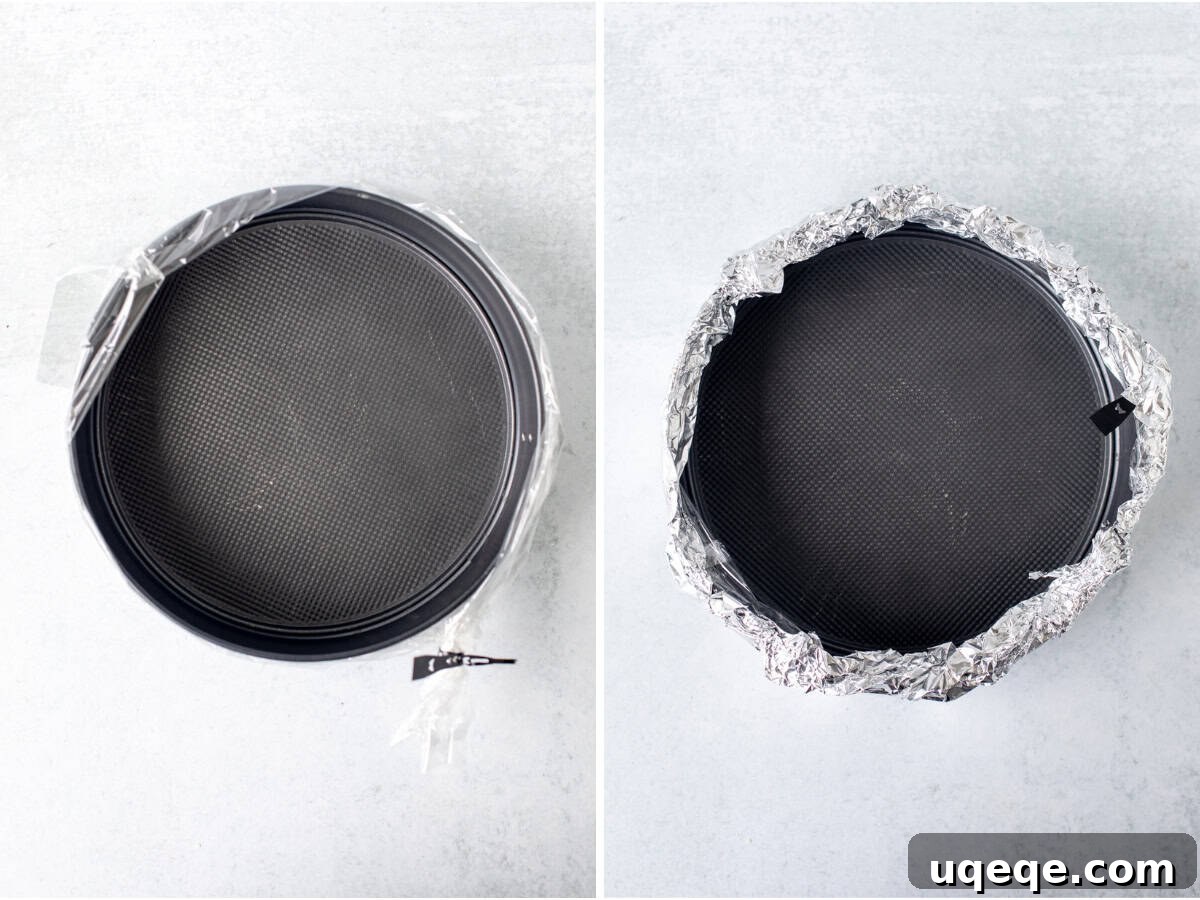
Before anything else, preparing your pan properly is crucial to prevent leaks when using a water bath. My foolproof method involves two layers of protection:
First, tightly wrap the outside of your 9-inch springform pan with a disposable oven bag (the type used for roasting turkeys). Trim any excess bag and secure the edge with the provided key lock tie, ensuring a snug fit. This forms the primary waterproof barrier.
Next, wrap the entire pan with heavy-duty aluminum foil at least 3-4 times. Overlap the foil generously and alternate the direction of wrapping to ensure that both the bottom and sides are thoroughly covered, and all seams are sealed multiple times. This double-layer protection is the most reliable way to prevent any water from seeping into your cheesecake during the water bath.
2. Create the Perfect Oreo Cookie Crust
With your pan ready, it’s time to assemble the delicious base:
- In a food processor, pulse the entire Oreo cookies (wafers and creamy filling included) until they transform into fine, even crumbs. If you don’t have a food processor, you can place the cookies in a sturdy freezer bag and crush them with a rolling pin – it requires a bit more effort but yields excellent results.
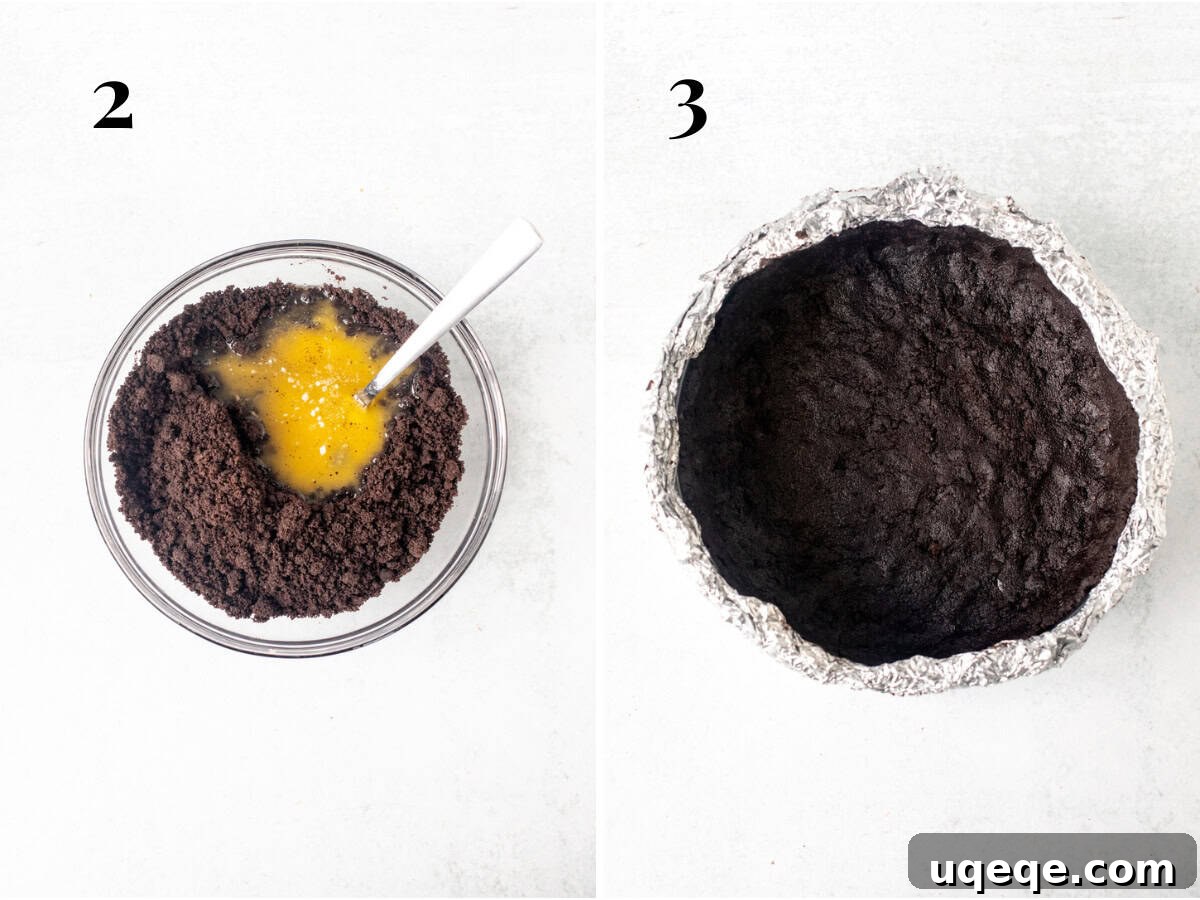
- Transfer the cookie crumbs to a bowl and mix them thoroughly with the melted unsalted butter until well combined. The mixture should resemble wet sand.
- Firmly press this mixture into the bottom of your prepared springform pan. Use the back of a spoon or your fingers to create an even layer, extending a slight lip up the sides of the pan. This lip helps contain the cheesecake filling and adds to the crust’s texture.
- Bake the crust in the middle rack of your preheated oven (325°F or 160°C) for approximately 10 minutes. This pre-baking step is crucial for a sturdier, crunchier crust that holds up beautifully under the rich filling. Once baked, remove it from the oven (keeping the pan wrapped) and keep the oven on for the cheesecake filling.
3. Prepare the Velvety Chocolate Cheesecake Filling
While your crust is baking, you can begin preparing the star of the show – the smooth chocolate filling:
- Melt the Dark Chocolate: Chop your dark chocolate (70% cocoa) into very small pieces. Avoid chocolate chips as they contain stabilizers that prevent them from melting as smoothly. You can melt the chocolate using one of two methods:
- Microwave Method: Place chopped chocolate in a large heatproof bowl. Microwave on medium power (not high, which is often the default setting) in 45-second intervals. Remove the bowl and stir well between each interval until the chocolate is completely smooth and glossy. Be careful not to overheat.
- Double Boiler Method: Place the chopped chocolate in a heatproof bowl set over a saucepan of gently simmering water. Ensure the bottom of the bowl does not touch the water. Stir continuously until the chocolate is fully melted and smooth.
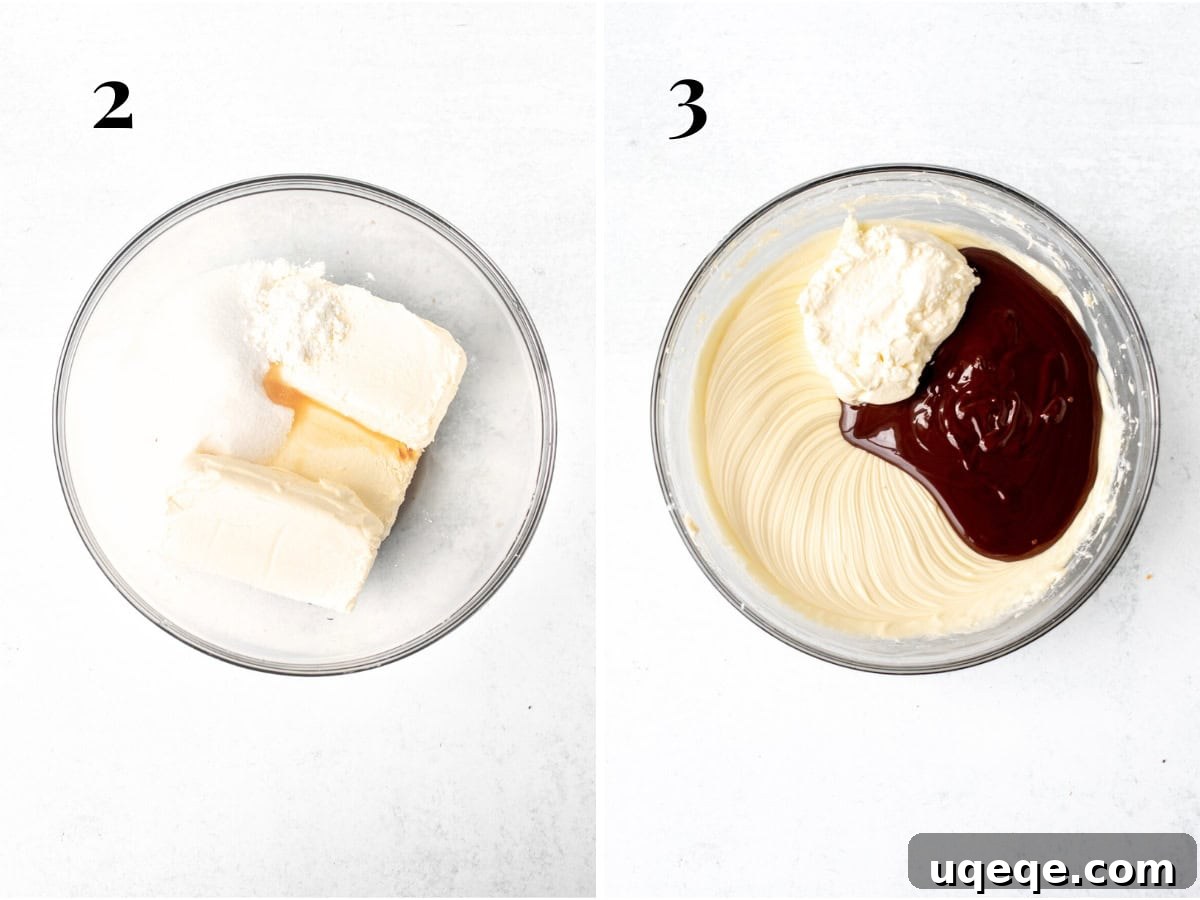
- Cream Cheese Base: In a very large mixing bowl, combine the room temperature full-fat cream cheese, granulated sugar, and cornstarch. Beat with an electric mixer on medium speed for about 3-5 minutes, until the mixture is incredibly smooth and creamy. It’s vital to stop the mixer frequently and scrape down the bottom and sides of the bowl to ensure no lumps remain and all ingredients are thoroughly incorporated.
- Add Sour Cream and Melted Chocolate: Pour in the room temperature sour cream and the slightly cooled melted chocolate. Mix on low speed until just combined. Again, pause to scrape down the sides and bottom of the bowl multiple times. Melted chocolate can easily stick to the bottom, leading to an uneven texture if not properly mixed.
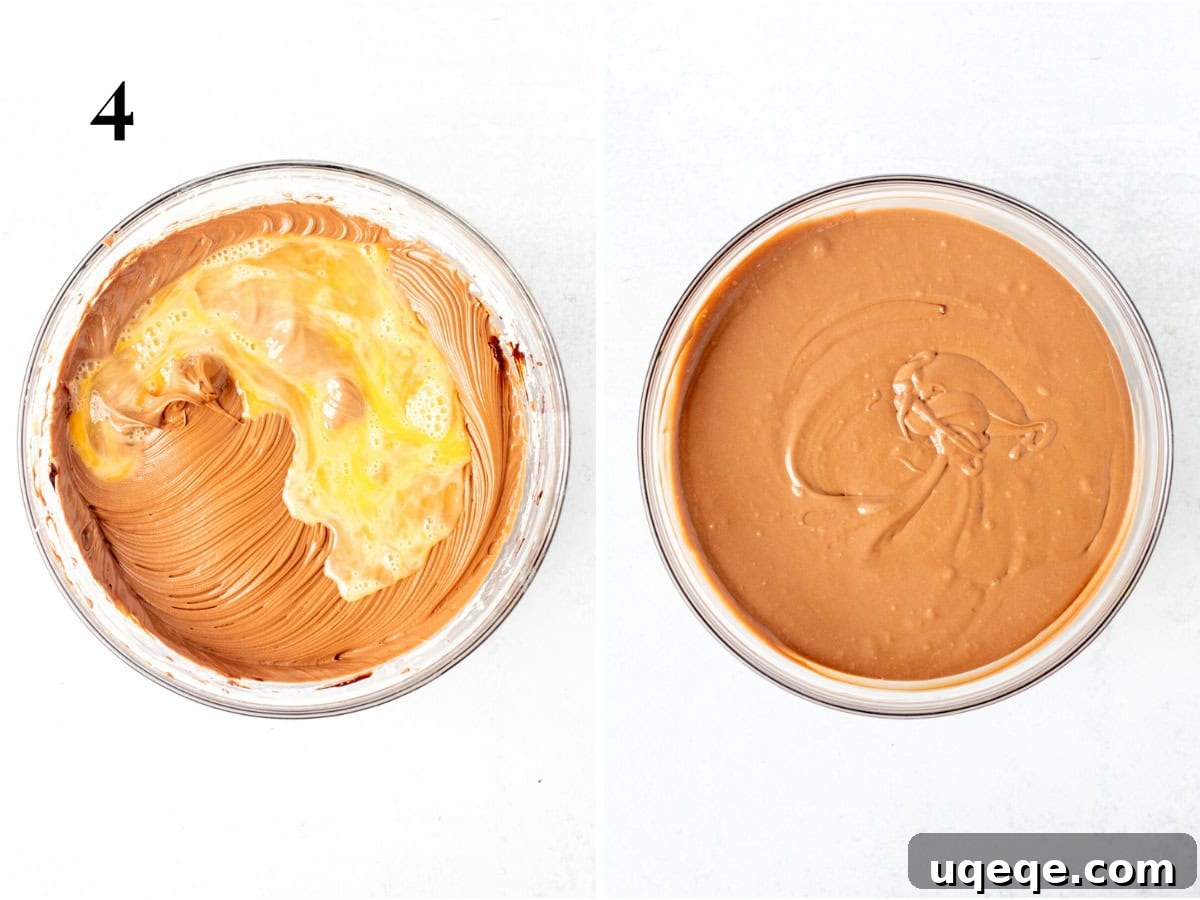
- Gentle Egg Incorporation: In a separate small bowl, lightly whisk together the 4 large eggs and the 2 additional egg yolks until just combined. Gradually add the whisked egg mixture to the cheesecake batter, about half at a time. I highly recommend doing this by hand with a wire whisk to minimize the risk of overmixing. If using an electric mixer, use the lowest speed possible and mix only until no streaks of egg remain. Overmixing at this stage will introduce air, which can cause cracks during baking.
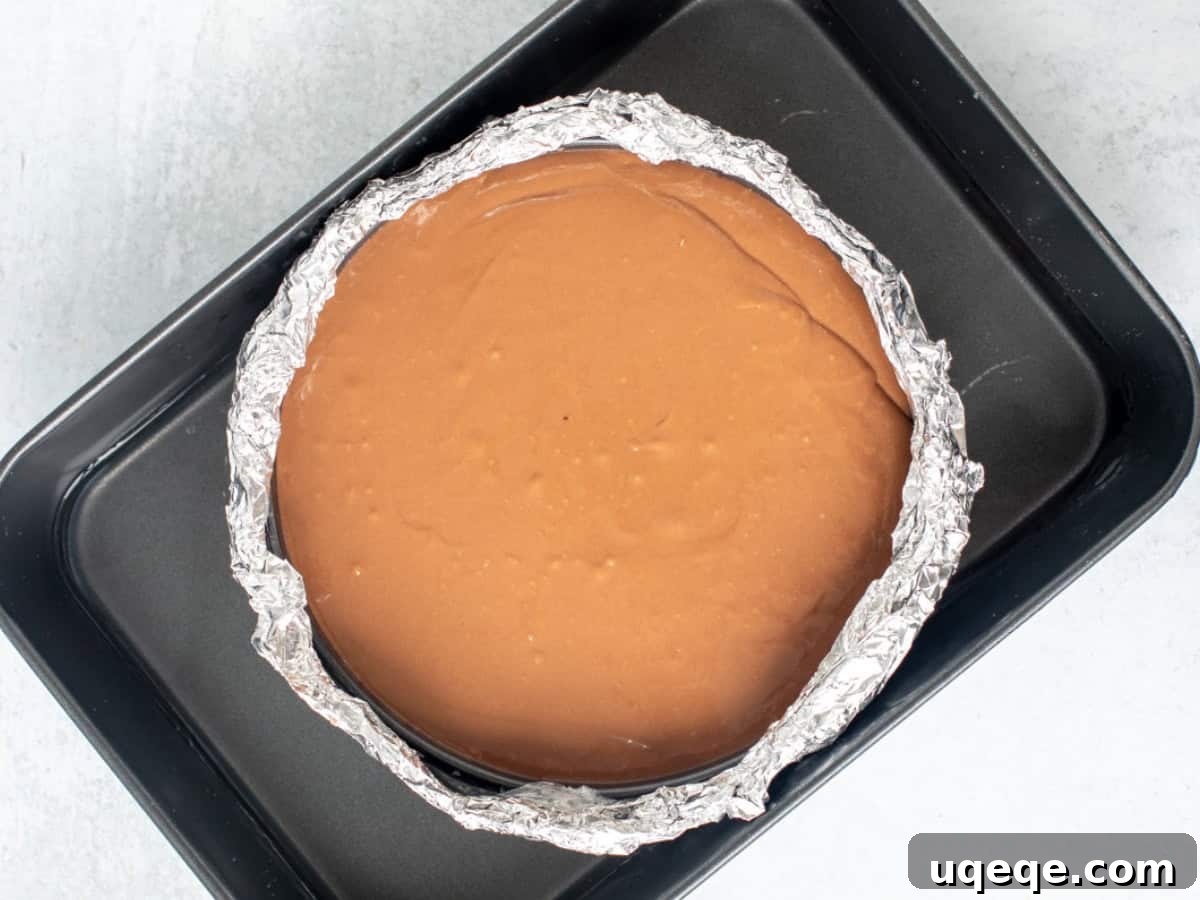
- Pour and Prepare for Baking: Carefully pour the beautifully smooth chocolate cheesecake batter over the pre-baked Oreo crust in your prepared springform pan. The cheesecake is now ready for its crucial water bath baking.
Mastering the Water Bath Technique for Cheesecake
As discussed, a water bath is essential for a crack-free, evenly baked, and creamy cheesecake. Here’s a clear guide on how to set it up:
After you’ve wrapped your springform pan (containing the unbaked cheesecake) in the oven bag and foil, place it in the center of a large roasting pan. The roasting pan should be large enough to comfortably hold the springform pan with some space around the edges, but not so large that the water volume becomes unmanageable. Now, carefully pour about 1/2 to 1 inch (1-2 cm) of boiling water into the bottom of the roasting pan. Be sure to pour the water directly into the roasting pan, not over the cheesecake pan itself. The entire assembly then goes into your preheated oven.
The cheesecake will bake for approximately 55-70 minutes at 325°F (160°C). It’s ready when the top edges appear just set, but the very center still has a slight wobble, similar to a firm pudding or jelly, if you gently nudge the pan. It shouldn’t be liquid, but also not completely firm. This wobble indicates that the center will finish cooking and set completely during the cooling process, ensuring a perfectly creamy texture.
Chilling, Serving & Make-Ahead Tips for Your Cheesecake
One of the many wonderful aspects of this chocolate cheesecake – and indeed, most cheesecakes – is that it’s an ideal dessert to prepare in advance. Proper chilling is absolutely essential for the cheesecake to fully set, firm up, and develop its optimal flavor and texture. In fact, the flavor truly improves as it rests in the refrigerator, allowing all the rich notes to meld together.
After baking, let the cheesecake cool slowly. Turn off the oven, crack the door open, and leave the cheesecake inside for about 30 minutes. This gradual cooling prevents sudden temperature shocks that can cause cracks. Then, remove the roasting pan from the oven and continue to cool the cheesecake (still in the roasting pan) on a wire rack until it reaches room temperature. Once completely cool, remove the springform pan from the roasting pan, cover it tightly with aluminum foil, and transfer it to the refrigerator. It needs to chill for at least 6 hours, but for the very best results, I typically make this cheesecake the night before I plan to serve it, allowing it to chill overnight.
You can then prepare the luscious chocolate ganache topping at any time after the cheesecake has chilled for at least 6 hours. Once applied, the ganache will require about 30 minutes in the fridge to firm up to a perfect consistency. Feel free to get creative with your presentation: sprinkle a few elegant chocolate shavings on top, adorn the outside edge of the cheesecake with vibrant fresh raspberries, add a delicate dollop of homemade whipped cream to each slice, or simply leave it plain to let the triple chocolate richness shine through. The choice is yours, and every option is delicious!
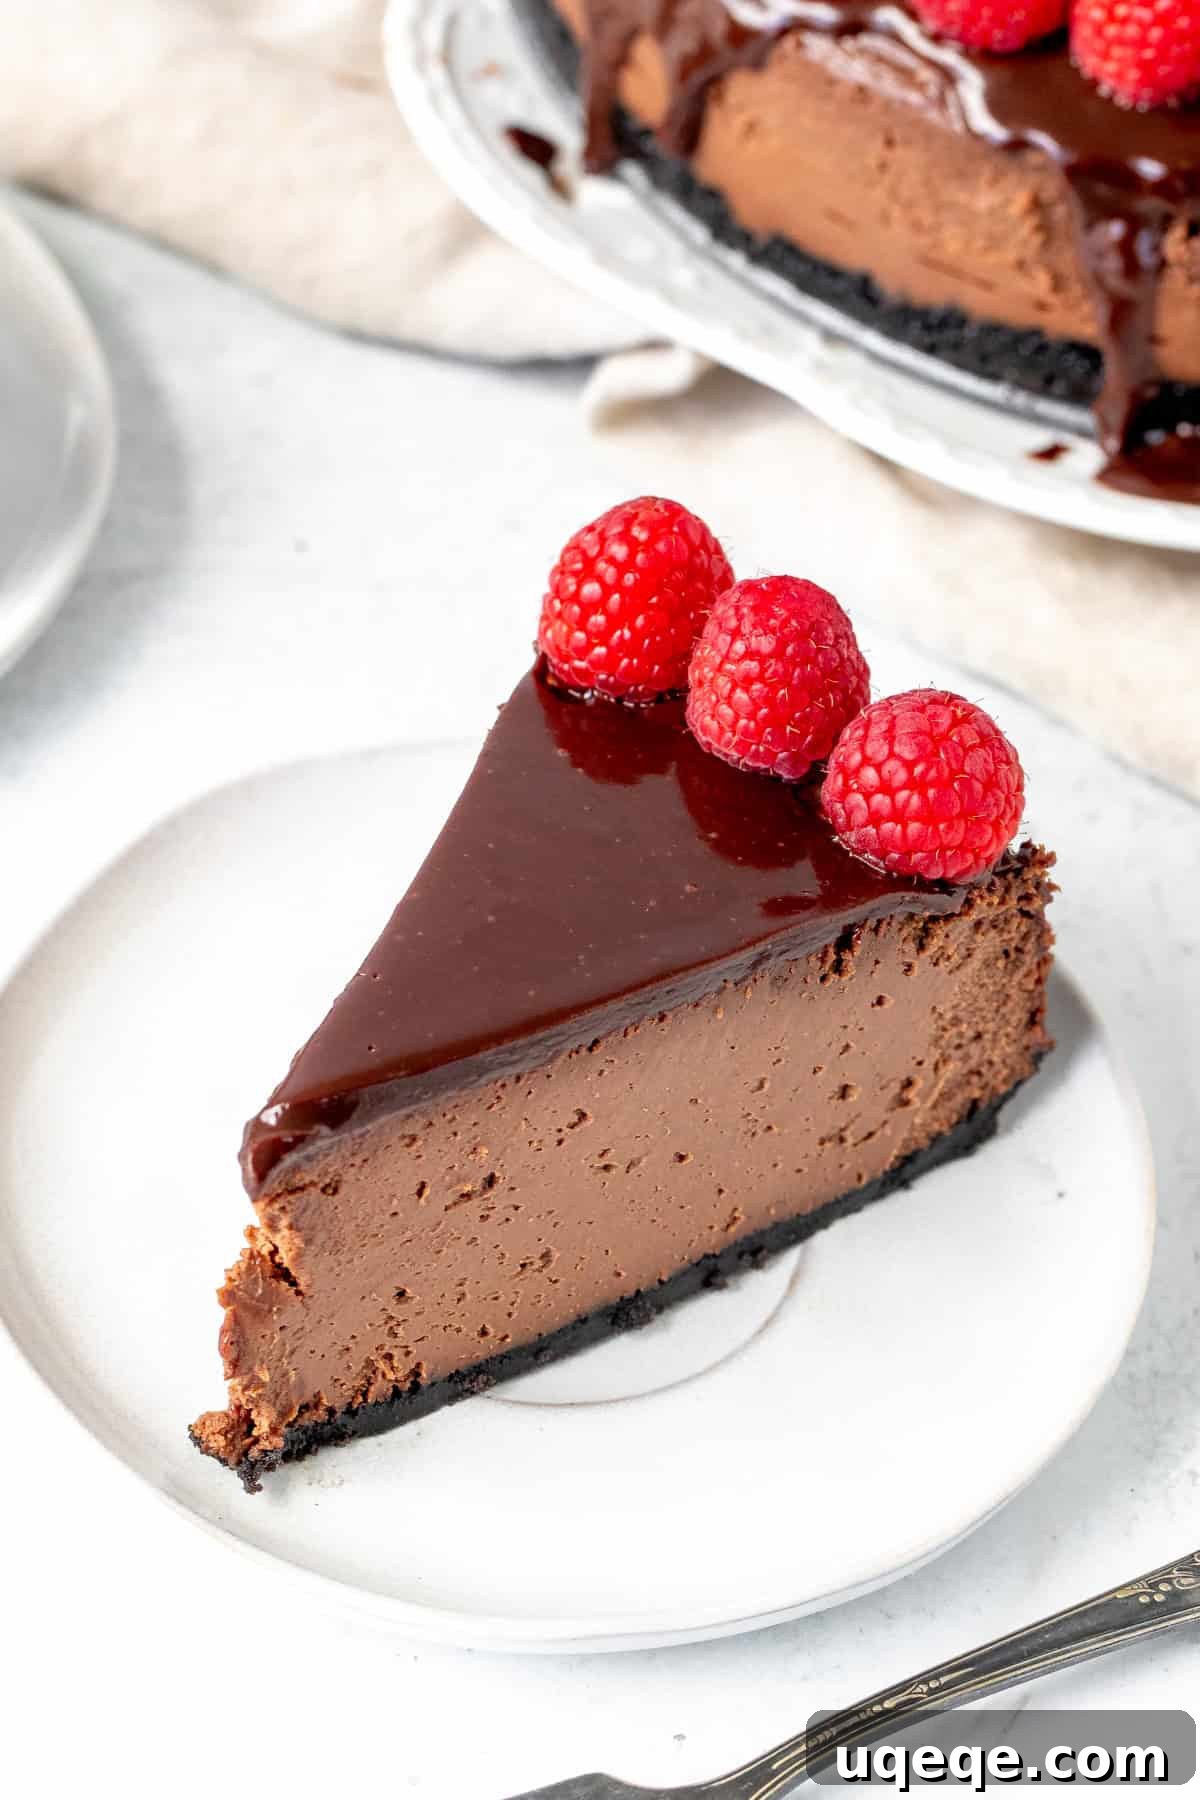
Achieving a creamy, decadent, and perfectly rich chocolate cheesecake is entirely within your grasp by following these simple yet crucial tips. The enchanting combination of the crunchy Oreo cookie crust and the velvety-smooth chocolate cheesecake filling creates a dessert that is truly impossible to resist, solidifying this recipe as the ultimate chocolate cheesecake experience. Enjoy every single indulgent bite!
More Irresistible Cheesecake Recipes to Love:
- No-Bake Chocolate Cheesecake
- Nutella Cheesecake
- Oreo Cheesecake
- Peanut Butter Cheesecake
Chocolate Cheesecake
Fiona Dowling
This baked chocolate cheesecake is super smooth and creamy with a decadent, rich chocolate flavor. With an Oreo cookie crust and chocolate ganache – this chocolate cheesecake recipe is a show stopper!
45 mins
1 hr
7 hrs
8 hrs 45 mins
14 slices
Rate Recipe
Print Recipe
Equipment
- 9-inch (23 cm) springform pan
- Large roasting pan (big enough for the springform pan to fit inside)
- Aluminum Foil
- Food Processor (optional, for crushing Oreos)
- Large heatproof bowl (for melting chocolate)
- Electric mixer (stand or hand mixer)
- Wire whisk (optional, for eggs)
Ingredients
Oreo Cookie Crust
- 30 Oreo cookies, wafers and filling
- 5 tablespoons unsalted butter (70 grams), melted
Chocolate Cheesecake
- 10 ounces 70% dark chocolate (280 grams)
- 24 ounces full-fat cream cheese (680 grams), brick style (not whipped, spreadable or light), room temperature
- 1 and 1/4 cup granulated sugar (250 grams)
- 1 tablespoon cornstarch (substitute with sifted cocoa powder for a richer chocolate flavor)
- 3/4 cup sour cream (180 ml), room temperature
- 4 large eggs, room temperature
- 2 large egg yolks, room temperature (in addition to the 4 large eggs)
- Boiling water, for the water bath
Ganache
- 5 oz dark chocolate (142 grams)
- 1/2 cup heavy cream (120 ml)
- Raspberries, for decoration – optional
- Chocolate shavings, for decoration – optional
Instructions
- Preheat the oven to 325°F (160°C).
- Wrap the outside of a 9-inch springform pan with a disposable oven bag (trim if needed). Twist the edge tightly and tie with the key lock tie. Then wrap the outside of the pan in heavy-duty aluminum foil at least 3-4 times, alternating the direction to ensure all sides and seams are covered for a watertight seal.
Cookie Crust
- Add the Oreo cookies (wafers and filling) to a food processor and pulse until fine crumbs. Alternatively, place them in a freezer bag and crush with a rolling pin.
- Mix the crumbs with the melted butter until thoroughly combined.
- Press the mixture firmly into the bottom of the prepared springform pan, creating a slight lip around the edge.
- Bake in the preheated oven for 10 minutes. Remove from the oven (keeping the pan wrapped in foil) and keep the oven turned on.
Cheesecake Filling
- Chop the 10 oz dark chocolate into very small pieces and place in a large heatproof bowl. Melt either in the microwave (on medium power, 45-second intervals, stirring between each until smooth) or in a double boiler (ensure gently simmering water in the saucepan does not touch the bottom of the chocolate bowl).
- In a very large bowl, beat the cream cheese, sugar, and cornstarch until smooth and creamy – about 3-5 minutes. Continually turn off the mixer and scrape down the bottom and sides of the bowl to prevent lumps.
- Add the sour cream and the melted chocolate to the cream cheese mixture. Mix on low speed until just combined, stopping to scrape down the bottom and sides of the bowl.
- In a small bowl, whisk together the 4 large eggs and the additional 2 egg yolks. Gently whisk the eggs into the cheesecake batter about half at a time. I recommend doing this by hand with a wire whisk to avoid overmixing. If using an electric mixer, mix on a very low speed just until no streaks of egg remain, then stop.
- Pour the batter over the prepared crust (the springform pan should still be wrapped).
Baking, Cooling & Chilling the Cheesecake
- Place the foil-wrapped springform pan (with the unbaked cheesecake) in the middle of a large roasting pan.
- Carefully pour about 1/2 – 1 inch (1-2 cm) of boiling water into the roasting pan, ensuring it does not splash into the cheesecake.
- Place the roasting pan (with cheesecake inside) in the oven and bake for 55-70 minutes, or until the top looks just set and the cheesecake has a slight wobble in the center when gently nudged (like a firm pudding).
- Turn off the oven, open the oven door slightly, and cool the cheesecake in the oven for about 30 minutes. Then remove the roasting pan from the oven and continue cooling the cheesecake (still in the roasting pan) on a wire rack until it reaches room temperature.
- Once at room temperature, remove the springform pan from the roasting pan, cover it tightly with aluminum foil, and place it in the fridge to chill for at least 6 hours or overnight for best results.
Chocolate Ganache
- Chop the 5 oz dark chocolate into very small pieces and place in a heatproof bowl.
- Heat the heavy cream until it’s almost boiling (small bubbles around the edge). Pour the hot cream over the chopped chocolate. Let it sit undisturbed for about 2-5 minutes, then whisk gently until completely smooth and glossy.
- Remove the chilled cheesecake from the fridge. Gently trace around the edge of the pan with a thin, sharp knife to loosen it. Unclamp and carefully remove the outer ring of the springform pan. If there is any condensation on top of the cheesecake, gently blot it with a paper towel.
- Pour the prepared chocolate ganache evenly over the top of the cheesecake, allowing it to artfully drip over the edges. Optionally, sprinkle a few chocolate shavings on top and/or decorate with fresh raspberries.
- Place the cheesecake back in the fridge for an additional 30 minutes to allow the ganache to firm up slightly.
- To serve, use a sharp, thin, non-serrated knife (not a table knife) to cut clean slices. Be sure to slice all the way through the crunchy Oreo crust for a perfect bite.
Notes
- Springform Pan: A 9-inch (23 cm) springform pan is absolutely essential for this recipe. An 8-inch (20-cm) pan will not hold all the batter.
- Chocolate Selection: I recommend 70% dark chocolate for the cheesecake filling. You can use 60% if preferred, but avoid anything stronger than 80% to prevent bitterness. For the ganache, semi-sweet or 50% dark chocolate works wonderfully.
- Cream Cheese Type: Always use full-fat, brick-style cream cheese. Whipped, spreadable, or light varieties will not yield the correct texture for this baked cheesecake. Philadelphia cream cheese is a reliable choice.
- Room Temperature Ingredients: Ensure cream cheese, sour cream, and eggs are at room temperature. This is critical for a smooth, lump-free batter.
- Storage: Store leftover cheesecake covered tightly in the refrigerator for up to 5 days. For longer storage, wrap the cheesecake tightly in plastic wrap, then aluminum foil, and freeze for up to 2 months. It’s best to freeze without the ganache topping and add it after thawing. Thaw frozen cheesecake in the refrigerator overnight.
- Nutrition Information: The provided nutrition information is an estimate based on one slice, assuming the cheesecake is cut into 14 equal pieces and all the ganache topping is used.
Nutrition
Carbohydrates: 53 g,
Protein: 9 g,
Fat: 46 g,
Saturated Fat: 25 g,
Polyunsaturated Fat: 3 g,
Monounsaturated Fat: 14 g,
Trans Fat: 0.2 g,
Cholesterol: 157 mg,
Sodium: 280 mg,
Potassium: 385 mg,
Fiber: 4 g,
Sugar: 37 g,
Vitamin A: 1104 IU,
Vitamin C: 0.2 mg,
Calcium: 105 mg,
Iron: 7 mg
Like this recipe? Rate and comment below! Your feedback helps us improve and inspires other bakers.