
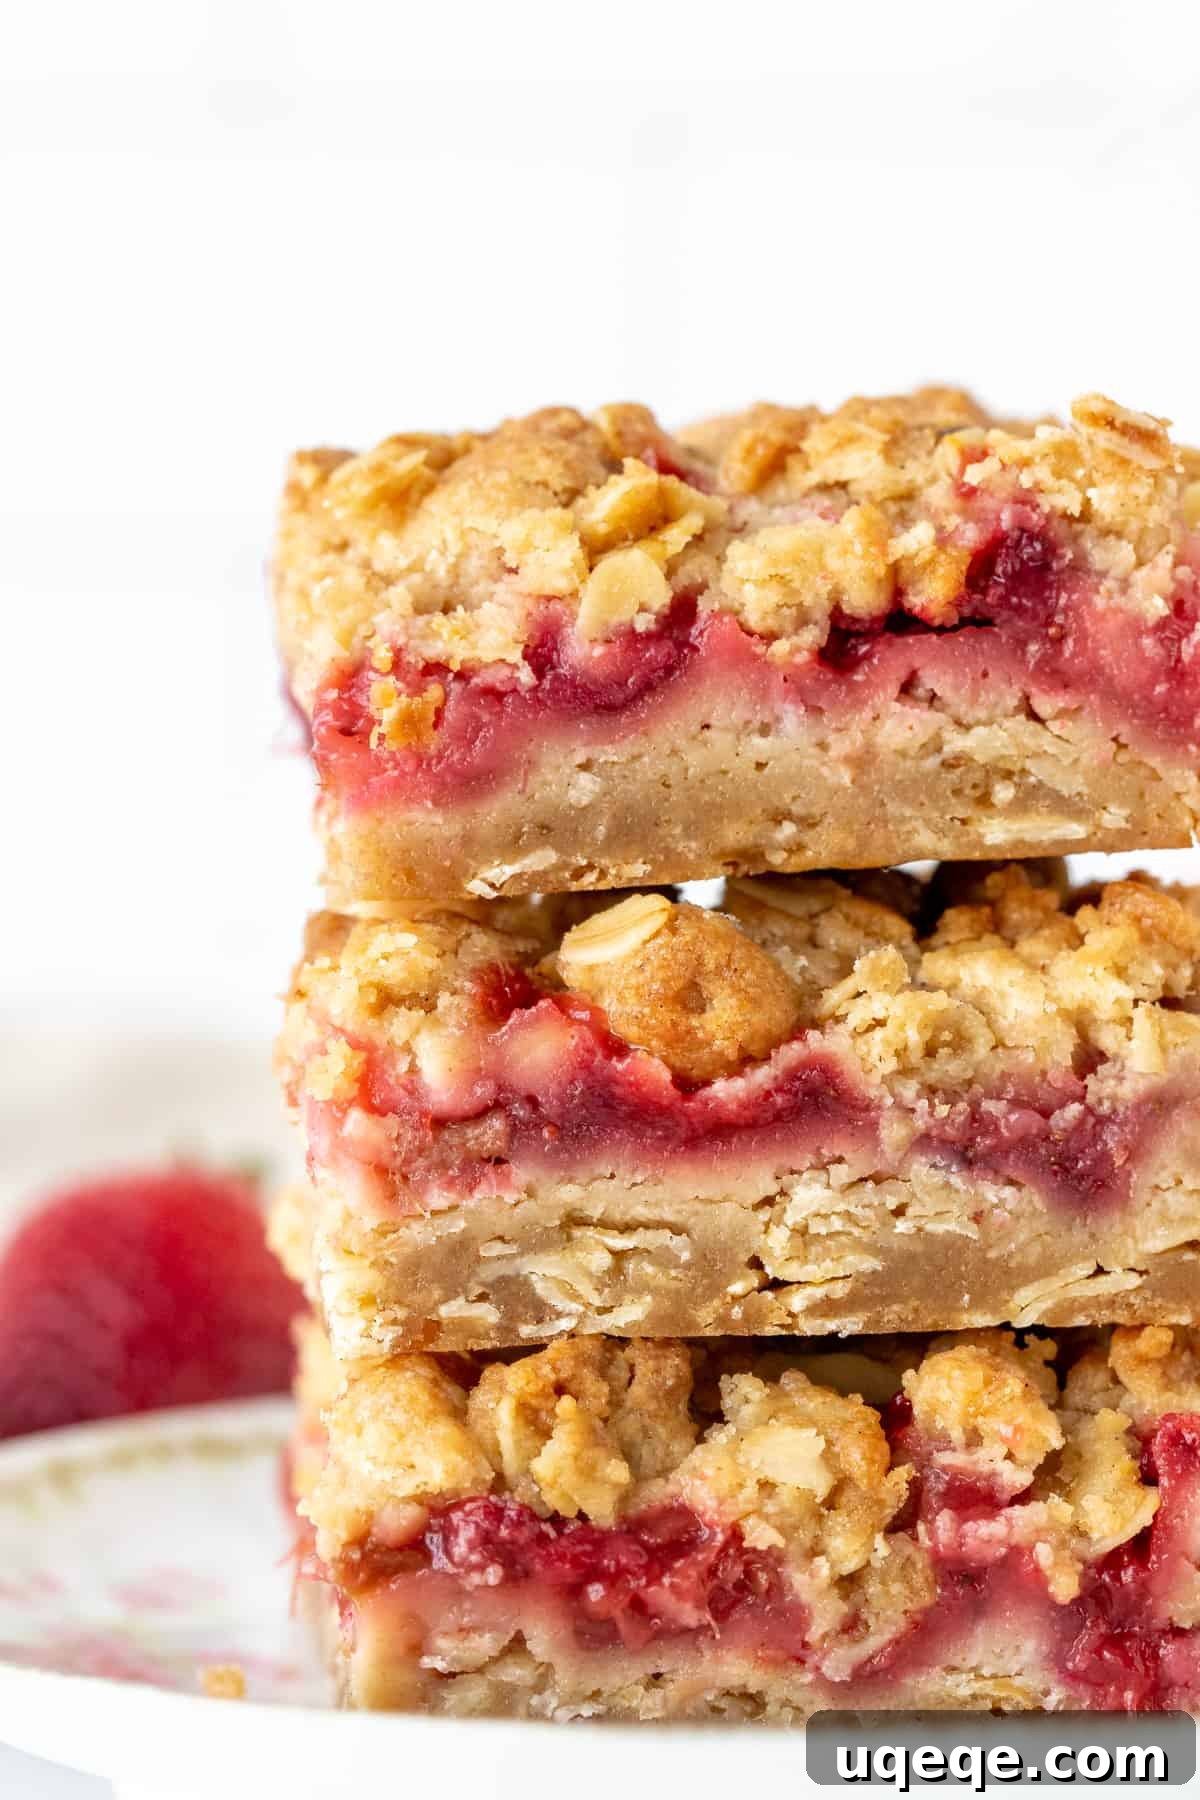
Homemade Strawberry Rhubarb Bars: A Sweet-Tart Summer Delight
Welcome to your new favorite summer dessert: homemade Strawberry Rhubarb Bars! These delectable treats feature a rich, buttery oatmeal base, a vibrant strawberry and rhubarb filling that strikes the perfect balance between sweet and tart, and a delightfully crunchy cinnamon oatmeal crumble topping. They are an absolute joy, whether enjoyed with a fresh cup of coffee in the morning or as a satisfying dessert with a scoop of vanilla ice cream.
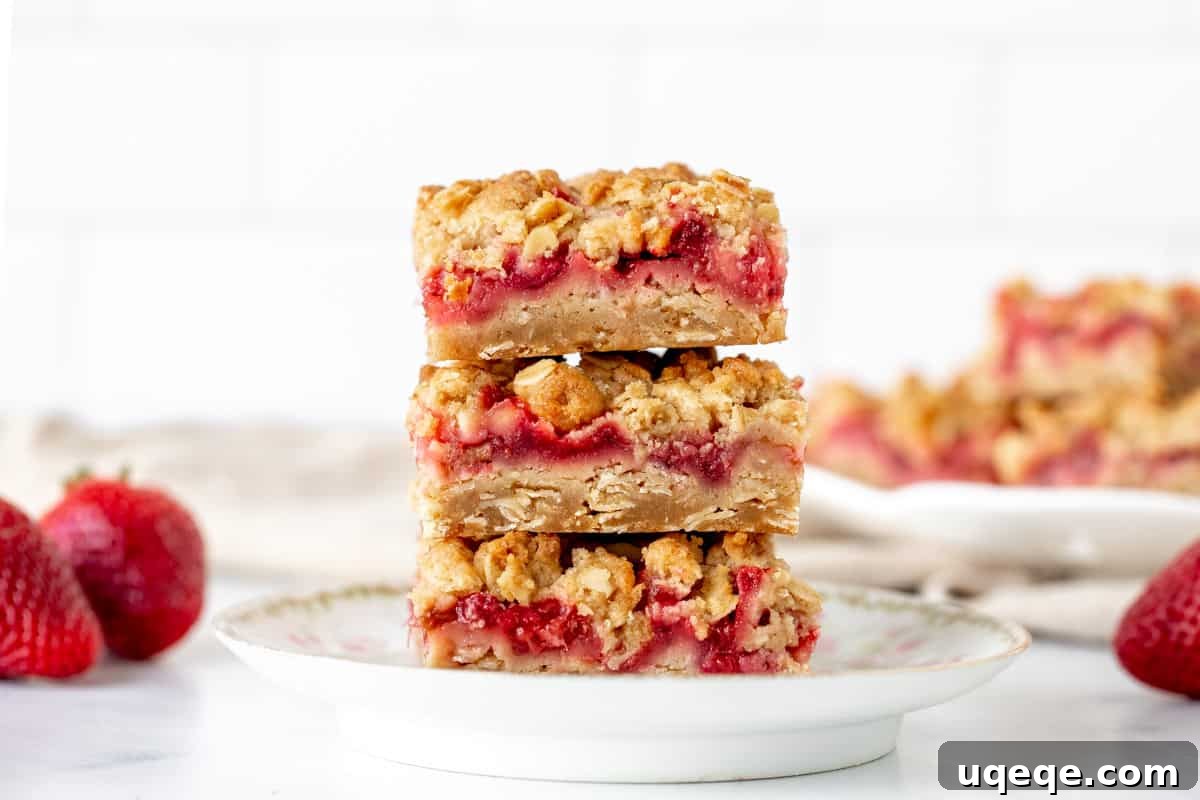
If you adore a classic strawberry rhubarb crisp, you’ll fall head over heels for these bars. They offer all the beloved flavors and textures of a crisp but in a convenient, portable format. Craving an extra generous portion of that irresistible crunchy oatmeal crumble topping? These bars deliver! The sturdy bottom layer is essentially a thick, chewy oatmeal cookie, providing a fantastic foundation. Nestled above it is the star of the show: a luscious strawberry rhubarb filling, harmonizing the sweetness of ripe strawberries with the tangy brightness of rhubarb. Finally, a golden-brown, cinnamon-infused crumble adds that quintessential crunch, making every bite an unforgettable experience.
While undoubtedly a decadent dessert, we won’t judge if you find yourself enjoying these bars for breakfast – they are that good! Their wholesome oatmeal component makes them a surprisingly delightful start to the day, offering a burst of fruity flavor to brighten any morning.
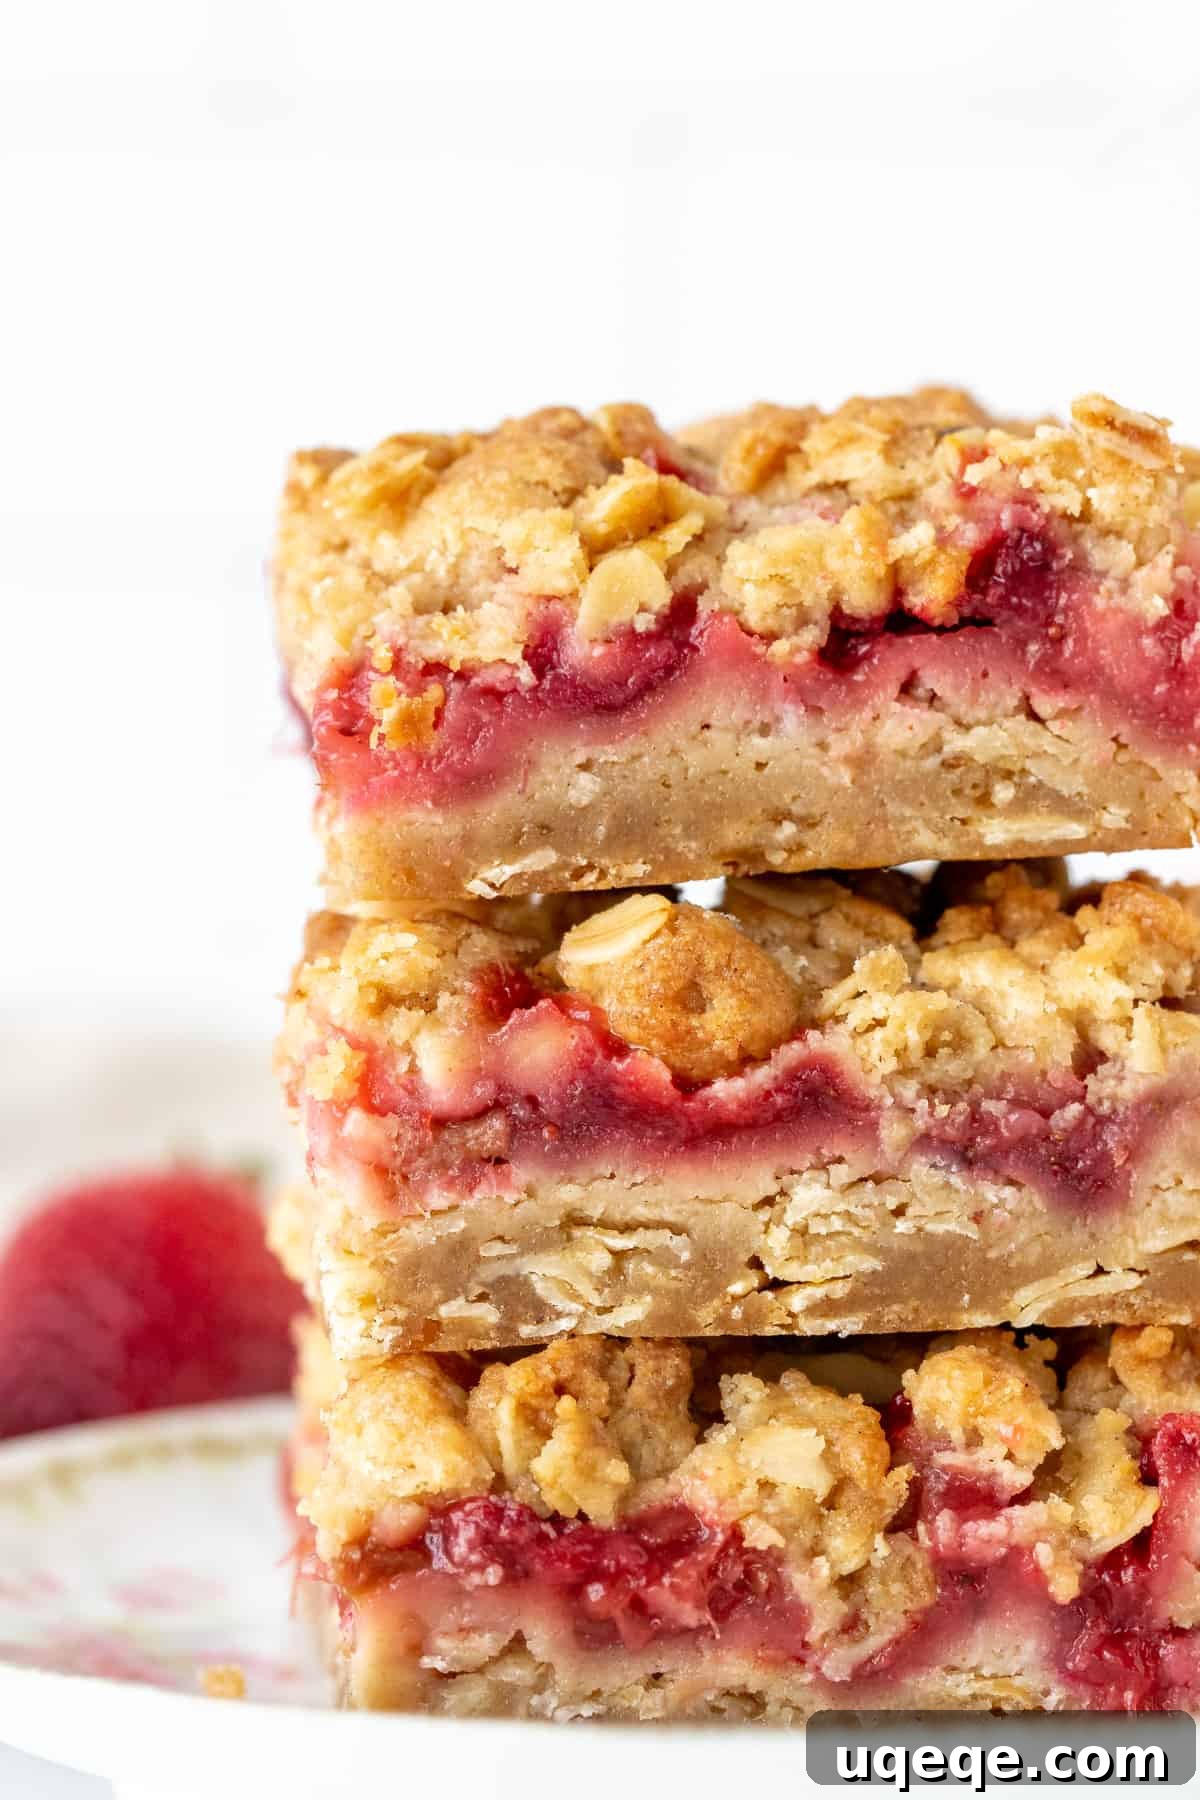
Crafting Your Perfect Strawberry Rhubarb Bars
Creating these sensational bars is simpler than you might imagine. With a few basic ingredients and straightforward steps, you’ll be enjoying this delightful treat in no time. Let’s break down the process for each delicious layer.
The Sweet-Tart Strawberry Rhubarb Filling
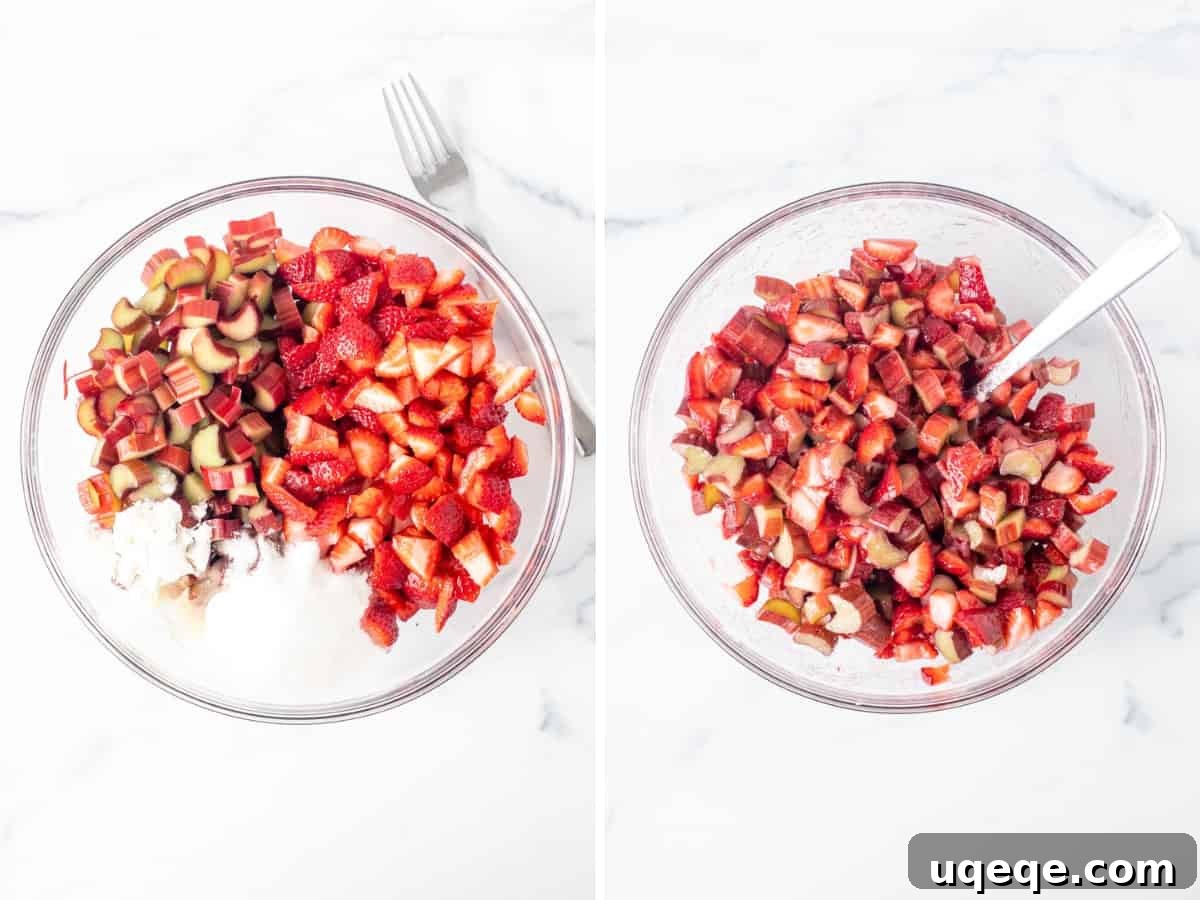
One of the best aspects of this recipe is that there’s no need for pre-cooking or simmering the fruit. You’ll simply combine the fresh, chopped rhubarb with sliced strawberries, granulated sugar, cornstarch (a key thickener), and a splash of freshly squeezed lemon juice. The cornstarch works wonders to ensure your filling sets beautifully, creating a jam-like consistency as it bakes. The lemon juice not only brightens the fruit flavors but also helps draw out the natural juices from the berries and rhubarb, creating a wonderfully integrated taste. As the bars bake, the fruits will soften and meld together into a truly delicious, vibrantly colored filling.
The Versatile Oatmeal Base & Crumble Topping
The genius of this recipe lies in its dual-purpose oatmeal mixture, which forms both the sturdy base and the irresistible crumble topping. Preparing it requires minimal effort and no electric mixer, making it an ideal recipe for bakers of all skill levels.
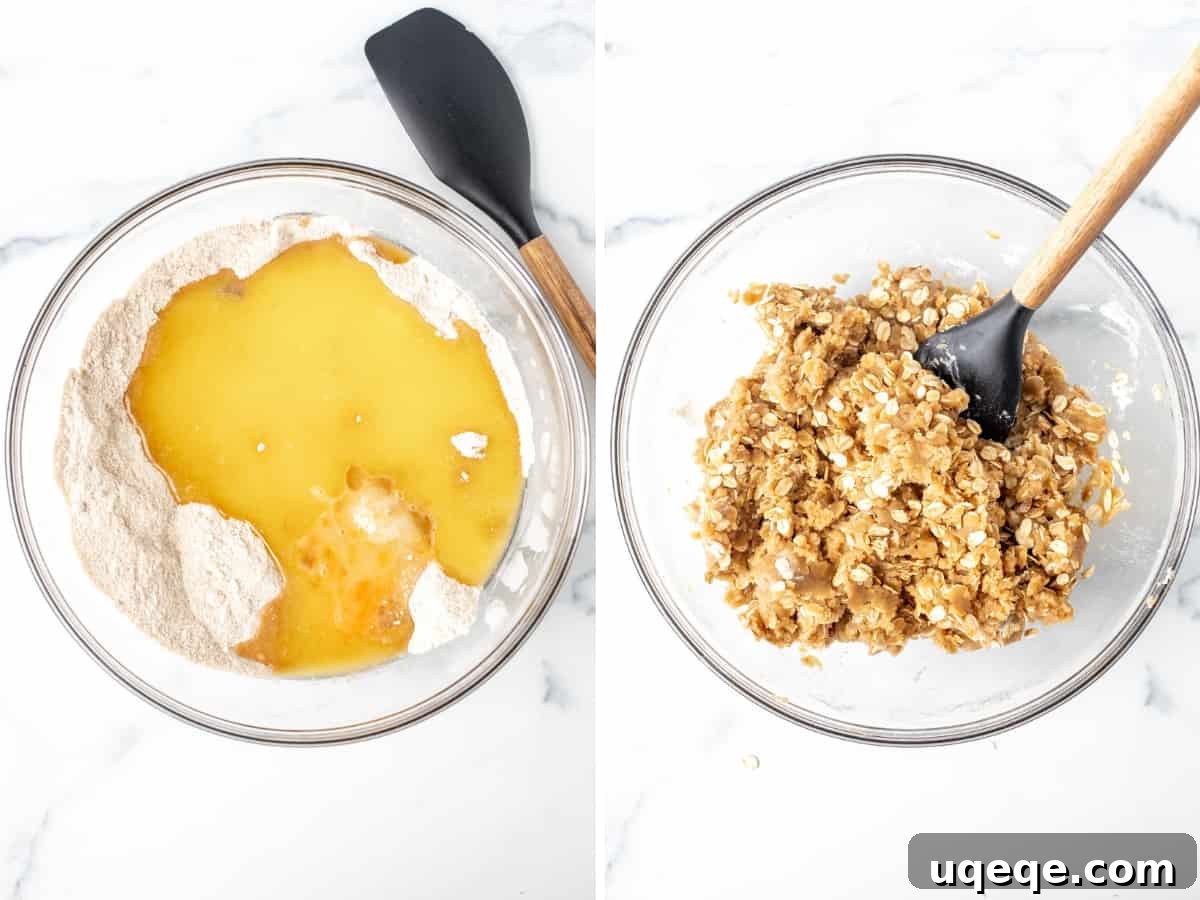
- Begin by whisking together the dry ingredients: all-purpose flour, both brown and white sugars, a hint of warm cinnamon, a touch of nutmeg, salt, and baking powder. Ensure there are no clumps, especially from the brown sugar.
- Next, pour in the melted unsalted butter. Stir until the mixture comes together. It will be thick and slightly crumbly, which is exactly the desired consistency.
- Finally, fold in the rolled oats. These add a wonderful chewiness to the base and a rustic texture to the topping.
This simple, one-bowl method for the oatmeal mixture is a total win, making cleanup a breeze and getting you to the baking stage faster.
Assembling and Baking Your Bars to Perfection
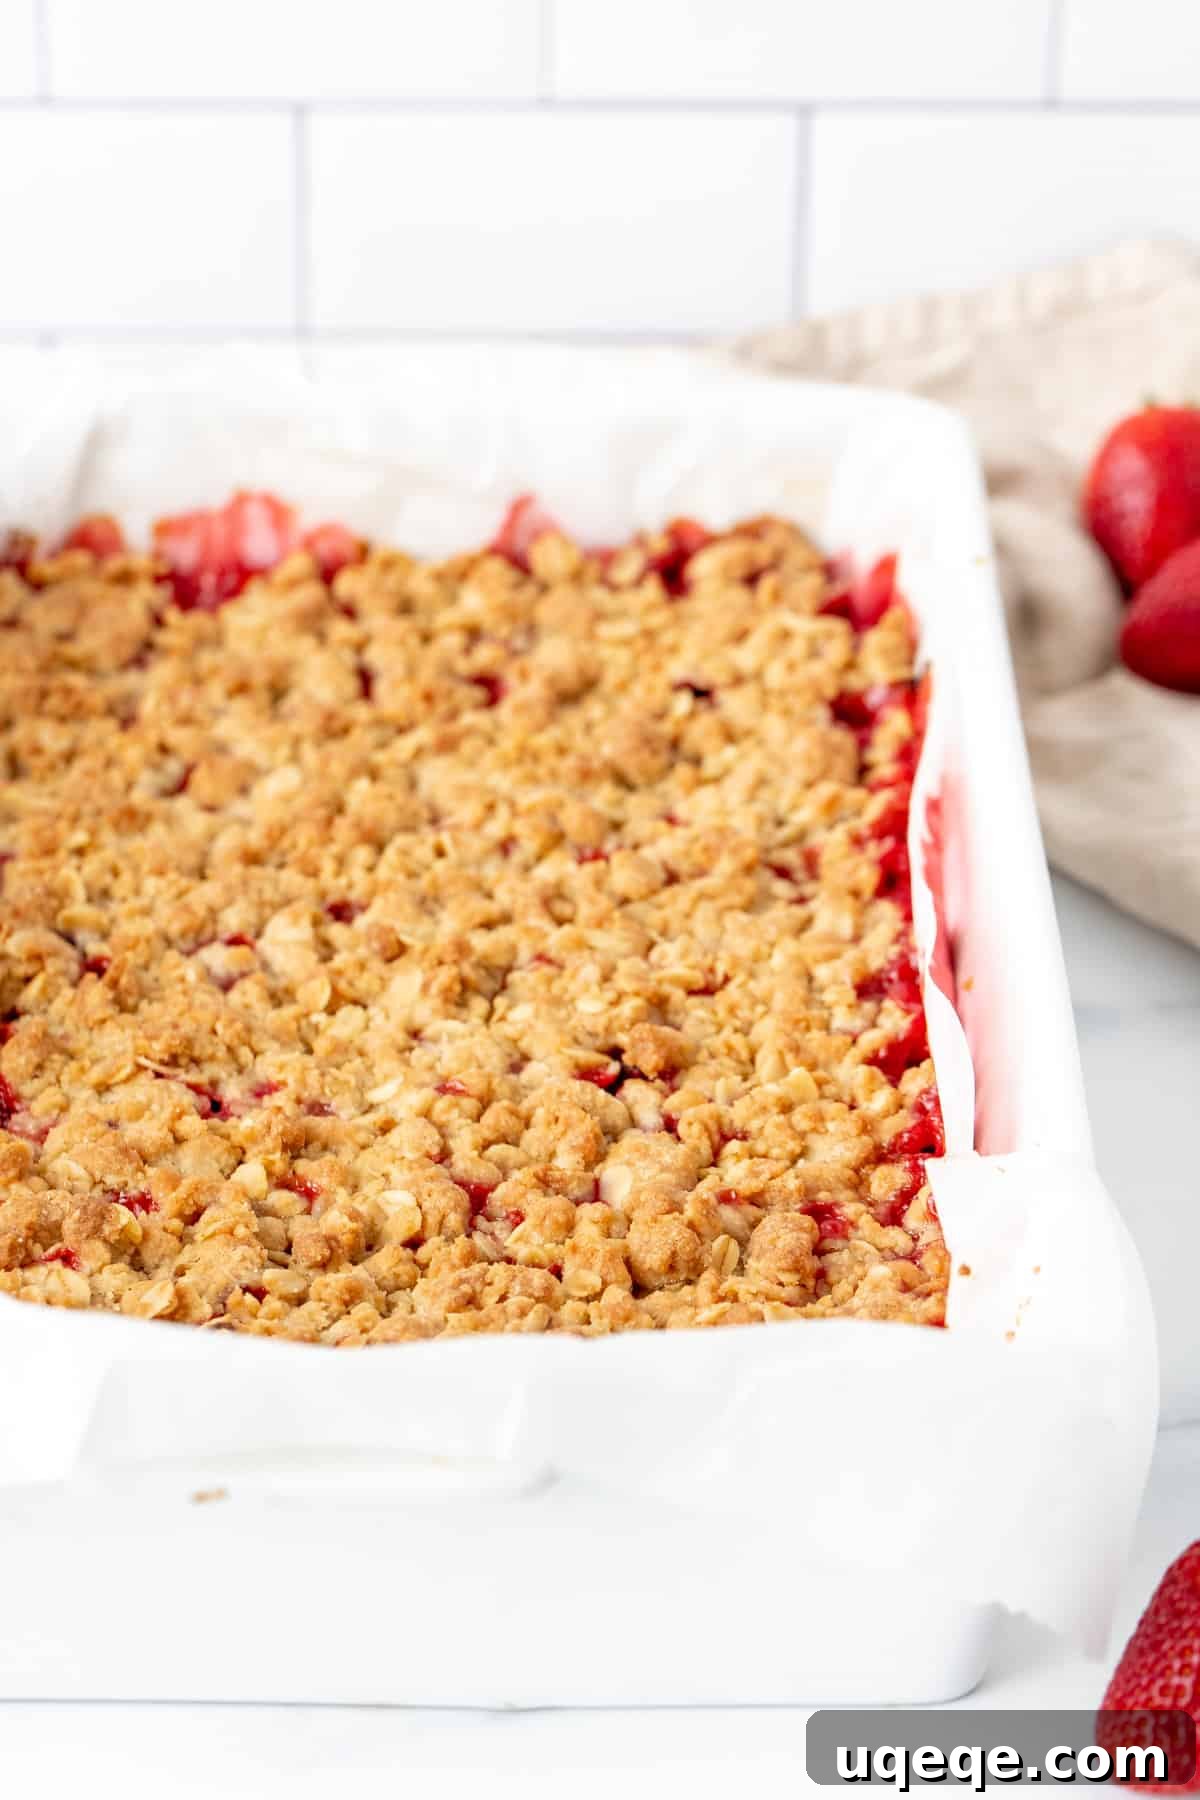
The assembly process is straightforward, layering the delicious components in your prepared baking pan. First, take a little over half of your prepared oatmeal mixture and press it firmly into the bottom of a 9×13 inch pan (or an 8×8 inch pan if halving the recipe). This forms the chewy, cookie-like base of your bars. Next, carefully spoon and spread the vibrant strawberry rhubarb filling evenly over the oatmeal base. Don’t worry if there’s a small amount of extra liquid in the fruit bowl; you don’t need to add it all to the pan. Finally, take the remaining oatmeal mixture and generously sprinkle it over the fruit layer. You can pinch and crumble the mixture to create varying sizes of delicious, rustic crumbles.
As these strawberry rhubarb bars bake, a magical transformation occurs. The fruit softens, releasing its juices, and the tartness of the rhubarb mellows, blending beautifully with the sweet strawberries. The crumble topping turns a glorious golden brown, and you’ll notice the fruit juices gently bubbling around the edges, a sure sign that your bars are nearing perfection. The typical bake time is around 45-55 minutes, but keep an eye on that beautiful golden color and bubbling fruit.
Expert Baking Tips & Tricks for Flawless Bars
Achieving the perfect strawberry rhubarb bars is easy with a few insider tips:
- Fresh is Best: For optimal results, I highly recommend using fresh strawberries and rhubarb. While frozen fruit can be used, it tends to add more moisture, potentially leading to a longer baking time (at least 10 minutes extra) and a slightly doughier base. If you do use frozen, make sure to thaw and drain any excess liquid to prevent a watery filling.
- Embrace the Crumble: Don’t be alarmed if your oatmeal mixture feels slightly dry and crumbly when you combine it. This is exactly what you want! It creates that wonderful, textured topping and a firm base.
- Patience is Key for Slicing: This might be the most crucial tip! Allow the bars to cool completely before attempting to slice them. Cooling gives the fruit filling ample time to set properly, preventing it from oozing out and ensuring clean, beautiful slices. Rushing this step often results in messy bars.
- Prevent Over-Browning: If you notice the topping browning too quickly during baking, you can lightly tent the pan with aluminum foil. This protects the top while allowing the fruit underneath to cook thoroughly.
- Perfect Pan Preparation: Lightly greasing your baking pan or lining it with parchment paper (leaving an overhang on the sides) will make removing the cooled bars incredibly easy, preventing sticking and making cleanup simpler.
Make-Ahead & Storage Solutions
These strawberry rhubarb bars are fantastic for meal prep or entertaining. You can assemble them a day in advance and store the unbaked bars, covered, in the refrigerator. Simply pull them out an hour before baking to come to room temperature, then bake as directed.
Once baked and cooled, store leftover bars in an airtight container at room temperature for up to 3 days. For extended freshness, they can be kept in the refrigerator for up to 5 days. For longer storage, these bars freeze beautifully! Wrap individual bars tightly in plastic wrap, then place them in a freezer-safe bag or container. They can be frozen for up to 3 months. Thaw them in the refrigerator overnight or at room temperature for a few hours before serving.
Serving Suggestions & Variations
While perfect on their own, these strawberry rhubarb bars can be elevated further:
- Classic Toppings: A dollop of whipped cream, a scoop of vanilla bean ice cream, or a drizzle of crème anglaise are all delightful additions.
- For Breakfast or Brunch: Serve them alongside your morning coffee or as part of a brunch spread. Their hearty oatmeal base makes them a welcome addition.
- Picnic Perfection: Their portability makes them ideal for picnics, potlucks, or packed lunches.
- Add a Citrus Zing: Instead of lemon juice, a little orange zest and juice in the fruit filling can add another layer of brightness.
- Spice It Up: A pinch of ginger or cardamom in the crumble mixture complements the fruit beautifully.
- Nutty Crunch: Add chopped pecans or walnuts to the oatmeal crumble for an extra layer of texture and flavor.
Frequently Asked Questions About Strawberry Rhubarb Bars
Q: Can I use frozen fruit for this recipe?
A: Yes, you can use frozen strawberries and rhubarb, but fresh is preferred. If using frozen, thaw them completely and drain off any excess liquid to prevent the filling from becoming too watery. You may also need to bake the bars for an additional 5-10 minutes, and consider loosely tenting the top with foil if it starts to brown too quickly.
Q: How do I know when the bars are fully baked?
A: The bars are done when the oatmeal crumble topping is golden brown, and you can see the fruit filling gently bubbling around the edges of the pan. A quick peek with a knife or toothpick into the fruit layer (avoiding the base) should show it to be thick and jammy.
Q: My crumble topping isn’t crunchy enough. What went wrong?
A: A common reason for a soft crumble is either too much moisture in the fruit layer or not baking long enough. Ensure your fruit is not overly juicy (especially if using frozen) and bake until the topping is a deep golden brown and feels firm to the touch.
Q: Can I make these bars gluten-free?
A: While this recipe uses all-purpose flour, you can experiment with a 1:1 gluten-free baking flour blend that contains xanthan gum. Ensure your oats are certified gluten-free as well. Results may vary slightly in texture.
Q: Can I substitute other fruits?
A: Absolutely! While strawberry rhubarb is a classic, you can try other fruit combinations. Blueberry peach, mixed berry (raspberries, blueberries, blackberries), or apple cinnamon variations would also be delicious, though slight adjustments to sugar and cornstarch might be needed based on the fruit’s sweetness and juiciness.
Love these strawberry rhubarb bars? Then be sure to explore these other fantastic recipes:
- Strawberry Rhubarb Crisp
- Raspberry Oatmeal Bars
- Mixed Berry Fruit Crumble Bars
Strawberry Rhubarb Bars
By: Fiona Dowling
These homemade Strawberry Rhubarb Bars feature a delightful oatmeal base, a sweet and tart fruit filling, and a cinnamon oatmeal crumble topping. A perfect summer treat!
Prep time: 20 mins
Cook time: 45 mins
Total time: 1 hr 5 mins
Servings: 15 bars
Rate Recipe |
Print Recipe
Equipment
- 9×13 inch (23 x 33 cm) baking pan*
Ingredients
Strawberry Rhubarb Layer
- 2 cups sliced strawberries (measure after removing cores & slicing)
- 2 cups chopped rhubarb (about 1/5 – 1/4 inch slices or 1/3 cm)
- 1/2 cup granulated sugar (100 grams)
- 3 tablespoons cornstarch (24 grams) (also known as corn flour in the UK and Australia)
- 2 tablespoons lemon juice (30 ml), freshly squeezed
Oatmeal Crumble Base & Topping
- 2 cups all-purpose flour (250 grams)
- 1 cup brown sugar (210 grams), light or dark
- 1/2 cup white sugar (100 grams)
- 1 teaspoon cinnamon
- 1/2 teaspoon salt
- 1 3/4 cup rolled oats (large rolled oats preferred)
- 1 cup unsalted butter (226 grams), melted
Instructions
- Preheat your oven to 350°F (180°C). Lightly grease a 9×13 inch (23×33 cm) baking pan or line it with parchment paper, ensuring an overhang around the edges for easy lifting.
For the Fruit Filling Layer:
- In a large bowl, gently toss together the sliced strawberries, chopped rhubarb, granulated sugar, cornstarch, and freshly squeezed lemon juice until the fruit is evenly coated. Set this mixture aside.
For the Oatmeal Crumble Layer:
- In a very large bowl, whisk together the flour, brown sugar, white sugar, cinnamon, salt, and rolled oats. Mix until thoroughly combined and you no longer see clumps of brown sugar, ensuring an even texture.
- Pour the melted butter into the dry ingredients. Stir well until the mixture is cohesive but still slightly crumbly and dry.
Assembling & Baking the Bars:
- Take a little over half of the prepared oatmeal crumble mixture and press it firmly and evenly into the bottom of your prepared baking pan to form the base layer.
- Carefully spoon the fruit mixture over the oatmeal base, spreading it evenly to cover the entire layer. If there’s excessive juice accumulated in your fruit bowl, you can omit adding it to the pan.
- Crumble the remaining oatmeal mixture evenly over the fruit layer. You can pinch and break up the mixture to create your desired crumble size.
- Bake in the preheated oven for approximately 40-50 minutes, or until the topping is golden brown and you can see the fruit juices gently bubbling through the crumble.
- Remove from the oven and allow the bars to cool completely in the pan before attempting to slice them. This crucial step ensures the fruit filling sets properly.
- If you lined the pan with parchment paper, use the overhang to carefully lift the cooled bars out of the pan and place them on a cutting board. Slice into 15 equal-sized bars. If you greased the pan, slice the bars directly in the pan.
Notes
- Pan Sizes: This recipe can be halved and baked in an 8×8 inch (20×20 cm) pan. The baking time will be slightly shorter, closer to 35-45 minutes. Note that halving the recipe will not yield enough batter for a 9×9 inch (23×23 cm) pan.
- Frozen Fruit: For best results, fresh fruit is recommended. If using frozen fruit, the bake time will increase by at least 5 minutes. To prevent the top from over-browning, you may need to loosely tent a piece of aluminum foil over the pan. Be aware that frozen fruit can release more liquid due to ice crystals, potentially making the base too moist or doughy.
- Storage: Store the baked and cooled bars in an airtight container at room temperature for up to 3 days, or in the refrigerator for up to 5 days. These bars also freeze well; thaw them in the refrigerator before serving.
- Nutrition: The provided nutritional details are an estimate only, based on one bar, assuming the entire pan yields 15 equal-sized servings.
Nutrition Information (Per Serving – 1 of 15 bars)
Calories: 328kcal, Carbohydrates: 51g, Protein: 3g, Fat: 13g, Saturated Fat: 8g, Polyunsaturated Fat: 1g, Monounsaturated Fat: 3g, Trans Fat: 0.5g, Cholesterol: 33mg, Sodium: 85mg, Potassium: 154mg, Fiber: 2g, Sugar: 29g, Vitamin A: 398IU, Vitamin C: 13mg, Calcium: 42mg, Iron: 1mg
Did you enjoy this recipe? We’d love to hear from you! Please consider rating the recipe and leaving a comment below to share your experience.