
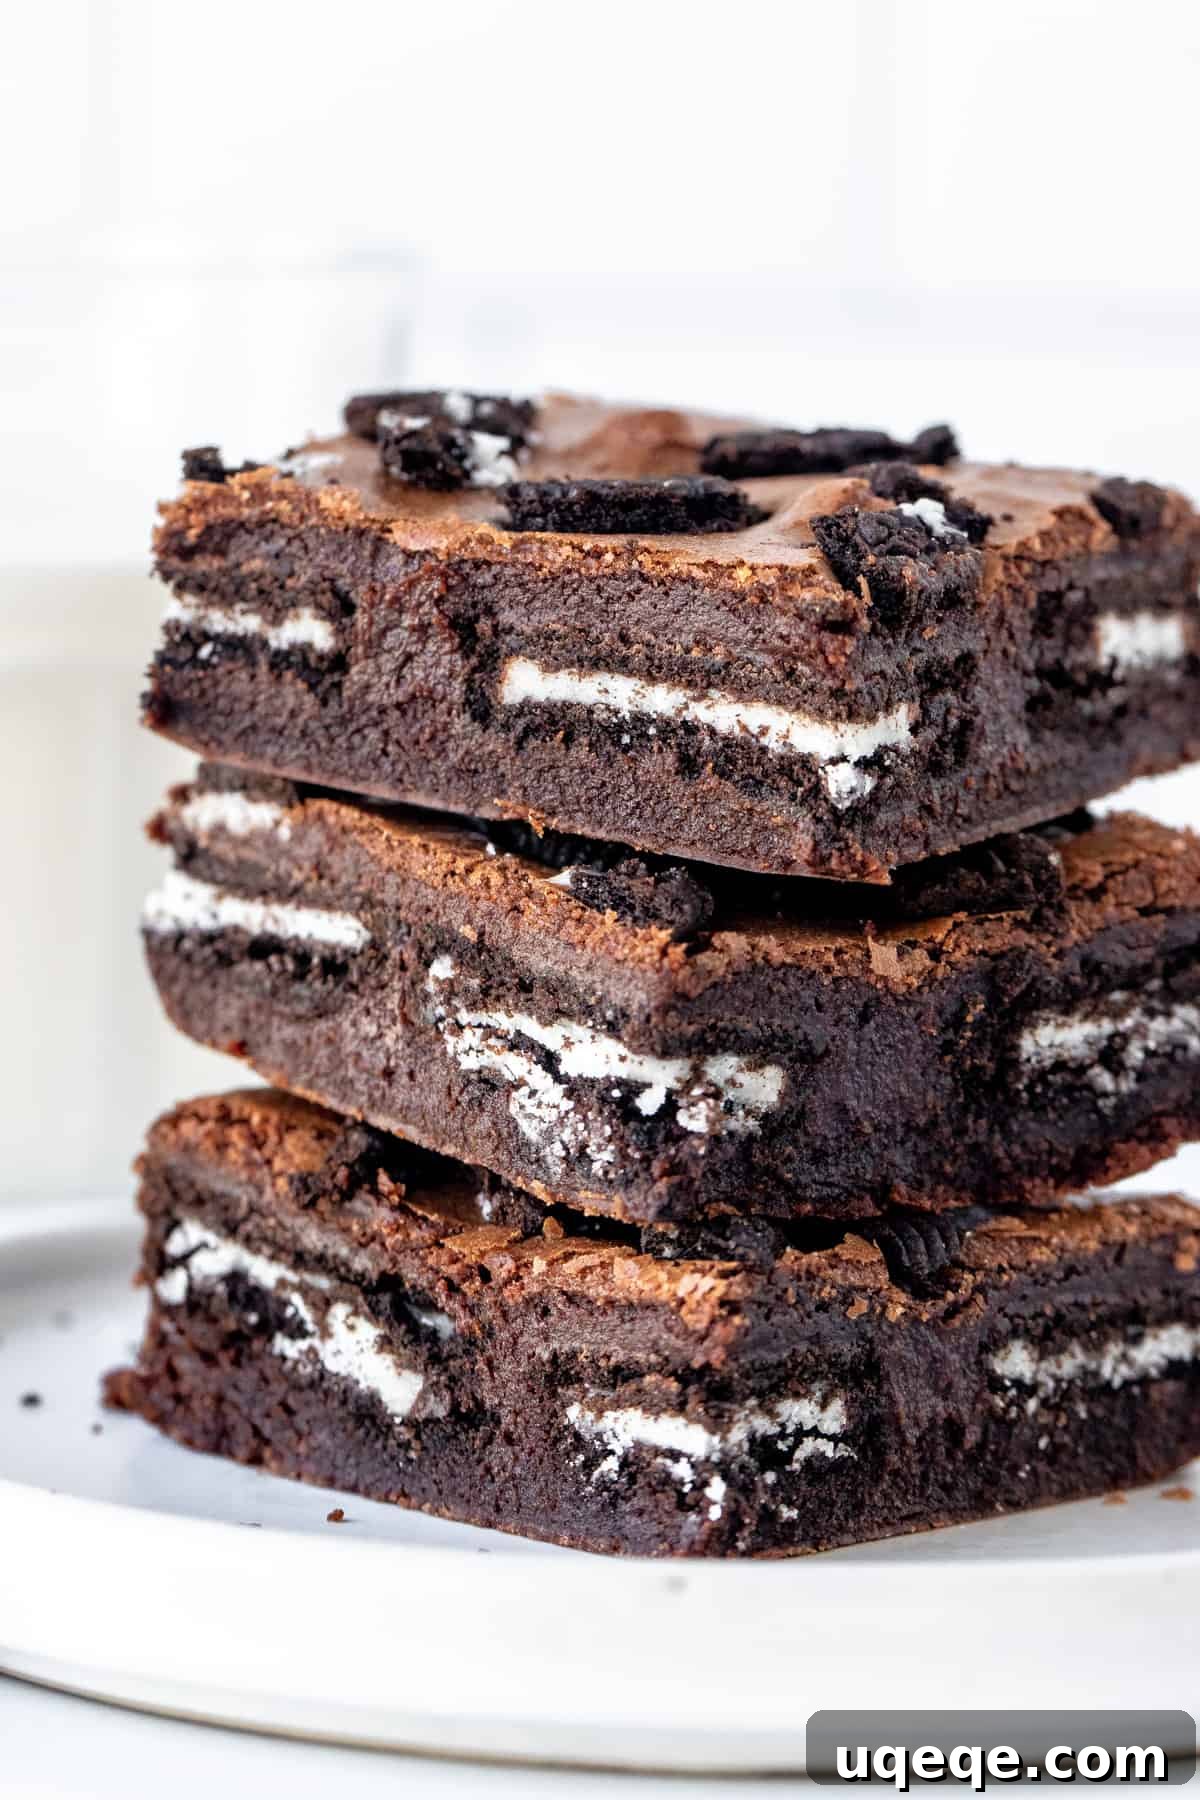
The Ultimate Fudgy Oreo Brownies: Stuffed, Topped & Simply Irresistible
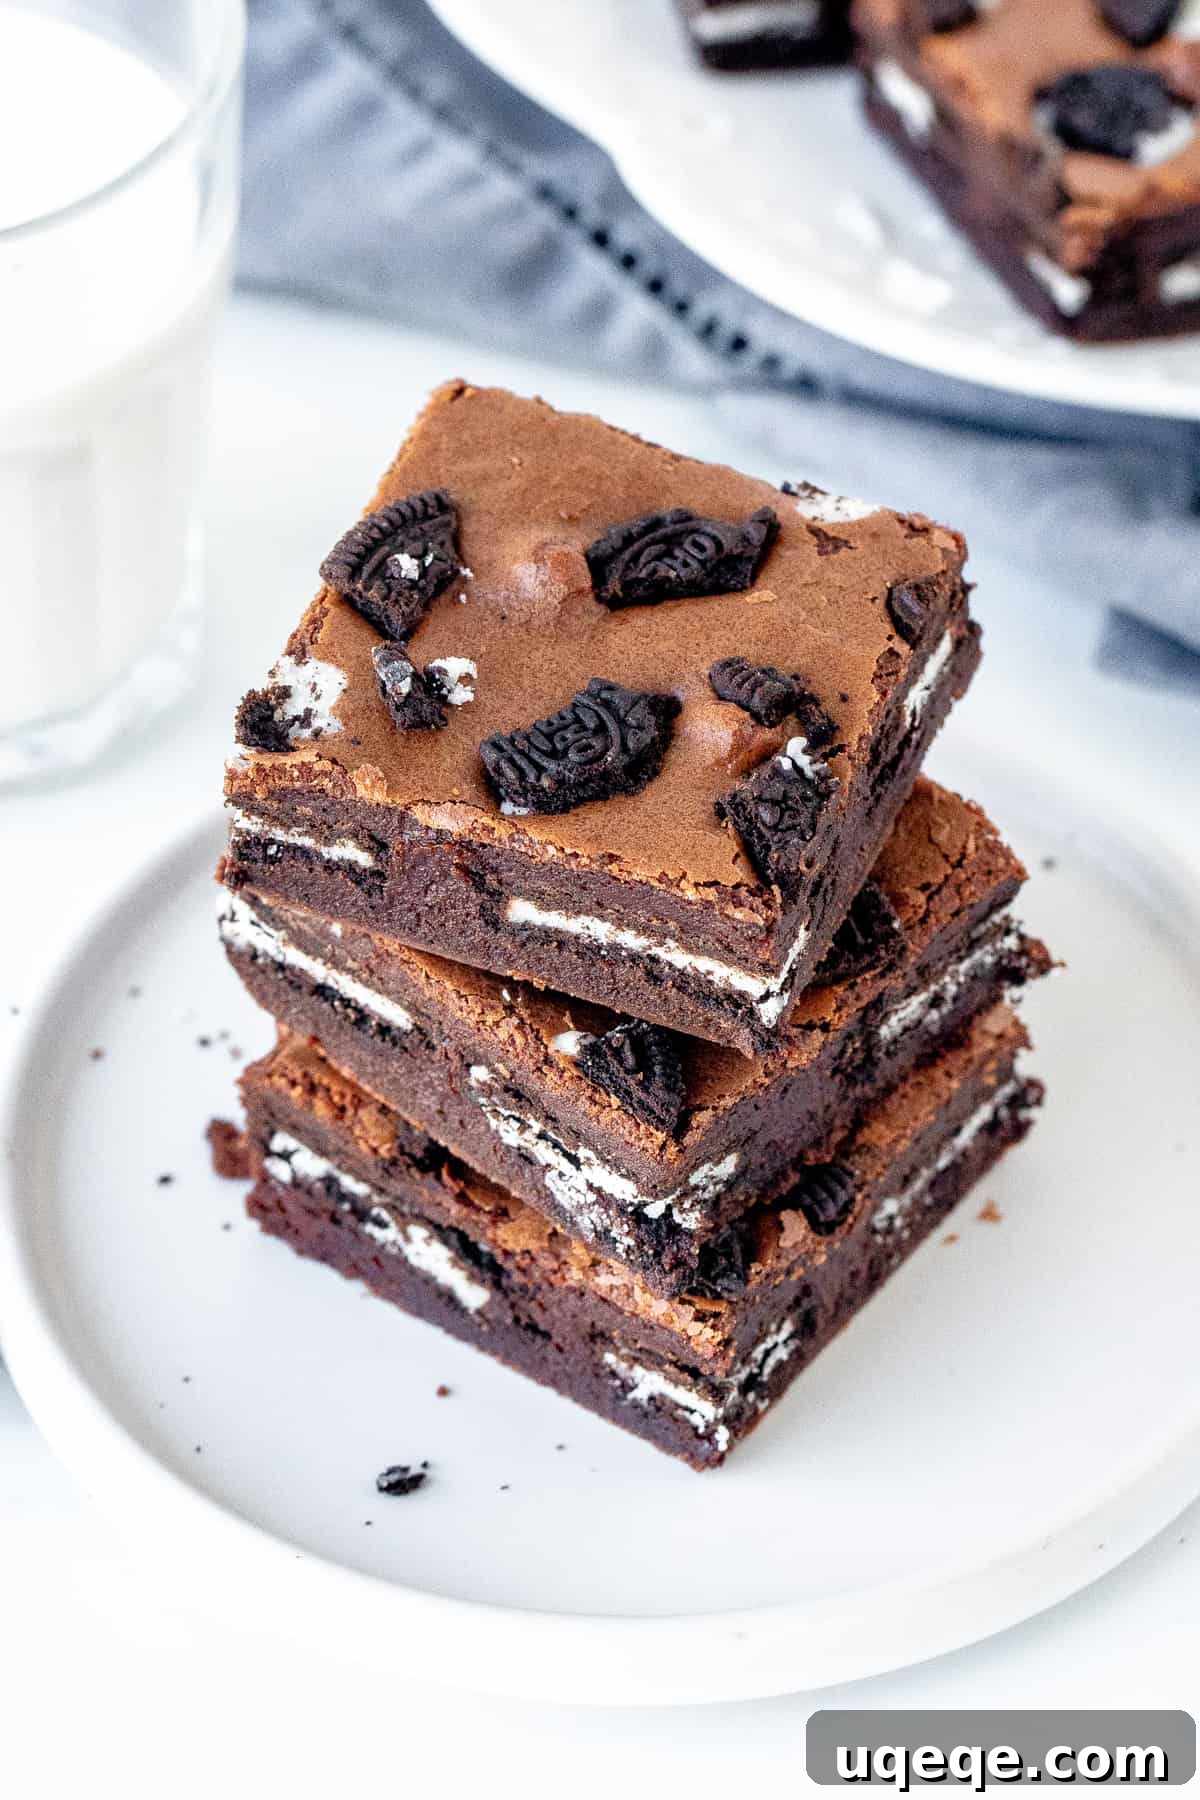
Prepare yourself for an extraordinary chocolate experience with these intensely fudgy Oreo brownies. Crafted from scratch, these brownies boast a coveted crinkly top, an incredibly gooey center, and are generously stuffed with whole Oreo cookies. To elevate the indulgence, they’re crowned with even more crushed Oreos, creating a symphony of textures and flavors. Despite their decadent appearance and taste, this recipe is surprisingly straightforward, making it perfect for bakers of all skill levels. Get ready to bake a batch of brownies that will disappear faster than you can say “Oreo”!
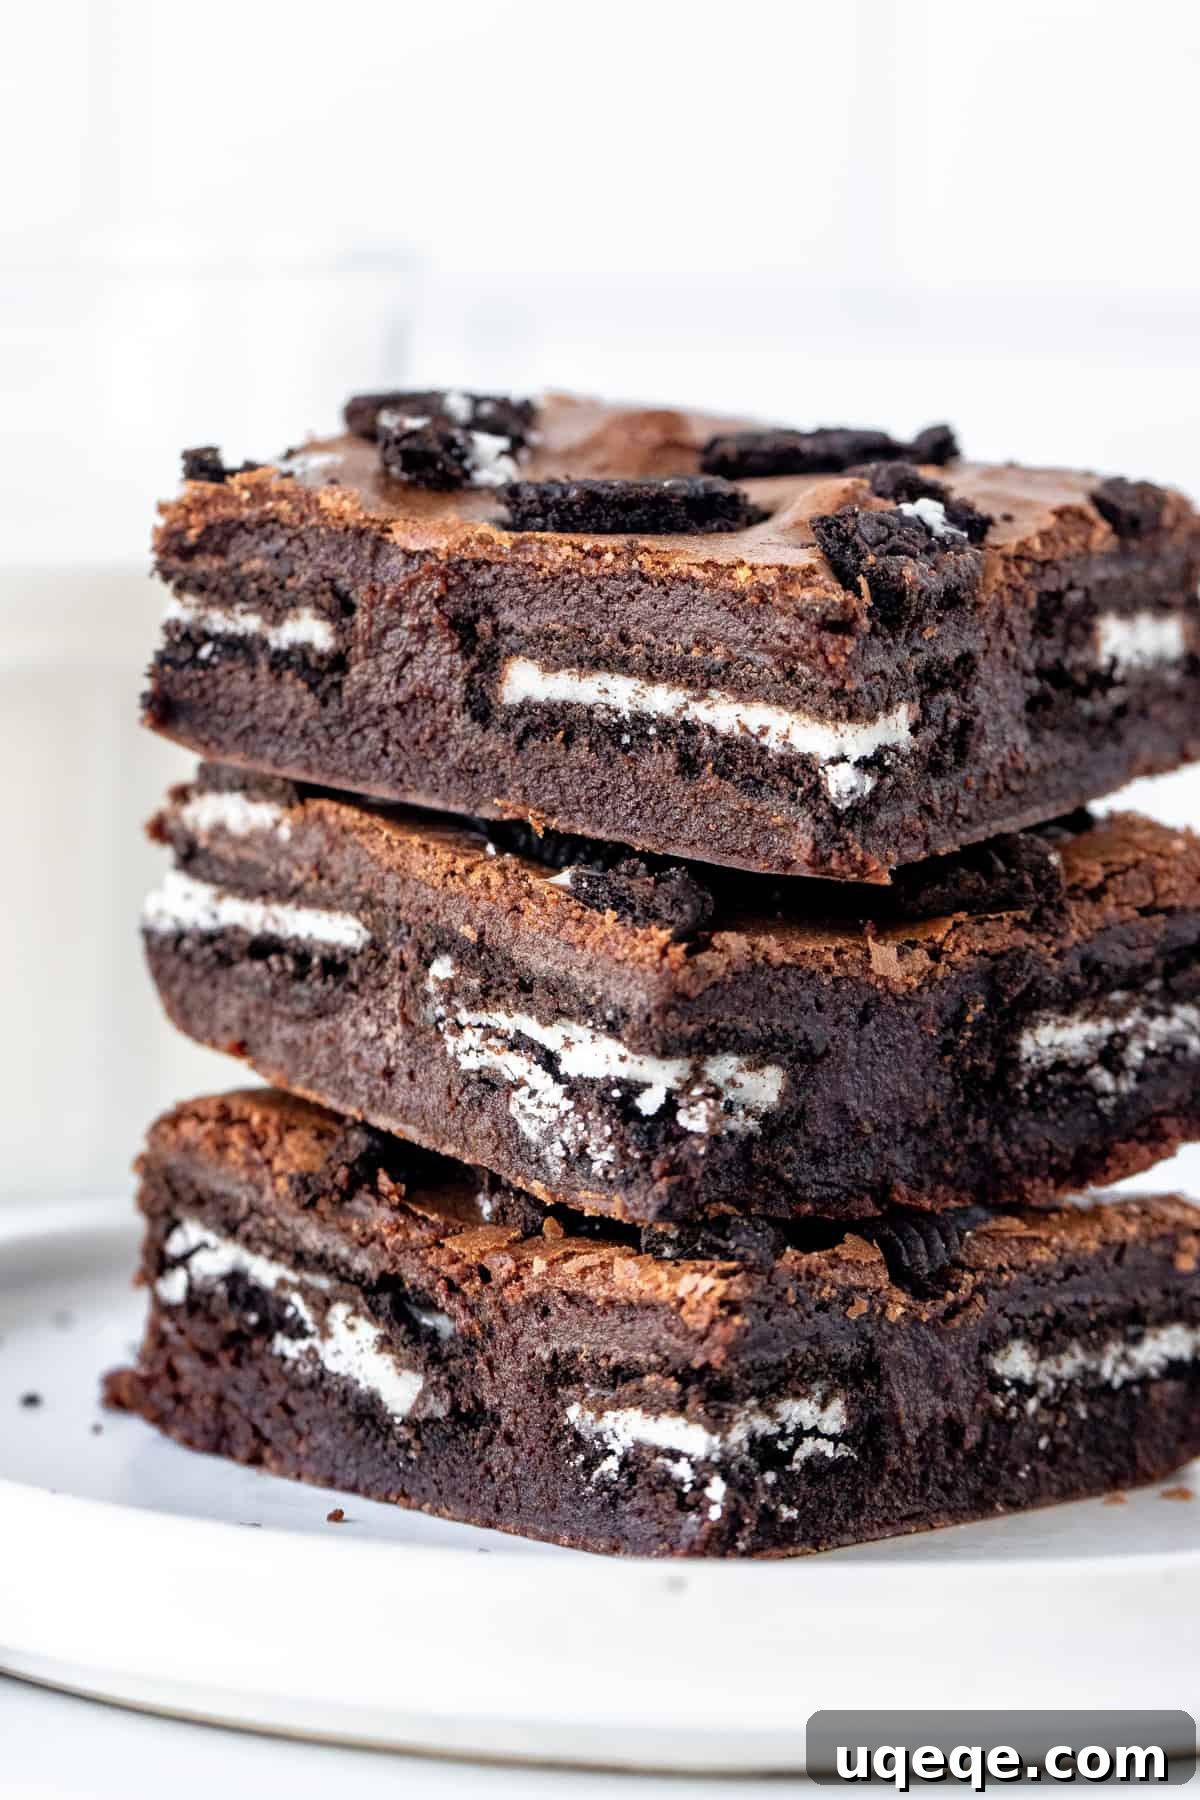
**This post was updated August 17, 2022 with new photos, enhanced tips, and a slightly refined recipe for an even gooier texture.**
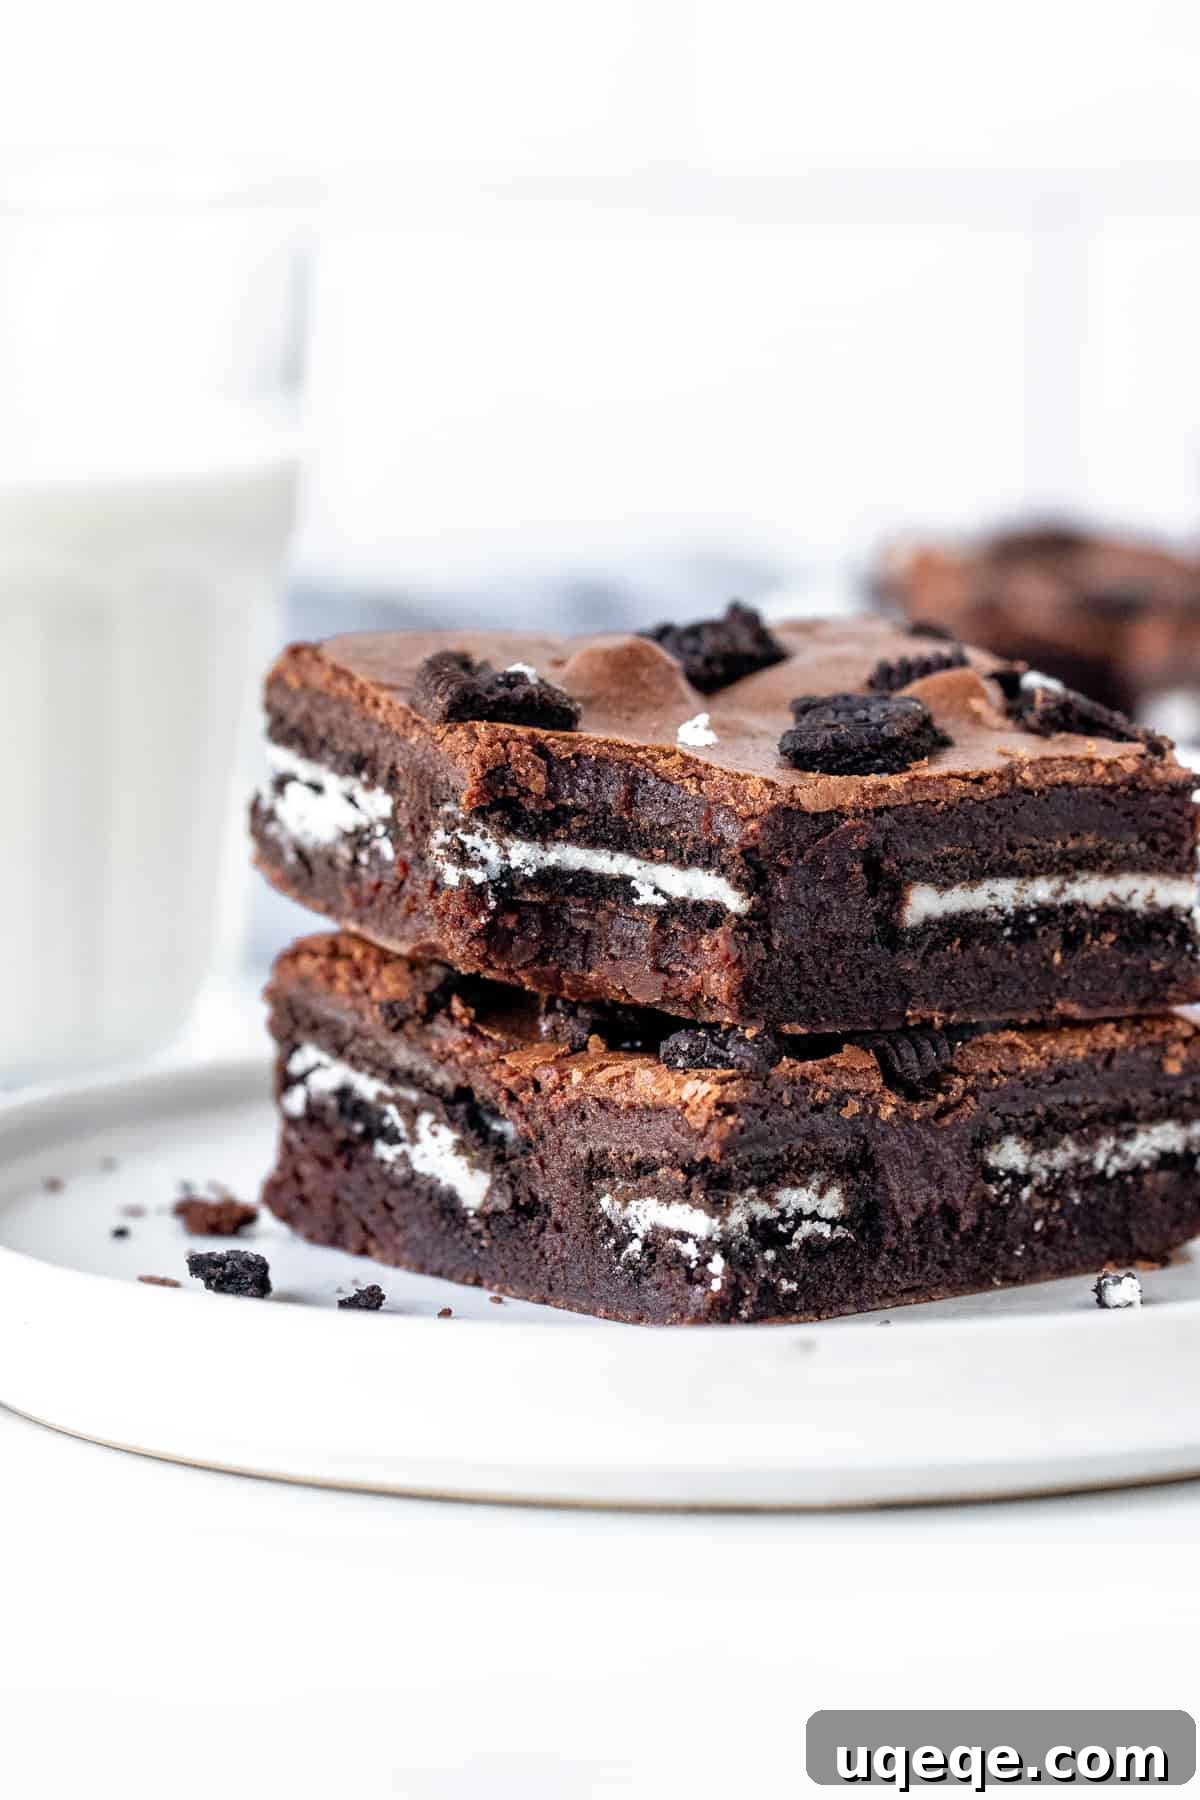
If your heart beats for the classic crunch of an Oreo cookie and melts for the rich, dense chewiness of a fudgy brownie, then these Oreo cookie brownies are an absolute must-try. This simple, from-scratch brownie recipe is meticulously designed to yield exceptionally thick, delightfully gooey, and utterly decadent brownies that will leave a lasting impression. While undeniably rich, their irresistible combination of deep chocolate and creamy Oreo layers ensures that everyone will reach for a second (or third!) piece. After all, when you unite the magic of Oreo cookies with the perfection of gooey brownies, can you truly go wrong?
Why You’ll Fall in Love with These Oreo Brownies
- Unrivaled Fudginess: Unlike cakey brownies, ours are engineered for maximum fudge factor. This is achieved by carefully balancing the fat-to-flour ratio and omitting leavening agents like baking soda or powder, resulting in a dense, moist, and intensely chocolatey bite.
- Double the Oreo Delight: We don’t just sprinkle Oreos on top; we *stuff* them inside too! A generous layer of whole Oreo cookies is nestled in the center, providing a delightful creamy crunch with every slice, complemented by a final flourish of crushed Oreos on the surface.
- Effortlessly Elegant Crinkly Tops: Achieve that signature, highly sought-after crinkly brownie top that signifies a perfectly baked brownie. Our method ensures a glossy, paper-thin crust that adds to the visual appeal and textural complexity.
- Surprisingly Simple from Scratch: Don’t let the “from scratch” label intimidate you. This recipe breaks down the process into easy-to-follow steps, proving that gourmet-quality brownies are well within reach for home bakers.
- The Perfect Treat for Any Occasion: Whether it’s a birthday party, a casual gathering, a potluck, or just a craving for something sweet, these Oreo brownies are always a crowd-pleaser and a guaranteed hit.
Key Ingredients for Decadent Oreo Brownies
Creating truly exceptional brownies starts with understanding the role of each ingredient. Here’s what you’ll need and why:
- All-Purpose Flour: We use a minimal amount of flour to ensure the brownies remain dense and fudgy, preventing them from becoming cake-like. The exact measurement is crucial for achieving the desired gooey texture.
- Unsweetened Cocoa Powder: This provides the deep chocolate flavor. While natural unsweetened cocoa powder (like Hershey’s) is generally fine, a good quality Dutch-processed cocoa can yield an even darker brownie with a slightly milder, less acidic chocolate flavor. Ensure it’s lump-free; sifting is recommended if your cocoa is clumpy.
- Salt: A pinch of salt is vital. It balances the sweetness, enhances the chocolate flavor, and brings out the depth in the brownies. Don’t skip it!
- Unsalted Butter: Using unsalted butter gives you full control over the salt content in your recipe. It’s the fat that carries flavor and contributes significantly to the rich, moist texture of the brownies. Cutting it into chunks before melting helps it melt more evenly with the chocolate.
- Good Quality Chocolate: This is where much of the brownie’s character comes from. We recommend using semi-sweet or dark chocolate, specifically in the 50-70% cacao range. Avoid milk chocolate as it can make the brownies too sweet and less intensely chocolatey. Bittersweet chocolate above 70% might be too strong for some palates but can be used if you prefer a very dark brownie. Chocolate chips work well, or you can chop a good quality chocolate bar for superior melting and flavor.
- Granulated Sugar: Sugar contributes to both sweetness and texture. It plays a role in creating that desirable crinkly top and ensures the brownies are moist and chewy.
- Large Eggs: Eggs act as a binder, provide structure, and contribute to the richness and moistness. Using room temperature eggs helps them emulsify better with the other ingredients, leading to a smoother batter.
- Vanilla Extract: A touch of vanilla extract is a flavor enhancer, complementing the chocolate and adding a layer of aromatic complexity to the brownies.
- Oreo Cookies: The star of the show! You’ll need a total of 20 Oreo cookies for this recipe – 16 for the glorious center layer and the remaining 4-5 to be chopped or crushed for the topping.
Crafting Your Perfect Oreo Brownies: A Step-by-Step Guide
Creating these irresistible Oreo brownies is a delightful process. Follow these detailed steps to ensure perfection every time.
Preparing the Brownie Batter
- Prepare Your Baking Pan: First, preheat your oven to 350°F (180°C, or 170°C fan forced). This ensures your oven is at the correct temperature when the batter is ready. Next, prepare an 8×8 inch (20×20 cm) baking pan. Line it thoroughly with aluminum foil or parchment paper, ensuring there’s an overhang on all sides. This overhang is your secret weapon for easily lifting the cooled brownies out of the pan for clean, effortless slicing. If using parchment paper, a light spray or smear of grease on the pan before lining can help the paper stay put.
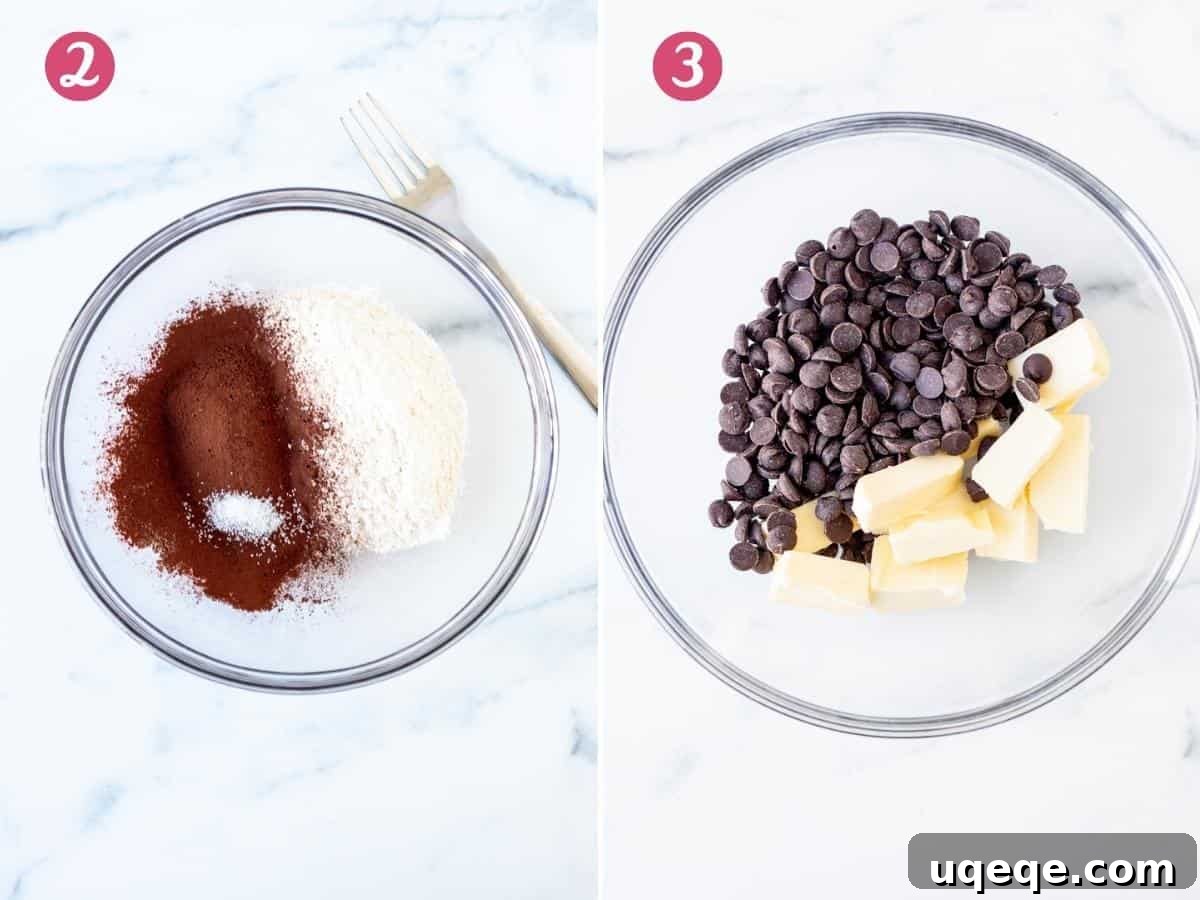
- Whisk Dry Ingredients: In a medium bowl, combine your dry ingredients: the all-purpose flour, cocoa powder, and salt. Whisk them together until thoroughly combined. You’ll notice there’s no baking soda or baking powder in this recipe. This is intentional! Omitting these leavening agents is key to achieving that dense, fudgy, and gooey brownie texture we’re aiming for, preventing them from becoming dry or cakey. The low flour quantity also contributes to this desirable gooeyness.
- Melt Chocolate and Butter with Care: In a large, heatproof bowl, combine the unsalted butter chunks and chocolate chips (or chopped chocolate). You have two excellent options for melting them:
- Double Boiler Method: Place the bowl over a saucepan of gently simmering water, ensuring the bottom of the bowl does not touch the water. Stir continuously until the mixture is smooth and fully melted. This provides a gentle, even heat.
- Microwave Method: Heat in 30-45 second intervals on medium power (important – avoid high power, which is often the default setting). Stir well after each interval, even if the chocolate doesn’t appear fully melted. The residual heat will continue the melting process.
Critical Tip for Melting Chocolate: Always melt chocolate slowly and at a low temperature or medium microwave power. High heat can ‘bake’ or ‘burn’ the chocolate, causing it to seize, become gritty, or develop a burnt flavor. For the best results, use semi-sweet or dark chocolate between 50-70% cacao.

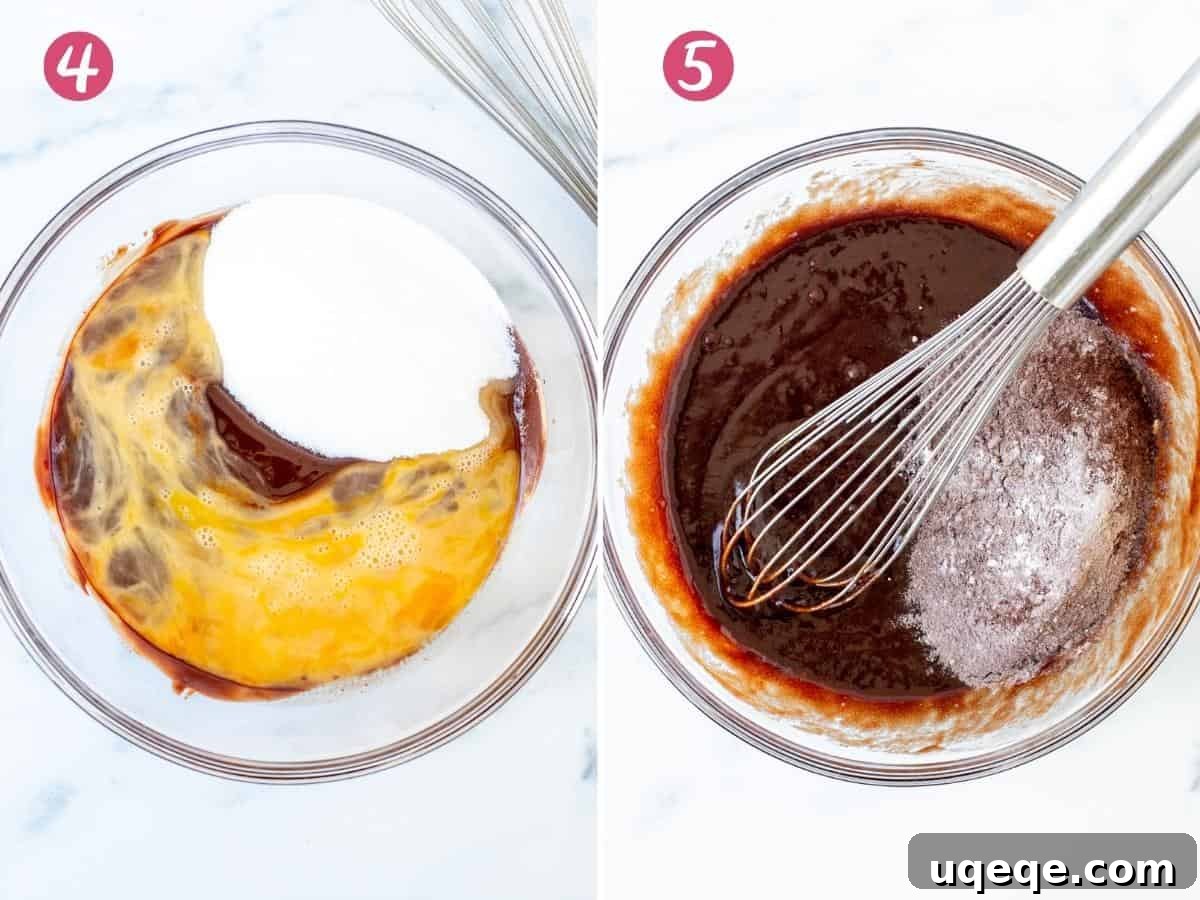
- Incorporate Wet Ingredients: Allow the melted chocolate and butter mixture to cool slightly (just a few minutes, so it’s warm but not piping hot). In a separate small bowl, lightly whisk your large eggs first; this makes them easier to incorporate smoothly into the batter without overmixing later. Add the whisked eggs, granulated sugar, and vanilla extract to the cooled chocolate mixture. Whisk everything together until well combined and glossy.
- Combine Wet and Dry: Finally, add the whisked dry ingredients (flour, cocoa, salt) to the wet chocolate mixture. Gently whisk or fold until just combined. Be careful not to overmix; overmixing can develop the gluten in the flour, leading to tougher brownies. A few small sugar granules might still be visible in the batter, which is perfectly normal and contributes to the crinkly top.
Assembling & Baking for Gooey Perfection
- First Batter Layer: Spoon about half, or slightly more, of the rich brownie batter into your prepared 8×8 inch pan. Using an offset spatula or the back of a spoon, gently spread it into an even layer, ensuring it covers the bottom of the pan from edge to edge.
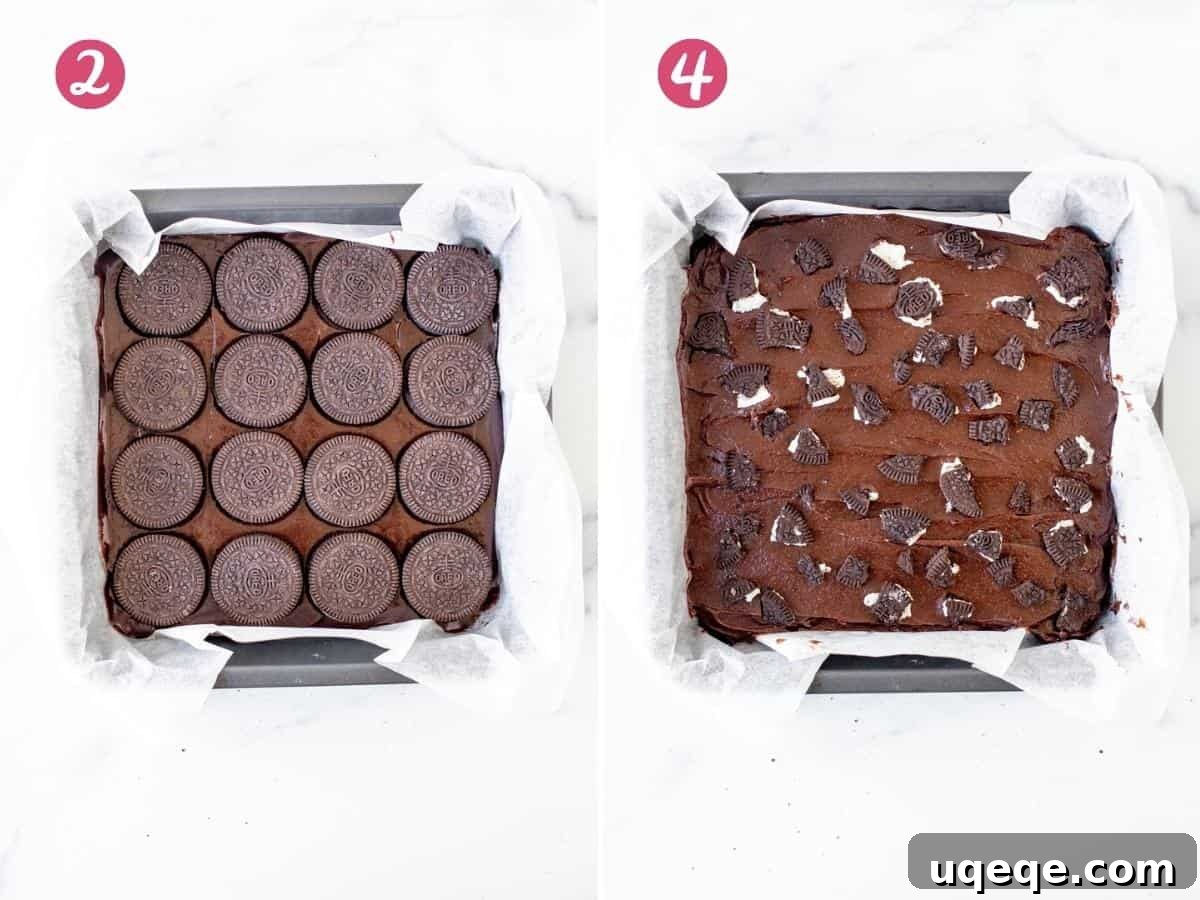
- The Oreo Layer: Carefully arrange 16 whole Oreo cookies over the first layer of batter. You can place them in a neat 4×4 grid. Once positioned, gently press them down slightly into the batter. This ensures they are fully encased and create that wonderful stuffed effect.
- Second Batter Layer: Now, spoon the remaining brownie batter over the layer of Oreos. For easier and more even spreading, I recommend distributing small dollops of batter across the surface of the Oreos first, rather than trying to spread one large blob. Then, gently smooth the top with your spatula, ensuring the Oreos are completely covered.
- Crushed Oreo Topping: Take the remaining 4-5 Oreo cookies, chop them roughly or crush them into pieces, and sprinkle them generously over the top of the brownie batter. This adds visual appeal and an extra crunch.
- Bake to Perfection: Transfer the pan to your preheated oven and bake for approximately 27-32 minutes. The exact bake time will depend on your oven and how gooey you prefer your brownies. For a perfectly gooey center, look for a top that appears set and slightly crinkled, and when a toothpick is inserted into the center (avoiding an Oreo), it should come out with a few moist crumbs attached, not wet batter. If you like your brownies very gooey, aim for the 27-minute mark. Overbaking will lead to drier, less fudgy brownies.
- Cool Completely: This step is critical! Allow the brownies to cool fully in the pan, typically for 3-4 hours, or even longer if possible. Cooling allows them to set properly, preventing a delicious but messy crumbly texture when cut. Once completely cool, use the foil or parchment paper overhang to lift them out of the pan and place them on a cutting board. Use a sharp knife to slice into 12 (or 16 smaller) perfectly fudgy, Oreo-filled squares.
Essential Baking Tips & Troubleshooting for Perfect Brownies
Achieving the ultimate fudgy Oreo brownies is simpler with these expert tips and solutions to common baking questions.
- Pan Size Matters: This recipe is precisely formulated for an 8×8 inch (20×20 cm) pan. While theoretically possible to use a 9×9 inch (23×23 cm) pan, the batter quantity won’t be sufficient for thick brownies, and it becomes challenging to create an even layer of batter to fully cover the middle Oreo cookie layer, resulting in thinner, less decadent squares. Stick to an 8×8 for optimal results.
- Doubling the Recipe: If you’re baking for a crowd or simply want more brownies, you can easily double this recipe. A doubled recipe fits perfectly into a 9×13 inch (23×33 cm) pan. Be aware that the brownies will be noticeably thicker and will require a longer baking time, typically closer to 35-40 minutes in the oven. Always check for doneness with a toothpick.
- The Secret to Clean Cuts: Patience is a virtue, especially with brownies! It’s absolutely crucial to wait for your brownies to cool 100% (at least 3-4 hours, or even chilling them in the fridge) before attempting to cut into them. Warm brownies will be too soft and gooey, leading to a delicious but messy, crumbly outcome that is difficult to serve cleanly. A sharp, warm knife can also help make cleaner cuts; wipe the blade clean between slices.
- Why Greasing Before Lining? A little trick for easy handling: lightly grease your baking pan first, then press your parchment paper or aluminum foil firmly into place. The grease helps the lining stick to the pan, preventing it from shifting and sliding around while you’re spreading the brownie batter, ensuring a smooth, even base.
- Achieving the Crinkly Top: The beautiful crinkly top is a hallmark of a great brownie. It’s often attributed to whisking the sugar and eggs until light and airy (which we do by whisking eggs with sugar), and the rapid evaporation of moisture from the top layer of batter during baking, which creates a thin, meringue-like crust. Ensuring your chocolate and butter mixture cools slightly before adding the eggs also helps maintain this delicate balance.
Storage and Serving Suggestions
Once you’ve baked your irresistible Oreo brownies, knowing how to store and serve them will ensure maximum enjoyment.
- Storage: Store leftover brownies in an airtight container at room temperature for up to 5 days. For longer storage, you can refrigerate them for up to a week. They also freeze exceptionally well! Wrap individual brownies tightly in plastic wrap, then place them in a freezer-safe bag or container for up to 2-3 months. Thaw at room temperature or gently warm in the microwave.
- Serving Suggestions: These fudgy Oreo brownies are absolutely divine on their own, perhaps with a tall glass of cold milk. However, don’t hesitate to elevate them further! Serve warm with a scoop of vanilla bean ice cream, a dollop of fresh whipped cream, or a drizzle of chocolate sauce. They also pair wonderfully with a hot cup of coffee or tea.
Frequently Asked Questions (FAQ)
Can I use a different type of chocolate for these brownies?
While we recommend semi-sweet or dark chocolate (50-70% cacao) for the best balance of sweetness and deep chocolate flavor, you can experiment. Avoid milk chocolate as it can make the brownies overly sweet. Bittersweet chocolate above 70% can be used if you prefer a more intense, less sweet brownie, but be aware it will significantly alter the flavor profile.
Do I have to use Oreo cookies?
Oreo cookies are definitely the star here, but if you’re feeling adventurous or have other cookies on hand, you could try similar cream-filled sandwich cookies. The texture and flavor will, of course, be different, but it could lead to a delightful new variation!
Can I freeze these brownies?
Absolutely! These brownies freeze beautifully. Once completely cooled, wrap individual brownies tightly in plastic wrap, then store them in a freezer-safe bag or airtight container for up to 2-3 months. Thaw at room temperature for a few hours or warm gently in the microwave for a quick treat.
How long do these brownies last?
When stored in an airtight container at room temperature, these brownies will stay fresh and delicious for up to 5 days. If refrigerated, they can last up to a week.
Are these suitable for a beginner baker?
Yes, definitely! This recipe is designed to be straightforward and accessible for bakers of all experience levels. The detailed step-by-step instructions and tips aim to guide you to success, even if it’s your first time making brownies from scratch.
Other Decadent Oreo Treats You’ll Love
If you’re an undeniable Oreo aficionado, be sure to explore these other fantastic recipes that celebrate everyone’s favorite cookie:
- Oreo Cheesecake
- Oreo Ice Cream Cake
- Oreo Marshmallow Brownies
- Oreo Blondies
Oreo Brownies
By: Fiona Dowling
These delicious Oreo brownies are extra fudgy and even a little gooey with crinkly tops. They’re stuffed with Oreo cookies, and topped with even more Oreos. They’re made from scratch and surprisingly easy to make.
Prep Time: 20 mins
Cook Time: 30 mins
Total Time: 50 mins
Servings: 12 brownies
Print Recipe
Equipment
- 8×8 inch (20×20 cm) pan
Ingredients
- 1/2 cup all-purpose flour (63 grams)
- 1/4 cup cocoa powder (20 grams)
- 1/4 tsp salt
- 1/2 cup unsalted butter (112 grams), cut into chunks
- 1 cup chocolate chips (180 grams/6.5 ounces), or chopped chocolate
- 1 cup granulated sugar (200 grams)
- 2 large eggs
- 1 tsp vanilla extract
- 20 Oreo cookies
Instructions
Making the Brownie Batter
- Preheat the oven to 350F (180C or 170C fan forced). Line an 8×8 inch pan with baking paper or aluminum foil, leaving an overhang around the edges. If using baking paper, I recommend lightly greasing the pan first so that the baking paper stays in place.
- Whisk together the flour, cocoa and salt. If the cocoa is very lumpy, I recommend sifting it first.
- Add the butter and chocolate to a large bowl. Melt together in a double boiler over low heat. Or melt in the microwave using 30-45 second intervals on medium power (not high power, which is often the default) and stir between each interval until smooth.
- Whisk the mixture and let it cool slightly. Then whisk in the whisked eggs, sugar and vanilla extract.
- Whisk the dry ingredients into the chocolate mixture until combined and there are no lumps of flour.
Assembling & Baking the Brownies
- Spoon about 1/2 of the batter into the prepared pan and spread flat.
- Place 16 Oreos on top (4 rows of 4) and press down slightly.
- Spoon the rest of the batter over top, dropping small tablespoons of batter over the Oreos. Then spread smooth.
- Cut the remaining Oreo cookies into pieces, and sprinkle on top.
- Bake for 27-32 minutes, or until the top looks set and an inserted toothpick comes out clean or with a few damp crumbs.
- Cool fully (typically 3-4 hours) leaving the brownies in the pan. Then lift them out of the pan using the overhang of the parchment paper/aluminum foil and place on a cutting board. Cut into pieces with a sharp knife.
Notes
- Chocolate: Feel free to use semi-sweet or dark chocolate between 50-70%. Do not use milk chocolate or bittersweet chocolate above 70% as it will drastically change the flavor profile. Chocolate chips or 1 cup of chopped chocolate work well for this recipe. I typically use 50% dark chocolate.
- Storage: Store brownies in an airtight container at room temperature for up to 5 days. For longer storage, they can be refrigerated or frozen.
- Nutrition: Details provided are based on 1 brownie, assuming the recipe yields 12 equal-sized brownies. You can likely slice this pan into 16 smaller brownies too, which would adjust the per-serving nutrition.
Nutrition Information (per serving)
Calculations assume 12 servings.
- Calories: 336 kcal
- Carbohydrates: 46g
- Protein: 4g
- Fat: 16g
- Saturated Fat: 9g
- Polyunsaturated Fat: 1g
- Monounsaturated Fat: 4g
- Trans Fat: 0.4g
- Cholesterol: 54mg
- Sodium: 150mg
- Potassium: 94mg
- Fiber: 2g
- Sugar: 34g
- Vitamin A: 315 IU
- Vitamin C: 0.1mg
- Calcium: 32mg
- Iron: 3mg
Like this recipe? We’d love to hear from you!
If you’ve tried these ultimate fudgy Oreo brownies, please consider leaving a rating and comment below. Your feedback helps us and other bakers!