
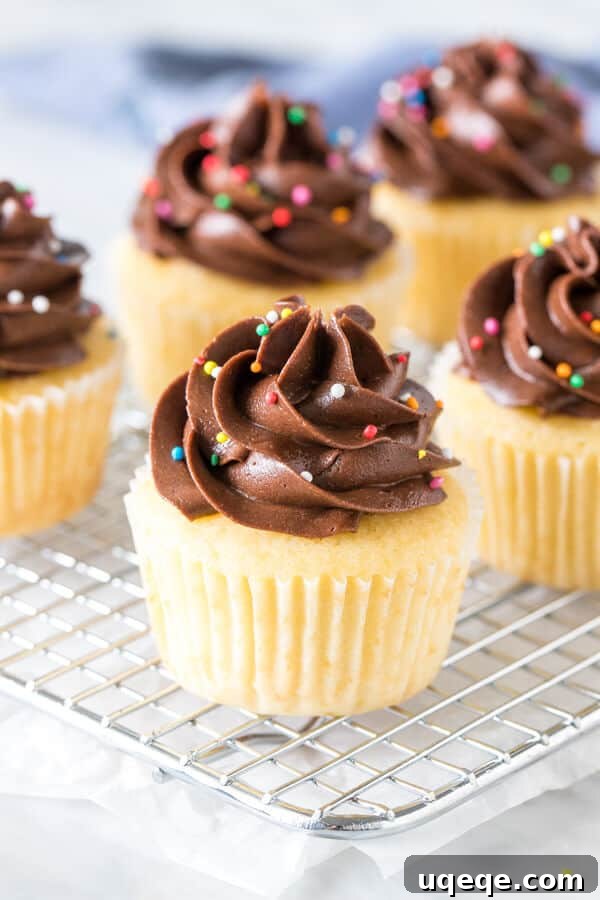
The Ultimate Moist Yellow Cupcakes with Creamy Chocolate Frosting
There’s an undeniable charm to a classic yellow cupcake. It evokes memories of childhood birthdays, school bake sales, and pure, unadulterated joy. These aren’t just any yellow cupcakes; they are the epitome of buttery perfection: incredibly moist, delightfully tender, and bursting with rich vanilla flavor. And when paired with a luscious, creamy milk chocolate buttercream, they transform into an irresistible treat that will steal the show at any celebration, or simply make an ordinary day extraordinary. While chocolate frosting is a match made in heaven, these versatile cupcakes are also equally delicious with a light and airy vanilla frosting, allowing you to customize your sweet experience.
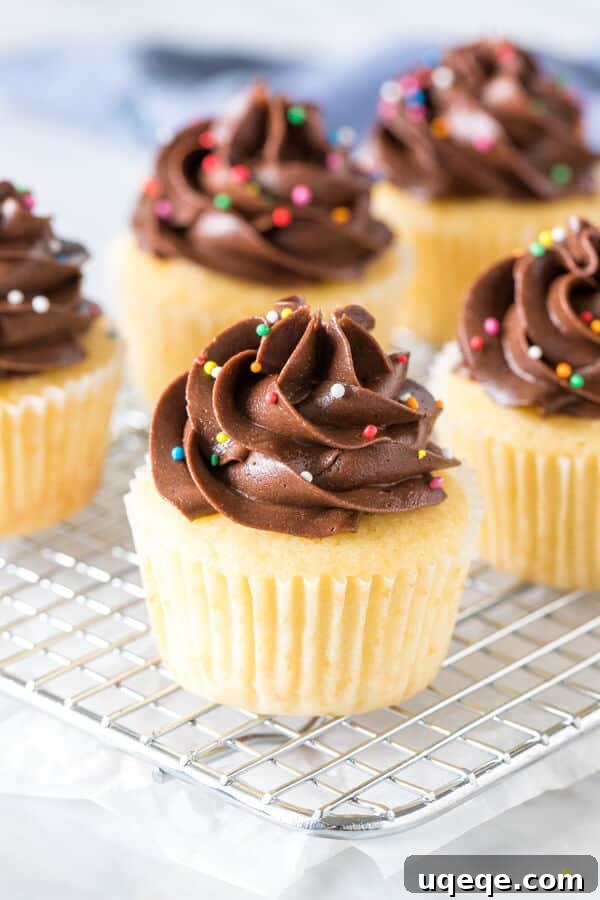
This cherished recipe was originally published on October 3, 2017. To ensure you have the most comprehensive and delightful baking experience, this post, along with its recipe and photographs, received a significant update on February 12, 2020.
Yellow vs. White Cupcakes: Unpacking the Delicious Difference
In the delightful world of vanilla cupcakes, two distinct categories reign supreme: **yellow cupcakes** and **white cupcakes**. Understanding their fundamental differences is key to choosing the perfect base for your dessert. The primary distinction lies in their egg composition. Yellow cupcakes, like those featured in this recipe, are made with whole eggs – incorporating both the yolks and the whites. This inclusion of egg yolks is what imparts their characteristic rich, golden color, a deeper, more pronounced buttery flavor, and a famously tender, moist texture.
Conversely, white cakes and cupcakes are meticulously crafted using only egg whites. This careful exclusion of yolks results in a pristine, pure white crumb, making them a popular choice for elegant occasions such as weddings or christenings where visual purity is paramount. While white cupcakes offer a delicate texture and a lighter vanilla flavor, if you are seeking a cupcake with a more profound, buttery taste, an incredibly tender crumb that practically melts in your mouth, and a comforting, golden hue, then these yellow cupcakes are undeniably the superior choice. Their robust flavor profile and rich texture make them a heartwarming classic that appeals to all ages.
Another advantage of yellow cupcakes is their slightly sturdier crumb compared to the more delicate structure of white cakes. This makes them exceptionally well-suited to handle generous dollops and elaborate swirls of creamy, heavy frostings, such as our decadent chocolate buttercream, without losing their shape or crumbling. This structural integrity ensures that every bite delivers a perfect balance of moist cake and rich frosting, making for an incredibly satisfying dessert experience.
Crafting the Perfect Yellow Cupcake: Key Ingredients for Unforgettable Flavor and Texture
The secret to baking these spectacularly delicious yellow cupcakes lies not in complex techniques, but in a thoughtful selection and careful handling of a few key ingredients. Each component plays a vital role in achieving their renowned moistness, tenderness, and rich flavor:
- Real Unsalted Butter: The cornerstone of flavor in any good yellow cake. Using high-quality unsalted butter, softened to room temperature, ensures that classic buttery taste and contributes significantly to the tender crumb structure. It also creates air pockets during the creaming process, which is essential for a light texture.
- Two Large Eggs: These are critical for more than just binding. The whole eggs, particularly the yolks, are responsible for the cupcakes’ rich, golden color and contribute to their deep, satisfying flavor. The proteins in the eggs provide essential structure, while the fat from the yolks adds moisture and helps to emulsify the batter, resulting in a cohesive and tender crumb.
- Pure Vanilla Extract: A non-negotiable for amplifying the natural sweetness and creating that irresistible aromatic vanilla essence. Opt for pure vanilla extract over imitation for a truly superior flavor profile.
- All-Purpose Flour: Unlike some white cakes that might use cake flour for an extra-fine crumb, all-purpose flour provides the ideal balance for yellow cupcakes. Its moderate protein content ensures a sturdy yet soft crumb that holds up beautifully to frosting without being overly dense or too delicate. Proper measurement is crucial here to avoid dry cupcakes.
- Buttermilk & Sour Cream: This powerful duo is the ultimate secret weapon for achieving perfectly moist and tender cupcakes, banishing any fear of dry cake crumbs. Their acidity reacts with the baking soda, contributing to a lighter, airier texture and helping the cupcakes rise beautifully. More importantly, the fat content in both buttermilk and sour cream ensures an incredibly rich, moist crumb that stays fresh longer.
- Baking Powder & Baking Soda: These chemical leavening agents work in concert. Baking powder provides the initial lift, while baking soda reacts with the acidic buttermilk and sour cream to produce carbon dioxide, creating a tender, open crumb and enhancing the rise.
- Granulated Sugar & Salt: Sugar not only provides sweetness but also helps tenderize the cake and retains moisture. Salt is essential for balancing the sweetness and enhancing all the other flavors, making them pop.
The Creaming Method: A Baker’s Secret for Fluffy, Tender Cupcakes
The method you use to combine your ingredients is just as important as the ingredients themselves. For these yellow cupcakes, we rely on the classic “creaming method,” a fundamental technique in baking that ensures a light, airy, and wonderfully tender result. Here’s a deeper look into each crucial step:
- Room Temperature Ingredients are Non-Negotiable: This might seem like a small detail, but it’s paramount. Before you even touch your mixer, ensure your unsalted butter, eggs, sour cream, and buttermilk are all at true room temperature. This typically means letting them sit out of the refrigerator for at least 30 minutes to an hour. Why is this so vital? Room temperature ingredients emulsify far better, meaning they blend together smoothly and uniformly. Cold ingredients will resist blending, leading to a lumpy, curdled batter that requires excessive mixing. Overmixing, in turn, develops too much gluten in the flour, resulting in tough, dense, and less moist cupcakes – a baker’s worst nightmare!
- Creaming Butter and Sugar to Perfection: The initial and most crucial step involves beating the softened butter and granulated sugar together until the mixture transforms into a light, fluffy, and noticeably pale consistency. This isn’t merely about combining them; it’s about incorporating tiny air pockets into the butter as the sugar crystals cut through it. These microscopic air cells are what expand during the baking process, creating the lift and incredibly light, airy texture that characterizes a perfect cupcake. Don’t rush this step; it’s the foundation of your cupcake’s structure and lightness.
- Incorporating Eggs and Vanilla: After creaming, the large eggs are added one at a time, with thorough beating after each addition to ensure complete incorporation. The eggs contribute richness, additional moisture, and vital structure to the batter. Following the eggs, the pure vanilla extract is mixed in, infusing the batter with its signature fragrant aroma. Beating well after each egg helps maintain the emulsification, preventing the batter from separating.
- The Art of Alternating Wet and Dry Ingredients: This carefully choreographed step is key to developing a uniform crumb and avoiding overmixing. You will alternate additions of the dry flour mixture (flour, baking powder, baking soda, salt) with the wet dairy ingredients (buttermilk and sour cream). Always begin and end with the dry ingredients. This method helps to distribute the flour evenly, hydrate the gluten gradually, and prevent the overdevelopment of gluten, which can lead to tough cupcakes. By gently mixing after each addition until just combined, you ensure a perfectly smooth, cohesive batter that will bake up into wonderfully tender and moist yellow cupcakes every single time.
The Irresistible Creamy Chocolate Frosting
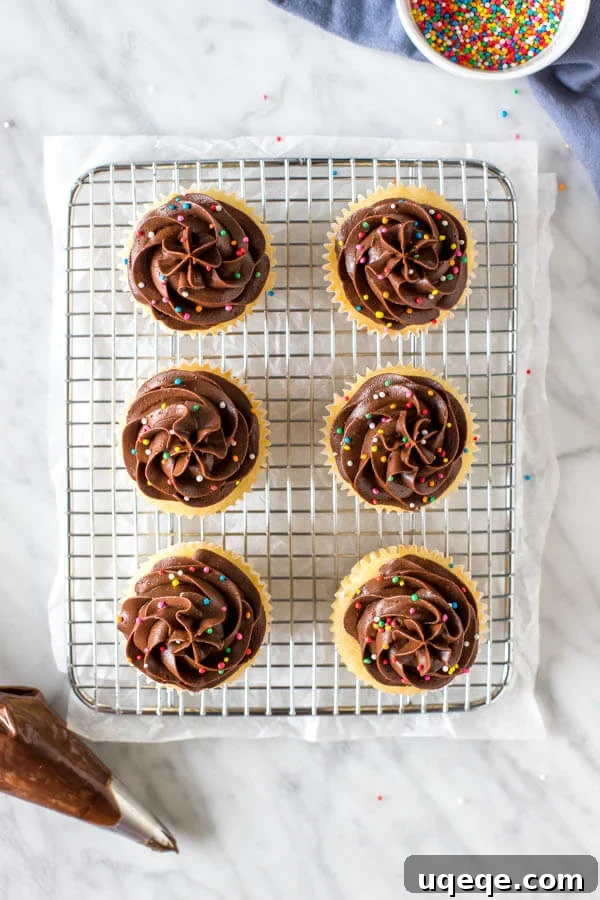
A yellow cupcake is certainly delightful on its own, but when crowned with this dreamy, creamy milk chocolate buttercream, it becomes an absolute masterpiece. This frosting isn’t just good; it’s truly unforgettable – fluffy, rich, perfectly creamy, and bursting with deep chocolate flavor. It’s crafted from a harmonious blend of classic ingredients, each playing a crucial role in its luxurious texture and taste:
- Real Unsalted Butter: The foundation of this indulgent buttercream. Softened unsalted butter creates a rich, smooth base that can be whipped to incredible lightness.
- High-Quality Cocoa Powder: The star ingredient for that profound chocolate essence. Your choice of cocoa powder can subtly alter the flavor:
- Natural Cocoa Powder: Offers a slightly fruitier, sharper, and more acidic chocolate taste. It typically interacts with baking soda for leavening.
- Dutch-Processed Cocoa Powder: This cocoa has been treated to reduce its acidity, resulting in a darker color, a smoother, less bitter, and more mellow chocolate flavor. If you desire a robust, rich, and deep chocolate intensity, Dutch-processed cocoa powder is highly recommended.
- Powdered Sugar (Confectioners’ Sugar): Essential for both sweetness and achieving that incredibly smooth, melt-in-your-mouth texture without any grittiness. It’s best to sift powdered sugar to prevent lumps.
- Heavy Cream or Whipping Cream: This is arguably the most crucial ingredient for achieving the ultimate fluffy and creamy texture. Seriously, resist the temptation to substitute with milk! Heavy cream provides the necessary high fat content and richness that milk simply cannot replicate. It allows the buttercream to whip up into a light, airy cloud while remaining incredibly luxurious and stable.
- Pure Vanilla Extract & a Pinch of Salt: Vanilla extract enhances and rounds out the chocolate flavor, adding a touch of warmth. A tiny amount of salt is vital for balancing the sweetness of the sugar and intensifying the deep notes of the cocoa, preventing the frosting from being cloyingly sweet.
To prepare, beat the softened butter until light and airy. Gradually incorporate the powdered sugar, then the cocoa powder, vanilla, and salt. Finally, the heavy cream is added judiciously, one or two tablespoons at a time, until the frosting reaches your desired consistency – whether you prefer a thick, pipeable buttercream or a slightly softer, spreadable glaze. The key is to beat it until it’s light, fluffy, and utterly irresistible.
Beyond Chocolate: Exploring Frosting Variations for Your Yellow Cupcakes
While our creamy chocolate frosting is a hands-down favorite, these versatile yellow cupcakes serve as a magnificent base for an array of other delicious buttercream flavors. Feel free to unleash your creativity and experiment with different toppings!
- The Classic Vanilla Buttercream: For those who appreciate timeless elegance, a smooth and airy vanilla buttercream perfectly complements the buttery notes of the yellow cake. It’s a simple yet sophisticated choice that lets the cupcake’s core flavor shine. You can find an excellent recipe for a classic vanilla buttercream here.
- Vibrant Strawberry Buttercream: If you’re in an adventurous mood or craving a fruity twist, a fresh and vibrant strawberry buttercream adds a delightful tang and a beautiful splash of pink color. It’s especially wonderful during berry season. Discover how to create a luscious strawberry buttercream frosting for a burst of fresh flavor.
- Zesty Raspberry Buttercream: For a slightly more tart and intensely fruity experience, raspberry frosting is an exceptional choice. It provides a bright contrast to the rich yellow cake. This frosting can be made with either fresh or frozen berries, making it accessible year-round. Learn how to craft a sensational raspberry buttercream frosting.
- Cream Cheese Frosting: For a less sweet and tangier option, a classic cream cheese frosting provides a wonderful counterpoint to the sweetness of the yellow cake, offering a sophisticated flavor combination.
Expert Baking Tips and Smart Substitutions for Flawless Cupcakes
Baking can often feel like a precise art, but with a few tried-and-true tips and clever substitutions, you can confidently bake perfect, moist, and fluffy yellow cupcakes every single time. These insights will help you avoid common baking mishaps and ensure consistently delicious results.
- Accurate Flour Measurement is Paramount: The most frequent culprit behind dry, dense cupcakes is the accidental addition of too much flour. Flour should always be measured meticulously. Avoid scooping flour directly from the bag with your measuring cup, as this compresses the flour and leads to an over-measurement. Instead, gently fluff the flour in its container with a whisk. Then, lightly spoon the flour into your dry measuring cup until it slightly overflows, and level off the top with the straight edge of a knife or an offset spatula. For the absolute greatest accuracy, which is highly recommended for baking, use a digital kitchen scale. For this particular recipe, 1 2/3 cups of all-purpose flour weighs approximately 7 ounces (or 208 grams).
- Sour Cream Substitutions in a Pinch: If your refrigerator is bare of sour cream, don’t let it derail your baking plans! Plain, full-fat Greek yogurt serves as an excellent 1:1 substitute. It offers a very similar tang, thickness, and creamy texture that will contribute effectively to the cupcake’s moisture and tenderness.
- Homemade Buttermilk Hack: Real buttermilk provides a unique tang and incredible moisture. If you don’t have it on hand, you can easily create a substitute. Add 1 1/2 teaspoons of distilled white vinegar or fresh lemon juice to a liquid measuring cup. Then, fill the rest of the 1/2-cup measure with regular milk (whole milk or 2% milk works best for richness). Give it a gentle stir and let it sit undisturbed for 5-10 minutes. The milk will visibly curdle slightly, mimicking the acidity and texture of genuine buttermilk, and will be ready to use in your recipe.
- Bake One Tray at a Time: For uniform baking and consistent results, it’s always best practice to bake your cupcakes one muffin tray at a time. Place the tray squarely on the middle rack of your preheated oven. This ensures that heat circulates evenly around all the cupcakes, preventing some from over-baking and drying out while others remain under-baked in cooler spots of the oven.
- Avoid Overfilling Muffin Liners: This recipe is designed to yield approximately 14-15 standard-sized cupcakes. It is crucial not to attempt to force all the batter into just 12 muffin cups. Filling each cupcake liner only about two-thirds full is the optimal amount. Overfilling will cause the cupcakes to overflow their liners, creating unsightly “muffin tops” and potentially drying out the exposed cake during baking.
- Do Not Double the Recipe: While the desire for a larger batch is understandable for bigger gatherings, it is strongly advised not to double this cupcake recipe. The increased quantity of batter can become too voluminous for most home stand mixers to handle effectively. This often leads to improper incorporation of ingredients or, more commonly, overmixing, which develops excessive gluten and ultimately results in tough, dry cupcakes. If you require more than 14-15 cupcakes, your best bet for consistent quality is to bake two separate batches.
- Test for Doneness Reliably: To ensure your cupcakes are perfectly baked through but not overcooked, insert a wooden toothpick into the center of one of the cupcakes (preferably one in the middle of the tray). If the toothpick comes out clean or with just a few moist crumbs attached, they are ready. If there is wet batter, continue baking for a few more minutes.
- Cool Completely Before Frosting: Patience is a virtue, especially when it comes to frosting! Always allow your freshly baked cupcakes to cool completely on a wire rack before applying any frosting. Attempting to frost warm cupcakes will cause your beautiful buttercream to melt, slide off, and create a messy situation.
Vanilla Cupcakes with Chocolate Frosting: A Classic Treat for Every Occasion
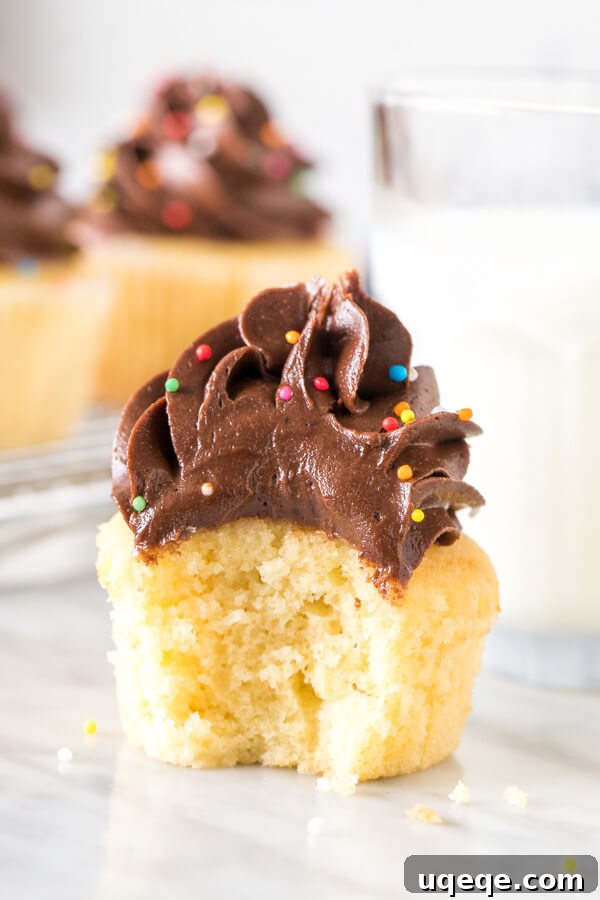
These truly exceptional vanilla cupcakes with their luscious chocolate frosting are a testament to classic baking at its finest. They are incredibly fluffy, remarkably moist, and possess the softest cupcake crumb imaginable, all infused with a delightful buttery vanilla flavor. Then, that rich, creamy chocolate frosting, perhaps adorned with a scattering of colorful sprinkles, elevates them from a simple dessert to an unforgettable experience. Whether you’re planning a vibrant birthday celebration, hosting a casual get-together with loved ones, or simply find yourself in need of a sweet pick-me-up (and let’s be honest, who isn’t always in need of a cupcake?), this recipe is your ultimate answer.
The harmonious contrast between the tender, golden cake and the smooth, decadent chocolate buttercream creates a symphony of textures and flavors that is utterly irresistible. Each bite offers a perfect balance of sweet, rich, and comforting goodness, making these cupcakes a guaranteed crowd-pleaser. Get ready to bake a batch of pure happiness and watch them disappear in record time!
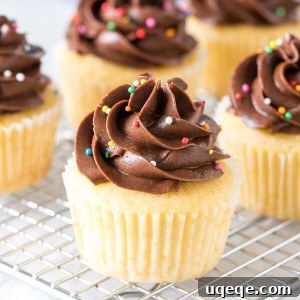
Vanilla Cupcakes with Chocolate Frosting
Fiona Dowling
45
18
1 45
14 cupcakes
Rate Recipe (Please share your feedback in the comments!)
Print Recipe
Ingredients
Vanilla Cupcakes
- 1 2/3 cups all-purpose flour, not self-rising
- 3/4 teaspoon baking powder
- 1/2 teaspoon baking soda
- 1/4 teaspoon salt
- 1/2 cup unsalted butter, softened
- 1 cup granulated sugar
- 2 large eggs
- 2 teaspoons vanilla extract
- 1/2 cup buttermilk*
- 3 tablespoons sour cream*
Chocolate Frosting*
- 1 cup unsalted butter, softened
- 3-4 cups powdered sugar
- 1/2 cup cocoa powder
- 1 teaspoon vanilla extract
- 1/4 teaspoon salt
- 3-4 tablespoons whipping cream
Instructions
Make the Vanilla Cupcakes
-
Preheat your oven to 350°F (175°C) and line two standard muffin trays with cupcake papers. This recipe yields approximately 14-15 cupcakes.
-
In a medium bowl, whisk together the all-purpose flour, baking powder, baking soda, and salt until thoroughly combined and no lumps remain. Set aside.
-
In a large mixing bowl, using an electric mixer (stand mixer with paddle attachment or a handheld mixer), beat the softened unsalted butter and granulated sugar together on medium-high speed. Cream until the mixture is very light, fluffy, and noticeably pale in color (this usually takes 3-5 minutes), scraping down the sides of the bowl as needed.
-
Add the large eggs one at a time, beating well after each addition until fully incorporated. Once eggs are mixed in, stir in the vanilla extract until just combined.
-
Mix in the sour cream until the batter is smooth and well combined.
-
With the mixer set to its lowest speed, gradually add about half of the prepared dry flour mixture into the butter mixture. Beat until just combined. Then, slowly pour in the buttermilk and mix until just incorporated.
-
Stop the mixer and use a rubber spatula to scrape down the sides and bottom of the bowl thoroughly. Add the remaining half of the dry flour mixture and mix on low speed until the batter is just combined and smooth. Be very careful not to overmix, as this can lead to tough cupcakes.
-
Spoon the cupcake batter evenly into the prepared muffin pans, filling each liner about two-thirds full. Remember, this recipe makes 14-15 cupcakes; distribute the batter accordingly and do not attempt to fit all the batter into only 12 liners, as they will overflow during baking.
-
Bake one tray at a time on the middle rack of your preheated oven for 15-18 minutes. The cupcakes are ready when a wooden toothpick inserted into the center of a cupcake comes out clean or with a few moist crumbs attached.
-
Allow the baked cupcakes to cool in the muffin pan for 5 minutes before carefully transferring them to a wire rack to cool completely. It is essential for cupcakes to be fully cooled before applying frosting.
Make the Chocolate Frosting
-
In a large bowl, using an electric mixer, beat the softened unsalted butter on medium speed until it is light, fluffy, and pale in color (about 2-3 minutes).
-
Carefully add 2 cups of the powdered sugar to the bowl. Beat on low speed until the sugar is incorporated, then increase to medium-high speed and beat until smooth and light.
-
Beat in the cocoa powder, vanilla extract, and salt until all ingredients are fully incorporated and the frosting takes on a rich, dark chocolate color. Scrape down the sides of the bowl as needed.
-
Gradually add the remaining powdered sugar (up to 2 more cups), about 1/2 cup at a time, alternating with 1-2 tablespoons of heavy whipping cream. Continue beating until the frosting reaches your desired consistency and sweetness level. You may not need all of the powdered sugar or all of the cream; adjust as necessary for a perfectly smooth, spreadable, or pipeable consistency. Beat for an additional minute on medium-high speed for extra fluffiness.
-
Once the cupcakes are completely cooled, generously frost them. You can use a knife, an offset spatula, or a piping bag fitted with your favorite tip (a classic 1M star tip creates beautiful swirls). Add sprinkles for an extra festive touch!
Notes
- Sour Cream Substitute: If you find yourself without sour cream, plain, full-fat Greek yogurt is an excellent 1:1 substitute, offering a similar tang and richness that contributes to the cupcake’s moisture.
- Buttermilk Alternative: If buttermilk is unavailable, you can easily create a homemade version. Simply mix 1 1/2 teaspoons of distilled white vinegar or lemon juice with 1/2 cup of regular milk (whole or 2% works best). Allow the mixture to sit on the counter for 5-10 minutes to curdle and thicken slightly before incorporating it into your recipe.
- Frosting Quantity: This recipe provides enough chocolate frosting for a generous application on 14-15 cupcakes. If you prefer only a thin layer of frosting applied with a knife, or if you’re making fewer cupcakes, consider halving the chocolate frosting recipe.
- Storage & Make-Ahead Tips:
- Optimal Freshness: For the very best taste and texture, these cupcakes are always most enjoyable on the same day they are baked and frosted.
- Storing Leftovers: Store any leftover frosted cupcakes at room temperature in an airtight container for up to 24 hours to maintain their softness. For longer storage, refrigerate them in an airtight container for up to 3 days. Always bring refrigerated cupcakes back to room temperature for at least 30 minutes before serving to ensure the cake is soft and the frosting is creamy.
- Preparing Cupcakes a Day Ahead:
- Cupcakes: Bake the cupcakes as instructed and ensure they cool completely on a wire rack. Once fully cooled, transfer them to an airtight container and store them at room temperature overnight.
- Frosting: For the freshest taste and best consistency, it’s ideal to make the frosting on the day you plan to serve the cupcakes. Alternatively, the chocolate frosting can be made the day before and stored in an airtight container in the refrigerator. Before frosting, allow the refrigerated buttercream to sit at room temperature for about 1 hour to soften. If it’s still too firm, beat it with an electric mixer for 1-2 minutes; you may need to add an additional 1-2 tablespoons of heavy cream or milk to restore its creamy, pipeable consistency.
- Freezing Unfrosted Cupcakes: Unfrosted cupcakes freeze exceptionally well! Once completely cooled, wrap each cupcake individually in plastic wrap, then place them in a freezer-safe airtight container or heavy-duty freezer bag. They can be frozen for up to 2 months. Thaw them overnight in the refrigerator before frosting and serving.
- Nutrition Information: The nutrition information provided is an estimated value based on one cupcake with frosting, assuming a total yield of 14 cupcakes per recipe batch. This may vary depending on exact ingredient measurements and portion sizes.
Nutrition
Carbohydrates: 54g,
Protein: 4g,
Fat: 23g,
Saturated Fat: 14g,
Cholesterol: 91mg,
Sodium: 157mg,
Potassium: 123mg,
Fiber: 1g,
Sugar: 40g,
Vitamin A: 745IU,
Calcium: 44mg,
Iron: 1mg