
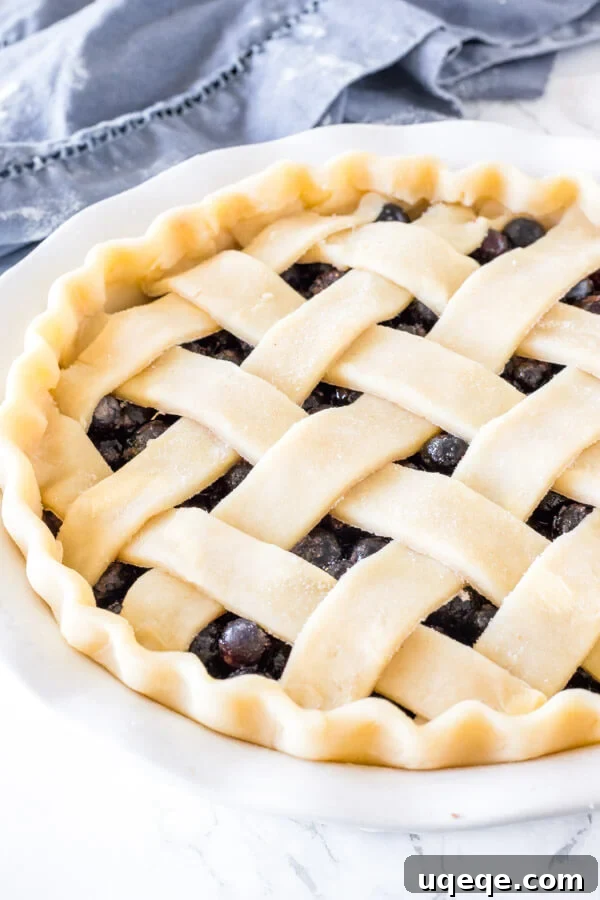
The Ultimate Guide to Flaky, Buttery Homemade Pie Crust
There’s an undeniable magic in a pie made with a truly perfect crust. That golden, tender, and incredibly flaky foundation elevates any filling, transforming a simple dessert or savory dish into a culinary masterpiece. While the idea of making pie crust from scratch might initially seem daunting, conjuring images of messy kitchens and endless frustration, I promise it’s a skill well within your reach. For years, I too was intimidated by the art of pie making. But through practice and a few key insights, I discovered the secrets to a consistently superb crust. Now, I’m thrilled to share my step-by-step tutorial, ensuring you can confidently create a buttery, flaky pie crust that will impress everyone. Forget store-bought shortcuts; once you master this recipe, you’ll never look back!
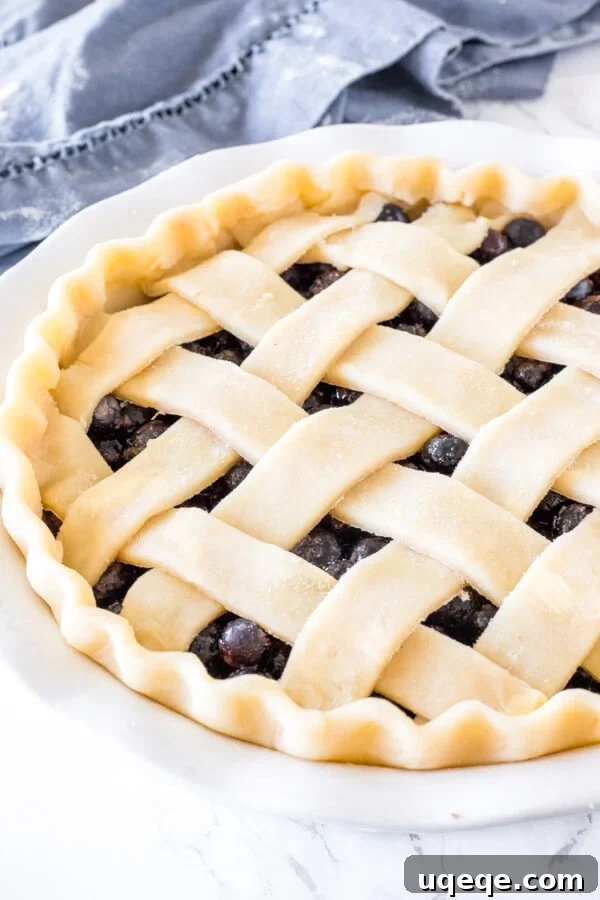
Why Homemade Pie Crust is Worth the Effort
You might be wondering, “Why go through the trouble when I can just buy a pre-made crust?” The answer lies in an unparalleled difference in taste and texture. Homemade pie crust offers a depth of flavor and a delicate flakiness that simply cannot be replicated by mass-produced alternatives. It’s richer, more tender, and free from the artificial ingredients often found in store-bought versions. Beyond the superior quality, there’s a profound sense of accomplishment and joy that comes from creating something so delicious with your own hands. This guide will demystify the process, making it accessible and enjoyable, proving that the effort invested in a homemade crust is always generously rewarded.
Essential Ingredients for Your Perfect Pie Crust
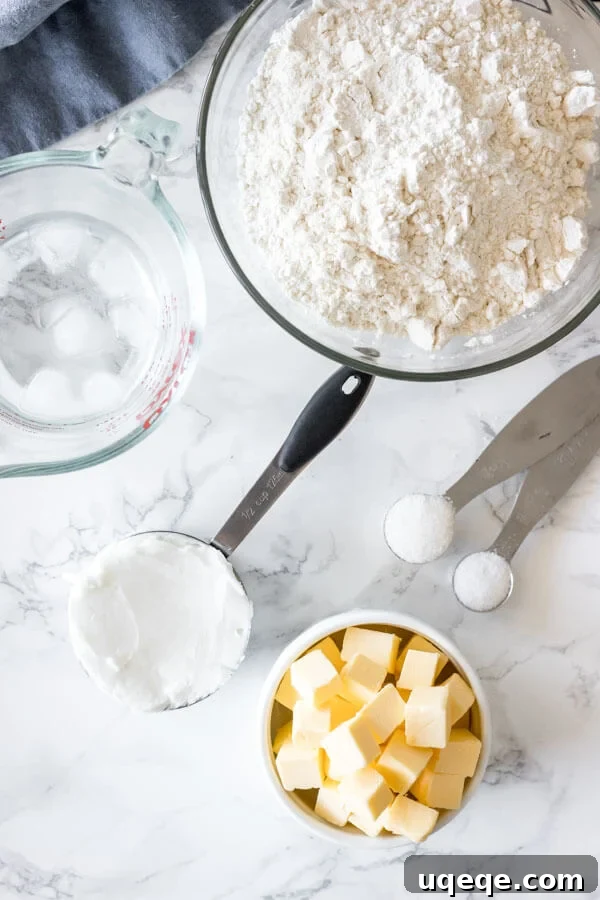
At its heart, a great pie crust relies on a surprisingly simple list of ingredients. The key isn’t complexity, but rather quality and proper handling. You’ll need a combination of fat, flour, a touch of seasoning, and very cold water. Each component plays a crucial role in achieving that sought-after flaky, buttery, and tender texture. Understanding these roles will empower you to make adjustments and troubleshoot any issues that arise, turning you into a true pie crust expert.
-
Butter: This is where much of the incredible flavor comes from. Using cold, unsalted butter is crucial. As it melts during baking, it releases steam, creating those wonderful, airy pockets that define a truly flaky crust. Unsalted butter allows you to control the exact amount of salt in your recipe, ensuring consistent flavor regardless of butter brand.
-
Shortening: While butter brings flavor, shortening is the secret weapon for ultimate tenderness and workability. It has a higher melting point than butter, which contributes to an even flakier texture and makes the dough more forgiving to handle. The combination of butter and shortening provides the best of both worlds: rich flavor and superior texture.
-
All-Purpose Flour: Flour forms the fundamental structure of your pie crust. I recommend using standard all-purpose flour, as it’s readily available and works beautifully for pies. Precision in measuring flour is paramount; too much can lead to a dry, tough, and flavorless crust, while too little can make it difficult to handle. For best results, use a kitchen scale (312.5g for this recipe) or spoon the flour into your measuring cup and level it off with a knife, avoiding scooping directly from the bag, which can compact it.
-
Salt: Often overlooked, salt is a vital ingredient for enhancing the overall flavor of your pie crust. It balances the richness of the fats and flour, ensuring a well-rounded taste. As mentioned, using unsalted butter and adding salt separately gives you complete control over the seasoning.
-
Sugar: A small amount of sugar is included to complement the flavor, especially for sweet pies. It contributes a subtle hint of sweetness and also aids in browning the crust. If you’re preparing a savory pie, such as a quiche or a pot pie, you can certainly omit the sugar without compromising the integrity of the crust.
-
Ice Cold Water: This essential ingredient brings the dough together. The “ice cold” aspect is non-negotiable, as it helps keep the fats solid and prevents gluten from developing too rapidly. Too much water will result in a sticky, unmanageable dough that’s impossible to roll out, while too little water will prevent the dough from coming together properly, leading to a crumbly, dry crust. It’s a delicate balance, and we’ll add it gradually.
The Science Behind a Flaky Crust: The Importance of Cold Ingredients
The secret to a truly flaky pie crust lies in maintaining cold temperatures for your fats (butter and shortening). When these fats are cut into the flour mixture, they create small, distinct pockets throughout the dough. As the pie bakes in a hot oven, the cold butter and shortening slowly melt and, more importantly, release steam. This trapped steam expands rapidly, pushing apart the layers of dough, which then puff up and separate, resulting in those characteristic airy, flaky layers. If your fats become too warm before baking, they will melt into the flour, coating the gluten strands and inhibiting the steam production needed for flakiness. This leads to a dense, tough, or crumbly crust rather than the light, ethereal layers we crave. Therefore, keep everything as cold as possible – from your butter and shortening to your water and even your hands, if feasible!
Step-by-Step: How to Make Pie Crust from Scratch
Now that we understand the critical role of each ingredient and the importance of temperature, let’s dive into the hands-on process of making this exquisite pie crust. Follow these steps carefully, and you’ll be rewarded with a pastry that’s both beautiful and delicious. Patience and gentle handling are your best tools here.
Combining the Dry Ingredients and Fats
- Begin by whisking together the dry ingredients – flour, salt, and sugar – in a large bowl. Ensure they are thoroughly combined to distribute the flavors evenly.
- Next, add your chilled, cubed butter and shortening directly into the flour mixture. It’s helpful to cut the butter into small cubes and place it in the freezer for about 10-15 minutes beforehand to ensure it’s extra cold.
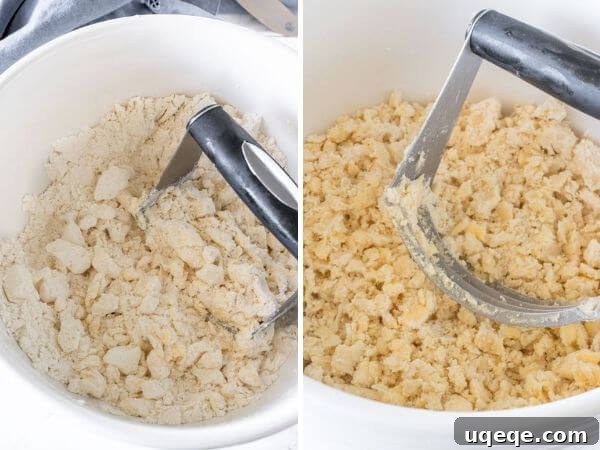
- Using a pastry cutter, two knives, or even your fingertips (working quickly to minimize warmth), cut the fats into the dry ingredients. The goal is to break down the butter and shortening into small pieces, no larger than a pea. You’ll want a mixture that resembles coarse meal, with some larger, irregular bits of fat still visible. These larger pieces are what will create those wonderful flaky layers. Avoid overmixing; you don’t want a uniform, pasty consistency. The process should feel somewhat rustic.
Incorporating the Ice Water
- Once your fats are properly cut into the flour, it’s time to add the ice-cold water. Sprinkle it in, one tablespoon at a time, gently folding it into the mixture with a wooden spoon or rubber spatula. The amount of water needed can vary slightly depending on humidity and flour, but typically 6-8 tablespoons (or 1/2 cup) will be sufficient.
- Continue adding water gradually until the dough just starts to come together. The key is to stop adding water as soon as the dough forms large clumps and holds together when lightly squeezed in your hand. You want it just barely cohesive; it should still look a little shaggy and not fully smooth. Over-hydrating will make the dough sticky and tough. Resist the urge to knead or overwork the dough at this stage, as it will develop gluten and result in a tough crust.
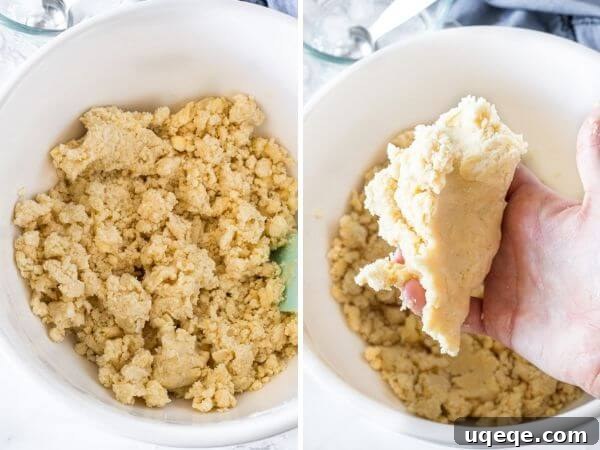
Forming and Chilling the Dough
- Carefully empty the contents of your bowl onto a lightly floured work surface. Gather the dough and gently form it into a ball. Avoid excessive handling or kneading.
- Using a sharp knife, cut the dough ball in half. If you look closely at the cut surface, you should be able to see small pockets and streaks of butter and shortening – this is a good sign that indicates a flaky crust is on its way!
- Take each half and gently press it into a round, flat disc, approximately 1/2 to 3/4 inch thick. This disc shape will make it much easier to roll out later.
- Wrap each disc tightly in plastic wrap, ensuring no air can get to the dough.
- It is absolutely crucial to chill the dough for at least 2-3 hours (and preferably longer, up to 24 hours) in the refrigerator before attempting to roll it out. This chilling period serves multiple vital purposes: it allows the flour to fully hydrate, the gluten to relax (preventing a tough crust), and the fats to firm up again. Trying to roll out warm or insufficiently chilled dough will result in a sticky, frustrating mess.
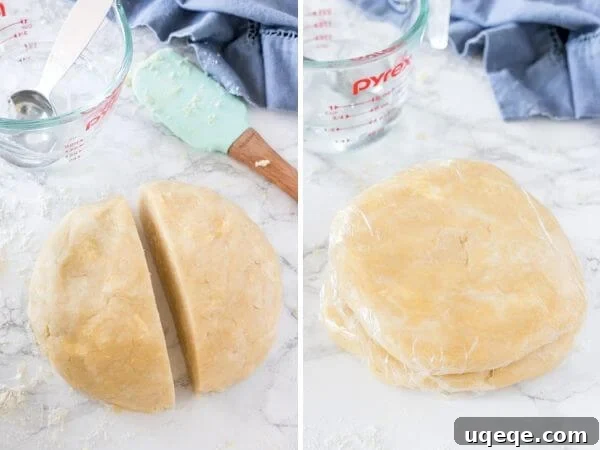
Mastering the Roll: Rolling Out Pie Dough
Once your dough has had ample time to chill and firm up, it’s ready for rolling. This stage can feel a bit like a dance, requiring a gentle touch and a methodical approach. The goal is to achieve an evenly thick, circular crust without overworking the dough or letting it stick. If your dough is too hard right out of the fridge, let it sit at room temperature for 5-10 minutes to soften slightly, but ensure it remains cool.
-
Prepare Your Work Surface: Always ensure your work surface and rolling pin are generously floured. I also like to lightly sprinkle flour on both sides of the dough disc. This prevents sticking, which is the nemesis of successful pie crust rolling. Keep a small bowl of flour nearby for easy re-flouring as needed.
-
The Rolling Technique: Place a dough disc on your floured surface. Start rolling from the center of the disc outwards, working towards the 12 o’clock position. Then, return your rolling pin to the center and roll downwards towards the 6 o’clock position. Apply even, firm pressure, but avoid pressing down too hard, which can stick the dough.
-
Turn and Repeat: After each set of rolls (up and down), turn the dough a quarter turn (90 degrees). Re-flour your surface and the dough as necessary. This constant turning helps create a beautifully circular shape and, critically, prevents the dough from sticking to your work surface. Continue this process until your dough reaches the desired thickness (typically about 1/8 to 1/4 inch) and diameter for your pie plate.
Don’t be alarmed if a few small cracks appear around the edges of your dough as you roll. These are usually minor and can be gently pressed together. However, if deep cracks form, it might indicate that your dough was too cold or slightly under-hydrated. In such cases, let the dough warm up for a few more minutes, or lightly mist it with a tiny bit of cold water and gently press the cracks together before continuing to roll.
Transferring Your Pie Dough to the Pie Plate
Transferring the rolled-out dough can seem like the most precarious step, but with a well-floured dough and rolling pin, it’s surprisingly simple and stress-free. The key is gentle handling to prevent stretching.
-
Roll Onto Your Pin: Carefully and gently roll your pie dough over your rolling pin. It doesn’t need to be rolled tightly; just enough so it lifts cleanly from the work surface. The first photo below illustrates this method perfectly.
-
Unroll Over the Plate: Position your rolling pin over your pie plate and then gently unroll the pie dough, allowing it to settle into the plate. Adjust and center it as needed, ensuring it drapes naturally without any pulling or stretching.
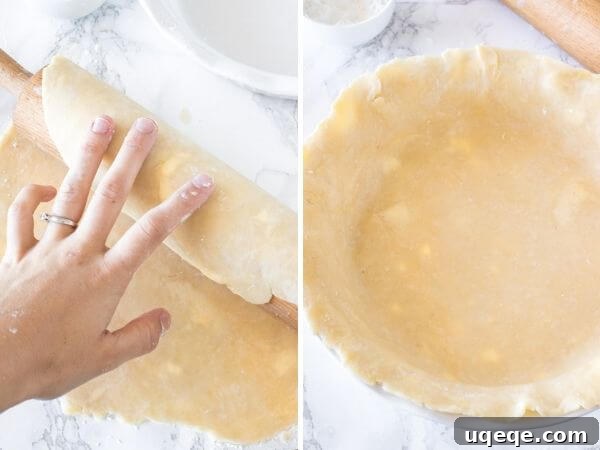
It is critically important not to stretch the dough as you transfer it or fit it into the pie plate. If you stretch the dough, it will inevitably pull back as the pie bakes, leading to a shrunken crust and potentially affecting the structure of your pie. Let the dough relax into the plate, gently pressing it into the corners without force.
Recipe Yield and Storage Tips
This recipe is designed to yield enough dough for one double-crust 9-inch pie (meaning both a bottom and a top crust) or two single-crust pies (bottom crust only). If your recipe only calls for a single bottom crust, you have a couple of options: you can halve the recipe to make just one disc, or you can freeze the other half for future use, which is a fantastic time-saver. I generally don’t recommend doubling this recipe because working with a very large batch of dough can lead to overworking, which results in a tough, dry, and less desirable pie crust. It’s better to make separate batches if you need more.
Homemade Pie Crust Recipe Card
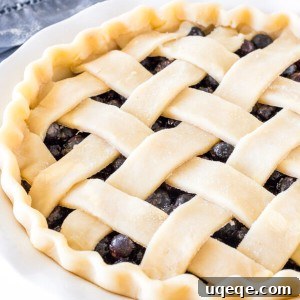
Pie Crust Recipe
By: Fiona Dowling
This comprehensive, step-by-step tutorial guides you through making a truly exceptional homemade pie crust. Crafted with a balanced blend of butter and shortening, this recipe ensures a crust that is consistently flaky, rich, and perfectly buttery, suitable for both sweet and savory pie fillings. This recipe yields enough dough for one 9-inch double-crust pie (both bottom and top crusts). For single-crust pies, you can either halve the recipe or freeze the remaining dough for later.
- Prep Time: 15 mins
- Chilling Time: 3 hrs
- Servings: 8 people
Ingredients
- 1/2 cup unsalted butter, cubed and chilled
- 1/2 cup shortening, chilled
- 2 2/3 cups all-purpose flour
- 1 teaspoon sugar (omit for savory pies)
- 1 teaspoon salt
- 1/2 cup ice water (approximately 6-8 tablespoons)
Instructions
- Cut the unsalted butter into small cubes and place them in the freezer while you prepare the dry ingredients.
- In a large mixing bowl, thoroughly whisk together the all-purpose flour, sugar, and salt until well combined.
- Add the chilled butter cubes and shortening to the flour mixture.
- Using a pastry blender, two knives, or your fingertips (working quickly), cut the fats into the dry ingredients until the mixture resembles coarse meal with some pieces no larger than a pea.
- Gently stir in the ice water, one tablespoon at a time, using a rubber spatula. Continue adding water until the dough begins to form large clumps and holds together when lightly squeezed in your hand. Typically, this will be between 6 to 8 tablespoons. Avoid overmixing.
- Pour the contents of the bowl onto a lightly floured surface and gently gather the dough to form a ball.
- Using a knife, cut the dough ball in half.
- Form each half into a round disc, about 1/2 to 3/4 inch thick. Wrap each disc individually and tightly in plastic wrap.
- Place the wrapped dough discs in the refrigerator to chill for a minimum of 3 hours, or ideally overnight, before rolling.
Notes
Make Ahead Tips
Pie dough is an excellent make-ahead component. You can prepare the dough up to 4 days in advance and store it, tightly wrapped, in the refrigerator. When you’re ready to roll it out, take the dough out of the fridge 5-10 minutes prior to allow it to soften just slightly, making it easier to work with.
Freezing Pie Dough
This dough freezes beautifully for long-term storage. Follow the recipe instructions up to forming the two discs and wrapping them in plastic. Then, place the wrapped discs in a freezer-safe bag or container and freeze for up to 3 months. To use, thaw the dough overnight in the refrigerator before proceeding with the rolling and baking steps.
Common Pie Crust Mistakes and How to Avoid Them
Even seasoned bakers can sometimes fall prey to common pie crust pitfalls. Knowing what to watch out for can save you a lot of frustration and ensure consistent success:
-
Overworking the Dough: This is perhaps the most frequent mistake. Excessive handling or kneading develops gluten, leading to a tough, inelastic crust. Always work the dough minimally and gently.
-
Not Keeping Ingredients Cold: As discussed, cold fats are vital for flakiness. If your butter and shortening melt into the flour before baking, you’ll end up with a dense, crumbly crust. Use ice water and work quickly.
-
Too Much or Too Little Water: The hydration level is critical. Too much water makes the dough sticky and prone to shrinking; too little results in a dry, fragile dough that cracks easily. Add water incrementally until the dough just comes together.
-
Stretching the Dough: Never stretch the dough when fitting it into the pie plate. This causes it to retract significantly during baking, leading to a misshapen or shrunken crust. Allow it to relax into place naturally.
Delicious Pies to Make with Your New Perfect Crust
Now that you’ve mastered the art of homemade pie crust, the possibilities are endless! This versatile recipe is the ideal foundation for an array of sweet and savory fillings. Why not put your newfound skills to the test and bake one of these delectable pies?
- Strawberry Pie: A classic favorite, bursting with fresh berry flavor.
- Brownie Pie: A rich, decadent chocolate treat, perfect for any occasion.
- Blackberry Pie: A delightful balance of sweet and tart, showcasing seasonal fruit.
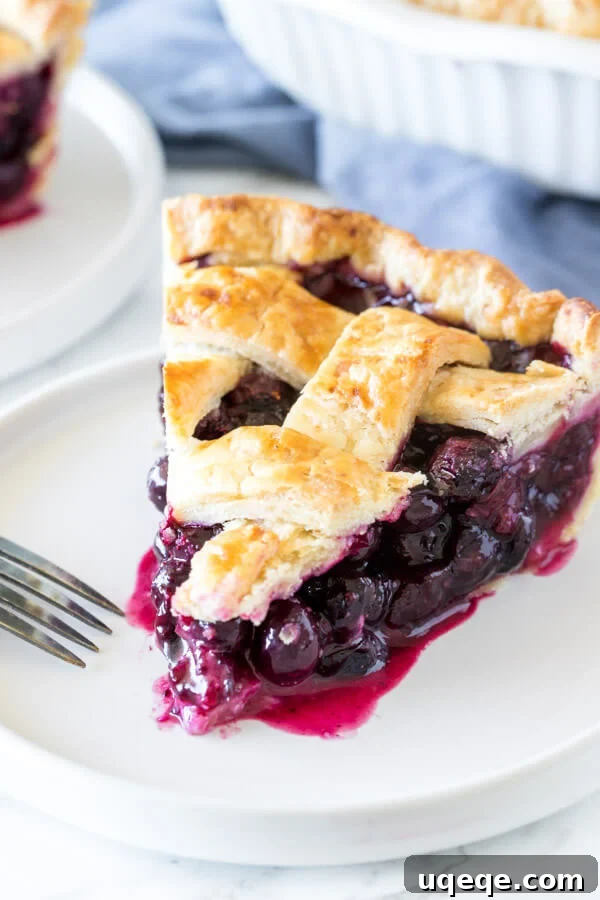
Final Thoughts on Your Pie Crust Journey
Creating homemade pie crust is truly a rewarding culinary journey. From the initial chill of the butter to the triumphant unveiling of a golden, flaky crust from the oven, each step brings you closer to baking perfection. This recipe, combined with these detailed tips and tricks, transforms a once-intimidating task into an enjoyable and achievable endeavor. Embrace the process, be patient with your dough, and soon you’ll be a pie crust expert, ready to craft stunning pies for every season and celebration. Happy baking!