
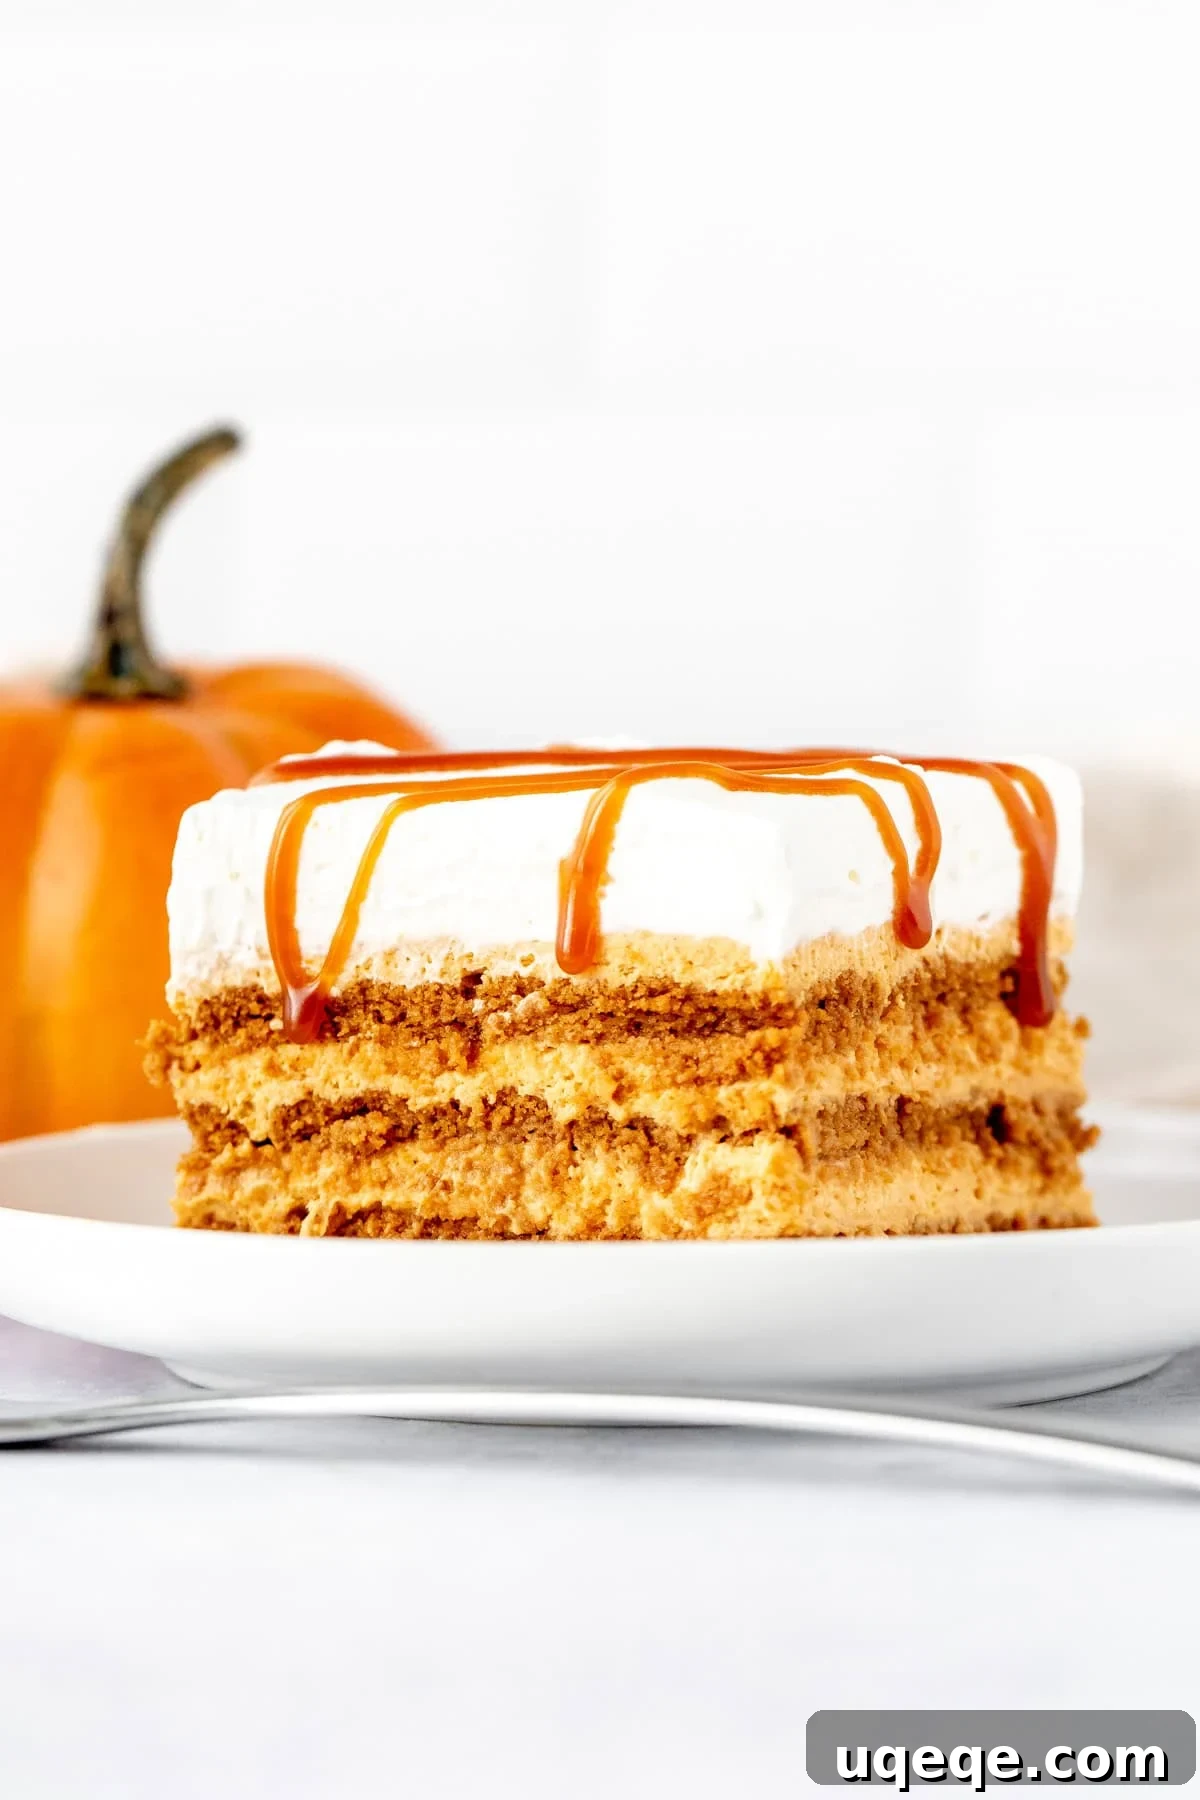
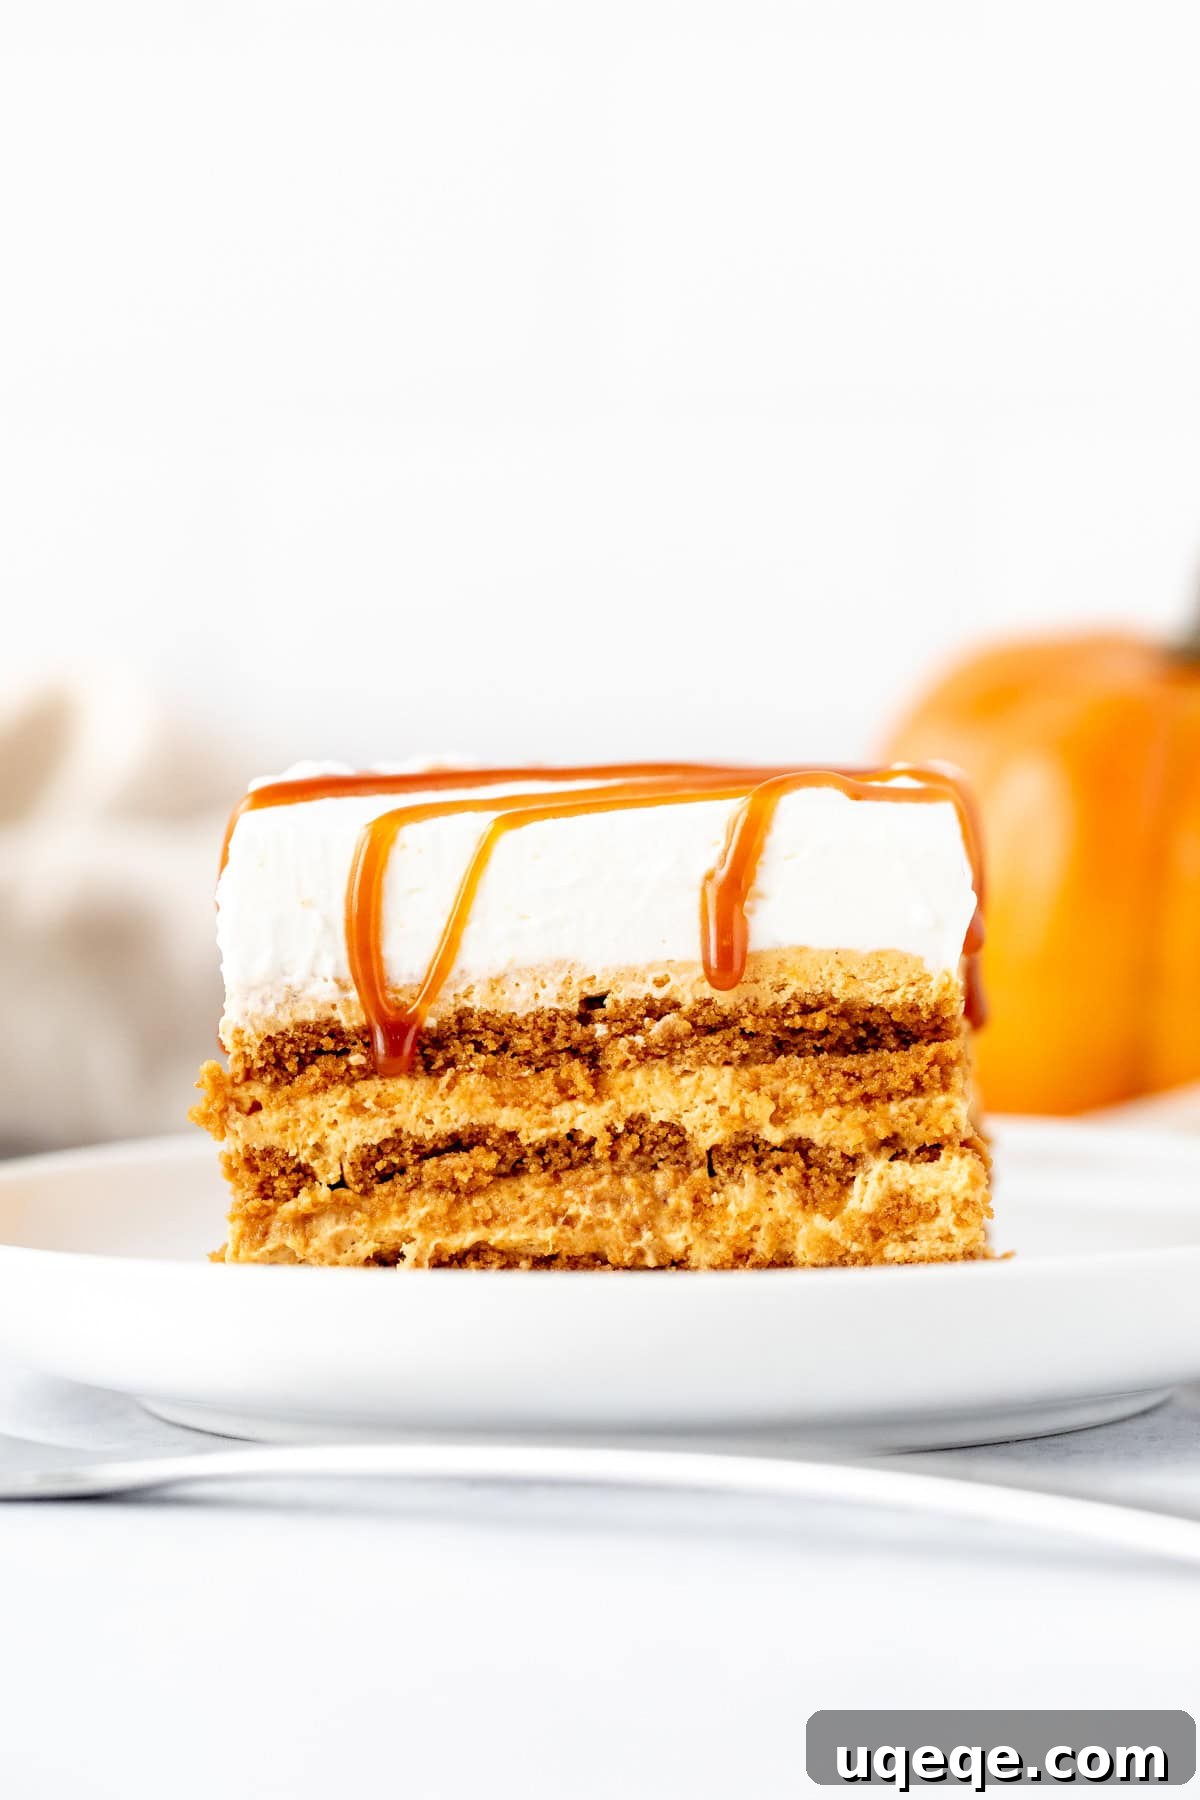
Welcome to your new favorite fall dessert! This utterly delicious Pumpkin Icebox Cake is a no-bake marvel, featuring luscious layers of creamy pumpkin cheesecake filling, perfectly softened Lotus Biscoff cookies, generous dollops of whipped cream, and a decadent drizzle of caramel sauce. It’s the ultimate easy, no-fuss dessert for Thanksgiving, holiday gatherings, or any autumn day when a craving for pumpkin strikes. Best of all, it requires no oven space, making it a lifesaver during busy holiday cooking, ensuring you can still deliver a show-stopping dessert without the stress.
What Exactly is an Icebox Cake? A Timeless No-Bake Classic
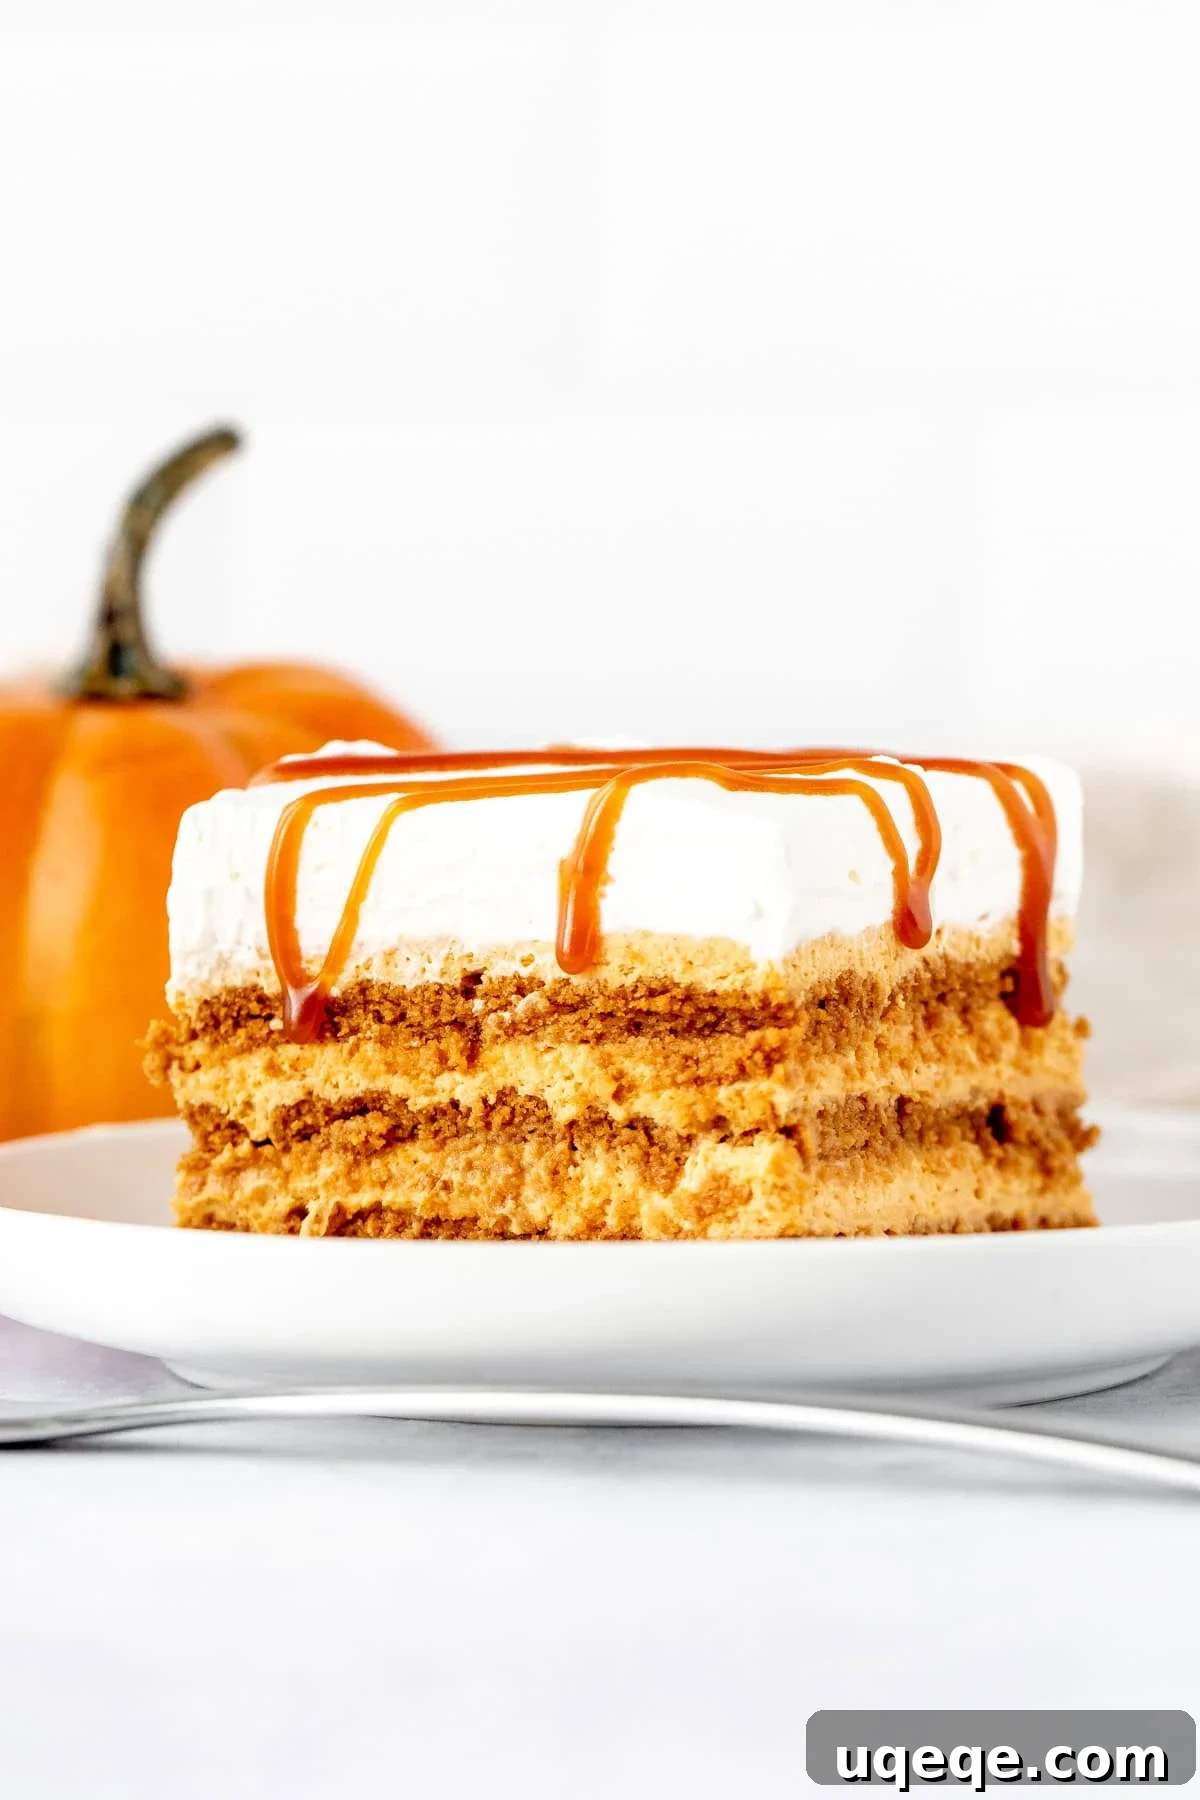
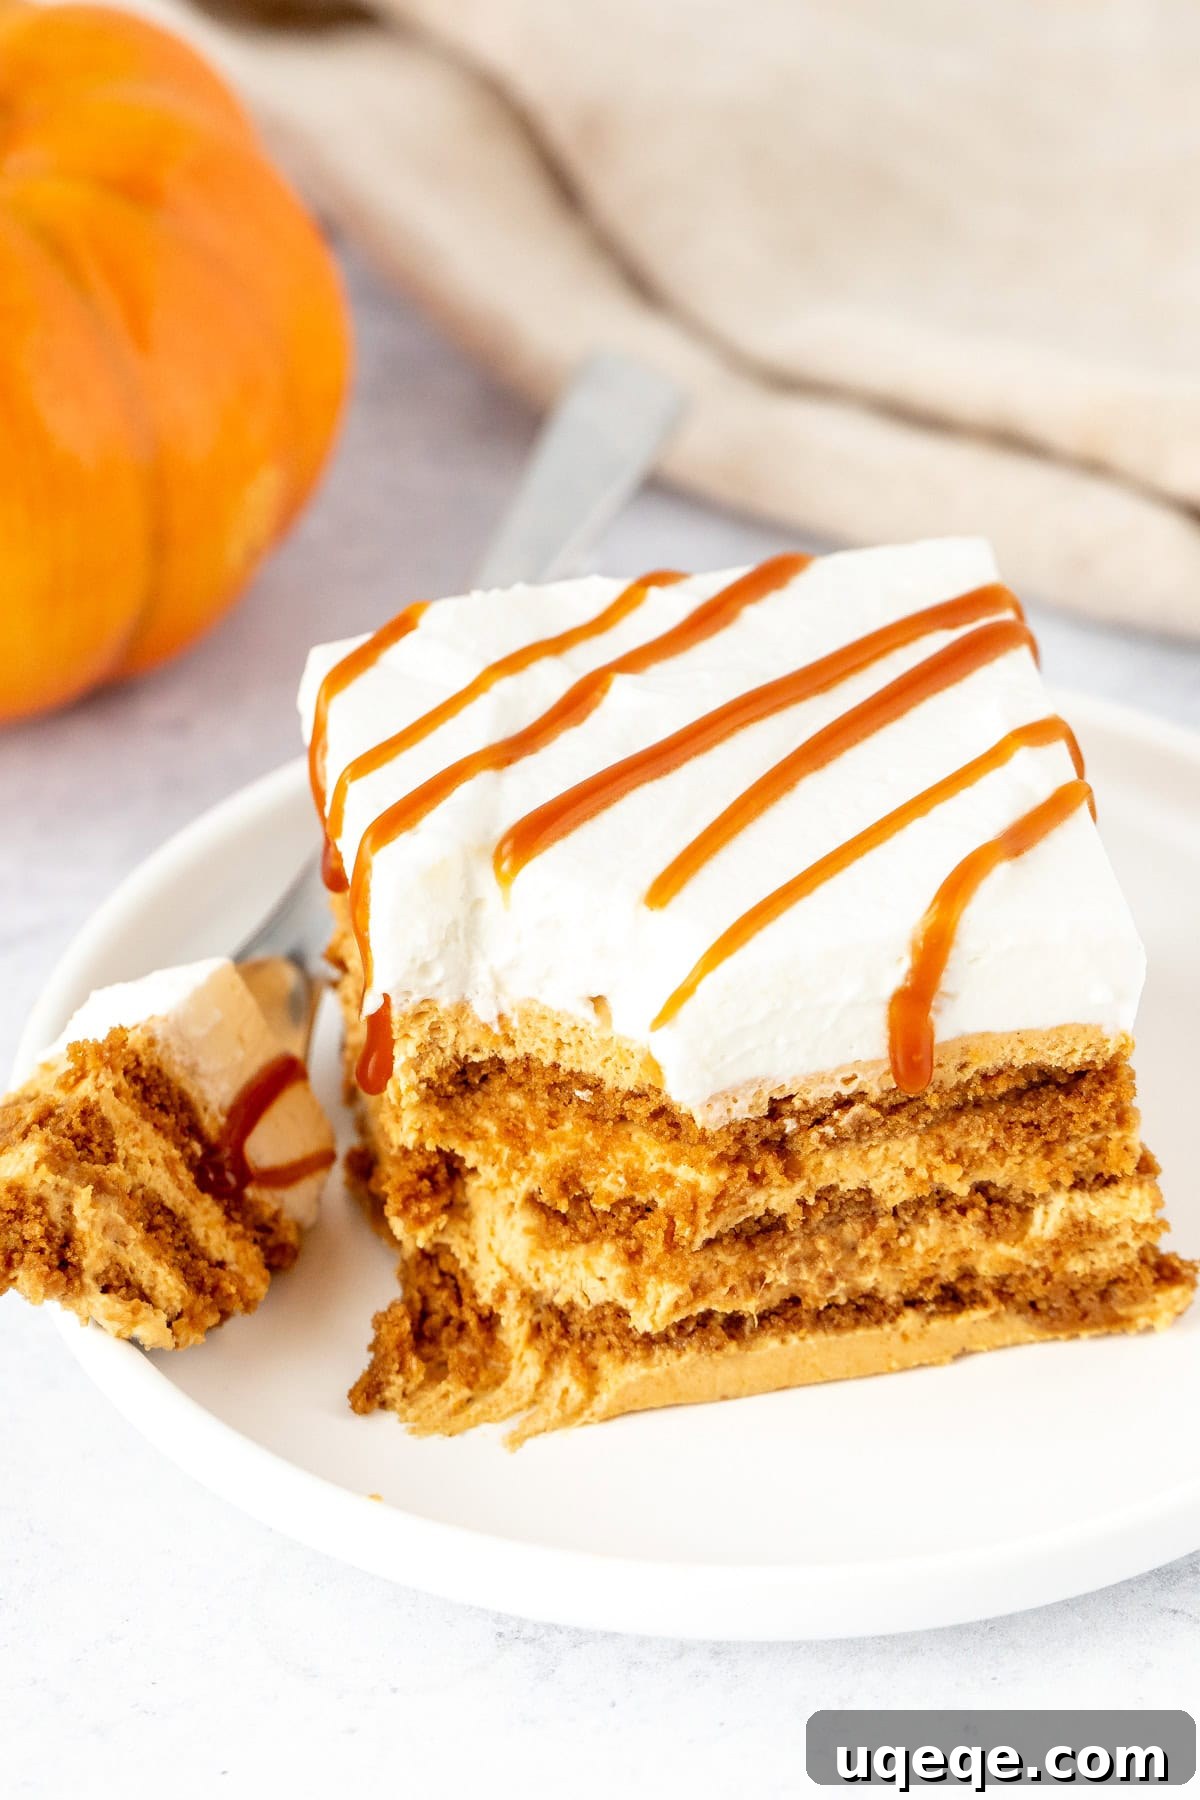
An icebox cake is a culinary triumph of simplicity and indulgence. It’s an umbrella term for any no-bake dessert that achieves its cake-like texture through alternating layers of a rich, creamy filling and crisp cookies or biscuits. The magic happens not in an oven, but in the “icebox” (an old term for a refrigerator). As the cake chills, the moisture from the creamy layers gradually softens the cookies, transforming them into tender, cake-like layers that melt in your mouth. The result is a luxurious dessert that is delightfully fluffy, wonderfully creamy, and velvety smooth – all without ever turning on your oven. This method not only simplifies the baking process but also creates a unique texture that’s distinct from traditional baked cakes, offering a refreshing and often lighter alternative.
The beauty of icebox cakes lies in their versatility. You can use almost any cookie, from chocolate wafers to graham crackers, and pair them with various cream-based fillings like pudding, mousse, or cheesecake. This particular recipe takes that versatility and infuses it with the warm, comforting flavors of autumn, making it an ideal choice for the season.
Why This Pumpkin Icebox Cake Will Be Your Ultimate Fall & Thanksgiving Dessert
This Pumpkin Icebox Cake is not just any dessert; it’s the perfect embodiment of fall flavors married with effortless preparation. For the creamy layers, we’ve crafted a simple yet incredibly rich no-bake pumpkin cheesecake filling. Unlike some cheesecake recipes, this one isn’t overly tangy, allowing the warm, aromatic pumpkin spice flavor to truly shine. Each bite is a harmonious blend of sweet pumpkin, subtle spice, and smooth creaminess that will transport your taste buds to a cozy autumn day.
What sets this icebox cake apart even further is the choice of cookies: Lotus Biscoff. These iconic Belgian speculoos cookies, with their distinct notes of brown sugar, cinnamon, and a hint of ginger, are an absolute dream paired with the pumpkin filling. Their unique flavor profile complements the pumpkin spice beautifully, adding an extra layer of complexity and a delightful crunch that softens to perfection. If Lotus Biscoff cookies aren’t available, don’t fret! Cinnamon graham crackers or gingersnaps make excellent alternatives, each contributing their own delicious spiced twist to the cake.
To finish, each slice is crowned with a cloud of freshly whipped cream and a generous drizzle of homemade (or store-bought) caramel sauce. This combination isn’t just a topping; it’s a symphony of textures and flavors that elevates an already exquisite dessert to sheer perfection. It’s a dessert that not only tastes incredible but also looks impressive, making it a guaranteed crowd-pleaser for any gathering, especially your Thanksgiving feast.
Essential Ingredients for Your Pumpkin Icebox Cake
Creating this magnificent no-bake dessert starts with understanding the role of each key ingredient. Quality components ensure the best flavor and texture.
The Heart of the Dessert: Pumpkin Puree
The star of our show is, of course, pumpkin puree. It’s crucial to use 100% pure pumpkin puree, not canned pumpkin pie filling, which contains added sugars and spices that will alter the flavor balance of our cheesecake filling. Pumpkin puree adds natural sweetness, a beautiful autumnal hue, and a comforting earthy flavor. One of the most critical steps in preparing the filling is to blot and squeeze out any excess moisture from the pumpkin puree using paper towels. This seemingly small step is vital because pumpkin puree naturally holds a lot of water, and too much liquid can prevent your cheesecake filling from setting properly, leading to a runny consistency. Taking the time to remove this excess moisture guarantees a firm, creamy, and perfectly structured filling.
The Creamy Foundation: Cream Cheese and Whipping Cream
For that luxurious, velvety texture, we rely on full-fat cream cheese, ideally in block form. Ensure your cream cheese is softened to room temperature before you begin. This allows it to whip up smoothly with the sugars and spices, preventing any lumps and ensuring a consistently creamy filling. Cold cream cheese will result in a lumpy texture that is hard to rectify. The whipping cream, also known as heavy cream, provides the airy, light body to the filling. It must be very cold to whip properly into stiff peaks. This whipped cream is then gently folded into the pumpkin-cream cheese mixture, giving the filling its signature light, mousse-like texture.
The Aromatic Elements: Pumpkin Pie Spice and Sweeteners
No pumpkin dessert is complete without the warm embrace of pumpkin pie spice. This blend typically includes cinnamon, nutmeg, ginger, and cloves, and sometimes allspice, creating that quintessential fall aroma and taste. You can use a store-bought mix or easily create your own with individual spices (see our notes section for a quick guide). The sweetness in our filling comes from a combination of powdered sugar (confectioners’ sugar) and brown sugar. Powdered sugar dissolves seamlessly, contributing to the smooth texture, while brown sugar adds a deeper, molasses-rich sweetness that complements the pumpkin and spices perfectly. A touch of vanilla extract further enhances all these flavors, adding a classic warmth.
The Signature Cookie: Lotus Biscoff and Delicious Alternatives
Lotus Biscoff Speculaas Cookies are truly exceptional in this recipe. Their caramelized, spiced flavor profile makes them a match made in heaven for pumpkin. They are crisp enough to hold their shape in layers but soften beautifully from the cream, becoming moist and cake-like after chilling. If you can’t find Biscoff, or if you simply prefer other options, ginger snaps are an excellent choice for their spicy kick, or cinnamon graham crackers will provide a more subtle, classic base that still pairs wonderfully with pumpkin. Whichever cookie you choose, aim for thin, sturdy varieties that can absorb moisture without disintegrating too quickly.
Crafting the Irresistible Creamy Pumpkin Filling: Your Step-by-Step Guide
The heart of this icebox cake lies in its rich and creamy pumpkin cheesecake filling. Follow these steps meticulously to ensure a smooth, well-set, and flavorful cream layer that will make your cake unforgettable.
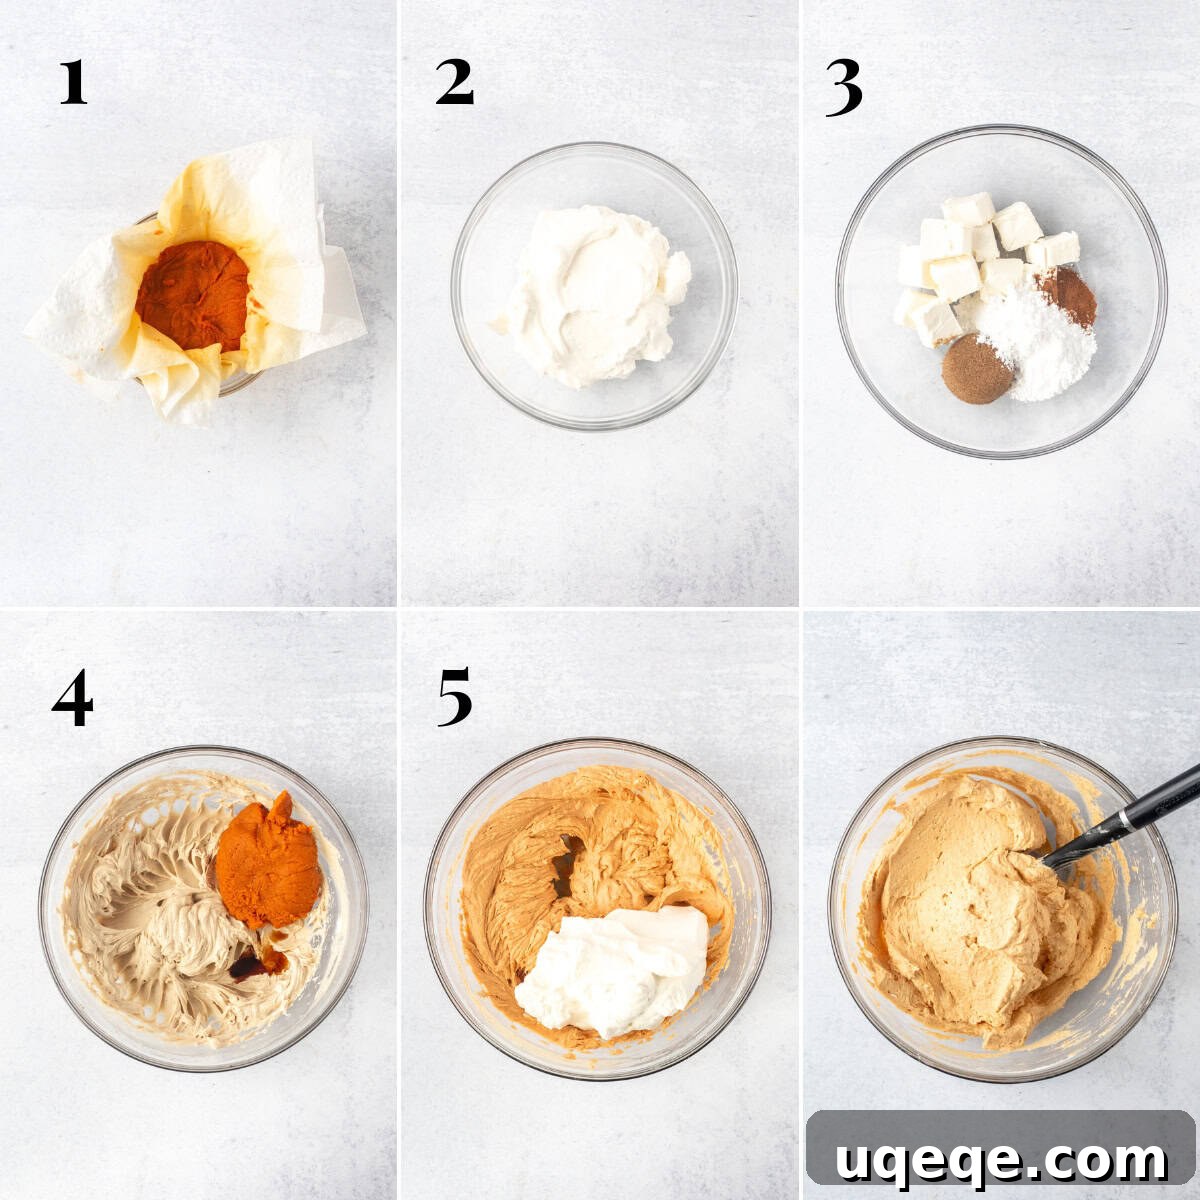
- Prepare the Pumpkin Puree: This initial step is non-negotiable for a firm filling. Measure out your 1 cup of pumpkin puree. Place it onto several layers of paper towels, then top with more paper towels. Gently press and squeeze out as much excess liquid as possible. You’ll be surprised how much water comes out! Continue blotting until the pumpkin appears drier and more concentrated. Set the blotted pumpkin aside.
- Whip the Whipping Cream: In a large, chilled mixing bowl (a cold bowl helps cream whip faster), pour the cold whipping cream. Using an electric mixer on medium-high speed, beat the cream until stiff peaks form. This means when you lift the beaters, the cream stands up in a peak that holds its shape. Be careful not to over-whip, or it could turn grainy. Once stiff, set the whipped cream aside in the fridge to keep it cold.
- Cream Together Cheese, Spices, and Sugars: In a separate large mixing bowl, combine the softened full-fat cream cheese, powdered sugar, brown sugar, and pumpkin pie spice. Beat with an electric mixer on medium speed until the mixture is completely smooth and creamy. It’s absolutely crucial that there are no lumps of cream cheese remaining at this stage, as they will not smooth out later. Scrape down the sides of the bowl often to ensure everything is incorporated evenly.
- Incorporate Pumpkin and Vanilla: To the smooth cream cheese mixture, add the blotted pumpkin puree and vanilla extract. Beat on medium speed until everything is well combined and the mixture is uniformly orange and creamy.
- Gently Fold in Whipped Cream: This step requires a delicate touch. Remove the whipped cream from the fridge. Using a rubber spatula, carefully fold the whipped cream into the pumpkin-cream cheese mixture. The goal is to incorporate the whipped cream without deflating the air you’ve just whipped into it. Fold until the mixture is an even consistency, with no streaks of plain whipped cream visible. The filling should be light, airy, and uniformly colored. Do not overmix.
Assembling Your Layered Masterpiece: Tips for a Stunning Icebox Cake
Assembling your pumpkin icebox cake is a simple process, but a few tricks can ensure a beautiful presentation and even softening of the cookies.
First, select your pan. An 8×8 inch (20×20 cm) square pan is ideal for thicker, more substantial layers. A 9×9 inch (23×23 cm) pan will also work, but your layers will be slightly thinner. For easier removal and cleaner slices, I highly recommend lining your pan with parchment paper, leaving an overhang on all sides. This will create “handles” to lift the cake out once it’s set.
For cookies that are extra tender and truly melt-in-your-mouth, consider a very quick dip of each cookie in milk (any kind of milk works). This jumpstarts the softening process. Be sure to shake off any excess milk to prevent the cake from becoming soggy. Alternatively, you can skip this step and let the moisture from the filling do all the work; the cookies will still soften perfectly, just perhaps over a slightly longer chilling period.
Now, let’s build those delicious layers! We’ll alternate between cookies and creamy pumpkin cheesecake filling, ensuring each bite is perfectly balanced.
- Foundation Layer: Start by spreading about 1/4 to 1/3 cup of the pumpkin filling evenly on the bottom of your prepared pan. This initial layer acts as an adhesive, helping the first layer of cookies stay in place and begin softening from the bottom up.
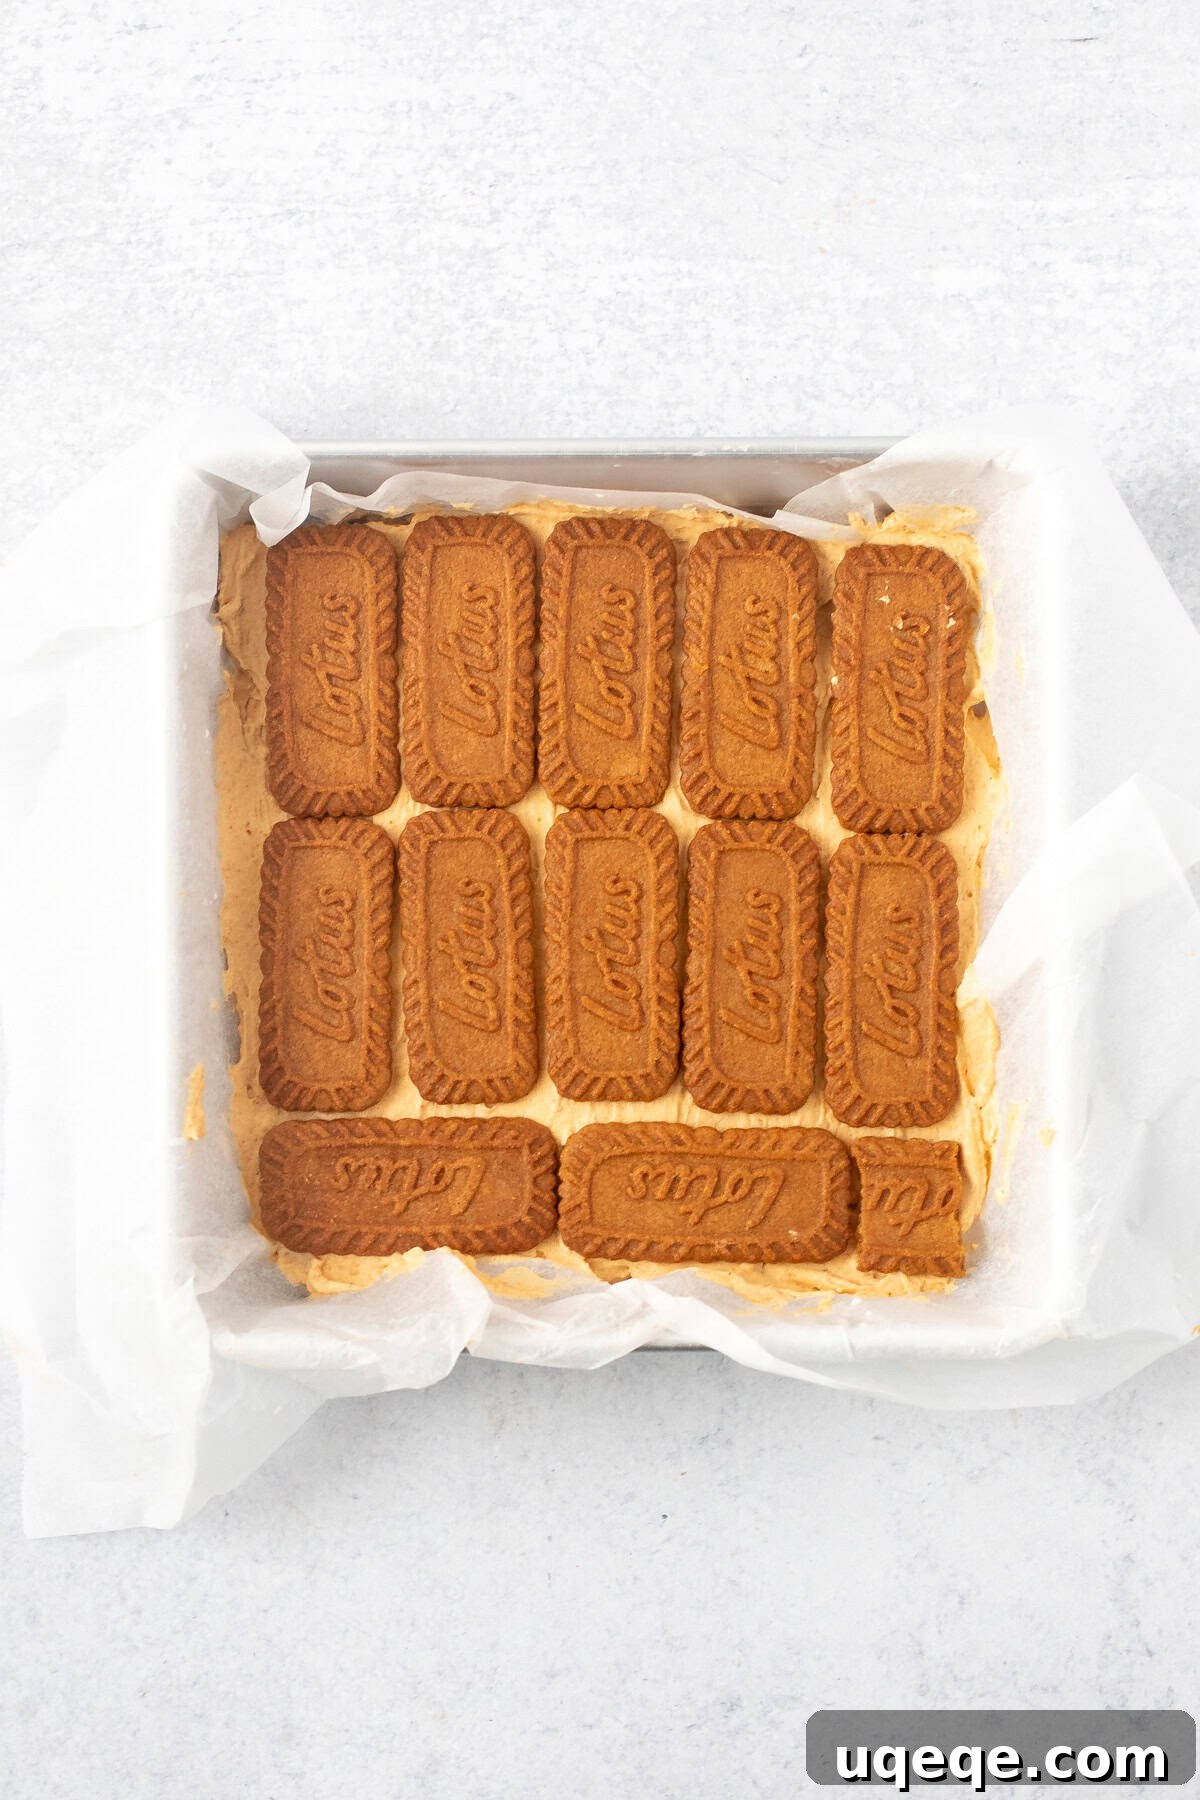
- First Cookie Layer: Arrange your chosen cookies (Lotus Biscoff, graham crackers, or gingersnaps) in a single, even layer over the pumpkin filling. You may need to break some cookies into smaller pieces to fill any gaps and create a solid, continuous layer. This ensures structural integrity and uniform texture throughout the cake.
- First Creamy Layer: Spread approximately 1 cup of the pumpkin filling (this should be about 1/3 of the remaining filling) evenly over the first layer of cookies. Use an offset spatula or the back of a spoon to create a smooth, consistent layer from edge to edge.
- Second Cookie Layer: Place another layer of cookies on top of the pumpkin filling, again breaking pieces as needed to cover the entire surface.
- Second Creamy Layer: Spread another 1 cup of pumpkin filling over the second cookie layer.
- Third Cookie Layer: Add your final layer of cookies.
- Top Creamy Layer: Finish with the remaining pumpkin filling, spreading it smoothly to cover the last cookie layer completely. This will be the top surface of your cake, ready for serving and decorations.
The Magic of Chilling: Setting Your Icebox Cake to Perfection
Once your Pumpkin Icebox Cake is assembled, the most crucial step—and arguably the hardest part of any no-bake dessert—is the chilling. Cover the pan tightly with plastic wrap or aluminum foil to prevent any odors from the fridge from permeating the cake and to maintain moisture. Then, place the cake in the refrigerator to firm up.
A minimum of 4 hours of chilling time is required, but for the best results, I strongly recommend chilling it overnight (12-24 hours). This extended chill time allows the cookies ample opportunity to fully absorb the moisture from the creamy pumpkin filling, transforming them into that luxurious, cake-like consistency. It also gives the cheesecake filling itself enough time to set completely, ensuring clean, beautiful slices.
While some icebox cakes can be frozen, I personally prefer this pumpkin icebox cake chilled from the refrigerator rather than frozen. The refrigerated version offers a superior creamy texture in the filling and a perfectly soft, tender cookie layer that truly melts in your mouth. Freezing can sometimes alter the texture of the cream cheese filling, making it a bit icier, and the cookies can become too hard if not thawed carefully. For optimal enjoyment, stick to refrigeration.
Serving Your Pumpkin Icebox Cake: Delicious Topping Ideas & Presentation
The moment of truth! After patiently chilling, your Pumpkin Icebox Cake is ready to be unveiled and enjoyed. Before serving, you can elevate its appearance and flavor even further with some delightful toppings.
For a classic and irresistible finish, whip up another batch of fresh whipped cream and spread it evenly over the top of the chilled cake. Then, generously drizzle your favorite caramel sauce (homemade salted caramel is highly recommended for an extra touch of sophistication) over the whipped cream. This combination is a match made in heaven, adding both visual appeal and a burst of complementary flavor.
However, the possibilities for toppings are endless! Feel free to get creative and customize your cake:
- Butterscotch Sauce: For a different kind of rich, sweet drizzle.
- Cookie Crumbles: Crush some extra Lotus Biscoff cookies or gingersnaps and sprinkle them over the top for added texture and flavor.
- Toffee Bits: A sprinkle of crunchy toffee bits adds a delightful chewiness and buttery sweetness.
- Chopped Nuts: Toasted pecans or walnuts would be fantastic, adding a nutty contrast.
- Dusting of Spice: A light dusting of cinnamon or pumpkin pie spice adds an aromatic touch and visual appeal.
- Chocolate Shavings: For the chocolate lovers, fine chocolate shavings can provide a touch of elegance and richness.
When you’re ready to slice and serve, if you lined the pan with parchment paper, carefully lift the cake out by the overhang and transfer it to a cutting board. Use a thin, sharp knife to slice the cake into neat pieces. For the cleanest cuts, wipe the knife clean with a damp cloth after each slice. This prevents the creamy filling from dragging and smearing between slices, ensuring a picture-perfect presentation.
Remember to keep any leftover icebox cake covered in the fridge until you’re ready to serve, as it’s best when thoroughly chilled and firm.
Recipe: Ultimate No-Bake Pumpkin Icebox Cake
By: Fiona Dowling
Prep Time: 30 mins
Chilling Time: 4 hours (or overnight for best results)
Total Time: 34 mins (active prep + minimum chill)
Servings: 12 pieces
Equipment
- 8×8 inch (20×20 cm) pan (a 9×9 inch / 23×23 cm pan will also work, but layers will be thinner)
- Electric mixer (handheld or stand mixer)
- Large mixing bowls
- Rubber spatula
- Measuring cups and spoons
- Parchment paper (optional, for easier removal)
Ingredients
For the Cake Layers
- 36-40 Lotus Biscoff Speculaas Cookies (you will typically need two 8-ounce / 250 gram packages and will have some leftover)
- (Optional: a splash of milk for dipping cookies)
For the Pumpkin Cheesecake Filling
- 1 cup (240 ml) pumpkin puree (ensure it’s 100% pure pumpkin, not pie filling; measure out 1 cup, not the full can!)
- 1 cup (240 ml) cold whipping cream (heavy cream), straight from the fridge
- 8 ounces (226 grams) full-fat cream cheese, brick style, softened to room temperature
- 1/2 cup (55 grams) powdered sugar (confectioners’ sugar)
- 1/4 cup (52 grams) packed brown sugar
- 1 1/2 teaspoons pumpkin pie spice (see notes for homemade blend)
- 1 teaspoon vanilla extract
For the Whipped Cream Topping & Garnish
- 1 cup (240 ml) cold whipping cream (heavy cream), straight from the fridge
- Caramel sauce, for drizzling (store-bought or homemade)
- Optional: cookie crumbles, toffee bits, or extra pumpkin pie spice for garnish
Instructions
Part 1: Prepare the Pumpkin Cheesecake Filling
- Blot the Pumpkin: Measure 1 cup of pumpkin puree. Spread it onto several layers of paper towels and top with more paper towels. Gently press and squeeze out as much excess liquid as possible. Set aside. This step is critical for the filling to set properly.
- Whip the Cream: In a large, chilled bowl, beat 1 cup of cold whipping cream with an electric mixer until stiff peaks form. Be careful not to over-whip. Place the whipped cream in the refrigerator while you prepare the rest of the filling.
- Cream Cheese Mixture: In a separate large bowl, combine the softened cream cheese, powdered sugar, brown sugar, and pumpkin pie spice. Beat with an electric mixer on medium speed until the mixture is completely smooth and creamy, ensuring no lumps remain. Scrape down the sides of the bowl as needed.
- Add Pumpkin & Vanilla: Beat the blotted pumpkin puree and vanilla extract into the cream cheese mixture until well combined and smooth.
- Fold in Whipped Cream: Gently fold the reserved whipped cream into the pumpkin-cream cheese mixture using a rubber spatula or wooden spoon. Continue folding until the mixture is an even consistency and no streaks of plain whipped cream are visible, taking care not to deflate the mixture.
Part 2: Assemble the Icebox Cake
- Prepare Pan: Optionally, line an 8×8 inch (20×20 cm) square pan with parchment paper, leaving an overhang on the sides for easy lifting.
- Optional Cookie Dip: For extra soft cookies, briefly dip each Lotus Biscoff cookie into a shallow dish of milk, shaking off any excess liquid.
- Build Layers:
- Spread about 1/4 to 1/3 cup of the pumpkin filling evenly on the bottom of the prepared pan.
- Arrange a single layer of cookies over the filling, breaking some to fit and fill any gaps.
- Spread 1 cup of the pumpkin filling (approximately 1/3 of the remaining filling) evenly over the first cookie layer.
- Place a second layer of cookies on top.
- Spread another 1 cup of filling over the second cookie layer.
- Add a third layer of cookies.
- Spread the remaining pumpkin filling evenly over the final cookie layer.
- Chill: Cover the pan tightly with plastic wrap or aluminum foil. Refrigerate for at least 4 hours, or preferably overnight (12-24 hours) for the best texture and firmness.
Part 3: Chill and Serve
- Prepare Topping (Optional): Just before serving, beat the remaining 1 cup of cold whipping cream until stiff peaks form. Spread it evenly over the top of the chilled cake.
- Slice and Serve: If you used parchment paper, carefully lift the cake out of the pan and transfer it to a cutting board. Slice the cake with a thin, sharp knife, wiping the blade clean after each cut for neat slices.
- Garnish: Optionally, drizzle each slice generously with caramel sauce and add any other desired garnishes like cookie crumbles or a dusting of spice.
Notes for Success
- Lotus Biscoff Speculaas Cookies: These can be substituted with gingersnaps or cinnamon graham crackers for a similar delightful crunch and spice.
- Whipping Cream: Ensure your whipping cream (heavy cream) has a milk fat content between 33-35% for optimal whipping results. Always use it very cold.
- Pumpkin Puree: Always double-check that you are using 100% pure pumpkin puree, not canned pumpkin pie filling, which is pre-sweetened and spiced.
- Pumpkin Pie Spice (Homemade): If you don’t have a pre-made blend, you can easily create your own with 1 teaspoon ground cinnamon, 1/4 teaspoon ground nutmeg, and 1/4 teaspoon ground cloves. You can also add a pinch of ground ginger or allspice if desired.
- Storage: Store any leftover Pumpkin Icebox Cake covered tightly in the refrigerator for up to 4 days.
- Nutrition Disclaimer: The nutritional details provided are an estimate only, based on 1 slice with whipped cream topping, assuming the cake is sliced into 12 uniform pieces. Actual values may vary.
Nutrition Information (Per Serving – Estimate)
Calories: 425 kcal, Carbohydrates: 46g, Protein: 5g, Fat: 25g, Saturated Fat: 14g, Polyunsaturated Fat: 1g, Monounsaturated Fat: 7g, Cholesterol: 64mg, Sodium: 349mg, Potassium: 187mg, Fiber: 2g, Sugar: 22g, Vitamin A: 4015IU, Vitamin C: 1mg, Calcium: 89mg, Iron: 2mg.
Why Choose a No-Bake Dessert for Your Holiday Table?
When the holidays roll around, especially Thanksgiving or Christmas, your oven becomes prime real estate. Between the turkey, stuffing, casseroles, and roasted vegetables, finding oven space for a traditional baked dessert can be a logistical nightmare. This is where no-bake desserts like our Pumpkin Icebox Cake truly shine. They offer a fantastic solution to holiday baking stress, allowing you to prepare a stunning and delicious dessert well in advance without monopolizing your oven.
Beyond the practical benefits, no-bake desserts are often lighter and more refreshing than their baked counterparts, providing a welcome contrast to a rich holiday meal. They are also incredibly easy to make, making them perfect for novice bakers or those looking for a low-effort, high-reward recipe. The extended chilling time means you can assemble the cake a day or two ahead, freeing up your time on the actual day of your celebration. This convenience, combined with the delightful taste and elegant presentation, makes the Pumpkin Icebox Cake an ideal choice for any festive occasion or simply a weeknight treat when you want something special without the fuss.
Frequently Asked Questions (FAQ)
Can I make this cake ahead of time?
Absolutely! This pumpkin icebox cake is an excellent make-ahead dessert. In fact, it tastes even better when given ample time to chill. You can assemble the entire cake (without the final whipped cream topping) up to 2 days in advance. Just ensure it’s tightly covered with plastic wrap and stored in the refrigerator. Add the fresh whipped cream and caramel drizzle just before serving for the best presentation.
What if I don’t have Lotus Biscoff cookies?
No problem! While Lotus Biscoff cookies offer a unique caramelized spice flavor, you can easily substitute them with other crisp, thin cookies. Gingersnaps are a fantastic alternative, providing a bolder ginger spice that pairs wonderfully with pumpkin. Cinnamon graham crackers are another excellent choice, offering a milder spiced flavor and a classic texture. Experiment with what you have on hand or what you prefer!
How do I store leftovers?
Store any leftover pumpkin icebox cake tightly covered with plastic wrap or in an airtight container in the refrigerator. It will stay fresh and delicious for up to 4 days. While the cake can be frozen, the texture of the cream cheese filling might change slightly upon thawing, becoming a bit icier. For the best experience, enjoy it chilled from the fridge.
Is this cake suitable for large gatherings?
Yes, this recipe yields 12 generous slices, making it perfect for a standard family gathering. If you’re hosting a very large party, you could easily double the recipe and make two cakes, or prepare it in a larger 9×13 inch (23×33 cm) baking dish, though the layers might be slightly thinner. The ease of preparation and make-ahead nature also makes it ideal for entertaining.
Conclusion: Embrace the Ease and Flavor of This Pumpkin Dream
This No-Bake Pumpkin Icebox Cake isn’t just a dessert; it’s a testament to the fact that incredibly delicious treats don’t always require hours of labor or a hot oven. With its layers of smooth, spiced pumpkin cheesecake and tender, caramelized Biscoff cookies, all crowned with whipped cream and caramel, it delivers all the warmth and comfort of autumn in every single, effortless bite. Whether you’re seeking a stress-free Thanksgiving option, a delightful fall indulgence, or simply a quick yet impressive dessert, this recipe is your answer. So go ahead, whip up this pumpkin dream, let it chill to perfection, and prepare to delight everyone who tries it!
Rate this Recipe | Print this Recipe