
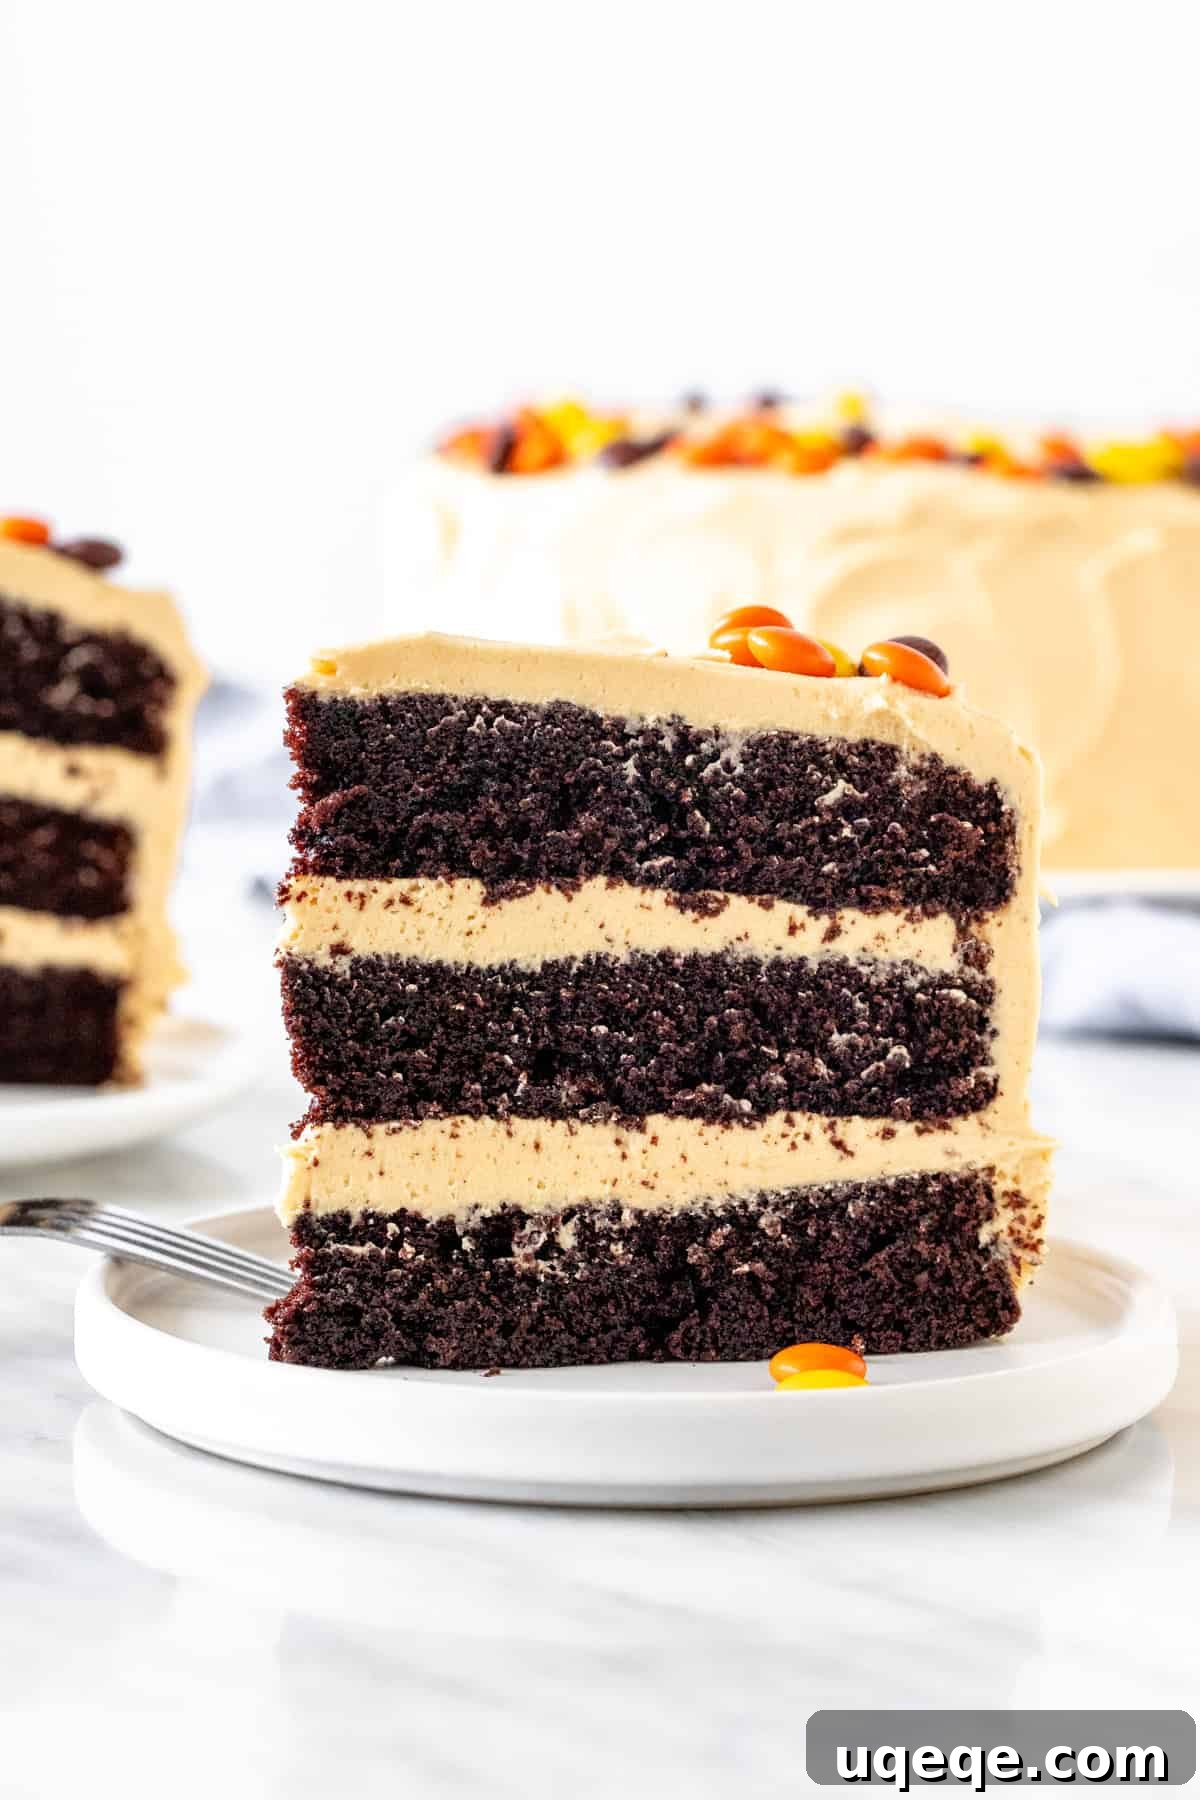
The Ultimate Decadent Chocolate Peanut Butter Cake
Prepare to embark on a truly sensational dessert journey with our ultimate **Chocolate Peanut Butter Cake**. This isn’t just any cake; it’s a masterpiece of flavor and texture, meticulously crafted to deliver an unparalleled experience for every chocolate and peanut butter enthusiast. Imagine layers of intensely moist, profoundly fudgy chocolate cake, perfectly complemented by a generous spread of luscious, creamy, and undeniably peanut buttery frosting. This recipe is more than just a dessert; it’s the realization of every sweet tooth’s dream, a truly over-the-top delight that stands out at any gathering or celebration.
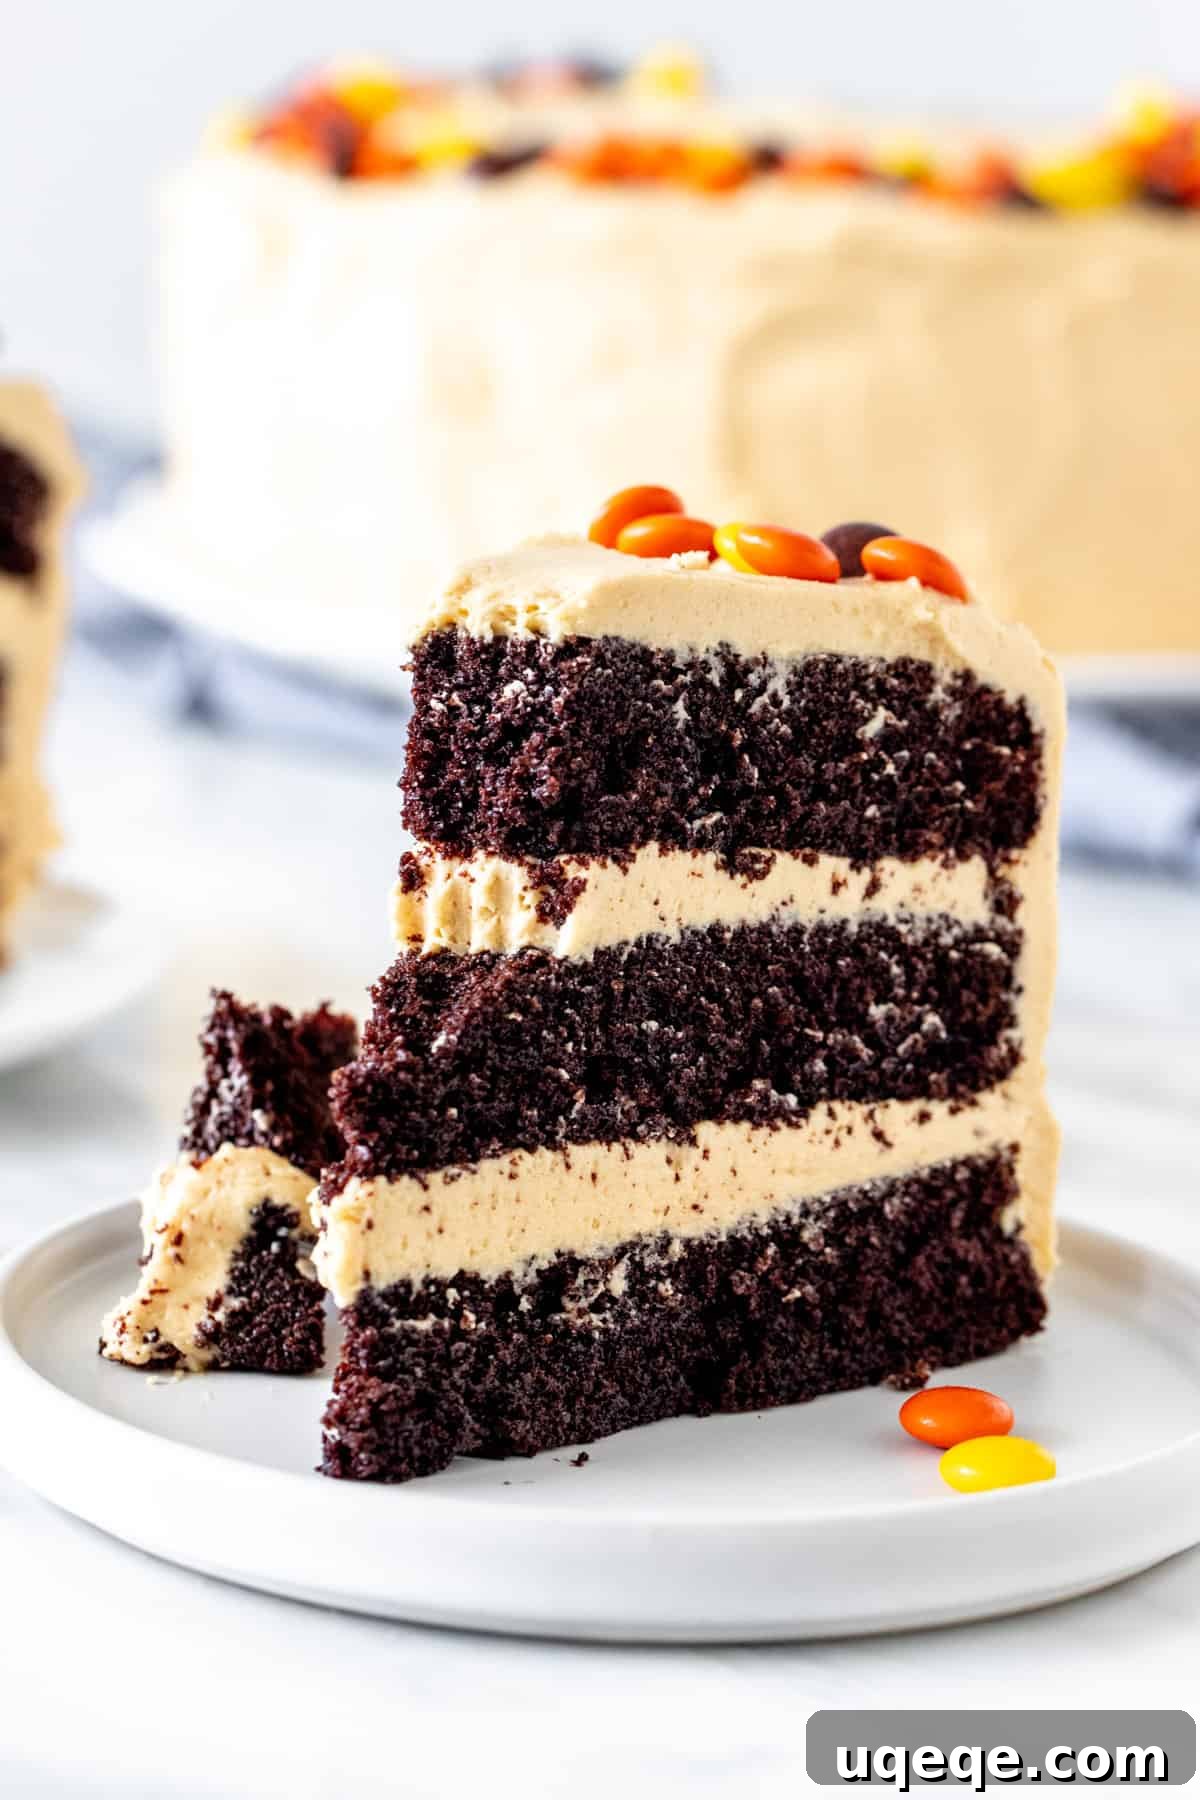
The timeless pairing of chocolate and peanut butter is celebrated in its most glorious form within this cake. Each forkful delivers a symphony of tastes, from the deep, rich cocoa notes of the cake to the sweet, savory depth of the peanut butter frosting. It’s a combination that evokes nostalgic memories of childhood treats like peanut butter cups, elevated to an elegant, celebratory dessert. This cake is undoubtedly rich, but it’s precisely that richness that makes it the perfect centerpiece for birthdays, holidays, or any moment deserving of something truly extraordinary.
Crafting the Perfect Moist Chocolate Cake Layers
The foundation of this incredible cake lies in its chocolate layers. Achieving a cake that is both rich in flavor and incredibly moist is key, and we unlock this with a few essential ingredients and techniques. These elements work in harmony to create a tender crumb that stays fresh and delicious for days.
- **The Magic of Oil:** Unlike butter, which can make cakes denser and prone to drying out, vegetable or canola oil ensures an exceptionally moist crumb. Don’t worry about any oily taste; the robust flavor of cocoa powder completely masks it, leaving you with only a tender, hydrated cake.
- **Buttermilk for Tenderness:** Buttermilk is a secret weapon in chocolate cake recipes. Its acidity reacts with baking soda to create a light, soft texture and a beautifully fine crumb. It also contributes to the cake’s overall richness and depth of flavor without making it heavy. If you don’t have buttermilk on hand, don’t fret! A simple homemade substitute can be made by adding a tablespoon of lemon juice or white vinegar to regular milk and letting it sit for a few minutes until it curdles.
- **Blooming Cocoa with Boiling Water:** This technique is crucial for intensifying the chocolate flavor. Pouring boiling water over the cocoa powder “blooms” it, much like brewing coffee. It releases and activates the full spectrum of cocoa’s aromatic compounds, resulting in a deeper, more pronounced chocolate taste in your finished cake.
Mixing Your Chocolate Cake Batter
Whether you prefer the simplicity of a metal whisk or the power of an electric mixer, this cake batter is surprisingly straightforward to prepare. The most important tip? Grab your largest mixing bowl! This recipe yields a generous amount of batter, ensuring plenty of space for mixing without spills.
- **Combine Dry Ingredients:** Start by thoroughly whisking together all the dry ingredients – flour, cocoa powder, baking soda, baking powder, and salt. This crucial step ensures that the leavening agents are evenly distributed throughout the mixture, leading to a consistent rise and texture in your baked cake. If your cocoa powder is particularly lumpy, a quick sift can prevent frustrating pockets of dry ingredients.
- **Whisk Wet Ingredients:** In a separate, equally large bowl, combine the oil, granulated sugar, eggs, vanilla extract, and buttermilk. Whisk until well incorporated and smooth. The sugar should begin to dissolve, and the mixture should be uniform.
- **Marry Wet and Dry:** Gently pour the wet ingredients into the dry mixture. Using either a whisk or an electric mixer on low speed, carefully combine them until just blended. The batter will be quite thick at this stage, but resist the urge to overmix. Overmixing can develop the gluten in the flour too much, resulting in a tough cake.
- **Introduce Boiling Water:** This is where the magic happens! Very carefully, slowly whisk or beat in the boiling water. The batter will visibly thin out significantly. Continue mixing until everything is fully incorporated and you no longer see any dry pockets of batter sticking to the bottom or sides of the bowl. This hot liquid helps create a tender, almost pudding-like texture when baked.
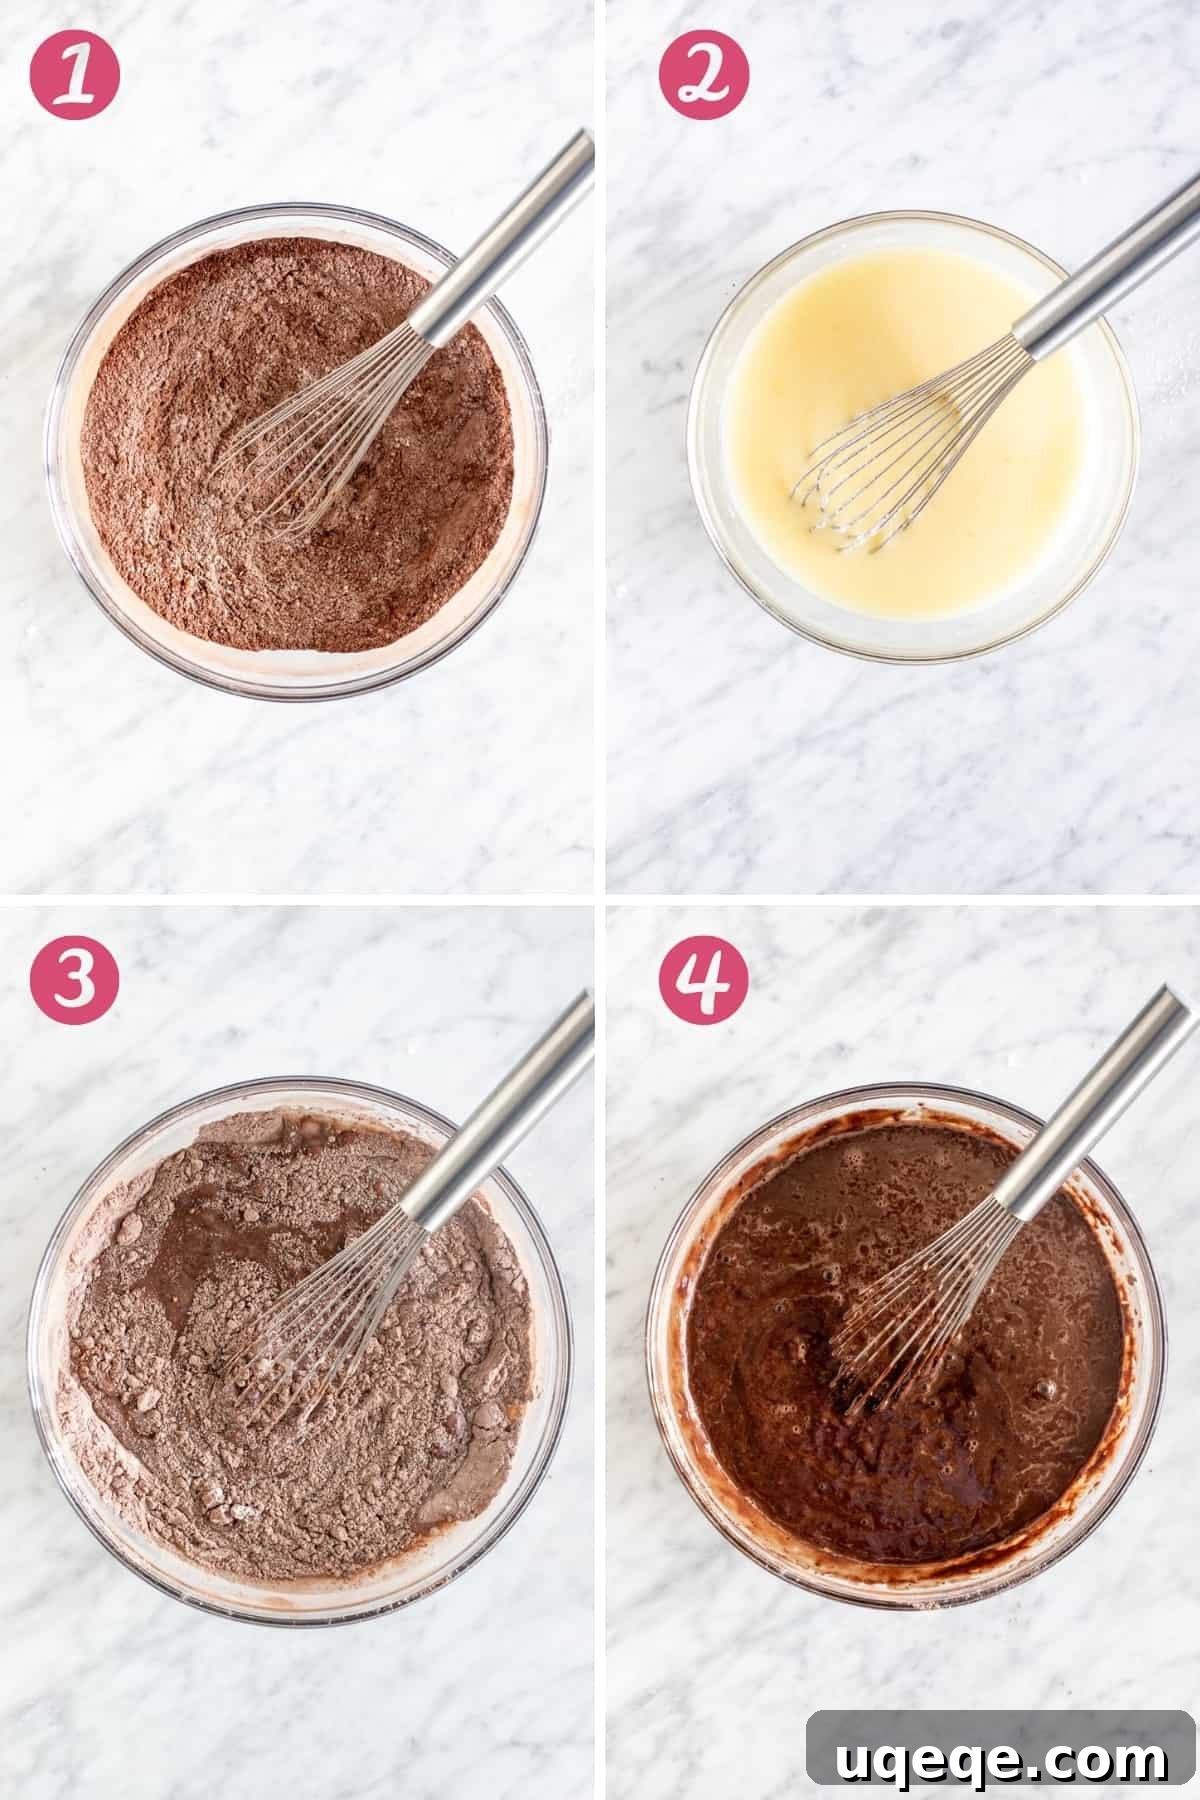
Once your luscious batter is ready, divide it evenly among your prepared cake pans. For consistent layers, it’s highly recommended to weigh the batter in each pan. This ensures even baking and beautifully uniform cake layers. Then, it’s off to the oven for baking!
Choosing and Preparing Your Cake Pans
The right pan size is essential for perfect cake layers. For this particular chocolate peanut butter cake, I opted for three 8-inch (20 cm) round cake tins, resulting in a bake time of approximately 20 minutes at 350°F (175°C).
However, this versatile recipe can be adapted to other pan sizes:
- **Two 8-inch (20 cm) round cake tins:** If using two pans, ensure their sides are at least 2 inches (5 cm) tall to accommodate the batter. The bake time will increase slightly, typically around 25-30 minutes at 350°F (175°C). Keep an eye on the cakes, as doneness can vary.
- **Two 9-inch (23 cm) round cake tins:** For slightly wider, thinner layers, two 9-inch pans work wonderfully. These will generally bake for about 22 minutes at 350°F (175°C).
- **Cupcakes:** If you’re craving individual portions, this batter can be easily transformed into delectable cupcakes. For specific instructions and baking times, I recommend consulting this dedicated chocolate cupcakes with peanut butter frosting recipe.
Regardless of your chosen pan size, proper pan preparation is key to preventing sticking. Always grease your pans thoroughly and line the bottoms with parchment paper rounds. For chocolate cakes, lightly dust the greased pans with cocoa powder instead of flour to avoid any white residue on your dark cake layers.
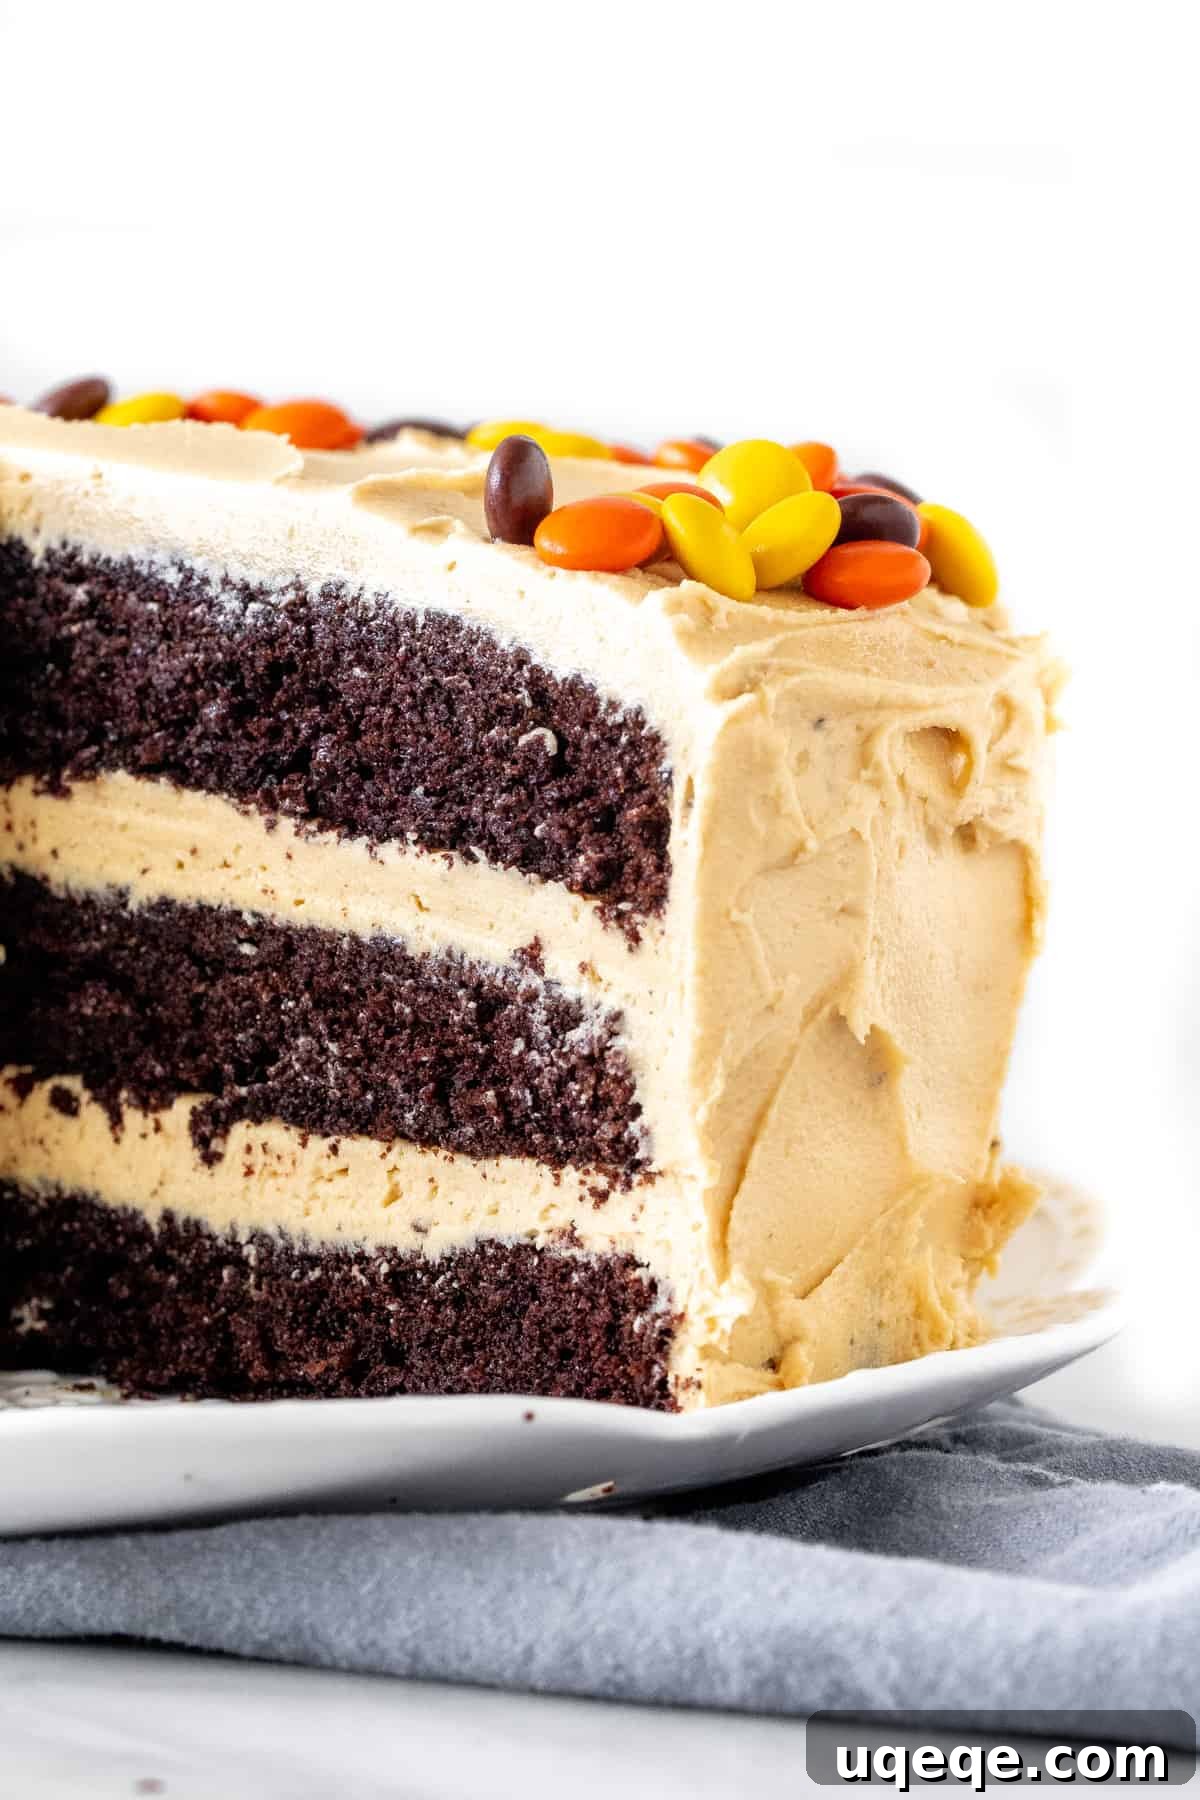
The Irresistible Creamy Peanut Butter Frosting
No chocolate peanut butter cake would be complete without a truly exceptional peanut butter frosting. This recipe delivers a frosting that is wonderfully thick, intensely peanut buttery, and incredibly creamy, striking the perfect balance between richness and sweetness. You have the flexibility to adjust the amount of powdered sugar to suit your personal sweetness preference.
The most critical aspect of achieving a flawless peanut butter frosting is your choice of peanut butter. **It is imperative to use a smooth, commercial-style peanut butter** – brands like Kraft, Skippy, or Jif are ideal. These types of peanut butter contain stabilizers that prevent oil separation. **Absolutely avoid natural or homemade peanut butter, or any variety that naturally separates.** Using these will almost certainly lead to a runny, oily frosting that refuses to emulsify properly, leaving unsightly pools of oil and a grainy texture. Stick to the classic, dependable options for the best results.
Assembling Your Layer Cake Like a Pro
Assembling a layer cake might seem daunting, but with a few simple tips, you’ll find it’s a rewarding process. Patience and proper preparation are your best friends here, ensuring a stunning and stable final product:
- **Cool Cake Layers Completely:** This step is non-negotiable! Attempting to frost warm cake layers is a recipe for disaster, as the frosting will melt and slide off. Ensure your cake layers are completely cool to the touch – ideally, chilled in the refrigerator for at least an hour after cooling on a wire rack.
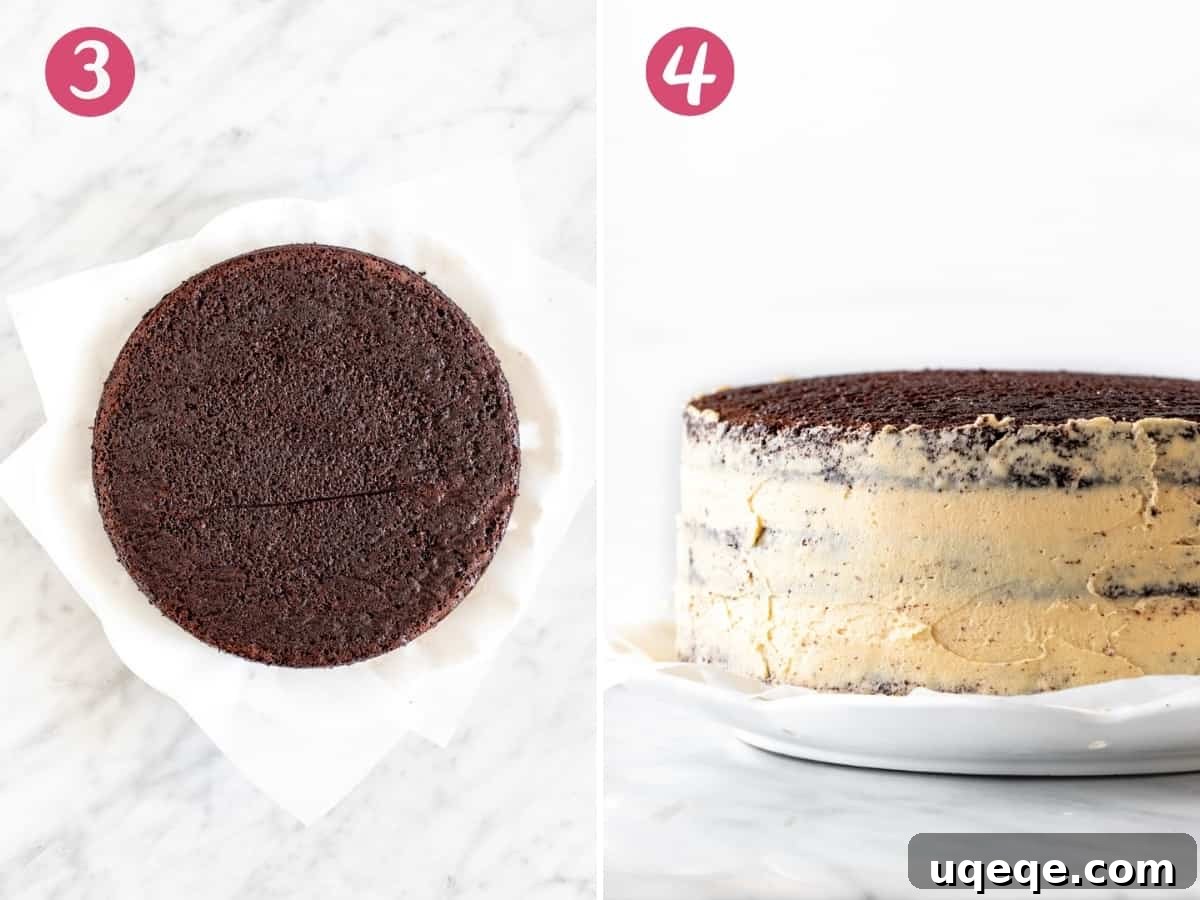
- **Level Your Cake Layers:** Most homemade cakes will bake with a slight dome on top. For a professional-looking, stable layer cake, use a long serrated knife (like a bread knife) to gently saw off these rounded tops, creating perfectly flat layers. This step makes stacking much easier and prevents your cake from leaning.
- **Keep Your Plate Clean:** To maintain a pristine serving plate, place a few strips of wax paper or parchment paper around the outside edges of your cake plate or stand. Position your first cake layer directly on top of these strips, allowing them to catch any excess frosting during assembly. Once you’re done decorating, simply wiggle them out from under the cake for a spotless presentation.
- **The Essential Crumb Coat:** This is a game-changer for smooth, crumb-free frosting. Apply a very thin layer of frosting all around the sides and top of your cake. Don’t worry if it looks a bit “dirty” with crumbs; this is its purpose – to seal in all those loose cake crumbs. After applying the crumb coat, place the cake in the refrigerator for about 20-30 minutes. This chilling period allows the thin layer of frosting to firm up, effectively trapping all the crumbs.
- **The Grand Finale – Final Frosting:** Once your crumb coat is firm, remove the cake from the fridge. Now you can apply your final, thicker layer of peanut butter frosting. Because the crumbs are locked in, your final coat will be beautifully smooth and clean. Use an offset spatula to create elegant swirls or a perfectly smooth finish, depending on your desired aesthetic.
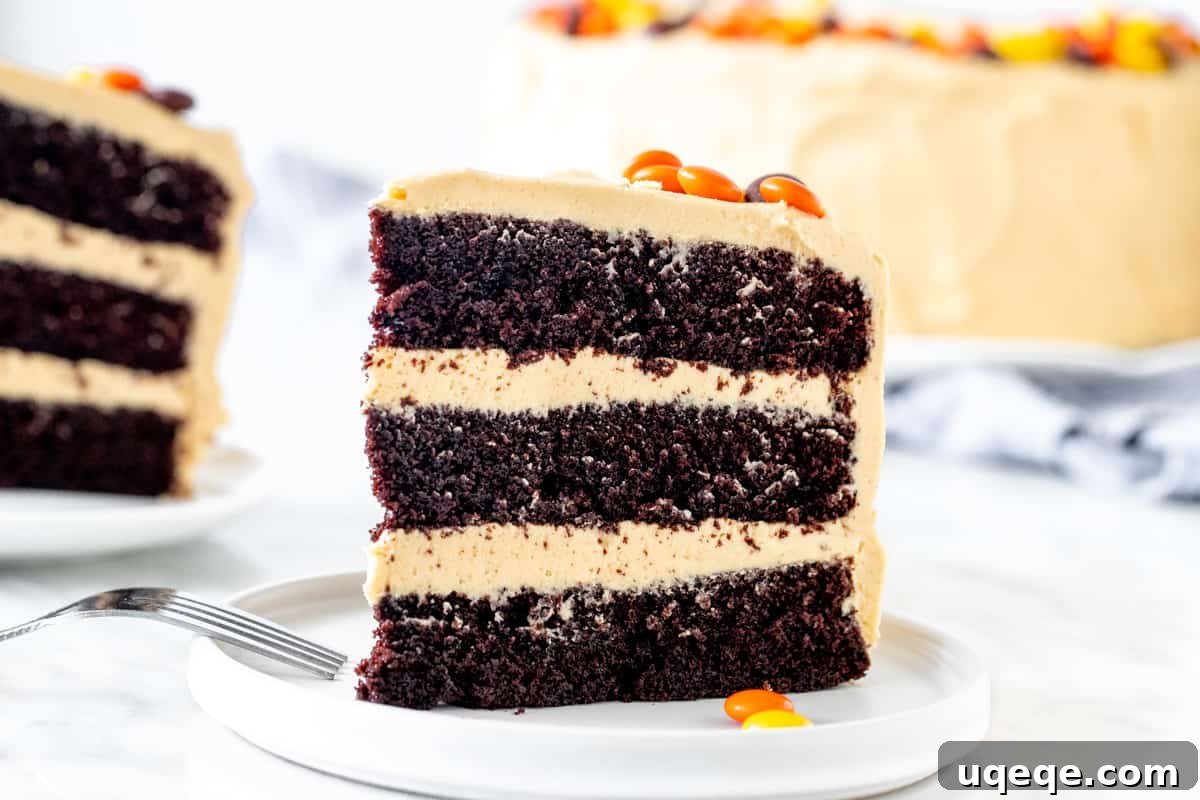
With its moist chocolate cake layers and luxurious peanut butter frosting, this chocolate peanut butter cake offers an unparalleled experience of indulgence. Each bite is a testament to the perfect harmony of these classic flavors, making it the absolute finest peanut butter dessert you could ever create!
If you love the artistry and satisfaction of crafting decadent layer cakes, explore some of our other fantastic recipes:
- Double Chocolate Layer Cake
- Classic Birthday Cake
- Funfetti Cake
***
Chocolate Peanut Butter Cake
By: Fiona Dowling
This decadent chocolate peanut butter cake features layers of moist chocolate cake with creamy peanut butter frosting. A peanut butter lover’s delight – this recipe is over the top delicious.
Prep: 1 hr | Cook: 22 mins | Cooling: 2 hrs | Total: 3 hrs 22 mins | Servings: 14 pieces
Equipment
- Three 8-inch (20cm) round cake tins
Ingredients
For the Chocolate Cake
- 2 1/2 cups all-purpose flour (312.5 grams)
- 1 cup cocoa powder (80 grams)
- 2 teaspoons baking soda
- 1 teaspoon baking powder
- 1/2 teaspoon salt
- 2/3 cup vegetable oil (160 ml), canola oil works too
- 2 1/2 cups granulated sugar (500 grams)
- 3 large eggs
- 2 teaspoons vanilla extract
- 1 1/4 cups buttermilk* (300 ml)
- 1 cup boiling water (240 ml)
For the Peanut Butter Frosting
- 1 3/4 cup unsalted butter (395 grams), softened to room temperature (not melty)
- 1 1/4 cup smooth peanut butter (300 grams)*
- 1 teaspoon vanilla extract
- 5-6 cups powdered sugar (550 – 660 grams), sifted
- 3-5 tablespoons whipping cream, or milk
Instructions
Chocolate Cake
- Preheat the oven to 350 F (180 C) degrees.
- Line the bottom of three 8-inch round cake tins with rounds of parchment paper. Lightly grease the sides and sprinkle with cocoa powder.
- In a very large bowl, whisk together the flour, cocoa powder, baking soda, baking powder and salt. If the cocoa powder is very lumpy, sift it first.
- In a separate large bowl, whisk together the oil, sugar, eggs, vanilla extract and buttermilk.
- Carefully whisk the wet ingredients into the dry ingredients. This can also be done with an electric mixer on low speed. Ensure there are no lumps – the batter will be thick.
- Very carefully whisk (or beat with an electric mixer) the boiling water into the cake batter. It will be quite a bit thinner now.
- Divide the cake batter evenly between the 3 pans. You can weigh the pans to ensure they’re the same size.
- Bake in the preheated oven for 18-22 minutes, or until an inserted toothpick comes out clean and the cakes are starting to pull away from the sides of the pans.
- Remove from the oven and cool the cakes in their pans for at least 30 minutes, then gently invert the cakes and continue cooling on a wire rack.
Peanut Butter Frosting
- In a very large bowl, beat the butter until smooth.
- Mix in the peanut butter until smooth.
- With the mixer on low speed, beat in 2 cups powdered sugar and the vanilla extract.
- Mix in the rest of the powdered sugar about 1 cup at a time, alternating with 1-2 tablespoons of whipping cream (or milk) until the desired sweetness and consistency is reached. It should be thick, but not as thick as peanut butter.
Assembling the Cake
- Ensure that the cake layers are completely cooled first.
- Using a serrated knife, gently saw off the domed top of each cake so that the cake layers are flat instead of rounded on top.
- Place 1 cake layer, bottom side up, on the plate you plan to serve the cake on. Frost the top with a layer of frosting. Place the 2nd cake layer on top (bottom side up) and frost the top. Place the 3rd layer on top.
- Carefully, frost the sides of the cake with a very thin layer of frosting. This is the crumb coat. If cake crumbs come up, don’t worry. Place the cake in the fridge for about 30 minutes for the crumb coat to firm up.
- Remove the cake from the fridge. Frost the top and sides with a thick layer of frosting, swirling the frosting as you go.
- Optionally, decorate the top with peanut butter candies or chocolate shavings.
- Slice the cake using a thin knife. For clean cuts, wipe off the knife after each slice.
Notes
- For alternative pan sizes, this cake can be made in:
- Two 8-inch (20 cm) round cake tins – just ensure their sides are at least 2 inches tall. The bake time will be around 25-30 minutes at 350F.
- Two 9-inch (23 cm) round cake tins will bake for about 22 minutes at 350F degrees.
- For cupcakes, I recommend this recipe.
- If you don’t have buttermilk, measure out 1 1/4 cups whole milk (or 2%). Add in 1 tablespoon of freshly squeezed lemon juice or white vinegar. Give it a stir and let it sit for 5 minutes before using.
- Do not use natural or homemade peanut butter, otherwise the frosting can separate and become oily.
- Nutrition information is an estimate only and based on 1 slice, assuming the cake is cut into 14 equal-sized pieces and all the frosting is used.
- Storage & Make-Ahead Tips:
- Unfrosted cake layers can be wrapped tightly and stored in an airtight container at room temperature for 2 days, or in the fridge for up to 5 days.
- Store leftover frosted cake covered in the fridge for up to 4 days.
- Unfrosted cake layers can be wrapped tightly and placed in a freezer bag or container and frozen for up to 2 months. Thaw in the fridge before frosting.
- For best results, I typically make the chocolate cake layers the day before I plan to serve it. Store the unfrosted cake layers in an airtight container at room temperature overnight. Then I prepare the frosting and assemble the cake on the day I plan to serve it. Cover the assembled cake and store at room temperature until serving.
Nutrition (per serving)
| Calories | Carbohydrates | Protein | Fat | Saturated Fat | Trans Fat | Cholesterol | Sodium | Potassium | Fiber | Sugar | Vitamin A | Vitamin C | Calcium | Iron |
|---|---|---|---|---|---|---|---|---|---|---|---|---|---|---|
| 871kcal | 105g | 12g | 49g | 27g | 1g | 108mg | 390mg | 352mg | 4g | 81g | 850IU | 1mg | 74mg | 3mg |