
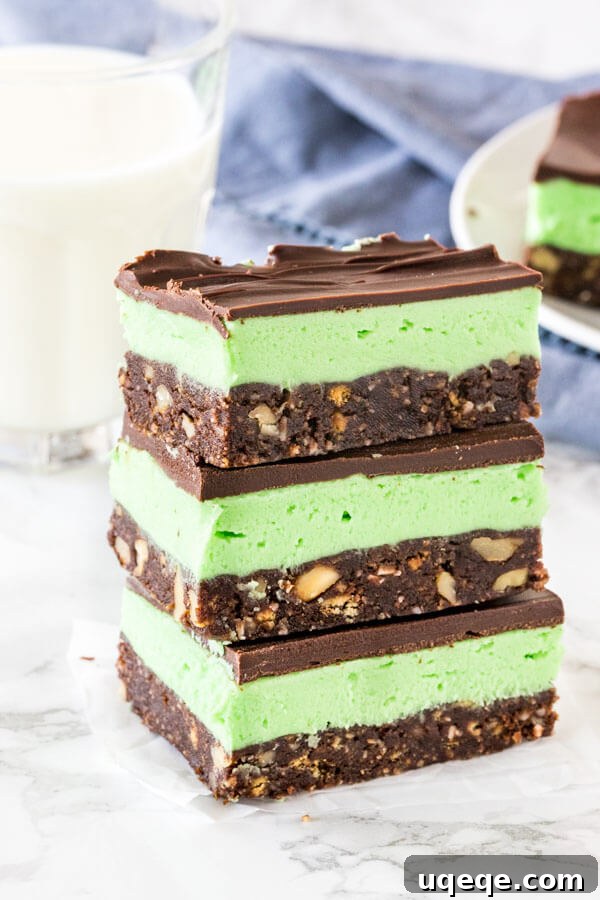
Irresistible No-Bake Mint Nanaimo Bars: A Canadian Classic with a Refreshing Twist
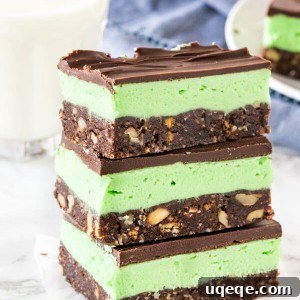
Experience a delightful culinary journey with these mouth-watering Mint Nanaimo Bars, a vibrant and refreshing spin on Canada’s beloved classic dessert. Perfectly crafted for ease and flavor, these bars are entirely no-bake, offering a delightful contrast of textures and tastes in every bite. They feature a robust, chewy chocolate base, a decadent layer of cool mint filling, and a smooth, rich chocolate topping that will captivate your palate.
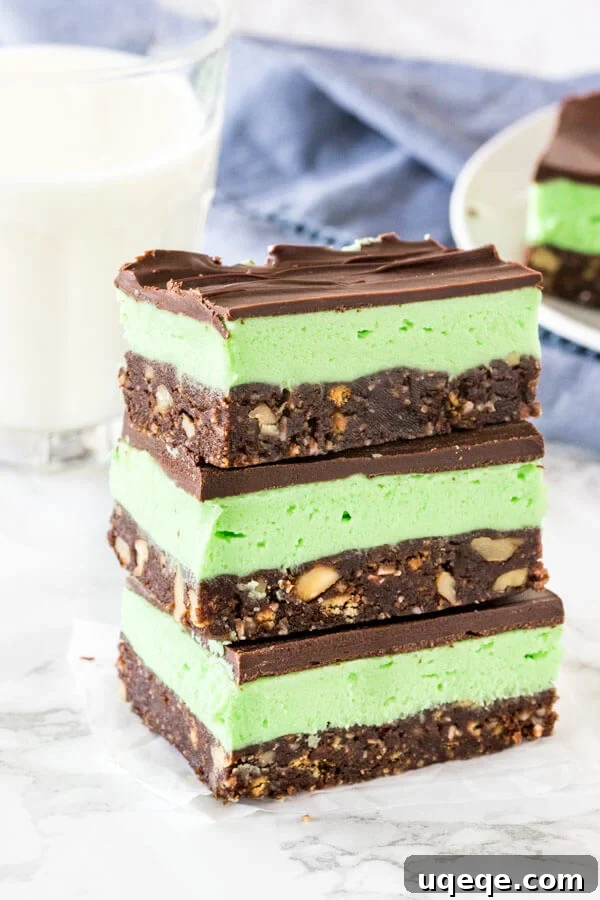
Nanaimo bars hold a special place in the hearts of Canadians, named after the picturesque city of Nanaimo, British Columbia. This iconic dessert is a testament to simple ingredients coming together to create something truly extraordinary. While the traditional Nanaimo bar, which I’ve shared in my classic recipe, is a timeless favorite, the culinary world thrives on innovation. Given the endless possibilities for delightful variations, introducing these mint Nanaimo bars wasn’t just an option—it was an absolute necessity!
These bars transcend the ordinary, offering a harmonious blend of perfect mint chocolate flavor and an exciting array of textures. They are the ideal treat for impressing guests, satisfying a sweet craving, or simply enjoying a moment of refreshing indulgence. Their vibrant green layer and rich chocolate combination make them particularly appealing for holidays or festive gatherings.
The Irresistible Layers of Mint Nanaimo Bars
What makes these bars truly special is their ingenious no-bake construction, making them accessible to even novice bakers. Unlike traditional Nanaimo bars, which often feature a middle layer enriched with custard powder for a creamy, custardy essence, our mint rendition takes a refreshing turn. Here, the star of the show is a luscious peppermint filling that transforms the experience. Each bar is a symphony of three distinct, delectable layers:
- **A Rich and Chewy Chocolate Base:** This foundational layer is a delightful medley of crunchy graham crumbs, finely chopped walnuts, and delicate shredded coconut, all bound together by a rich, chocolatey mixture. It provides a satisfying chew and a burst of classic flavors.
- **A Refreshing Mint Buttercream Filling:** Nestled between the base and topping, this thick, creamy, and undeniably sweet layer is infused with the invigorating essence of peppermint. Its vibrant green hue hints at the cool, refreshing taste awaiting you.
- **A Decadent Semi-Sweet Chocolate Topping:** Capping off this masterpiece is a smooth, glossy layer of semi-sweet chocolate. It adds a satisfying snap and a perfect bittersweet counterpoint to the sweet mint filling.
Crafting the base layer follows the time-honored Nanaimo bar method: a blend of butter, sugar, and cocoa powder is gently melted over a double boiler. This gentle heating ensures a smooth, consistent mixture. Once melted, a single egg is whisked in vigorously. This crucial step not only enriches the mixture but also tempers the egg, raising its temperature safely while thickening the chocolate mixture into a glossy perfection. This rich concoction is then folded into the dry ingredients—graham crumbs, walnuts, and coconut—creating a cohesive and flavorful foundation.
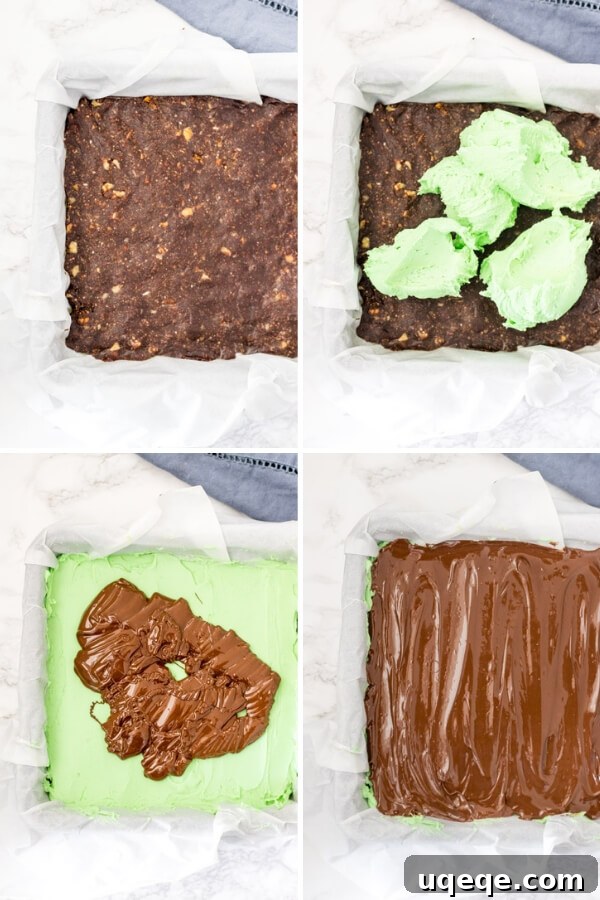
Once the base is firmly pressed into the pan, it’s time for the vibrant mint frosting to be generously spread on top. The final flourish is the melted chocolate topping, creating a smooth, inviting finish. While these three distinct layers might suggest a complex undertaking, the process is surprisingly straightforward and incredibly rewarding, culminating in a dessert that looks as impressive as it tastes.
Mastering the Craft: Tips and Tricks for Perfect Mint Nanaimo Bars
Achieving Nanaimo bar perfection is simpler than you might think, especially with a few expert tips. These suggestions will help you navigate each step with confidence, ensuring your bars are not only delicious but also beautifully presented.
- **Effortless Removal with Parchment Paper:** Always line your baking pan with parchment paper, leaving a generous overhang on all sides. This simple trick is a game-changer; once the bars are fully set, you can easily lift the entire slab out of the pan, making cutting a breeze and ensuring clean edges. The images above perfectly illustrate this technique.
- **Scale Up for a Crowd:** Planning for a larger gathering? This recipe is easily doubled to fit a standard 9×13 inch pan, allowing you to create more of these delectable treats without extra effort. Simply adjust your ingredient quantities accordingly.
- **The Art of Whisking the Egg:** When incorporating the egg into the warm chocolate mixture, constant and vigorous whisking is paramount. Initially, the mixture may appear somewhat lumpy or as if the butter is separating. However, as you continue to whisk quickly and steadily, the mixture will miraculously transform into a thick, glossy, and beautifully emulsified consistency. This rapid agitation prevents the egg from scrambling due to the heat, ensuring it integrates seamlessly into the chocolate base.
- **The Secret to Smooth Cuts: Finely Shredded Coconut:** While any shredded coconut works, opting for finely shredded varieties makes a noticeable difference when cutting your finished bars. The finer texture helps prevent cracking and crumbling, resulting in neater, more professional-looking slices.
- **Tailor the Mint Flavor to Your Liking:** The amount of peppermint extract used is entirely a matter of personal preference. I recommend starting with a smaller amount (e.g., half a teaspoon) and then tasting the buttercream as you go. You can always add a few more drops until you reach your desired level of refreshing mintiness.
- **Embrace or Skip the Green Hue:** Green food coloring gives these Mint Nanaimo Bars their characteristic festive appearance. However, if you prefer to keep things natural or simply don’t have food coloring on hand, feel free to omit it. The taste will remain just as spectacular!
- **For a Perfect Topping, Add a Touch of Oil:** Incorporating a small amount of neutral vegetable oil into your melted chocolate topping significantly improves its texture. The oil makes the chocolate more pliable when set, preventing it from cracking and shattering as you cut the bars, thus ensuring a smooth, clean slice every time.
- **Score for Success: The Cutting Trick:** This tip is crucial for beautifully cut bars. Once the chocolate topping is about 75% hardened (still slightly yielding but not fully liquid), use a thin, sharp knife to gently score lines where you intend to cut the bars. This pre-scoring creates guide marks and weakens the chocolate layer just enough to allow for precise, crack-free cuts once the bars are completely firm. Do not attempt to cut fully hardened, cold chocolate directly from the fridge, as it will inevitably crack and break.
Why These Mint Nanaimo Bars Will Become Your New Favorite
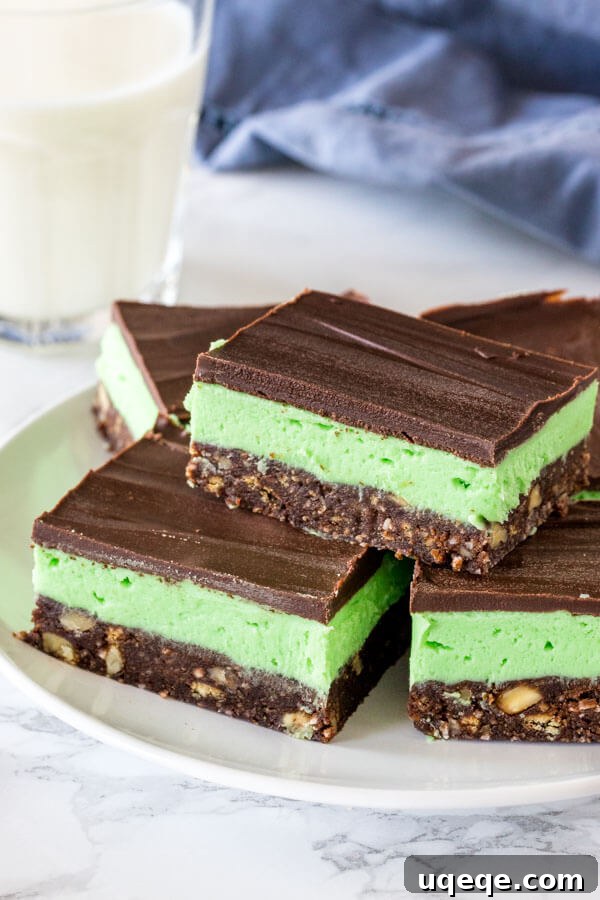
Beyond their delightful flavor, these Mint Nanaimo Bars offer numerous advantages that make them a standout dessert. Their no-bake nature means no oven time, keeping your kitchen cool, especially during warmer months. This also makes them a fantastic option for potlucks, parties, and family gatherings where oven space might be limited. The combination of rich chocolate and refreshing mint is universally appealing, striking a perfect balance between decadent and invigorating.
The layers provide a dynamic eating experience: the satisfying chew of the base, the smooth and creamy mint filling, and the crisp snap of the chocolate topping. Each bite is a textural adventure, ensuring these bars are far from monotonous. Furthermore, their vibrant green layer makes them a visually appealing treat, perfect for holiday dessert tables or any occasion where you want to add a pop of color and festive cheer.
Whether you’re a seasoned baker or just starting your culinary journey, the straightforward steps and minimal equipment required make this recipe incredibly approachable. You’ll be rewarded with a batch of beautifully layered, utterly delicious bars that taste like they came from a gourmet bakery but were made with love right in your own kitchen.
Explore More Classic Canadian Treats
If you’ve fallen in love with the charm and simplicity of these Mint Nanaimo Bars, you’re in for a treat with other easy and classic Canadian desserts. These recipes capture the essence of comforting, homemade goodness:
- Classic Nanaimo Bars: The original, untamed delight that started it all.
- Confetti Squares (Peanut Butter Marshmallow Squares): A playful, colorful, and irresistibly chewy no-bake treat.
- Chocolate Confetti Squares: A chocolatey twist on the classic confetti squares, perfect for chocolate lovers.
- Haystack Cookies: Crunchy, chewy, and incredibly easy cookies that are always a hit.
Recipe for Mint Nanaimo Bars
Rated 5 out of 5 stars by 3 users
Mint Nanaimo Bars
Rate Recipe
Print Recipe
Ingredients
Bottom Layer
- 1 3/4 cup graham crumbs
- 1/2 cup chopped walnuts
- 1/2 cup shredded coconut
- 1/2 cup unsalted butter
- 1/4 cup white sugar
- 3 tablespoons cocoa powder
- 1 large egg
Mint Filling
- 1/2 cup unsalted butter, softened
- 2 – 2 1/2 cups powdered sugar
- 1 teaspoon peppermint extract
- 2 tablespoons heavy cream
- green food coloring (optional)
Chocolate Topping
- 6 oz semi-sweet chocolate
- 2 teaspoons vegetable oil
Instructions
- Line an 8×8 or 9×9 inch pan with parchment paper, leaving an overhang on the sides for easy removal.
Base Layer
- In a large bowl, combine the graham crumbs, chopped walnuts, and shredded coconut. Stir well to ensure they are evenly mixed.
- Set up a double boiler: Add about 1/2 inch of water to a medium saucepan and place a heatproof glass bowl over the saucepan, ensuring the bottom of the bowl does not touch the water. Turn the burner to low heat.
- Add the butter, cocoa powder, and sugar to the glass bowl. Melt them together, stirring occasionally, until the mixture is completely smooth and cohesive.
- Carefully add the egg to the chocolate mixture and whisk constantly and vigorously for about 5 minutes. The mixture will thicken and become beautifully glossy. This vigorous whisking helps temper the egg and prevents it from scrambling.
- Pour the warm chocolate mixture over the dry ingredients in the large bowl. Stir thoroughly until all the dry ingredients are fully coated and combined, forming a thick, uniform mixture.
- Press the mixture firmly and evenly into the bottom of your prepared pan. Place the pan in the fridge for at least 30 minutes to allow the base to set.
Mint Buttercream
- In a separate bowl, beat the softened butter until it is light and fluffy.
- With your mixer on low speed, gradually beat in 2 cups of powdered sugar and the peppermint extract. Start with 2 cups and add more if needed.
- Add the heavy cream, one tablespoon at a time, beating until the frosting reaches your desired thickness and creamy consistency. If it’s too thick, add a tiny bit more cream; if too thin, add more powdered sugar. Adjust sweetness as needed.
- If desired, mix in green food coloring a few drops at a time until you achieve the desired vibrant mint color.
- Spread the mint frosting evenly over the chilled base layer. Return the pan to the fridge for 5-15 minutes to allow the frosting to slightly firm up before adding the chocolate topping.
Chocolate Topping
- If not using chocolate chips, finely chop the semi-sweet chocolate and place it in a heatproof bowl.
- Melt the chocolate in the microwave on medium power for 45-second intervals (avoid high power to prevent burning). Remove and stir after each interval until completely melted and smooth. Alternatively, use a double boiler method for melting.
- Stir in the vegetable oil until fully incorporated. This helps make the chocolate topping smoother and easier to cut once set.
- Pour and spread the melted chocolate evenly over the mint layer, creating a smooth, glossy finish.
- Allow the chocolate topping to harden fully, which typically takes about 2 hours at room temperature or in the fridge. Once the chocolate is about 75% hardened (still slightly soft to the touch but not liquid), score the surface with a thin, sharp knife where you plan to make your cuts. This scoring technique helps prevent the chocolate from cracking when you finally cut the bars. Do not attempt to cut the bars when they are cold and fully hardened directly from the fridge, as the chocolate will likely crack.
Notes
Store these delicious Mint Nanaimo Bars in an airtight container at room temperature for up to 4 days, or in the fridge for up to 1 week for a firmer texture. For longer storage, bars can be frozen in an airtight container for up to 2 months. To enjoy after freezing, thaw them in the fridge until soft enough to serve.
Nutrition
Like this recipe? Rate and comment below!
Your feedback helps other home cooks discover delicious new treats!