
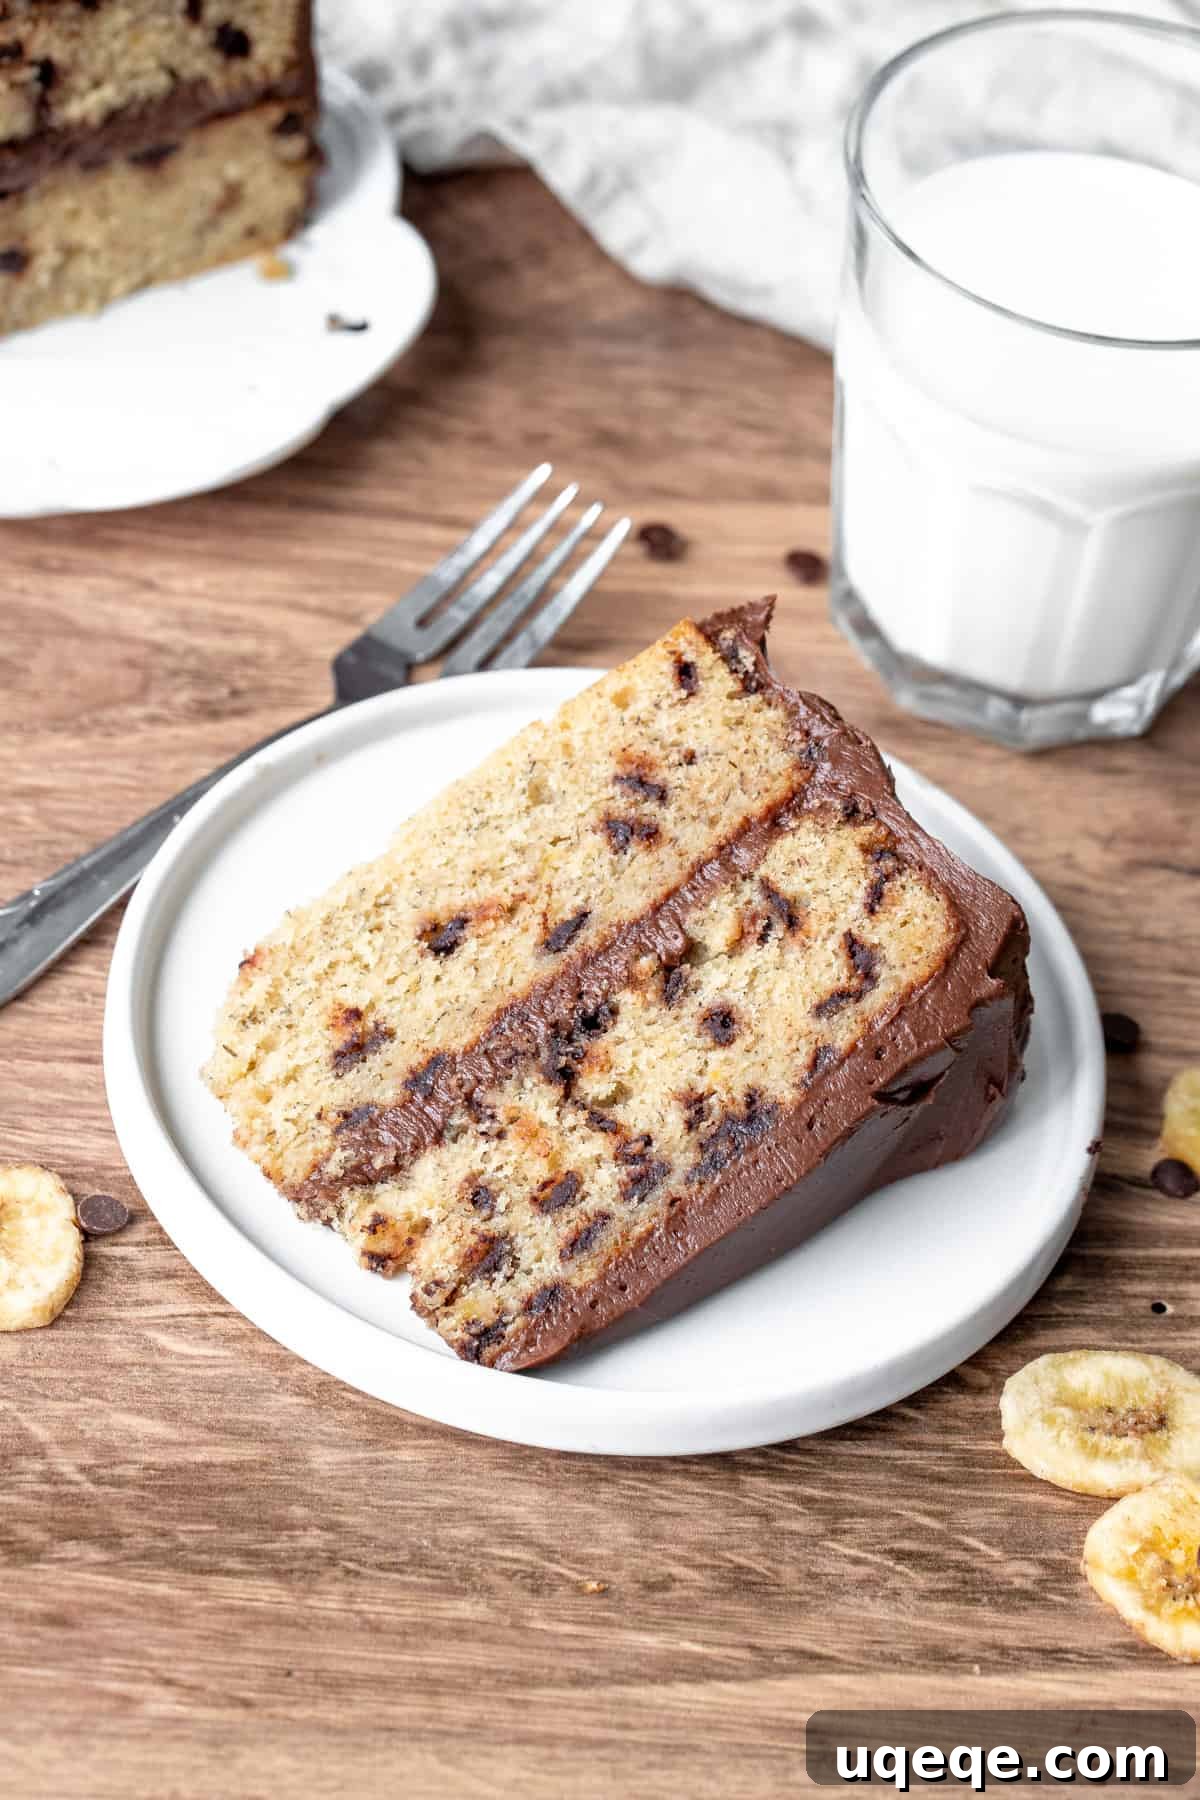
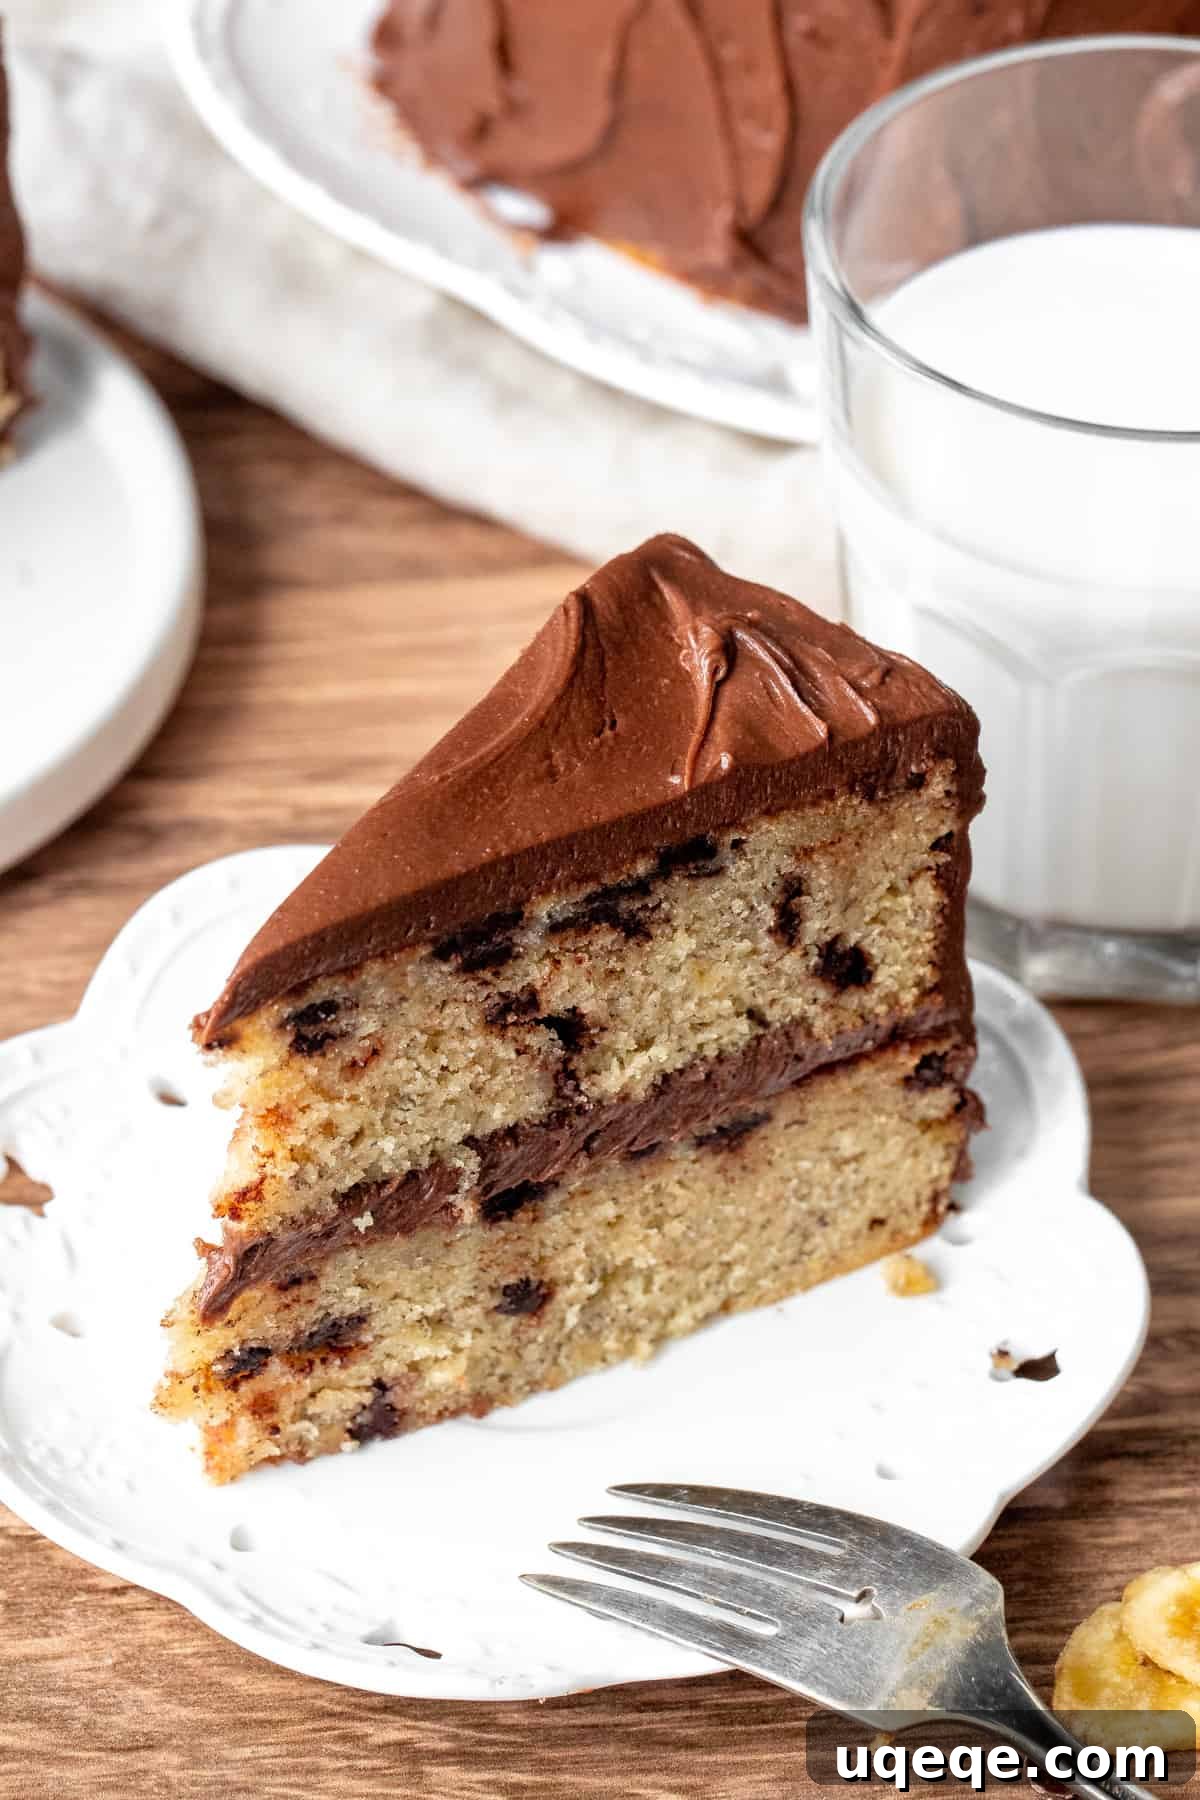
Imagine layers of incredibly moist banana cake, generously dotted with mini chocolate chips, and elegantly frosted with the creamiest, most decadent chocolate buttercream. This Banana Chocolate Chip Cake isn’t just a dessert; it’s a celebration in every single bite. Its deep, mellow banana flavor is beautifully complemented by rich chocolate, creating a harmonious balance that’s never overly sweet. Whether you’re a seasoned baker or just starting, this recipe is designed for success and can even be adapted to a convenient 9×13 inch pan if a layer cake isn’t your immediate plan. Get ready to bake a showstopper that will earn rave reviews!
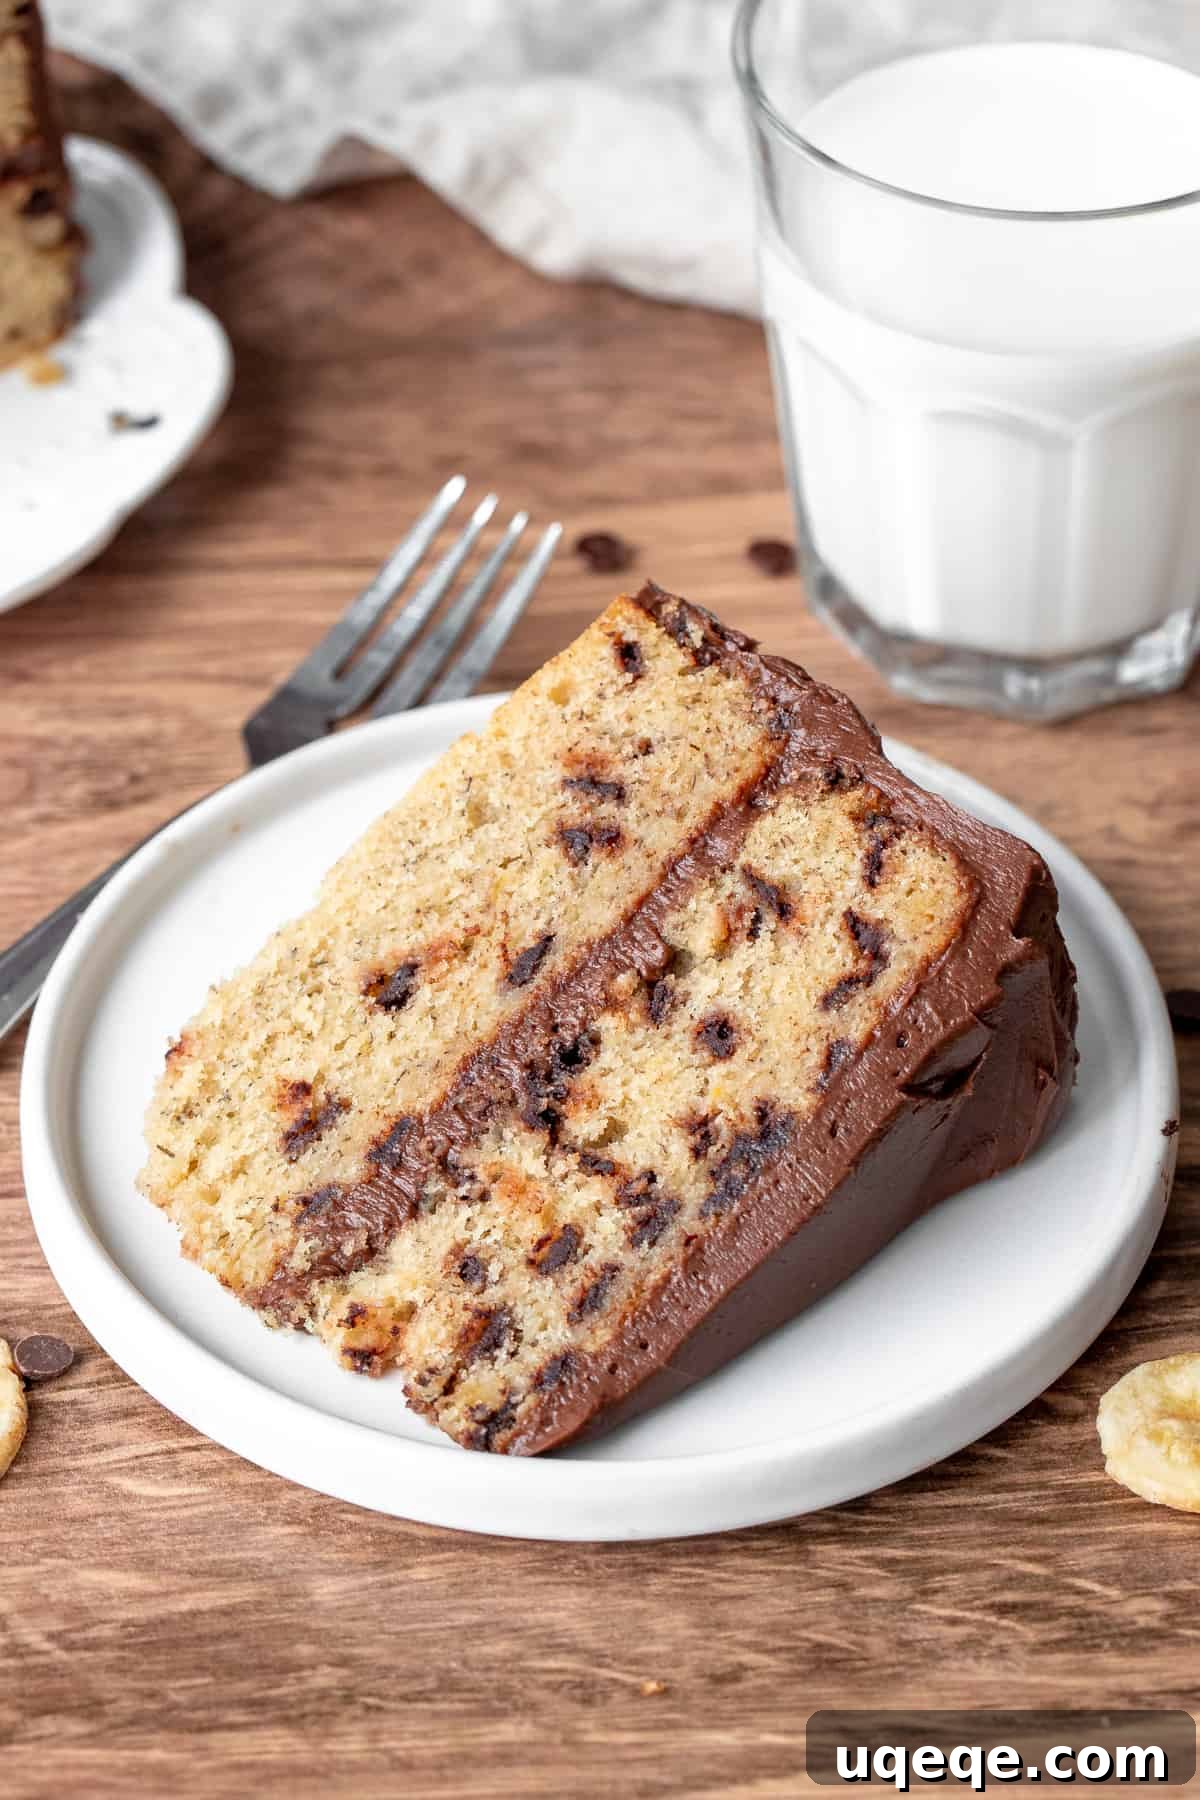
This banana chocolate chip cake offers a delightful twist on a classic comfort food, reminiscent of your favorite warm chocolate chip banana bread, but elevated for a special occasion. The cake itself boasts an exceptionally moist and tender crumb, infused with that distinct, comforting banana bread aroma and taste. We enhance this natural goodness with subtle hints of brown sugar, pure vanilla extract, and a touch of cinnamon, ensuring every mouthful is a symphony of flavors. The inclusion of mini chocolate chips throughout the batter ensures a chocolatey surprise in each slice, all culminating under a blanket of our luscious, perfectly sweetened chocolate frosting. What truly sets this cake apart is its thoughtful sweetness level – it’s rich and satisfying without being cloying, making it universally appealing and utterly addictive.
The Secret to a Perfect Banana Chocolate Chip Cake: Essential Baking Tips
Achieving a bakery-quality banana chocolate chip cake at home is entirely within reach with these crucial tips. Paying attention to these details will ensure your cake is perfectly moist, flavorful, and a joy to assemble, turning every baking session into a success story.
- The Dual-Fat Advantage: Butter and Oil Combination: This recipe ingeniously combines both butter and vegetable oil, a technique that maximizes both flavor and moisture. Butter is indispensable for its rich, dairy notes and its ability to contribute to the cake’s golden crust and tender texture. However, incorporating a touch of vegetable oil significantly enhances the cake’s moisture retention, ensuring it remains incredibly tender and fresh for days longer than cakes made with butter alone. For optimal results, always ensure your unsalted butter is properly softened to room temperature before beginning. This allows it to cream smoothly with sugar, creating essential air pockets that contribute to a light and airy cake crumb.
- Room Temperature Ingredients for Optimal Emulsification: The temperature of your ingredients plays a more significant role than you might think. Just like softened butter, ensuring your eggs and buttermilk are at room temperature is paramount for a perfectly smooth and stable batter. Cold ingredients can cause the batter to seize, curdle, or become lumpy, making it challenging to achieve a homogenous mixture without overmixing. Room temperature ingredients, on the other hand, emulsify much better, blending seamlessly to create a uniform batter that bakes into a consistently tender and fine-crumbed cake. Plan ahead by taking them out of the refrigerator at least 30 minutes to an hour before you intend to start baking.
- Precision in Banana Measurement: The quantity of mashed bananas is absolutely critical for both the cake’s signature flavor and its desired moisture content. This recipe specifically calls for 1 1/4 cups of mashed bananas. It’s crucial to measure the bananas *after* mashing them, rather than relying on a count of whole bananas. Banana sizes vary widely, so going by number alone (e.g., “3 brown bananas”) can lead to inconsistent results in your final cake’s texture and taste. Mashing them first and then measuring ensures you have the precise amount for optimal moisture and flavor distribution.
- The Importance of Ripe, Spotty Bananas: For the most intensely delicious banana flavor and ideal moisture, always reach for bananas that are brown and spotty – the riper, the better! Yellow or green bananas simply haven’t developed the necessary moisture content or the concentrated, sweet, mellow flavor that is essential for this recipe. As bananas ripen and their skins develop those characteristic brown spots, their starches convert into natural sugars, intensifying their sweetness and making them incredibly soft and easy to mash, which is perfect for integrating into cake batter.
- Avoiding the Pitfall of Overmixing: Once you begin incorporating the dry ingredients into your wet mixture, it’s imperative to exercise caution and avoid overmixing the batter. Overmixing causes the gluten in the flour to develop excessively, leading to a tough, dense, and chewy cake rather than the desired tender, melt-in-your-mouth crumb. To prevent this, switch to a low speed on your electric mixer or, even better, fold in the dry ingredients gently by hand with a rubber spatula. It is perfectly normal and expected to see some small lumps from the mashed banana in the batter – embrace them, as they contribute to the cake’s rustic charm and don’t indicate improper mixing.
- The Strategic Use of Mini Chocolate Chips: While it might be tempting to use regular-sized chocolate chips, I strongly recommend opting for mini chocolate chips in this recipe for several compelling reasons. Regular chocolate chips can be too heavy for the cake batter, especially given its thickness, causing them to sink to the bottom of the cake layers during baking. Mini chocolate chips, being lighter and smaller, distribute much more evenly throughout the batter, ensuring a delightful burst of chocolate in every single bite. Furthermore, they make slicing the finished cake significantly cleaner and easier, preventing large chips from dragging through and tearing the delicate cake layers, maintaining a beautiful presentation.
- Resist the Urge to Overload on Chocolate Chips: While a generous amount of chocolate chips is fantastic, there can be too much of a good thing. It’s incredibly tempting to add extra chocolate chips for an even richer chocolate experience, but adding too many can actually compromise the structural integrity of the cake. An excessive amount of chips can make the cake fragile, leading to it crumbling or falling apart when you attempt to slice it. Stick to the recommended amount for the perfect balance of flavor, texture, and stability in every delicious slice.
Mastering the Art of Assembling Your Layer Cake for a Flawless Finish
Assembling a beautiful layer cake is an art form, but it’s one that anyone can master with a few key techniques and a touch of patience. Proper preparation is your best friend here, ensuring a stunning, stable, and professional-looking final product that will impress all your guests.
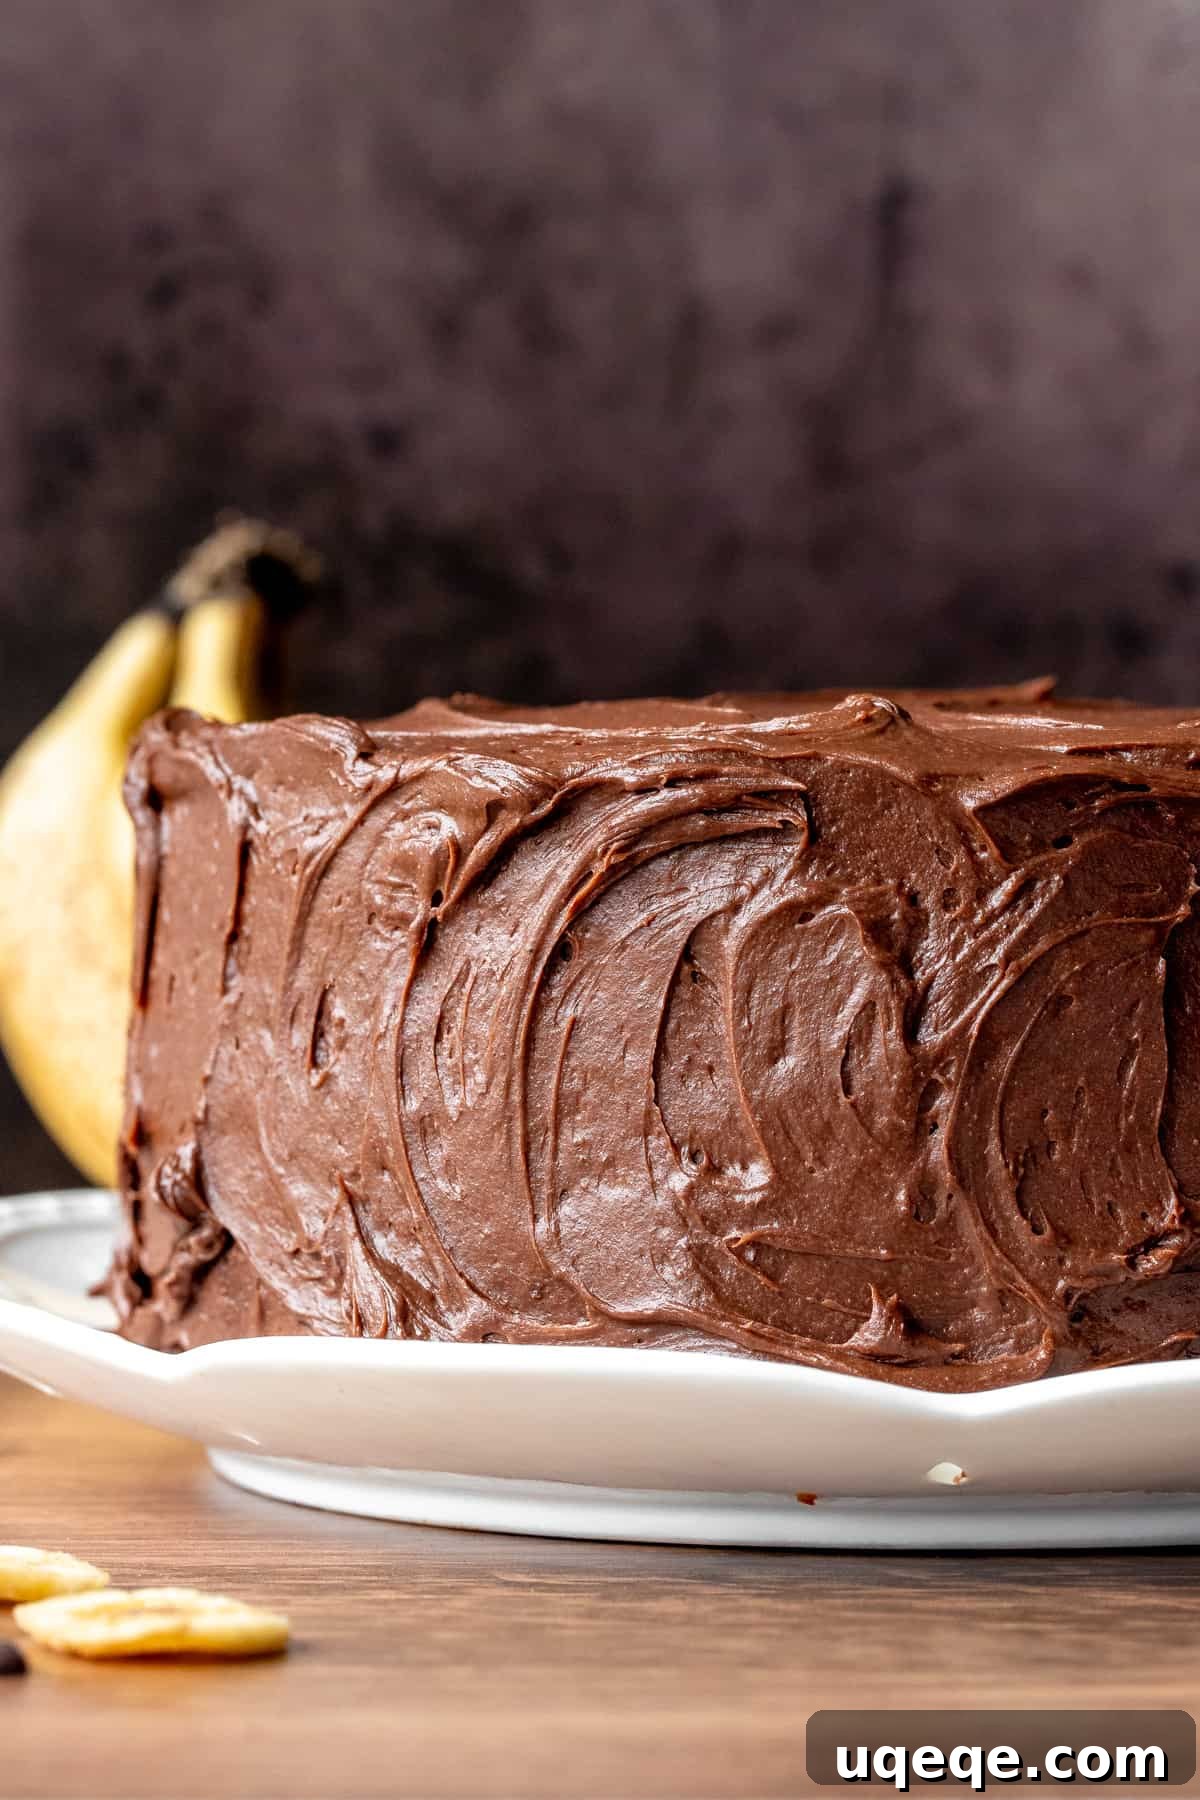
The most crucial rule for assembling any layer cake is an absolute non-negotiable: you must ensure that your cake layers are 100% completely cooled before you even think about applying a single dollop of frosting. Attempting to frost warm or even slightly warm cakes will result in a disastrous mess of melted, sliding frosting and a cake structure that will inevitably collapse. Do not rush this step; patience here is truly a virtue!
Pro Tip for Convenience and Stress-Free Baking: To streamline your baking process and significantly reduce stress on the day of serving, I highly recommend baking the cake layers the night before you plan to assemble and present the cake. Once baked, allow them to cool fully in their pans for about 20 minutes before carefully inverting them onto a wire rack to cool completely. This full cooling process can take a few hours. Once they are entirely cool to the touch, wrap each layer tightly in plastic wrap and store them at room temperature overnight. The next day, you’ll simply need to prepare your frosting fresh and then proceed with assembling your perfectly chilled and stable cake layers.
It’s quite common for cake layers to bake with a slightly domed top. For a truly professional-looking, level cake, you’ll want to gently trim these domes. Use a specialized cake leveler or a long, sharp serrated knife to carefully saw off the rounded top of each cake layer. This essential step ensures that your layers sit perfectly flat and even on top of each other, preventing any leaning, instability, or uneven slices in your finished masterpiece.
Here’s a detailed, step-by-step guide to assembling your magnificent banana chocolate chip layer cake:
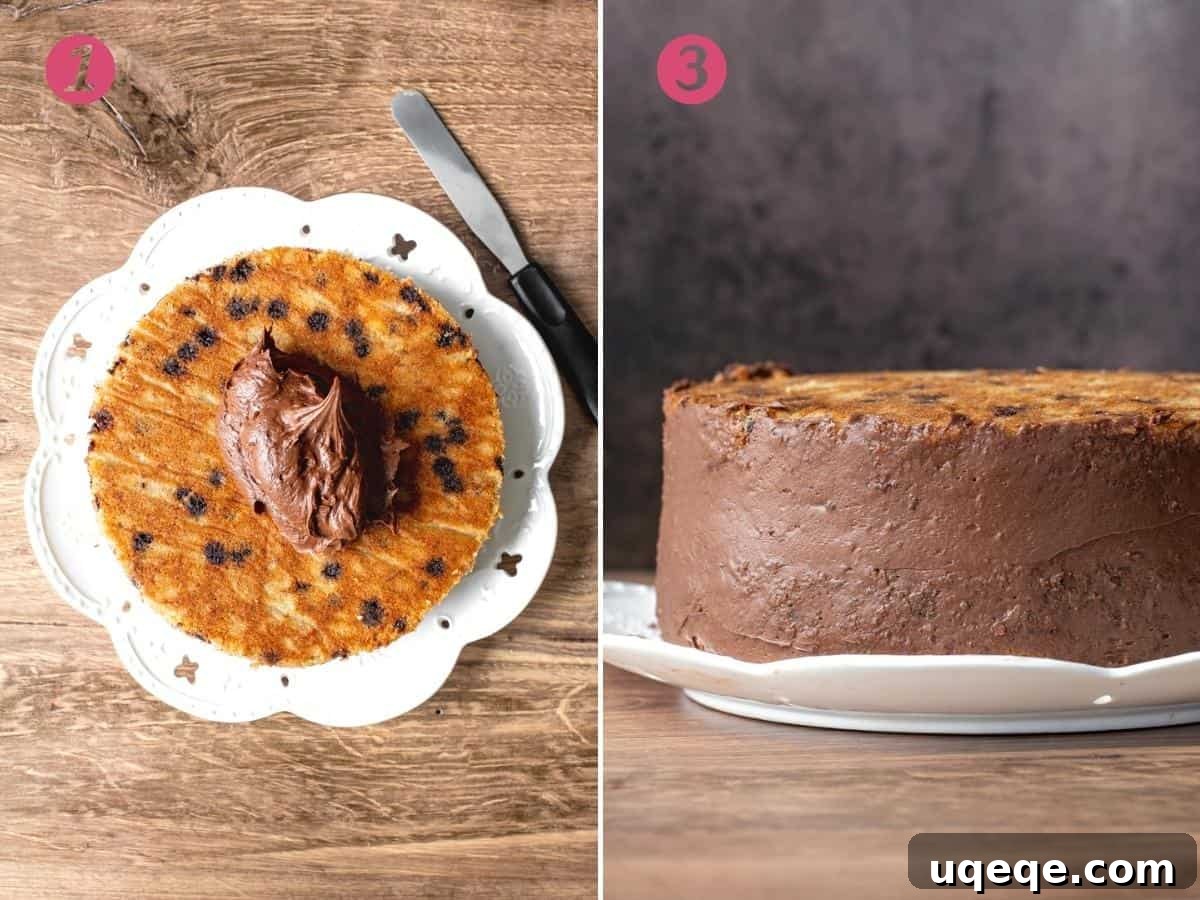
- First Layer Placement: Carefully place one of your cooled and leveled cake layers, with its trimmed (flat) side facing down, onto your chosen serving plate or cake stand. This flat surface provides the most stable foundation for your cake. Evenly frost the top of this layer with approximately 1/4 to 1/3 of your prepared, creamy chocolate buttercream. Spread it smoothly right to the edges using an offset spatula.
- Second Layer Placement: Gently place the second cake layer directly on top of the first, again ensuring its trimmed side is facing down. Take a moment to align it carefully, making sure the cake is centered and perfectly level. Lightly press down on the top layer to secure it firmly in place.
- The Essential Crumb Coat Application: Now, apply a very thin layer of frosting all around the sides and across the top of your cake. This crucial step is known as the “crumb coat,” and it serves a vital purpose: it effectively traps any loose crumbs from the cake, preventing them from mixing into your final, decorative layer of frosting. Think of it much like a primer coat when painting a wall – it prepares the surface for a flawlessly smooth and crumb-free finish. While not always strictly necessary if your cake is exceptionally crumb-free, it’s highly recommended for achieving a truly professional and polished look. If you notice even a few crumbs appearing in your frosting as you work, definitely do not skip this step!
- Chill for Stability: Once the crumb coat has been meticulously applied, immediately place the cake in the refrigerator for about 15-20 minutes. This chilling period allows the thin layer of frosting to firm up and effectively “seal” in all those tiny crumbs. This critical chilling step is the key to achieving a perfectly smooth and pristine final frosting layer without any rogue crumbs disrupting its perfection.
- Final Frosting Flourish: After the crumb coat has completely set and firmed up, remove the cake from the refrigerator. Now, generously apply the remaining chocolate frosting to the sides and top of the cake. You have creative freedom here: you can smooth it out for a sleek, contemporary look, or use an offset spatula or the back of a spoon to create beautiful swirls and charming, rustic textures for an inviting, homemade appeal.
Pan Sizes and Frosting Adjustments: Versatility for Your Baking Needs
This generously proportioned cake batter offers excellent versatility, allowing you to choose the pan size that best suits your specific needs, occasion, or preference. Regardless of your choice, remember to adjust baking times accordingly to ensure your cake is perfectly cooked through and consistently delicious.
- Two 9-Inch Round Cake Pans: This is the classic and most recommended configuration for a beautiful, substantial two-layer cake. When baked in these pans, the layers will be thick enough to create an impressive height and are ideal for stacking and elaborate decorating. Bake for approximately 35-40 minutes at 350°F (180°C, or 170°C fan forced).
- Three 8-Inch Round Sandwich Tins: If you desire a slightly taller, more elegant three-layer cake with comparatively thinner layers, this option is perfectly suitable. Baking in three 8-inch tins results in a more dramatic presentation. Bake for about 25-30 minutes at 350°F (180°C, or 170°C fan forced). Always keep a close eye on the baking time, as thinner layers will naturally cook faster.
- One 9×13 Inch (23×33 cm) Rectangular Pan: For a simpler, single-layer sheet cake that’s incredibly easy to transport, serve, and perfect for larger gatherings, a 9×13 inch rectangular pan works wonderfully. This is often the preferred choice for potlucks, casual family events, or when a less formal presentation is desired. Bake for approximately 50-55 minutes at 350°F (180°C, or 170°C fan forced).
A Note on Frosting Quantity and Adjustments: The provided chocolate frosting recipe is designed to be ample for either a classic double-layer cake or a triple-layer cake, assuming slightly thinner applications of frosting for the latter to cover all layers. If you’re preparing a double-layer cake, you might find yourself with a little extra frosting, which is perfect for adding decorative piping, rosettes, or an extra flourish to your cake’s presentation. However, if you opt to bake the cake in a single 9×13 inch rectangular pan, the full frosting recipe will yield far too much. In this scenario, I highly recommend dividing the frosting recipe in half to achieve the perfect cake-to-frosting ratio and avoid unnecessary waste:
- 1/2 cup plus 2 tablespoons unsalted butter, softened
- 1/4 cup plus 2 tablespoons cocoa powder
- 1 1/2 – 2 cups powdered sugar (adjust to your sweetness preference)
- 1/2 teaspoon vanilla extract
- 1/4 teaspoon salt
- 1-2 tablespoons whipping cream or milk (adjust for desired consistency)
Make-Ahead & Storage Solutions for Your Delicious Cake
Planning ahead can significantly streamline your baking process and ensure that serving this exquisite banana chocolate chip cake is a breeze, even for busy schedules. Here are some smart tips for preparing your cake in advance and effectively storing any delicious leftovers:
- Preparing Cake Layers in Advance: The cake layers themselves are excellent candidates for make-ahead preparation. They can be baked up to two days in advance without any loss of quality. Once fully cooled to room temperature, wrap each individual layer tightly with plastic wrap to prevent them from drying out and maintain their moisture. Store these wrapped layers at room temperature until you’re ready to frost and assemble. For even longer preservation, cooled cake layers can be double-wrapped – first in plastic wrap, then in aluminum foil, or placed in a freezer-safe bag – and frozen for up to 2 months. When you’re ready to use them, simply thaw the frozen layers overnight in the refrigerator before proceeding with frosting.
- Strategic Assembly for Freshness: As mentioned in our assembly guide, a fantastic strategy is to prepare the cake layers the day before you plan to serve. This allows you to break up the baking process. On the day of your event, you can then prepare the fresh chocolate frosting and proceed with assembling the perfectly chilled cake, ensuring both optimal flavor and a pristine presentation.
- Storage of the Finished Cake: Once your banana chocolate chip cake is fully assembled and frosted, proper storage is key to maintaining its freshness and deliciousness. Store the cake covered with a cake dome or in an airtight container at cool room temperature for up to 3 days. For extended freshness, especially in warmer climates or if you want to enjoy it longer, transfer the cake to the refrigerator, where it will stay fresh for up to 4 days. For the absolute best flavor and tender texture of both the cake and the frosting, allow any refrigerated cake to come to room temperature for about 30-60 minutes before serving.
Why This Banana Chocolate Chip Cake is a Must-Try for Every Occasion
This isn’t just another banana cake recipe; it’s an elevated dessert experience designed to delight. The perfect marriage of naturally sweet, ripe bananas and rich, indulgent chocolate creates a flavor profile that is both profoundly comforting and delightfully sophisticated. Its incredible moisture and tender crumb will undoubtedly impress everyone who takes a bite, making it the ideal centerpiece for birthdays, holiday gatherings, or any special occasion where you want to serve something truly memorable. Simple enough for enthusiastic home bakers, yet refined enough for even the grandest celebrations, this banana chocolate chip cake is guaranteed to become a cherished and frequently requested recipe in your culinary collection.
More Irresistible Banana & Chocolate Recipes to Satisfy Your Cravings
If you’ve fallen head over heels for the delightful combination of banana and chocolate in this cake, you’re in for a treat! Explore these other fantastic recipes that perfectly blend these two beloved flavors into equally delicious and satisfying desserts:
- Banana Brownies – Discover these unbelievably moist and fudgy brownies, a true banana lover’s dream with a rich chocolate twist.
- Banana Chocolate Chip Muffins – Perfect for breakfast, brunch, or a satisfying snack, these muffins are packed with wholesome banana flavor and sweet chocolate chips.
- Chocolate Banana Cupcakes – Indulge in these decadent and moist cupcakes, a sophisticated and individual-sized dessert option that’s always a crowd-pleaser.
- Chocolate Banana Muffins – Another fantastic muffin option, these are intensely chocolatey with the subtle sweetness of banana, perfect for a quick and satisfying bite anytime.
Banana Chocolate Chip Cake
Fiona Dowling
1 hr
35 mins
3 hrs
4 hrs 35 mins
12 slices
Rate Recipe
Print Recipe
Equipment
-
2 9-inch cake pans see recipe notes for alternatives
Ingredients
Banana Chocolate Chip Cake
- 2 3/4 cup all-purpose flour
- 1 teaspoon baking powder
- 1 teaspoon baking soda
- 1 teaspoon cinnamon
- 1/2 cup unsalted butter, softened to room temperature
- 1/4 cup vegetable oil, canola oil works too
- 1 cup granulated sugar
- 1/2 cup brown sugar, packed, light or dark works
- 2 teaspoons vanilla extract
- 3 large eggs, room temperature
- 1 1/4 cup mashed bananas, about 3-4 brown bananas, measure after mashing
- 1 1/2 cups buttermilk, see notes for a substitution
- 1 cup mini chocolate chips
Chocolate Frosting
- 1 1/4 cup unsalted butter, softened
- 3/4 cup cocoa powder
- 3-4 cups powdered sugar
- 1 teaspoon vanilla extract
- 1/2 teaspoon salt
- 3-4 tablespoons whipping cream, or milk
Instructions
Banana Chocolate Chip Cake
- Preheat the oven to 350°F (180°C or 170°C fan forced).
- Line the bottom of two 9-inch cake pans (see recipe notes for pan alternatives) with rounds of parchment paper. Lightly grease the sides of the pans to prevent sticking.
- In a medium bowl, whisk together the all-purpose flour, baking powder, baking soda, cinnamon, and salt until well combined. Set this dry mixture aside.
- In a very large mixing bowl, using an electric mixer, beat together the softened butter, granulated sugar, and brown sugar until the mixture is light, fluffy, and there are no visible lumps of sugar or butter (this usually takes about 1 minute). Then, beat in the vegetable or canola oil until fully incorporated.
- Add the vanilla extract to the butter mixture. Beat in the eggs one at a time, ensuring each egg is fully incorporated before adding the next. Remember to turn off the mixer and scrape down the sides and bottom of the bowl frequently to ensure everything mixes evenly.
- Turn off the mixer and gently whisk in the mashed bananas until just combined.
- With the mixer on a very low speed, gradually beat in about one-third of the dry ingredients. Mix until just combined.
- Scrape down the sides and bottom of the bowl again. Then, slowly beat in about half of the buttermilk.
- Turn off the mixer. Whisk in another one-third of the dry ingredients, followed by the remaining buttermilk.
- Finally, whisk in the rest of the dry ingredients until just combined. It is perfectly normal and expected to see some small lumps in the batter from the mashed banana. Be careful not to overmix at this stage.
- Using a rubber spatula or wooden spoon, gently fold in the mini chocolate chips until they are evenly distributed throughout the batter.
- Divide the cake batter evenly between the two prepared pans.
- Bake both on the same rack of the oven in the middle for about 35-40 minutes, or until an inserted toothpick comes out with a few crumbs. I typically don’t say clean with this recipe, as sometimes the toothpick can come out clean but the middle of the cake is still gummy.
- Cool the cake layers in the pans for about 20 minutes, then carefully invert and continue cooling on a wire rack.
Chocolate Frosting
- If the cocoa and powdered sugar are lumpy, sift them first before getting started to ensure a smooth frosting.
- In a large bowl, beat the softened butter until smooth and creamy using an electric mixer.
- Add in 2 cups powdered sugar and beat into the butter, starting with the mixer on a low speed to avoid a sugar cloud. Once combined, increase speed and beat until light and fluffy.
- Add in the cocoa powder, vanilla extract, and salt. Beat into the mixture, again starting with the mixer on a low speed, then increasing to combine until well incorporated.
- Beat in the rest of the powdered sugar (up to 2 more cups), about 1/2 cup at a time, alternating with 1 tablespoon of whipping cream or milk, until the desired sweetness, consistency, and thickness are reached. You may not need all of the suggested powdered sugar or cream, adjust to your preference.
Assembling & Frosting the Cake
- Ensure that the cake layers are 100% completely cooled first. This is crucial for successful frosting.
- Use a cake leveler or a sharp serrated knife to gently saw off any rounded top from each cake layer, creating a flat surface for stable stacking.
- Place one cake layer on the plate you plan to serve it on, with its trimmed (flat) side facing down. Frost the top of this layer evenly with about 1/4 to 1/3 of the prepared chocolate frosting.
- Carefully place the second cake layer on top of the first, again with its trimmed side facing down. Lightly press to secure.
- Frost the sides of the cake with a thin layer of frosting. This is the crumb coat, designed to seal in any loose crumbs. Place the cake in the refrigerator for about 15-20 minutes for the crumb coat to firm up. If you don’t notice many crumbs in your frosting, you could potentially skip this step, but it’s a good practice for a polished finish.
- Once the crumb coat is set, remove the cake from the fridge. Frost the sides and top of the cake generously with the remaining frosting, creating smooth surfaces or decorative swirls as desired.
Notes
- Pan Sizes & Frosting Adjustment:
- Two 9-inch round cake pans: Bake for 35-40 minutes.
- Three 8-inch round cake pans: Bake for 25-30 minutes.
- One 9×13 inch (23×33 cm) rectangular pan: Bake for 50-55 minutes. If using this size, divide the frosting recipe in half. Half frosting recipe: 1/2 cup plus 2 tablespoons unsalted butter, 1/4 cup plus 2 tablespoons cocoa powder, 1 1/2 – 2 cups powdered sugar, 1/2 teaspoon vanilla extract, 1/4 teaspoon salt, 1-2 tablespoons whipping cream or milk.
- Bananas: For the best flavor and moisture, always use brown and spotty bananas.
- Buttermilk Substitute: If you don’t have buttermilk on hand, you can easily make a substitute. Add 1 1/2 tablespoons of freshly squeezed lemon juice (or white vinegar) to a large liquid measuring cup. Then, fill the cup with 1% or 2% milk up to the 1 1/2 cup line. Let it sit for 5-10 minutes until it slightly curdles before using.
- Make-Ahead & Freezing Tips: Cake layers can be baked the day before. Once fully cooled, wrap tightly in plastic wrap and store at room temperature overnight. Prepare the frosting and assemble the cake the following day. For longer storage, cooled cake layers can be wrapped tightly with plastic wrap, then aluminum foil or placed in a freezer-safe bag, and frozen for up to 2 months. Thaw frozen layers overnight in the refrigerator before frosting.
- Storage of Finished Cake: Store the frosted cake covered or in an airtight container at room temperature for up to 3 days. For extended freshness, store in the refrigerator for up to 4 days. Allow refrigerated cake to come to room temperature before serving for optimal taste and texture.
- Nutrition Information: The provided nutrition details are an estimate only and are based on one slice, assuming the cake is cut into 12 equal pieces and all the frosting is used. Depending on how you slice it, you may get up to 14 servings.
Nutrition
Carbohydrates: 107g,
Protein: 8g,
Fat: 38g,
Saturated Fat: 21g,
Polyunsaturated Fat: 4g,
Monounsaturated Fat: 9g,
Trans Fat: 1g,
Cholesterol: 124mg,
Sodium: 259mg,
Potassium: 323mg,
Fiber: 4g,
Sugar: 78g,
Vitamin A: 997IU,
Vitamin C: 2mg,
Calcium: 111mg,
Iron: 3mg
Like this recipe? Rate and comment below!