
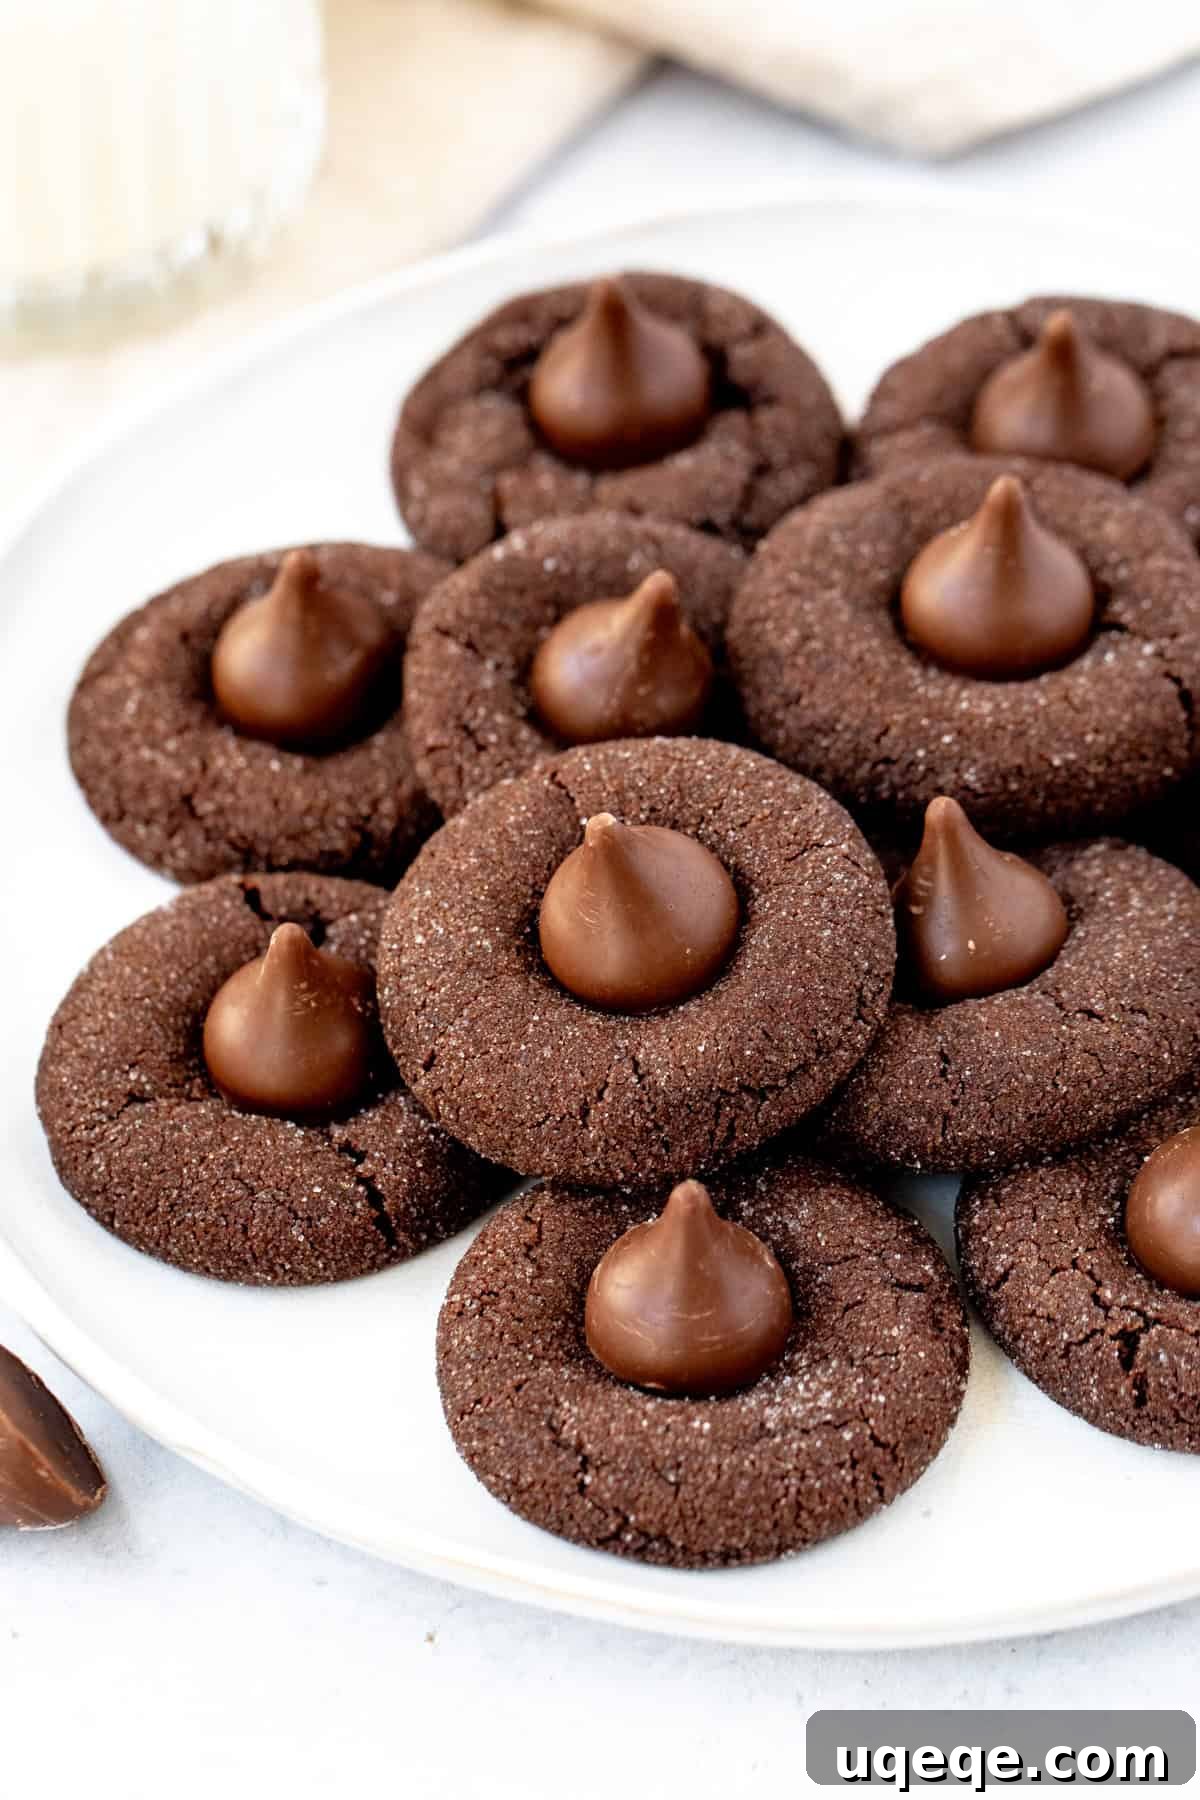
Indulge in the rich, comforting taste of homemade chocolate with these irresistible **Chocolate Blossom Cookies**. Perfectly soft, wonderfully chewy, and intensely fudgy, each cookie is a small work of art, coated in a delightful crunchy sugar shell and crowned with a classic Hershey’s Kiss. Whether you’re planning your festive holiday baking, contributing to a cookie exchange, or simply craving a comforting homemade treat, this recipe promises a simple yet spectacularly delicious result that will have everyone reaching for more.
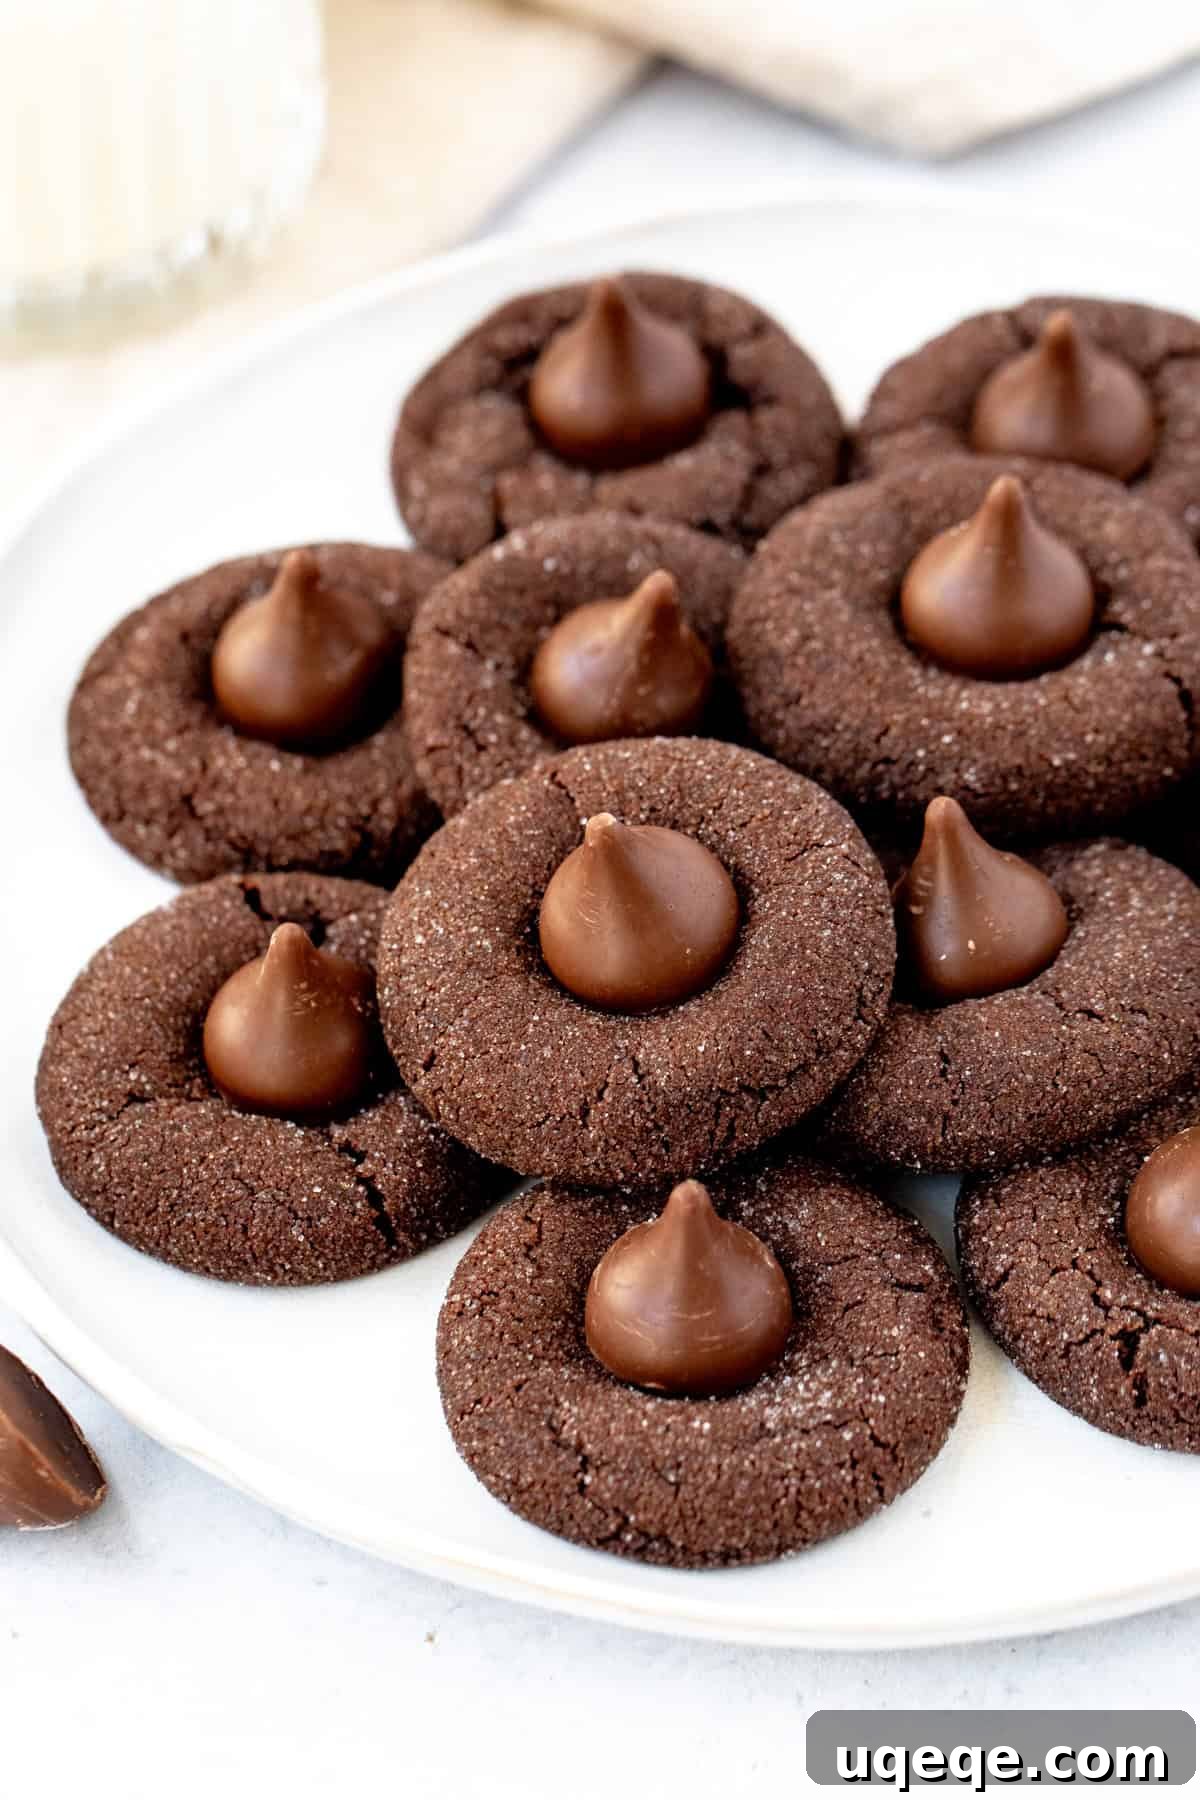
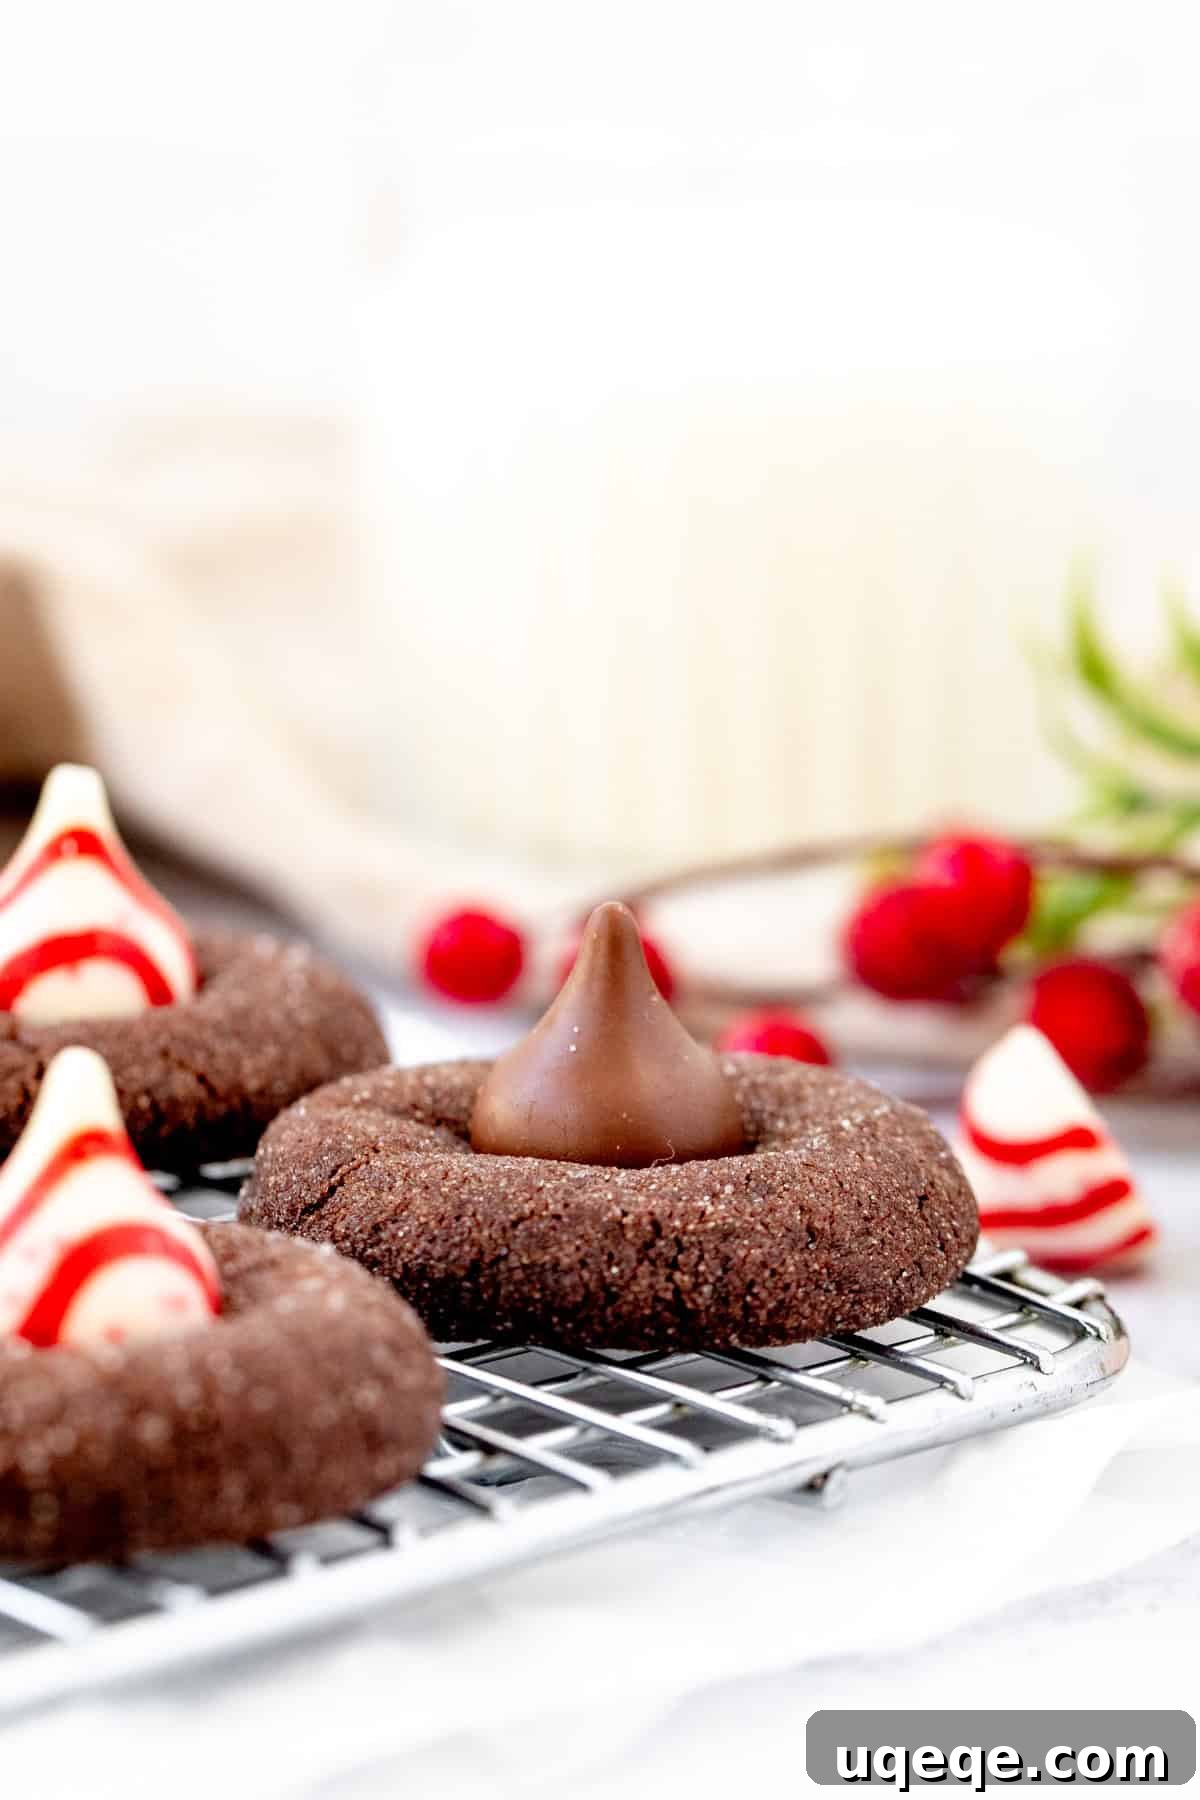
A beloved twist on the traditional peanut butter blossoms, these chocolate kiss cookies offer a deeply satisfying cocoa experience. They are designed to be perfectly tender, melting in your mouth with every bite. The magic begins with rolling each chocolate dough ball in granulated sugar, creating a beautiful sparkle and a subtle textural contrast. After a quick bake, a Hershey’s Kiss is gently pressed onto the center of each warm cookie, creating its signature “blossom” look. For an extra festive touch during the holiday season, consider using Candy Cane Hershey’s Kisses – a delightful peppermint twist that will impress your guests and elevate your Christmas cookie tray.
I find myself returning to this chocolate blossom cookie recipe year after year, especially during the holidays. It’s incredibly straightforward, requires no advanced decorating skills, and yet the finished cookies look absolutely stunning on any festive platter. Their elegance and simplicity make them a crowd-pleaser, but their deliciousness isn’t limited to special occasions; they are equally delightful served with a glass of milk on a cozy evening, making them a fantastic treat any time of year. This recipe yields a generous batch, perfect for sharing, gifting, or simply enjoying throughout the week.
Why You’ll Love These Chocolate Blossom Cookies
There’s more than one reason these chocolate blossom cookies earn a permanent spot in my recipe rotation. Here’s what makes them truly special and a must-try for any cookie enthusiast:
- **Rich Chocolate Flavor:** We prioritize quality cocoa powder to ensure a deep, robust, and utterly satisfying chocolate taste that avoids being overly sweet.
- **Perfectly Soft & Chewy Texture:** Each bite offers a delightful balance of melt-in-your-mouth softness and a pleasant chewiness, making them incredibly moreish and impossible to resist.
- **Sparkling Sugar Coating:** Rolling the dough in granulated sugar before baking adds a beautiful, eye-catching sparkle and a subtle, delightful crunch that elevates the cookie’s overall texture and visual appeal.
- **Iconic Hershey’s Kiss Topping:** The creamy, slightly melted chocolate kiss on top isn’t just a pretty finish; it adds another layer of classic chocolatey goodness and makes these cookies instantly recognizable and beloved.
- **Easy & No-Chill Dough:** This recipe is specifically designed for convenience, meaning you can whip up a batch from start to finish without the tedious waiting time required for chilling the dough. Perfect for satisfying those sudden cookie cravings!
- **Versatile for Any Occasion:** While a quintessential holiday favorite, these cookies are incredibly versatile. They are fantastic year-round for birthday parties, potlucks, bake sales, or simply as a comforting homemade dessert after dinner.
- **Kid-Friendly Fun:** From rolling the dough balls to pressing on the Hershey’s Kisses, this recipe is a wonderful opportunity to involve children in the kitchen, creating lasting memories along with delicious treats.
- **Simple Ingredients, Stunning Results:** You don’t need fancy ingredients or expert baking skills to create these impressive and delightful cookies. Basic pantry staples transform into a truly special dessert.
Essential Ingredients for Perfect Chocolate Blossoms
Creating these delightful chocolate blossom cookies starts with a few simple, high-quality ingredients. Paying attention to detail, especially when measuring and preparing your ingredients, is key to achieving that perfect texture and flavor profile.
- **All-Purpose Flour:** This forms the structural backbone of our cookie. Accurate measurement is incredibly important here. Too much flour can lead to dry, dense, and crumbly cookies, while too little can make them spread excessively and become too flat. Always spoon your flour into a measuring cup and then level it off with a straight edge for the most consistent results.
- **Cocoa Powder:** This is where our cookies get their signature rich chocolate flavor and deep, inviting color. I highly recommend using **Dutch-processed cocoa powder** (sometimes labeled “specialty dark” or “alkalized”). It has a smoother, less bitter flavor and a darker hue compared to natural cocoa powder. Its lower acidity reacts perfectly with the baking soda in this recipe, contributing to a soft, tender, and moist crumb. Sifting the cocoa powder before use is also important to remove any lumps and ensure smooth incorporation into the dough.
- **Baking Soda:** Our essential leavening agent. It works in conjunction with the cocoa powder and brown sugar to create the perfect rise, ensuring the cookies are light and tender, not dense or cakey.
- **Salt:** A small but mighty ingredient! Salt is crucial for balancing the sweetness in the cookies and significantly enhances all the other flavors, particularly the deep notes of chocolate. If you opt to use salted butter, you may want to slightly reduce or completely omit the added salt to avoid over-salting.
- **Unsalted Butter:** Using unsalted butter allows you to precisely control the overall salt content in your cookies. It should be softened to true room temperature – not melted, but pliable enough to leave a slight indent when gently pressed with a finger. This ensures it creams properly with the sugars, creating a light and airy base for the dough. Cold butter won’t cream effectively, and melted butter will lead to greasy, flat cookies.
- **Brown Sugar:** This ingredient is a secret weapon for achieving the cookies’ characteristic chewiness and moist texture, thanks to its molasses content. I personally prefer using **dark brown sugar** for a deeper, more pronounced caramel-like flavor, but light brown sugar works perfectly well and will still yield delicious results.
- **Granulated Sugar:** Used in two distinct ways in this recipe. A portion is incorporated directly into the cookie dough for sweetness and to help with the cookie’s structure. Additionally, extra granulated sugar is used for rolling each cookie dough ball before baking. This coating step creates a lovely crisp exterior and a sparkling, attractive finish.
- **Large Egg:** The egg acts as a vital binder, bringing the ingredients together while adding essential moisture and richness to the dough. It’s crucial for your egg to be at room temperature; it emulsifies much better with the softened butter and sugar, leading to a smoother, more uniform dough and a better-textured cookie.
- **Vanilla Extract:** A classic flavor enhancer that beautifully complements and deepens the chocolate notes, adding a warm, inviting aroma and a touch of traditional bakery flavor to the cookies.
- **Hershey’s Kisses:** The iconic topping that defines a “blossom” cookie! You’ll need approximately 32 Kisses for this recipe, which typically amounts to one standard 10-ounce bag. Feel free to experiment with different varieties of Hershey’s Kisses – classic milk chocolate, dark chocolate, peppermint (especially for holidays), caramel, or even Hugs (white and milk chocolate swirled) can all add a delightful personalized touch. Remember, freezing them before use is a critical step to prevent them from melting excessively and losing their shape on the warm cookies.
Step-by-Step Guide to Baking Chocolate Blossom Cookies
This recipe is designed for ease and convenience, specifically created so that there’s no need to chill the dough, allowing you to enjoy your delicious cookies sooner! However, if you wish to prepare the dough in advance, it can be covered and stored in the fridge for up to 48 hours without compromising quality.
- **Prepare Your Workspace and Kisses:** Begin by preheating your oven to 350°F (180°C). Line two standard baking sheets with parchment paper or silicone baking mats; this prevents sticking and ensures your cookies bake evenly and release easily. Next, unwrap all your Hershey’s Kisses and place them in a freezer-safe bag. Pop the bag into the freezer immediately while you prepare the cookie dough. Freezing the Kisses is a crucial step for preventing them from melting excessively and losing their iconic shape when pressed onto the warm cookies.
- **Whisk Together the Dry Ingredients:** In a medium-sized bowl, use a fine-mesh sieve to sift together the all-purpose flour, cocoa powder, baking soda, and salt. Sifting the cocoa powder is particularly important as it helps to remove any stubborn lumps, ensuring a smooth and consistent cookie dough. Once sifted, whisk these dry ingredients together thoroughly until they are well combined. Set this bowl aside for later.
- **Cream the Butter and Sugars:** In a separate large mixing bowl (or the bowl of a stand mixer fitted with the paddle attachment), combine the softened unsalted butter, brown sugar, and ½ cup of granulated sugar. Beat these ingredients together on medium speed for about 2-3 minutes until the mixture is light, fluffy, and visibly pale, with no visible lumps of butter remaining. This creaming process incorporates air into the butter and sugar, which is vital for achieving a light and tender cookie texture.
- **Incorporate the Egg and Vanilla:** Add the room-temperature large egg and the vanilla extract to the creamed butter and sugar mixture. Beat on medium speed until they are just combined, making sure to scrape down the sides of the bowl with a spatula as needed to ensure everything is fully incorporated. Be careful not to overmix at this stage, as overmixing can develop gluten prematurely.
- **Combine Wet and Dry Ingredients:** With your mixer set to the lowest speed, gradually add the sifted dry ingredients into the wet butter mixture. Start slowly to prevent the flour from flying out of the bowl. Mix only until the dry ingredients are just combined and no streaks of flour are visible. As soon as the flour is incorporated, stop mixing. Overmixing the dough at this stage can lead to tough, dry cookies.
- **Form and Coat the Dough Balls:** Pour the remaining ⅓ cup of granulated sugar (designated specifically for rolling the cookie dough balls) onto a small, shallow plate. Using a standard cookie scoop (approximately 1 to 1½ tablespoons of dough per cookie), scoop out portions of the prepared dough. Roll each portion gently into a smooth ball between your palms, then roll it generously in the granulated sugar on the plate, ensuring it is fully and evenly coated. Place the sugar-coated dough balls about 2 inches apart on your prepared baking sheets to allow for proper spreading during baking.
- **Bake to Perfection:** Place one cookie sheet at a time into the center rack of your preheated oven. Bake for approximately 8-10 minutes. The cookies are done when the edges appear set, the tops look slightly puffy, and you might notice a few small cracks beginning to form on the surface. It’s important to remember that the centers may still look a little soft; this is exactly what you want for a fudgy and chewy texture. Avoid overbaking, as this will result in dry cookies.
- **Add the Hershey’s Kisses Immediately:** As soon as you remove the cookies from the oven, immediately retrieve your frozen Hershey’s Kisses from the freezer. Gently but firmly press one Kiss into the center of each warm cookie. The residual heat from the freshly baked cookie will slightly melt the bottom of the Kiss, helping it adhere and creating that iconic “blossom” shape without causing it to completely melt and lose its form.
Expert Tip for Flawless Hershey’s Kisses
To ensure your Hershey’s Kisses remain perfectly shaped and don’t melt excessively on top of the warm cookies, the freezing step is absolutely essential. Pressing chilled Kisses onto hot cookies creates a temperature contrast that helps them set beautifully. For an extra layer of insurance against melting, especially if your kitchen is warm or you’re making a large batch, immediately after pressing the Kisses onto the freshly baked cookies, place the entire cookie sheet into your freezer for about 5-10 minutes. This rapid cooling sets the chocolate Kiss quickly, preventing it from losing its distinct conical shape and yielding beautiful, picture-perfect results every single time.

Frequently Asked Questions About Chocolate Blossom Cookies
Here are some common questions and helpful answers to ensure your chocolate blossom cookies turn out perfectly every time and address any potential issues:
Q: Why are my chocolate blossom cookies dry and crumbly?
A: The most common culprits for dry or crumbly cookies are either too much flour or overmixing the dough. To prevent this, ensure you measure your flour accurately by spooning it into a measuring cup and leveling it off with a straight edge, rather than scooping directly from the bag (which can compact the flour and add too much). Additionally, mix the dry ingredients into the wet ingredients only until they are just combined – overmixing develops gluten, leading to a tougher, drier texture in your final cookie.
Q: Why did my Hershey’s Kisses melt too much and lose their shape?
A: This usually happens if the Kisses aren’t cold enough before being placed on the cookies, or if they are pressed onto cookies that are too hot and then not allowed to cool quickly. The key is to always freeze your Hershey’s Kisses for at least 10-15 minutes prior to pressing them onto the hot cookies. For extra insurance, particularly if you notice them melting quickly, place the baking sheet of finished cookies directly into the freezer for 5-10 minutes right after adding the Kisses. This rapid cooling will set the chocolate quickly and preserve its iconic shape.
Q: Can I use natural cocoa powder instead of Dutch-processed?
A: While you technically can substitute natural cocoa powder, it will likely change the flavor and texture of your cookies slightly. Natural cocoa powder is more acidic, which reacts differently with baking soda, potentially leading to a lighter color and a slightly different rise and chewiness. For the deep, rich chocolate flavor and fudgy, tender texture intended for this recipe, Dutch-processed cocoa powder is highly recommended as it creates the ideal chemical balance for the baking soda.
Q: Do I need to chill the cookie dough for this recipe?
A: No, this particular chocolate blossom cookie recipe is designed to be made without chilling the dough, saving you valuable time! However, if you find the dough exceptionally sticky or a bit difficult to work with, or if you simply prefer to make it ahead of time, you can certainly cover the bowl and refrigerate it for 30 minutes to an hour to firm it up. The dough can also be safely stored in the fridge for up to 48 hours.
Q: Can I make these cookies gluten-free?
A: Yes, you can often substitute the all-purpose flour with a high-quality 1:1 gluten-free baking flour blend. For best results, look for a blend that specifically contains xanthan gum, as this helps with the structure and texture that gluten typically provides. Keep in mind that while delicious, the texture of gluten-free versions might be slightly different from the original.
Q: How many cookies does this recipe yield?
A: This recipe is designed to yield approximately 32 delicious chocolate blossom cookies, assuming you use about 1 to 1½ tablespoons of dough per cookie. This makes it perfect for sharing, cookie exchanges, or enjoying over several days.
Variations and Customizations for Your Chocolate Blossoms
While the classic chocolate blossom cookie is absolutely divine on its own, there are many creative ways to personalize this recipe and make it truly your own. Don’t hesitate to experiment with these fun variations:
- **Hershey’s Kiss Flavors:** The possibilities are endless! Don’t limit yourself to just classic milk chocolate Kisses. For an intense chocolate experience, try using dark chocolate Kisses. During the holidays, peppermint Kisses or candy cane Kisses offer a delightful and festive twist. Caramel Kisses can provide a gooey, sweet center, while Hugs (the white and milk chocolate swirled Kisses) add visual appeal and a different flavor profile. Peanut butter Kisses could also be a fun nod to the original blossom cookie.
- **Alternative Coatings:** Instead of the traditional granulated sugar, try rolling the dough balls in other delicious coatings. Powdered sugar before baking can create a beautiful “crinkle” cookie effect as they spread. Rolling them in cocoa powder will give them an extra deep chocolate exterior and a slightly bittersweet contrast. For added texture and flavor, finely chopped nuts (like pecans, walnuts, or almonds) can be mixed with the sugar or used on their own as a coating. Shredded coconut is another unique option.
- **Dough Mix-Ins:** For an even richer or more complex cookie, consider folding in some additional ingredients directly into the dough before forming the balls. About ½ cup of mini chocolate chips (milk, dark, or white) will boost the chocolate factor. Finely chopped nuts, toffee bits, or even mini M&Ms can add delightful texture and bursts of flavor.
- **Holiday Sprinkles:** After rolling the dough balls in sugar, you can also gently roll them in festive sprinkles (like nonpareils or jimmies) before baking for a more colorful, celebratory, and whimsical look. This is especially fun for themed parties or children’s events.
- **Citrus Zest:** A tiny bit of orange zest or even a hint of espresso powder added to the dough can really enhance the chocolate flavor and add a sophisticated touch.
Storage and Make-Ahead Tips
These chocolate blossom cookies are not only delicious but also excellent for making ahead and storing, ensuring you always have a delightful treat on hand for unexpected guests or sudden cravings. Proper storage helps maintain their freshness and flavor:
- **Storing Baked Cookies:** Once your chocolate blossom cookies have completely cooled to room temperature, they should be stored in an airtight container. At room temperature, they will remain fresh and delicious for up to 4 days. If you prefer a slightly longer shelf life or a firmer texture, they can be kept in the refrigerator for up to 1 week. Placing a slice of plain bread in the container can sometimes help keep them soft.
- **Freezing Baked Cookies:** To prepare baked cookies for freezing, first allow them to cool completely. Then, arrange them in a single layer on a baking sheet and freeze until they are solid (this usually takes about 1-2 hours). Once frozen firm, transfer the cookies to a freezer-safe airtight container or a heavy-duty freezer bag. Layer them with parchment paper between layers to prevent sticking. They will keep beautifully in the freezer for up to 2-3 months. To enjoy, simply thaw them at room temperature for an hour or two before serving.
- **Freezing Cookie Dough:** You can conveniently freeze the prepared cookie dough balls (after you’ve rolled them in sugar) for future baking. Place the sugared dough balls on a baking sheet lined with parchment paper and freeze them until they are solid. Once frozen, transfer them to a freezer-safe bag or container, again, separating layers with parchment paper. This frozen dough will last for up to 2 months. When you’re ready to bake, you can bake them directly from frozen, adding a couple of extra minutes (typically 2-4 minutes) to the baking time as needed.
- **Make-Ahead Dough for Refrigeration:** If you wish to get a head start, the unbaked cookie dough can be prepared up to 48 hours in advance. Simply cover the bowl containing the dough tightly with plastic wrap or transfer it to an airtight container and refrigerate. When you’re ready to bake, let the dough sit at room temperature for about 15-20 minutes to soften slightly, making it easier to roll into balls and bake as directed in the recipe.
Chocolate Blossom Cookies Recipe Card
A soft and chewy chocolate cookie, rolled in sugar and topped with a Hershey’s Kiss. These are delicious for chocolate lovers, and look beautiful on your Christmas cookie tray. They’re also delicious with a candy cane Hershey’s Kiss on top!
By: Fiona Dowling
Prep time: 30 minutes | Cook time: 10 minutes | Total time: 1 hour
Yields: 32 cookies
Equipment
- Cookie Sheets
- Parchment paper or silicone baking mats
- Medium mixing bowl
- Large mixing bowl (or stand mixer)
- Whisk
- Rubber spatula
- Cookie scoop (1 to 1½ tablespoon size)
- Small plate for rolling sugar
Ingredients
- 32 chocolate Kisses (one 10-ounce package is usually more than enough)
- 1 cup all-purpose flour (125 grams) – measure carefully to avoid dry cookies
- ½ cup cocoa powder (45 grams) – Dutch-processed recommended for best flavor and color
- ½ teaspoon baking soda
- ¼ teaspoon salt
- ½ cup unsalted butter (112 grams), softened (not melted)
- ½ cup brown sugar (105 grams), light or dark (dark brown sugar for richer flavor)
- ½ cup granulated sugar (100 grams), for the cookie dough
- 1 large egg, at room temperature
- 1 teaspoon vanilla extract
- ⅓ cup granulated sugar (67 grams), for rolling the cookies
Instructions
- **Prepare Oven and Kisses:** Preheat your oven to 350℉ (180℃). Line two cookie sheets with parchment paper or silicone baking mats. Unwrap all chocolate Kisses, place them in a freezer bag, and put them in the freezer to chill while you make the dough.
- **Combine Dry Ingredients:** In a medium bowl, sift together the all-purpose flour, cocoa powder, baking soda, and salt. Whisk briefly to ensure they are well combined. Set this bowl aside.
- **Cream Butter and Sugars:** In a separate large mixing bowl, using an electric mixer (handheld or stand mixer with paddle attachment), cream together the softened unsalted butter, brown sugar, and ½ cup of granulated sugar. Beat on medium speed for 2-3 minutes until the mixture is light, fluffy, and no lumps of butter remain.
- **Add Egg and Vanilla:** Beat in the room-temperature large egg and vanilla extract until just combined, scraping down the sides of the bowl as needed. Do not overmix.
- **Mix in Dry Ingredients:** With the mixer on low speed, gradually add the reserved dry ingredients to the wet mixture. Mix until just combined and no streaks of flour are visible. Be careful not to overmix, as this can lead to tough cookies.
- **Form and Coat Dough Balls:** Pour the ⅓ cup granulated sugar (for rolling) onto a small, shallow plate. Using a cookie scoop (about 1 to 1½ tablespoons of dough per cookie), scoop out portions of dough. Roll each dough ball thoroughly in the sugar until completely coated and place them about 2 inches apart on the prepared cookie sheets.
- **Bake Cookies:** Bake one cookie sheet at a time in the center of the preheated oven for approximately 8-10 minutes. The cookies are done when the edges are set, the tops look slightly puffed, and a few small cracks may appear. The centers may still look soft, which is desirable for a fudgy texture. Do not overbake.
- **Add Kisses and Cool:** Immediately remove the baking sheet from the oven. Take the frozen Kisses from the freezer and gently press one Kiss into the center of each warm cookie. For best results in preventing Kisses from melting too much, immediately place the baking sheet into the freezer for 5-10 minutes to set the chocolate. Allow cookies to cool on the baking sheet for a few minutes before transferring them to a wire rack to cool completely.
Notes
- Hershey’s Kisses: Feel free to use any variety of Hershey’s Kisses you prefer. A standard 10-ounce bag will typically provide more than enough Kisses for this recipe.
- Doubling the Recipe: This recipe is easily scalable. You can simply double all the ingredients to make an extra-large batch of dough, perfect for entertaining or stocking up your freezer.
- Sticky Dough: The dough for this recipe is naturally a bit on the sticky side. If you find it too frustrating or difficult to handle and roll into balls, cover the mixing bowl and refrigerate the dough for about 30 minutes to firm it up slightly before proceeding.
- Chilling the Dough: Although not required for baking, the prepared cookie dough (in a covered bowl) can be stored in the refrigerator for up to 48 hours. This is great for making ahead.
- Freezing the Dough: Formed dough balls (already rolled in sugar) can be placed in a freezer-safe bag and frozen for up to 2 months. When you’re ready to bake, simply bake them directly from frozen, adding an extra 2-4 minutes to the baking time.
- Storage: Once baked and completely cooled, store your chocolate blossom cookies in an airtight container at room temperature for up to 4 days. For extended freshness, they can be kept in the refrigerator for up to 1 week.
- Nutrition: The nutritional details provided are an estimate only. They are based on 1 cookie, assuming the recipe yields 32 uniform cookies, and may vary depending on specific ingredients and brands used.
Nutrition Facts (Estimated per cookie)
- Calories: 101 kcal
- Carbohydrates: 15g
- Protein: 1g
- Fat: 5g
- Saturated Fat: 3g
- Polyunsaturated Fat: 0.2g
- Monounsaturated Fat: 1g
- Trans Fat: 0.1g
- Cholesterol: 15mg
- Sodium: 43mg
- Potassium: 32mg
- Fiber: 1g
- Sugar: 11g
- Vitamin A: 97 IU
- Calcium: 16mg
- Iron: 0.5mg
More Delicious Chocolate Cookie Recipes to Explore
If you’re a true chocolate lover, especially during the festive season or simply whenever a craving strikes, you’ll definitely want to explore these other fantastic recipes that celebrate cocoa in all its glorious forms. Each offers a unique and delightful chocolate experience:
- Classic Chocolate Thumbprint Cookies with a Gooey Center
- Festive Chocolate Peppermint Sandwich Cookies
- Rich and Buttery Chocolate Shortbread Cookies
- Decadent and Easy-to-Decorate Chocolate Sugar Cookies
There you have it – a complete guide to baking the most delightful and irresistible chocolate blossom cookies. With their perfect balance of fudgy chewiness, rich chocolate flavor, and that iconic Hershey’s Kiss on top, these cookies are truly special. They’re a joy to make, a treat for the senses, and an even greater joy to share with friends and family. So gather your ingredients, follow these simple steps, and get ready to create a batch of chocolatey bliss that will bring smiles to everyone’s faces. Happy baking!