
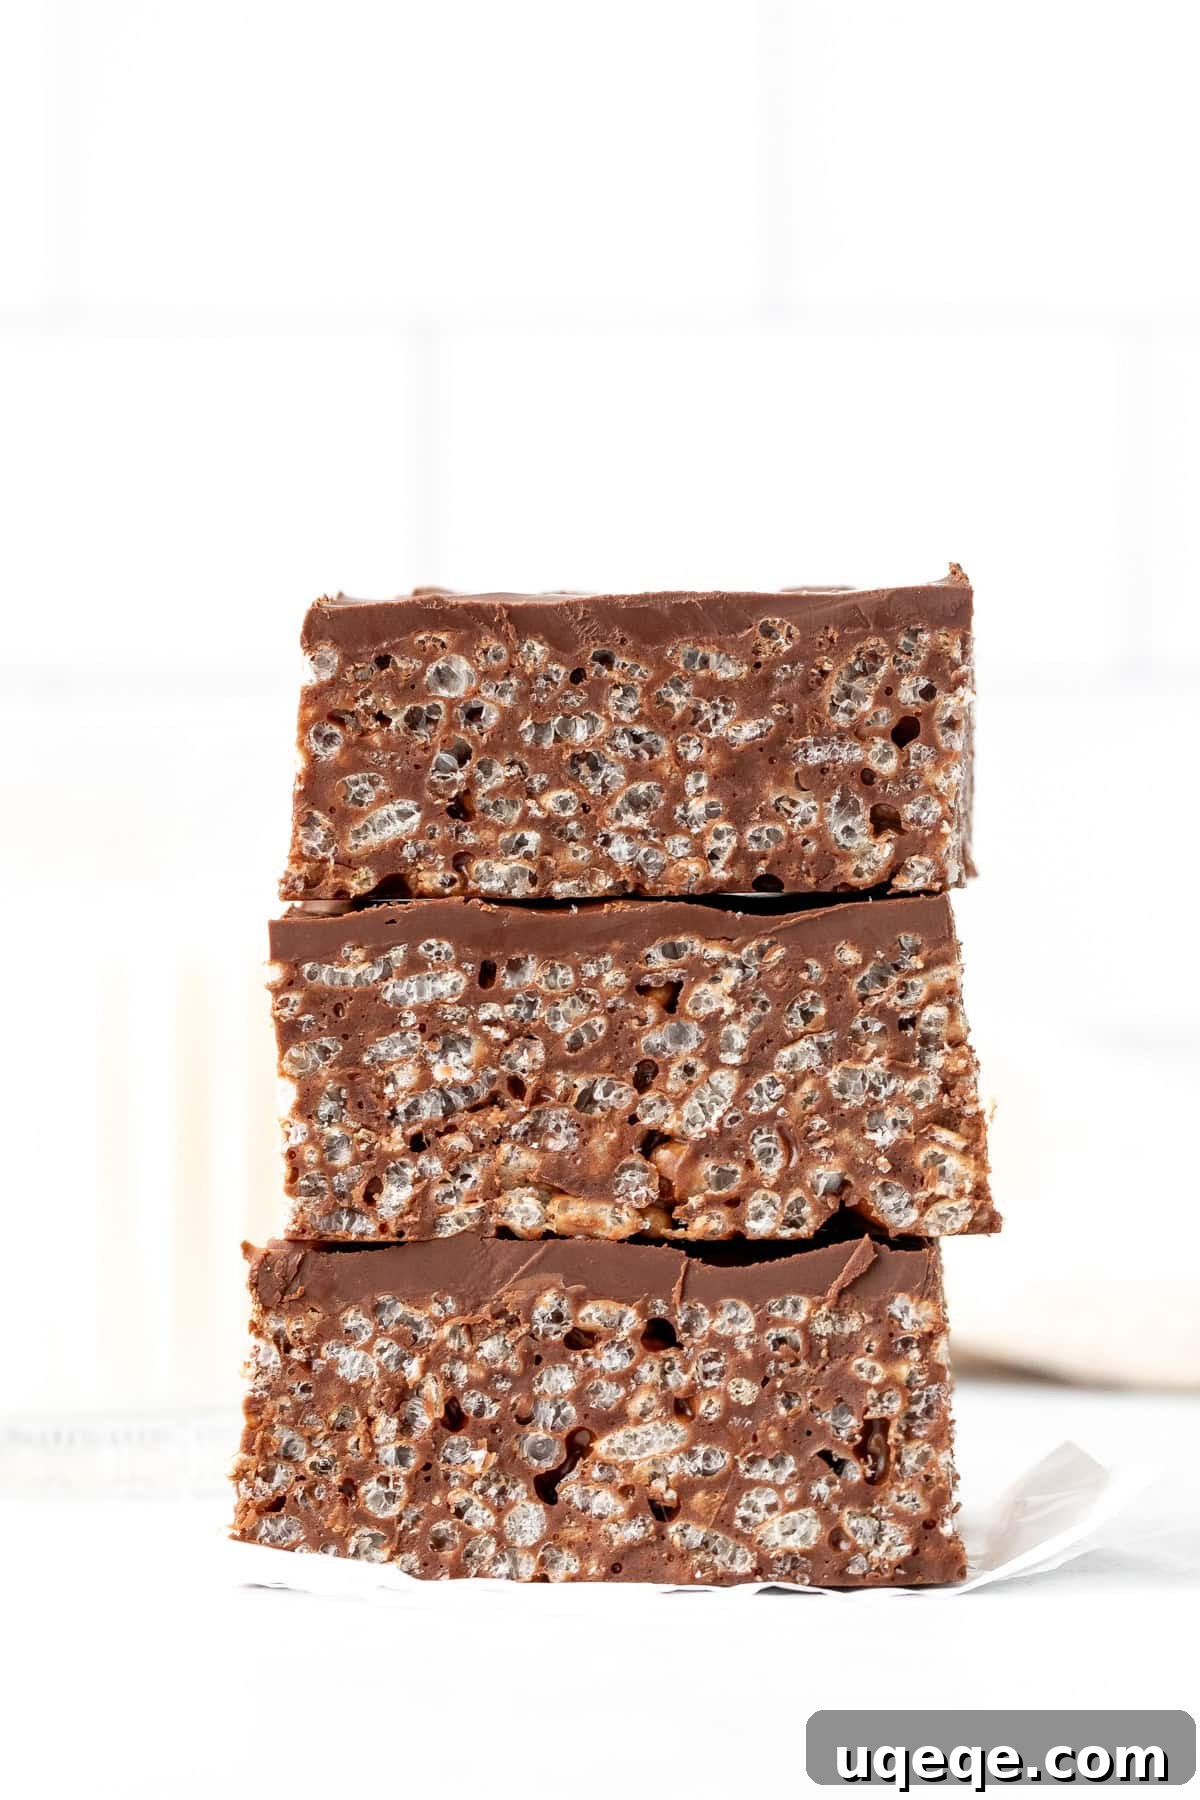
Indulge in the ultimate gooey delight with these incredibly rich and perfectly chewy Chocolate Rice Krispie Treats! A delightful twist on the classic no-bake dessert, this recipe infuses every bite with deep chocolate flavor and a generous amount of melted marshmallows. To elevate them even further, we’ll guide you on adding an optional, luscious extra layer of chocolate on top, creating a truly irresistible cereal treat that’s impossible to resist. These simple-to-make bars are a fantastic choice for any occasion, offering a delightful blend of texture and taste that will captivate both kids and adults.
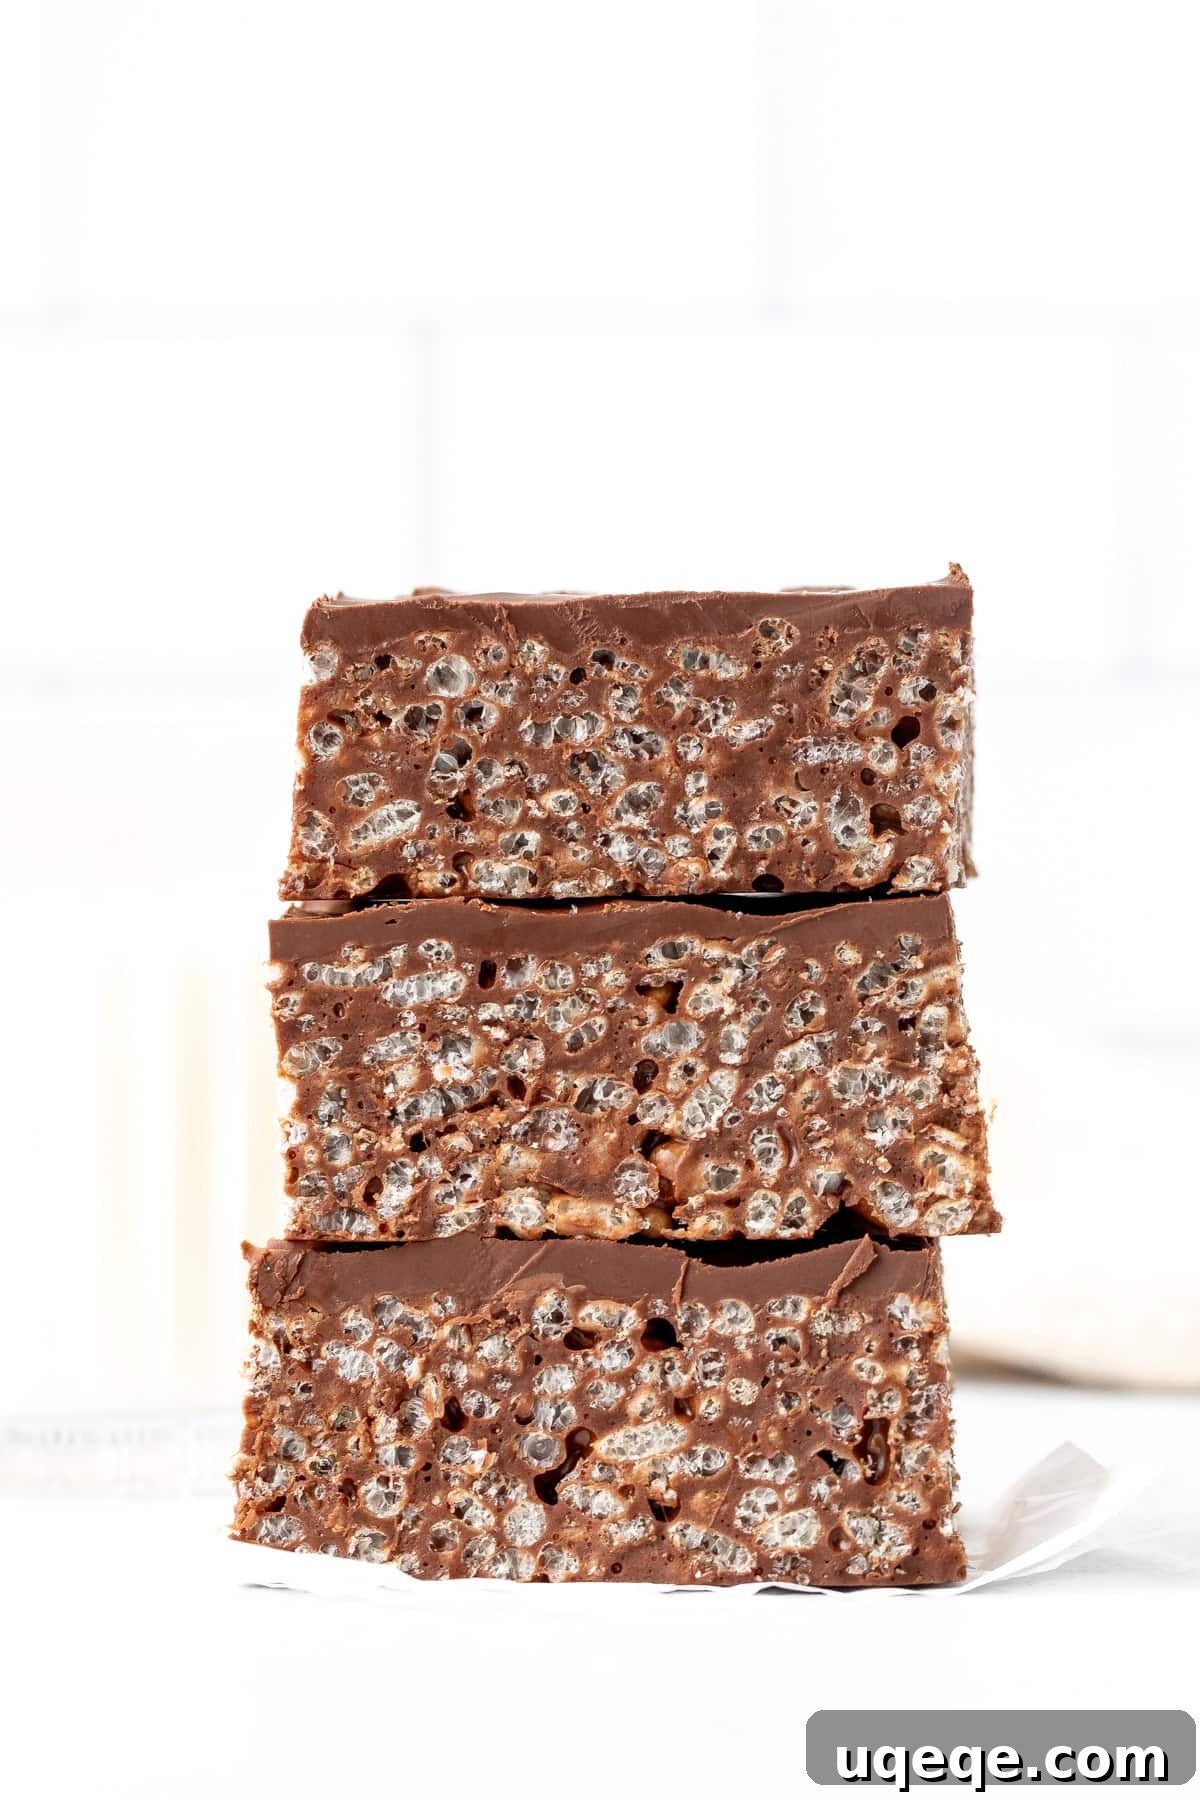
**This post was updated May 20, 2025, with enhanced photos, comprehensive recipe tips, and the exciting addition of a decadent chocolate topping!**
The Ultimate Chocolate Rice Krispie Treats Recipe: A Gooey, Decadent Delight
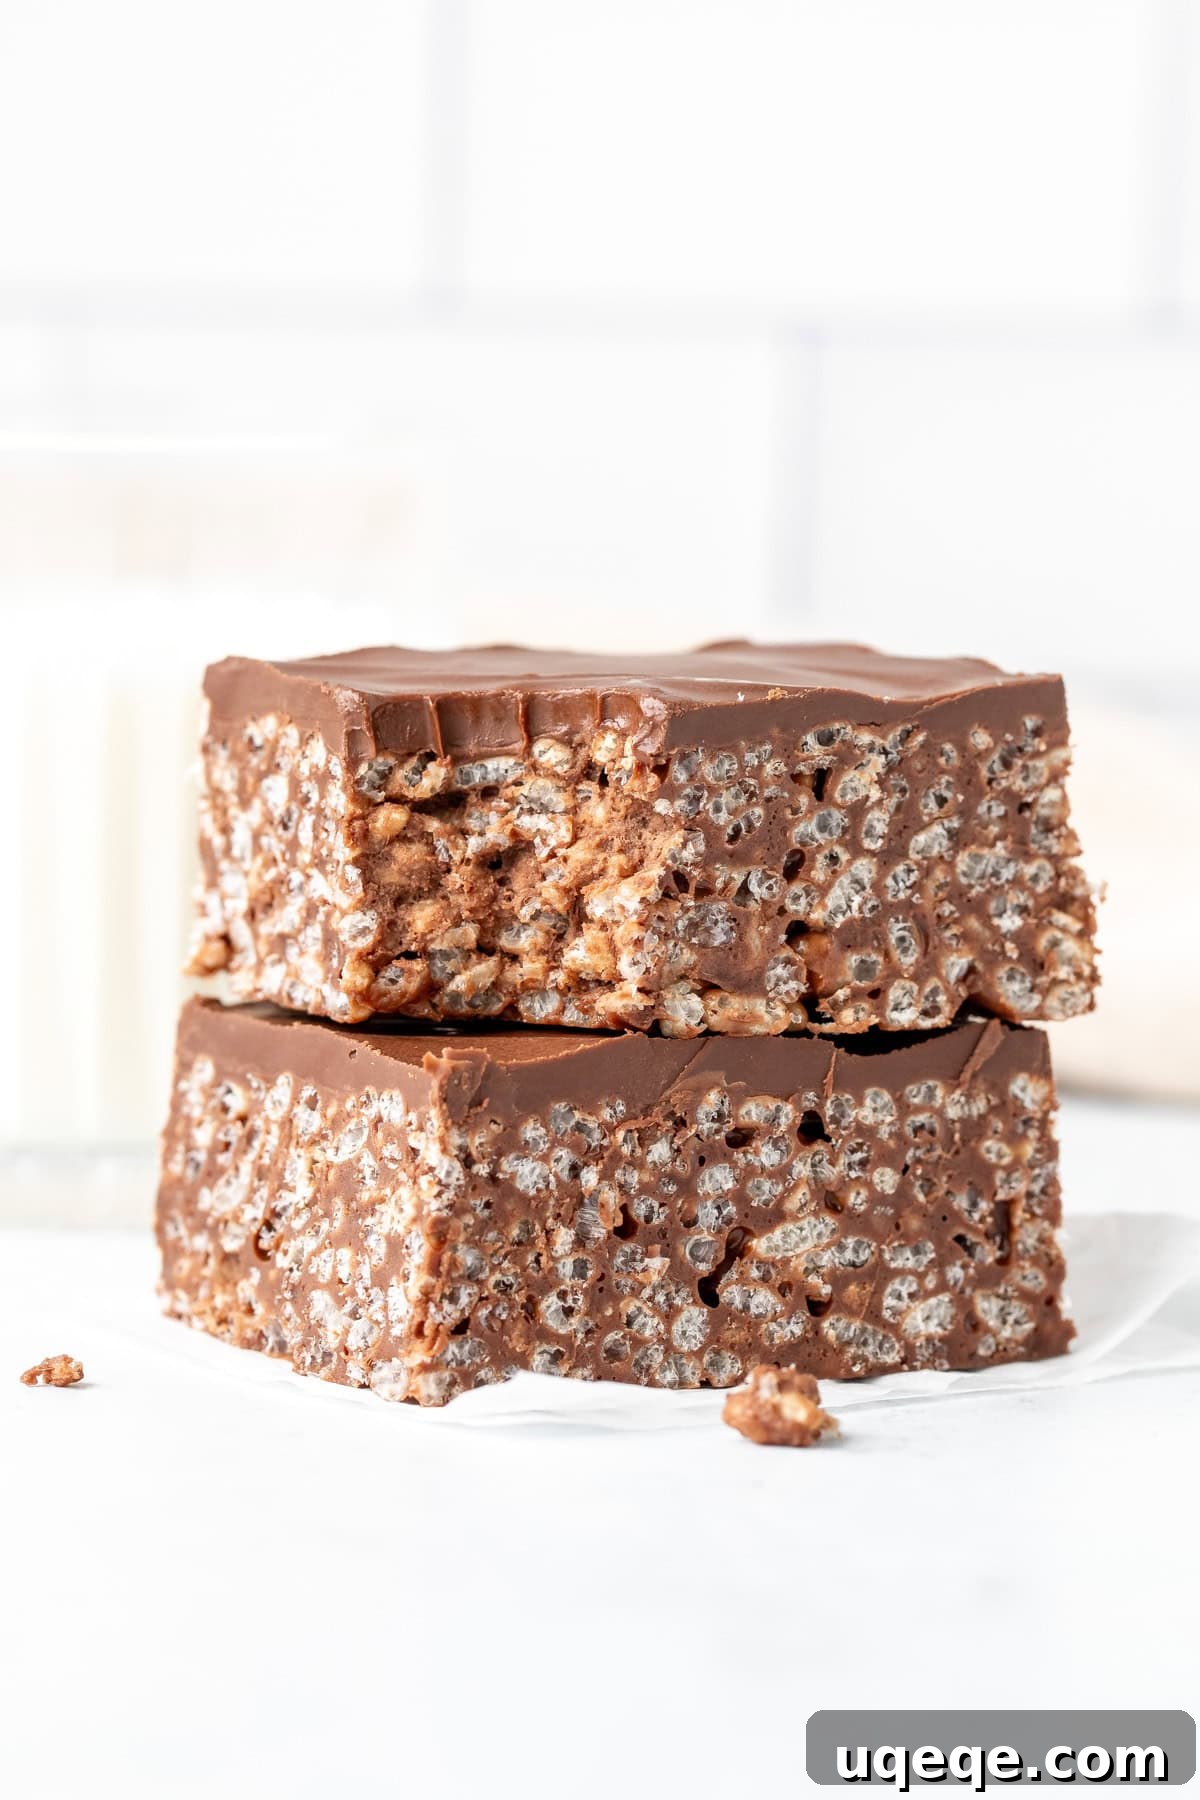
While classic Rice Krispie squares hold a special place in our hearts, have you ever imagined taking that gooey, buttery marshmallow base and infusing it with an abundance of rich chocolate? These aren’t just any Rice Krispie treats; they’re a dream come true for chocolate lovers! Each bite delivers a decadent experience reminiscent of the molten middle of a s’more, thanks to the harmonious blend of milk chocolate and soft, chewy marshmallows. Our recipe ensures the perfect ratio of airy Rice Krispies to the signature sticky marshmallow mixture, creating a treat that’s not too dense, but perfectly gooey and satisfying. And for an extra layer of bliss, we’ll show you how to finish them with a smooth, glossy chocolate topping that takes these no-bake bars from delicious to absolutely divine. Get ready to elevate your cereal treat game, transforming a simple snack into an irresistible dessert that promises to be the star of any gathering.
Why These Gooey Chocolate Rice Krispie Treats Are a Must-Make in Your Kitchen
There are countless reasons why these chocolate Rice Krispie treats deserve a coveted spot in your recipe collection. First and foremost, their remarkable simplicity makes them an ideal choice for both seasoned bakers and complete novices. Requiring no oven and minimal effort, they come together quickly, making them perfect for a last-minute dessert, a delightful party favor, or a fun and engaging baking project with children. The magic truly happens with the infusion of both unsweetened cocoa powder and chopped chocolate directly into the marshmallow mixture. This dual-chocolate approach creates a deep, authentic, and incredibly satisfying chocolate flavor that truly sets these bars apart from any standard version you might have tried. The resulting gooey texture is unparalleled, ensuring each square stretches delightfully when pulled apart, offering that signature satisfying chewiness everyone loves.
Beyond their delicious taste and texture, these treats offer incredible versatility. You can easily customize them to suit various preferences, whether by choosing different types of chocolate for the topping or experimenting with fun mix-ins like sprinkles, mini candies, or even a swirl of peanut butter. They are naturally gluten-free (ensure your cereal is certified GF if necessary) and can be easily adapted for larger crowds, making them a go-to for potlucks, birthday parties, or school events. Whether you’re planning a grand celebration, need a quick after-school snack, or simply crave a comforting sweet treat, these homemade chocolate Rice Krispie bars are guaranteed to be a hit. They’re more than just a nostalgic classic; they’re a chocolatey masterpiece reinvented, promising pure joy in every bite.
Essential Ingredients for Your Decadent Chocolate Creation
Crafting these delectable chocolate Rice Krispie treats starts with selecting quality ingredients. Each component plays a vital role in achieving the perfect balance of flavor and that irresistible gooey texture. Here’s a detailed breakdown of what you’ll need and why:
- Unsalted Butter (6 tablespoons / 84 grams): Butter is the foundation of our gooey base. Using unsalted butter allows you to control the overall saltiness of the treats, ensuring a balanced flavor profile. Its rich fat content is crucial for a smooth and even marshmallow melt, contributing significantly to the luxurious, chewy texture and adding a wonderful depth of flavor. If you only have salted butter on hand, you can certainly use it, but consider slightly reducing any added salt in other parts of the recipe, if applicable, to avoid an overly salty taste.
- Mini Marshmallows (10 oz bag / 283 grams, about 5 cups): These tiny puffs of sweetness are the star of the show. Mini marshmallows are highly recommended over large ones because they melt more quickly and uniformly, which is essential for achieving that perfectly smooth, silky, and gooey base without the risk of overcooking or scorching them. For the best possible texture and chewiness, always ensure you’re using fresh marshmallows; stale marshmallows can lead to a tougher, less pleasant treat.
- Unsweetened Cocoa Powder (3 tablespoons / 22 grams): This is where the deep, authentic chocolate flavor truly begins! Three tablespoons of unsweetened cocoa powder are incorporated directly into the melting marshmallow mixture. It blends seamlessly, giving the entire batch a rich, inviting brown hue and a consistent, robust chocolate essence that permeates every bite of the finished treat.
- Chopped Milk Chocolate (4 oz / 112 grams) or 2/3 cup Chocolate Chips: Adding chopped chocolate alongside the cocoa powder introduces another layer of rich, creamy chocolatey goodness. Chopping chocolate ensures it melts evenly and integrates beautifully into the warm marshmallow base. Milk chocolate provides a sweet, creamy flavor that perfectly complements the soft marshmallows, making for a truly comforting treat. However, if you prefer a less sweet, more intense chocolate profile, feel free to substitute with semi-sweet or even dark chocolate chips or chopped bars.
- Rice Krispies Cereal (4-5 cups / 100-125 grams): This iconic puffed rice cereal provides the essential crispy crunch and light, airy structure that defines these treats. The exact amount of cereal you use depends entirely on your preference for gooeyness. Starting with 4 cups will result in a super gooey, stretchable treat that’s wonderfully soft. If you prefer a slightly firmer bar that holds its shape a bit more, gradually add the fifth cup until you reach your desired consistency. It’s crucial to use fresh, crispy cereal; stale cereal will unfortunately detract from the desired light and crunchy texture.
- Optional Chocolate Topping (6 ounces chopped chocolate and 1/2 teaspoon shortening or vegetable oil): For an extra special, visually appealing, and utterly decadent touch, a chocolate topping is highly recommended! You’ll need an additional 6 ounces of your favorite chopped chocolate (milk, semi-sweet, or dark work equally well) and a small amount of shortening or vegetable oil. The shortening is the secret ingredient here; it helps create a beautifully smooth, glossy, and slightly softer chocolate layer that won’t crack too aggressively when you slice the bars, ensuring both stunning presentation and an easy, enjoyable bite.
Crafting Your Perfect Chocolate Rice Krispie Treats: A Detailed Step-by-Step Guide
Making these decadent chocolate cereal treats is surprisingly simple and comes together with remarkable speed. Follow these detailed steps meticulously to ensure the best results: perfectly gooey, richly chocolatey bars every time.
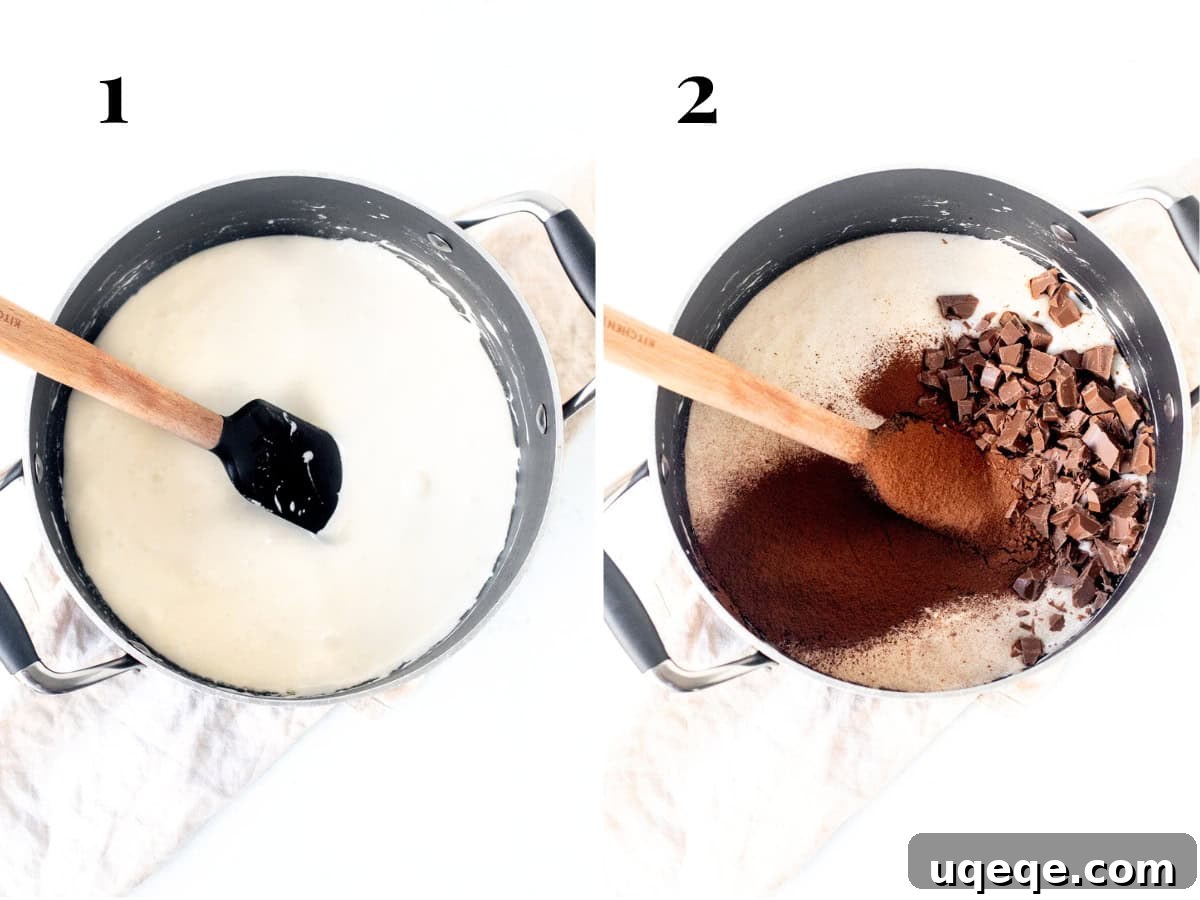
- Melt the Marshmallows and Butter with Utmost Care. Begin by combining 6 tablespoons of unsalted butter with the entire 10-oz bag of mini marshmallows in a large, heavy-bottomed saucepan. Place the pot over very low heat. This is perhaps the most critical stage: your burner must be set to the absolute lowest heat setting. Gently and continuously stir the mixture with a sturdy spatula or wooden spoon as the butter melts and the marshmallows slowly begin to soften and deflate. Patience is paramount here; rushing this step by using high heat will inevitably lead to burnt marshmallows, which results in a tough, incredibly unappetizing texture and a bitter, unpleasant taste. Continue stirring diligently until the mixture is mostly smooth, creamy, and free of large marshmallow lumps.
- Infuse with Rich Chocolate & Cocoa for Deep Flavor. Once your butter and marshmallow mixture is nearly fully melted and smooth, it’s time to introduce the powerful chocolate elements. Carefully add 3 tablespoons of unsweetened cocoa powder and the 4 ounces of finely chopped milk chocolate (or your chosen chocolate chips) into the pot. Continue stirring gently over the same low heat until all the chocolate has completely melted and is fully incorporated into the marshmallow base, creating a truly rich, uniform, and luscious chocolate marshmallow mixture. Maintain vigilance during this step: if you notice the chocolate beginning to look grainy, lumpy, or “seized” (where the fats separate), immediately remove the pan from the heat. This is a clear indication that the chocolate is getting too hot and beginning to “bake” or burn. You can often salvage the mixture by stirring it off the heat until it cools slightly and smooths out, then return it to the lowest heat only if absolutely necessary.
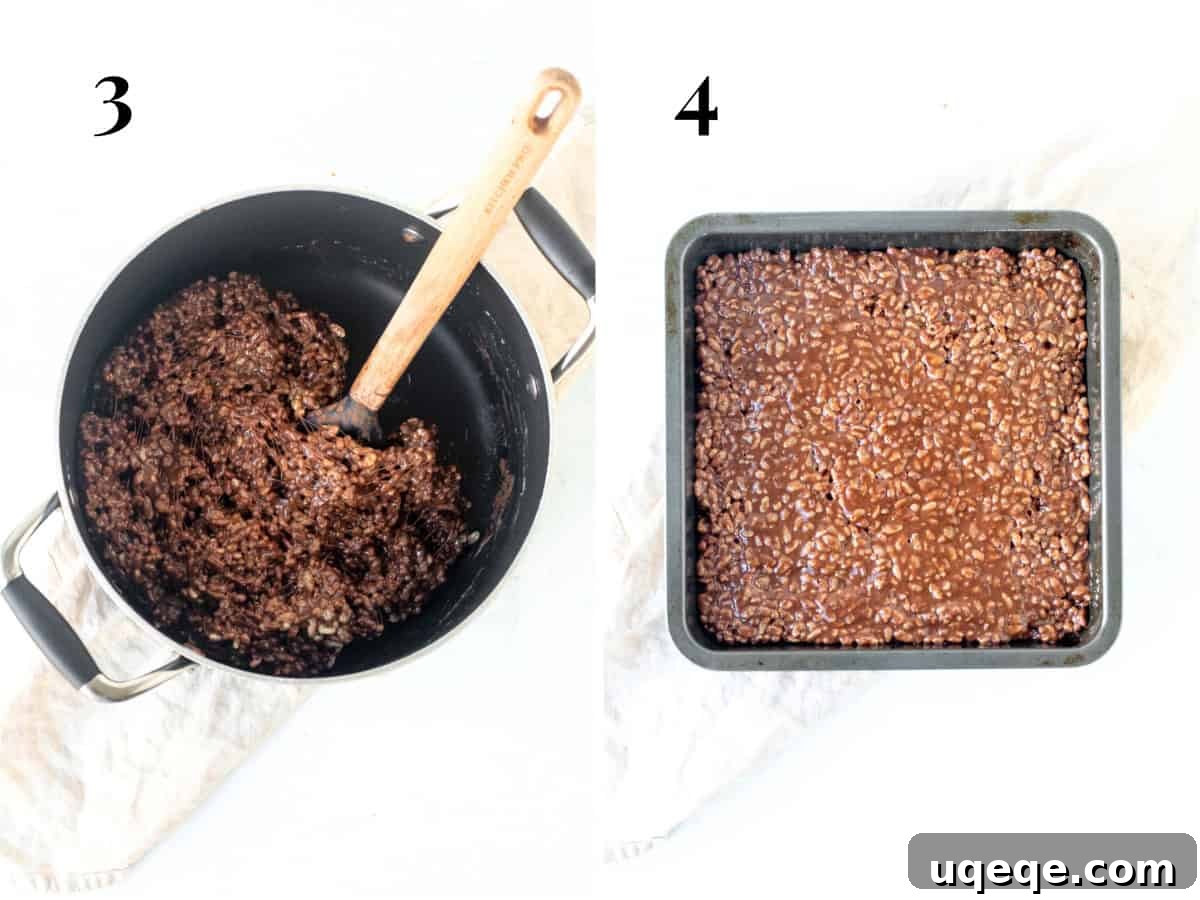
- Gently Fold in the Crispy Rice Cereal. As soon as your chocolate-marshmallow mixture is perfectly smooth, glossy, and vibrant, immediately turn off the burner. This stops the cooking process and preserves the gooiness. Without delay, add the Rice Krispies cereal to the pot. For a truly irresistible, super gooey treat, I highly recommend starting with 4 cups of cereal; this ratio allows for maximum marshmallow stretch and a delightfully soft chew. If you prefer a slightly firmer bar that holds its structure more, you can gradually add the fifth cup, mixing until just combined. Use your sturdy spatula or wooden spoon (preferably lightly coated with non-stick cooking spray to prevent sticking) to gently fold the cereal into the chocolate mixture. Avoid overmixing, as this can crush the delicate cereal and compromise its signature airy, crispy texture, leading to denser treats.
- Press into the Pan with a Feather-Light Touch. Prepare an 8×8 inch (20×20 cm) baking pan. You can lightly grease it with butter or non-stick cooking spray, or for the easiest removal, line it completely with parchment paper, leaving an overhang on the sides. Transfer the warm Rice Krispie treat mixture evenly into the prepared pan. Here’s a profoundly crucial tip for achieving the optimal, soft, and chewy texture: do NOT press the mixture too firmly into the pan. Instead, use lightly greased hands (a quick spray with non-stick cooking spray on your palms works wonders and prevents sticking) or a lightly greased rubber spatula to gently and evenly spread the mixture into the pan. Pressing too hard compacts the treats, squeezing out all the air from the marshmallows and cereal. This results in hard, dense, and incredibly difficult-to-slice bars, completely losing that desirable soft and gooey quality. A light, even pat is all you need.
Elevate Your Treats: The Decadent Chocolate Topping (Optional, but Highly Recommended!)
For those who truly believe there’s no such thing as too much chocolate, an extra layer of glossy, rich chocolate on top of your Rice Krispie treats is an absolute game-changer. This optional but highly recommended topping not only adds a beautiful visual appeal, making your treats look professionally finished, but also introduces an extra dimension of rich, smooth chocolate flavor and a delightful textural contrast. You have the freedom to customize it with your favorite type of chocolate – whether it’s the creamy sweetness of milk chocolate, the balanced richness of semi-sweet, or the intense depth of dark chocolate. I often find myself using a combination of milk and dark chocolate, depending on what I have available, which offers a lovely complexity that appeals to a wide range of palates. To prepare this exquisite topping, follow these simple steps:
- Prepare the Chocolate: Finely chop 6 ounces of your chosen chocolate. Placing it in a heatproof bowl is ideal for the melting process.
- Melt the Chocolate Carefully: The safest and most reliable method is using a double boiler. Place your heatproof bowl over a saucepan containing about an inch or two of gently simmering water, ensuring that the bottom of the bowl does not directly touch the water. Stir the chocolate continuously until it melts into a smooth, luscious consistency. Alternatively, you can melt the chocolate in a microwave: heat on medium power in 30-45 second intervals, stirring thoroughly after each interval, until it is completely smooth. It is crucial to avoid using high power in the microwave, as chocolate can burn very easily and quickly, resulting in a gritty, unusable topping.
- Add Shortening for a Perfect Sheen: Once the chocolate is completely melted and smooth, stir in ½ teaspoon of shortening or vegetable oil. This small addition is a key secret for a beautifully smooth, shiny finish on your chocolate layer. More importantly, it helps the chocolate topping set to a slightly softer consistency, preventing it from cracking aggressively or shattering when you slice the bars later. This ensures both a stunning presentation and a clean, enjoyable bite.
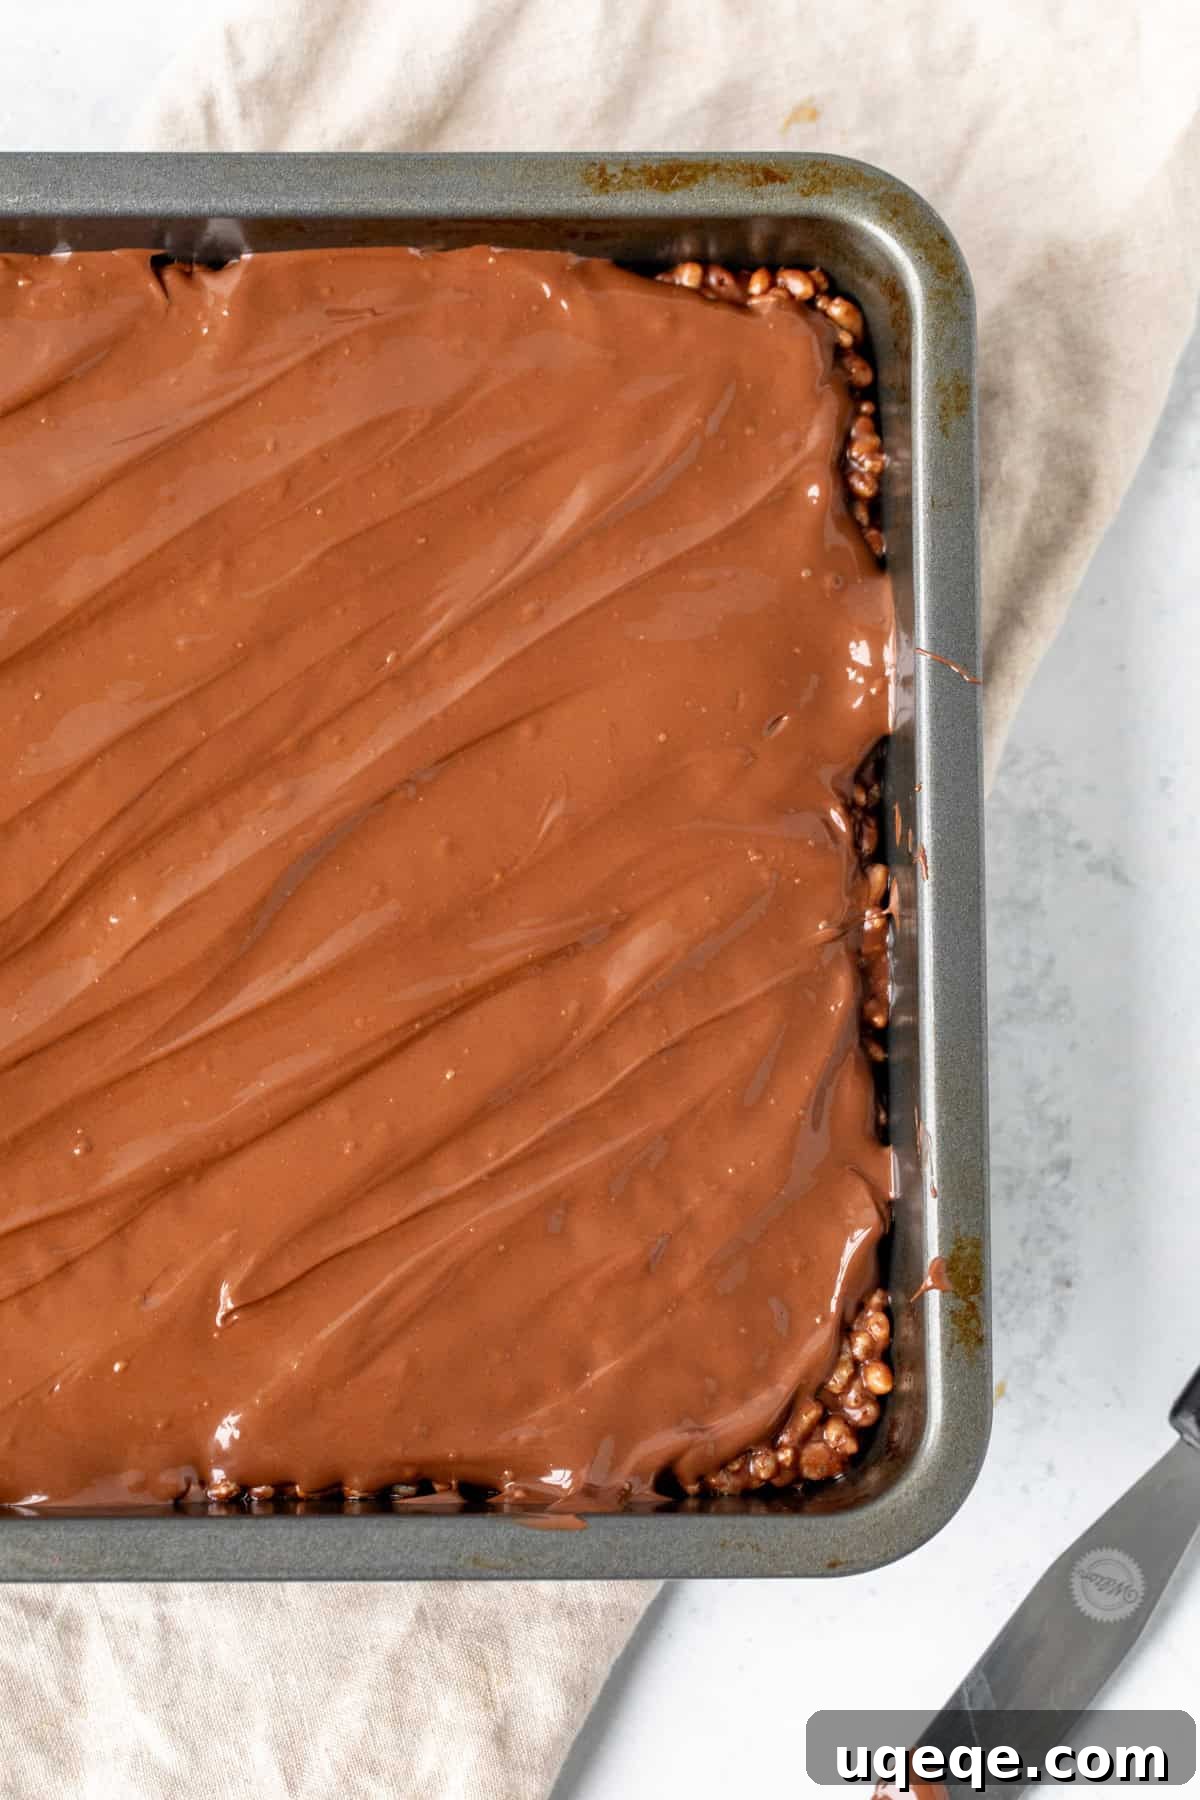
- Apply and Score the Topping: Pour the melted chocolate evenly over the pressed Rice Krispie treats in the pan. Use an offset spatula or the back of a spoon to gently spread and smooth the chocolate into an even layer, reaching all edges.
- The Slicing Secret: Allow the chocolate topping to set partially at room temperature, until it is about 60-70% firm but still slightly yielding. At this crucial stage, use a thin, sharp knife to gently score lines into the chocolate surface where you intend to cut your squares. This scoring acts as a guide and makes slicing through the fully set chocolate much easier and helps achieve clean, precise lines, preventing unsightly cracks and jagged edges. Once the chocolate topping is completely firm and set, use a sharp knife to cut down firmly along your scored lines.
While the chocolate topping is undeniably delicious and adds a touch of elegance, if you prefer the classic pull-apart, delightfully sticky nature of traditional Rice Krispie treats, you might consider omitting this layer. The bars will still be incredibly flavorful and gooey without it, offering a different, equally delightful experience that focuses purely on the marshmallow-cereal base.
Expert Tips and Tricks for Flawless Chocolate Rice Krispie Treats Every Time
Achieving the perfect batch of chocolate Rice Krispie treats is a simple feat when armed with a few insider tips and tricks. These pieces of advice will help you avoid common pitfalls and ensure your treats are always wonderfully gooey, perfectly crispy, and utterly delicious:
- Steer Clear of the Microwave for Melting: While some expedited recipes suggest melting marshmallows in the microwave, I strongly advise against this method for our chocolate-infused version. Microwaves tend to heat ingredients unevenly and too rapidly, which significantly increases the risk of burning the marshmallows or, more critically, causing the chocolate to seize or scorch. Sticking to the stovetop over consistently low heat gives you far greater control over the melting process, resulting in a smooth, uniform base without any unpleasant surprises.
- Scale Up Your Recipe with Ease: These treats are always a crowd-pleaser, making them perfect for sharing! You can effortlessly double this recipe to make a larger batch, ideal for a 9×13 inch pan. When scaling up, just ensure you use a very large, sturdy saucepan or even a Dutch oven to comfortably accommodate the increased volume of ingredients, allowing for proper stirring and melting.
- Prevent Sticky Situations with a Simple Spray: The marshmallow mixture is notoriously sticky, which can make mixing in the cereal a bit challenging. To combat this, lightly spray your spatula or wooden spoon with non-stick cooking spray before you begin folding the cereal into the chocolate-marshmallow mixture. This incredibly simple trick prevents the sticky mixture from clinging excessively to your utensil, making the mixing process much easier, cleaner, and more efficient.
- The Golden Rule for Gooeyness: Don’t Over-Press! This is perhaps the single most crucial tip for achieving that signature soft, chewy, and gooey texture. When you transfer the warm Rice Krispie mixture into the prepared pan, resist every urge to press it down too firmly. Instead, use lightly greased hands (a quick spray with non-stick cooking spray on your palms works wonders) or a lightly greased piece of parchment paper to gently and evenly spread and pat the mixture into an even layer. Over-pressing compresses the treats, squeezing out all the air from the marshmallows and cereal. This invariably results in hard, dense, and difficult-to-chew bars instead of the deliciously soft, pliable, and gooey treats everyone loves. A light, even touch is all that’s needed for perfection.
- Optimal Storage is Absolutely Key: To maintain their pristine gooey texture and freshness, always store your finished chocolate Rice Krispie treats in an airtight container at room temperature. They will remain wonderfully delicious for up to 3 to 5 days. A critical piece of advice: never store these treats in the refrigerator! The cold temperature causes the marshmallows and cereal to become excessively hard and chewy, completely altering their delightful texture and making them far less enjoyable. If you need to store them for a longer period, freezing is an excellent option; wrap individual bars tightly in plastic wrap, then place them in an airtight freezer-safe container or bag for up to 3 months. Thaw them at room temperature for an hour or two before serving for the best texture.
- Quality Chocolate Elevates Flavor: For the most exquisite flavor, it’s worth investing in good quality chocolate for both the internal mixture and the optional topping. This doesn’t necessarily mean buying the most expensive brand, but aim for chocolate that has a pleasant taste on its own and melts smoothly. Avoid overly waxy or artificial-tasting chocolate, as it can negatively impact the overall enjoyment of your treats.
- Customize Your Cereal Crunch: While classic Rice Krispies are traditional and beloved, don’t hesitate to experiment with other puffed cereals to create unique variations. For an extra chocolatey punch, consider using Cocoa Krispies. Alternatively, cornflakes can offer a different, slightly heartier texture, or you could even try a mix of cereals for a custom crunch.
Frequently Asked Questions About Homemade Chocolate Rice Krispie Treats
Here are answers to some common questions and concerns about making and enjoying these delightful chocolate-infused Rice Krispie treats, ensuring you have all the information you need for success.
- Can I use large marshmallows instead of mini marshmallows in this recipe?
- While it’s possible to use large marshmallows, mini marshmallows are highly recommended for this recipe. Mini marshmallows melt much more quickly and evenly, which is crucial for achieving that perfectly smooth, gooey base without overcooking or burning them. If you only have large marshmallows available, you can cut them into smaller pieces to help them melt more uniformly and speed up the process. Be prepared for a slightly longer melting time and ensure constant stirring.
- What kind of chocolate is best for both the base and the topping?
- For the base mixture, milk chocolate chips or finely chopped semi-sweet chocolate bars work wonderfully, providing a classic, sweet chocolate flavor that blends beautifully with the marshmallows. For the optional topping, any good quality chocolate you enjoy – be it creamy milk chocolate, balanced semi-sweet, or intensely rich dark chocolate – will be delicious. The shortening added to the topping helps ensure a smooth, slightly softer set, allowing you to choose based purely on your personal chocolate preference!
- How do I prevent my Rice Krispie treats from becoming hard and dense?
- The key to achieving wonderfully soft, chewy, and gooey treats lies in two main factors: low heat during the melting process and gentle handling when pressing the mixture. First, avoid overcooking the marshmallows; melt them over very low heat, stirring constantly until just smooth. Second, and critically, do not press the cereal mixture too firmly into the pan. A light, even pat is all that’s needed. Finally, always store them at room temperature in an airtight container; refrigeration is the enemy of gooey Rice Krispie treats, as the cold temperature makes them excessively hard.
- Can I add other mix-ins to these chocolate Rice Krispie treats?
- Absolutely! This recipe is incredibly versatile and lends itself beautifully to creative add-ins. Feel free to personalize your treats by incorporating elements like mini chocolate chips, colorful sprinkles, chopped nuts (such as pecans, walnuts, or almonds), small candies, or even a delightful swirl of peanut butter (added after the marshmallow mixture is off the heat but before the cereal). For best distribution, add your chosen mix-ins along with the Rice Krispies cereal.
- How long do these homemade chocolate Rice Krispie treats last, and what’s the best way to store them?
- When stored correctly in an airtight container at room temperature, these chocolate Rice Krispie treats will stay fresh, soft, and perfectly gooey for up to 3 to 5 days. As mentioned, refrigeration is not recommended as it will cause them to harden significantly. For longer storage, you can freeze individual bars: wrap them tightly in plastic wrap, then place them in an airtight freezer-safe container or bag. They will keep well in the freezer for up to 3 months. Thaw them at room temperature for an hour or two before serving for the best texture.
- Why did my chocolate become grainy or seize during melting?
- Chocolate can become grainy or “seize” (turn into a thick, crumbly paste) if it gets too hot too quickly, or if even a tiny amount of water or steam comes into contact with it during the melting process. To prevent this, always melt chocolate over very low heat, stirring constantly. If using a double boiler, ensure the bottom of your chocolate-containing bowl does not touch the simmering water below, and be careful that no steam or water droplets enter the chocolate. If your chocolate does seize, sometimes stirring in a teaspoon of warm vegetable oil or shortening (not water!) can help smooth it out, but prevention through careful, low-heat melting is always the best approach.
Discover More Irresistible No-Bake Cereal Treats!
If you’ve fallen in love with the effortless simplicity and mouth-watering deliciousness of these chocolate Rice Krispie treats, you’re in for a delightful journey! The expansive world of no-bake cereal bars is brimming with possibilities for quick, satisfying, and utterly fun desserts. They’re perfect for impromptu sweet cravings, convenient lunchbox fillers, or whenever you need a fantastic dessert fix without the fuss of turning on the oven. Here are a few other fantastic no-bake cereal recipes from Just So Tasty that you simply must try, each offering a unique twist on the classic concept:
- Peanut Butter Rice Krispie Treats: A truly beloved and timeless combination, these treats expertly merge the chewy, crispy texture of Rice Krispies with the creamy, satisfying, and irresistible salty-sweet goodness of peanut butter. They are incredibly filling and often elevated with a decadent chocolate drizzle on top for an extra layer of flavor and visual appeal, creating a treat that’s hard to resist for peanut butter and chocolate enthusiasts alike.
- Tiger Bars (Butterscotch Rice Krispie Treats): Venture beyond traditional chocolate with these unique and highly addictive cereal bars, where classic Rice Krispies meet the distinct, comforting, and caramel-like sweetness of butterscotch chips. Their rich butterscotch flavor offers a delightful alternative to chocolate, providing a warm, inviting sweetness that is truly irresistible and a fantastic option for those seeking something a little different.
- Strawberry Rice Krispie Treats: For a fruity, fun, and vibrantly colorful twist, these delightful treats are beautifully infused with natural strawberry flavor, often resulting in a charming pink hue. They offer a refreshing and playful option, perfect for springtime gatherings, summer picnics, or any occasion that calls for a cheerful pop of color and a burst of fruity sweetness. These are especially popular with kids and those who enjoy lighter, fruit-flavored desserts.
Chocolate Rice Krispie Treats
By: Fiona Dowling
These chocolate Rice Krispie treats are perfectly gooey with a delicious chocolate flavor and tons of gooey marshmallows. Top them with an extra layer of chocolate for the perfect cereal treat. These are so easy to make and the perfect twist on classic Rice Krispie treats.
To Firm: 1 hr
Total: 1 hr 15 mins
Servings: 16 squares
Rate Recipe
Print Recipe
Equipment
- 8×8 inch (20×20 cm) pan
- Large saucepan
- Spatula or wooden spoon
- Heatproof bowl (for topping)
Ingredients
Chocolate Rice Krispie Treats
- 6 tablespoons unsalted butter (84 grams)
- 10 oz bag mini marshmallows (283 grams), about 5 cups
- 3 tablespoons cocoa powder (22 grams)
- 4 oz milk chocolate, chopped* (112 grams), or 2/3 cup chocolate chips
- 4-5 cups Rice Krispies* (100-125 grams)
Topping (Optional)
- 6 ounces chopped chocolate (84 grams), milk, semi-sweet or dark – your favorite, or about 1 cup chocolate chips
- 1/2 teaspoon shortening, or vegetable oil
Instructions
- Add the butter and marshmallows to a large saucepan over low heat. Gently stir the mixture as the marshmallows and butter begin to melt. Stir constantly to avoid burning.
- Once the mixture is almost melted, stir in the cocoa and 4 ounces chopped chocolate. Keep stirring until the chocolate has melted. If you notice the chocolate looking at all grainy, remove from the heat. If the chocolate gets too hot it will bake and become grainy or burn.
- Once everything is melted, turn off the burner and stir in the cereal. I typically start with 4 cups, and then mix in up to 1 more cup depending on desired gooiness.
- Lightly grease an 8×8 inch (20×20 cm) pan. Turn the cereal into the greased pan and gently press it down using lightly greased hands (I spray them with non-stick cooking spray) or a lightly greased rubber spatula.
- For the topping (optional): Finely chop the 6 ounces of chocolate and place in a heatproof bowl. Microwave for 45-seconds on medium power, and stir. Repeat the process until smooth. Do not use high power, as the chocolate will burn. Alternatively, the chocolate can be melted in a double boiler over low heat – ensure that the bottom of the bowl containing your chocolate does not touch the gently simmering water underneath. Once melted, stir in the shortening.
- Pour the chocolate over the Rice Krispie treats and smooth into an even layer.
- Once the chocolate looks about 60-70% set, use a thin knife to draw into the chocolate where you plan to slice the bars. This makes the bars easier to slice later. Once the chocolate topping is set, slice the bars with a sharp knife, cutting down where you scored the chocolate.
Notes
- Chocolate: Feel free to use milk chocolate or semi-sweet chocolate for these bars. For a richer flavor, dark chocolate can also be used.
- Butter: Salted or unsalted butter works well. You can also substitute butter with margarine for this recipe.
- Marshmallows: A 10-ounce bag of mini marshmallows is roughly equivalent to about 5 cups.
- Storage: Store these delicious treats in an airtight container at room temperature for up to 5 days to maintain their optimal gooey texture. Avoid refrigeration, as it will cause them to harden.
- Nutrition: The provided nutritional details are an estimate only and are based on 1 square with chocolate topping, assuming the pan is sliced into 16 uniform pieces.
Nutrition
Calories: 215kcal, Carbohydrates: 32g, Protein: 2g, Fat: 11g, Saturated Fat: 6g, Polyunsaturated Fat: 0.4g, Monounsaturated Fat: 3g, Trans Fat: 0.2g, Cholesterol: 11mg, Sodium: 55mg, Potassium: 81mg, Fiber: 1g, Sugar: 20g, Vitamin A: 597IU, Vitamin C: 4mg, Calcium: 8mg, Iron: 3mg
We hope you thoroughly enjoy creating and devouring these ultimate chocolate Rice Krispie treats! They are truly a delightful experience that brings joy with every gooey, chocolatey bite. Don’t forget to share your creations and let us know what you think. Happy treating!