
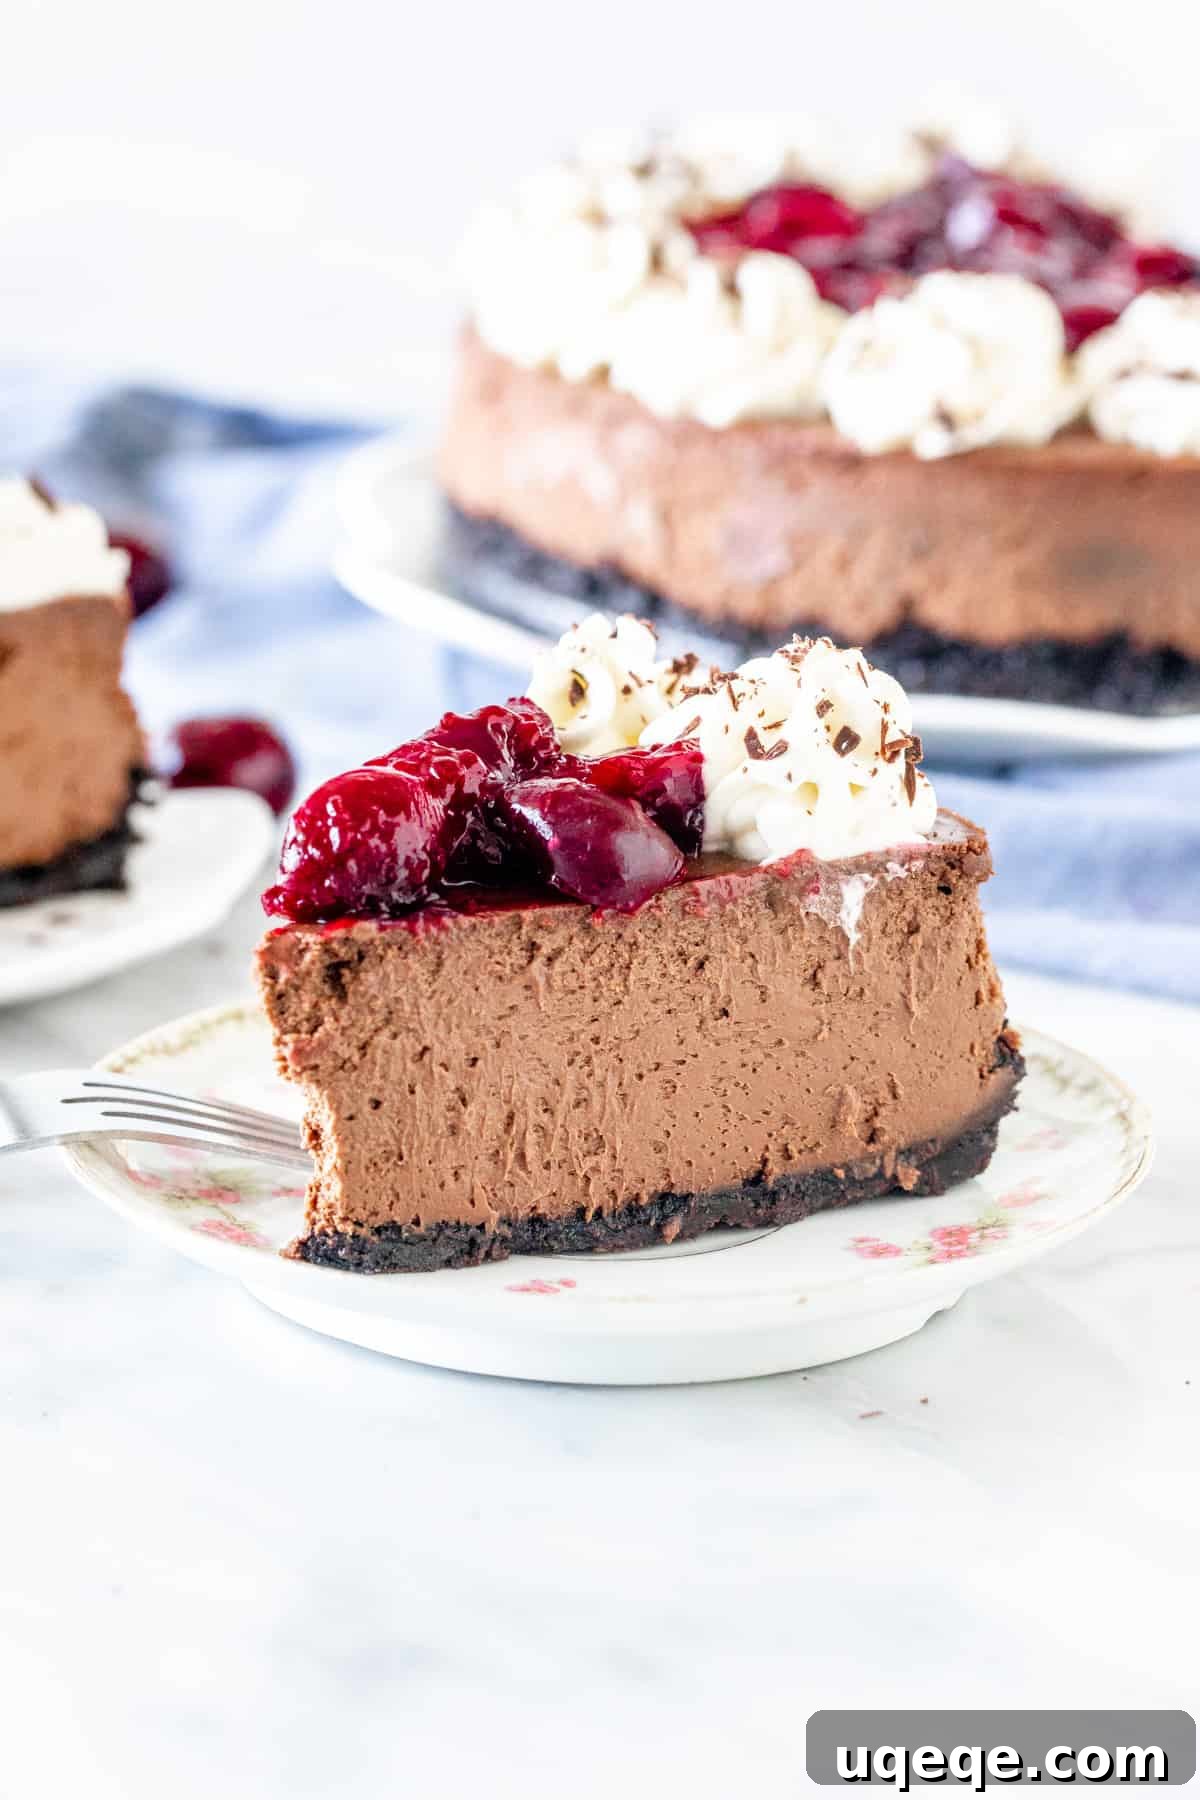
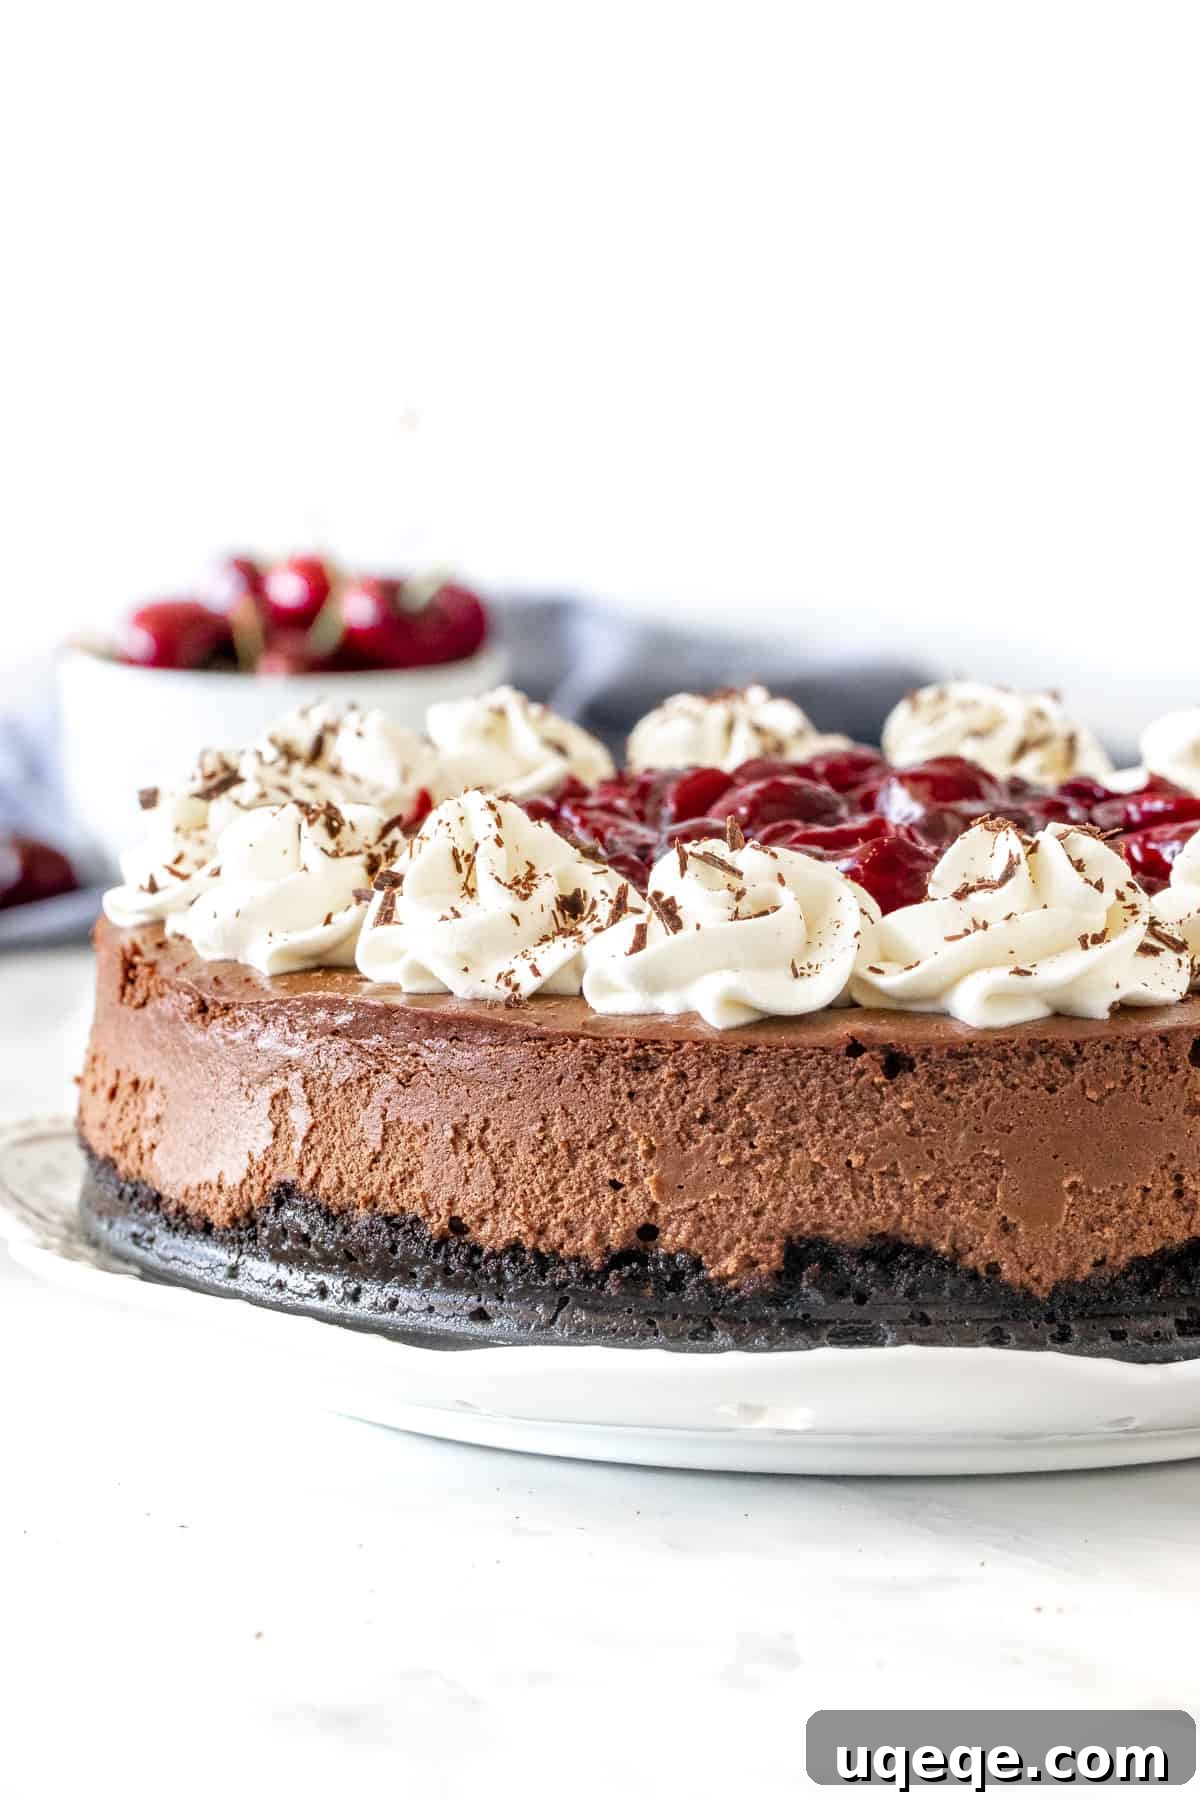
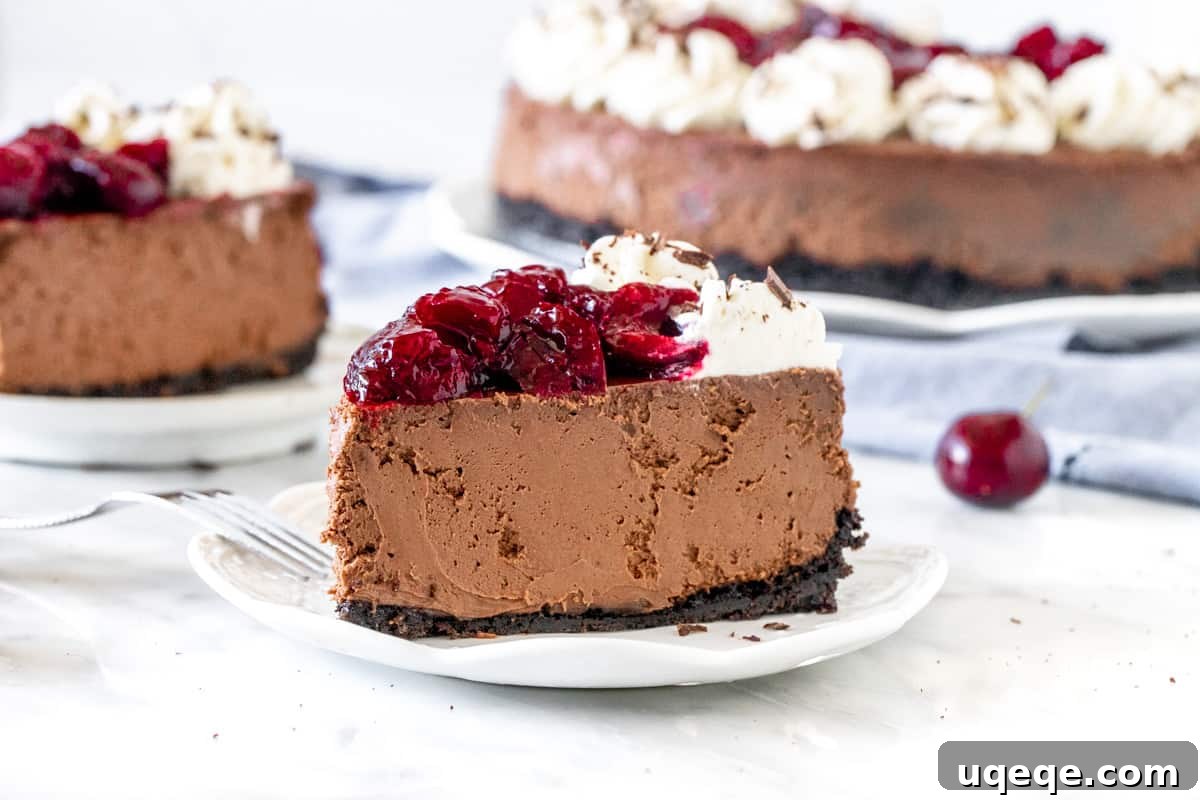
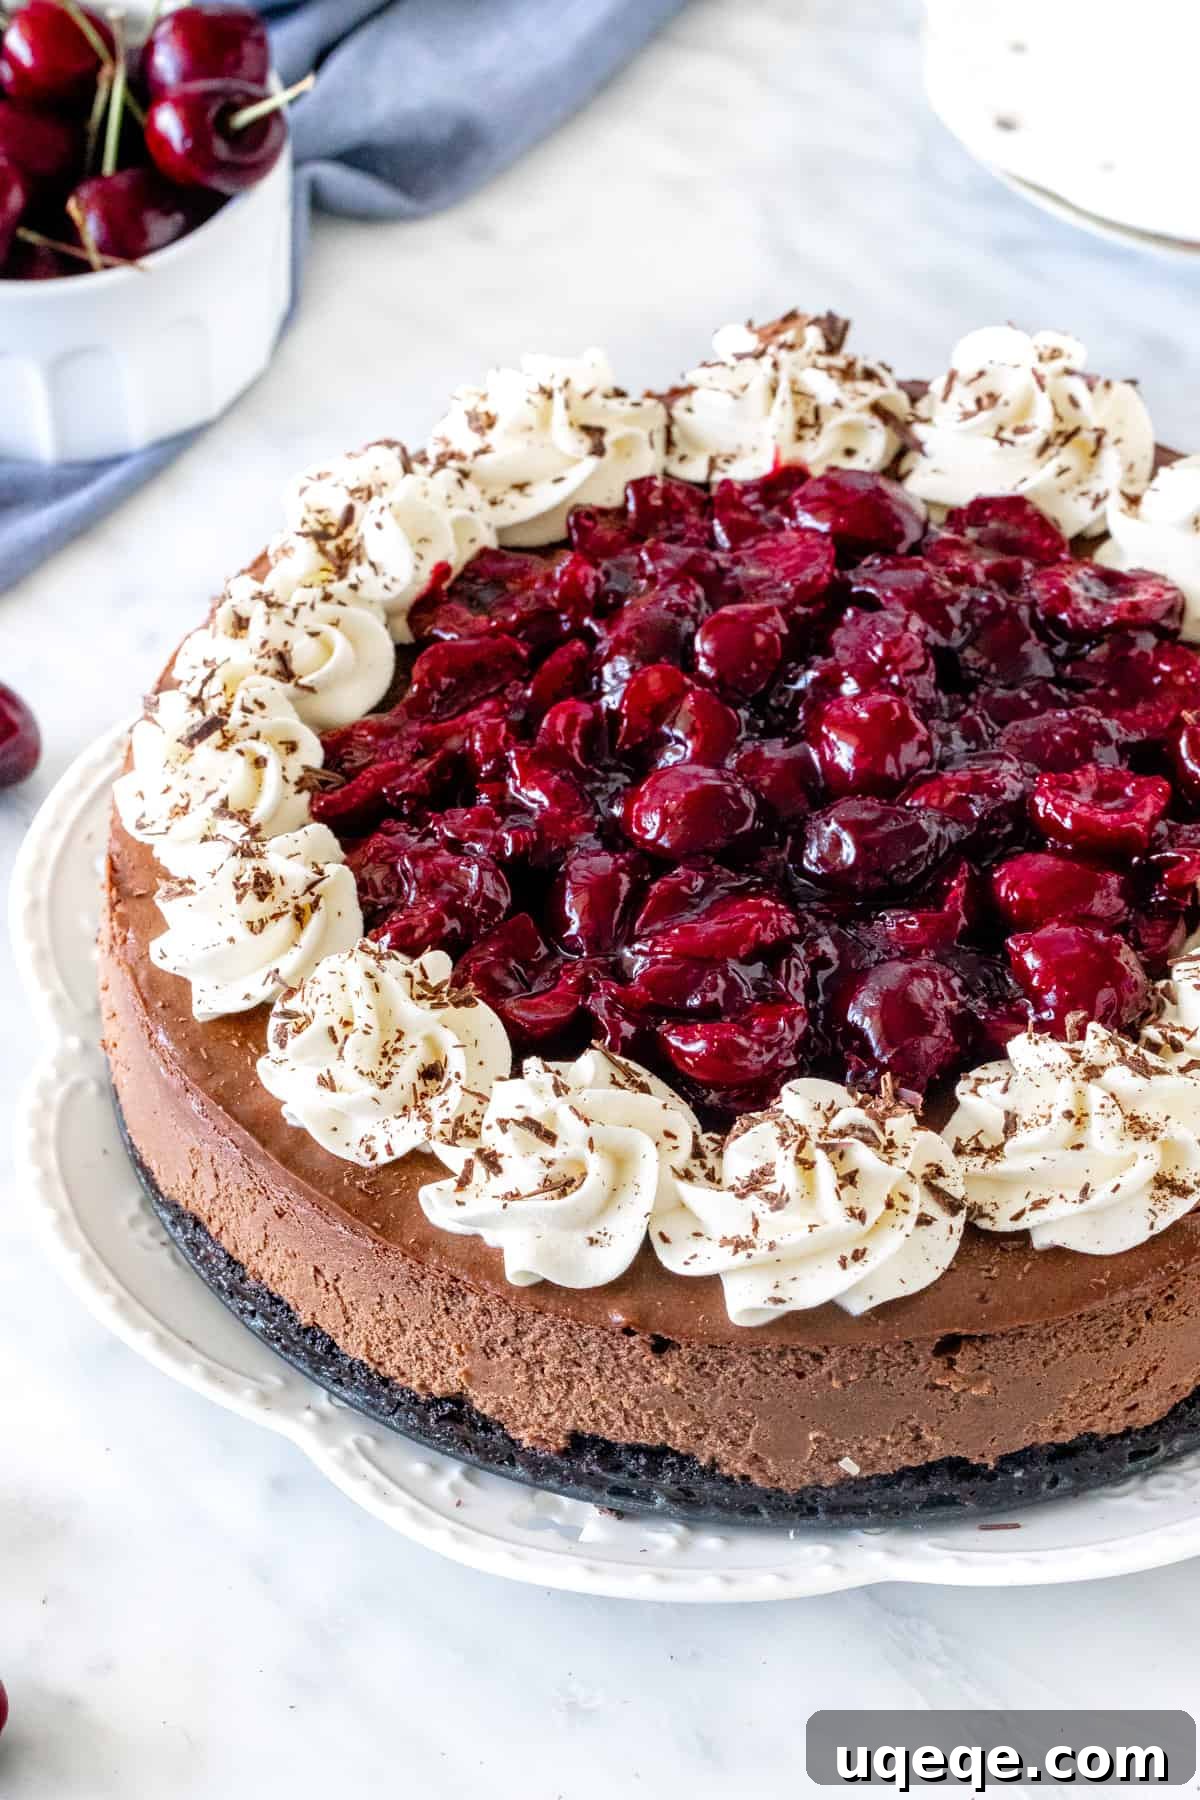
This stunning Black Forest Cheesecake elevates a classic dessert to new heights of indulgence. Imagine a thick, crunchy Oreo cookie crust cradling an unbelievably creamy, tangy chocolate cheesecake. This masterpiece is then generously crowned with a vibrant fresh cherry topping and adorned with delicate rosettes of sweetened whipped cream. It’s truly a showstopper, boasting a sophisticated flavor profile and an elegant presentation that makes it absolutely perfect for a dinner party, holiday gathering, or any special event where you want to impress.
The Ultimate Black Forest Cheesecake: A Decadent Twist on a Classic
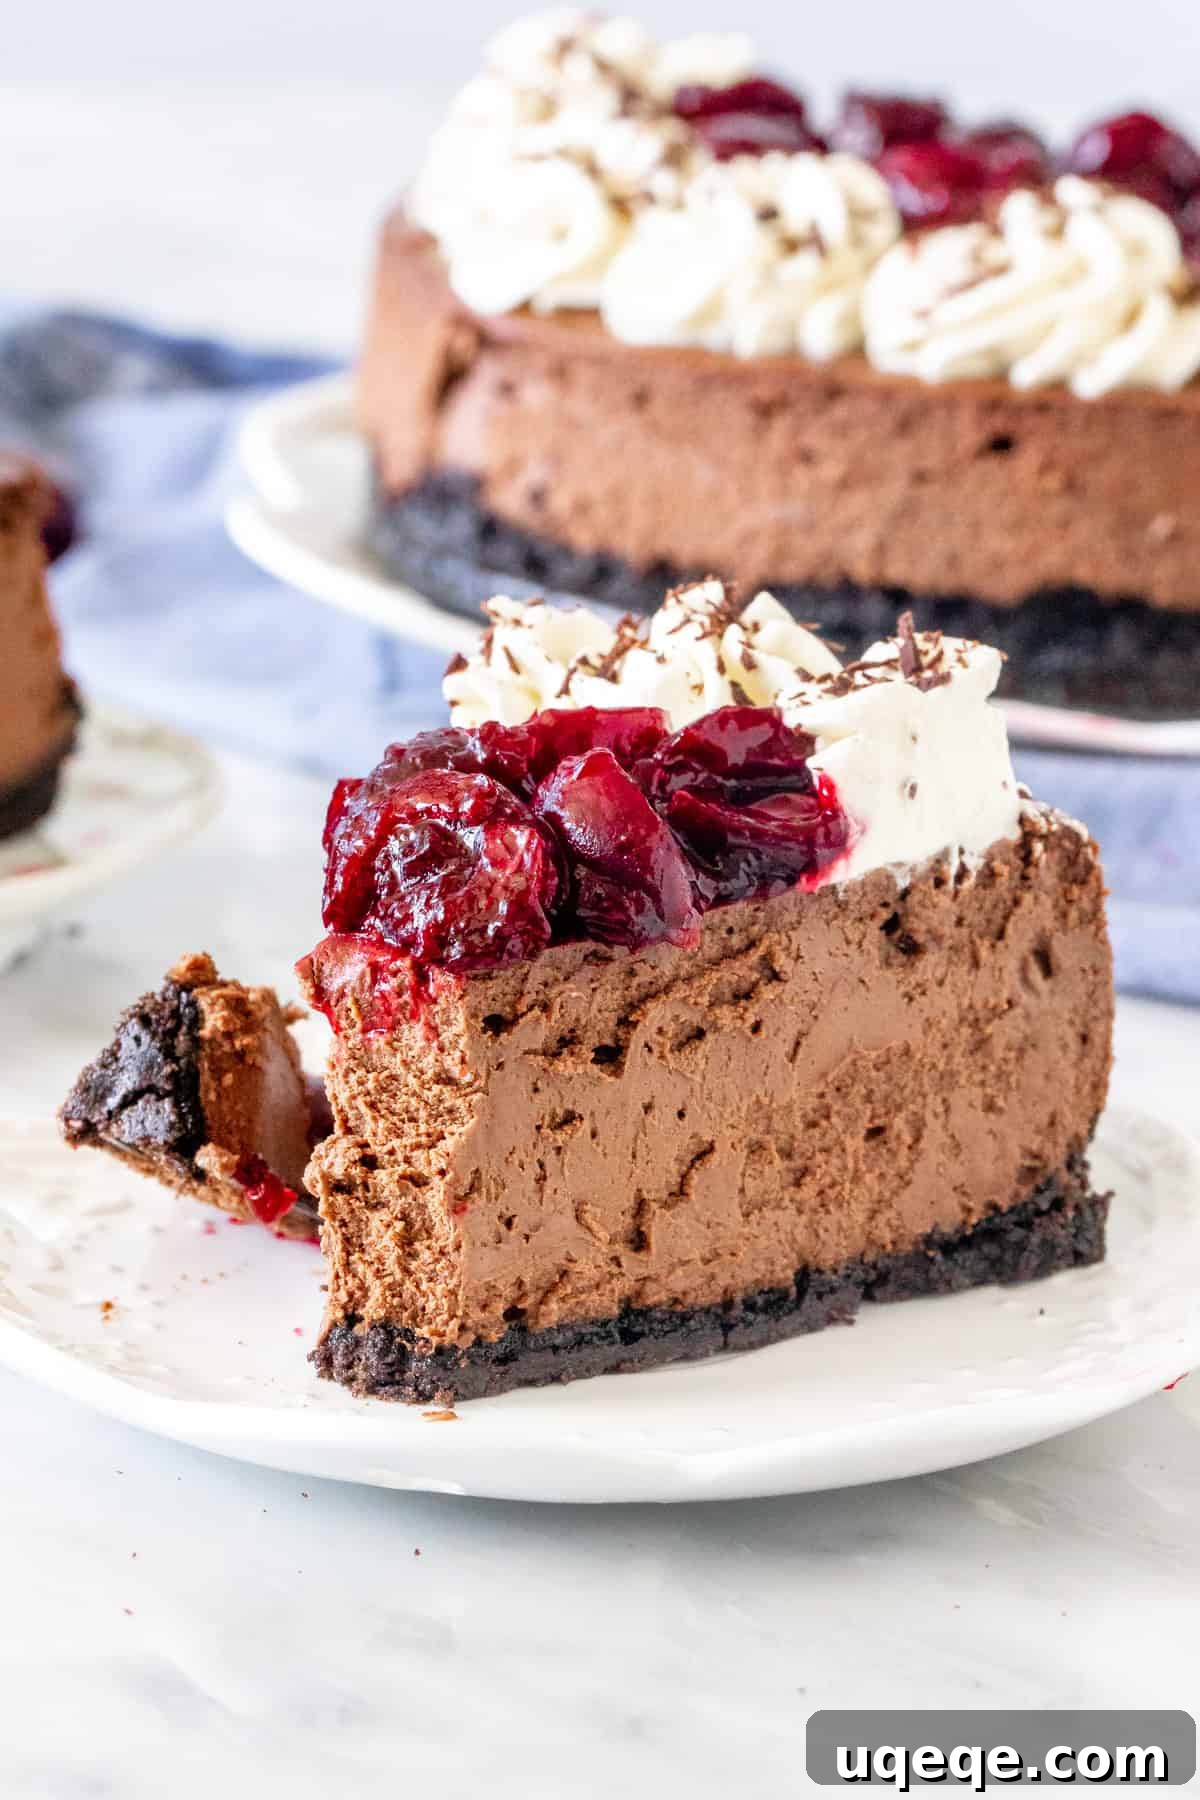
If you’re a fan of the traditional Black Forest cake, prepare to have your expectations surpassed. This Black Forest Cheesecake takes all the beloved flavors of the German classic – rich chocolate, sweet cherries, and light whipped cream – and transforms them into a luxurious cheesecake experience. Instead of the typical chocolate cake layers, this recipe features an intensely flavorful, lusciously smooth chocolate cheesecake that provides a delightful tangy contrast to the sweetness of the cherries and cream. Each bite is a symphony of textures and tastes, from the crisp crust to the velvety filling and the burst of fresh fruit.
This recipe is designed for those who appreciate gourmet desserts without overly complicated steps. While it requires some patience for chilling, the hands-on preparation is straightforward, leading to a truly rewarding result. You’ll only need a small slice to feel completely satisfied, as its richness and depth of flavor are truly unparalleled. The marriage of decadent chocolate cheesecake with bright, juicy cherries creates a harmonious balance that will leave a lasting impression on anyone lucky enough to try it.
Why You’ll Fall in Love with This Black Forest Cheesecake
This isn’t just any cheesecake; it’s an experience. Here’s a closer look at what makes this Black Forest Cheesecake so irresistibly delicious and a must-try for any dessert enthusiast:
- Irresistible Oreo Cookie Crust: The foundation of this cheesecake is a robust and crunchy crust made from crushed Oreo cookies. This provides a delightful texture contrast to the creamy filling and adds an extra layer of chocolatey goodness.
- Luxuriously Smooth Chocolate Cheesecake: The heart of this dessert is a rich, dense, and incredibly creamy chocolate cheesecake. Made with high-quality dark chocolate and a hint of cocoa, it delivers an intense chocolate flavor that is both deep and satisfying.
- Vibrant Fresh Cherry Topping: No Black Forest dessert is complete without cherries! This recipe features a homemade cherry compote made from fresh, sweet cherries, gently cooked with sugar and lemon juice. The tartness of the cherries beautifully cuts through the richness of the chocolate.
- Elegant Whipped Cream & Chocolate Shavings: A crown of delicate, sweetened whipped cream rosettes encircles the cherry topping, adding a light, airy finish. A sprinkle of chocolate shavings provides a sophisticated touch and enhances the visual appeal.
- A Showstopper Dessert: Beyond its incredible taste, this cheesecake is visually stunning. It’s guaranteed to draw admiring glances and makes for an unforgettable centerpiece at any celebratory meal.
Crafting Your Decadent Black Forest Cheesecake: A Step-by-Step Guide
Creating this magnificent Black Forest Cheesecake is a rewarding process. Follow these detailed steps to ensure a flawless and delicious outcome.
The Perfect Oreo Cookie Crust
We begin with the foundation: a sturdy and flavorful crust. For this, you’ll need about 24 Oreo cookies, including their creamy filling. Crush these cookies thoroughly into fine crumbs. A food processor makes this task quick and easy, but if you don’t have one, placing the cookies in a freezer bag and crushing them with a rolling pin works just as well. Once you have your fine crumbs, mix them with a small amount of melted unsalted butter. This buttery mixture is then pressed firmly into the bottom of a 9-inch (23 cm) springform pan, extending slightly up the sides to create a small lip. Baking the crust on its own for 8-10 minutes is a crucial step that helps to set it, making it wonderfully crunchy and preventing it from becoming soggy when the filling is added.
Creating the Creamy Chocolate Cheesecake Filling
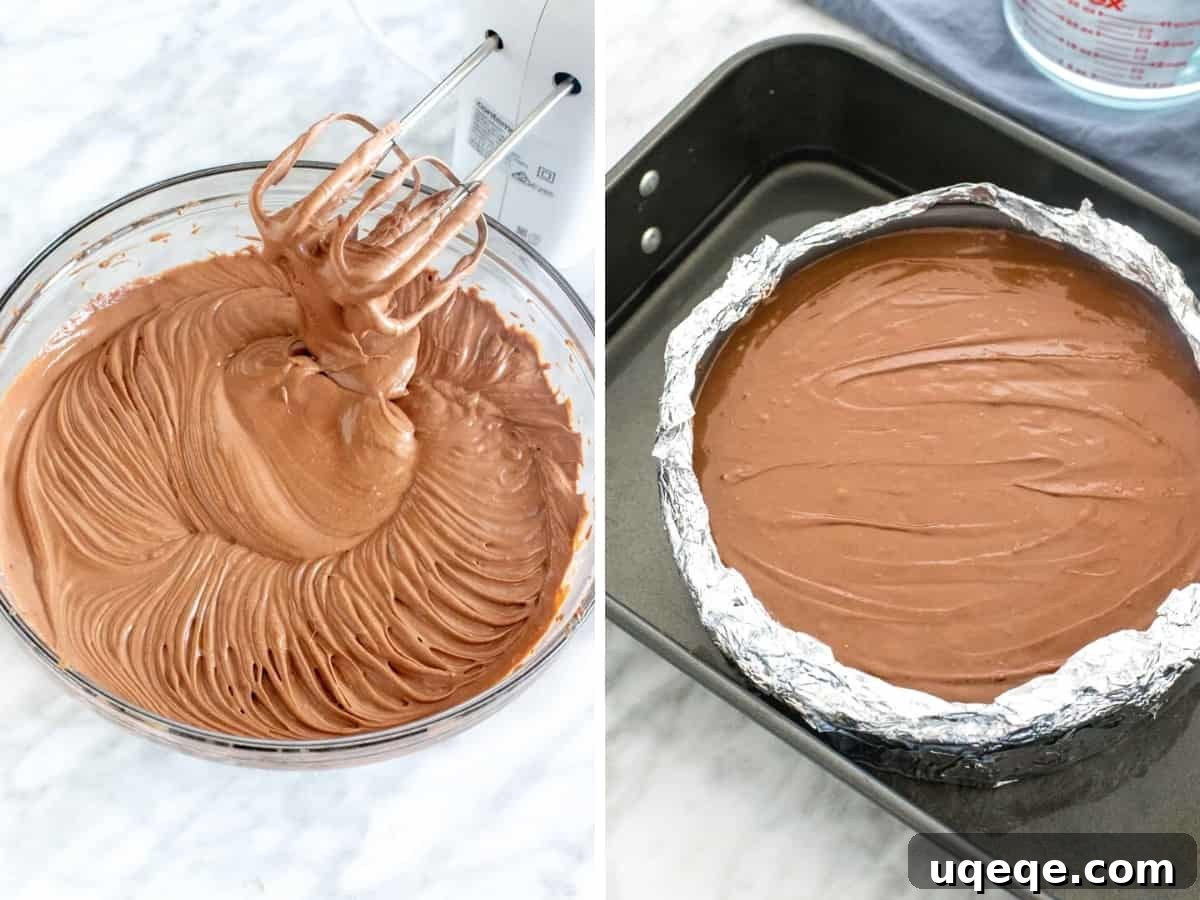
Despite its luxurious taste, the cheesecake filling is surprisingly simple to prepare. The key to a smooth, lump-free filling is ensuring your dairy ingredients are at room temperature. Start by beating together full-fat cream cheese and granulated sugar until the mixture is light, fluffy, and completely smooth. Next, incorporate melted dark chocolate (preferably 50-70% cacao for a balanced richness). To deepen the chocolate flavor even further, we’ll dissolve a tablespoon of cocoa powder in a little hot water and mix it into the batter. This step intensifies the chocolate notes without adding extra sweetness. Finally, gently fold in sour cream, which adds a crucial tanginess and contributes to the cheesecake’s creamy texture, followed by the eggs, one at a time. Be careful not to overmix once the eggs are added; mix just until combined to prevent incorporating too much air, which can lead to cracks.
The Essential Water Bath Technique for Smooth Cheesecakes
This cheesecake recipe calls for baking in a water bath, a technique widely favored by bakers for achieving incredibly smooth, crack-free cheesecakes with a perfectly even texture. To prepare for the water bath, wrap the outside of your springform pan with several layers of heavy-duty tin foil, ensuring no water can seep in. This creates a protective barrier. Then, place the foiled springform pan into a larger roasting pan. Pour about 1/2 to 1 inch (1-2 cm) of hot water into the roasting pan around the springform pan. The water acts as insulation, providing a moist, gentle heat that prevents the edges of the cheesecake from baking faster than the center, minimizing temperature fluctuations, and ensuring a slow, even bake. This results in that signature silky, custard-like cheesecake texture we all love.
Crafting the Fresh Cherry Topping
Once your cheesecake has baked, slowly cooled, and thoroughly chilled in the refrigerator for at least 6 hours (or ideally overnight), it’s time for the crowning glory: the cherry topping. While you could opt for canned cherry pie filling to save time, I passionately recommend using fresh, sweet cherries for a truly superior flavor and texture. Begin by pitting the cherries – a cherry pitter is a fantastic tool for this, making the process quick and clean. Once pitted, slice the cherries in half. Combine them with a little granulated sugar and fresh lemon juice in a saucepan. Gently simmer this mixture until the cherries soften and release their beautiful juices. To achieve a slightly thickened, glossy compote consistency, mix cornstarch with a small amount of water to create a slurry, then stir it into the simmering cherries until the sauce thickens. This homemade topping is vibrant, bursting with natural cherry flavor, and perfectly complements the rich chocolate cheesecake.
The Final Flourish: Whipped Cream and Presentation
The final steps are all about presentation, transforming your delicious cheesecake into an edible work of art. Once the cheesecake is removed from the pan, prepare sweetened whipped cream by beating cold heavy cream with a touch of powdered sugar until firm peaks form. Transfer the whipped cream to a piping bag fitted with a star tip (a 1M Wilton tip is ideal for elegant rosettes). Pipe beautiful rosettes around the outer edge of the cheesecake, creating a lovely border. Then, carefully spoon the luscious cherry topping into the center of the cheesecake, filling the space within the whipped cream border. For an added touch of sophistication and a nod to the Black Forest theme, sprinkle a few delicate chocolate shavings over the whipped cream. This final assembly creates a stunning visual contrast and completes the Black Forest experience, making your cheesecake truly unforgettable.
Essential Baking Tips for Cheesecake Perfection
Baking a cheesecake can seem daunting, but with these expert tips, you’ll achieve perfect results every time.
- Room Temperature Ingredients are Key: This is arguably the most crucial tip for any cheesecake. Ensure your cream cheese, sour cream, and eggs are at room temperature before you begin mixing. Cold ingredients won’t emulsify properly, leading to a lumpy batter and a less smooth final texture. Plan ahead and take them out of the fridge at least 30 minutes to an hour before you start.
- Choose the Right Chocolate: For the cheesecake filling, I recommend using dark chocolate with a cacao percentage between 50% and 70%. This range provides a rich, deep chocolate flavor that isn’t overly sweet, balancing beautifully with the other ingredients. Avoid milk chocolate, which can make the cheesecake too sweet and less complex.
- Don’t Overmix the Batter: Once you’ve added the eggs, mix just until the batter is smooth and no streaks of egg remain. Overmixing incorporates too much air, which can cause the cheesecake to puff up significantly during baking and then collapse and crack as it cools.
- Recognizing When Your Cheesecake is Done: A perfectly baked cheesecake will still have a slight “wobble” in the very center when you gently nudge the pan. The edges should appear set, but the middle should jiggle like firm gelatin. It will continue to set as it cools.
- Slow Cooling is Crucial: Rapid changes in temperature are a cheesecake’s worst enemy, often leading to cracks. After baking, leave the cheesecake in the turned-off oven with the door slightly ajar for about an hour. Then, remove it from the water bath and cool completely on a wire rack at room temperature before chilling it in the fridge.
- Patience for Chilling: For the best flavor and firmest texture, this cheesecake requires at least 6 hours of chilling in the refrigerator, but overnight is even better. Chilling allows the flavors to meld and the cheesecake to fully set, making it easier to slice and more enjoyable to eat.
- Plan Ahead: Due to the extensive cooling and chilling time, it’s highly recommended to make this cheesecake the day before you plan to serve it. You can prepare the cherry topping the next day, right before assembly.
Frequently Asked Questions About Black Forest Cheesecake
- Can I use frozen cherries for the topping?
- Yes, you can use frozen cherries if fresh ones are not available. Thaw them first and drain any excess liquid before proceeding with the recipe. The cooking time might be slightly shorter as they are already softer.
- My cheesecake cracked! What went wrong?
- Cracks are usually caused by overbaking, overmixing, or sudden temperature changes. Ensure you don’t overbeat the eggs, don’t bake past the “slight wobble” stage, and allow the cheesecake to cool slowly according to the instructions.
- How do I store leftover cheesecake?
- Store any leftover Black Forest Cheesecake, covered loosely with plastic wrap or in an airtight container, in the refrigerator for up to 4 days. It tastes even better the next day!
- Can I freeze this cheesecake?
- Yes, this cheesecake freezes well. For best results, freeze the cheesecake (without the cherry topping and whipped cream) once it’s fully cooled and chilled. Wrap it tightly in several layers of plastic wrap, then a layer of aluminum foil. It can be frozen for up to 1 month. Thaw in the refrigerator overnight before adding the topping and serving.
- What’s the best way to slice a cheesecake cleanly?
- For clean slices, use a thin, sharp knife. Dip the knife in hot water and wipe it clean between each slice. This prevents sticking and ensures beautiful presentation.
Explore More Cherry & Chocolate Delights!
If you’re captivated by the irresistible pairing of cherries and chocolate, you’re in for a treat! Discover more delightful recipes that highlight this classic combination:
- Black Forest Brownies – All the flavors of Black Forest in a fudgy brownie.
- Cherry Almond Bars – A lighter, yet equally delicious, fresh cherry dessert.
- Cherry Crisp – A comforting and easy-to-make dessert showcasing fresh cherries.
- Maraschino Cherry Cake – A fun and festive cake for any occasion.
Black Forest Cheesecake
By: Fiona Dowling
This Black Forest Cheesecake features a thick Oreo cookie crust, creamy chocolate cheesecake, a luscious fresh cherry topping, and delicate whipped cream rosettes. It’s a truly decadent dessert perfect for any special occasion.
Equipment
- 9-inch (23 cm) springform pan
- Large roasting pan (big enough for the springform pan to fit inside)
- Tin foil
- Food processor (optional, for crushing cookies)
- Cherry pitter (optional, for pitting cherries)
- Piping bag with 1M Wilton tip (optional, for whipped cream rosettes)
Ingredients
Crust
- 24 Oreo cookies, wafers and filling
- 1/4 cup unsalted butter, melted
Chocolate Cheesecake Filling
- 10 ounces dark chocolate (285 grams), 50-70% cacao
- 24 ounces full-fat cream cheese (680 grams), brick-style, room temperature
- 1 1/4 cup granulated sugar (250 grams)
- 1 tablespoon cocoa powder
- 2 tablespoons hot water (30 ml)
- 3/4 cup sour cream (180 ml), (I used 18% MF), room temperature
- 4 large eggs, room temperature
- Boiling water, for the water bath
Cherry Topping
- 10 ounces fresh, sweet cherries (280 grams), pitted and halved
- 1 tablespoon granulated sugar
- 2 tablespoons fresh lemon juice (30 ml)
- 2 teaspoons cornstarch
- 2 tablespoons water (30 ml)
Whipping Cream
- 1/2 cup whipping cream (120 ml), cold
- 2 teaspoons powdered sugar
- Chocolate shavings, optional, for garnish
Instructions
- Preheat your oven to 325 F (160 C) degrees.
- Wrap the outside of a 9-inch (23-cm) springform pan with several layers of tin foil. Wrap at least 3 times to ensure no water seeps in during the water bath.
Oreo Crust
- Crush the Oreo cookies (wafers and filling) into fine crumbs using a food processor or by placing them in a freezer bag and crushing with a rolling pin.
- In a medium bowl, mix the cookie crumbs with the melted butter until well combined.
- Press the mixture evenly into the bottom of the prepared springform pan, creating a slight lip around the edges.
- Bake the crust in the preheated oven for 8 minutes. Remove from the oven and leave the oven turned on.
Cheesecake Filling
- Chop the dark chocolate into very fine pieces. Place in a heatproof bowl and microwave in 30-second intervals at medium power, stirring well after each interval, until completely smooth. Set aside to cool slightly.
- In a very large bowl, using an electric mixer, beat the room temperature cream cheese and granulated sugar until the mixture is light, fluffy, and completely smooth, with no lumps.
- Beat in the melted chocolate until fully incorporated. Stop the mixer and scrape down the sides and bottom of the bowl with a spatula.
- In a small cup, whisk together the cocoa powder and hot water until the cocoa is fully dissolved and forms a paste.
- Add the dissolved cocoa paste and the room temperature sour cream to the batter. Beat until just combined.
- Mix in the room temperature eggs, one at a time. Beat until each egg is just incorporated and the batter is smooth. Do not overmix.
Baking and Cooling
- Place the springform pan (still wrapped in tin foil) into the center of a large roasting pan.
- Pour the cheesecake filling evenly over the baked crust in the springform pan and gently smooth the top with a spatula.
- Carefully pour hot (preferably boiling) water into the roasting pan around the springform pan, ensuring the water level is about 1/2 – 1 inch (1-2 cm) deep.
- Carefully transfer the roasting pan with the cheesecake to the preheated oven. Bake for 55-65 minutes, or until the edges are set and the center still has a slight wobble when gently nudged.
- Once baked, turn off the oven and open the oven door slightly. Let the cheesecake cool in the roasting pan within the oven for about an hour. Then, remove the springform pan from the roasting pan and continue cooling on a wire rack at room temperature. Do not unclamp the outer ring of the springform pan yet.
- Once the pan is cool to the touch (room temperature), cover it tightly with foil or plastic wrap and refrigerate for at least 6 hours, or preferably overnight, to chill and set completely.
Topping & Serving
- While the cheesecake chills or just before serving, prepare the cherry topping. Pit the fresh cherries and slice them in half.
- In a medium saucepan, combine the pitted and halved cherries, 1 tablespoon granulated sugar, and 2 tablespoons fresh lemon juice. Cook over low heat, stirring gently, until the cherries soften and release their juices (about 5-7 minutes).
- In a small bowl, dissolve the cornstarch in 2 tablespoons of water to create a slurry. Add this slurry to the cherry mixture in the saucepan and stir continuously until the mixture thickens into a compote. Remove from heat and let cool completely.
- In a clean, cold bowl, beat the cold whipping cream and 2 teaspoons powdered sugar with an electric mixer until firm peaks form.
- Transfer the whipped cream to a piping bag fitted with a 1M Wilton tip (or your preferred star tip).
- Remove the chilled cheesecake from the fridge. Run a sharp, thin knife around the outer edge of the cheesecake before unclamping and removing the springform pan ring.
- Pipe rosettes of whipped cream around the edges of the cheesecake. Carefully spoon the cooled cherry topping into the middle.
- Optionally, sprinkle a few chocolate shavings over the whipped cream for garnish.
- Slice with a thin, sharp knife, making sure to cut all the way through the crust for each piece. Clean the knife between slices for a neat presentation. Serve immediately and enjoy!
Notes
- Pan Sizes: This recipe is designed for a 9-inch (23-cm) springform pan. It can also be successfully made in a 10-inch (25-cm) springform pan, though the cheesecake will be slightly thinner. However, there is too much batter for an 8-inch (20-cm) springform pan.
- Room Temperature Ingredients: As highlighted, ensuring your cream cheese, sour cream, and eggs are at room temperature is absolutely critical for a smooth, lump-free batter. Take them out of the fridge approximately 30-60 minutes before you start making the crust.
- Cream Cheese Selection: Always use full-fat, brick-style cream cheese for cheesecake. Avoid anything labeled low-fat, whipped, or spreadable, as these have different compositions and moisture content that will negatively impact the texture and consistency of your cheesecake.
- Make Ahead Tips: This Black Forest Cheesecake is an excellent make-ahead dessert. I typically bake the cheesecake the day before I plan to serve it. After it has fully cooled, cover the entire pan and chill it in the fridge overnight. You can prepare the cherry topping either on the day you plan to serve it or ahead of time and store it in the fridge. Assemble the cheesecake just before serving for the freshest look.
- Leftovers: Store any leftover cheesecake covered in the refrigerator for up to 4 days. The flavors often deepen beautifully overnight.
- Nutrition: The provided nutrition information is an estimate only and is based on one slice, including cherries and whipped cream, assuming the cheesecake is cut into 12 equal pieces. Given its richness, you could potentially get up to 14 slices from this recipe.
Nutrition
Carbohydrates: 58g
Protein: 10g
Fat: 46g
Saturated Fat: 25g
Polyunsaturated Fat: 3g
Monounsaturated Fat: 13g
Trans Fat: 1g
Cholesterol: 156mg
Sodium: 337mg
Potassium: 412mg
Fiber: 4g
Sugar: 43g
Vitamin A: 1230IU
Vitamin C: 3mg
Calcium: 115mg
Iron: 6mg