
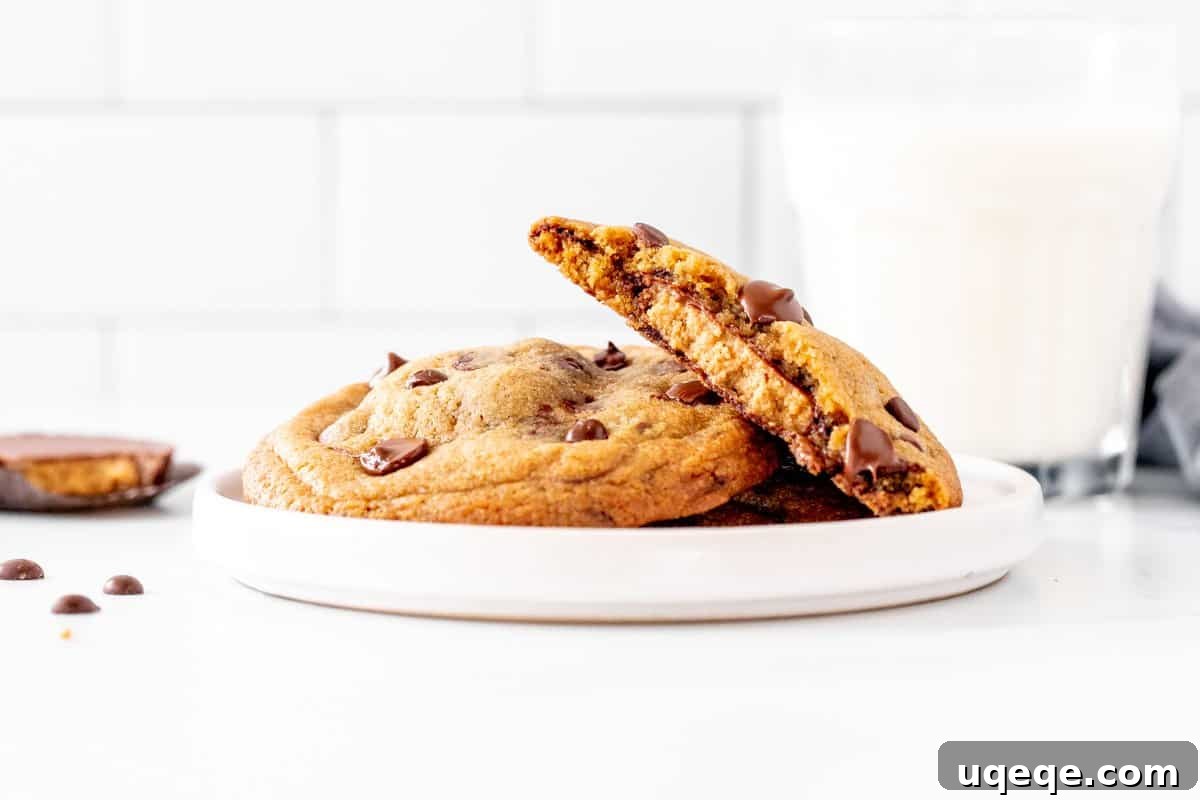
Imagine a perfectly baked, chewy chocolate chip cookie, warm from the oven, with a delightful surprise waiting inside. These aren’t just any cookies; they’re **Reese’s Chocolate Chip Cookies**, each one generously stuffed with an entire, creamy peanut butter cup. This recipe transforms a classic favorite into an extraordinary treat, creating an explosion of chocolate and peanut butter in every single bite. Prepare to elevate your dessert game and redefine what a truly indulgent cookie can be. Grab a glass of cold milk – you’re going to need it!

Bake the Ultimate Reese’s Chocolate Chip Cookies: Your Guide to Stuffed Cookie Perfection
These Reese’s chocolate chip cookies might not win any beauty contests at first glance—their rustic, homemade charm is part of their appeal—but what they lack in pristine uniformity, they more than make up for in flavor and pure indulgence. Each cookie cradles a whole peanut butter cup, encased in a rich, chewy chocolate chip cookie dough. The sensation of biting into the soft, warm cookie and discovering that gooey peanut butter center is an experience that truly sets these cookies apart. You’ll relish the perfectly chewy texture, complemented by subtly crispy edges, all working in harmony with the melty chocolate and creamy peanut butter. It’s a symphony of textures and tastes that’s absolutely irresistible.
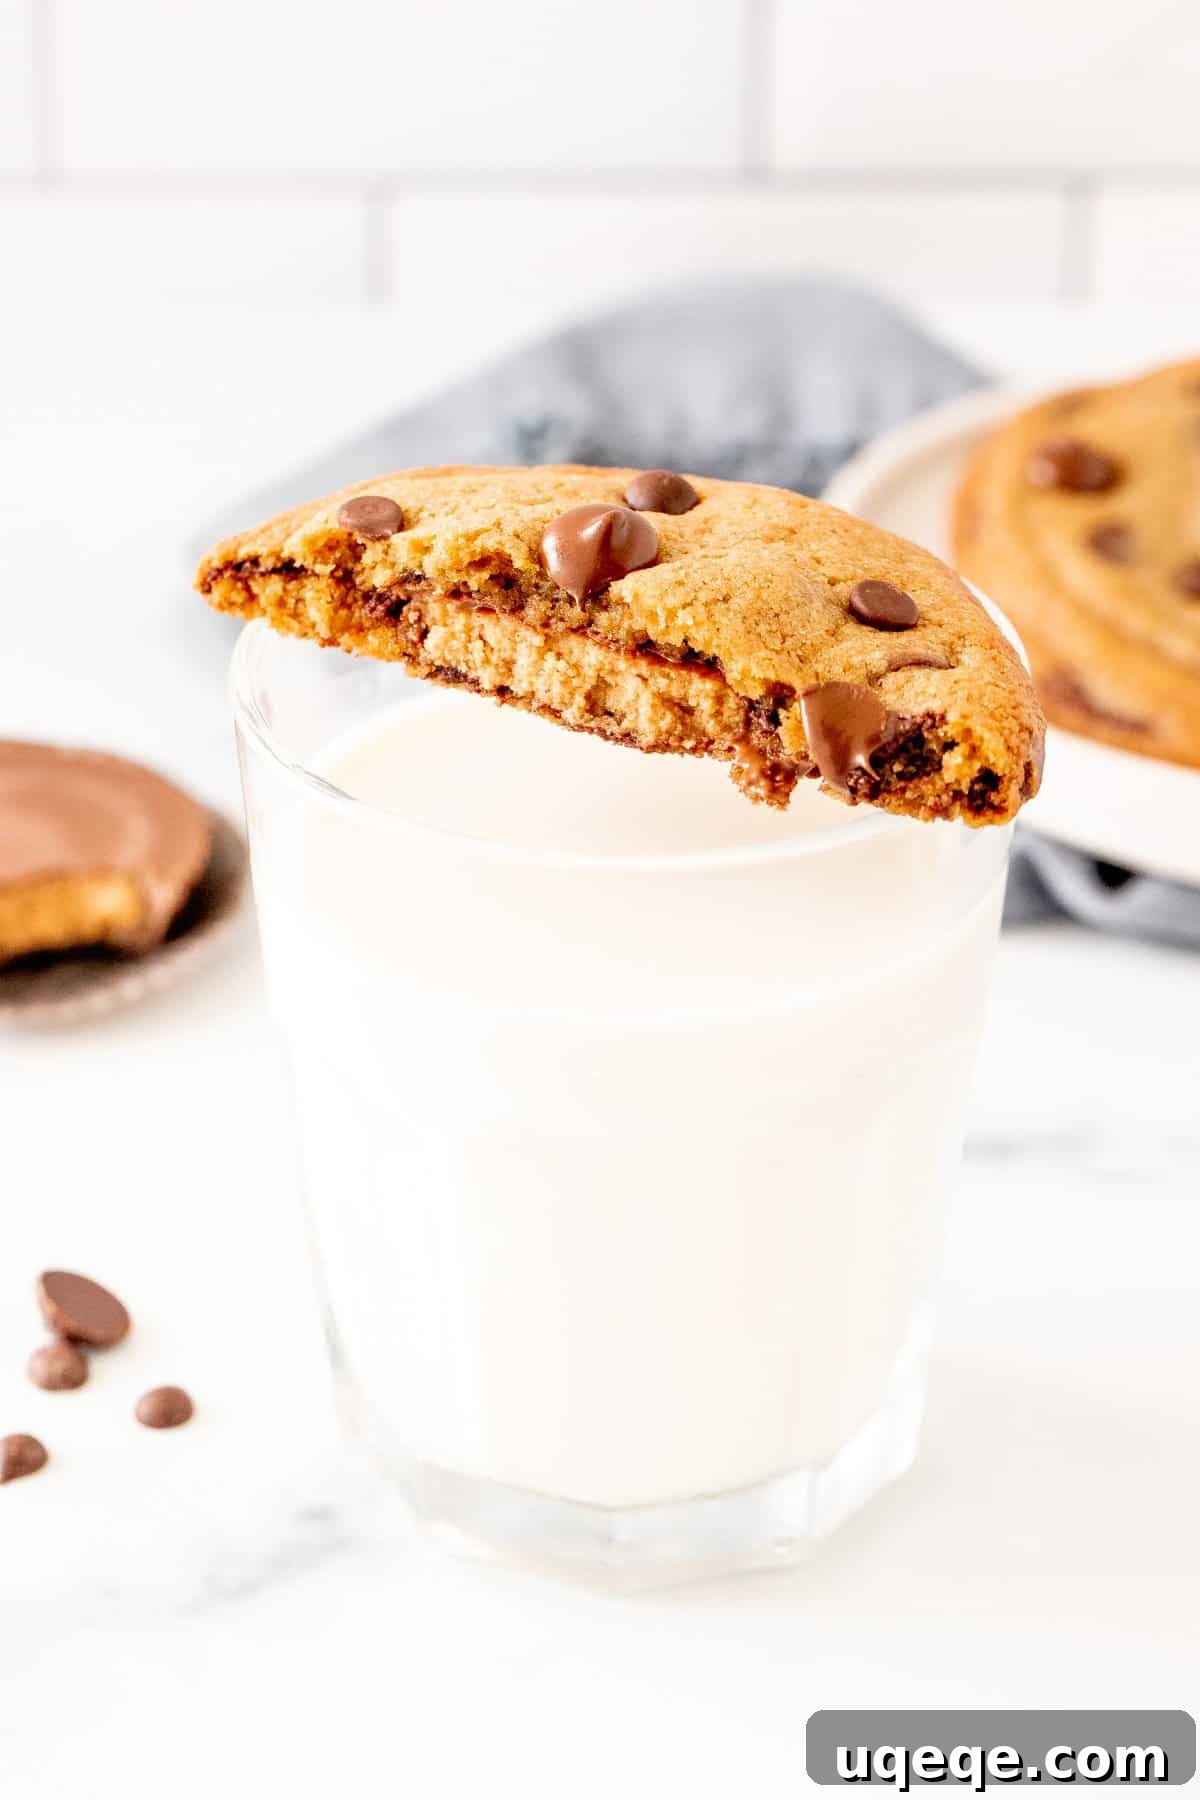
While optional for some cookie recipes, for these delightful creations, a tall, frosty glass of cold milk is an absolute must. It’s the perfect companion to cut through the richness and enhance every delectable bite.
Mastering the Art of Stuffed Cookie Making
The foundation of these incredible treats begins with a classic, straightforward chocolate chip cookie dough recipe. However, the magic truly happens when you transform that simple dough into an edible hug around a Reese’s peanut butter cup. This process, while requiring a bit of patience and technique, is surprisingly rewarding. The key to success lies in two crucial chilling steps, which we’ll dive into shortly, and careful handling of the dough.
Prepping Your Dough for Peanut Butter Perfection
After preparing your rich cookie dough, the very first step is to give it a brief chill. This initial 30-minute refrigeration is critical. It firms up the dough, making it significantly less sticky and much easier to handle when it comes time to encapsulate those precious peanut butter cups. Working with overly soft or sticky dough will make the assembly process challenging and can compromise the final shape of your cookies.
Step-by-Step Assembly: Stuffing Your Reese’s Chocolate Chip Cookies
Once your dough has had its initial rest, you’re ready to embark on the most exciting part: stuffing the cookies! This is where the ordinary becomes extraordinary. Follow these steps carefully to ensure your peanut butter cups are perfectly nestled within the dough:
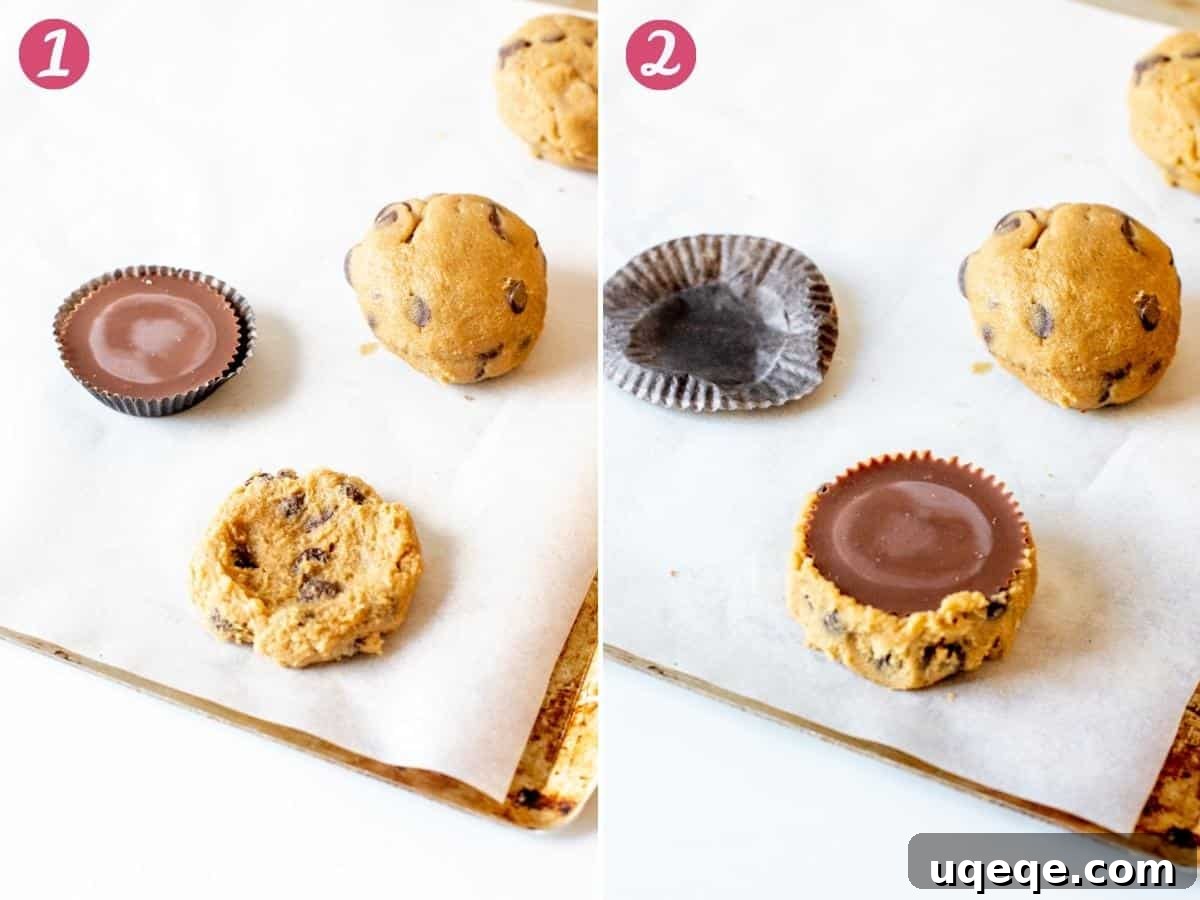
- First Scoop: The Base Layer: Begin by scooping approximately 1 to 1.5 tablespoons of cookie dough. Gently flatten this portion in the palm of your hand, forming a slight “bowl” or disc shape. This will be the sturdy base for your peanut butter cup.
- Position the Peanut Butter Cup: Take an unwrapped Reese’s peanut butter cup (chilled, as recommended for easier handling) and carefully place it in the center of your flattened dough disc. Ensure it’s centered to allow for even coverage.

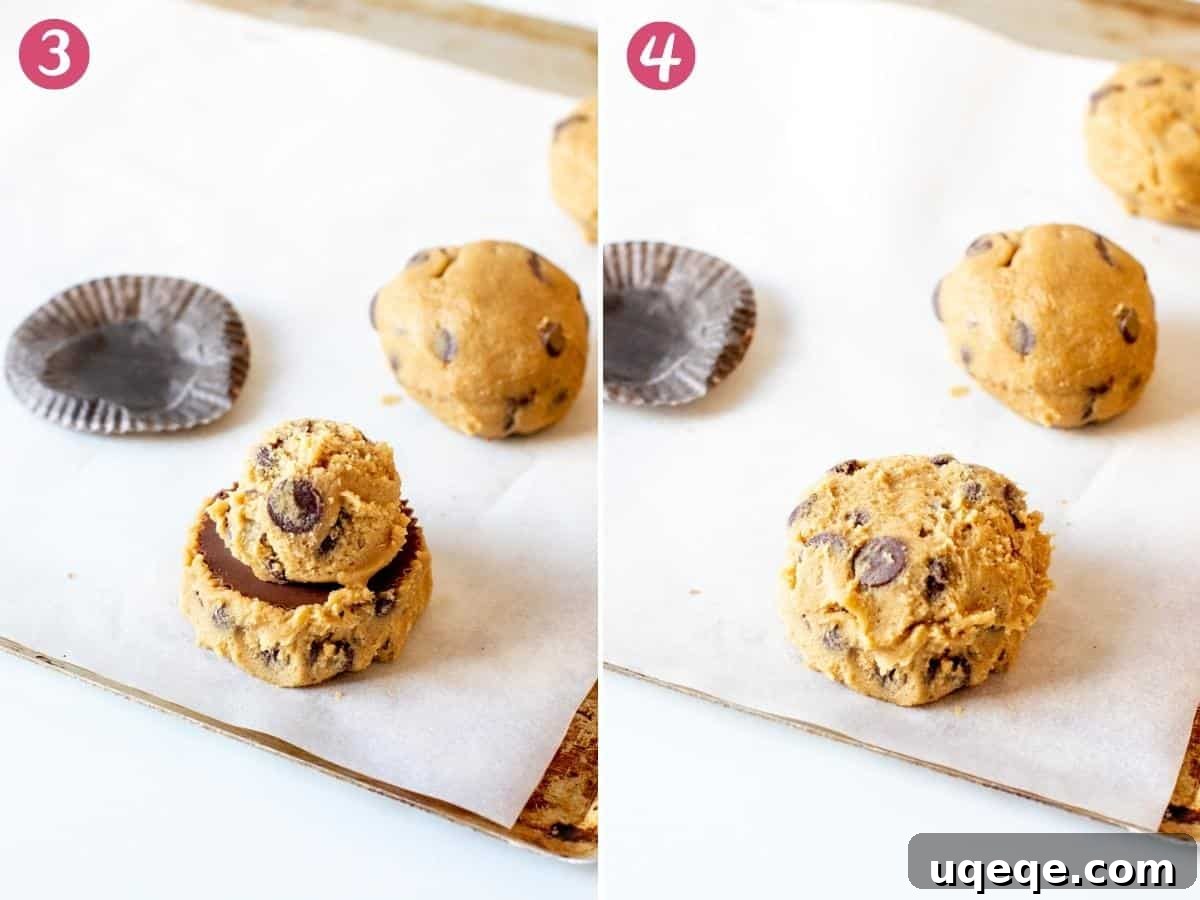
- Second Scoop: The Top Layer: Scoop another portion of cookie dough, also about 1 to 1.5 tablespoons in size. This second scoop will form the top layer of your cookie, sealing the peanut butter cup inside.
- Seal and Roll: Place the second dough ball directly on top of the peanut butter cup. Gently flatten it down, then carefully work the edges of both the bottom and top dough layers around the sides of the peanut butter cup until it is completely enclosed. Once fully covered, gently roll the entire cookie into a smooth ball. Take care not to overwork the dough or apply too much pressure, which could cause the peanut butter cup to squish out.
The Second Crucial Chill: Preventing Spread
Once all your dough balls are beautifully formed and the peanut butter cups are securely tucked inside, it’s time for the second, and arguably most important, chilling period. This chill ensures that your cookies maintain their shape during baking and don’t spread excessively. If you bypass this critical step, you risk ending up with thin, flat cookies where the melted peanut butter cup oozes out, creating a sticky, less-than-appetizing mess. A minimum of 2 hours in the refrigerator allows the butter to firm up completely, leading to thicker, chewier cookies with perfectly contained centers.
Expert Baking Tips & Tricks for Perfect Reese’s Cookies
Achieving the perfect Reese’s chocolate chip cookie is an art, but with these proven tips and tricks, you’ll be a master baker in no time. These insights will help you avoid common pitfalls and ensure every cookie is a delightful success.
- The Double Chill is Non-Negotiable: We cannot stress this enough – chilling the dough twice is absolutely essential for the best results. The first chill (30 minutes) makes the dough manageable and less sticky, preventing frustration during assembly. The second, longer chill (at least 2 hours) is vital for preventing your cookies from spreading too thin in the oven. It allows the butter to re-solidify, ensuring thick, chewy cookies that hold their shape and keep that precious peanut butter cup perfectly encased. Without this, your cookies will flatten, and the peanut butter cups will likely melt and seep out, creating an unfortunate mess.
- The Right Chocolate Chip Ratio: For optimal stuffing and an excellent chocolate distribution, we highly recommend using a combination of mini and regular-sized chocolate chips, or even exclusively mini chocolate chips. Using only large, regular-sized chocolate chips can make the dough denser and harder to wrap smoothly around the peanut butter cups, potentially leading to cracks or uneven coverage. The smaller chips integrate more seamlessly, providing chocolate in every bite without compromising the structural integrity of your stuffed cookie.
- Precision with a Cookie Scoop: For consistent sizing and baking, a 1.5 tablespoon cookie scoop is your best friend in this recipe. It helps ensure that each cookie ball is roughly the same size, promoting even baking and yielding a uniform batch. Plus, it makes portioning the dough a breeze for both the base and top layers.
- Horizontal Peanut Butter Cups are Key: This might sound like a minor detail, but the orientation of your peanut butter cups when placing the dough balls on the cookie sheet is incredibly important. Always ensure the peanut butter cup is horizontal (lying flat) within the dough ball on the baking sheet. If they are placed vertically (standing upright), the cookies are much more likely to spread excessively and flatten during baking, once again risking exposed, melted peanut butter cups. A horizontal orientation helps the cookie maintain a beautiful, rounded shape as it bakes.
- Preheating Your Oven Properly: Ensure your oven is fully preheated to the correct temperature (350°F or 180°C / 160°C fan-forced) before putting in your cookies. An oven that hasn’t reached temperature can lead to inconsistent baking and over-spreading.
- Don’t Overbake: For that perfect chewy texture, keep a close eye on your cookies. They should be baked for 11-14 minutes, or until the edges are lightly golden and the tops look just set, perhaps still slightly soft in the very center. They will continue to set as they cool on the baking sheet. Overbaking will result in dry, crumbly cookies.
- Cooling Process: Allow the cookies to cool on the baking sheet for at least 5 minutes after removing them from the oven. This allows them to firm up before you attempt to transfer them to a wire rack to cool completely. Moving them too soon can cause them to break apart.
Beyond the Reese’s Cookie: More Peanut Butter Delights
If your love for peanut butter is as profound as ours, you’ll be thrilled to explore other incredible recipes that celebrate this versatile ingredient. From decadent cheesecakes to rich pies and unique dessert pizzas, there’s a peanut butter treat for every craving:
- No-Bake Peanut Butter Cheesecake: A creamy, dreamy dessert that requires no oven time. Perfect for warmer days or when you need a quick, impressive treat.
- Peanut Butter Pie: An effortless, rich, and velvety pie that combines the irresistible flavor of peanut butter with a delightful texture.
- Peanut Butter Cookie Pizza: This fun and flavorful dessert features a giant peanut butter cookie crust, topped with luscious peanut butter frosting, and generously adorned with an assortment of peanut butter candies. It’s a party on a plate!
- Peanut Butter Layer Cake: For those special occasions, this show-stopping layer cake delivers intense peanut butter flavor in every moist bite, complete with a smooth and creamy frosting.
Reese’s Chocolate Chip Cookies Recipe
Big, chewy chocolate chip cookies stuffed with an entire peanut butter cup – these cookies are over the top. Take your milk to the next level with these Reese’s chocolate chip cookies!
By: Fiona Dowling
Prep time: 30 mins |
Cook time: 12 mins |
Chilling time: 2 hrs 30 mins |
Total time: 3 hrs 12 mins
Yields: 15 large cookies
Ingredients
- 3/4 cup (168 grams) unsalted butter, softened
- 3/4 cup (150 grams) brown sugar, light or dark
- 3/4 cup (150 grams) granulated sugar
- 1 large egg
- 2 teaspoons vanilla extract
- 2 cups (150 grams) all-purpose flour
- 3/4 teaspoon baking soda
- 1/4 teaspoon salt
- 1 cup chocolate chips (I used 1/2 cup mini and 1/2 cup regular chocolate chips)
- 15 peanut butter cups (regular size)
Instructions
Making the Cookie Dough
- Place the peanut butter cups in the freezer for easier handling while you prepare the dough.
- In a large bowl, using an electric mixer, beat together the softened butter, brown sugar, and white sugar until the mixture is light and creamy. Scrape down the sides of the bowl as needed.
- Beat in the large egg and vanilla extract until well combined and fluffy.
- Turn off the mixer. Add in the all-purpose flour, baking soda, and salt. Stir the dry ingredients into the wet ingredients a few times by hand to prevent flour from flying. Then, with the mixer on a low speed, beat until the ingredients are just combined. Be careful not to overmix.
- Turn off the mixer and stir in the chocolate chips by hand. I typically stir in about 3/4 cup of the chips and save the remaining 1/4 cup for placing on top of the baked cookies for a beautiful finish.
- Cover the bowl tightly with plastic wrap and place it in the refrigerator for at least 30 minutes. This first chill is crucial for making the dough easier to handle.
Assembling & Baking the Cookies
- While the dough is chilling, unwrap all the frozen peanut butter cups.
- Once the dough has chilled, scoop about 1 to 1.5 tablespoons of cookie dough. Flatten it slightly into a disc or “bowl” shape in your palm. Place one unwrapped peanut butter cup in the center. Scoop a second 1 to 1.5 tablespoons of cookie dough and place it directly over the peanut butter cup. Gently flatten the top dough layer and wrap the edges of both dough portions around the peanut butter cup until it is completely sealed inside. Carefully roll the dough into a smooth ball, ensuring the peanut butter cup remains horizontal within the ball. Note: If the dough becomes too sticky to work with at any point, simply place it back in the fridge for a few minutes to firm up.
- Place the formed dough balls on a plate, ensuring the peanut butter cup inside each is horizontal. Cover the plate with food wrap and place it back in the refrigerator for at least 2 hours, or up to 48 hours. This second chill is essential for preventing the cookies from spreading too thin during baking.
- When you’re ready to bake, preheat your oven to 350°F (180°C, or 160°C for a fan-forced/convection oven).
- Line several cookie sheets with parchment paper or silicone baking mats. This prevents sticking and promotes even baking.
- Arrange the chilled cookie dough balls on the lined cookie sheets, ensuring each cookie is placed approximately 3 inches (about 7-8 cm) apart. Confirm that the peanut butter cups inside are still horizontal.
- Bake one sheet at a time on the middle rack of your preheated oven. While one batch bakes, keep the remaining unbaked cookie dough balls in the refrigerator to maintain their chill. Bake for 11-14 minutes, or until the edges are lightly golden and the tops appear just set, though they may still look slightly soft in the center.
- Remove the cookies from the oven. For an extra touch, you can optionally press a few reserved chocolate chips onto the tops of each warm cookie immediately after baking. Let the cookies cool on the baking sheet for at least 5 minutes to allow them to firm up before carefully transferring them to a wire cooling rack to cool completely.
Notes
- Peanut Butter Cups: This recipe calls for regular-sized Reese’s Peanut Butter Cups, not miniatures, to ensure a substantial, gooey center.
- Freezing Dough Balls: Unbaked cookie dough balls can be stored in a freezer-safe bag or airtight container and frozen for up to 2 months. When ready to bake, place them directly from the freezer onto a prepared cookie sheet and bake as directed, adding an extra 1-2 minutes to the baking time.
- Storage: Baked Reese’s chocolate chip cookies are best enjoyed fresh, but they can be stored in an airtight container at room temperature for up to 4 days. For longer storage, freeze baked cookies for up to 2 months. Thaw at room temperature before serving.
- Nutrition: The provided nutritional details are an estimate only, based on 1 cookie and assuming the recipe yields 15 equal-sized cookies.
Nutrition Information (Per Cookie Estimate)
Calories: 380kcal, Carbohydrates: 51g, Protein: 5g, Fat: 18g, Saturated Fat: 10g, Polyunsaturated Fat: 1g, Monounsaturated Fat: 5g, Trans Fat: 1g, Cholesterol: 52mg, Sodium: 172mg, Potassium: 100mg, Fiber: 1g, Sugar: 36g, Vitamin A: 354IU, Vitamin C: 1mg, Calcium: 45mg, Iron: 1mg
Frequently Asked Questions About Stuffed Cookies
Here are some common questions and troubleshooting tips to help you master your Reese’s chocolate chip cookies:
- Why did my cookies spread too much?
- The most common culprit for overly spread cookies is insufficient chilling time, especially the second chill after stuffing. Warm dough or butter causes cookies to spread rapidly in the oven before they have a chance to set. Ensure your dough balls are thoroughly chilled for at least 2 hours before baking. Also, make sure your oven temperature is accurate – a too-low oven can also contribute to spreading.
- Can I use miniature Reese’s peanut butter cups?
- While you technically *can* use miniatures, this recipe is specifically designed for regular-sized peanut butter cups to achieve that wonderfully gooey, substantial center. Using miniatures might result in less peanut butter impact and could be harder to properly encapsulate in the dough without them melting out.
- My peanut butter cups melted out of the cookies. What went wrong?
- This usually happens due to two reasons: either the dough wasn’t chilled enough (especially the second chill), or the peanut butter cups weren’t kept horizontal on the baking sheet. Make sure the cups are frozen before assembling and remain flat when placed on the tray. The double chilling process is key to preventing this issue.
- Can I make these cookies ahead of time?
- Absolutely! You can prepare the cookie dough, form the stuffed balls, and then chill them in the refrigerator for up to 48 hours before baking. This makes them perfect for entertaining or when you want fresh-baked cookies without all the immediate prep work. For longer storage, freeze the unbaked dough balls as directed in the notes.
- What if I don’t have a stand mixer?
- No problem! You can easily make this cookie dough using a hand mixer. Just ensure you beat the butter and sugars until light and creamy, and scrape down the bowl frequently. If you don’t have any electric mixer, you can do it by hand with a whisk and sturdy spoon, though it will require more effort.
Ready to Bake Your Best Stuffed Cookies Yet?
There’s something uniquely satisfying about biting into a warm, homemade cookie, especially one with a surprise center. These Reese’s chocolate chip cookies offer that perfect blend of comfort, indulgence, and a touch of excitement. They’re ideal for sharing with loved ones, bringing to a potluck, or simply treating yourself after a long day. With our detailed instructions and expert tips, you’re now equipped to create a batch of cookies that are sure to impress and delight.
Don’t just dream about them – make them! We encourage you to try this recipe and experience the joy of baking these ultimate stuffed cookies. Feel free to leave a comment below with your feedback or any variations you tried. Happy baking!