
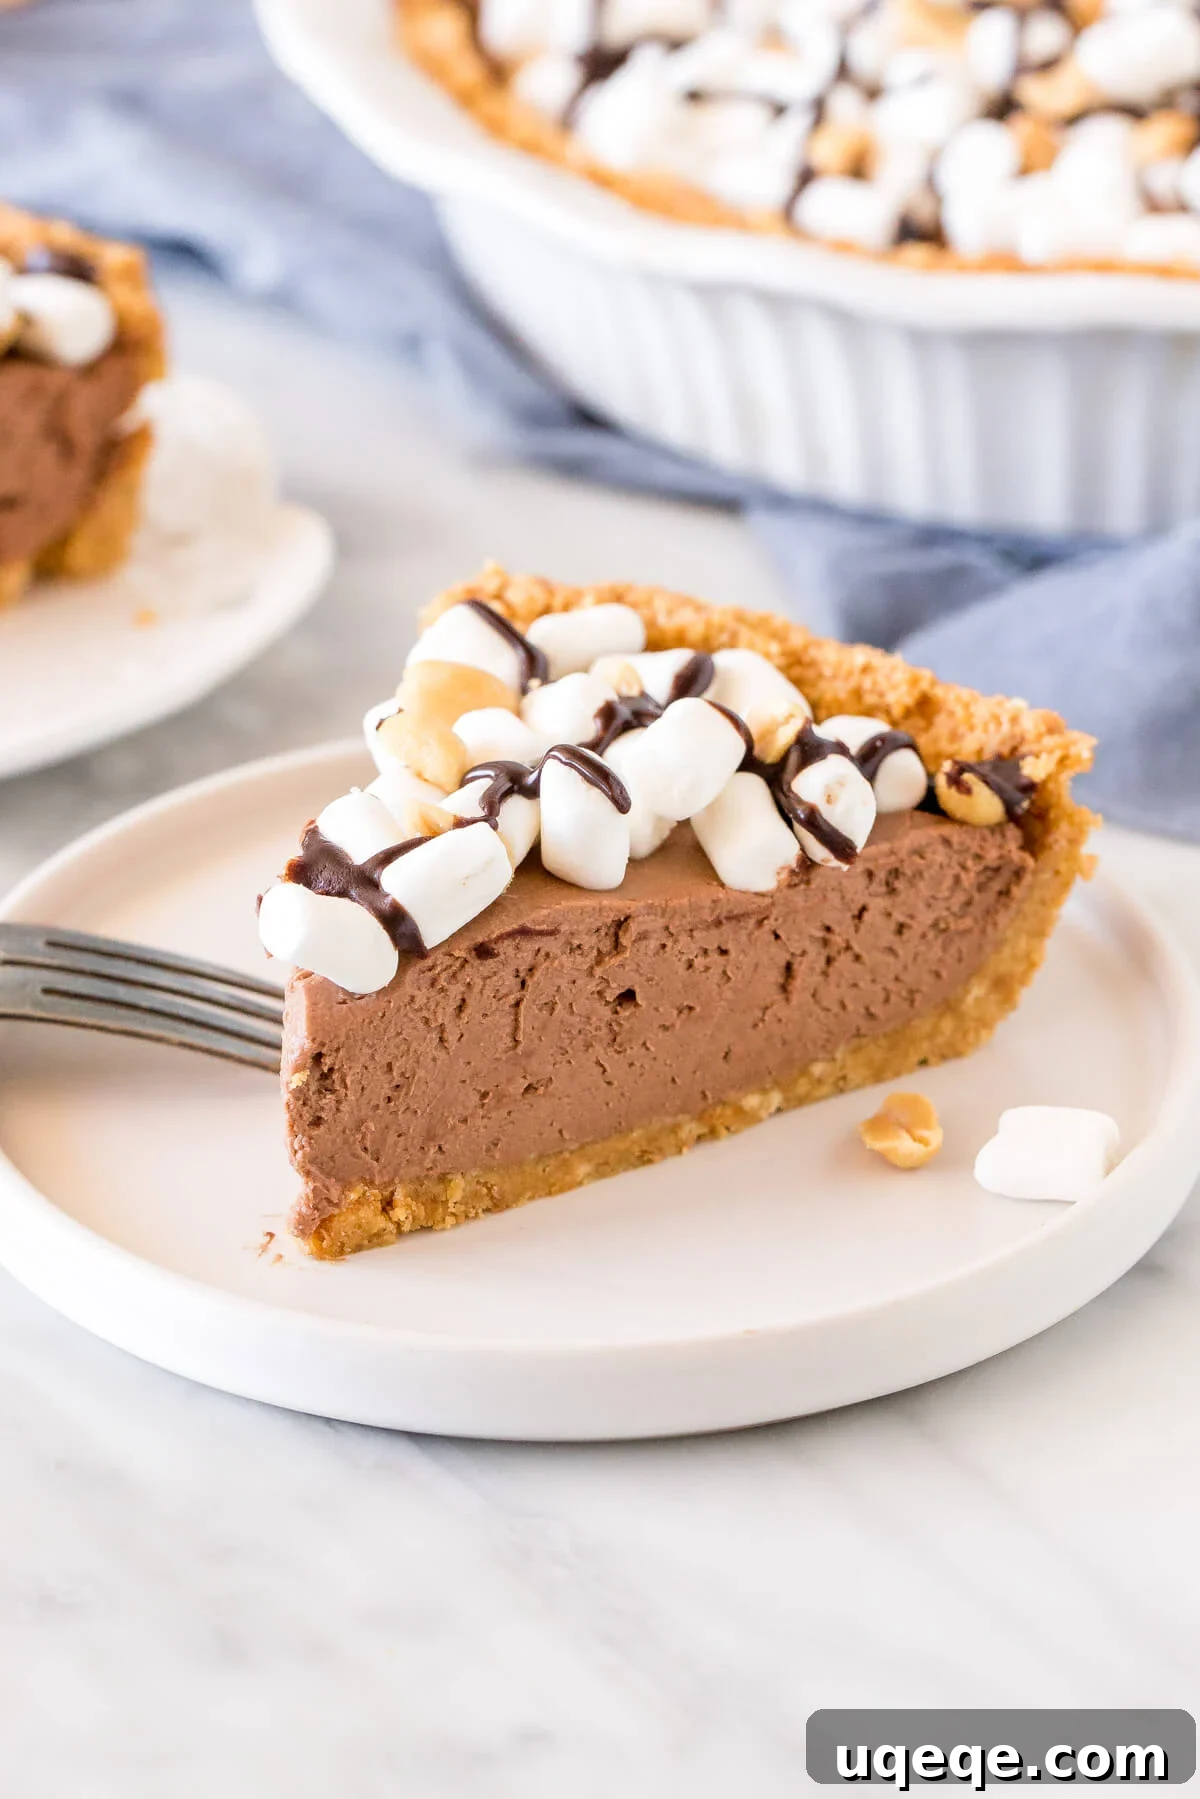
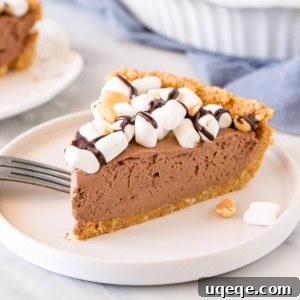
Chocolate, crunchy peanuts, and fluffy marshmallows unite in this utterly irresistible no-bake Rocky Road Pie. With a luxuriously creamy filling that requires no oven time, it’s the quintessential dessert for any occasion, especially when you need a crowd-pleasing treat without the baking hassle. This recipe offers the perfect blend of classic rocky road flavors in a cool, delightful pie format.
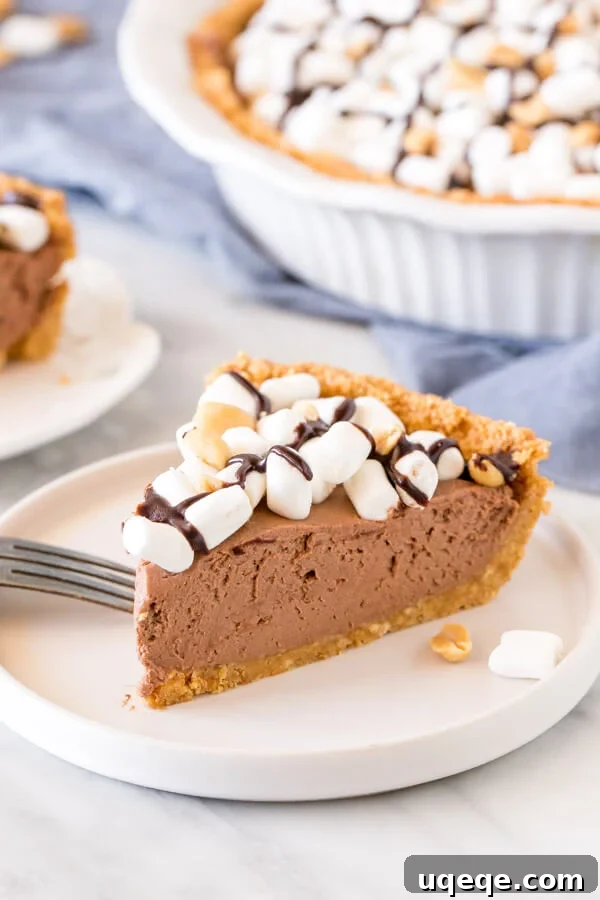
The Ultimate No-Bake Rocky Road Pie: A Dessert Dream Come True
Rocky road has always been a nostalgic flavor, conjuring fond memories of childhood ice cream cones and delightful candy bars. This no-bake rocky road pie takes that beloved combination of creamy chocolate, chewy marshmallows, and crunchy peanuts and transforms it into a show-stopping dessert that’s surprisingly simple to make. Imagine a rich, chocolatey base reminiscent of an extra-creamy chocolate cheesecake, all nestled within a buttery, peanut butter-infused graham cracker crust, and crowned with all the classic rocky road fixings. It’s a symphony of textures and flavors designed to delight even the most discerning dessert connoisseur.
Perfect for warm summer evenings when turning on the oven is unthinkable, or any time you desire a truly decadent treat with minimal effort. This pie is served chilled, offering a refreshing contrast to its rich components. For an even firmer texture or a convenient make-ahead option that stores beautifully, it can also be frozen, making it incredibly versatile for entertaining guests or simply satisfying a sudden sweet craving.
Why This Rocky Road Pie is Your Next Favorite Dessert
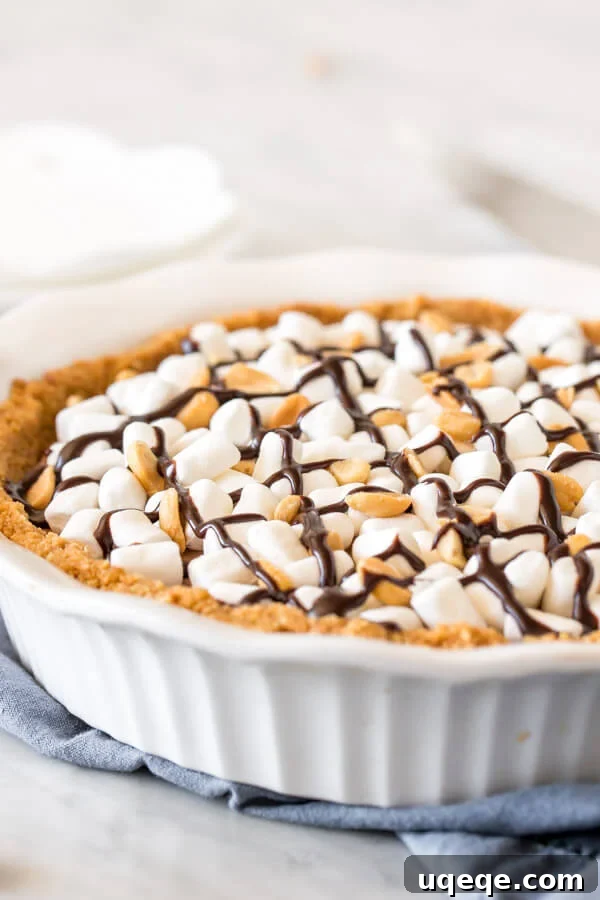
There are countless reasons why this no-bake rocky road pie deserves a permanent spot in your recipe collection. Firstly, its sheer simplicity makes it an ideal recipe for beginner bakers or anyone looking for a quick yet impressive dessert. With absolutely no baking involved, you eliminate the complexities of oven temperatures and cooking times, allowing you to focus purely on assembling delicious layers to create a masterpiece.
Secondly, the flavor profile is unparalleled and deeply satisfying. We begin with a unique graham cracker crust, which is ingeniously elevated by the addition of creamy peanut butter. This not only enhances the flavor with a nutty richness but also adds a delightful depth that perfectly complements the sweet chocolatey filling. We advocate for an extra-thick crust to ensure a sturdy and intensely flavorful foundation, capable of holding up to the generous filling and toppings.
The true star of this dessert is undoubtedly the filling. It’s a dream come true for chocolate lovers: a decadent blend that marries the subtle tang of a classic cheesecake with the airy lightness of a chocolate mousse. The result is a texture that is unbelievably smooth, creamy, and utterly melt-in-your-mouth. It’s rich without being overly heavy, striking a perfect balance that will leave everyone craving another slice and wondering how something so luxurious could be so easy to make.
Finally, the iconic rocky road toppings are generously applied, ensuring every single bite delivers that signature combination of soft, sweet marshmallows, satisfyingly salty and crunchy peanuts, and an extra layer of decadent chocolate. This pie isn’t just a dessert; it’s an experience—a delightful journey through various textures and bold flavors that perfectly define the much-loved classic rocky road treat. It’s truly a celebration in every spoonful.
Crafting the Perfect Peanut Butter Graham Cracker Crust
The foundation of any truly great pie is its crust, and for this rocky road masterpiece, we’re taking a classic graham cracker crust to an exciting new level with a delicious and aromatic peanut butter twist. This simple yet incredibly effective addition infuses the crust with a nutty aroma and a subtle savory note that brilliantly cuts through and balances the sweetness of the filling and toppings.
Choosing Your Graham Crackers: Crumbs or Whole?
You have two convenient options when it comes to the graham cracker component. You can either purchase pre-crushed graham cracker crumbs, which are readily available in the baking aisle of most grocery stores, saving you a step. Alternatively, if you prefer, you can buy whole graham crackers and crush them yourself. If you opt for whole crackers, a food processor makes quick work of turning them into fine, uniform crumbs, ensuring a consistent texture. For those who enjoy a more hands-on approach or desire a slightly more rustic texture, placing the crackers in a sturdy zip-top bag and crushing them with a rolling pin can be a fun and surprisingly therapeutic activity!
Assembling the Crust Ingredients for Optimal Flavor
Once you have your graham crumbs, you’ll combine them with a touch of brown sugar. The brown sugar not only adds a hint of warm, caramel-like sweetness but also plays a vital role in binding the crust together. The true star of this crust, however, is the peanut butter, which is gently melted along with unsalted butter. Melting these together ensures a smooth, even distribution throughout the graham crumbs. The melted butter acts as the primary binder, solidifying when chilled to hold the crust together, while the peanut butter introduces that irresistible flavor dimension that makes this crust truly special and complementary to the rocky road theme.
Pressing and Chilling for a Flawless Foundation
After thoroughly mixing all the crust ingredients until the crumbs are uniformly moistened and resemble wet sand, it’s time to press them into your pie pan. Use the back of a spoon or your clean fingers to firmly and evenly press the mixture into the bottom and up the sides of a lightly greased 9-inch pie plate. The key to a sturdy, non-crumbly crust is applying uniform pressure across all surfaces; ensure there are no loose spots or thin patches. Once perfectly pressed, the crust needs a crucial chill in the refrigerator for at least 30 minutes. This chilling period allows the butter and peanut butter to solidify, creating a firm, cohesive crust that will hold its shape beautifully when sliced. While the crust is chilling, you can efficiently move on to preparing the decadent filling.
The Luscious No-Bake Chocolate Cheesecake Filling
This pie’s filling is nothing short of heavenly – a velvety, mousse-like concoction that strikes a perfect balance between a rich, indulgent chocolate mousse and a creamy, subtly tangy cheesecake. It’s remarkably easy to prepare, relying on a few key ingredients and simple techniques to achieve its utterly irresistible texture and deep chocolate flavor.
Essential Ingredients for Unmatched Creaminess
- Full-Fat Cream Cheese: This forms the essential backbone of our cheesecake-style filling. It is absolutely imperative that your brick-style cream cheese is softened completely to room temperature. This is the most crucial step for achieving a smooth, lump-free filling with a silky texture. Cold cream cheese will inevitably result in a clumpy, unappetizing consistency. If you’re short on time, you can quickly soften cream cheese by unwrapping it and placing it on a microwave-safe plate for 10-15 seconds, checking frequently and gently massaging it until pliable.
- Powdered Sugar: Also widely known as confectioners’ sugar or icing sugar, this finely milled sugar blends seamlessly into the filling, adding sweetness without any granular texture, ensuring a consistently smooth mouthfeel.
- Quality Melted Chocolate: The source of our deep, luxurious chocolate flavor. Semi-sweet chocolate is highly recommended for a perfectly balanced sweetness that isn’t cloying. For the best results, chop the chocolate into very small, uniform pieces before melting. You can melt it gently in a microwave in short bursts (15-20 seconds), stirring thoroughly between each interval until completely smooth. Alternatively, a double boiler setup over simmering water works wonderfully. Exercise caution not to overheat the chocolate, as this can cause it to seize and become unusable.
- Cold Heavy Whipping Cream: This ingredient is crucial for the filling’s airy, light, and supremely creamy texture. It is whipped until stiff peaks form and then gently folded into the cream cheese mixture. While you can substitute with a whipped topping like Cool Whip if preferred, homemade whipped cream offers a superior flavor and a fresher, more delightful texture that truly elevates the pie.
Mixing for Mousse-Like Perfection and Silky Smoothness
The preparation process for the filling is straightforward and rewarding. First, in a large mixing bowl, beat the fully softened cream cheese until it is incredibly smooth and light, almost fluffy. Next, gradually incorporate the slightly cooled melted chocolate and the powdered sugar, mixing until all ingredients are just combined and the mixture is uniformly chocolatey and free of lumps. In a separate, impeccably clean bowl, whip the very cold heavy cream until it holds firm peaks – a sign of perfectly aerated cream. The final, delicate step is to gently fold the whipped cream into the chocolate cream cheese mixture. This delicate folding technique is absolutely vital for maintaining the airiness and volume of the whipped cream, which contributes significantly to the filling’s light, mousse-like consistency. Avoid the temptation to overmix, as this can deflate the whipped cream and result in a denser, less appealing filling.
Chilling: The Indispensable Key to a Perfectly Set Pie
Once the luscious filling is prepared, carefully spoon it into your chilled peanut butter graham cracker crust, spreading and smoothing the top evenly with a spatula for an attractive finish. To protect its flavor and texture, cover the pie plate loosely but completely with aluminum foil or plastic wrap to prevent any absorption of refrigerator odors or moisture loss. The pie then needs to undergo a crucial chilling period of a minimum of 6 hours, or ideally overnight, in the refrigerator. This extended chilling time allows the filling to fully set and firm up, developing its perfect sliceable texture and ensuring each piece holds its shape beautifully, making for a truly impressive presentation.
Rocky Road Toppings: Customization and Delectable Presentation
No Rocky Road Pie is truly complete without its signature toppings! This is where you can truly personalize your pie, choosing your favorite elements to sprinkle generously over the perfectly set chocolate filling. While the classic combination includes mini marshmallows, crunchy peanuts, and an extra drizzle of rich chocolate, feel free to unleash your creativity and make it uniquely yours.
Classic and Creative Topping Choices:
- Mini Marshmallows: These soft, pillowy clouds add a delightful chewiness and the quintessential rocky road charm that everyone loves. You can scatter them plain for a simple touch, or for an elevated, gourmet experience, lightly toast them with a kitchen torch just before serving. This adds a subtle smoky flavor and creates beautiful golden-brown edges that are incredibly appealing.
- Crunchy Peanuts: Roasted and salted peanuts provide a fantastic crunch and a welcome savory counterpoint to the sweet components of the pie. If peanuts aren’t your preference, or you want to experiment, feel free to substitute them with other chopped nuts like walnuts, almonds, pecans, or even cashews for a different flavor profile and texture. Each nut offers its own unique contribution to the overall experience.
- Rich Chocolate Drizzle: A final flourish of melted semi-sweet chocolate, or a ready-made high-quality chocolate sauce or fudge, adds an extra layer of decadence and significant visual appeal. For an even richer, glossier finish, you can easily make a simple chocolate ganache by melting chocolate with a small amount of heavy cream. This adds a touch of elegance and ensures every bite is packed with chocolatey goodness.
- Other Fun Additions: Consider sprinkling some miniature chocolate chips, a drizzle of warm caramel sauce, or even some chopped candy bar pieces for an extra layer of fun and flavor, further customizing your rocky road experience.
When to Add Your Toppings: Flexibility for Your Schedule
You have excellent flexibility when it comes to adding your toppings, allowing you to fit it into your schedule. You can either add the marshmallows and peanuts before the pie goes into the fridge to chill, allowing them to settle slightly into the filling as it sets. Alternatively, for a fresher, more vibrant and visually striking look, add them right before serving. The chocolate drizzle is almost always best applied closer to serving time for the freshest appearance and to prevent it from solidifying too hard. The choice is yours, depending on your schedule, desired presentation, and how you envision your perfect rocky road pie.
Serving and Storage Tips for Maximum Enjoyment
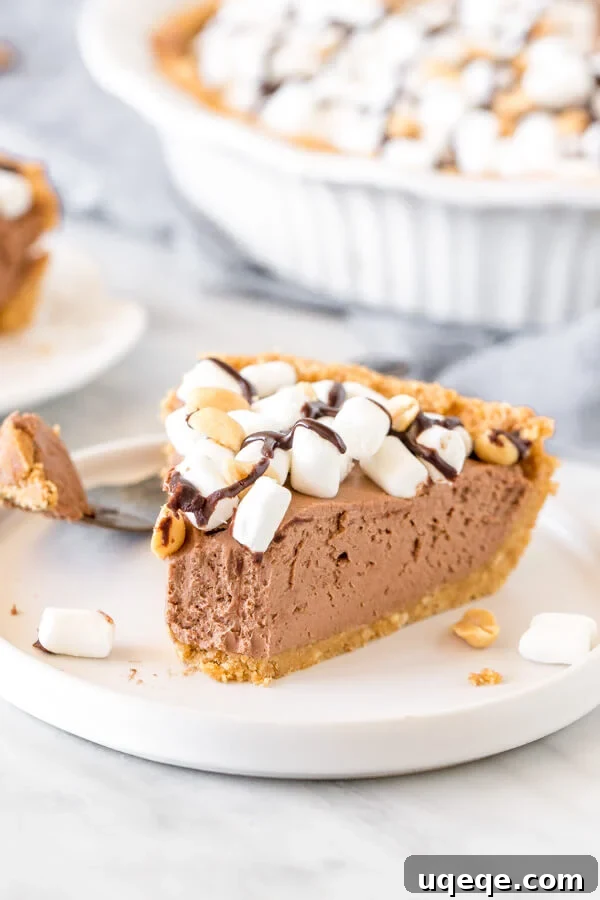
Once your Rocky Road Pie has chilled sufficiently and is beautifully adorned with its delectable toppings, it’s finally ready to be enjoyed! For the cleanest, most aesthetically pleasing slices, use a thin, sharp knife and remember to wipe it clean with a damp cloth between each cut. Ensure you press all the way through the thick, sturdy crust to avoid crumbling and to achieve perfect, intact pieces.
Ideal Serving Suggestions:
This pie is absolutely divine on its own, a complete dessert experience in every bite. However, you can elevate the experience even further with a few simple additions. Serve it with a generous dollop of extra freshly whipped cream, a scoop of premium vanilla bean ice cream for a delightful temperature contrast, or a drizzle of warm caramel sauce for an additional layer of luxurious indulgence. A perfectly brewed cup of coffee or a cold glass of milk makes a wonderful and classic accompaniment, enhancing the rich flavors of the pie.
Optimal Storage for Freshness and Longevity:
To keep any leftover rocky road pie at its best, store it covered tightly with plastic wrap or in an airtight container in the refrigerator for up to 3 days. While the crust may soften slightly over time, the flavors will remain wonderfully delicious. For longer-term storage, this pie freezes exceptionally well. To freeze, wrap the entire pie (or individual slices for convenient portions) tightly in plastic wrap, then enclose it in a layer of aluminum foil to prevent freezer burn. It can be frozen for up to 1-2 months. When you’re ready to enjoy a frozen slice, simply thaw it in the refrigerator overnight, or let individual slices sit at room temperature for about 20 minutes before serving for easier slicing and a creamier, more yielding texture.
More Irresistible No-Bake Pie Recipes to Love
If you’ve fallen in love with the sheer ease, incredible convenience, and deliciousness of this no-bake rocky road pie, you’re in for an absolute treat! The world of no-bake desserts is vast and exciting, offering countless options for delightful treats without ever needing to turn on the oven. These recipes are perfect for hot weather, busy schedules, or simply when you desire a quick yet impressive dessert. Here are a few more irresistible no-bake pie recipes to add to your culinary repertoire and enjoy:
- Caramel Cream Pie: A luscious, incredibly creamy pie bursting with rich, buttery caramel flavor, absolutely perfect for those who adore intensely sweet, gooey, and indulgent desserts.
- Peanut Butter Pie: For the ultimate peanut butter enthusiast, this pie features a dreamy, light, and airy peanut butter filling that simply melts in your mouth, often set in a chocolate cookie crust.
- No-Bake Key Lime Pie: A fantastically zesty and refreshing classic, offering a perfect balance of sweet and tart flavors in a cool, creamy, and vibrant green filling.
- Strawberry Cream Cheese Pie: Bursting with the freshness of seasonal strawberries, this pie features a light, tangy, and delightful cream cheese filling, making it a vibrant and fruity dessert choice.
Rocky Road Pie Recipe
Rate Recipe
Print Recipe
Equipment
- 9-inch pie plate
Ingredients
Crust
- 2 cups graham crumbs*
- 3 tablespoons brown sugar
- 4 tablespoons peanut butter
- 6 tablespoons unsalted butter, melted
Filling
- 4 oz semi-sweet chocolate*, chopped
- 12 oz cream cheese*, softened to room temperature
- 2/3 cup powdered sugar
- 1 cup heavy whipping cream*
Topping
- 1/2 cup mini marshmallows
- 3 tablespoons peanuts, chopped (optional, for extra crunch and flavor)
- 2 oz semi-sweet chocolate, melted (or use your favorite chocolate sauce for drizzling)
*Ingredient notes: Graham crumbs can be substituted with Digestive biscuit crumbs. If using Digestive biscuits, you may omit the brown sugar from the crust as they are typically sweeter. 4 oz semi-sweet chocolate is equivalent to approximately 2/3 cup chocolate chips. Always use full-fat, brick-style cream cheese for the best texture in your no-bake filling.
Instructions
Crust
- Lightly grease a 9-inch pie plate to ensure easy removal.
- In a medium-sized bowl, thoroughly stir together the graham crumbs and brown sugar until well combined.
- In a separate microwave-safe bowl, melt the peanut butter and unsalted butter together until smooth and fully liquid. Stir well.
- Pour the melted butter mixture into the graham crumbs and stir vigorously until all crumbs are evenly coated and moist.
- Press the mixture firmly and evenly into the bottom and up the sides of the prepared pie plate. Place the crust in the refrigerator to chill and firm up while you prepare the filling.
Filling
- Chop the semi-sweet chocolate into very small pieces to facilitate even melting. Place in a microwave-safe bowl. Microwave on medium power (not regular or high to prevent burning) for 45-second periods, stirring thoroughly between each interval, until the chocolate is completely smooth. Set aside to cool slightly.
- In a large mixing bowl, beat the softened cream cheese until it is light, soft, and completely smooth, with no lumps.
- Gradually beat in the slightly cooled melted chocolate and the powdered sugar into the cream cheese mixture until everything is well combined and the filling is uniformly chocolatey.
- In a separate, clean bowl, beat the cold heavy whipping cream until stiff peaks form. Be careful not to overbeat, which can result in a grainy texture.
- Gently fold the whipped cream into the chocolate cream cheese mixture using a spatula until it’s evenly incorporated and no streaks remain. This gentle technique helps maintain the airy texture of the filling.
- Spoon the completed filling into the chilled pie crust, spreading it evenly and smoothing the top with a spatula for a neat finish.
- Cover the pie plate loosely with aluminum foil or plastic wrap and place the pie in the refrigerator to set for at least 6 hours, or ideally overnight, to ensure it is thoroughly firm.
Topping (can be done before or after chilling the pie)
- Just before serving, or after the pie has fully set, generously sprinkle the top of the pie with mini marshmallows and chopped peanuts.
- Melt the remaining 2 oz of semi-sweet chocolate (or use a ready-made chocolate sauce) and artfully drizzle it over the top of the pie, covering the marshmallows and peanuts.
- When ready to serve, use a thin, sharp knife (avoid using a table knife) to slice the pie. Ensure you cut all the way through the crust in one smooth motion for clean, perfect slices.
Notes
- Graham Cracker Substitutions: If graham crumbs are unavailable, Digestive biscuit crumbs are an excellent alternative. If using Digestive biscuits, you may choose to omit the brown sugar from the crust as they are typically sweeter than graham crackers.
- Chocolate Choices: While semi-sweet chocolate is recommended for its balanced flavor, you can certainly experiment with milk chocolate for a sweeter pie or dark chocolate for a more intense and less sweet chocolate experience. Ensure chocolate is melted gently to avoid seizing.
- Cream Cheese Quality: For the best texture and stability in your no-bake cheesecake filling, always use full-fat, brick-style cream cheese. Whipped or spreadable cream cheese varieties will not yield the same firm and creamy results.
- Storage Guidelines: Store any leftover pie covered tightly in the refrigerator for up to 3 days. For longer storage, this pie freezes exceptionally well. Wrap the entire pie or individual slices tightly in plastic wrap and then in aluminum foil, and freeze for up to 1-2 months. To serve from frozen, thaw the pie in the refrigerator overnight or allow individual slices to sit at room temperature for about 20 minutes before serving for easier slicing and a perfectly creamy texture.
- Nutrition Information: The provided nutrition information is an estimate only and is based on the pie being sliced into 10 equal pieces. Nutritional values may vary depending on exact ingredient brands and precise quantities used.
Nutrition Facts (per serving)
Based on 10 servings
- Calories: 528 kcal
- Carbohydrates: 37g
- Protein: 7g
- Fat: 40g
- Saturated Fat: 21g
- Cholesterol: 89mg
- Sodium: 265mg
- Potassium: 260mg
- Fiber: 3g
- Sugar: 23g
- Vitamin A: 1022 IU
- Vitamin C: 1mg
- Calcium: 84mg
- Iron: 2mg
Enjoyed This Recipe?
We’d love to hear your thoughts and see your creations! Please consider rating this recipe and leaving a comment below to share your experience with this delicious Rocky Road Pie. Your feedback helps us and other home bakers!