
The Ultimate Red Velvet Oreo Cheesecake: A Decadent Dessert Masterpiece
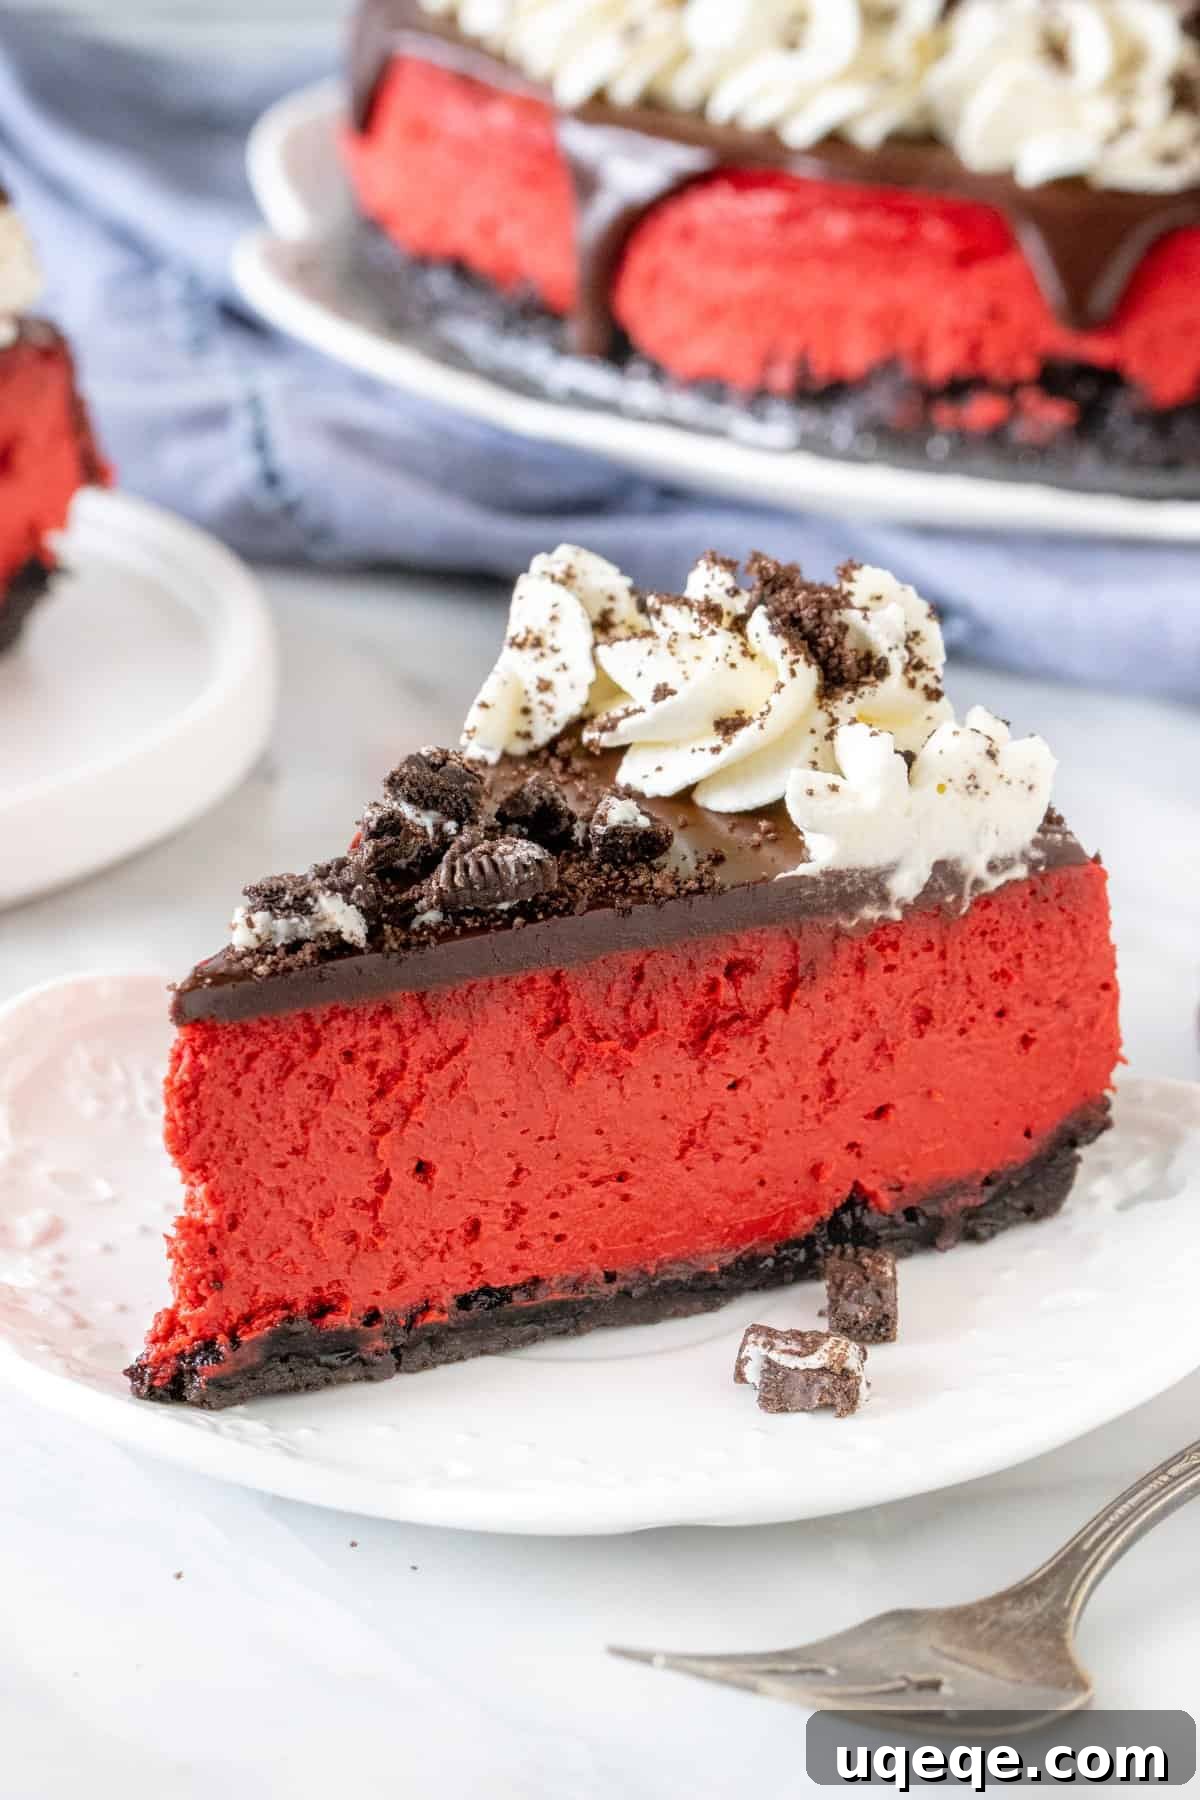
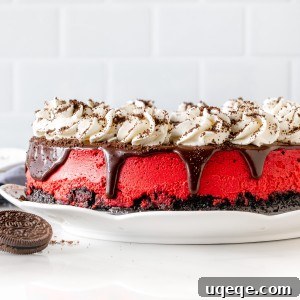
Prepare to be captivated by a dessert that seamlessly marries two iconic treats: the rich, tangy allure of red velvet cake and the irresistible crunch of Oreo cookies, all transformed into a show-stopping cheesecake. This Red Velvet Oreo Cheesecake is not just a dessert; it’s an experience. Boasting a velvety smooth red velvet filling with its signature vibrant hue, cradled by an extra-thick Oreo crust, and crowned with a luxurious chocolate ganache, fluffy whipped cream, and a generous sprinkle of crushed Oreos, this recipe promises pure decadence. It’s the perfect showpiece for dinner parties, holidays, or any occasion where you want to impress and delight.
A Symphony of Flavors: Where Red Velvet Meets Oreo
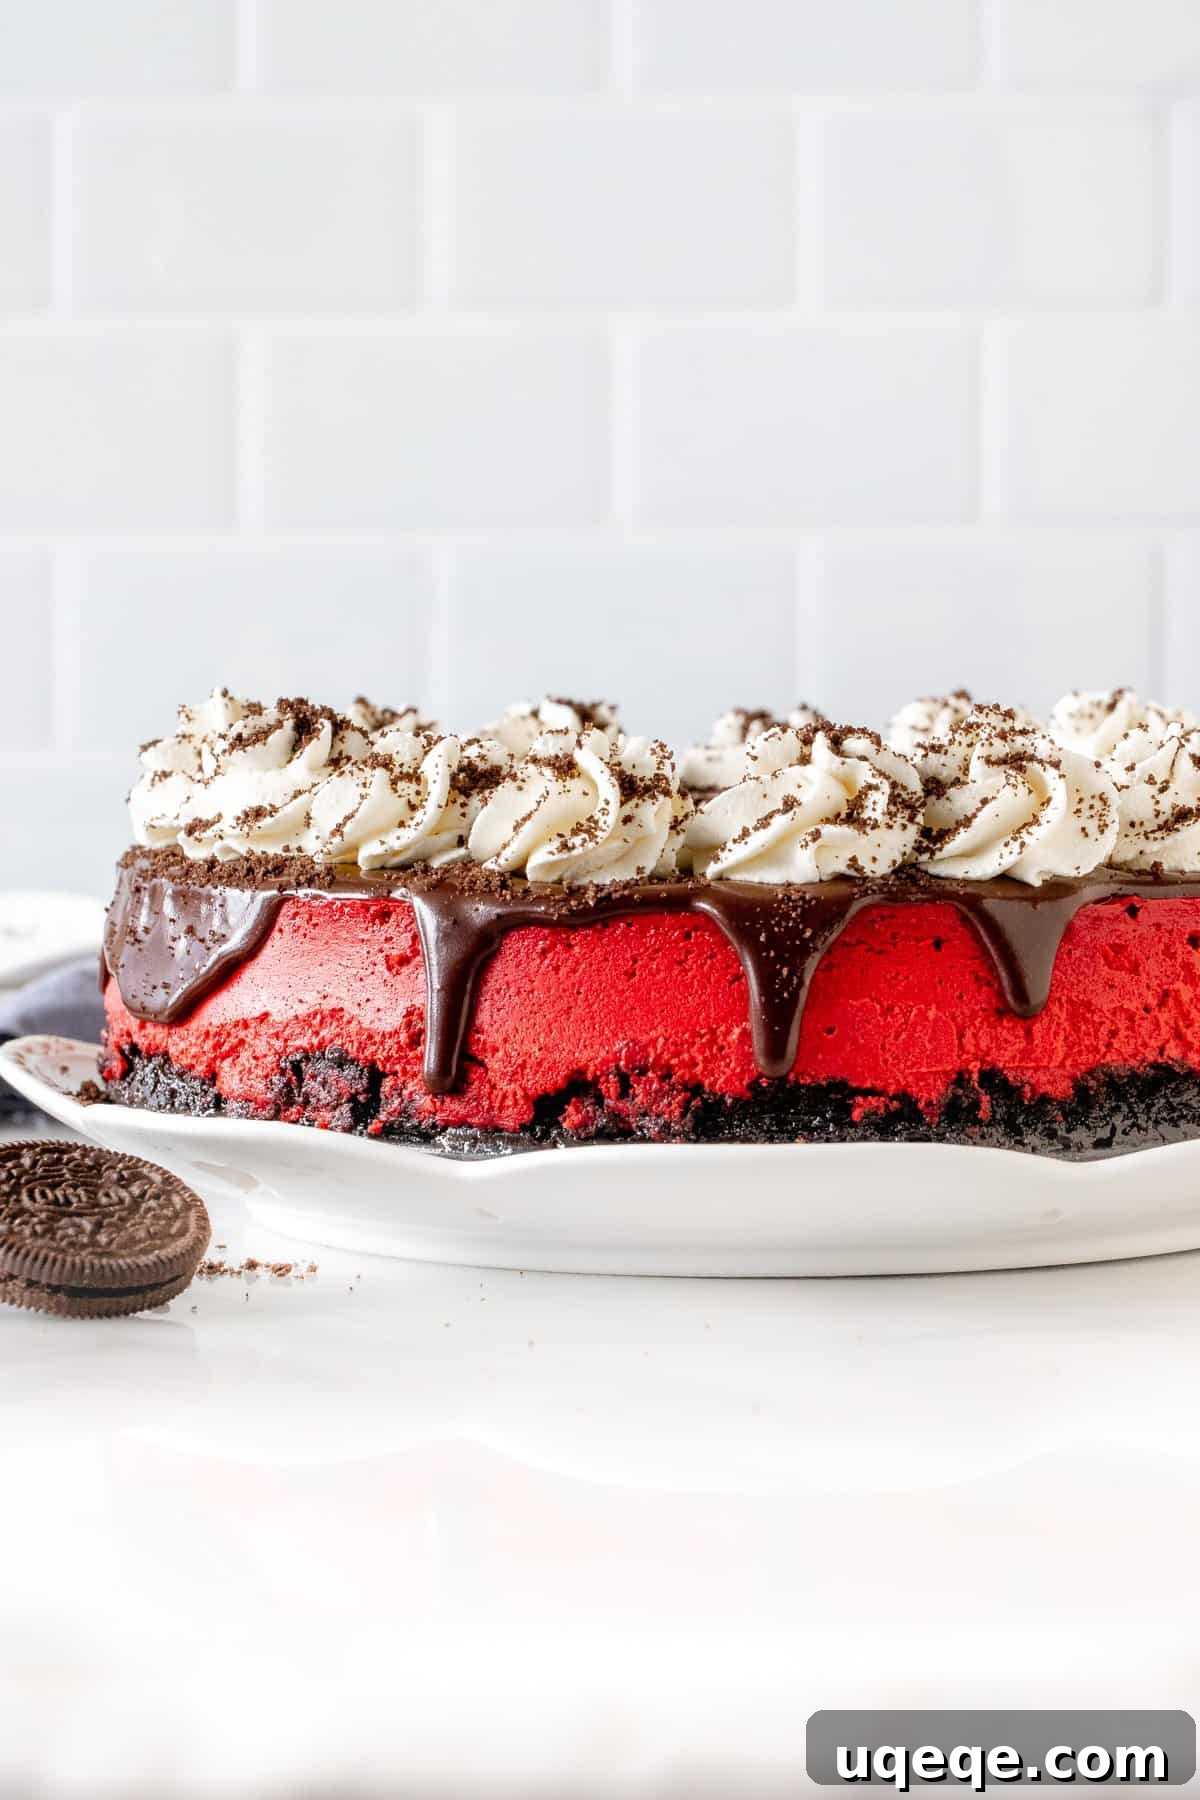
Imagine the delightful fusion of a classic red velvet cake and a creamy Oreo cheesecake. This recipe brings that dream to life, creating a dessert that is both familiar and excitingly new. The distinct deep red color of the cheesecake immediately draws the eye, making it an incredibly attractive dessert that’s perfect for celebrations like Valentine’s Day, Christmas, or any special gathering. The interplay of the slightly tart red velvet with the sweet, chocolatey notes of Oreos creates a complex yet harmonious flavor profile that will leave everyone craving another slice.
At the heart of this masterpiece is a cheesecake filling that encapsulates all the beloved characteristics of a traditional red velvet cake. This means incorporating a delicate hint of cocoa powder, which contributes to the subtle chocolate undertones and deepens the red color. The tangy elements, crucial for authentic red velvet flavor, come from buttermilk and a touch of vinegar, balancing the sweetness and adding a unique depth. And, of course, the vibrant red food coloring ensures that visually stunning presentation that is synonymous with red velvet. Beyond these specific additions, the baking process for this cheesecake largely follows standard, reliable cheesecake techniques, ensuring a familiar and achievable baking journey.
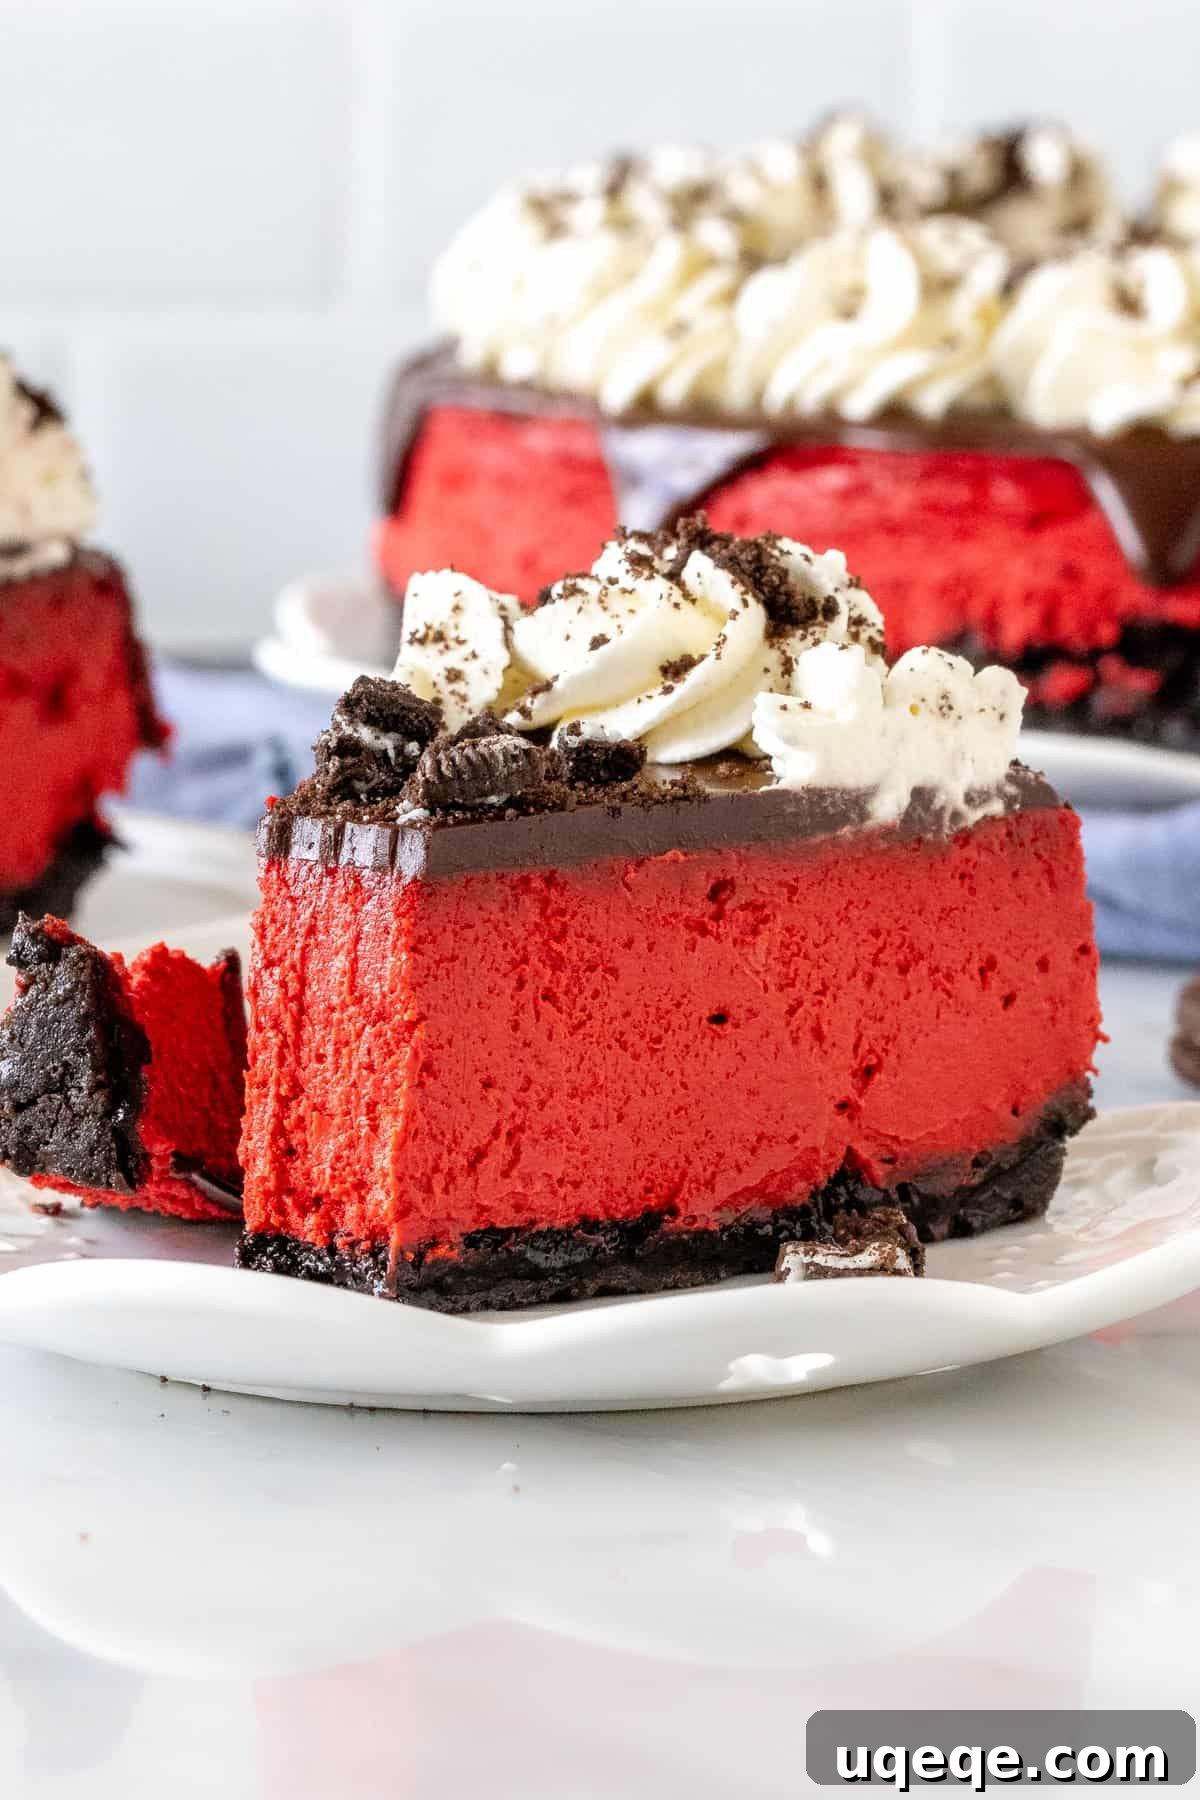
The foundation of this extraordinary dessert is its undeniably thick Oreo crust. Unlike many cheesecake recipes that feature a thin crust, this version embraces the glorious crunch and chocolatey richness of Oreos with an extra-generous base. This robust crust not only provides structural integrity but also delivers an incredible textural contrast to the silky-smooth filling. To elevate the Oreo experience further, the finished cheesecake is adorned with a rich chocolate ganache, a cloud of whipped cream, and a final flourish of even more crushed Oreo cookies, cementing its status as an ultimate flavor combo.
Essential Baking Tips for Cheesecake Perfection
Baking a cheesecake can seem daunting, but with a few key techniques and a little patience, you can achieve a perfectly smooth, crack-free, and incredibly delicious dessert. These tips are designed to guide you through the process, ensuring your Red Velvet Oreo Cheesecake turns out flawlessly every time.
Plan Ahead for Flawless Results: The Importance of Cooling and Chilling
One of the most crucial steps for any cheesecake is adequate cooling and chilling. A cheesecake must cool slowly after baking to prevent cracks, and then it absolutely needs a minimum of 6 hours in the refrigerator to fully set and develop its creamy texture. For the best results, I strongly recommend baking your cheesecake the day before you plan to serve it. Allow it to cool gradually on the counter, then chill it overnight in the fridge. This extended chilling time ensures that when you finally slice into it, you’ll be rewarded with a firm, perfectly set slice. The ganache and final toppings can then be added on serving day, allowing them to look their freshest.
The Magic of Room Temperature Ingredients
For a truly silky-smooth cheesecake batter free of any lumps, it is imperative that your cream cheese, sour cream, buttermilk, and eggs are all at room temperature before you begin mixing. Cold ingredients are stiff and resist combining smoothly, leading to over-mixing (which can introduce too much air and cause cracks) or a lumpy batter. To ensure everything is perfectly tempered, take these ingredients out of the refrigerator at least 30 minutes, or even an hour, before you start your baking process.
Achieving the Perfect Oreo Crust
While often overlooked, pre-baking your Oreo crust is a simple step that makes a significant difference. Baking the crust on its own for a short period helps to set it, making it wonderfully crunchy and preventing it from becoming soggy once the wet cheesecake filling is added. This ensures a delightful textural contrast that elevates the entire dessert.
Vibrancy of Red: Food Coloring Guide
The amount of red food coloring you use is entirely up to your personal preference for vibrancy. I typically use about 1.5 tablespoons to achieve a deep, rich, and very vibrant red color that truly pops. However, feel free to adjust this amount to your liking if you prefer a subtler hue. Both gel food coloring (which is more concentrated) and liquid food coloring work well for this recipe, though you may need slightly more liquid coloring to achieve the same intensity.
The Water Bath Method: Your Secret Weapon for Crack-Free Cheesecake
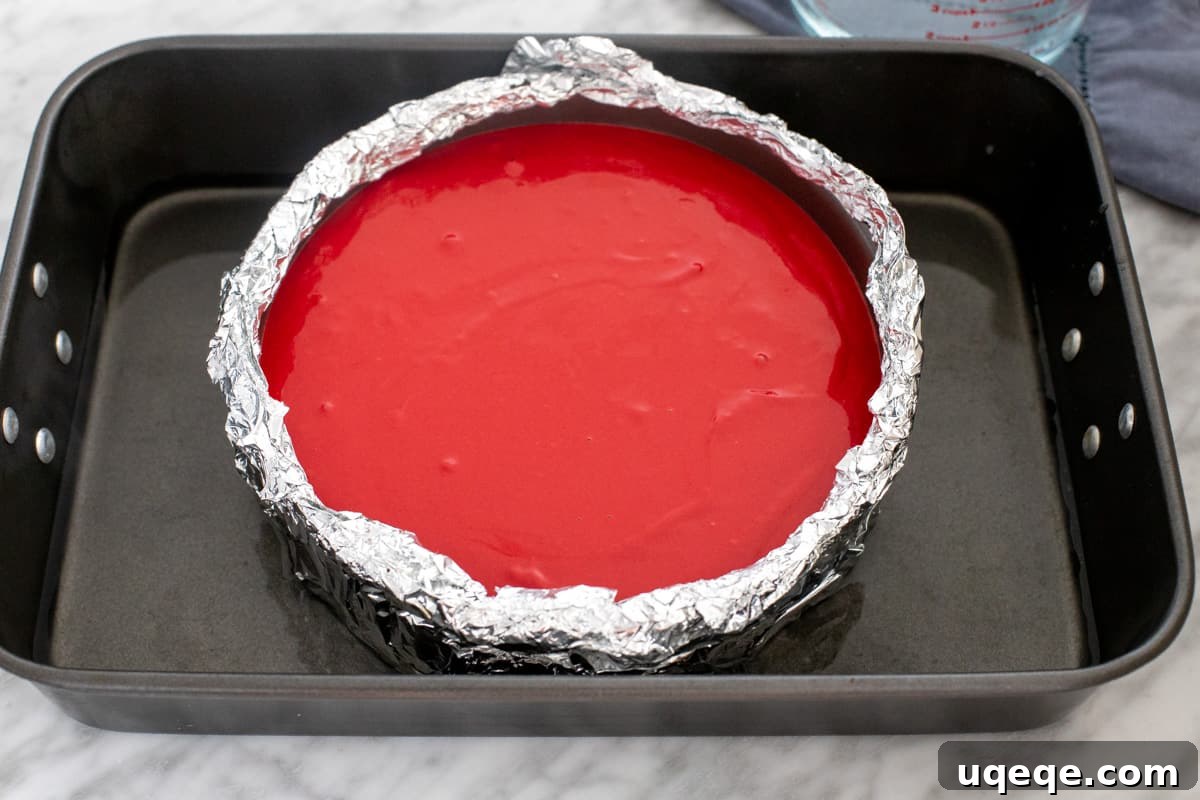
Baking cheesecake in a water bath (bain-marie) is a professional trick that is easier than it sounds and yields consistently amazing results. This method creates a moist, even-heat environment in your oven, which is essential for preventing the cheesecake from cracking on top. Here’s how to do it:
- First, wrap the outside of your springform pan (the bottom and sides) with at least three layers of heavy-duty aluminum foil. This is crucial to prevent any water from seeping into your crust. Make sure all seams are thoroughly covered.
- Place your foil-wrapped springform pan into a larger roasting pan.
- Once your cheesecake batter is poured into the springform pan, carefully pour about 1/2 to 1 inch (approximately 1.5 to 2.5 cm) of hot water into the roasting pan, ensuring the water surrounds the springform pan but does not come into contact with the cheesecake batter itself.
- Transfer the entire roasting pan, with the cheesecake nestled inside its water bath, into the preheated oven. The steam created by the hot water helps the cheesecake bake gently and evenly, resulting in that coveted creamy texture and a smooth, crack-free surface.
Elevating Your Cheesecake with Decadent Toppings
While the Red Velvet Oreo Cheesecake is a star on its own, the toppings are what transform it into an truly unforgettable dessert. The rich chocolate ganache, fluffy whipped cream, and crunchy crushed Oreos add layers of flavor and texture that complete this magnificent treat.
Silky Smooth Chocolate Ganache
The chocolate ganache provides a sophisticated layer of deep chocolate flavor that perfectly complements the red velvet. Its smooth, glossy finish creates an elegant appearance, and as it gently drips over the sides, it adds to the visual appeal. Making ganache is simpler than you might think, requiring just two ingredients and a bit of gentle heating. It’s the perfect foil to the tangy cheesecake filling.
Light and Airy Whipped Cream
A dollop or elegantly piped rosettes of homemade whipped cream provide a delightful lightness and creamy texture that contrasts beautifully with the dense cheesecake. It’s a classic pairing for a reason, offering a cool, airy counterpoint to the rich flavors beneath. You can sweeten it lightly or leave it plain, depending on your preference.
The Final Flourish: Crushed Oreos
No Red Velvet Oreo Cheesecake would be complete without a generous sprinkling of crushed Oreo cookies on top. This final topping isn’t just for decoration; it reintroduces that beloved Oreo crunch and chocolatey flavor, tying the entire dessert together. It’s the perfect textural element to finish off each luscious slice.
Variations & Customization Ideas
While this recipe is perfect as written, there’s always room to get creative and personalize your Red Velvet Oreo Cheesecake:
- Different Oreo Flavors: Experiment with Golden Oreos for a vanilla twist, Mint Oreos for a festive touch, or even Peanut Butter Oreos for an added nutty depth.
- White Chocolate Ganache: Instead of dark or semi-sweet chocolate ganache, try a white chocolate version for a different flavor profile and a striking visual contrast against the red cheesecake.
- Cream Cheese Frosting Swirl: For an extra dose of red velvet authenticity, swirl a dollop of classic cream cheese frosting on top of the ganache.
- Berry Topping: Fresh raspberries or strawberries can add a burst of fruity brightness and a beautiful color accent, especially for a summer celebration.
- Chocolate Shavings: Instead of or in addition to crushed Oreos, garnish with elegant chocolate shavings for a more refined look.
Serving and Storage Suggestions
To ensure your Red Velvet Oreo Cheesecake remains a culinary triumph from the first slice to the last, follow these serving and storage recommendations:
- Slicing: For clean slices, use a thin, sharp knife. Dip the knife in hot water and wipe it clean between each cut. This prevents the cheesecake from sticking and dragging. Remember to press firmly to cut through the thick Oreo crust.
- Presentation: Allow the cheesecake to sit at room temperature for about 15-20 minutes before serving. This slight warming helps to soften it just enough for optimal flavor and texture.
- Storage: Store any leftover cheesecake covered tightly in the refrigerator. It will maintain its delicious flavor and creamy texture for up to 5 days. You can also freeze individual slices wrapped in plastic wrap and then foil for longer storage (up to 1-2 months). Thaw in the refrigerator overnight before serving.
Explore More Decadent Desserts
If you’ve fallen in love with the rich flavors of red velvet or the playful crunch of Oreos, there are many more delightful recipes waiting to be discovered. Expand your baking repertoire with these irresistible treats:
- Classic Red Velvet Cupcakes
- Chewy Red Velvet Chocolate Chip Cookies
- Decadent Chocolate Chip Red Velvet Muffins
- No-Bake Oreo Cream Pie
- Irresistible Oreo Cheesecake Cookies
Recipe: Red Velvet Oreo Cheesecake
This ultimate Red Velvet Oreo Cheesecake combines creamy red velvet flavor with a silky-smooth texture and striking red color. It features a rich, thick Oreo crust and is topped with luscious chocolate ganache, whipped cream, and more crushed Oreos for an unbeatable flavor combination.
By: Fiona Dowling
Prep Time: 1 hour | Cook Time: 1 hour | Cooling and Chilling: 7 hours | Yields: 12 slices
Equipment
- 9-inch springform pan
- Large roasting pan (big enough for the springform pan to fit inside)
- Food processor or blender (optional, for crushing Oreos)
- Large mixing bowls
- Electric mixer (stand or hand-held)
- Heatproof bowl (for ganache)
- Piping bag with 1M tip (optional, for whipped cream)
Ingredients
Oreo Crust
- 26 Oreo cookies (wafers and filling)
- 1/3 cup (75 grams) unsalted butter, melted
Red Velvet Cheesecake Filling
- 24 ounces (680 grams) full-fat cream cheese, brick-style, at room temperature
- 1 1/4 cup (250 grams) granulated sugar
- 3 tablespoons cocoa powder (natural over Dutch-process preferred)
- 3/4 cup (180 ml) sour cream, room temperature
- 1/4 cup (60 ml) buttermilk, room temperature
- 2 teaspoons distilled vinegar (white vinegar is fine)
- 1 – 1 1/2 tablespoons red food coloring (15 – 22.5 ml), gel or liquid
- 4 large eggs, whisked
- Boiling water, for the water bath
Chocolate Ganache
- 4 ounces (56 grams) dark chocolate (50% cocoa or semi-sweet works well)
- 1/2 cup (120 ml) whipping cream (or heavy cream, around 35% MF)
Topping (Optional)
- 1/2 cup (120 ml) whipping cream
- 3-4 Oreos, crushed or chopped, for decorating
Instructions
Preparation
- Preheat the oven to 350°F (180°C or 160°C for a fan-forced oven).
- Wrap the outside of a 9-inch springform pan with heavy-duty aluminum foil. Wrap it at least 3 times to ensure the bottom and sides are covered and all seams are sealed to prevent water leakage.
Oreo Crust
- Crush the Oreo cookies (wafers and filling) into fine crumbs using a food processor or blender. Alternatively, place cookies in a freezer bag and crush with a rolling pin.
- In a bowl, mix the crushed cookies with the melted butter until well combined.
- Press the mixture firmly into the bottom and slightly up the sides of the prepared springform pan.
- Bake the crust in the preheated oven for 8 minutes. Remove from the oven but keep the oven turned on.
Cheesecake Filling
- While the crust is baking, prepare the cheesecake filling.
- In a very large bowl, beat together the room temperature cream cheese and granulated sugar until the mixture is smooth and creamy.
- Beat in the cocoa powder until fully incorporated. Turn off the mixer and scrape down the sides and bottom of the bowl thoroughly.
- With the mixer on a low speed, beat in the room temperature sour cream. Then, mix in the buttermilk, vinegar, and red food coloring until just combined.
- Gently whisk the eggs in a separate bowl. Carefully beat the whisked eggs into the cheesecake batter a little at a time (I recommend adding in 3 separate additions) until just combined. Do not overmix.
Baking and Cooling
- Place the foil-wrapped springform pan (with the baked crust and filling) in the middle of the large roasting pan.
- Pour the cheesecake batter over the crust and gently smooth the top with a spatula.
- Carefully pour boiling water into the roasting pan so that there is about 1/2 to 1 inch (approximately 1.5 to 2.5 cm) of water surrounding the springform pan.
- Place the roasting pan (with the cheesecake inside) into the preheated oven. Bake for 55-65 minutes, or until the top appears just set, and the center still has a slight wobble like Jell-O or pudding when the pan is gently nudged, but it shouldn’t wobble like a liquid.
- Remove the roasting pan from the oven. Allow the cheesecake to cool slowly inside the water bath until the water reaches room temperature.
- Once the water is cool, carefully remove the cheesecake from the roasting pan and place it on a wire cooling rack to continue cooling completely to room temperature.
- Once the pan feels room temperature to the touch, cover the top of the cheesecake loosely with plastic wrap and transfer it to the refrigerator to chill for at least 6 hours, or preferably overnight. This chilling process is essential for the cheesecake to properly set and achieve its optimal texture.
Topping and Serving
- For the chocolate ganache, chop the dark chocolate into very fine pieces and place them in a heatproof bowl.
- Heat 1/2 cup of whipping cream in a small saucepan over medium heat until it is almost boiling (small bubbles will form around the edges).
- Pour the hot cream over the chopped chocolate. Let it sit undisturbed for 2-4 minutes to allow the chocolate to melt. Then, whisk gently until the ganache is smooth and glossy. If any chocolate pieces remain, microwave on medium power for 30 seconds, then whisk again until smooth.
- Remove the chilled cheesecake from the fridge. Carefully trace around the outside edge of the cheesecake with a thin, sharp knife to loosen it from the pan. Then, unclamp and remove the outer ring of the springform pan.
- If there is any condensation on the top surface of the cheesecake, gently blot it with a paper towel to remove excess moisture.
- Pour the chocolate ganache over the top of the cheesecake, allowing it to naturally drip elegantly over the edges. Place the cheesecake back in the fridge until you are ready to serve, allowing the ganache to set slightly.
- If using, beat the remaining 1/2 cup whipping cream until firm peaks form.
- Transfer the whipped cream to a piping bag (using a 1M tip is recommended for rosettes) and pipe decorative rosettes around the edges of the cheesecake.
- Crush or chop the additional 3-4 Oreos and sprinkle them generously on top of the cheesecake for decoration and added crunch.
- Slice the cheesecake with a thin, sharp knife, making sure to slice all the way through the thick Oreo crust. Clean the knife between each slice for a perfect presentation. Serve immediately and enjoy!
Chef’s Notes
- Room Temperature Ingredients: It is absolutely crucial for the cream cheese, sour cream, buttermilk, and eggs to be at room temperature before you begin mixing. This ensures a lump-free, perfectly smooth batter, preventing over-mixing and potential cracks in the final cheesecake.
- Cream Cheese Selection: Always use full-fat, brick-style cream cheese for this recipe. Avoid any products labeled as light, reduced-fat, spreadable, or whipped, as they contain more water and stabilizers that can significantly alter the texture and setting of your cheesecake.
- Make-Ahead Strategy: For optimal flavor and texture, I always prepare this cheesecake the day before I intend to serve it. After baking, allow it to cool completely, then cover it and chill it in the refrigerator overnight. The next day, you can prepare and pour the chocolate ganache, returning the cheesecake to the fridge to set. Add the whipped cream and crushed Oreos right before serving to keep them fresh and visually appealing.
- Nutrition Information: The provided nutrition details are an estimate only and are based on a single slice, assuming the recipe is divided into 12 equal pieces and includes ganache, crushed Oreos, and whipped cream toppings. This recipe can typically yield up to 14 slices, which would slightly reduce the nutritional values per serving.
- Storage Guidelines: Store any leftover Red Velvet Oreo Cheesecake covered tightly in the refrigerator for up to 5 days to maintain its freshness and quality.
Nutritional Information (Per Slice Estimate)
- Calories: 624 kcal
- Carbohydrates: 48g
- Protein: 9g
- Fat: 46g
- Saturated Fat: 25g
- Polyunsaturated Fat: 3g
- Monounsaturated Fat: 13g
- Trans Fat: 1g
- Cholesterol: 173mg
- Sodium: 353mg
- Potassium: 288mg
- Fiber: 2g
- Sugar: 36g
- Vitamin A: 1403IU
- Vitamin C: 1mg
- Calcium: 115mg
- Iron: 4mg