
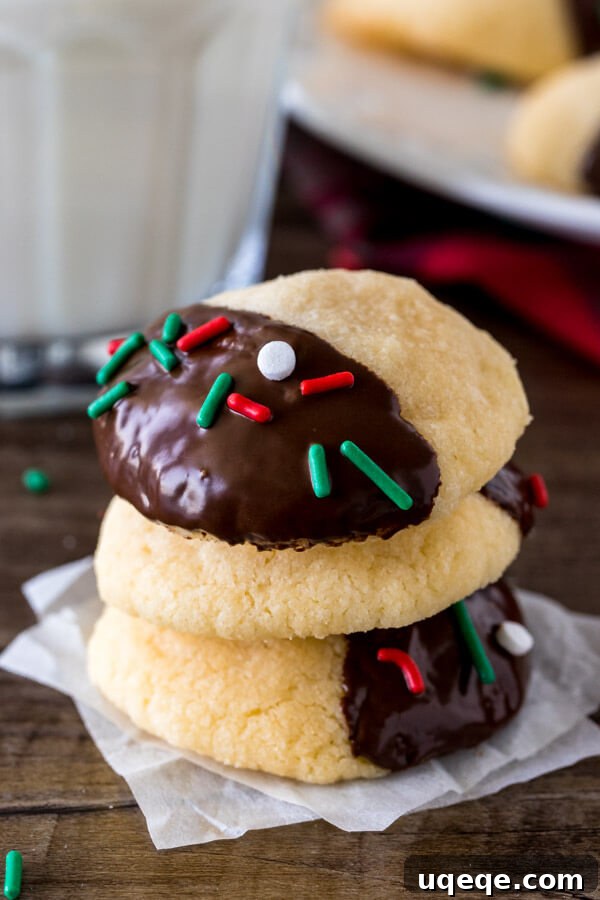
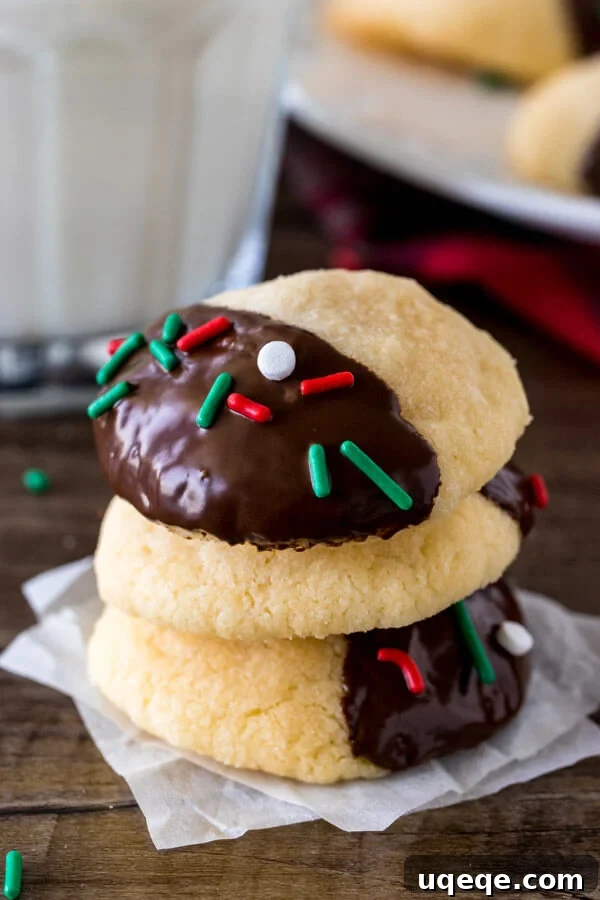
Irresistible Chocolate-Dipped Shortbread Cookies: Your Ultimate Guide to Buttery, Melt-in-Your-Mouth Holiday Treats
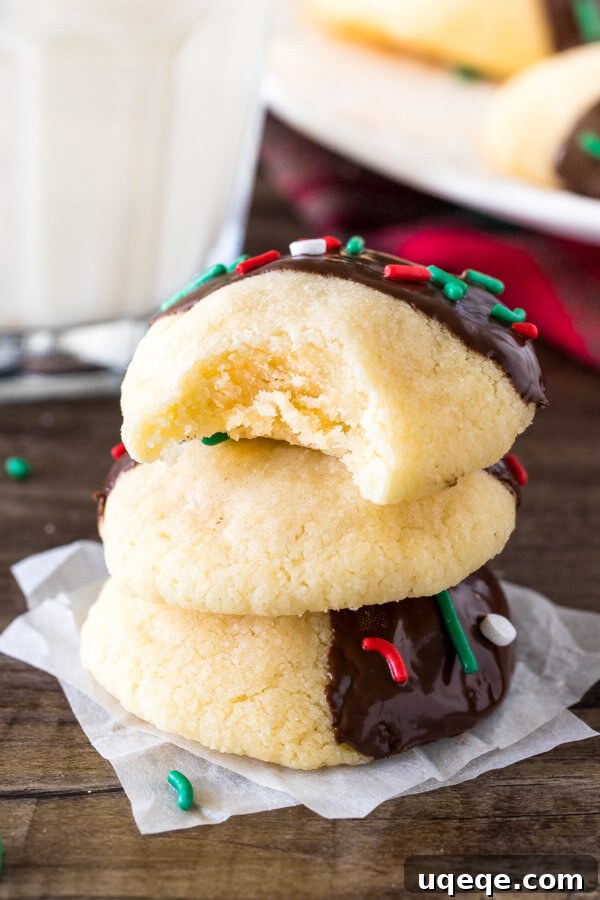
There’s something truly magical about a classic shortbread cookie, and when it’s elegantly dipped in rich, smooth chocolate, it transcends into a realm of pure indulgence. These **chocolate-dipped shortbread cookies** are more than just a treat; they’re a celebration of simple, wholesome ingredients creating an unforgettable experience. Imagine a buttery, delicate cookie that practically dissolves on your tongue, enrobed in a crisp layer of luscious chocolate. Whether you’re planning your elaborate **Christmas cookie tray**, searching for an **easy shortbread recipe** to impress guests, or simply craving a comforting **melt-in-your-mouth dessert** to enjoy with your afternoon tea, this recipe promises perfection every single time. Get ready to bake a batch of cookies that will become an instant family favorite!
A Timeless Tradition: My Journey to Crafting the Perfect Shortbread
My culinary journey with shortbread cookies began many years ago, a cherished memory from my early teenage years. I must have been around 12 or 13 when I first stumbled upon a deceptively simple shortbread recipe in one of my mum’s well-worn magazines. It quickly became “my” dedicated contribution to our cherished annual Christmas baking tradition. There was a unique satisfaction in rolling those soft, buttery balls and watching them transform into golden, fragrant discs in the warmth of the oven. For many festive seasons, these shortbread treats were not just a cookie; they were a staple in our home, eagerly anticipated by family and friends alike.
As the years progressed, that beloved magazine and its precise recipe eventually faded into the past, lost to time and countless kitchen adventures. For a period, these delightful shortbread balls regrettably vanished from our holiday cookie rotation, leaving a noticeable void that was keenly felt. But the lingering longing for that distinct buttery flavor and exquisitely tender crumb eventually spurred me to action. I embarked on a dedicated mission, committing countless hours to extensive recipe testing and, of course, the delightful task of taste testing countless batches. My goal was clear yet ambitious: to recreate the ultimate **buttery shortbread recipe** that not only held its shape beautifully when gently dipped in chocolate but also retained that essential, characteristic melt-in-your-mouth tenderness. After much experimentation, fine-tuning, and a few delicious failures, I am absolutely thrilled to share with you the culmination of that heartfelt effort – a shortbread cookie that perfectly balances richness, delicate texture, and a dreamy, glossy chocolate finish. It’s a testament to the fact that some traditions are simply too good to let go.
The Art of Making Exquisite Shortbread Cookies from Scratch
Crafting truly exceptional shortbread is a delightful and surprisingly straightforward process that relies on a few fundamental principles and a commitment to high-quality ingredients. It’s a wonderful testament to how simple components can, with a little care, create an extraordinary flavor experience. Here’s a deep dive into what makes these **easy shortbread cookies** so remarkably special and how you can achieve bakery-quality results right in your own kitchen.
Choosing Your Ingredients Wisely for Superior Flavor and Texture
- Butter is King (and Queen): The absolute cornerstone of any truly great shortbread is real, high-quality butter. It’s not merely an ingredient; it is, without a doubt, the primary flavor contributor. For the best results, always opt for unsalted butter, as this allows you to meticulously control the salt content in your recipe. Crucially, ensure your butter is softened to true room temperature – it should be pliable to the touch, leaving an indentation when pressed, but definitely not melted or greasy. This precise consistency is utterly vital for achieving the perfect dough texture and for preventing your cookies from spreading excessively during the baking process. Think of high-quality butter as the very soul of your **classic shortbread recipe**.
- The Subtlety of Sweetness: Traditional shortbread is renowned for its delicate, subtle sweetness, a characteristic that allows the rich, nutty butter flavor to truly shine through. You’ll notice that this recipe calls for a moderate amount of sugar, precisely to achieve this balance. Overly sweet shortbread can easily overpower those delicate buttery notes, so resist any temptation to add more sugar than specified!
- Flour and Cornstarch: The Secret to Unrivaled Tenderness: My specific recipe incorporates a thoughtful blend of all-purpose flour and cornstarch, a combination that is an absolute game-changer! While the all-purpose flour provides the necessary structure and body for the cookie, the cornstarch works its magic by yielding an incredibly soft, tender, and genuinely melt-in-your-mouth texture, coupled with a finer, more delicate crumb. This ingenious addition is the secret ingredient for an **easy shortbread** that feels incredibly luxurious and boasts an unmatched delicate snap.
Mixing the Dough: Precision for a Perfect Shortbread Texture
The mixing process for shortbread dough is wonderfully straightforward, but paying attention to a few key details will guarantee optimal results:
- Creaming Butter and Sugar Just Right: Begin by thoroughly beating together the softened unsalted butter and granulated sugar until the mixture becomes light, pale, and fluffy. However, unlike some other cookie recipes, especially whipped shortbread, which demands extended creaming for an airy texture, you don’t want to over-beat the mixture here. Beat just until well combined and visibly fluffy. Excessive beating can incorporate too much air into the mixture, which might unfortunately lead to your cookies spreading too thin in the oven, losing their classic shape.
- Expertly Incorporating Dry Ingredients: In a separate, medium-sized bowl, take the time to sift together your all-purpose flour and cornstarch. Sifting is a small but mighty step that ensures even distribution of these dry ingredients and effectively prevents any pesky lumps from forming. Gradually add this meticulously sifted dry mixture to your butter and sugar mixture, mixing gently on low speed just until all the flour and cornstarch are fully incorporated and a cohesive, firm dough begins to form. It is absolutely essential that no dry streaks of flour remain, as unmixed pockets can cause the cookies to flatten or become inconsistent during baking.
- Achieving the Ideal Dough Consistency: The finished shortbread dough should feel quite firm and rather thick to the touch. If, after mixing, it feels overly sticky or too soft to handle easily, don’t despair! Simply cover the mixing bowl with plastic wrap and refrigerate the dough for about 30 minutes. This brief chill will firm up the butter and make the dough much more manageable for shaping.
Forming and Baking Your Delicious Shortbread Balls
Once your perfectly mixed dough is ready, it’s time to shape these delicious morsels into their classic form, preparing them for their buttery transformation in the oven:
- Shape and Size Consistency: For the best and most consistent results, roll the dough into uniform balls, each approximately 2 teaspoons in size, which is roughly equivalent to the size of a ping-pong ball. Consistency in size is paramount here, as it ensures that all your cookies bake evenly and come out perfectly done at the same time.
- Optimal Preparation for Baking: Arrange the uniformly shaped dough balls about 2 inches apart on baking sheets that have been generously lined with parchment paper. Parchment paper is a baker’s best friend here, as it not only prevents the cookies from sticking to the sheet but also aids immensely in easy cleanup once your delightful **homemade shortbread cookies** are baked.
- Baking to Golden Perfection: Preheat your oven accurately to 350°F (175°C). For best results and even baking, bake one cookie sheet at a time for approximately 12-15 minutes. Keep a close eye on them; the cookies are ready when their tops appear set and the edges are just barely, lightly golden. Remember, classic shortbread is known for its pale color, so resist the urge to over-brown them, which can make them dry.
- Crucial Cooling Step: Once baked, carefully remove the shortbread cookies from the oven. Gently transfer them to a wire cooling rack and allow them to cool completely to room temperature. It’s important to note that they will be quite delicate when warm, but they will firm up beautifully as they cool, becoming perfectly ready for their decadent chocolate transformation.
The Decadent Chocolate Dip: Elevating Your Shortbread to New Heights
The luscious chocolate dip is what truly elevates these **classic shortbread cookies** from merely delicious to absolutely divine. This final step adds a glorious layer of richness, a delightful textural contrast, and undeniable visual appeal, making them utterly perfect for any special occasion, from festive holiday gatherings to elegant dessert spreads.
Choosing the Right Chocolate for Your Dipped Delights
The type of chocolate you select will significantly impact the final flavor profile and overall experience of your **chocolate-dipped shortbread cookies**. I personally find that using a harmonious blend of milk and dark chocolate (for instance, combining 4 oz milk chocolate with 8 oz of 50% dark chocolate) yields a beautifully balanced sweetness and a satisfying depth of flavor. However, feel entirely free to experiment with your personal favorites:
- Milk Chocolate: Offers a sweeter, creamier, and more universally familiar flavor that many find comforting and appealing.
- Dark Chocolate: Provides a more intense, sophisticated, and slightly bitter contrast that exquisitely complements the rich, buttery shortbread. A cacao content ranging from 50% to 70% is often considered ideal for dipping.
- Semi-Sweet Chocolate: This is a highly versatile choice that perfectly balances the sweetness of milk chocolate with the intensity of dark, making it a crowd-pleasing option for many palates.
- White Chocolate: For a completely different aesthetic and a wonderfully sweet, creamy flavor, high-quality white chocolate can also be a delightful and elegant option. Consider adding a few drops of food coloring for a vibrant holiday touch!
Achieving a Perfectly Glossy and Smooth Chocolate Finish
To ensure your chocolate dip is wonderfully smooth, evenly distributed, and boasts a truly beautiful, professional-looking sheen, there’s a simple yet effective trick: add just a few drops of neutral-flavored vegetable oil (or, for a hint of flavor, refined coconut oil) to the melted chocolate. This addition not only imparts a gorgeous glossy finish but also slightly thins the chocolate, making it much easier to work with and providing a more consistent, elegant coating on your cookies.
Mastering the Art of Melting Chocolate Like a Professional
Melting chocolate can sometimes be a delicate process, but with a bit of care and attention, you’ll achieve a silky-smooth, perfectly tempered consistency every time:
Pro Tip for Microwave Melting: When using the microwave, always finely chop your chocolate first for even melting. Microwave it on medium power, using short intervals of 30-45 seconds. Critically, stir the chocolate thoroughly and gently after each interval, even if it doesn’t appear fully melted. This gradual, controlled heating prevents the chocolate from burning, seizing (becoming thick and grainy), or developing an unappetizing clumpy texture. Patience is absolutely key here; it’s always better to melt slowly and carefully than to scorch it and have to start over.
The Joy of Dipping and Decorating Your Creations
Once your **homemade shortbread cookies** are completely cooled and your chocolate is perfectly melted and gloriously glossy, you’re ready for the most fun part:
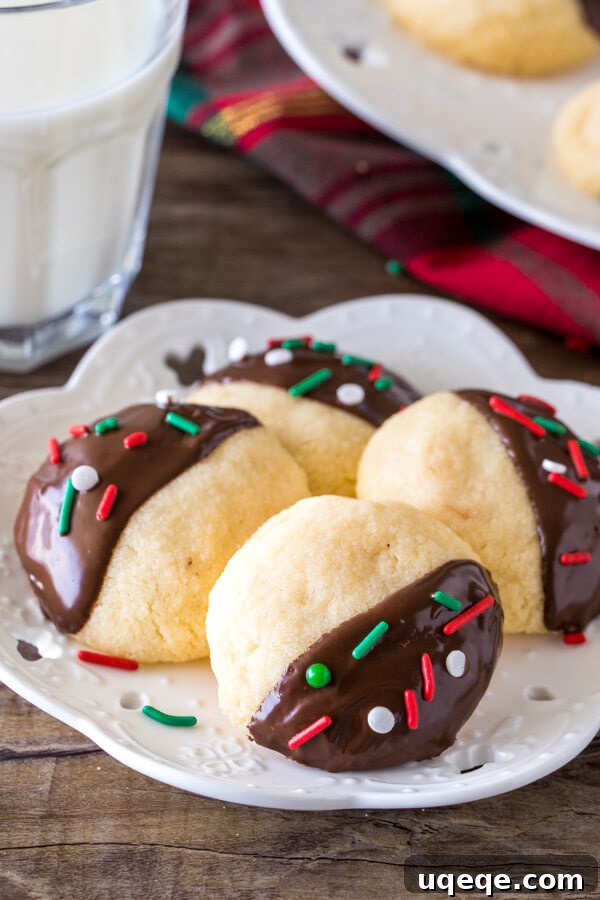
- The Decadent Dip: Gently dip half of each completely cooled cookie into the melted chocolate. For those who prefer a neater or more artistic finish, you can also use a small knife or the back of an offset spatula to delicately spread the chocolate onto one half of the cookie, creating a smooth, even layer.
- Add Festive Sprinkles (Optional, but Highly Recommended!): Immediately after dipping (while the chocolate is still wet), if you’re embracing the festive spirit, generously sprinkle your favorite holiday sprinkles, crushed peppermint, or even a dusting of sea salt over the wet chocolate. This not only adds a delightful textural crunch but also a vibrant pop of color, making them even more appealing and picture-perfect for your **Christmas cookie tray** or any celebratory spread.
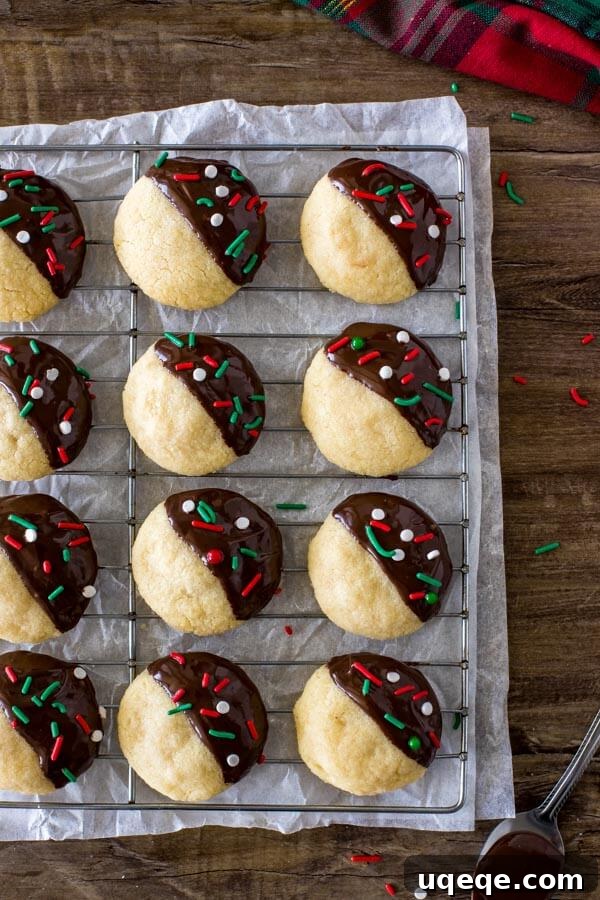
- Set the Chocolate to Perfection: Carefully place the chocolate-dipped cookies on a sheet of parchment paper or back onto a wire rack that is set over parchment paper (to catch any drips) until the chocolate is fully set and firm. For quicker setting, especially if you’re in a hurry or in a warmer climate, you can gently place them in the refrigerator for about 10-15 minutes.
Why These Chocolate-Dipped Shortbread Cookies are an Absolute Must-Try
These **chocolate-dipped shortbread cookies** are far more than just another recipe; they’re an experience designed to delight the senses. They are:
- Deliciously Buttery: The star ingredient, high-quality butter, truly shines through, creating an incredibly rich, satisfying, and deeply comforting flavor profile that is the hallmark of classic shortbread.
- Uniquely Melt-in-Your-Mouth: Thanks to the clever and strategic addition of cornstarch, each bite delivers an unparalleled tenderness and delicacy that quite literally melts on your tongue, leaving a wonderfully smooth finish.
- Made with Simple, Accessible Ingredients: Requiring only a handful of common pantry staples, this **easy shortbread recipe** elegantly proves that extraordinary taste and gourmet quality do not require a long or complex ingredient list.
- Perfect for Any and Every Occasion: While undeniably a festive favorite and an indispensable addition to **holiday cookies** and **Christmas cookie exchanges**, their simple elegance makes them equally delightful as an everyday treat, perfectly paired with a warm cup of tea, coffee, or hot cocoa.
- Visually Stunning and Elegant: The sophisticated chocolate dip, complemented by optional festive sprinkles, transforms these cookies into a truly beautiful and eye-catching addition to any dessert spread, making them as pleasing to the eye as they are to the palate.
Recipe Card: Chocolate-Dipped Shortbread Cookies
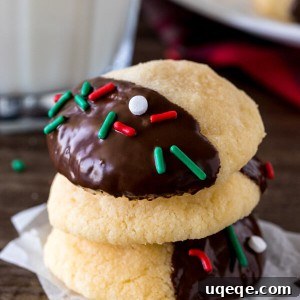
Chocolate-Dipped Shortbread Cookies
By: Fiona Dowling
These chocolate-dipped shortbread cookies are buttery, melt-in-your-mouth morsels of deliciousness. Perfect for your Christmas cookie tray or whenever you need a classic, easy shortbread recipe.
Prep Time: 30 mins |
Cook Time: 14 mins |
Cooling Time: 30 mins |
Total Time: 1 hr 15 mins
Servings: 36 cookies
Ingredients
- For the Shortbread:
- 1 1/2 cups unsalted butter (3 sticks), softened but not melted
- 3/4 cup granulated sugar
- 3 cups all-purpose flour
- 1/2 cup cornstarch
- For the Chocolate Dip:
- 12 oz chocolate, finely chopped (milk, dark, or semi-sweet – I recommend 4 oz milk chocolate and 8 oz 50% dark chocolate for a balanced flavor)
- 1/4 teaspoon vegetable oil (or refined coconut oil)
- Holiday sprinkles, optional, for decoration
Instructions
- Preheat your oven to 350°F (175°C) and line two large cookie sheets with parchment paper. This prevents sticking and ensures easy cleanup.
- In a large mixing bowl, using an electric mixer, beat together the softened unsalted butter and granulated sugar until the mixture is light, fluffy, and pale. Be careful not to over-beat, as this can cause cookies to spread.
- In a separate medium bowl, sift together the all-purpose flour and cornstarch. This step ensures an even distribution of ingredients and prevents lumps, contributing to the melt-in-your-mouth texture.
- Gradually add the sifted flour mixture to the butter mixture, incorporating it about half at a time. Beat on low speed until all the flour is fully incorporated and a firm, cohesive dough forms. Ensure no dry streaks of flour remain. If the dough feels too sticky to handle easily, cover the bowl with plastic wrap and refrigerate for 30 minutes to firm it up.
- Form the dough into uniform balls, each approximately 2 teaspoons in size (roughly the size of a ping-pong ball). Place the dough balls about 2 inches apart on the prepared parchment-lined cookie sheets. This spacing allows for even baking.
- Bake one cookie sheet at a time for 12-15 minutes, or until the tops appear set and the edges are just very lightly golden. Shortbread should maintain a relatively pale color, so avoid over-browning.
- Remove the cookies from the oven and carefully transfer them to a wire rack to cool completely. It is crucial that the cookies are entirely cool before proceeding to the chocolate dipping stage.
- While the cookies cool, prepare the chocolate dip. Place the finely chopped chocolate in a large, heat-proof microwave-safe bowl.
- Microwave the chocolate on medium power for short 30-45 second intervals, stirring thoroughly between each interval, until the chocolate is completely melted and beautifully smooth. Stir in the vegetable oil until it is well combined and the chocolate has a glossy sheen.
- Once the cookies are completely cool and the chocolate is perfectly melted, dip half of each cookie into the luscious melted chocolate. Alternatively, for a precise finish, use a knife or the back of a spoon to spread chocolate over one half of each cookie.
- If desired, immediately add festive holiday sprinkles on top of the wet chocolate for an extra touch of color and crunch.
- Place the chocolate-dipped cookies on a clean sheet of parchment paper or back onto the wire rack until the chocolate is fully set and firm. For faster setting, you can place them in the refrigerator for 10-15 minutes.
- Serve and savor your beautiful, buttery chocolate-dipped shortbread cookies!
Nutrition Information (per cookie, estimated)
Calories: 177 kcal | Carbohydrates: 19g | Protein: 2g | Fat: 11g | Saturated Fat: 7g | Cholesterol: 20mg | Sodium: 3mg | Potassium: 41mg | Fiber: 1g | Sugar: 9g | Vitamin A: 236IU | Calcium: 6mg | Iron: 1mg
Tips for Shortbread Success: Achieve Bakery-Quality Results Every Time
Making **perfect shortbread** is an achievable goal with a few key insights. These tips will help you avoid common pitfalls and ensure your cookies are nothing short of spectacular:
- Room Temperature Butter is Non-Negotiable: This is arguably the most critical tip. Don’t skip this step! Cold butter will not cream properly with the sugar, resulting in a dense, crumbly dough. Conversely, melted butter will make your dough greasy and cause your beautiful cookies to spread excessively in the oven, losing their shape. Aim for butter that’s pliable but still cool to the touch.
- Resist the Urge to Overmix the Dough: After you’ve added the flour and cornstarch, mix the dough only until the dry ingredients are just combined and no streaks of flour remain. Overmixing develops gluten in the flour, which leads to a tougher, chewier cookie – and we are aiming for tender, melt-in-your-mouth shortbread!
- Ensure Uniform Sizing for Even Baking: Rolling your cookies to a consistent size is essential for ensuring they bake evenly. If some cookies are larger than others, you’ll end up with a mix of perfectly baked and under or over-baked cookies. A small cookie scoop or careful measurement can help achieve this uniformity.
- Patience is a Virtue When Cooling: It’s tempting to dip warm cookies, but resist! Dipping warm cookies will cause the chocolate to melt unevenly, creating a messy finish, and the warm shortbread itself is more prone to crumbling. Allow them to cool completely.
- The Quality of Your Chocolate Truly Matters: Just like with butter, using good quality chocolate for your dip makes a significant difference in both the taste and texture of the final product. While chocolate chips can work in a pinch, finely chopped baking bars or couverture chocolate often melt more smoothly and yield a superior, more professional-looking finish.
- Utilize a Cooling Rack for Dripping Chocolate: When dipping your cookies, place a sheet of parchment paper or wax paper directly underneath your wire cooling rack. This simple setup will efficiently catch any excess chocolate drips, making your cleanup significantly easier and mess-free.
Storage and Freezing Instructions for Your Homemade Shortbread
These **homemade shortbread cookies** are so irresistibly delicious, they rarely last long! However, should you manage to have any left over, here’s how to store them to maintain their freshness and delightful texture:
- Storing at Room Temperature: To keep your chocolate-dipped shortbread cookies at their best, store them in an airtight container at room temperature for up to 1 week. If you plan on stacking them, it’s a good idea to place small sheets of parchment paper or wax paper between layers to prevent the chocolate from sticking or smudging.
- Refrigeration for Extended Freshness: If your home environment is particularly warm, or if you simply prefer a firmer cookie, you can store them in the refrigerator for up to 2 weeks. For the very best texture, allow them to come to room temperature for about 15-20 minutes before serving, or enjoy them chilled for a different experience.
- Freezing Unbaked Dough: For future baking convenience, you can easily freeze the unbaked shortbread dough. Form the dough into individual balls as per the recipe instructions, then place them in a single layer on a baking sheet and freeze until they are solid. Once frozen, transfer the dough balls to a freezer-safe airtight bag or container for up to 3 months. When ready to bake, you can bake them directly from frozen, adding a few extra minutes (approximately 2-4 minutes) to the usual baking time.
- Freezing Baked Cookies: Baked (and even fully chocolate-dipped) shortbread cookies freeze wonderfully for up to 3 months. To freeze, place them in a single layer on a baking sheet and freeze until solid. Once frozen, transfer them to an airtight freezer-safe container or bag, ensuring they are well-protected from freezer burn. Thaw them at room temperature for a few hours before serving.
Frequently Asked Questions About Our Favorite Shortbread Cookies
- Can I make these shortbread cookies without the chocolate dip?
- Absolutely! While the chocolate dip adds a wonderful layer of indulgence, these **buttery shortbread cookies** are incredibly fantastic and satisfying on their own. They make a wonderful, simple treat for any day or can serve as a versatile base for other toppings, such as a delicate drizzle of citrus glaze or a classic dusting of powdered sugar.
- Why did my shortbread cookies spread too much during baking?
- Several factors can contribute to cookies spreading excessively. Your butter might have been too warm or even partially melted when you began mixing, you might have inadvertently over-beaten the butter and sugar mixture, incorporating too much air, or the dough itself might have simply been too soft. To help prevent spreading, ensure your butter is at the correct room temperature (softened but not melted) and consider chilling the dough for at least 30 minutes before baking.
- Can I use a different type of flour in this shortbread recipe?
- All-purpose flour is specifically recommended for this recipe to achieve the desired texture. Using specialty flours like bread flour (which has a higher protein content) or self-rising flour (which contains added leavening agents) will significantly alter the texture of your shortbread, resulting in a cookie that is tougher or spreads differently than intended.
- How can I ensure my chocolate doesn’t seize or become clumpy when melting?
- To effectively prevent chocolate from seizing (where it becomes thick, grainy, and unusable), it’s crucial to use completely dry utensils and bowls. Additionally, always melt chocolate slowly – either over a double boiler with minimal steam or in short microwave intervals, stirring very frequently. Avoid introducing any water or even a tiny amount of steam directly into the chocolate, as this is the primary cause of seizing.
- Can I add other flavorings to the shortbread dough?
- Certainly! You can easily customize the flavor of your shortbread dough. A teaspoon of pure vanilla extract, almond extract, or even a delightful pinch of fresh citrus zest (such as lemon or orange) can be added along with the butter and sugar for an extra layer of aromatic flavor. Just be mindful not to add too much liquid if you’re using extracts, as it can slightly alter the dough’s consistency.
More Delightful Treats for Your Baking Repertoire
If you absolutely loved these **easy shortbread cookies** and are looking to expand your baking skills, you might also enjoy these other irresistible recipes. They are perfect for complementing your **Christmas cookie tray** or simply for any time you desire a sweet, homemade indulgence:
- Soft Gingerbread Cookies: A holiday classic with a wonderfully chewy texture.
- Soft Batch Frosted Sugar Cookies: Pillowy soft cookies topped with a sweet, vibrant frosting.
- Easy Chocolate Fudge: A simple, rich, and creamy chocolate fudge that’s always a crowd-pleaser.
These **chocolate-dipped shortbread cookies** are truly a testament to the joy and simplicity of home baking. With their rich buttery flavor, delicately tender texture, and luscious chocolate coating, they are destined to become a cherished new favorite in your home for years to come. Gather your ingredients, clear your schedule, and get ready to create some pure baking magic. Happy baking!