
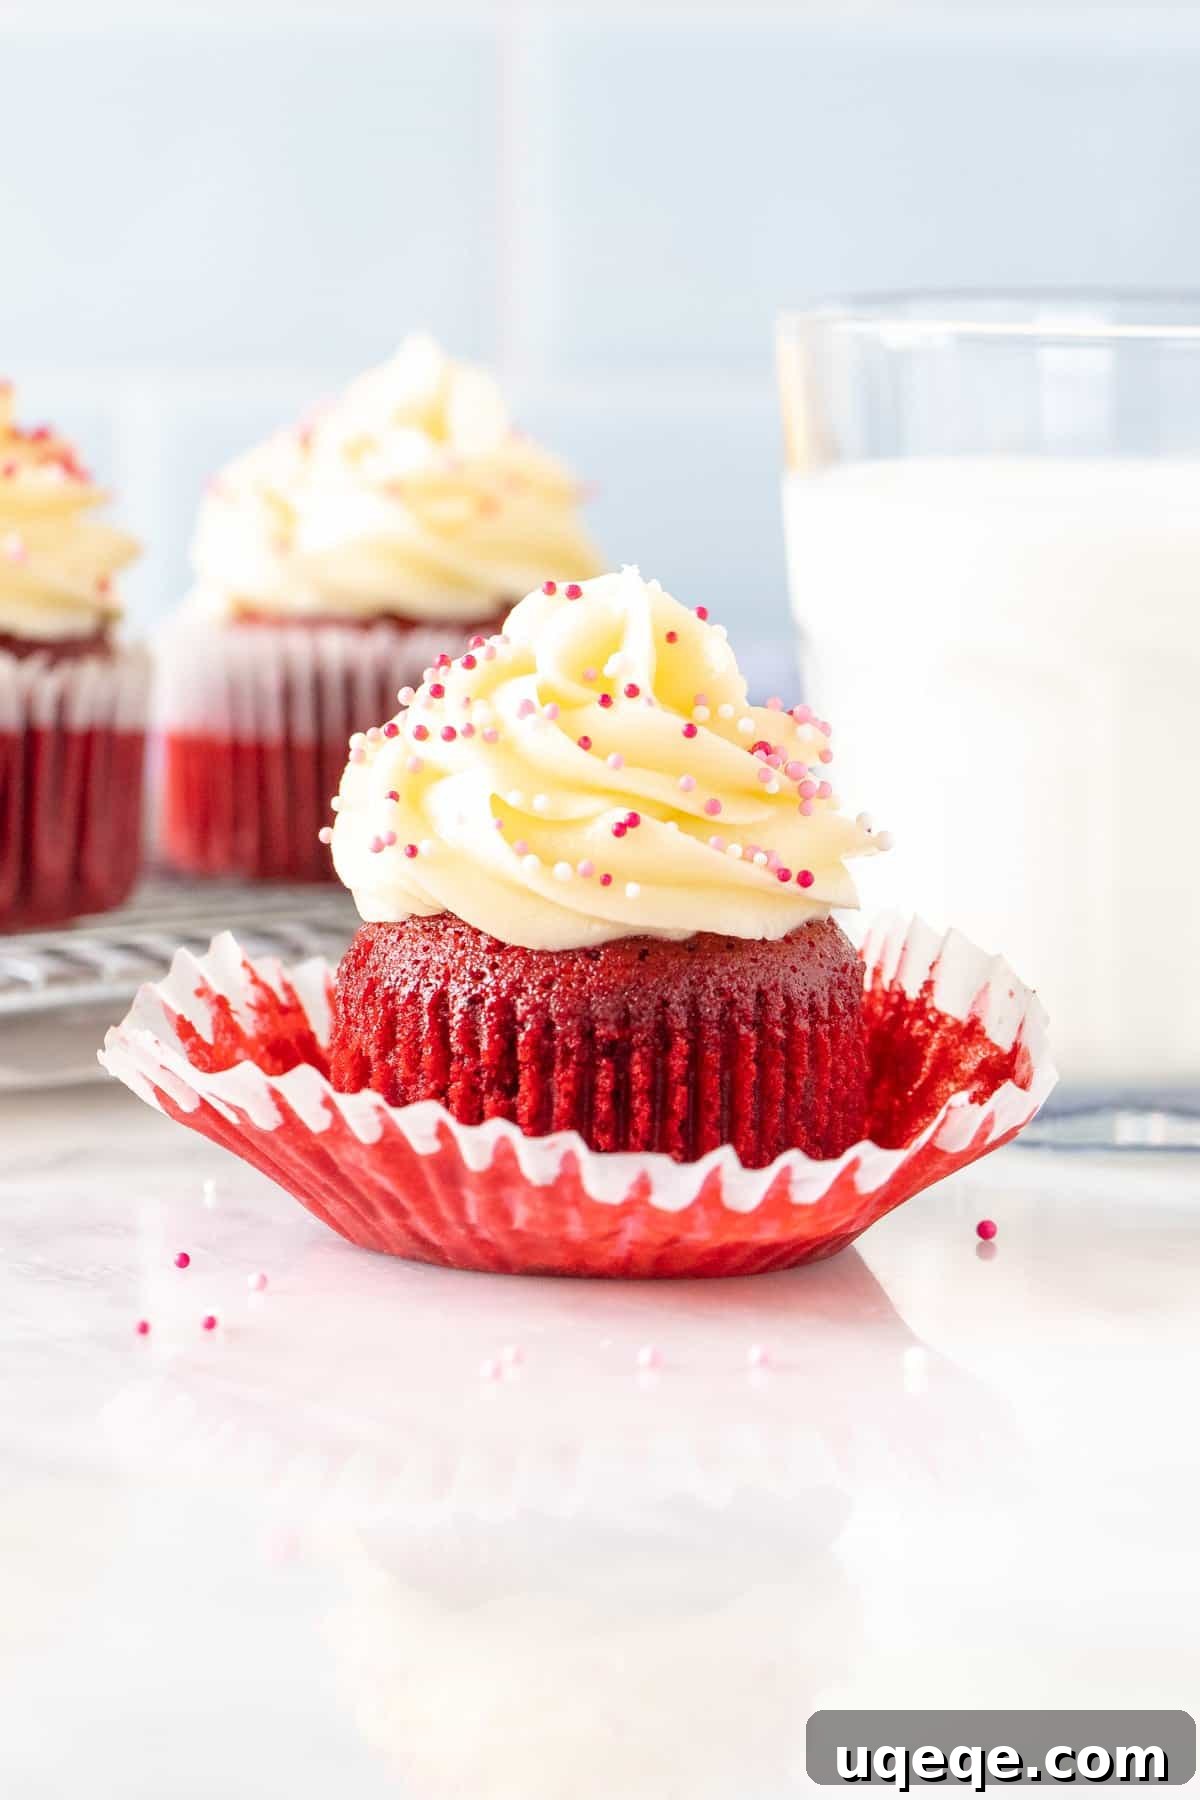
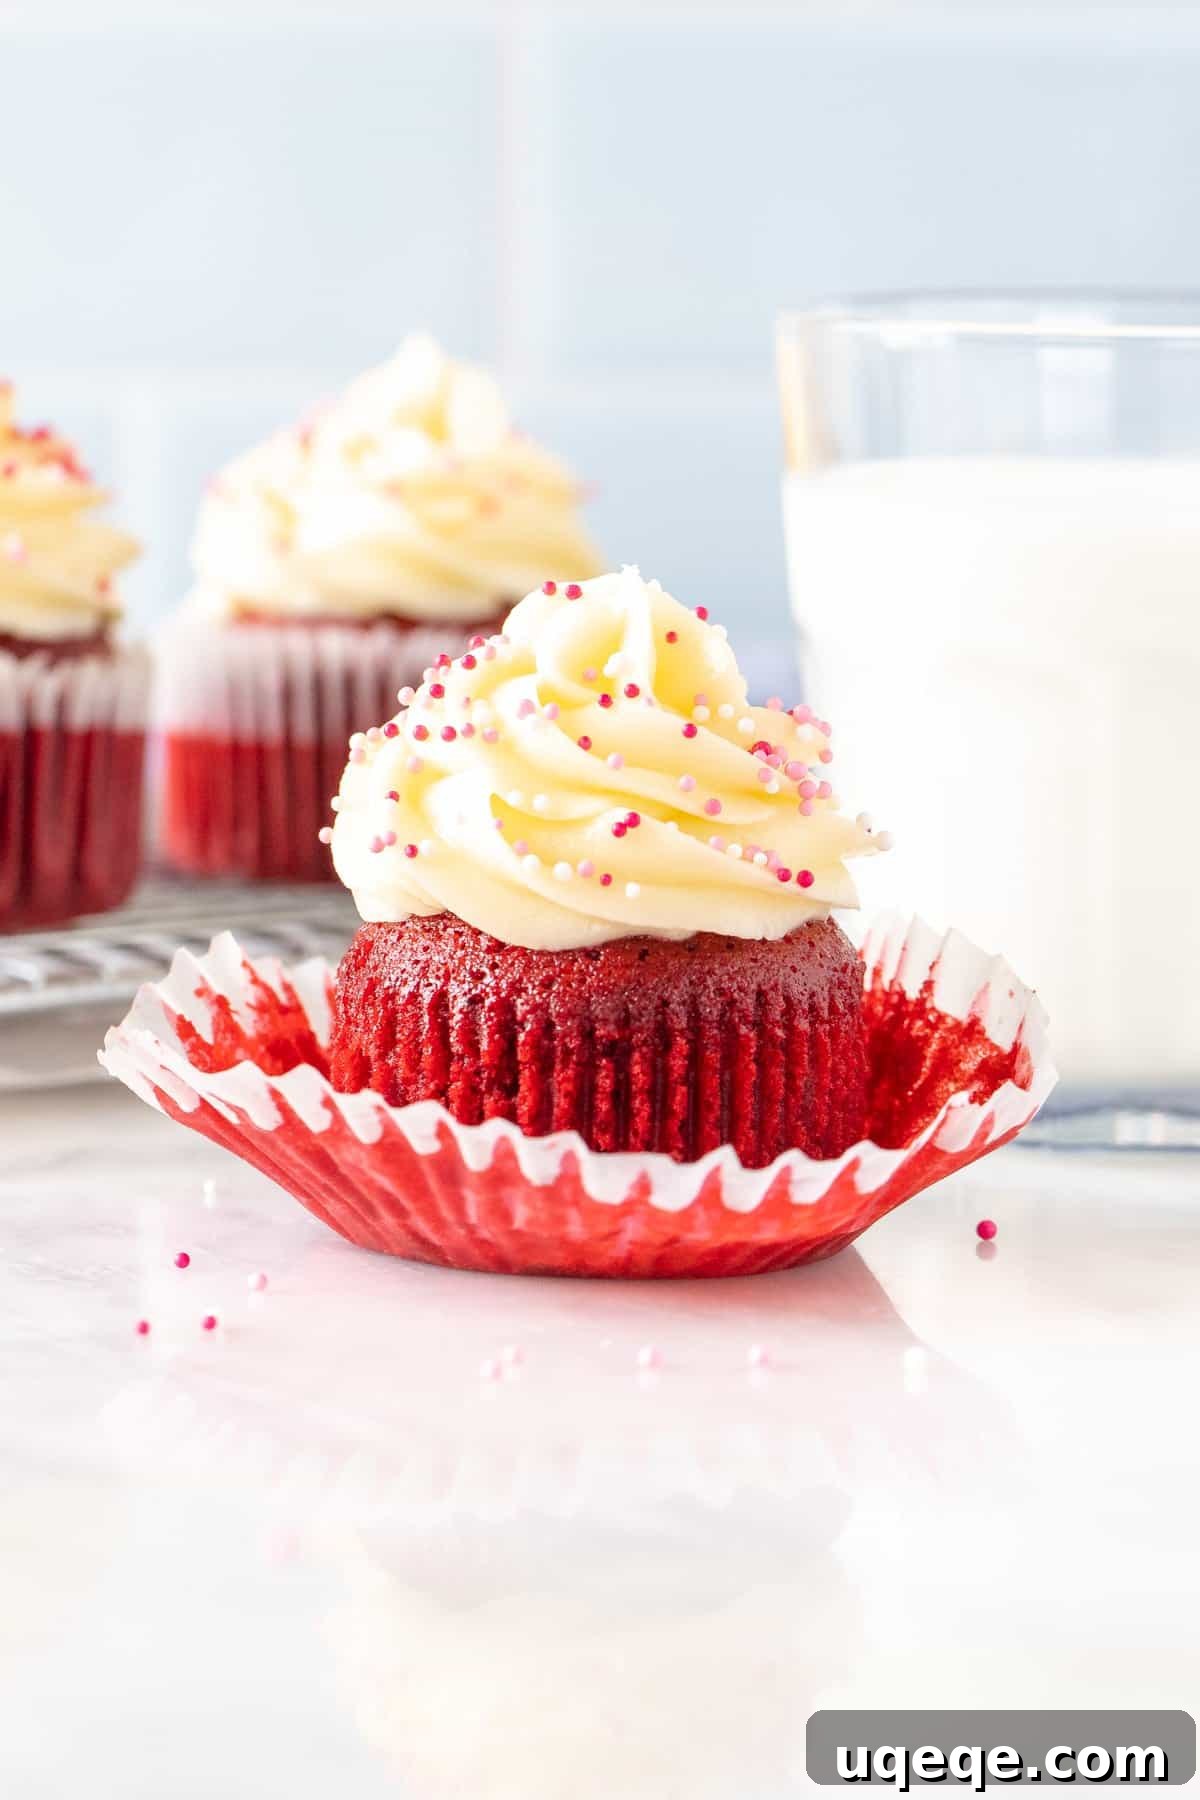
Indulge in the rich, vibrant world of red velvet with these easy, small-batch cupcakes. Designed for perfection without the excess, each cupcake boasts a moist, tender crumb with that distinctive red velvet flavor, all crowned with swirls of tangy, creamy cream cheese frosting. This recipe yields just 6-7 delightful cupcakes, making it ideal for when you desire a special treat for a few lucky individuals or simply want to avoid a mountain of leftovers!
The Ultimate Small-Batch Red Velvet Cupcake Recipe
Craving the iconic flavor and stunning appearance of red velvet cupcakes but don’t want to be left with dozens? Look no further! This carefully crafted small-batch recipe delivers all the magic of classic red velvet in a manageable quantity. Each cupcake is incredibly moist and fluffy, featuring a subtle hint of cocoa that beautifully complements the striking deep red hue. The simplicity of the cupcake batter means it comes together in record time, while the rich, tangy cream cheese frosting elevates these treats from delicious to absolutely divine. This recipe is your go-to for a perfect dessert without the waste, ensuring every bite is fresh and celebrated.
Whether you’re celebrating a special occasion with a loved one, hosting a small gathering, or simply treating yourself, these 6-7 perfectly portioned cupcakes are an absolute dream. No more struggling with scaling down larger recipes or feeling overwhelmed by too many sweets – just pure, unadulterated red velvet joy, exactly when you want it.
The Allure of Red Velvet: A Timeless Classic
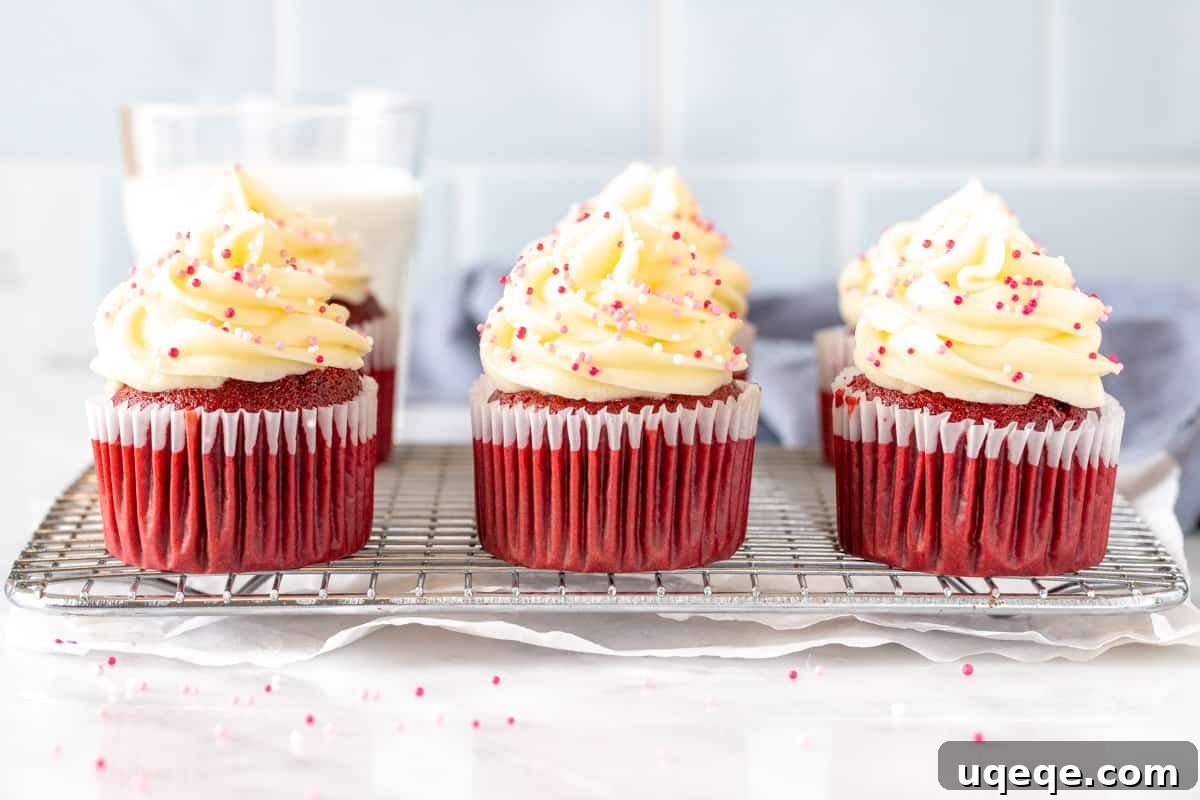
Red velvet cake holds a special place in the hearts of dessert lovers worldwide. Its distinctive flavor profile, a delicate balance of mild cocoa, vanilla, and a slight tang, combined with its show-stopping crimson color, makes it instantly recognizable and deeply satisfying. The “velvet” in its name refers to the exceptionally smooth and tender texture, traditionally achieved through the use of cocoa powder and buttermilk, which tenderizes the flour. Originally, the red color was a natural reaction between non-Dutched cocoa and acidic ingredients like buttermilk and vinegar. Today, food coloring enhances this visual drama, making red velvet an irresistible feast for both the eyes and the palate.
Pairing this exquisite cupcake with a rich, buttery, and slightly tart cream cheese frosting is non-negotiable. The bright tang of the frosting cuts through the sweetness of the cupcake, creating a harmonious flavor symphony that defines the red velvet experience. This small-batch recipe ensures you get to enjoy this classic indulgence at its very best, perfectly fresh and exceptionally flavorful.
Baking Your Small-Batch Red Velvet Cupcakes: Step-by-Step
Crafting these delicious red velvet cupcakes is simpler than you might think, and the batter can even be made entirely by hand, no fancy equipment required! For those who love to dive deep into baking techniques and tips, read on. If you’re a seasoned baker, feel free to skip directly to the detailed recipe card below.
Preparing for Cupcake Success
- **Preheat and Prepare:** Begin by preheating your oven to 350°F (180°C). This ensures your oven is at the correct temperature for even baking. Line a 6-cup muffin tin with paper liners. Using the middle cavities of the tin often provides the most consistent baking results. Muffin papers are essential here, as they prevent sticking and make for easy serving.
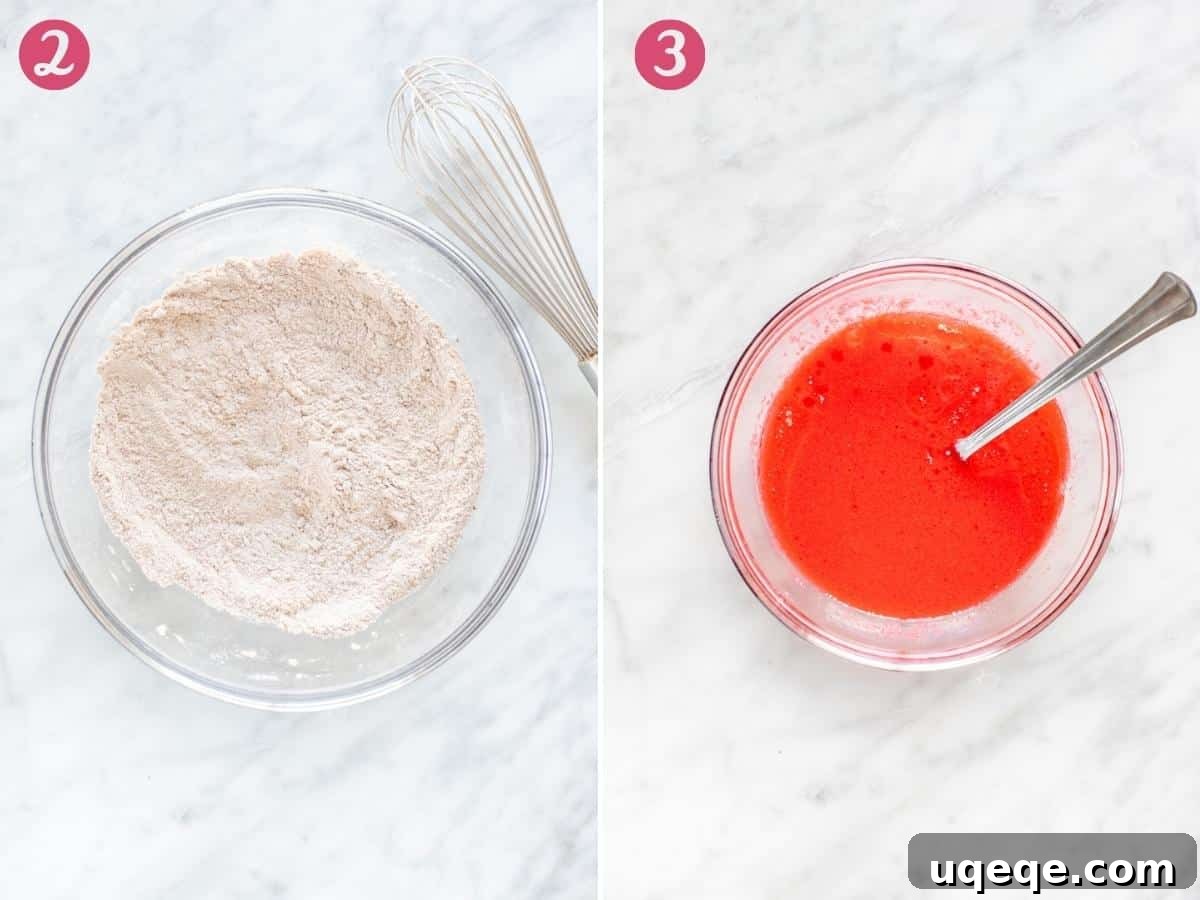
- **Whisk the Dry Ingredients:** In a large mixing bowl, combine the all-purpose flour, granulated sugar, a hint of unsweetened cocoa powder, baking soda, and salt. Whisk these dry ingredients thoroughly to ensure they are well combined and lump-free. *Pro Tip:* If your cocoa powder tends to be lumpy, sift it through a fine-mesh sieve before adding it to the bowl. This extra step guarantees a smooth batter and prevents undesirable pockets of unmixed cocoa.
The Wet Ingredients and That Signature Red Hue
- **Combine the Wet Ingredients:** In a separate medium bowl, whisk together the vegetable oil, melted unsalted butter, large egg, vanilla extract, buttermilk, red food coloring, and distilled vinegar. This mixture will initially appear quite vibrant and almost neon in color, but don’t worry – the red will deepen and soften as it blends with the dry ingredients during the next steps. The combination of buttermilk and vinegar is crucial for authentic red velvet cupcakes; they react with the baking soda to create a light, tender crumb and impart that characteristic subtle tanginess. A blend of oil and melted butter ensures maximum moisture without an overly oily texture. If you don’t have buttermilk, you can easily make a substitute (check the recipe notes for details).
Bringing It All Together
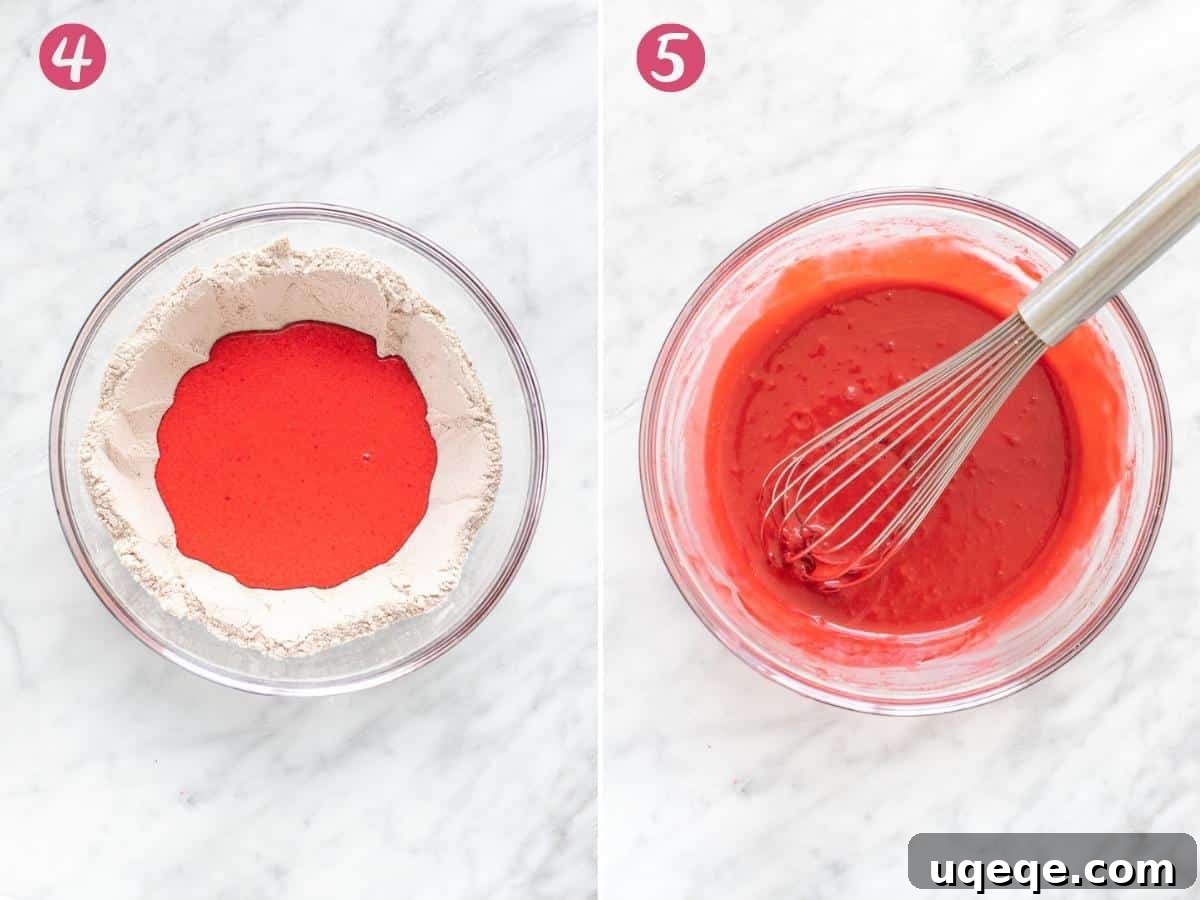
- **Combine Wet and Dry:** Create a small well in the center of your dry ingredients mixture. Gently pour the whisked wet ingredients into this well.
- **Mix Until Smooth:** Carefully whisk the ingredients together, starting from the center and gradually incorporating the dry ingredients into the wet. Mix just until the batter is smooth and no dry streaks remain. Be mindful not to overmix, as this can lead to tough cupcakes. The moment it looks uniform, stop mixing.
Filling, Baking, and Cooling
- **Fill and Bake:** Evenly spoon the batter into your prepared cupcake liners. It’s important to fill each liner only about 2/3 to 3/4 full. Overfilling can cause the cupcakes to overflow during baking, creating messy tops. You should yield 6-7 cupcakes in total.
- **Bake to Perfection:** Transfer the muffin tin to the preheated oven and bake for 15-17 minutes, or until a toothpick inserted into the center of a cupcake comes out clean. This indicates they are fully cooked.
- **Cool Completely:** Once baked, allow the cupcakes to cool in the muffin pan for at least 10 minutes. This helps them set and prevents them from collapsing. After 10 minutes, carefully transfer them to a wire cooling rack to cool completely before frosting. Frosting warm cupcakes will result in melted frosting!
The Signature Cream Cheese Frosting
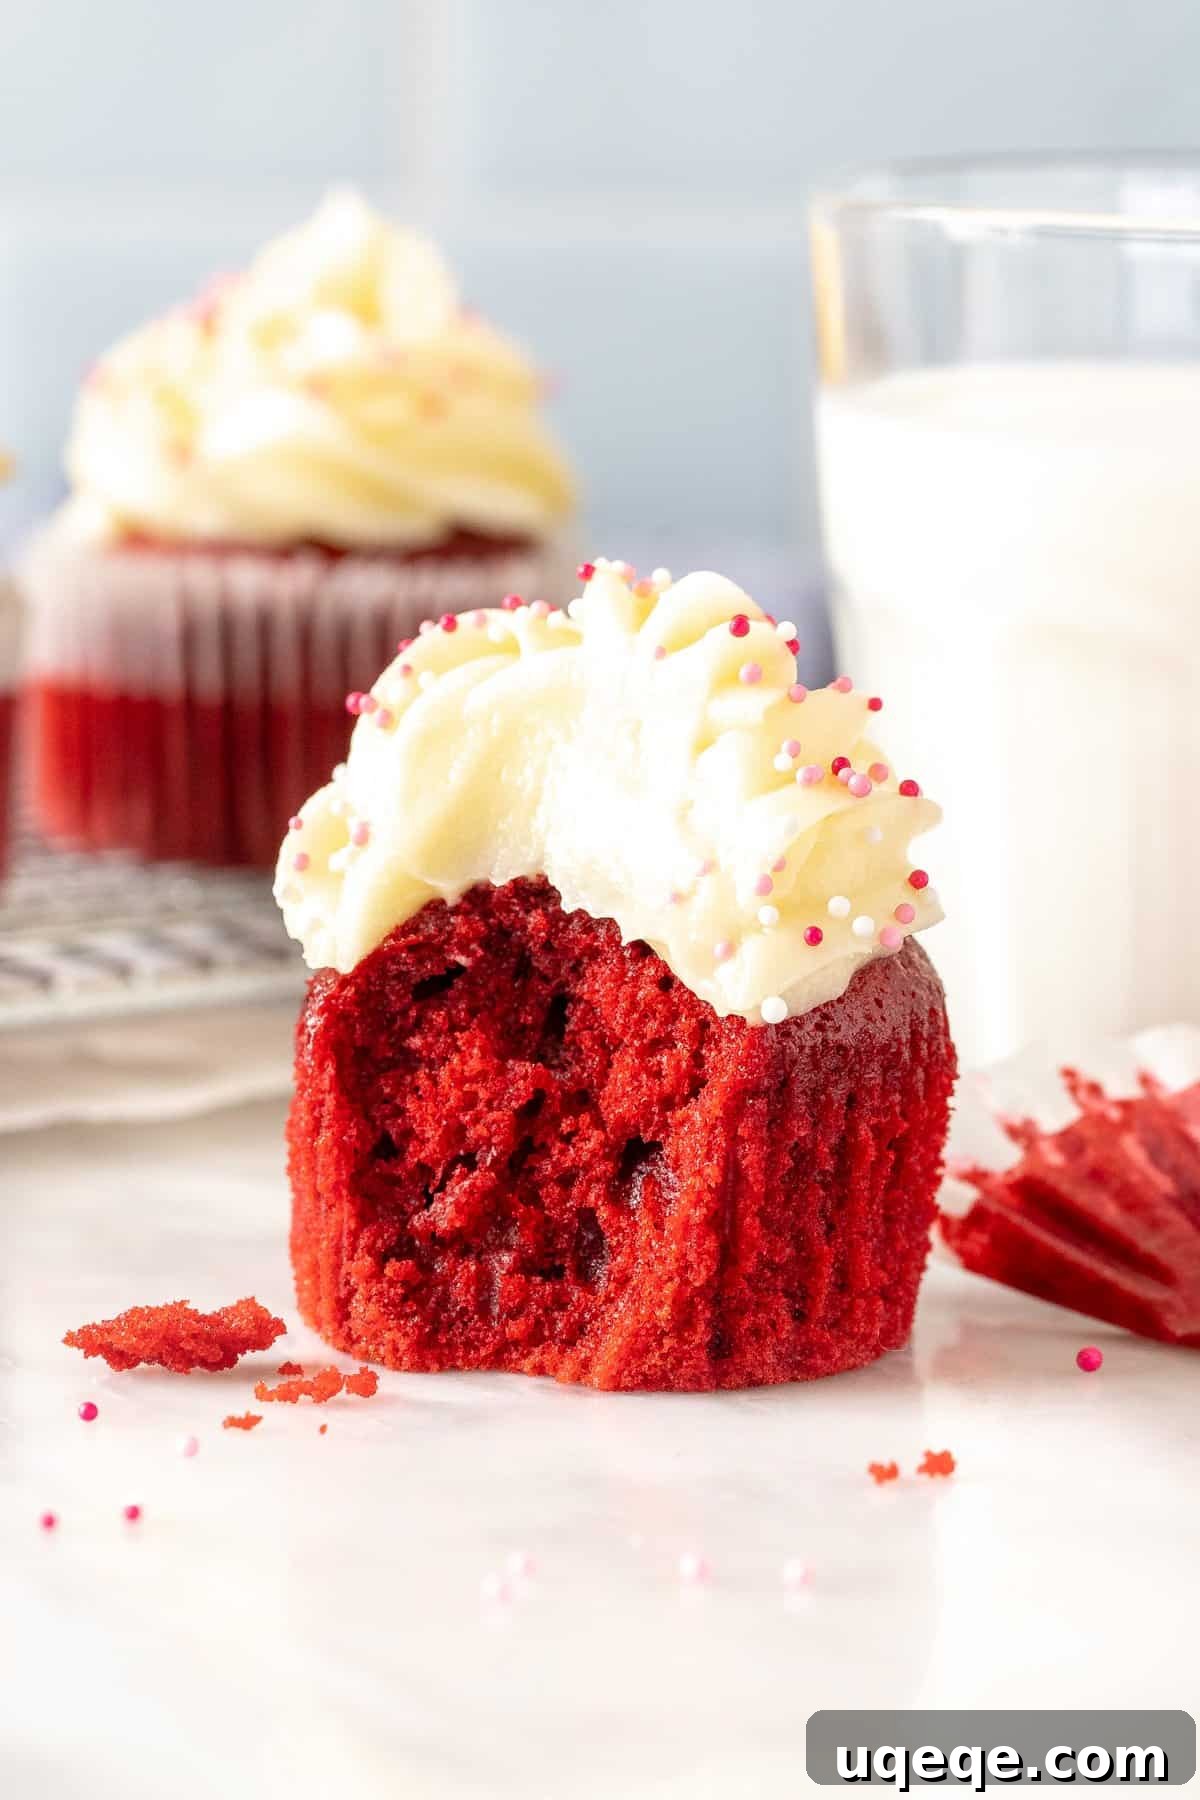
No red velvet cupcake is complete without a generous dollop of luscious cream cheese frosting. Its creamy texture and tangy notes are the perfect counterpoint to the sweet, slightly chocolatey cupcakes, truly taking this dessert to the next level. To ensure your frosting is absolutely perfect – thick, smooth, and utterly delicious – keep these essential tips in mind:
- **Choose the Right Cream Cheese:** Always use full-fat, brick-style cream cheese. Whipped or spreadable cream cheese varieties have a higher water content and will result in a runny, unstable frosting that won’t hold its shape.
- **Temperature Matters:** Ensure both your unsalted butter and cream cheese are softened to room temperature, but not melted. If they are too cold, your frosting will be lumpy. If they are too warm or melted, the frosting will be too soft and liquidy. A good test is if you can easily press an indentation into them with your finger.
- **Sift Powdered Sugar:** If your powdered sugar (also known as icing sugar or confectioners’ sugar) has any lumps, sift it before adding it to the frosting. This step guarantees a silky-smooth frosting texture.
- **Don’t Overmix:** Once you add the powdered sugar, mix only until just combined and smooth. Overmixing cream cheese frosting can incorporate too much air, making it less stable and prone to becoming runny.
Serving and Storage Tips
Once your cupcakes are cooled and frosted, they are ready to be devoured! For best results, enjoy them within 24 hours of baking. If you have any leftovers (though with a small batch, this is unlikely!), store them properly to maintain their freshness.
- **Room Temperature Storage:** Red velvet cupcakes with cream cheese frosting can be stored in an airtight container at room temperature for up to 24 hours.
- **Refrigerated Storage:** For longer storage, transfer the airtight container to the refrigerator. They will stay fresh for up to 3 days. Allow them to come to room temperature for about 15-30 minutes before serving for the best flavor and texture of both the cake and the frosting.
- **Freezing:** Unfrosted cupcakes can be frozen for up to 2-3 months in an airtight container or freezer bag. Thaw them at room temperature, then frost as desired. Frosted cupcakes can also be frozen, but the frosting texture might change slightly upon thawing.
Explore More Small-Batch and Red Velvet Delights
If you’ve fallen in love with the convenience of small-batch baking or the irresistible charm of red velvet, we have more recipes you’ll adore:
- Small-Batch Vanilla Cupcakes: Classic sweetness, perfect for any occasion.
- Small-Batch Chocolate Cupcakes: Rich, fudgy, and intensely chocolatey.
- Small-Batch Brownies: Chewy, gooey perfection in a modest quantity.
And for those who can’t get enough of red velvet:
- Red Velvet Cookies: Soft, chewy, and studded with chocolate chips.
- Red Velvet Brownies: A decadent twist on a classic treat.
- Red Velvet Muffins: A delicious breakfast or snack option with chocolatey goodness.
Small-Batch Red Velvet Cupcakes
Fiona Dowling
30 minutes
15 minutes
30 minutes
1 hour 15 minutes
6 cupcakes
Rate Recipe
Print Recipe
Equipment
-
Muffin pan
Ingredients
Red Velvet Cupcakes
- 3/4 cup all-purpose flour (94 grams)
- 1 tablespoon cocoa powder
- 1/2 cup granulated sugar (100 grams)
- 1/4 teaspoon baking soda
- 1/8 teaspoon salt, or just use a tiny pinch
- 2 tablespoons vegetable oil (30 ml) , canola works too
- 2 tablespoons unsalted butter (28 grams) , melted
- 1 large egg
- 1 teaspoon vanilla extract
- 1/4 cup buttermilk (60 ml) , or substitute with 1/4 cup milk and 1/2 teaspoon fresh lemon juice
- 2 teaspoons red food coloring, feel free to use a little less if you prefer
- 1/2 teaspoon distilled vinegar, white vinegar works too
Cream Cheese Frosting
- 1/3 cup unsalted butter (75 grams) , softened
- 1/4 cup full-fat cream cheese (56 grams) , brick style, cut into chunks
- 1 – 1 1/2 cup powdered sugar (110 – 165 grams)
- 1/2 teaspoon vanilla extract
- 1/8 teaspoon salt
Instructions
Red Velvet Cupcakes
-
Preheat the oven to 350°F (180°C). Line a muffin tin with 6-7 muffin papers, utilizing the middle 6 cavities of the muffin tin for best results.
-
In a large bowl, thoroughly whisk together the flour, cocoa powder, granulated sugar, baking soda, and salt. If there are any lumps in the cocoa, ensure you sift it into the bowl before mixing.
-
In a separate bowl, whisk together the vegetable oil, melted butter, egg, vanilla extract, buttermilk, vibrant red food coloring, and distilled vinegar until well combined.
-
Create a small well in the middle of your dry ingredients. Carefully pour the combined wet ingredients into this well.
-
Gently whisk the ingredients together until the batter is smooth and free of any lumps. It is crucial to stop whisking as soon as the batter appears uniform to prevent overmixing.
-
Spoon the prepared batter evenly into the lined muffin tin, filling each cupcake liner approximately 2/3 to 3/4 full. This recipe should yield 6-7 perfect cupcakes.
-
Bake in the preheated oven for 15-17 minutes, or until a toothpick inserted into the center of a cupcake comes out clean, indicating it is fully baked.
-
Allow the cupcakes to cool in the muffin pan for at least 10 minutes before carefully transferring them to a wire cooling rack to cool completely. Ensure they are fully cooled before proceeding to frosting.
Cream Cheese Frosting
-
In a medium bowl, beat the softened butter until it is smooth and creamy. Then, add the full-fat cream cheese chunks and mix until fully incorporated and smooth.
-
Turn off your mixer. Add 1/2 cup of powdered sugar, the vanilla extract, and salt to the bowl. Start the mixer on a very low speed to avoid a cloud of sugar, then gradually increase speed to beat the ingredients until smooth.
-
Continue to mix in additional powdered sugar, a little at a time, until your desired level of sweetness and frosting consistency is achieved. Be careful not to overmix.
-
Once the cupcakes are completely cooled, generously frost them. You can use a piping bag with a 1M tip for beautiful swirls, or simply apply the frosting with a knife or offset spatula for a rustic charm.
Notes
- Buttermilk Substitute: If you don’t have buttermilk on hand, don’t fret! Simply add 1/2 teaspoon of fresh lemon juice or white vinegar to 1/4 cup of regular milk. Whisk it gently and let it sit for about 5-10 minutes until it slightly curdles. This quick homemade buttermilk substitute works perfectly in this recipe.
- Red Food Coloring: This recipe calls for 2 teaspoons of red food coloring to achieve that classic, vibrant red hue. You can use either liquid red food coloring or gel food coloring. Feel free to adjust the amount to your preference: use a little less for a subtle pinkish-red, or a little more for an even stronger, deeper crimson.
- Storage Guidelines: For optimal freshness and flavor, store your red velvet cupcakes with cream cheese frosting in an airtight container. They will remain delicious at room temperature for up to 24 hours. If you need to store them longer, transfer the container to the refrigerator where they will keep well for up to 3 days. Always allow refrigerated cupcakes to sit at room temperature for about 15-30 minutes before serving to ensure the cake is soft and the frosting is creamy.
- Nutrition Information: The provided nutritional details are an estimate based on one cupcake with frosting. This calculation assumes the recipe yields 6 equal-sized cupcakes and that all of the prepared frosting is used. Individual results may vary depending on exact ingredient measurements and portion sizes.
Nutrition
Calories:
380kcal
,
Carbohydrates:
40g
,
Protein:
4g
,
Fat:
23g
,
Saturated Fat:
12g
,
Polyunsaturated Fat:
4g
,
Monounsaturated Fat:
6g
,
Trans Fat:
1g
,
Cholesterol:
79mg
,
Sodium:
197mg
,
Potassium:
73mg
,
Fiber:
1g
,
Sugar:
27g
,
Vitamin A:
620IU
,
Calcium:
33mg
,
Iron:
1mg
Like this recipe? Rate and comment below!