
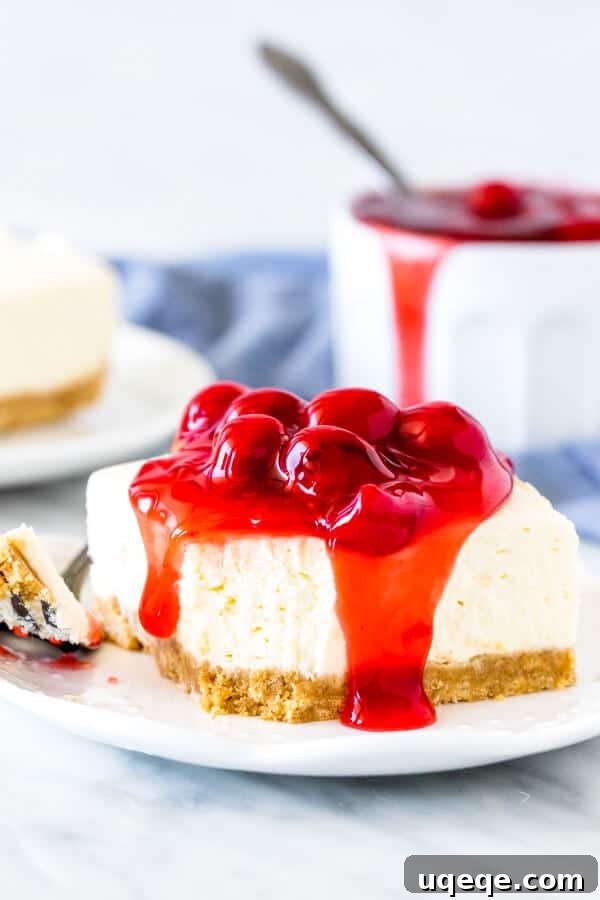
Effortless Elegance: Easy No-Bake Cherry Cheesecake Bars for Summer
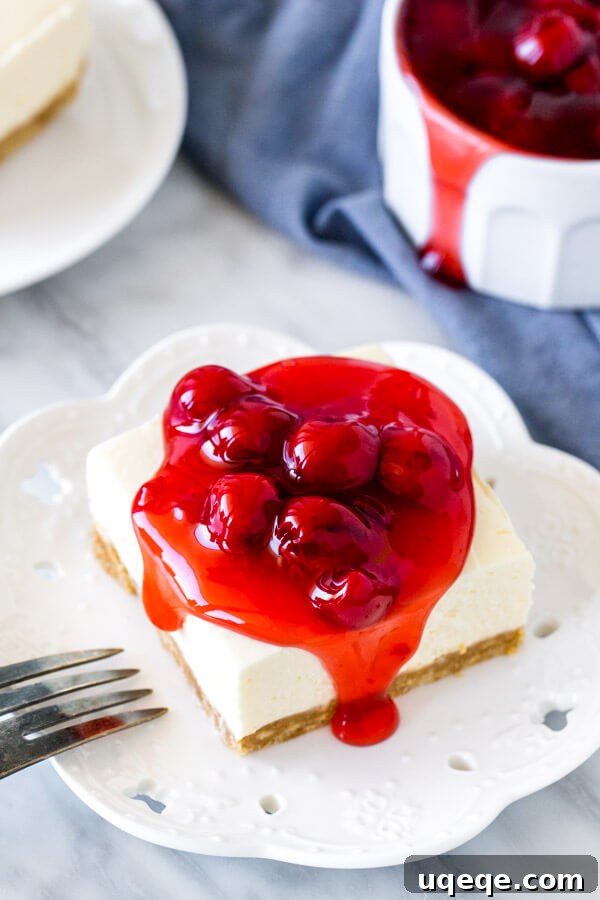
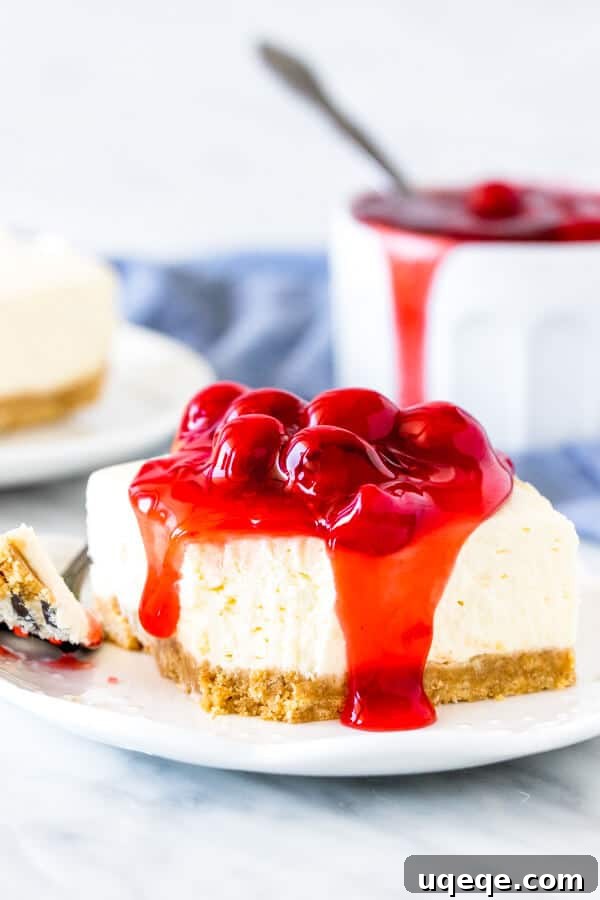
Imagine a dessert that’s both decadently creamy and wonderfully light, requiring no oven, and coming together in mere minutes. Welcome to the world of our Easy No-Bake Cherry Cheesecake Bars! These delightful treats are an absolute game-changer for anyone who loves cheesecake but dreads turning on the oven, especially during warmer months. Combining a perfectly crunchy graham cracker crust with a velvety, tangy cheesecake filling and a vibrant, sweet cherry topping, they are destined to become your go-to summer dessert.
Whether you’re planning a lively backyard barbecue, a casual potluck, or simply craving a refreshing treat, these no-bake bars are incredibly simple to prepare and always impress. Say goodbye to complicated water baths and lengthy baking times – with this recipe, you get all the luscious flavor of classic cheesecake with a fraction of the effort. The best part? They require only a handful of common ingredients and minimal kitchen experience. Let’s dive into creating these irresistible no-bake wonders that are guaranteed to be a crowd-pleaser!
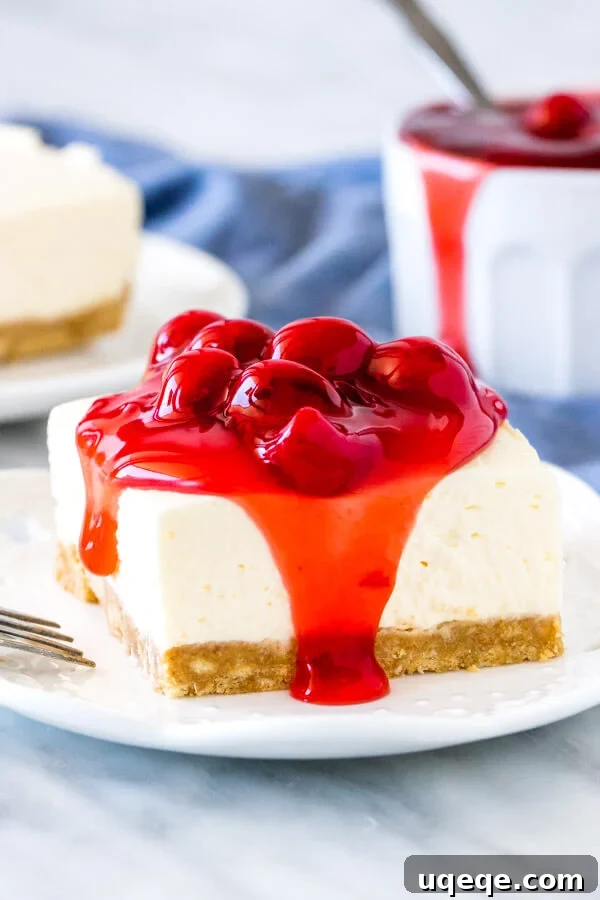
Why No-Bake Cheesecake is Your Ultimate Summer Dessert
Traditional New York-style cheesecake is undoubtedly a culinary masterpiece, celebrated for its dense, rich texture and profound flavor. However, achieving that perfection often involves a lengthy baking process, precise temperature control, and frequently a finicky water bath to prevent cracks. When the sun is shining brightly and the temperatures soar, the last thing most of us want to do is generate more heat in our kitchens by turning on the oven. This is precisely where no-bake cheesecake truly shines as the ultimate summer dessert hero.
Our no-bake version elegantly captures the essence of classic cheesecake with its rich, tangy flavor, but it boasts a distinctly lighter, almost mousse-like texture that is incredibly refreshing. It strikes the perfect balance of creamy indulgence without being overly heavy, making it an ideal choice for a warm afternoon dessert, a refreshing post-grill treat, or a delightful finish to any summer meal. Furthermore, the significantly reduced prep time means you spend less time confined to the kitchen and more time enjoying the beautiful weather and good company with friends and family. It’s truly a win-win for deliciousness and convenience!
Crafting the Perfect No-Bake Cherry Cheesecake Bars: Step-by-Step
Creating these delightful cherry cheesecake bars is a surprisingly straightforward process, broken down into two main, easily manageable components: the irresistible graham cracker crust and the silky-smooth cheesecake filling. To achieve dessert perfection, attention to a few simple yet crucial details makes all the difference, ensuring a treat that is both beautiful and incredibly tasty.
The Crunchy Graham Cracker Crust: Foundation of Flavor
Every truly great cheesecake, whether baked or no-bake, begins with an exceptional crust. Our buttery graham cracker base is no exception; it provides the perfect crunchy, sweet, and slightly salty counterpoint to the creamy filling. You’ll only need three incredibly simple ingredients for this foundational layer:
- 1 ¼ cups Graham Cracker Crumbs: For the best texture and adhesion, use finely crushed crumbs. You can purchase pre-crushed graham cracker crumbs for convenience, or easily crush whole graham crackers yourself using a food processor for a consistent texture, or by placing them in a sealed Ziploc bag and crushing them with a rolling pin until fine.
- 2 tablespoons Granulated Sugar: This adds a subtle hint of sweetness to the crust, enhancing its overall flavor profile and balancing the richness.
- ⅓ cup Unsalted Butter, Melted: The melted butter is essential as it acts as the binding agent, holding the crumbs together firmly once chilled. It also imparts that rich, signature buttery flavor. Ensure the butter is fully melted but has cooled slightly, so it’s not boiling hot when mixed with the crumbs.
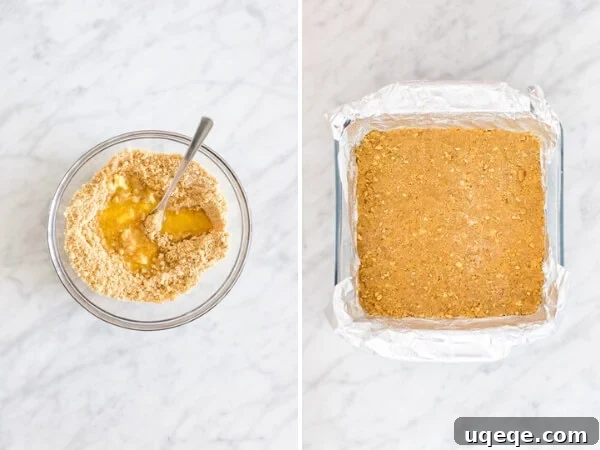
To prepare this perfect base, simply combine the graham cracker crumbs, granulated sugar, and melted butter in a medium-sized mixing bowl. Stir thoroughly until all the crumbs are evenly moistened and resemble wet sand. Then, transfer this mixture into the bottom of your prepared 8×8 or 9×9 inch square pan. Using a flat-bottomed glass, the back of a spoon, or even your hands, press the mixture firmly and evenly across the bottom of the pan. This firm press is crucial for creating a sturdy crust that will hold together beautifully when the bars are sliced.
The Luscious Cheesecake Filling: A Creamy Dream Unveiled
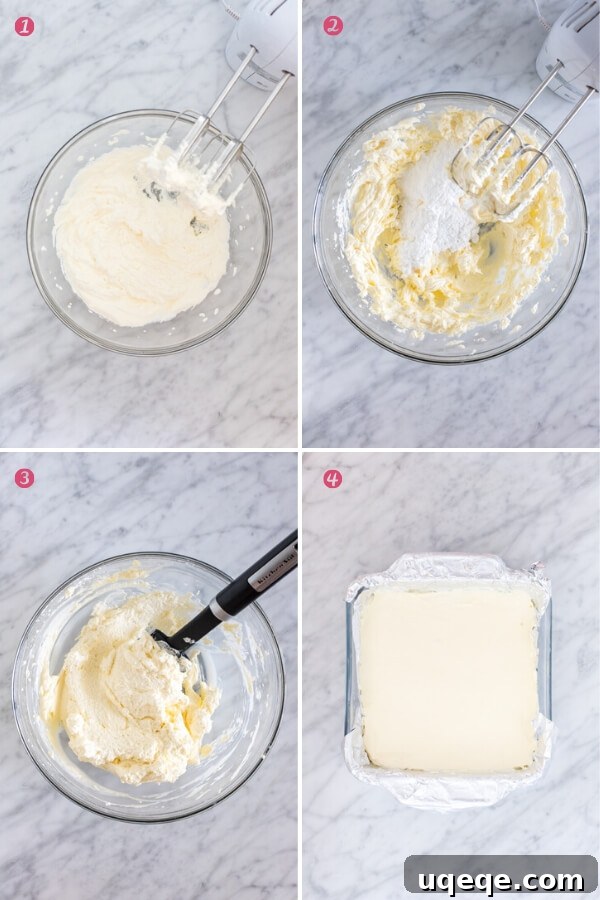
The star of the show, this no-bake cheesecake filling is incredibly straightforward to make and delivers an unbelievably smooth, rich, and airy texture that’s distinctly different yet equally satisfying as its baked counterpart. Follow these precise steps for a filling that will leave everyone asking for more:
- Whip the Cream to Perfection: In a large, preferably chilled mixing bowl, use an electric mixer to beat 1 cup of very cold whipping cream (also known as heavy cream) until stiff peaks form. Stiff peaks mean that when you lift the beaters, the cream holds its shape firmly without collapsing. Be vigilant and avoid overbeating, as whipped cream can quickly turn grainy if beaten for too long. Set this fluffy whipped cream aside gently.
- Prepare the Silky Cream Cheese Base: In a separate, medium-sized bowl, beat 16 ounces (which typically translates to two standard 8-ounce packages) of full-fat, brick-style cream cheese until it’s soft, completely smooth, and free of any lumps. It is absolutely vital that your cream cheese is at true room temperature before you begin this step; this ensures a perfectly silky texture and easy blending. Next, gradually beat in ¾ cup of powdered sugar (also known as confectioners’ sugar), 1 teaspoon of pure vanilla extract for warmth and depth, and 2 teaspoons of freshly squeezed lemon juice. The lemon juice is a key ingredient here – it provides that essential tangy brightness that cuts through the richness of the cream cheese, delivering that signature cheesecake flavor profile. Continue beating until the mixture is light, fluffy, and impeccably smooth.
- Gently Fold for Unmatched Airiness: This step is paramount for achieving the light, ethereal, mousse-like texture characteristic of a perfect no-bake cheesecake. Using a rubber spatula, very gently fold the whipped cream into the prepared cream cheese mixture. Employ a light hand and an upward, circular motion to carefully incorporate the two mixtures without deflating the precious air you’ve built into the whipped cream. Continue folding until no streaks of white cream or cream cheese are visible, and the entire mixture is uniformly smooth, light, and airy.
- Assemble and Smooth with Care: Once your filling is perfectly blended, carefully spoon it over your prepared graham cracker crust in the pan. Gently spread and smooth the top with your spatula, ensuring an even layer across the entire crust. Avoid pressing down too hard, as this can compress the crust and alter its texture. The goal is a beautifully even and delicate layer.
The All-Important Chill Time: The Key to Setting
Once your cheesecake bars are assembled, the hardest part is waiting! The entire pan needs adequate time to set properly. Place the assembled cheesecake in the refrigerator for a minimum of 6 hours, or ideally, overnight. This extended chilling period is absolutely essential for the cheesecake filling to firm up completely and achieve its stable, sliceable consistency. Rushing this step will result in a soft, messy cheesecake. Patience truly is a virtue when it comes to no-bake desserts!
Pro Tips for Flawless No-Bake Cheesecake Bars
Achieving bakery-worthy no-bake cherry cheesecake bars is simpler than you might think, especially with these expert tips and tricks to guide you:
- Lining the Pan for Easy Slicing: Always line your square baking pan (whether it’s an 8×8 or 9×9 inch) with aluminum foil or parchment paper. Make sure to leave a generous overhang on two opposite sides of the pan. Once your cheesecake is fully chilled and perfectly set, you can simply use these overhangs as handles to lift the entire cheesecake slab cleanly out of the pan and onto a cutting board. This clever method allows for much cleaner, more precise, and effortless slicing, and it protects your pan from scratches! After lifting, gently peel back the foil or parchment paper before you begin to cut the bars.
- The Right Cream Cheese Matters Immensely: For a successful set and an optimal, rich texture, it is crucial to always use full-fat, brick-style cream cheese. Steer clear of light, low-fat, spreadable, or whipped cream cheese varieties, as their different compositions and higher water content can significantly prevent the cheesecake from firming up correctly, leading to a runny result.
- Room Temperature Ingredients are Non-Negotiable: Ensure your cream cheese is at true room temperature. This means it should be soft enough to easily indent with a finger, almost spreadable. Cold cream cheese will inevitably result in a lumpy filling, no matter how much you beat it, compromising the smooth texture.
- Don’t Overbeat the Whipped Cream: While stiff peaks are the goal for your whipping cream, exercise caution. Over-whipping can quickly lead to a grainy, curdled texture. Keep a close eye on it, stopping as soon as the desired consistency is achieved.
- Master the Gentle Folding Technique: When combining the whipped cream and the cream cheese mixture, be incredibly gentle. The primary goal is to incorporate the two without deflating the air that has been carefully incorporated into the whipped cream. This delicate handling preserves the light, airy quality that distinguishes a superb no-bake filling.
- Chill Time is Sacred: Seriously, do not attempt to rush the chilling process. A minimum of 6 hours, and ideally an overnight chill, is absolutely crucial for the bars to set and achieve their firm yet beautifully creamy consistency. Insufficient chilling will result in a soft, unmanageable dessert.
- Smart Storage and Make-Ahead Advice: You can prepare these cheesecake bars a day in advance, allowing them to chill overnight for optimal setting and flavor development. Store any leftover no-bake cheesecake bars in an airtight container in the refrigerator for up to 4 days. However, please note that these bars do not freeze well; freezing can cause ice crystals to form, which will regrettably compromise the smooth, luxurious creamy texture.
Endless Flavor Possibilities: Beyond Cherry Toppings
While the classic cherry pie filling topping is undeniably delicious, visually stunning, and a beloved favorite, these versatile no-bake cheesecake bars serve as an excellent canvas for a myriad of other flavors. Feel free to unleash your creativity and experiment with different fruit toppings, sauces, and additions to create your own unique signature dessert that caters to any preference:
- Strawberry Sensations: Easily transform them into delightful no-bake strawberry cheesecake bars by topping them with a vibrant homemade strawberry sauce, a generous layer of fresh sliced strawberries, or even a strawberry glaze.
- Blueberry Bliss: Opt for luscious no-bake blueberry cheesecake bars, utilizing a rich, homemade blueberry compote, fresh blueberries, or a simple blueberry jam for a burst of sweet-tart flavor.
- Raspberry Elegance: A quick and easy raspberry coulis, a handful of fresh raspberries, or a drizzle of raspberry preserves can make for a sophisticated and delightfully tangy twist.
- Chocolate Lover’s Dream: Indulge your chocolate cravings by drizzling the bars with melted dark or milk chocolate, a rich chocolate syrup, or by sprinkling mini chocolate chips over the top for an extra layer of decadence.
- Zesty Lemon Brightness: Elevate the citrus notes by mixing in extra lemon zest directly into the cheesecake filling, then top with a dollop of lemon curd or delicate candied lemon peel for an extra vibrant, tangy kick.
- Irresistible Caramel Drizzle: A generous swirl of homemade or high-quality store-bought caramel sauce, perhaps finished with a sprinkle of flaky sea salt, offers a delightful sweet and salty contrast that’s simply irresistible.
- Seasonal Peach Perfection: During the late summer months, capitalize on fresh produce by topping your bars with perfectly sliced ripe peaches, a warm peach compote, or a peach preserve for a wonderful seasonal flavor.
- Mixed Berry Medley: Combine several of your favorite berries – strawberries, blueberries, raspberries, and blackberries – for a colorful, antioxidant-rich, and incredibly flavorful topping that’s both beautiful and delicious.
No matter your topping choice, these versatile no-bake bars consistently offer a delicious and wonderfully refreshing dessert option that is sure to please any palate. Each variation provides a unique sensory experience while consistently maintaining the beloved creamy texture and crisp crust that makes this recipe a true winner.
Complete No-Bake Cherry Cheesecake Bars Recipe
No-Bake Cherry Cheesecake Bars
By: Fiona Dowling
These No-Bake Cherry Cheesecake Bars are a quick and easy dessert with a deliciously creamy texture and a crunchy graham cracker crust. They take only 15 minutes of active prep time, then chill in the fridge to set. The perfect dessert for summer gatherings, potlucks, or simply a refreshing treat!
Total Time: 6 hrs 15 mins (includes chilling)
Servings: 12 slices
Rate Recipe
Print Recipe
Ingredients
For the Graham Cracker Crust
- 1 1/4 cup graham cracker crumbs
- 2 tablespoons granulated sugar
- 1/3 cup unsalted butter, melted
For the Cheesecake Filling
- 1 cup whipping cream (heavy cream)
- 16 oz brick-style cream cheese, room temperature (2x 8oz packages)
- 3/4 cup powdered sugar
- 1 teaspoon vanilla extract
- 2 teaspoons lemon juice, freshly squeezed
- 1 jar cherry pie filling (for topping)
Instructions
- Line an 8×8 (or 9×9) inch square pan with aluminum foil, ensuring there’s an overhang on each of two opposite sides. Lightly spray the foil with non-stick cooking spray for easy removal.
- In a medium bowl, combine the graham cracker crumbs, 2 tablespoons granulated sugar, and melted butter. Stir well until the crumbs are thoroughly moistened. Press this mixture firmly and evenly into the bottom of the prepared pan to form the crust.
- In a large, chilled bowl, beat the cold heavy cream with an electric mixer until stiff peaks form. Be careful not to overbeat. Set aside.
- In a separate bowl, beat the room temperature brick-style cream cheese until it is completely soft and smooth. Add the powdered sugar, vanilla extract, and freshly squeezed lemon juice, beating until the mixture is light, fluffy, and perfectly smooth.
- Gently fold the whipped cream into the cream cheese mixture using a rubber spatula. Use a light, upward motion to incorporate them fully without deflating the whipped cream. Continue folding until the mixture is uniform and free of streaks.
- Carefully spoon the cheesecake filling over the prepared graham cracker crust and gently smooth the top with your spatula, creating an even layer.
- Transfer the pan to the refrigerator and chill for a minimum of 6 hours, or ideally overnight, to allow the cheesecake to set completely. This step is crucial for firm, sliceable bars.
- To serve, use the aluminum foil overhangs to carefully lift the entire cheesecake slab out of the pan and place it onto a clean cutting board. Gently peel back the aluminum foil.
- Using a sharp knife, slice the cheesecake into 12 even bars. Top each bar generously with cherry pie filling just before serving. Enjoy your delicious, homemade no-bake treats!
Notes
- Whipping Cream Substitute: If fresh whipping cream is unavailable, you can substitute it with 1 1/2 cups of thawed Cool Whip (whipped topping). If using Cool Whip, skip step 3 of the instructions, and instead, gently fold the thawed Cool Whip into the cream cheese mixture in step 5.
- Cream Cheese Type: For optimal texture and proper setting, it is essential to use full-fat, brick-style cream cheese. Avoid light, spreadable, or whipped cream cheese products as they contain more water and may not allow the bars to set correctly.
- Doubling the Recipe: This recipe is easily scalable. Simply double all the ingredient quantities and prepare the cheesecake in a larger 9×13 inch pan. The chilling time remains the same.
- Make-Ahead Tips & Storage: For convenience, the cheesecake can be fully prepared a day in advance and chilled overnight. Store any leftover no-bake cheesecake bars in an airtight container in the refrigerator for up to 4 days. It is important to note that these bars do not freeze well; freezing can lead to the formation of ice crystals, which will compromise the smooth and creamy texture.
Nutrition Information (per slice, estimated)
Calories: 318kcal | Carbohydrates: 18g | Protein: 3g | Fat: 26g | Saturated Fat: 15g | Cholesterol: 82mg | Sodium: 187mg | Potassium: 83mg | Fiber: 1g | Sugar: 13g | Vitamin A: 957IU | Vitamin C: 1mg | Calcium: 58mg | Iron: 1mg
(Nutritional information is an estimate and may vary based on specific ingredients used, brands, and portion sizes.)
Explore More Cheesecake Delights
If you’ve fallen in love with the ease and deliciousness of these no-bake cherry cheesecake bars, you’ll be thrilled to discover other fantastic cheesecake recipes perfect for any craving or occasion. Expand your dessert repertoire with these irresistible options:
- No-Bake Peanut Butter Cheesecake: A rich and creamy treat for peanut butter lovers.
- Fresh Strawberry Cheesecake Bars with a Graham Cracker Crust: A vibrant and fruity classic perfect for spring.
- Decadent Chocolate Cheesecake Bars: For those who can never get enough chocolate.
- No-Bake Mini Egg Chocolate Cheesecake: A fun and festive option, especially around Easter.
Each recipe offers a unique twist on the beloved cheesecake, promising delightful flavors and textures to satisfy every sweet tooth.