
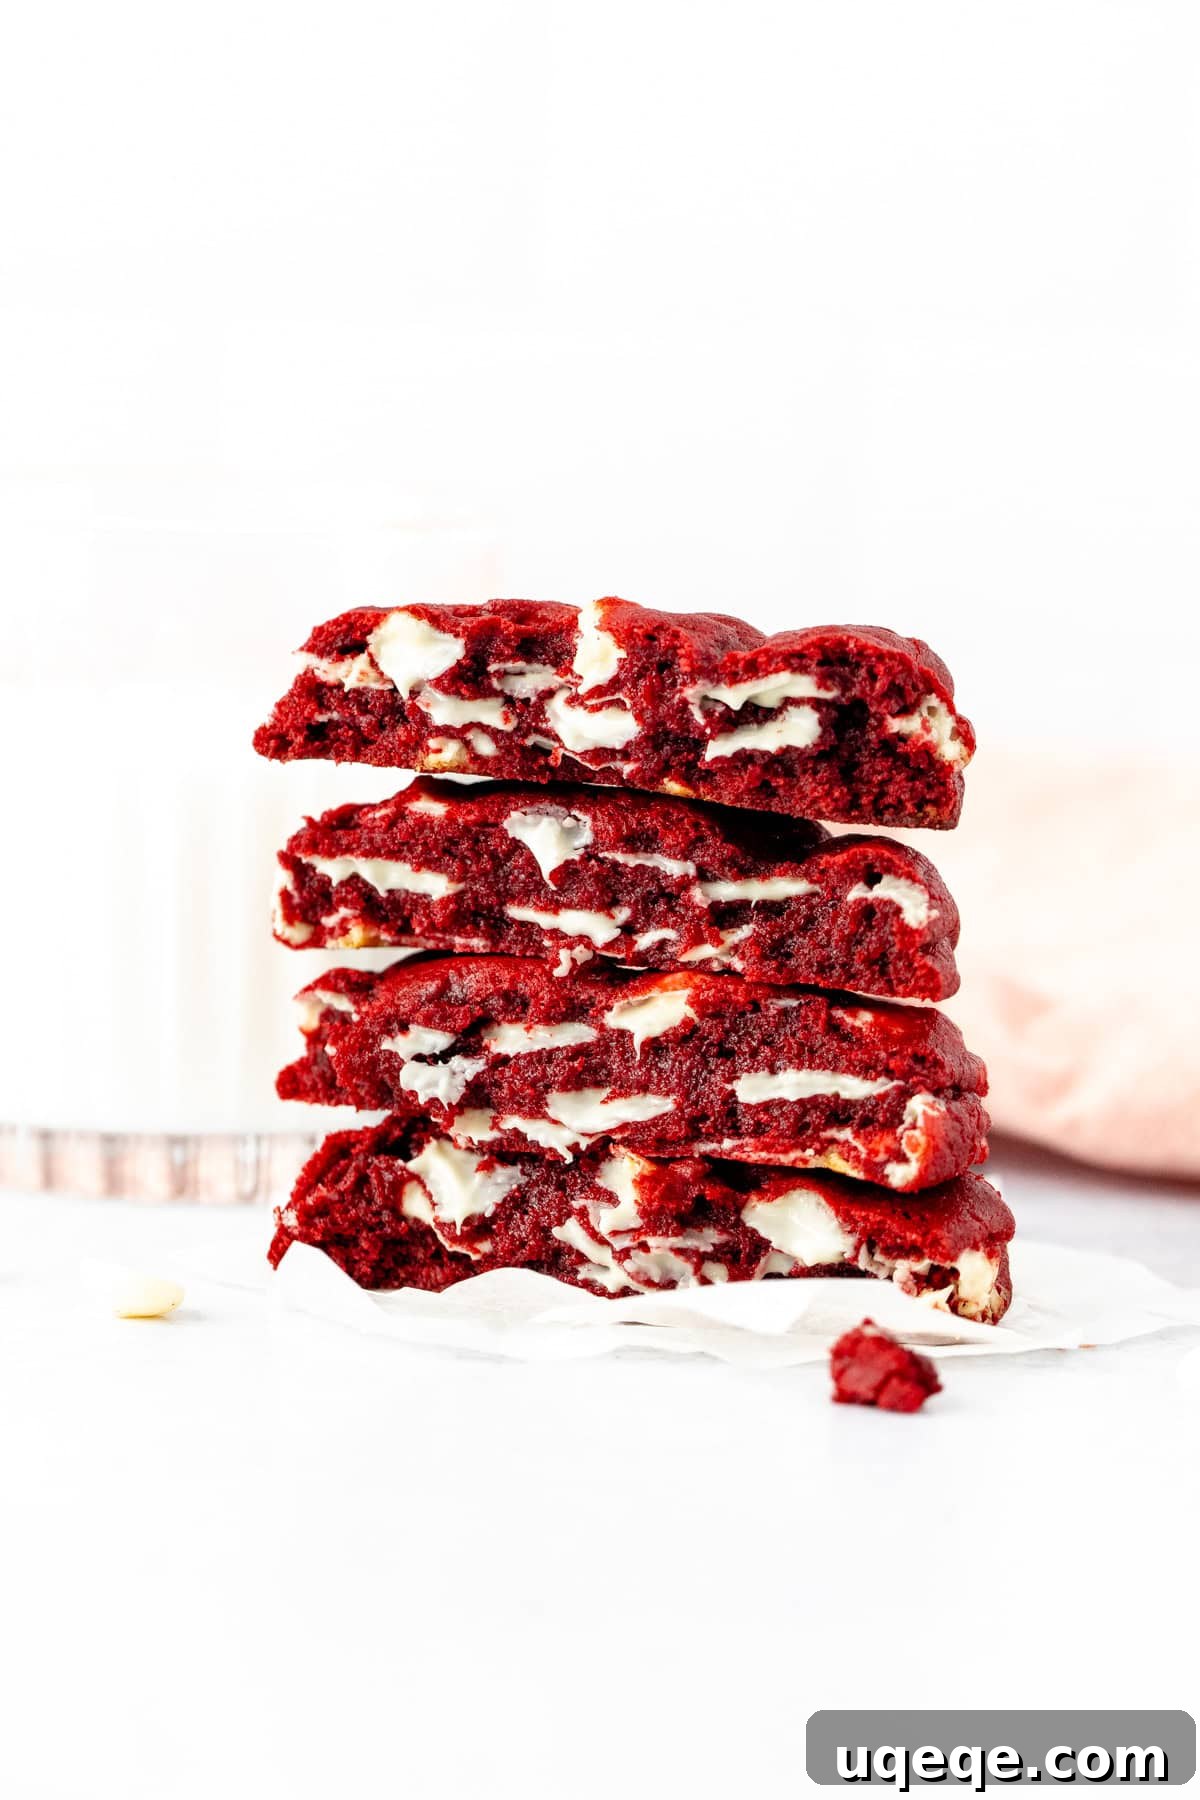
Bakery Style Red Velvet Cookies: Extra Thick & Gooey Perfection
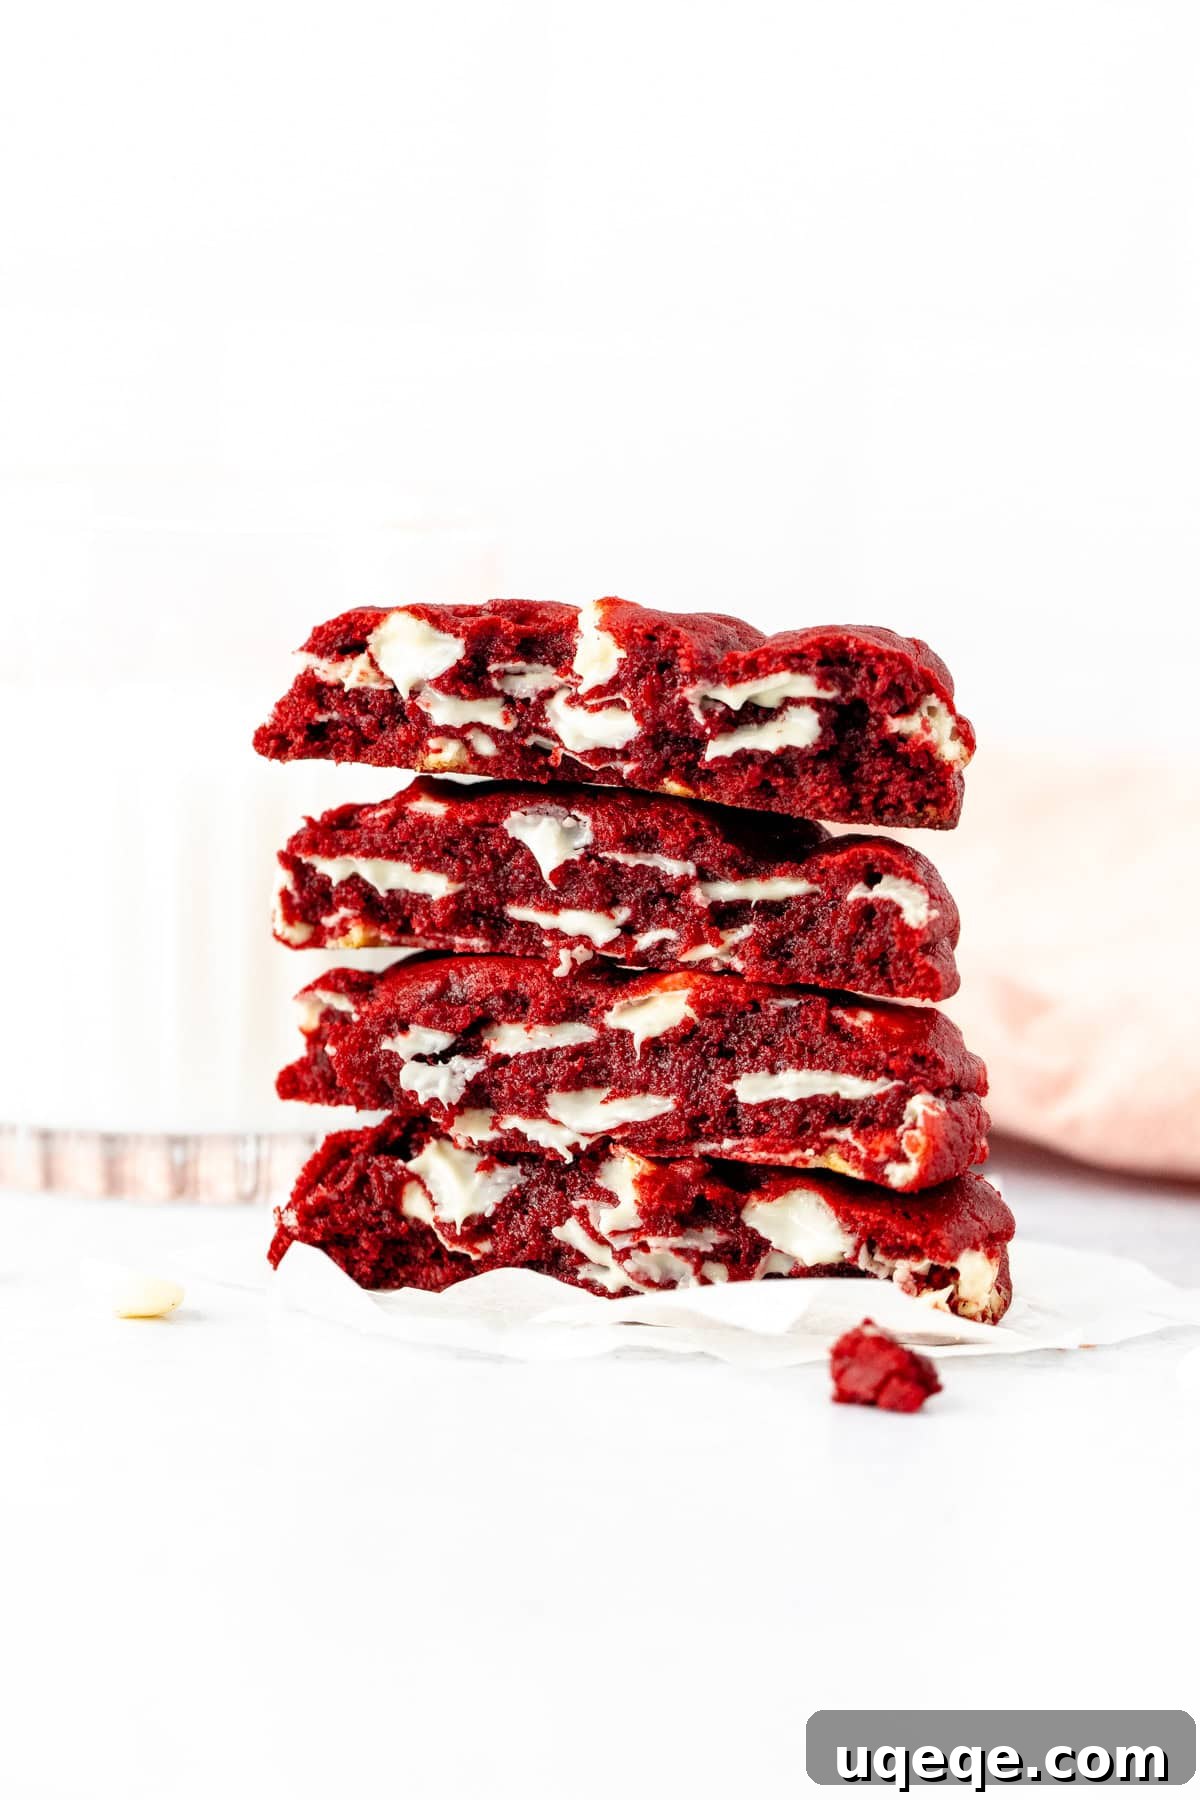
Prepare to elevate your cookie game with these absolutely sensational bakery-style red velvet cookies! Imagine sinking your teeth into a cookie that’s not just thick, but truly colossal, boasting perfectly crisp edges that give way to an irresistibly gooey, soft center. Each bite delivers the quintessential red velvet flavor – a delicate hint of cocoa intertwined with a subtle tang – generously studded with an abundance of creamy white chocolate chips. These aren’t just cookies; they’re an experience, designed to bring the magic of a high-end bakery right into your kitchen.
My journey into crafting truly extra thick, bakery-style cookies began years ago, driven by a desire to replicate those gigantic, melt-in-your-mouth treats that leave a lasting impression. When I envision thick and chunky cookies, my mind instantly drifts to the legendary Levain Bakery in New York City. Their renowned creations set the gold standard for indulgent, substantial cookies. This particular red velvet cookie recipe draws direct inspiration from that iconic bakery, aiming to capture their signature size, incredible texture, and profound satisfaction in every single bite. Get ready for cookies that are not only visually stunning with their vibrant red hue but also a symphony of textures and flavors that will undoubtedly become a new favorite.
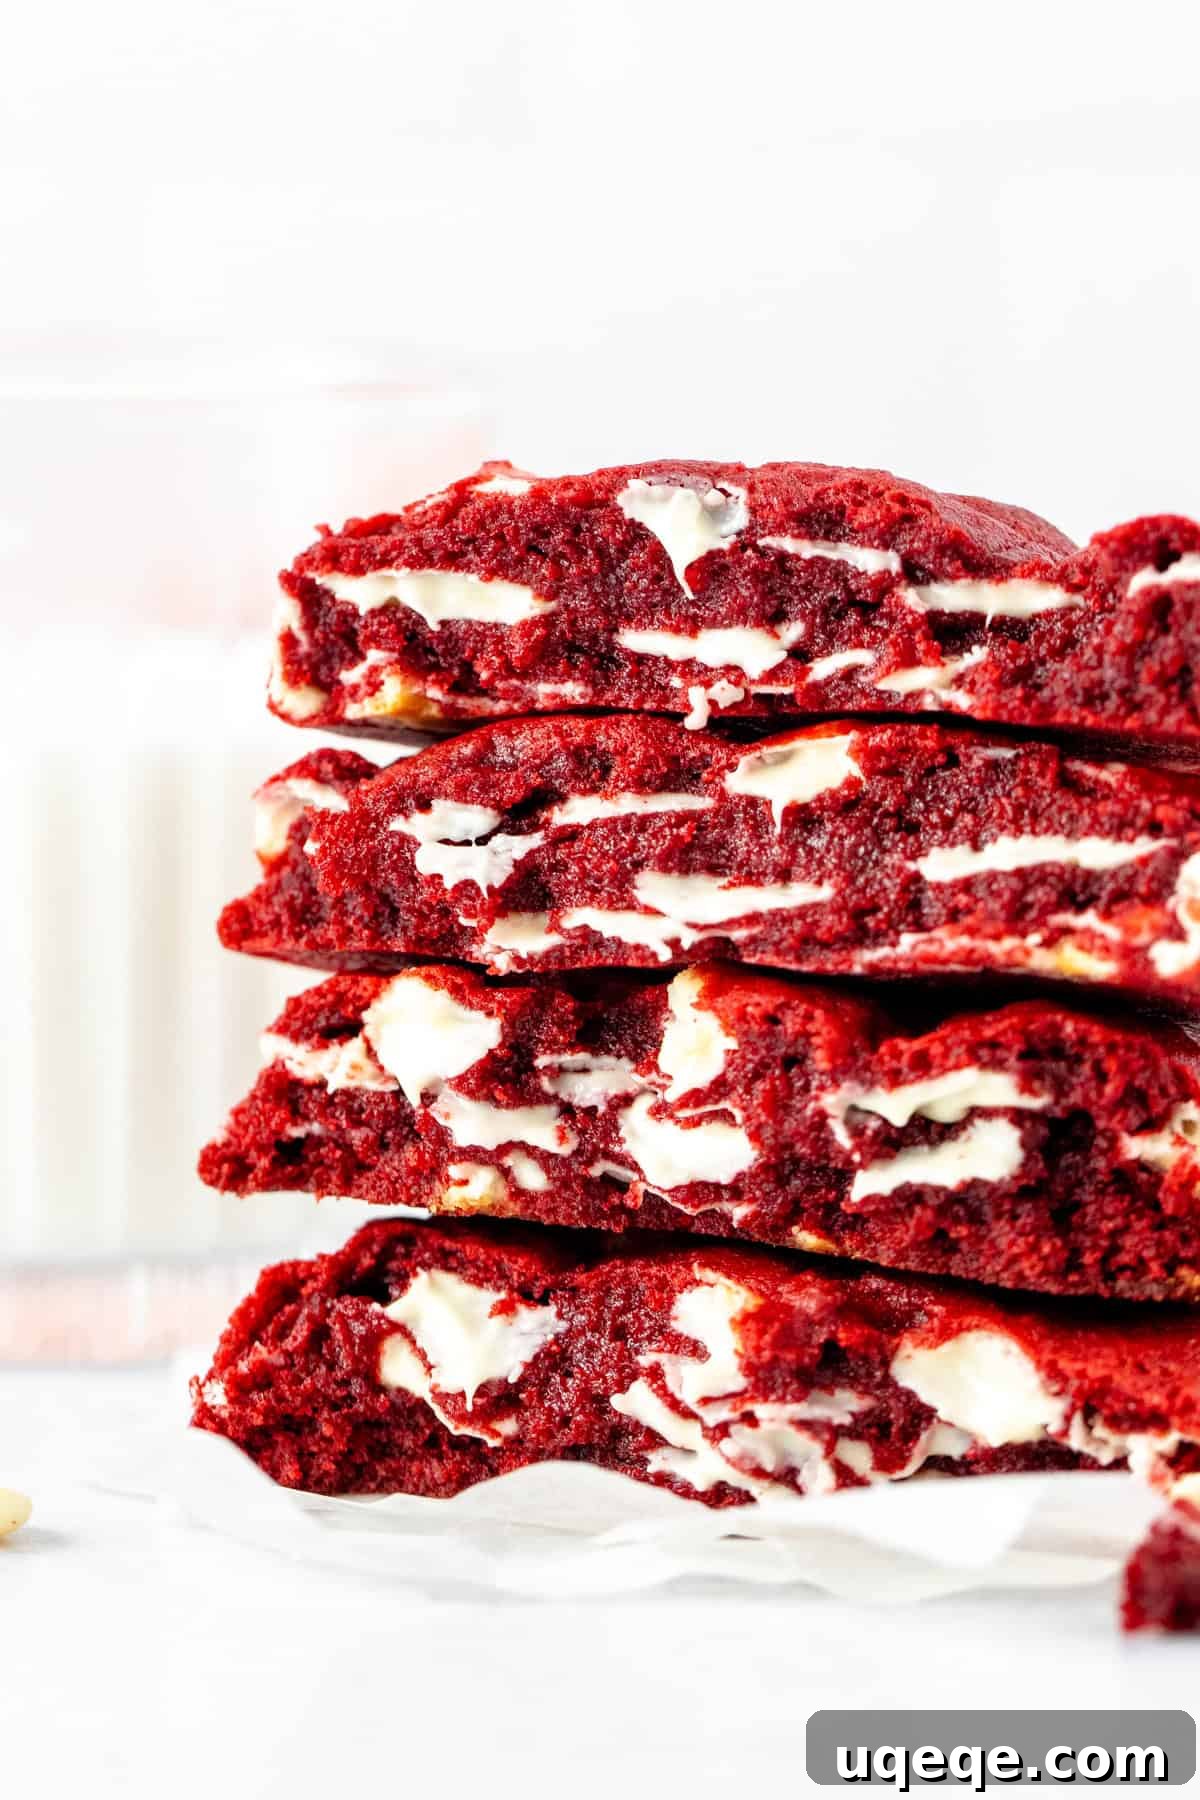
Mastering the Authentic Red Velvet Flavor
The hallmark of a truly great red velvet dessert lies in its distinctive flavor profile: a harmonious blend of mild cocoa and a refreshing, subtle tang. Achieving this delicate balance is crucial, and it’s what sets red velvet apart from a standard chocolate cookie. In this recipe, we intentionally use less cocoa powder than you’d find in a typical chocolate cookie, ensuring that the chocolate notes are present but not overpowering. Furthermore, natural cocoa powder is the preferred choice over Dutch-processed cocoa. Natural cocoa provides a lighter, more delicate chocolate flavor and a reddish hue, which is ideal for red velvet, whereas Dutch-processed cocoa delivers a darker, richer chocolate experience that would mask the tanginess we’re aiming for.
That signature tanginess, a non-negotiable component of any authentic red velvet creation, comes from a touch of white vinegar. This ingredient is fundamental, just as it is in classic red velvet cakes. Do not be tempted to omit it! The vinegar, being an acid, plays a vital role in reacting with baking soda – our chosen leavening agent for these cookies. This chemical reaction not only contributes to the cookie’s rise and tender crumb but also enhances the vibrant red color, making it even more pronounced and visually appealing. The interplay of these ingredients is key to unlocking the quintessential red velvet experience.
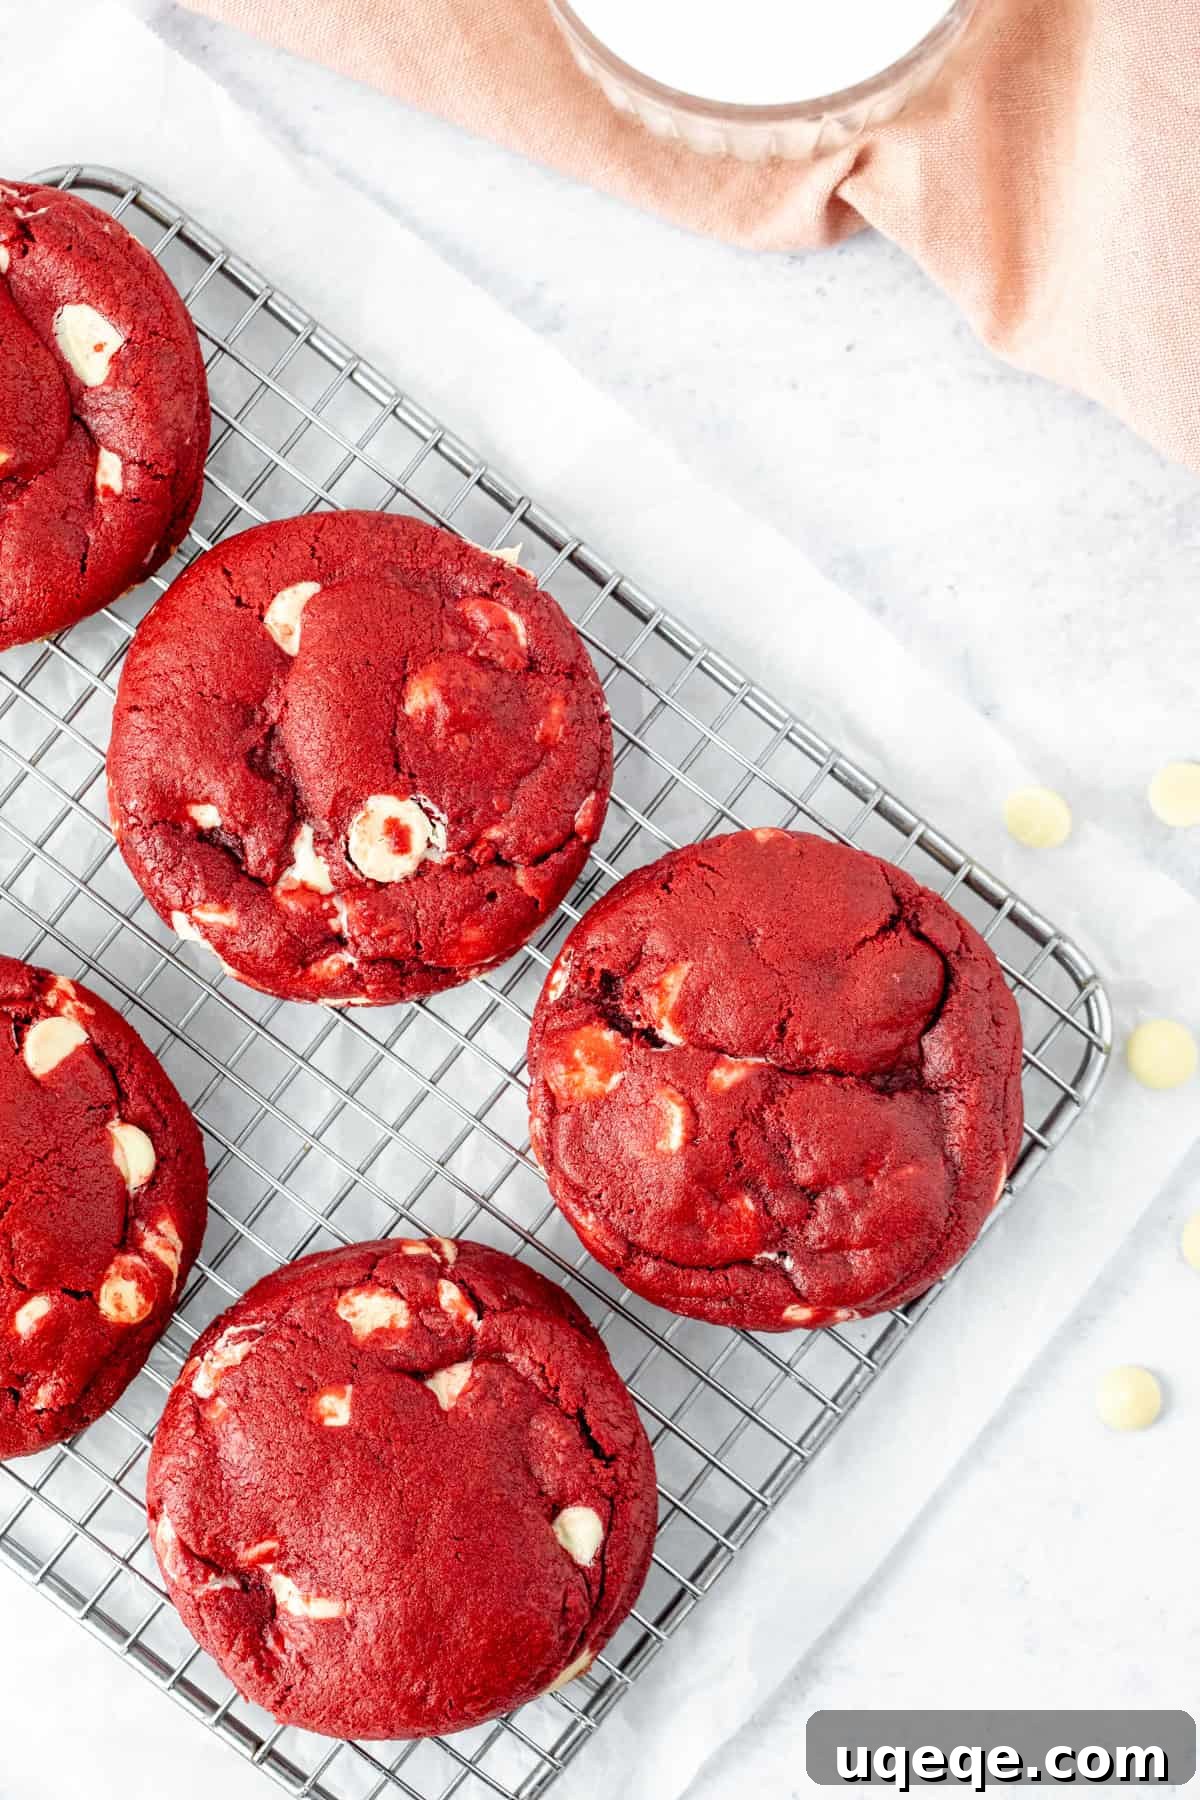
Unlocking the Perfect Thick & Chunky Texture
Creating cookies that are gloriously thick and wonderfully chunky, with that sought-after bakery-style chew, involves a few crucial techniques and ingredient considerations. It’s a delicate science, but by following these key tips, you’ll achieve cookie perfection every time:
- Cold Butter: The Foundation of Texture. Unlike many cookie recipes that call for room-temperature butter, using cold butter in this recipe is paramount. When cold butter is creamed with sugar, it creates pockets of air that, during baking, release steam and contribute to the cookie’s structure. This results in edges that are beautifully crispy while the center remains delightfully gooey and soft – the ultimate contrast in texture that defines a bakery-style cookie.
- The Magic of Cake Flour. This recipe strategically employs a blend of all-purpose flour and cake flour. Cake flour, with its lower protein content, is renowned for producing exceptionally tender baked goods. Its inclusion here is essential for achieving that characteristic soft, delicate interior texture, preventing the cookies from becoming dense or dry. Always remember to sift your cake flour before measuring, as it can be prone to lumps, and absolutely avoid self-rising cake flour, which contains leavening agents that would disrupt the recipe’s careful balance.
- Precision in Flour Measurement. The correct amount of flour is critical. Too much flour will lead to dry, crumbly, and flavorless cookies that lack that coveted chewiness. For the most accurate and consistent results, I highly recommend using a kitchen scale to weigh your flours. If a scale isn’t available, whisk the flour thoroughly first to aerate it, then spoon it lightly into dry measuring cups (not liquid measuring cups) and level off the top with a straight edge. This method helps prevent over-packing the flour, which can add too much to your dough.
- Vivid Color with Gel Food Coloring. To achieve that stunning, rich red hue without compromising the cookie’s texture, gel food coloring is indispensable. Liquid food coloring adds excess moisture to the dough, which can lead to thinner, more spread-out cookies. Gel coloring, being highly concentrated, allows you to impart a deep, vibrant color with minimal liquid, maintaining the dough’s ideal consistency for thick cookies.
- The Non-Negotiable Chill. For truly thick cookies that hold their shape and develop complex flavors, chilling the dough is absolutely required. This isn’t just an optional step; it’s fundamental. I recommend chilling the dough for a minimum of 2 hours, and you can even extend this up to 48 hours. Chilling solidifies the butter, preventing the cookies from spreading too rapidly in the oven and ensuring they bake up tall and thick. It also allows the flavors to meld beautifully.
- Crafting BIG Cookie Dough Balls. To achieve that impressive, gigantic bakery size, don’t be shy with your dough portions. I typically use a 1/4 cup or even a 1/3 cup measure for each cookie ball. For ultimate consistency, I weigh each ball on a kitchen scale, aiming for approximately 3.5 ounces or about 100 grams per cookie. Larger dough balls inherently bake into thicker cookies with more pronounced textural variations.
- Baking at a Higher Temperature: 375°F (190°C). A slightly higher baking temperature of 375°F (190°C) plays a strategic role in minimizing cookie spread. The intense initial heat helps to set the edges of the cookie quickly, creating that desirable crispy exterior, while allowing the interior to bake more slowly, resulting in a perfectly gooey, soft center. This method effectively locks in the cookie’s height and creates that signature bakery texture.
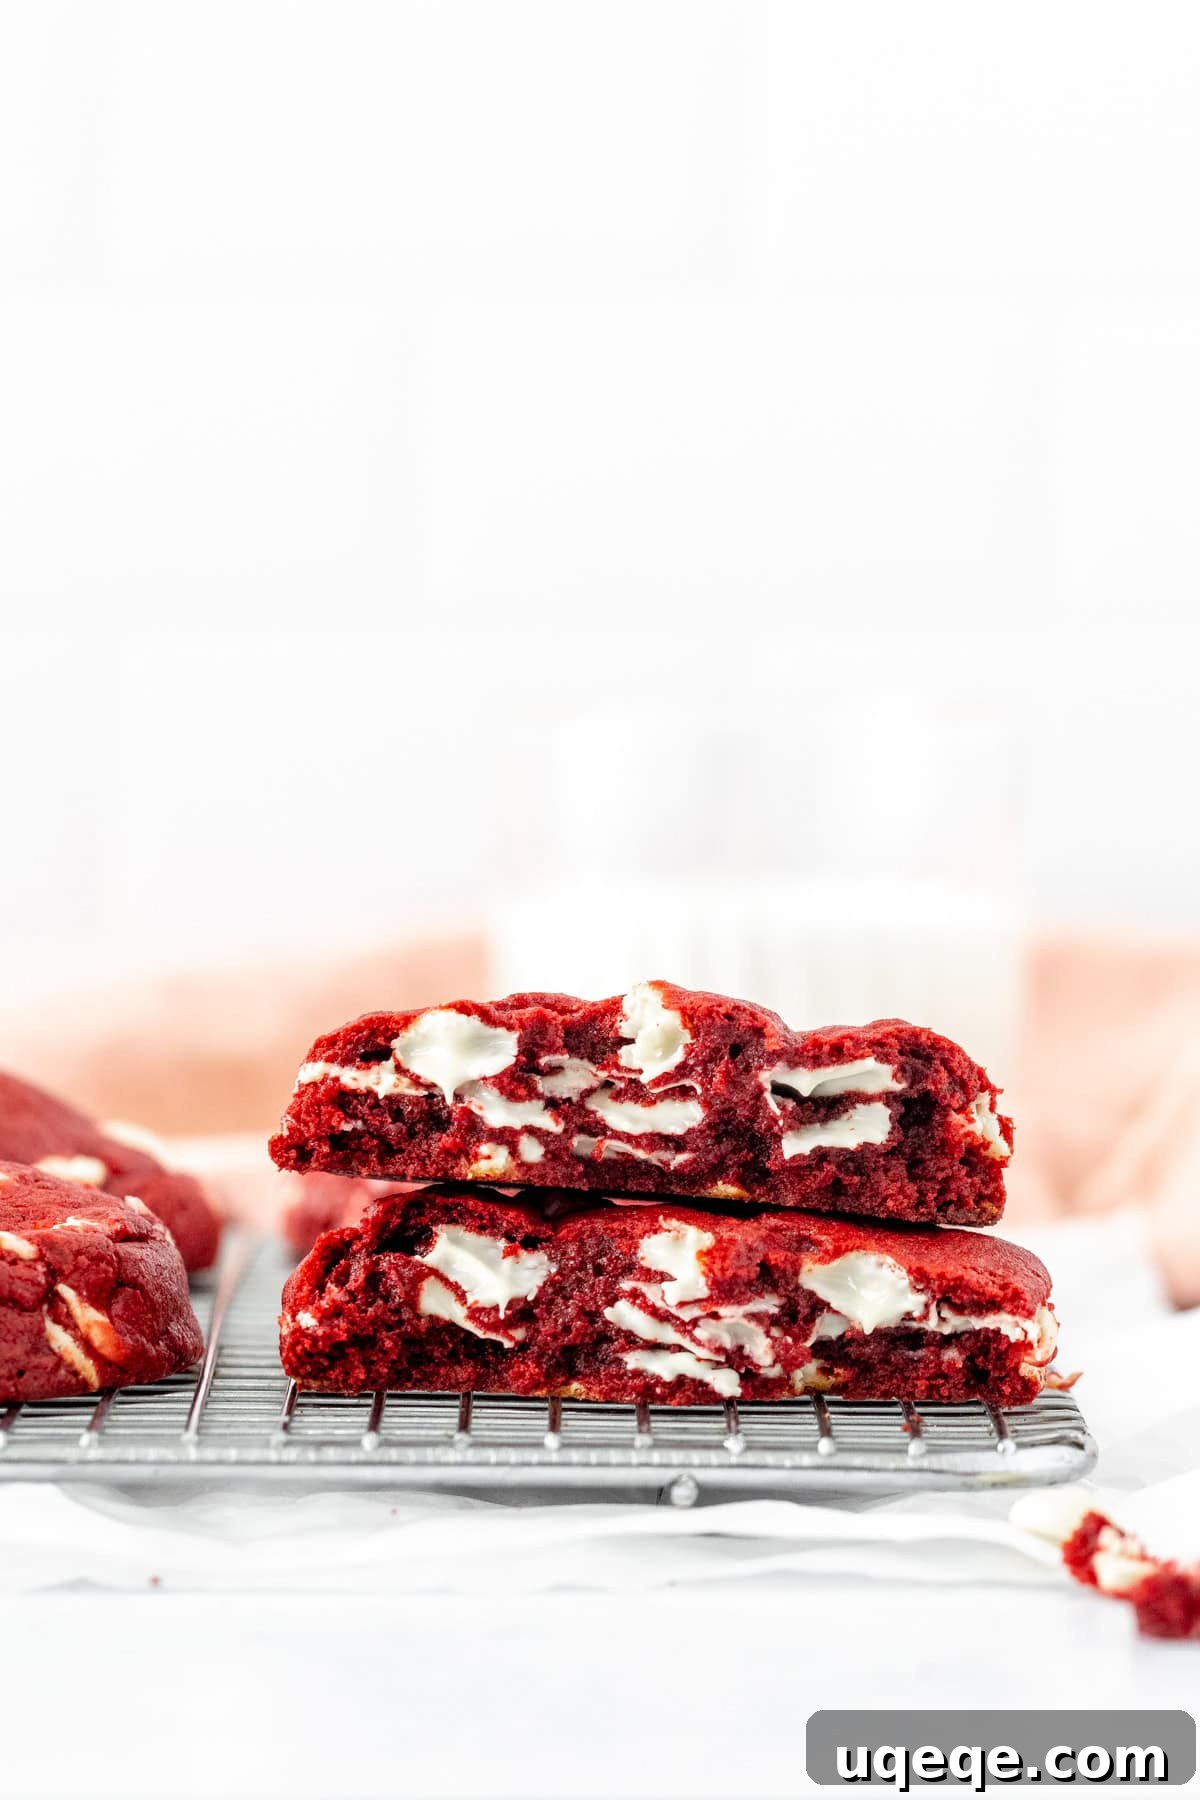
Recipe Tip: Choosing Your White Chocolate
For these cookies, I highly recommend using high-quality white chocolate callets or chopped white chocolate bars. I specifically used white chocolate callets by Callebaut, which melt beautifully as the cookies bake and maintain a delightfully melty consistency even as they cool, as you can see vividly pictured. While any good quality white chocolate chips or chunks will work well, I strongly advise against using products labeled “white cream” or “white confectionary coating.” These often contain very little real cocoa butter and have an inferior flavor and texture compared to genuine white chocolate, which truly elevates these cookies.
Freezing for Future Indulgence: Make-Ahead & Storage Solutions
One of the many wonderful aspects of this bakery-style red velvet cookie recipe is its exceptional versatility for making ahead and freezing. This means you can always have a batch of gourmet cookies ready for any occasion, or simply to satisfy a sudden craving!
Freezing Cookie Dough Balls:
- Prepare the cookie dough as directed in the recipe, up to the point of forming the balls.
- Form the dough into your desired large balls (3.5 ounces or 100 grams each).
- Place the cookie dough balls onto a baking sheet lined with parchment paper, ensuring they don’t touch.
- Freeze until solid, typically 1-2 hours.
- Once solid, transfer the frozen cookie dough balls to a freezer-safe zip-top bag or airtight container. Remove as much excess air as possible to prevent freezer burn.
- Store in the freezer for up to 3 months.
- To bake from frozen: Preheat your oven and line cookie sheets as usual. Place the frozen cookie dough balls on the prepared sheets, spacing them appropriately. You may need to add an extra 2-4 minutes to the baking time, or until the tops look set and the edges are lightly golden. There’s no need to thaw the dough first!
Freezing Baked Cookies:
- Allow your freshly baked red velvet cookies to cool completely on the baking sheet, then transfer them to a wire rack. This is crucial to prevent condensation and sogginess when freezing.
- Once fully cooled, wrap each cookie tightly in plastic wrap, then place them in a freezer-safe zip-top bag or an airtight freezer-safe container.
- Store in the freezer for up to 2 months.
- To thaw and enjoy: Transfer the frozen baked cookies to the refrigerator to thaw overnight. Once thawed, bring them to room temperature before serving for the best texture and flavor. For an extra treat, you can gently warm them in a microwave for 10-15 seconds or in a low oven (around 250°F / 120°C) for 5-7 minutes to recapture that “fresh from the oven” gooeyness.
More Irresistible Red Velvet Treats to Try
If you’ve fallen in love with the classic red velvet flavor, you’ll adore exploring these other delightful recipes from my collection:
- Red Velvet Blossoms: These soft, chewy cookies are adorned with a classic Hershey’s Kiss, combining two favorites into one irresistible bite.
- Easy Red Velvet Cake: A fuss-free recipe for a stunning red velvet cake, baked in a convenient 9×13 inch pan, making frosting a breeze.
- Red Velvet Cookie Cake: Imagine one giant, delicious cookie, beautifully decorated with a luscious cream cheese frosting – perfect for celebrations!
- Red Velvet Brownies: Rich, fudgy brownies infused with red velvet flavor, exceptionally delicious whether filled with white chocolate chips or topped with a tangy cream cheese frosting.
Bakery Style Red Velvet Cookies
By: Fiona Dowling
These bakery style red velvet cookies are inspired by the famous Levain Bakery in New York City and other renowned bakeries known for their extra thick and chunky cookies. They capture the perfect red velvet flavor, loaded with tons of white chocolate, and are absolutely gigantic with a delightfully gooey middle.
Prep Time: 15 mins
Cook Time: 14 mins
Chilling Time: 2 hrs
Total Time: 2 hrs 45 mins
Servings: 16 cookies
Equipment
- Cookie Sheets
Ingredients
- 1¾ cup all-purpose flour (219 grams or 7.87 ounces)
- 1⅔ cup cake flour (135 grams or 6.68 ounces), not self-rising
- ¼ cup natural cocoa powder (22 grams or 0.75 ounces)
- 1 teaspoon baking powder
- ¾ teaspoon baking soda
- ½ teaspoon salt
- 1 cup unsalted butter (226 grams or ½ lb), cold, cut into cubes
- 1 cup brown sugar (210 grams or 7.5 ounces), light brown sugar recommended
- ¾ cup granulated sugar (150 grams or 5.6 ounces)
- 2 large eggs
- 2 teaspoons vanilla extract
- ½ teaspoon white vinegar, or distilled vinegar
- 2 teaspoons red food coloring, gel food coloring highly recommended, adjust amount for desired vibrancy
- 2¼ cups white chocolate chips or chunks (about 405 grams)
Instructions
- In a large bowl, sift together the all-purpose flour, cake flour, natural cocoa powder, baking soda, baking powder, and salt. Whisk these dry ingredients together thoroughly and set the bowl aside. Ensure accurate flour measurement either by using a kitchen scale or by whisking first, then lightly spooning into dry measuring cups and leveling off the top.
- In a separate large mixing bowl, using an electric mixer, beat together the cold cubed butter, brown sugar, and granulated sugar until the mixture is light and creamy. This typically takes 2-3 minutes.
- Into the creamed butter mixture, add the eggs one at a time, mixing well after each addition. Then, incorporate the vanilla extract, white vinegar, and red food coloring. Mix until fully combined and the color is vividly dispersed throughout the mixture.
- With your mixer set to a low speed, gradually add the dry ingredients into the wet butter mixture. Incorporate about half of the dry ingredients at a time, mixing until just combined. The dough will be exceptionally thick at this stage. You may find it helpful to switch to your hands or a sturdy spatula to fully incorporate all the dry ingredients without overmixing.
- Finally, gently fold in the white chocolate chips or chunks until they are evenly distributed throughout the thick red velvet cookie dough.
- Cover the bowl containing the cookie dough tightly with plastic wrap and place it in the refrigerator. Chill the dough for a minimum of 2 hours, or for best results and enhanced flavor development, up to 48 hours. This chilling step is essential for thick cookies.
- When you’re ready to bake, preheat your oven to 375℉ (190℃). Line two large baking sheets with parchment paper. If your dough has been chilling overnight or longer, you might need to let it sit at room temperature for 5-10 minutes to make it easier to scoop and shape.
- Form the chilled dough into large, generous balls. You can use a ¼ cup or ⅓ cup measuring scoop for this. For consistent size, I recommend weighing each cookie dough ball to approximately 3.5 ounces (about 100 grams). Place the dough balls about 2½ inches (approximately 6 cm) apart on the prepared cookie sheets.
- Bake one cookie sheet at a time in the middle rack of your preheated oven. Keep any unbaked cookie dough balls in the refrigerator while the first batch bakes. The cookies will typically bake for about 12-15 minutes, or until the tops appear set and the edges are lightly golden, but the centers still look very soft and slightly underbaked.
- Once baked, remove the cookies from the oven and allow them to cool on the cookie sheets for at least 15 minutes. Important Note: These cookies are very thick and gooey when hot, so resist the urge to transfer them to a cooling rack too quickly, as they may fall apart. For perfectly round cookies, immediately after removing them from the oven, take a large biscuit cutter or a very large mug (one that is large enough to encircle the cookie without touching it) and place it around a cookie. Gently move the cutter/mug in a circular motion to reshape any uneven edges, creating a perfectly round cookie.
Notes
- Cake Flour Substitute: Cake flour is key for a tender middle. If you don’t have it, you can create a substitute. For this recipe, in addition to the 1¾ cups of all-purpose flour, add an extra 1¼ cups of all-purpose flour. Then, whisk in 3 tablespoons of cornstarch (known as cornflour in the UK and Australia) to the combined flours before sifting.
- Cocoa Powder Choice: For authentic red velvet flavor, natural cocoa powder is superior to Dutch-processed cocoa. Natural cocoa provides a milder chocolate taste and a lighter color, allowing the red dye and tangy notes to shine through effectively.
- Freezing Instructions: Raw cookie dough balls can be frozen for up to 3 months. Bake them directly from frozen, following the recipe instructions but possibly adding a few minutes to the baking time. Baked and fully cooled cookies can be wrapped tightly and frozen for up to 2 months. Thaw them in the refrigerator, then bring to room temperature before enjoying, or gently rewarm for a fresh-baked experience.
- Nutrition Information: The provided nutritional details are an estimate only and are based on the assumption that this recipe yields 16 very large cookies. Actual values may vary depending on ingredients used and portion sizes.
Nutrition
Calories: 437 kcal, Carbohydrates: 59g, Protein: 6g, Fat: 21g, Saturated Fat: 13g, Polyunsaturated Fat: 1g, Monounsaturated Fat: 6g, Trans Fat: 0.5g, Cholesterol: 59mg, Sodium: 162mg, Potassium: 177mg, Fiber: 1g, Sugar: 38g, Vitamin A: 396IU, Vitamin C: 0.1mg, Calcium: 85mg, Iron: 1mg
Like this recipe? We encourage you to rate and comment below! Your feedback helps us share more delicious treats.