
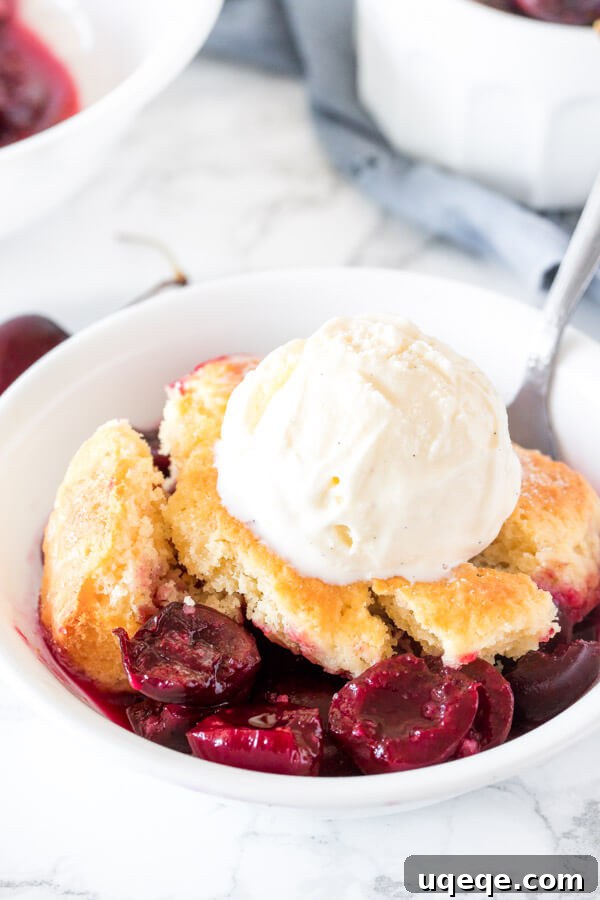
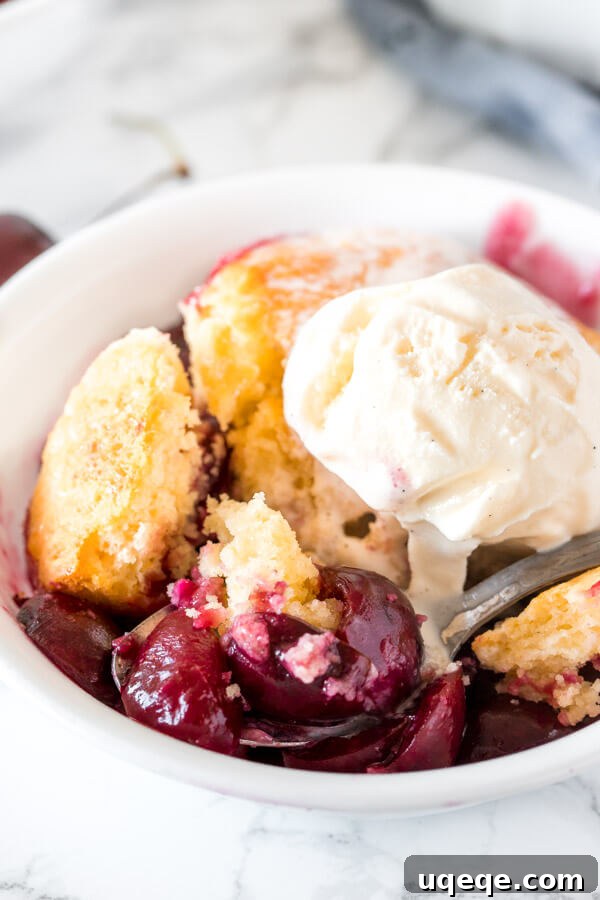
Experience the ultimate taste of summer with this incredibly easy cherry cobbler. Boasting a rich, sweet, and perfectly juicy fresh cherry filling crowned with a soft, golden, and buttery biscuit topping, it’s the quintessential dessert to celebrate peak cherry season. Serve it warm with a generous scoop of vanilla ice cream for an unforgettable treat that captures the essence of homemade comfort.
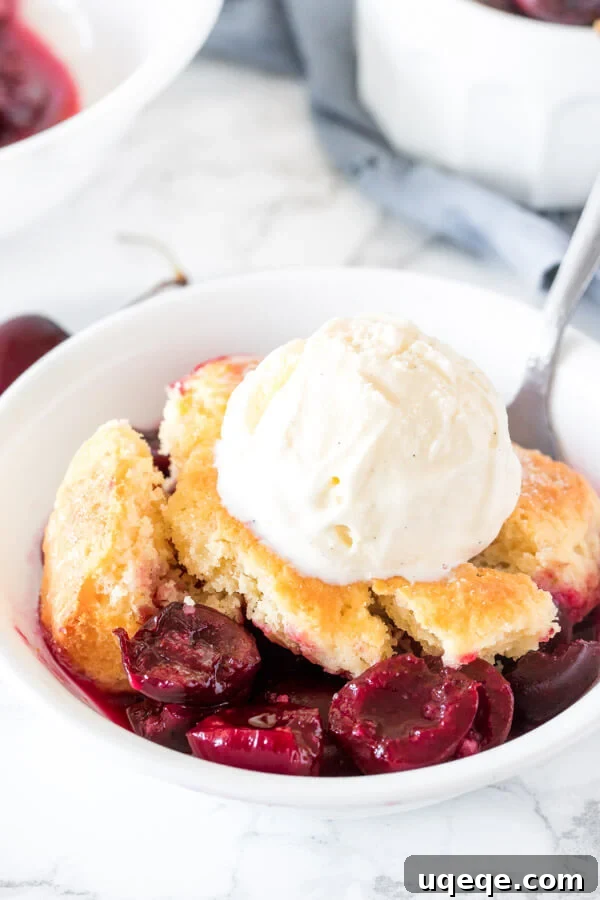
The Ultimate Easy Cherry Cobbler: A Sweet Taste of Summer
Summer ushers in a bounty of vibrant, sweet dark purply-red cherries, and there’s no better way to showcase their natural splendor than with a homemade cherry cobbler. This recipe transforms fresh, seasonal fruit into a bubbling, aromatic delight, nestled beneath a fluffy, cake-like biscuit topping that bakes to a beautiful golden brown. Forget the fuss of a traditional cherry pie; this cobbler offers all the comforting flavors with significantly less effort, making it your go-to dessert for any summer gathering or a cozy night in.
What Makes a Cobbler So Special?
A cobbler is a beloved rustic fruit dessert, characterized by a simple fruit filling baked underneath a unique dough or batter topping. Unlike a crisp, which typically features a streusel or oatmeal-based crumble, a cobbler is distinguished by its biscuit-like crust. The term “cobbler” is believed to come from the way the topping is “cobbled” or dropped onto the fruit in small mounds, resembling cobblestones. This method creates a delightful contrast: a warm, tender fruit layer mingling with soft, buttery biscuit pieces that absorb the fruit’s juices while baking to a satisfying golden hue on top.
This particular recipe shares the irresistible fruit filling concept with my popular cherry crisp, but swaps the crunchy oat crumble for a tender, slightly doughy, and undeniably comforting biscuit topping. The result is a dessert that feels both elegant and down-to-earth, perfect for any occasion.
Why This Easy Cherry Cobbler Recipe Shines
This cherry cobbler isn’t just easy; it’s designed for maximum flavor and textural pleasure with minimal fuss. Here’s what sets it apart:
Perfectly Sweet and Juicy Cherry Filling
Our filling is a celebration of cherries. We use a generous quantity of fresh, pitted cherries, ensuring every bite is bursting with fruity goodness. The natural sweetness of the cherries is enhanced by a touch of sugar, while a splash of fresh lemon juice brightens the flavors and helps to soften the cherry skins, making them incredibly tender. The secret ingredient, almond extract, adds a subtle depth that beautifully complements the cherries without overpowering them, creating a truly irresistible base. Cornstarch ensures the filling thickens just enough to be wonderfully spoonable, without becoming gummy.
Golden, Buttery Biscuit Topping
The topping is what truly makes a cobbler unique. This recipe features a light, fluffy, and tender biscuit crust that’s incredibly easy to prepare. Made with everyday pantry staples, the dough comes together quickly and bakes into golden-brown clouds of buttery goodness. Its slightly cakey texture provides the perfect counterpoint to the vibrant, bubbling fruit beneath, offering a comforting chewiness that’s simply divine.
Simplicity at its Best
From start to finish, this cherry cobbler prioritizes ease. The cherry filling requires a simple toss of ingredients, and the biscuit topping is a straightforward mix-and-drop affair. No rolling, no complex crimping, just pure, unadulterated baking joy. It’s perfect for beginner bakers and seasoned pros alike, promising a delicious outcome every time.
Essential Ingredients for Your Homemade Cherry Cobbler
Crafting this delightful cobbler requires two main components: the luscious cherry filling and the tender biscuit topping. Here’s a breakdown of what you’ll need:
For the Irresistible Cherry Layer:
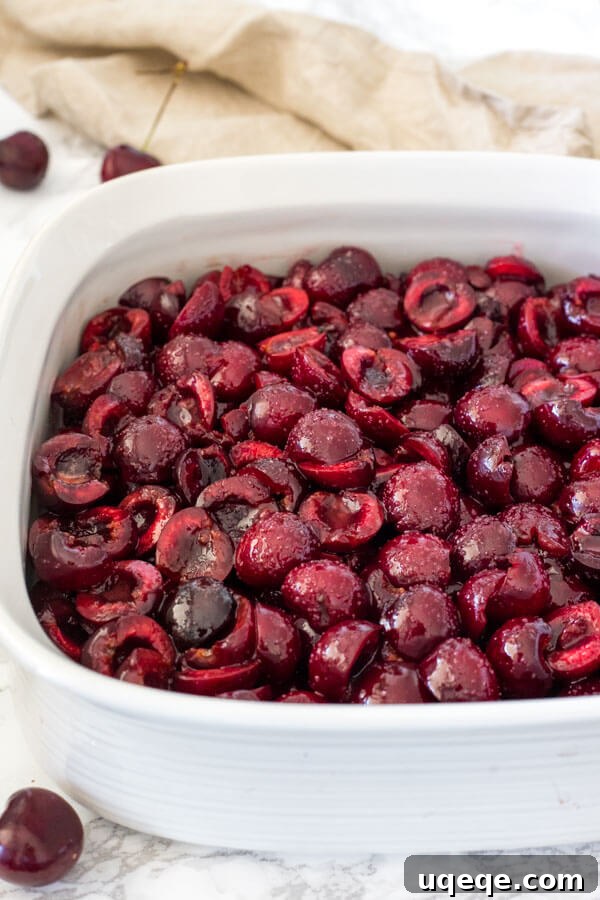
- 6 cups Pitted Fresh Cherries: You’ll need approximately 1.5 to 2 pounds of fresh, ripe cherries. Dark sweet cherries like Bing or Rainier are excellent choices. Pitting them can be a fun activity or a quick task with a cherry pitter!
- 2/3 cup White Sugar: Just enough to sweeten the cherries without making them overly syrupy, allowing their natural flavor to shine.
- 2 tablespoons Freshly Squeezed Lemon Juice: This is a crucial ingredient! Lemon juice not only adds a bright, tangy note that elevates the cherry flavor but also helps in breaking down the cherry skins, ensuring a tender bite. Do not skip this!
- 1/2 teaspoon Almond Extract: A magical ingredient that harmonizes exquisitely with cherries. If you don’t have it, you can omit it, but it truly enhances the overall flavor profile.
- 2 tablespoons Cornstarch: Our thickening agent. It ensures the cherry filling becomes wonderfully juicy and not overly watery. If cornstarch is unavailable, you can substitute with 3 tablespoons of all-purpose flour.
All these ingredients come together in a large bowl, where they are gently tossed to ensure the cherries are evenly coated. This abundant cherry layer forms the foundation of your cobbler, filling a 9×9-inch ceramic baking pan with vibrant color and promise.
For the Fluffy Biscuit Topping:
The biscuit topping is intentionally less sweet than the filling, letting the fruit remain the star. This simple stir-together dough delivers a wonderfully cakey and fluffy texture:
- 1 1/2 cups All-Purpose Flour: The structural base for our biscuits.
- 1/4 cup White Sugar: A touch of sweetness for the topping.
- 2 teaspoons Baking Powder: The leavening agent that gives the biscuits their lift and fluffiness.
- 1/4 teaspoon Salt: Balances the flavors and enhances the sweetness.
- 6 tablespoons Unsalted Butter, Melted and Cooled: Provides richness and moisture, contributing to the tender crumb. Ensure it’s slightly cooled to avoid cooking the egg yolk.
- 1 large Egg Yolk: Adds tenderness and a rich golden color to the biscuits. Discard the white (or save it for another recipe!).
- 1 teaspoon Vanilla Extract: A classic flavor enhancer that complements both the butter and the cherries.
- 1/2 cup Buttermilk: Essential for a tender, moist biscuit. If you don’t have buttermilk, you can easily make a substitute by mixing 1/2 cup of regular milk with 1 teaspoon of fresh lemon juice and letting it sit for 5 minutes until it slightly curdles.
When mixing the biscuit dough, remember the golden rule: do not overmix! Stir until just combined; the dough will look lumpy, and that’s perfectly fine. Overworking the dough can lead to tough, dense biscuits, which we want to avoid for that perfect fluffy texture.
Step-by-Step Guide to Making Your Perfect Cherry Cobbler
Follow these simple instructions to create a truly delicious homemade cherry cobbler:
1. Prepare Your Oven and Pan:
- Preheat your oven to 400°F (200°C).
- Lightly grease a 9×9-inch (23×23 cm) ceramic or glass baking pan.
2. Craft the Luscious Cherry Layer:
- In a large mixing bowl, combine the pitted fresh cherries, white sugar, freshly squeezed lemon juice, almond extract, and cornstarch.
- Gently toss the mixture with a spoon or your hands until all the cherries are evenly coated with the sugar and thickening agents.
3. Prepare the Buttery Biscuit Dough:
- In a medium bowl, whisk together the dry ingredients: all-purpose flour, white sugar, baking powder, and salt.
- In a separate liquid measuring cup, whisk together the melted and slightly cooled butter, large egg yolk, vanilla extract, and buttermilk.
- Pour the wet ingredients into the dry ingredients. Stir gently with a spoon or spatula until the mixture is *just* combined. The dough will be thick and lumpy; resist the urge to overmix, as this will lead to tough biscuits.
4. Assemble and Bake Your Cobbler:
- With a slotted spoon, transfer the cherry mixture into the prepared 9×9-inch baking pan. Leave any excess juice in the bottom of your mixing bowl; we want the cherries, not a watery filling.
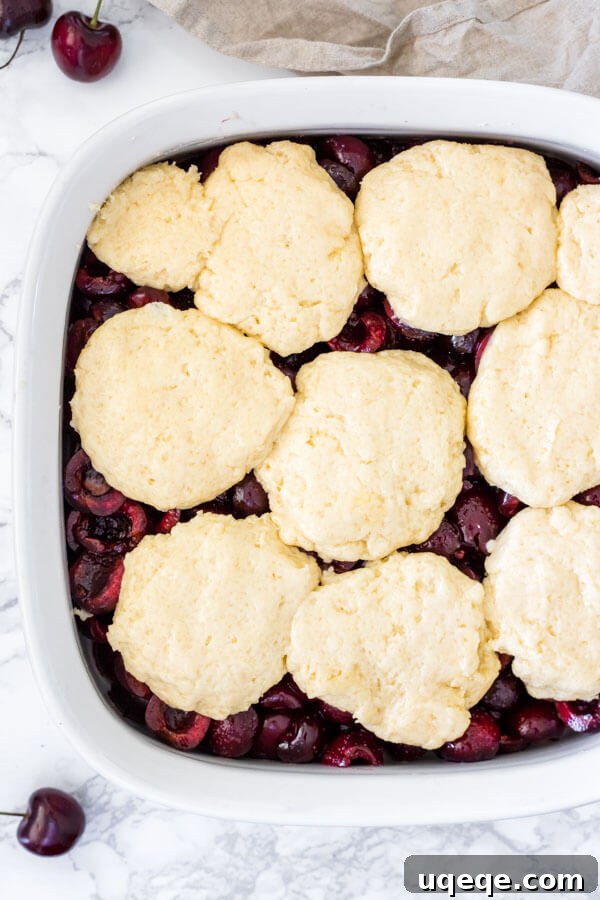
- Take small sections of the biscuit dough (about 1-2 tablespoons each), flatten them slightly with your hands, and arrange them on top of the cherry layer. It’s okay if some of the cherries are exposed; the biscuits will expand as they bake, and you want to see the fruit bubbling through for that classic cobbler look. Aim for about 8-9 biscuit sections in total.
- Lightly cover the baking pan with aluminum foil. This helps the biscuits cook through without browning too quickly. Bake for 20 minutes.
- Remove the aluminum foil and continue baking for another 25-30 minutes, or until the biscuit topping is beautifully golden brown and the cherry filling underneath is visibly bubbling and thickened.
- Carefully remove the cobbler from the oven. Let it cool for 10-15 minutes before serving. This cooling time allows the filling to set slightly and prevents burns from the hot fruit. For an extra touch of sweetness, you can optionally sprinkle about 1 tablespoon of granulated sugar over the warm biscuits immediately after taking it out of the oven.
Tips for the Best Cherry Cobbler
Choosing the Right Cherries:
For the best flavor, always opt for fresh, ripe, in-season cherries. Look for firm, plump, and dark-colored cherries. While dark sweet cherries are traditional, you can also experiment with a mix of sweet and tart cherries for a more complex flavor profile. Remember to pit them thoroughly before use!
Using Frozen Cherries:
No fresh cherries available? No problem! You can absolutely make this cobbler with frozen cherries. Simply thaw the frozen cherries completely, then drain off any excess liquid and pat them dry with a paper towel before tossing them with the other filling ingredients. This prevents the cobbler from becoming too watery.
Store-Bought Cherry Pie Filling vs. Fresh:
While this recipe highlights fresh cherries, you can use canned cherry pie filling in a pinch. If using store-bought or homemade cherry pie filling, simply dump two 21-ounce cans of filling directly into your baking dish. Then prepare the biscuit topping as directed and bake. Keep in mind that the overall quality and fresh flavor of your cobbler will largely depend on the deliciousness of your chosen cherries or pie filling.
Mastering the Biscuit Topping:
The key to tender biscuits is minimal handling. Overmixing the dough develops the gluten, leading to a tough texture. Stir just until the flour is moistened. Also, ensure your melted butter is cooled slightly before adding it to the egg yolk to prevent it from scrambling.
Serving Suggestions & Variations
A warm cherry cobbler is a dessert in itself, but a few additions can elevate it to pure indulgence:
- Vanilla Ice Cream: The classic pairing! The cold, creamy vanilla ice cream slowly melts into the warm, fruity cobbler, creating a symphony of temperatures and textures.
- Whipped Cream: A dollop of freshly whipped cream provides a lighter, airy contrast.
- Additional Toppings: A sprinkle of chopped nuts (like almonds or pecans) or a drizzle of chocolate sauce can add extra flavor and flair.
- Spice It Up: A pinch of cinnamon or a tiny grating of fresh nutmeg can be added to the cherry filling for a warmer, spicier twist.
- Mixed Fruit Cobbler: Feel free to experiment with other berries or fruits! Peaches, blueberries, or a mix of summer fruits can be delightful substitutes or additions to the cherries. Adjust sugar levels as needed for different fruits.
Storage and Reheating
Leftover cherry cobbler stores beautifully. Simply cover the baking pan tightly with plastic wrap or aluminum foil and refrigerate for up to 3-4 days. To reheat, preheat your oven to 250°F (120°C). Cover the pan loosely with aluminum foil and bake until warmed through, typically 15-20 minutes, or until the center is warm.
Frequently Asked Questions About Cherry Cobbler
Can I use tart cherries for this recipe?
Yes, you can! If using tart cherries, you might want to increase the sugar in the cherry filling to 1 cup or more, depending on your preference for sweetness. Taste the raw filling mixture (before adding egg yolk to the biscuit) and adjust as needed.
Do I need a cherry pitter?
A cherry pitter makes the job much quicker and cleaner. However, you can also pit cherries using a chopstick or a small straw, pushing it through the stem end of the cherry to pop out the pit. Be prepared for some juicy mess!
My cobbler topping didn’t get golden brown. What happened?
Ensure your oven temperature is accurate and that the cobbler bakes uncovered for the last 25-30 minutes. If your topping is cooking too slowly, you can briefly increase the oven temperature to 425°F (220°C) for the last 5-10 minutes, but watch it carefully to prevent burning.
Can I make this dairy-free?
Yes, you can substitute the butter with a plant-based butter alternative and use a dairy-free buttermilk substitute (e.g., almond milk mixed with lemon juice or a store-bought dairy-free buttermilk alternative).
More Delicious Cherry Desserts to Try
If you’re a fan of cherries, you’ll love these other recipes:
- Cherry Crisp: For those who prefer a crunchy oat topping.
- Cherry Almond Bars: A delightful handheld treat with cherry and almond flavors.
- Black Forest Brownies: A rich chocolate brownie featuring the classic cherry and chocolate combination.
This easy cherry cobbler recipe is more than just a dessert; it’s an experience. The bubbling, aromatic fruit, combined with the tender, golden biscuit topping, creates a comforting masterpiece that embodies the warmth and sweetness of summer. So gather your fresh cherries, invite your loved ones, and prepare to delight in every single bite of this timeless classic. It’s sure to become a cherished recipe in your kitchen for years to come.
Love this recipe? Please rate and share your comments below!
Your feedback helps others discover delicious dishes.