
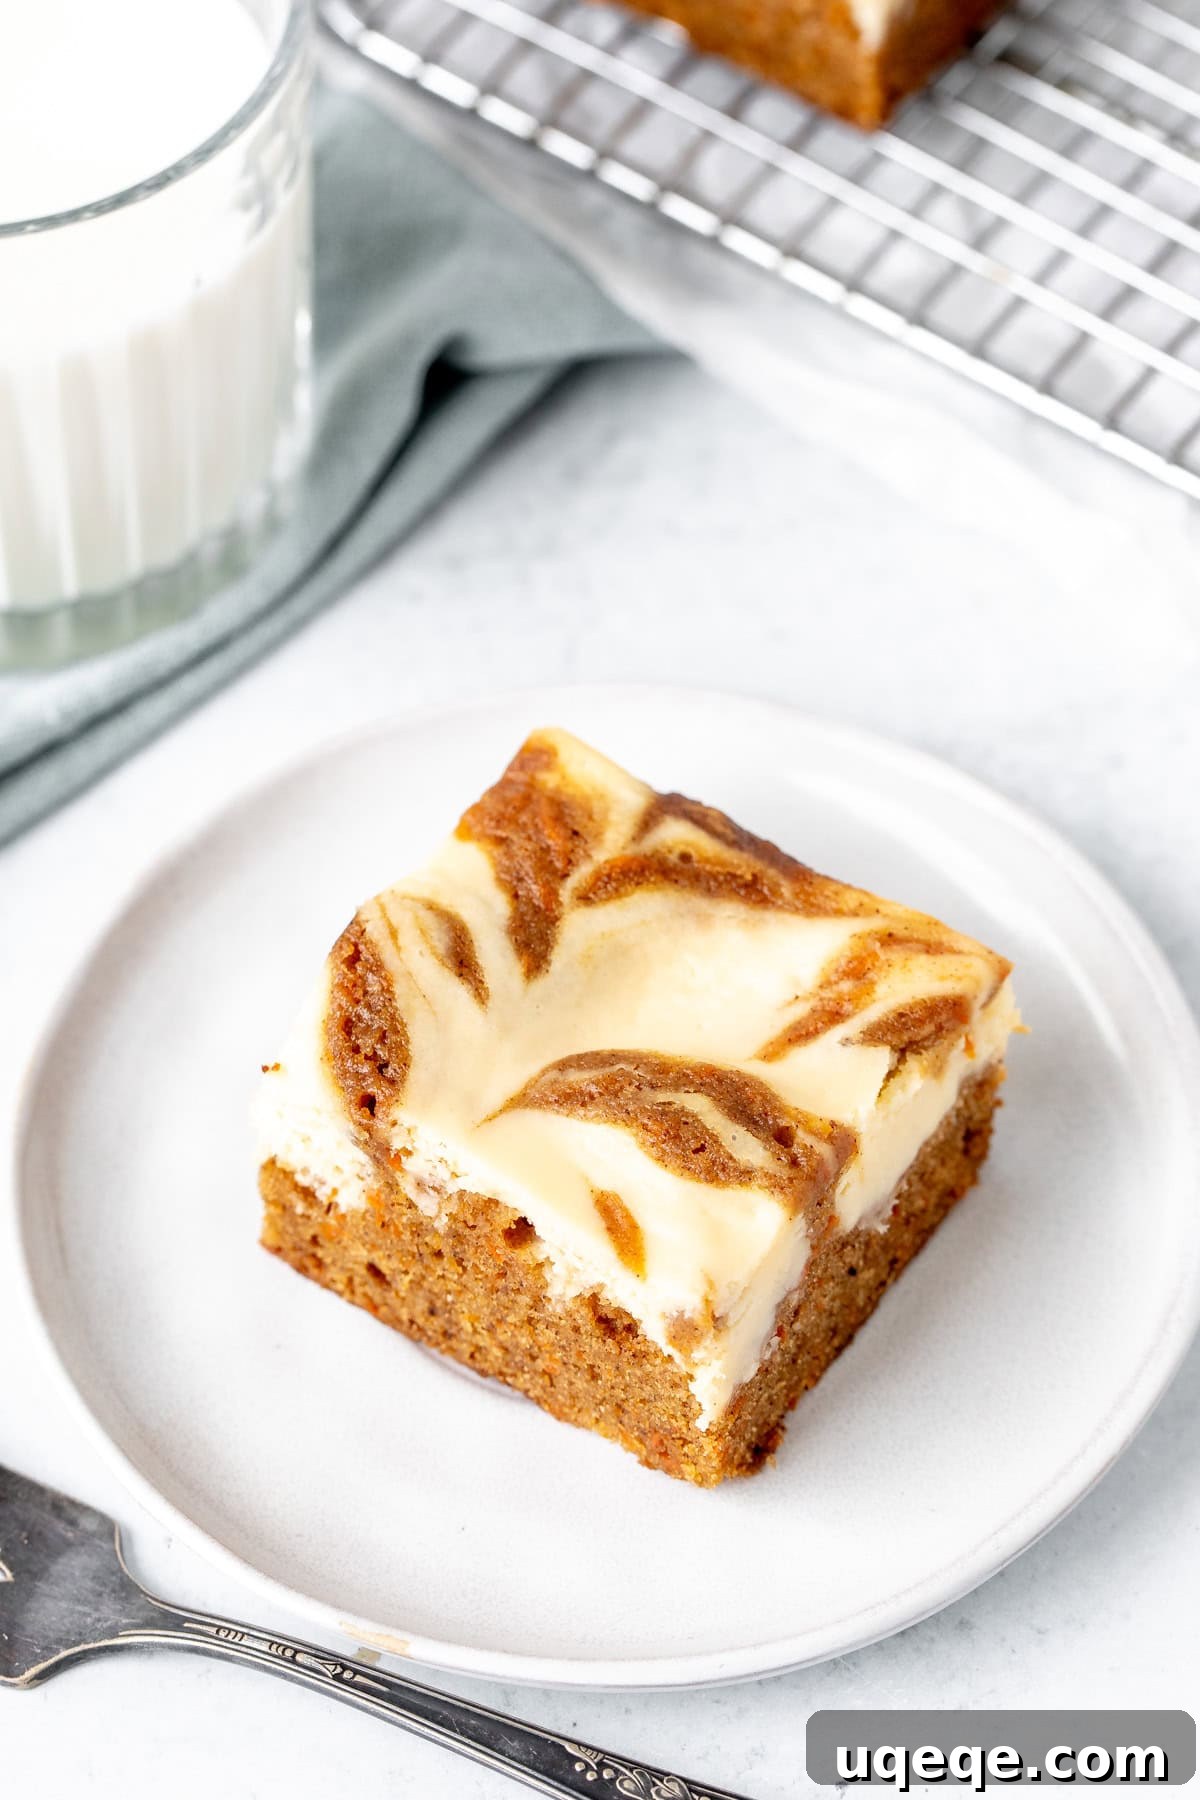
Experience the perfect harmony of flavors and textures with these incredible **Carrot Cake Cheesecake Bars**. This unique dessert brings together the beloved warmth of a classic carrot cake and the luxurious tang of creamy vanilla cheesecake, swirled into one visually stunning and utterly delicious bite. They are an absolute showstopper, especially ideal for Spring gatherings and Easter celebrations.
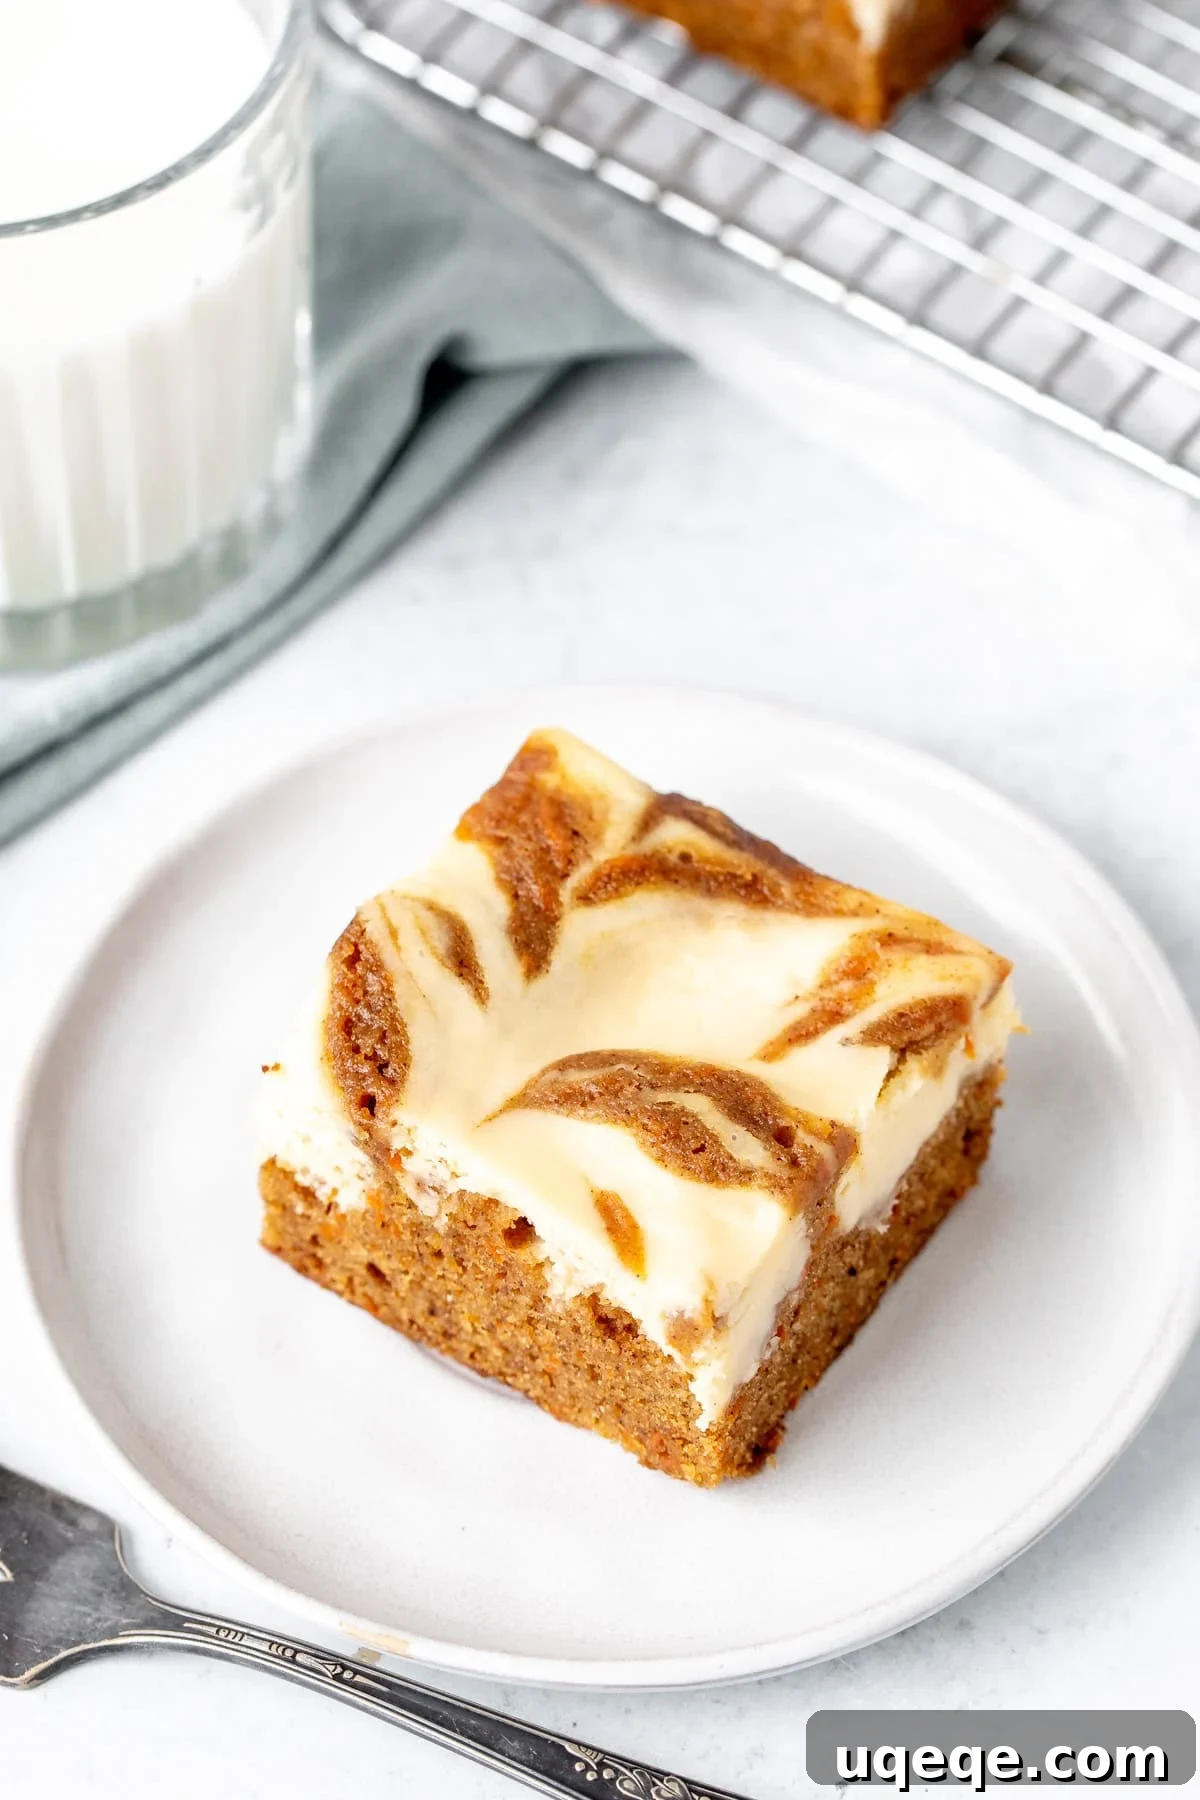
There’s something truly special about carrot cake, a quintessential spring dessert renowned for its moist crumb, comforting warm spices, and the delightful tang of cream cheese frosting. In this innovative recipe for **Carrot Cake Cheesecake Bars**, we elevate that classic experience by replacing the traditional frosting with a luscious, smooth, and creamy vanilla cheesecake layer that’s beautifully marbled throughout the cake. The result is a dessert that offers the best of both worlds – the tender, spiced carrot cake and the rich, velvety cheesecake – in every single square.
What sets these bars apart is not just their captivating marbled appearance, but also their perfectly balanced sweetness. Unlike a traditional carrot cake often slathered with a thick layer of frosting, these bars offer a sophisticated taste that is less intensely sweet, allowing the nuanced flavors of the carrot cake and the bright tang of the cheesecake to truly shine. You’ll fall in love with the harmonious combination of the dense, moist carrot cake base and the exquisite, silky-smooth vanilla cheesecake swirl. It’s a textural and flavor adventure that’s sure to impress any dessert lover.
The Marriage of Two Classics: Why These Bars Are a Must-Try
The concept of combining two beloved desserts into one creates a masterpiece that transcends expectations. Carrot cake brings its earthy sweetness, vibrant color, and comforting spices like cinnamon, nutmeg, and cloves. Cheesecake, on the other hand, offers a cool, creamy, and slightly tart counterpoint that cuts through the richness of the cake. When these two are swirled together, they create a dynamic interplay of flavors and textures that is simply irresistible. Each bite delivers a delightful surprise, making these bars far more exciting than either dessert enjoyed separately.
Preparing these decadent bars involves two straightforward stages: first, crafting the moist carrot cake batter, and then, preparing the silky cheesecake batter. Once both batters are ready, the magic happens as they are artfully marbled and swirled together in the pan before baking to golden perfection. Let’s delve into the details of each step to ensure your Carrot Cake Cheesecake Bars are nothing short of spectacular.
Crafting the Perfect Carrot Cake Batter
One of the beauties of this carrot cake recipe is its simplicity. The batter is designed to come together with minimal effort and does not even require an electric mixer, making it accessible for bakers of all skill levels. The final texture is wonderfully dense and moist, often described as almost verging on the delightful chewiness of a blondie. Achieving this perfect texture starts with carefully combining your ingredients.
1. Laying the Foundation: Dry Ingredients
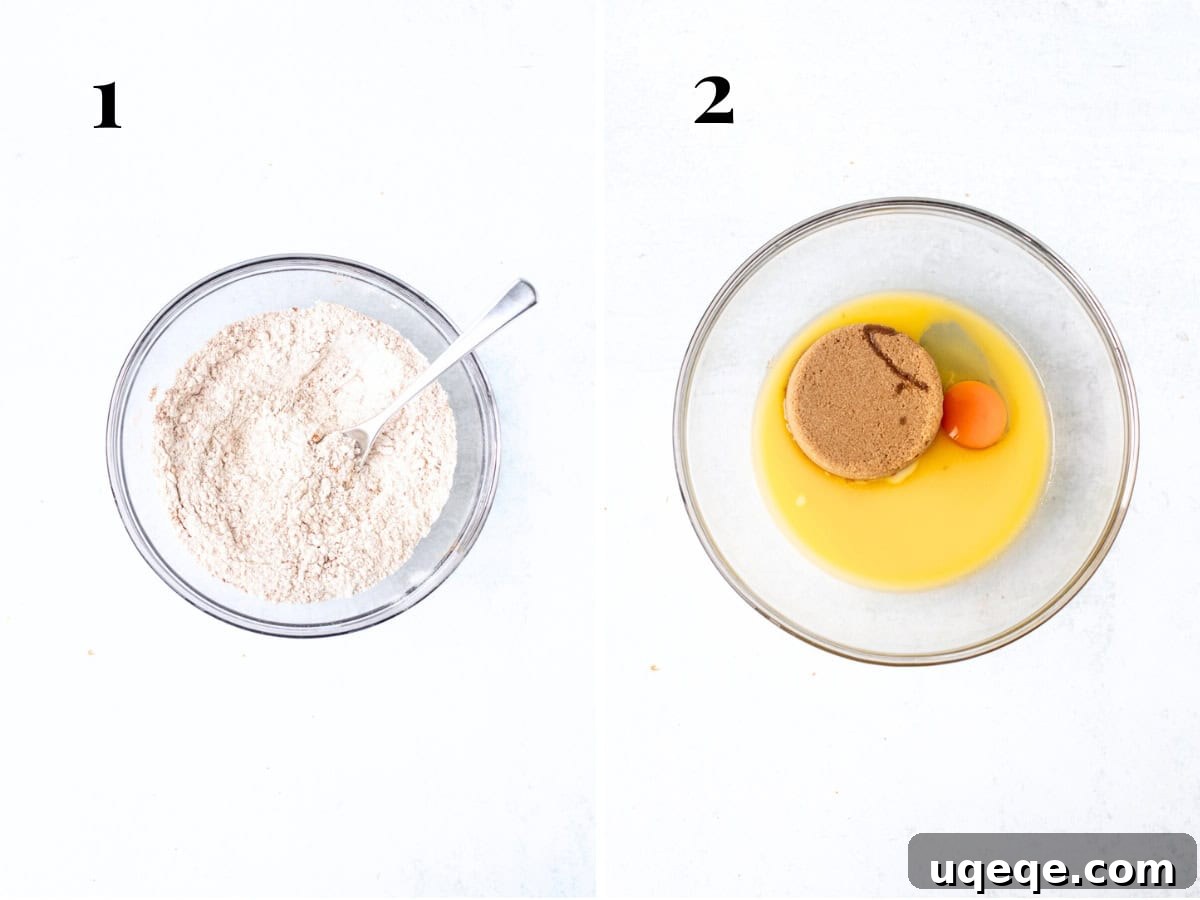
- Begin by whisking together all your dry ingredients in a medium bowl. This includes all-purpose flour, fragrant cinnamon, a touch of ground nutmeg, a hint of ground cloves, baking soda (to ensure a tender crumb and proper rise), and a pinch of salt to balance the sweetness. Whisking them thoroughly ensures that the spices and leavening agents are evenly distributed, which is crucial for uniform flavor and texture throughout your bars. Set this mixture aside.
2. Infusing Flavor: Wet Ingredients and Carrots
- In a separate, larger bowl, combine your wet ingredients and sugars. Whisk together the melted unsalted butter, rich brown sugar (whether light or dark, it adds wonderful molasses notes), a large egg, and a teaspoon of pure vanilla extract. Continue whisking until the mixture is smooth, and you no longer see any visible pieces of egg or lumps of sugar. The brown sugar contributes significantly to the cake’s signature moisture and deep flavor profile.
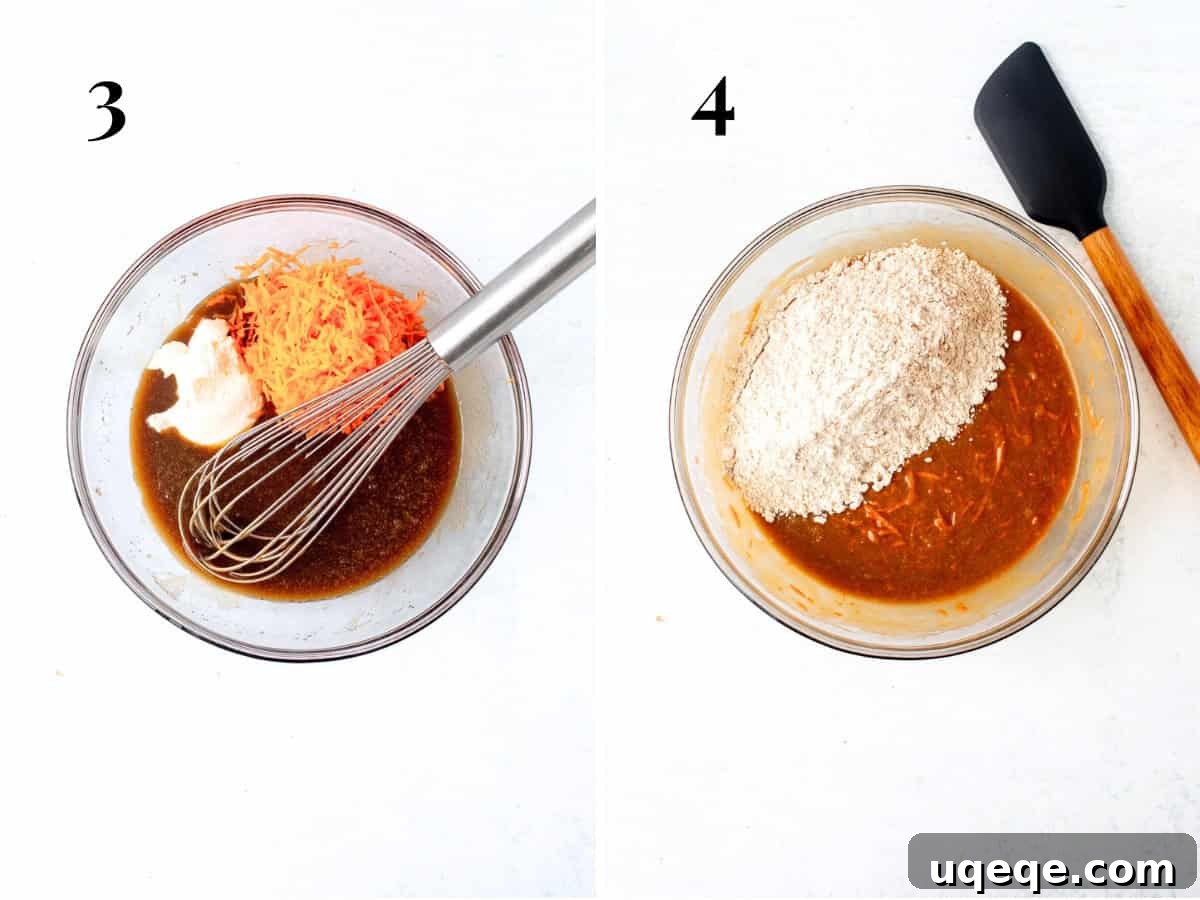
- Next, stir in the unsweetened sour cream and the finely shredded carrots. The sour cream is a secret weapon for moisture and a subtle tang that complements the carrots and spices beautifully. For the best texture in these bars, we highly recommend using **finely shredded carrots**. This ensures they integrate seamlessly into the batter, distributing their natural sweetness and moisture without creating large, chunky bits.
- Finally, gently incorporate the dry ingredients into the wet ingredients. Using a rubber spatula or wooden spoon, stir the mixture until just combined. The key here is to **avoid overmixing**. Overmixing can develop the gluten in the flour too much, leading to a tough and dry cake. Stop mixing as soon as you no longer see any streaks or lumps of flour. A few small lumps are perfectly fine and often preferred to an overmixed batter. You can easily do this step entirely by hand, reinforcing the “minimal effort” aspect of this recipe.
Crafting the Silky Cheesecake Batter
The cheesecake swirl is the luxurious counterpoint to the spiced carrot cake. Its batter is designed to be incredibly creamy, smooth, and perfectly balanced in sweetness, providing that delightful tangy contrast. The secret to a perfect cheesecake batter lies in the quality of your ingredients and careful mixing.
1. The Golden Rule: Choose Your Cream Cheese Wisely
The most crucial tip for a flawless cheesecake batter is to use **full-fat, brick-style cream cheese**. This is non-negotiable for achieving the desired rich flavor and firm, smooth texture once baked and chilled. You absolutely do not want to use anything labeled as “spreadable” (which often contains added stabilizers and liquids) or “low-fat” (which will result in a less creamy and potentially grainy texture). For best results, ensure your cream cheese is at **room temperature** before you begin, as this will help it blend smoothly without lumps.
2. Mixing for Supreme Smoothness
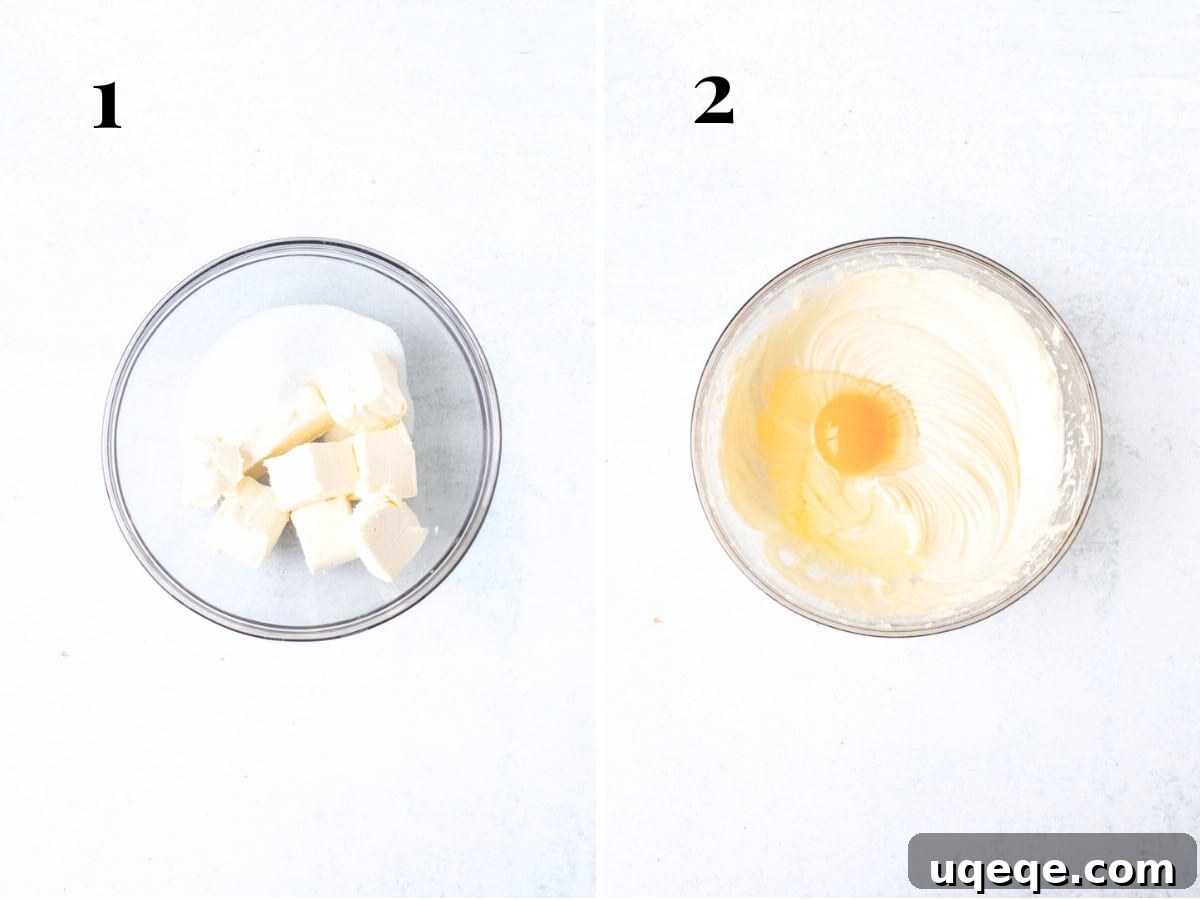
- In a mixing bowl, beat the room temperature cream cheese and granulated sugar (or caster sugar) until the mixture is incredibly smooth and creamy. This step is essential for breaking down any lumps in the cream cheese and dissolving the sugar. Throughout this process, it’s vital to occasionally turn off your mixer and use a rubber spatula to **scrape down the sides and bottom of the bowl** thoroughly. This ensures all ingredients are fully incorporated, preventing any unmixed pockets of cream cheese or sugar from remaining. Take your time with this step; a perfectly smooth cream cheese base is the foundation of a great cheesecake.
- Once the cream cheese and sugar are smooth, mix in the large egg and the vanilla extract. Mix just until the egg is incorporated and no longer visible. Be careful not to overmix the batter once the egg is added, as excessive beating can incorporate too much air, which can lead to cracks in your cheesecake layer. The vanilla extract enhances the overall flavor, so use a good quality one.
Assembling and Swirling Your Masterpiece
Assembling these bars is where the creative fun begins, and while it’s not overtly difficult, having a clear visual of the process can certainly help. The goal is to create beautiful, distinct swirls of carrot cake and cheesecake batter that will make each bar a work of art.
1. The Layering Process
- First, prepare your baking pan. Preheat your oven to 325°F (170°C). Line an 8×8 inch (20×20 cm) pan with parchment paper or aluminum foil, ensuring there’s an overhang on all sides. This overhang will act as handles later, making it incredibly easy to lift the baked bars out of the pan for slicing. If using aluminum foil, a light greasing with butter or non-stick spray is recommended to prevent sticking.
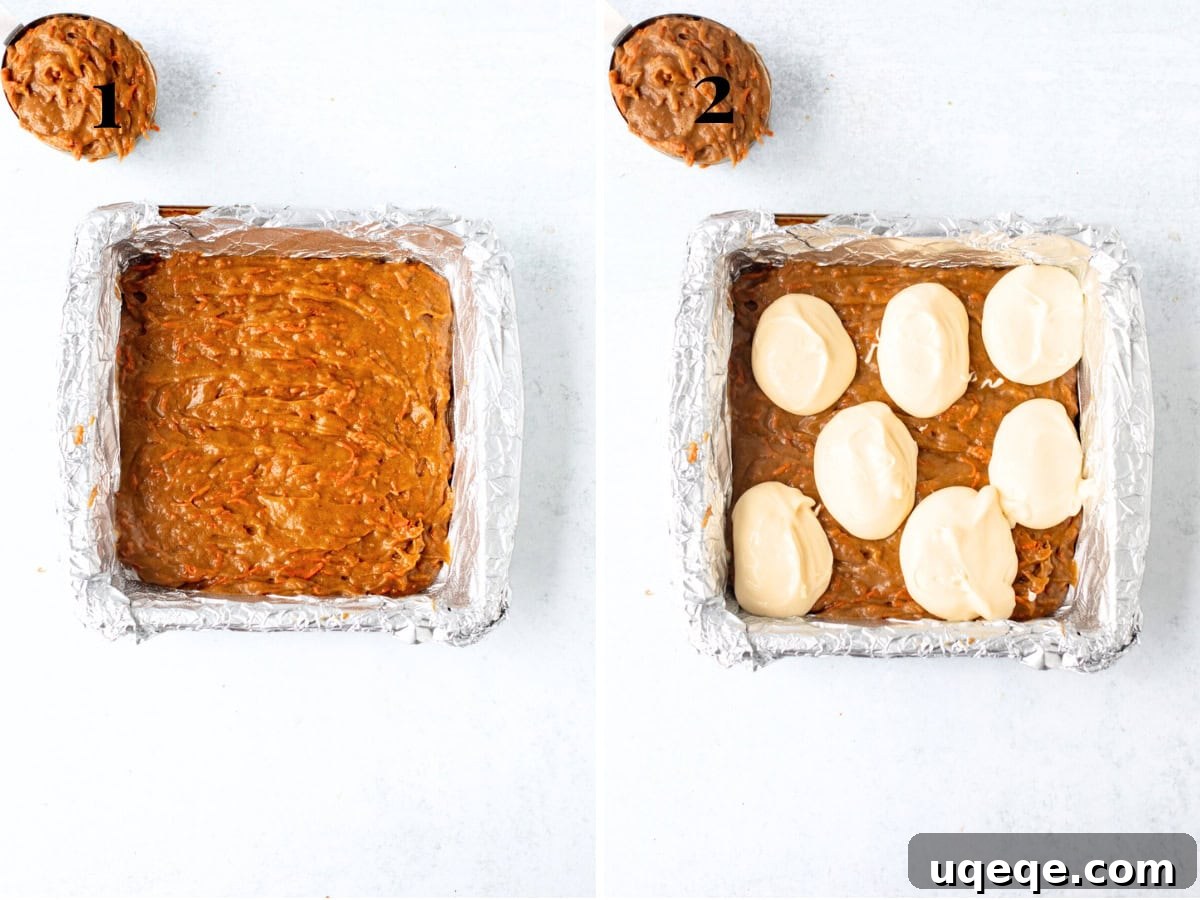
- Spread about half of your prepared carrot cake batter evenly into the lined pan. This will form the initial base layer of your bars. Ensure it’s spread from edge to edge for a uniform foundation.
- Next, spoon generous dollops of the creamy cheesecake batter over the carrot cake layer. Distribute these dollops somewhat evenly across the surface.
2. Creating the Perfect Swirl
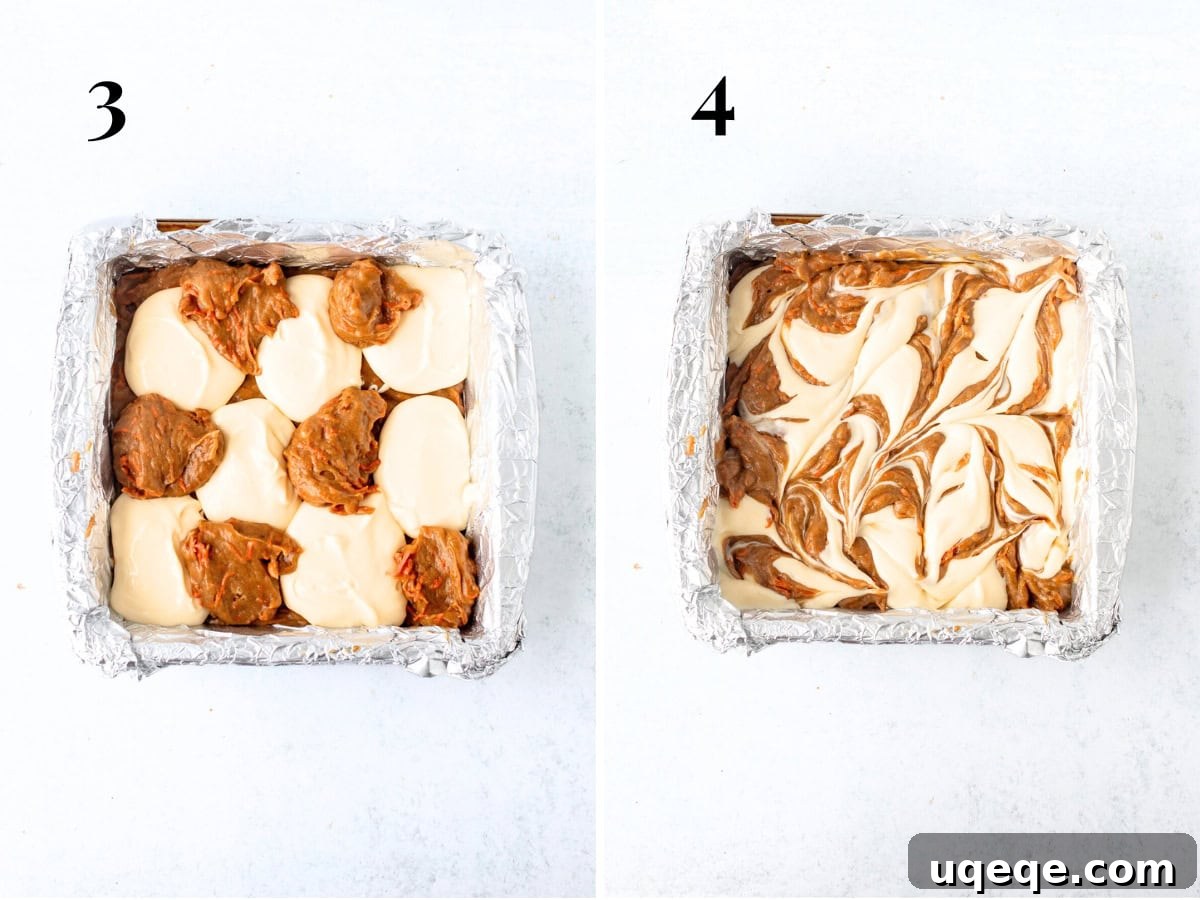
- Now, take the remaining reserved carrot cake batter (you should have reserved about 3/4 cup to 1 cup earlier) and drop dollops of this batter into the gaps, nestled beside the dollops of cheesecake. This creates a mosaic of both batters across the pan.
- Using a thin, sharp knife, a skewer, or even a toothpick, gently run it through the batters in a swirling motion. You can make figure-eights, zig-zags, or random patterns – there’s no need to be overly precise or careful here. The beauty of a swirl is its organic, unique pattern. Aim to create distinct streaks of both cake and cheesecake without fully blending them, as you want to see the beautiful marbling after baking.
3. Baking for Perfection
Your beautifully swirled bars are now ready for the oven. They will need to bake for approximately 30-40 minutes in the preheated oven. The exact bake time can vary slightly depending on your oven’s calibration and your personal preference for the texture of the carrot cake layer. If you prefer a slightly gooier, more blondie-like texture for the carrot cake, you might bake closer to 30 minutes. For a more cake-like texture, extend the baking closer to 40 minutes.
To check for doneness, the top of the bars should look set and lightly golden. An inserted toothpick into the carrot cake portion should come out clean, without gooey carrot cake batter. It’s perfectly normal, however, for a toothpick inserted into the cheesecake portion to come out with some moist cheesecake batter still clinging to it; the cheesecake will firm up significantly as the bars cool and chill.
Essential Cooling and Slicing Tips
Patience is a virtue, especially when it comes to cheesecake. These bars require ample cooling and chilling time to reach their optimal texture and to allow the cheesecake layer to fully set. After baking, let the bars cool completely in the pan at room temperature until the pan is no longer warm to the touch. This initial cooling helps prevent the cheesecake from cracking.
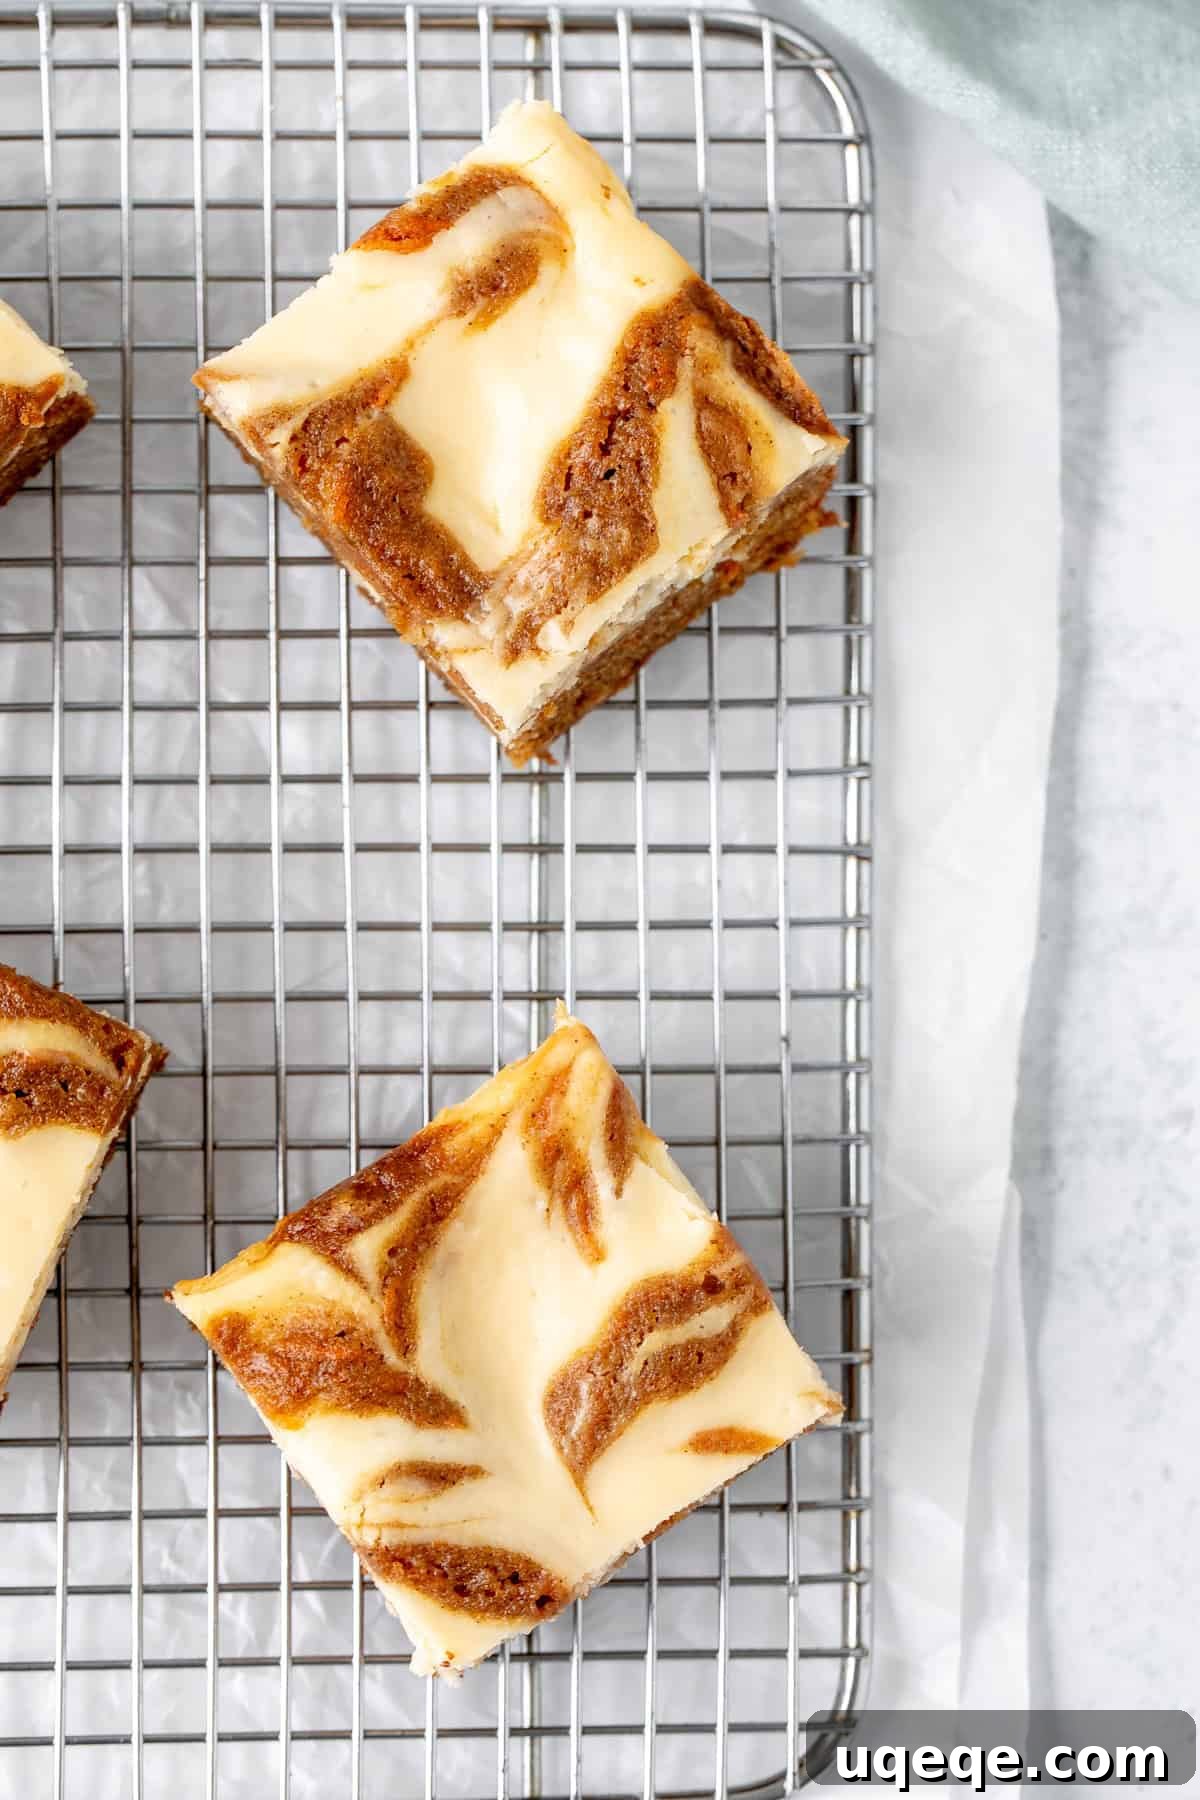
Once cooled, cover the pan loosely and transfer it to the refrigerator to chill for at least 4 hours, or preferably overnight. This chilling period is crucial for the cheesecake to firm up, making the bars much easier to slice into neat, clean squares. When you’re ready to slice, simply use the overhang of the parchment paper or foil to lift the entire slab of bars out of the pan and place it onto a cutting board. Use a thin, sharp knife for precise cuts. For the cleanest slices, wipe your knife with a damp cloth between each cut to prevent batter from dragging.
Storage & Freezing for Freshness
Due to the creamy cheesecake component, these bars require proper storage to maintain their freshness and safety. Always store your Carrot Cake Cheesecake Bars in an airtight container in the refrigerator. They will remain fresh and delicious for up to 4 days, perfect for enjoying throughout the week or for making ahead of a gathering.
For longer storage, these bars freeze beautifully. To freeze, wrap individual bars or the entire slab tightly in plastic wrap, then an additional layer of aluminum foil, to prevent freezer burn. Place the well-wrapped bars into a freezer-safe bag or container. They can be frozen for up to 2 months. When you’re ready to enjoy them, simply thaw the frozen bars in the refrigerator overnight. Avoid thawing at room temperature to maintain the cheesecake’s texture and safety. Once thawed, store them in the fridge.
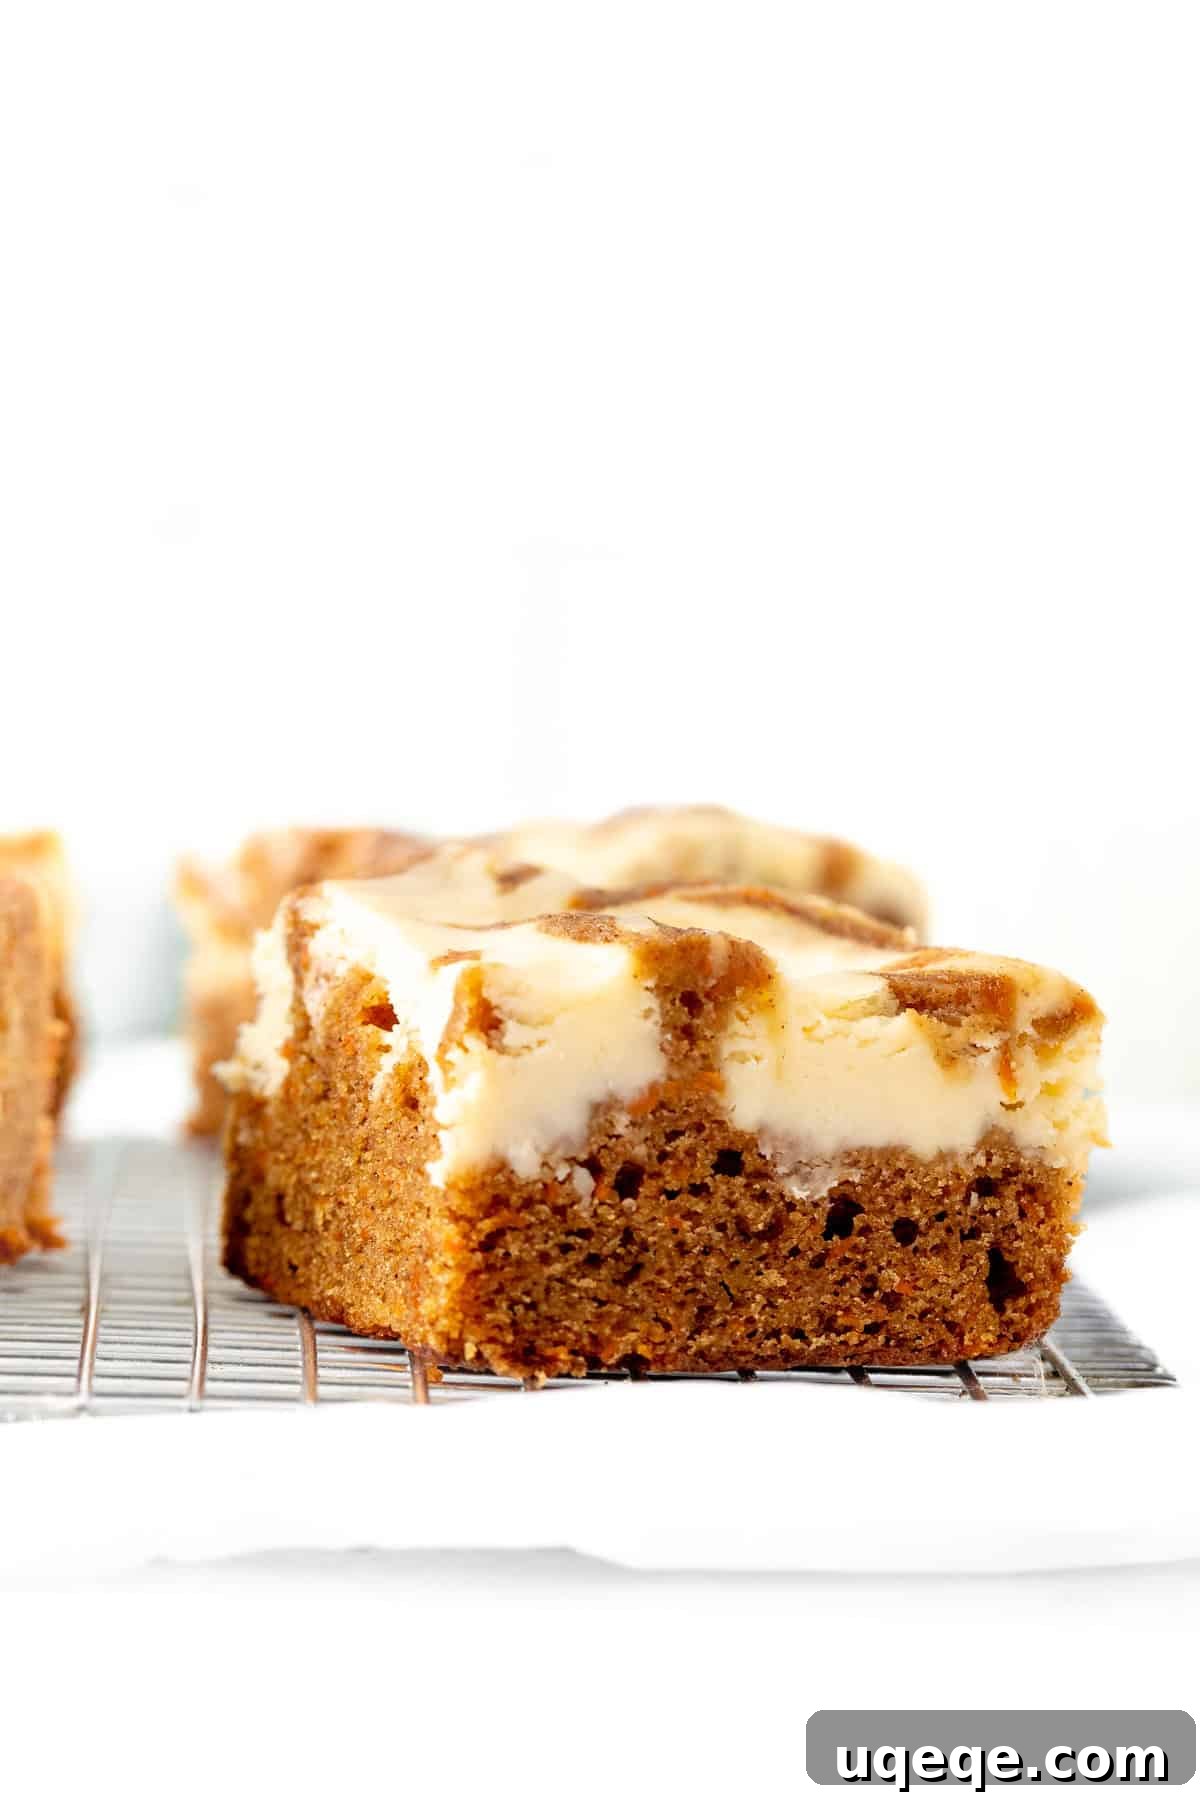
The Ultimate Spring and Easter Dessert
These Carrot Cake Cheesecake Bars are more than just a dessert; they’re a celebration of spring. The vibrant orange of the carrot cake and the creamy white of the cheesecake create a cheerful palette that perfectly suits the season of renewal and growth. They are an impeccable choice for Easter brunch, a spring potluck, or simply as a delightful treat to welcome warmer weather. Their grab-and-go bar format also makes them incredibly convenient for entertaining, allowing guests to easily serve themselves without the need for plates and forks.
Creative Variations and Customizations
While the recipe itself is a masterpiece, feel free to get creative! For added texture and flavor in your carrot cake layer, consider folding in a handful of chopped walnuts or pecans, shredded coconut, or even a few tablespoons of crushed pineapple (drained well). A pinch of ginger or a dash of allspice could also deepen the spice profile. For the cheesecake, a hint of lemon zest would brighten the flavor even further. These bars are incredibly versatile and can be tailored to your personal taste preferences.
Common Baking Questions and Troubleshooting
- Why is my cheesecake runny? Ensure you use full-fat, brick-style cream cheese and allow sufficient chilling time. Room temperature cream cheese also helps prevent lumps.
- My carrot cake is dry. This is often due to overmixing the batter or overbaking. Mix just until combined and watch your oven carefully. Using sour cream or Greek yogurt helps maintain moisture.
- My swirls aren’t distinct. Don’t over-swirl! A few gentle passes with your knife are enough to create beautiful marbling without fully blending the batters.
- Cracks in cheesecake? Overbeating the cheesecake batter (especially after adding the egg) can incorporate too much air, leading to cracks. Baking at a lower temperature and cooling gradually also helps.
The enchanting combination of moist, intensely flavorful carrot cake and rich, creamy cheesecake is truly a match made in dessert heaven. These bars are an ideal choice if you adore the taste of carrot cake but prefer a treat that’s not quite as sweet as a traditional cake with heavy frosting. Beyond their exquisite taste, the beautiful marble effect makes them incredibly appealing and impressive, suitable for any occasion, big or small. Give them a try and discover your new favorite spring dessert!
If you’re a devoted fan of carrot cake, be sure to explore these other fantastic recipes from Just So Tasty:
- Classic Carrot Cake Bars: A simpler, yet equally delicious take on the traditional bar format.
- Carrot Cake Cupcakes: Perfect individual portions with classic cream cheese frosting.
- Mini Carrot Cake: An adorable and perfectly portioned cake for smaller gatherings or when you’re just feeding a few mouths.
Carrot Cake Cheesecake Bars Recipe
Moist carrot cake swirled with tangy cheesecake – these carrot cake cheesecake bars combine two classic desserts into one delicious bite. These are perfect for Spring and Easter celebrations.
By: Fiona Dowling
Prep time: 30 mins | Cook time: 40 mins | Total time: 1 hr 10 mins
Yields: 12 bars
Equipment
- 8×8 inch (20×20 cm) pan
Ingredients
Carrot Cake Layer
- 3/4 cup (94 grams) all-purpose flour
- 1 teaspoon cinnamon
- 1/4 teaspoon ground nutmeg
- 1/8 teaspoon ground cloves
- 1/2 teaspoon baking soda
- 1/4 teaspoon salt
- 1/3 cup (75 grams) unsalted butter, melted
- 3/4 cup (158 grams) brown sugar, light or dark
- 1 large egg
- 1 teaspoon vanilla extract
- 3 tablespoons (45 ml) sour cream, or plain Greek yogurt
- 1 cup finely shredded carrots
Cheesecake Swirl
- 8 ounces (226 grams) full-fat cream cheese, brick style, not from a tub
- 1/3 cup (67 grams) granulated sugar, or caster sugar
- 1 large egg
- 1 teaspoon vanilla extract
Instructions
- Preheat the oven to 325°F (170°C). Line an 8×8 inch (20×20 cm) pan with parchment paper or aluminum foil so that there’s an overhang around the edges. If using aluminum foil, lightly grease.
- Carrot Cake Batter:
- In a medium bowl, whisk together the flour, cinnamon, nutmeg, cloves, baking soda, and salt. Set aside.
- In a separate large bowl, whisk together the melted butter, brown sugar, egg, and vanilla extract until you no longer see pieces of egg or lumps of sugar.
- Whisk the sour cream and shredded carrots into the wet ingredients.
- Stir the dry ingredients into the wet ingredients. Gently stir together using a rubber spatula or wooden spoon. Stop mixing when you no longer see streaks or lumps of flour. Set aside.
- Cheesecake Batter:
- Beat together the room temperature cream cheese and sugar until smooth. Occasionally, turn off the mixer and scrape down the sides and bottom of the bowl to ensure no lumps remain.
- Mix in the egg and vanilla extract. Stop mixing when you no longer see pieces of egg.
- Assemble & Bake:
- Reserve about 3/4 cup to 1 cup of the carrot cake batter. Spread the remaining carrot cake batter into an even layer in the prepared pan.
- Drop large dollops of the cheesecake batter on top of the carrot cake batter.
- With the reserved carrot cake batter, drop large dollops of batter in between the dollops of cheesecake.
- Use a thin knife or toothpick to swirl the carrot cake batter and cheesecake batter together, creating a marbled effect.
- Bake in the middle of the preheated oven for about 30-40 minutes. The bake time will vary depending on your oven and if you prefer the carrot cake layer to be more cake-y in texture or a little more like a blondie (a longer bake time will make it more cake-y). When done, the top should look set, and an inserted toothpick in the carrot cake portion should come out without gooey batter (gooey cream cheese batter is acceptable as it will set as the bars cool and chill).
- Cool the bars in the pan until the pan is no longer warm to the touch. Cover the pan and place it in the fridge to chill for at least 4 hours before slicing.
- When ready to slice, lift the bars out of the pan using the overhang of the parchment/aluminum foil and place them on a cutting board. Slice with a sharp knife. Wipe off the knife between each slice for clean cuts.
Notes
- Pan Sizes: This recipe can also be made in a 9×9 inch (23×23 cm) pan. The bars will be thinner, and the bake time will be shorter – approximately 25-30 minutes.
- Doubling the Recipe: This recipe can be doubled and made in a 9×13 inch (23×33 cm) pan. The bars will be thicker, and the bake time will be longer – approximately 40-50 minutes.
- Cream Cheese: Be sure to use full-fat, brick-style cream cheese. For best results, it should be at room temperature before getting started.
- Storage: Store bars in the fridge in an airtight container for up to 4 days. Bars can be frozen for up to 2 months. Thaw in the fridge and store in the fridge after freezing.
- Nutrition: Details provided are an estimate only and based on 1 bar, assuming the pan is sliced into 12 uniform pieces.
Nutrition
Calories: 238kcal, Carbohydrates: 28g, Protein: 3g, Fat: 13g, Saturated Fat: 8g, Polyunsaturated Fat: 1g, Monounsaturated Fat: 3g, Trans Fat: 0.2g, Cholesterol: 65mg, Sodium: 178mg, Potassium: 105mg, Fiber: 1g, Sugar: 20g, Vitamin A: 2258IU, Vitamin C: 1mg, Calcium: 46mg, Iron: 1mg